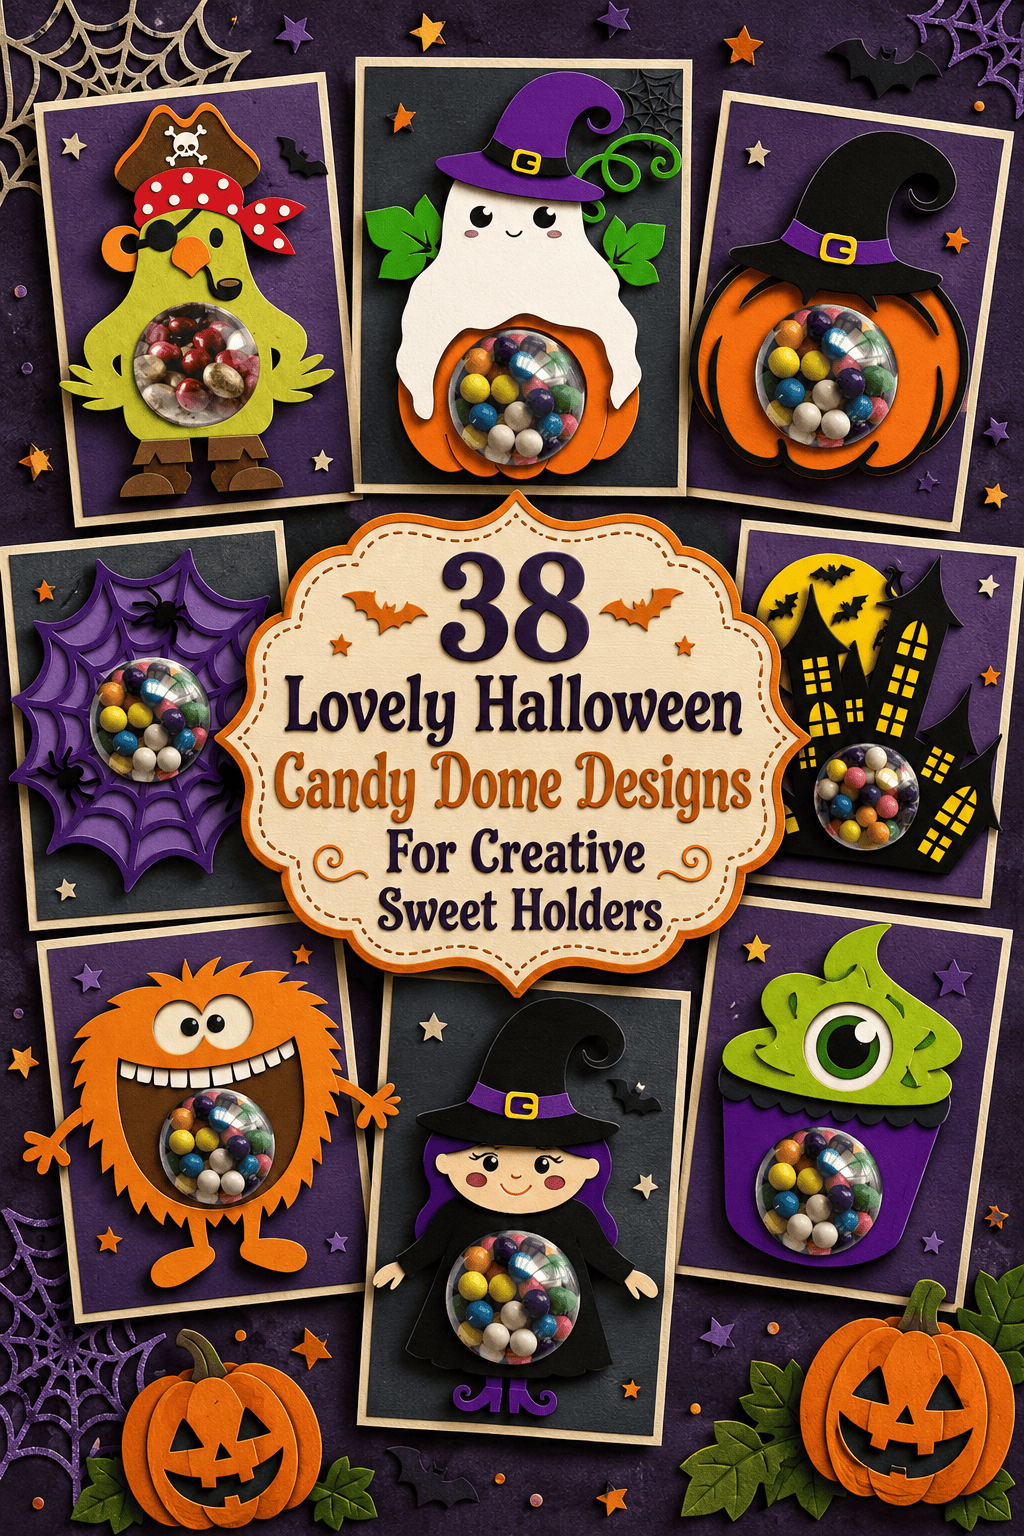
This collection of halloween candy dome designs brings together spooky pumpkins, ghosts, witches, monsters, bats, spiders, and fantasy characters for layered paper crafting. Each project turns wrapped sweets into a creative party favor, classroom treat, seasonal ornament, or handmade Halloween gift.
1. Spider SVG Halloween Candy Dome Ornaments
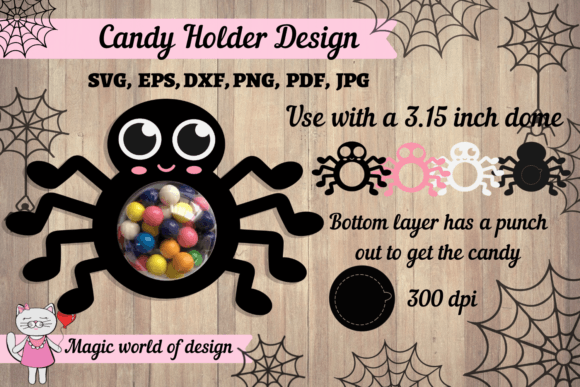
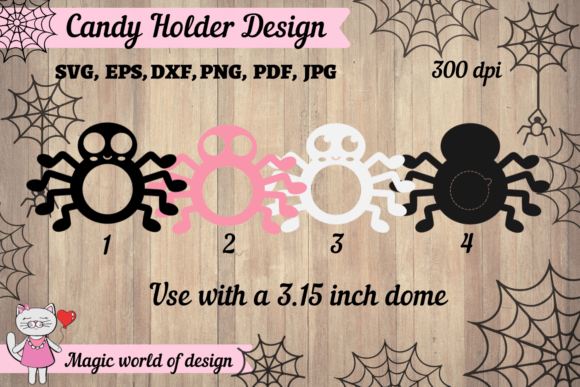
A bold spider silhouette gives this halloween candy dome a playful spooky look without making it too frightening for children. I like how the layered cardstock pieces frame the clear dome while keeping the sweets visible. The cut file is already sized for straightforward assembly, and the separate layers make it easy to organize each piece before gluing.
Fill the dome with wrapped candy, secure it to the base, then build the paper layers from back to front. The finished spider ornament works well as a Halloween party favor, classroom treat, small gift, or hanging seasonal decoration. Its mix of papercraft detail and practical candy storage makes it a natural fit for themed treat-holder projects.
2. Black Cat Halloween Candy Dome Ornament
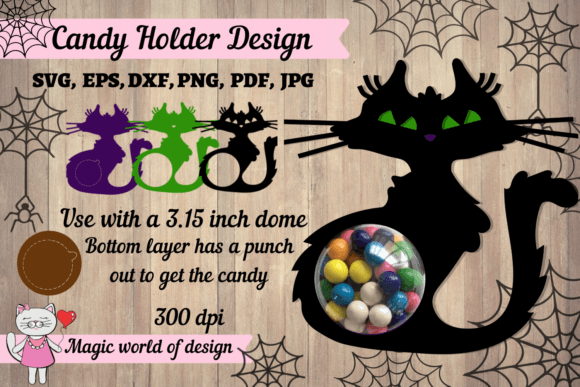
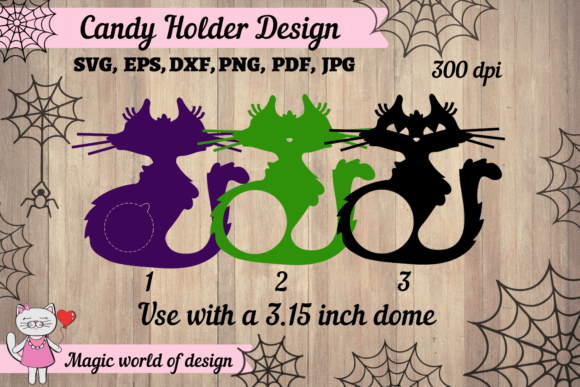
That curved cat silhouette gives this halloween candy dome a mischievous seasonal look while keeping the clear treat compartment easy to see. The layered cardstock pieces create a neat frame around the dome, and the pre-sized cut elements help each section line up without awkward trimming. I would sort the layers before gluing, especially the smaller facial and decorative details.
Once the dome is filled with wrapped sweets, attach it securely to the base and build the remaining paper layers upward. The finished ornament works nicely as a party favor, classroom treat, small gift, or hanging Halloween decoration. Its friendly feline theme suits family celebrations and adds a playful alternative to bats, ghosts, and spiders.
3. Spooky Cupcake Halloween Candy Dome SVG
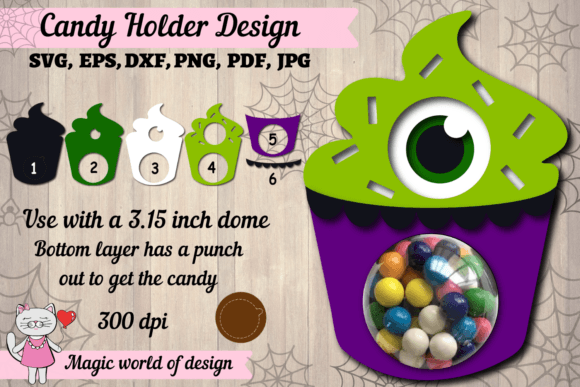
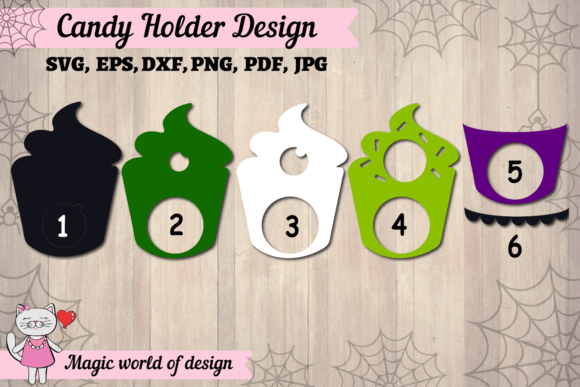
A creepy cupcake shape gives this halloween candy dome a fun mix of sweetness and spooky detail. The layered paper pieces are pre-sized for a 3.15-inch or 8 cm round bauble, which makes the cutting and alignment process much easier. I would keep the original scale for the first build, then resize the full design together only when using a different dome diameter.
After cutting the cardstock, secure the clear bauble to the bottom layer, fill it with wrapped treats, and attach each decorative section in order. The finished piece works well as a party favor, table accent, classroom gift, or small Halloween decoration. Its playful dessert theme adds variety to traditional ghost, bat, and pumpkin crafts.
4. Pumpkin Halloween Candy Dome Treat Holder
A cheerful pumpkin face gives this halloween candy dome a classic seasonal look that works for both children’s parties and autumn displays. The layered shape is simple to understand, with broad cardstock sections that should cut cleanly and align without fussy details. You can prepare the pieces with a cutting machine or print the template and trim each layer by hand.
For assembly, attach the clear dome to the base, add wrapped sweets, and glue the pumpkin layers in sequence. The finished holder makes a charming party favor, classroom treat, table decoration, or small handmade gift. Its familiar jack-o’-lantern styling fits naturally with Halloween papercrafts while keeping the candy visible and easy to present.
5. Dragon Halloween Candy Dome Ornament
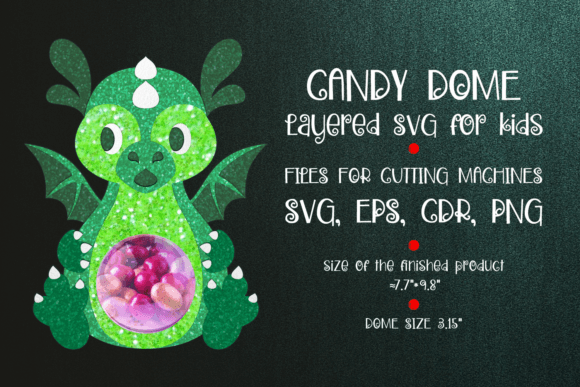
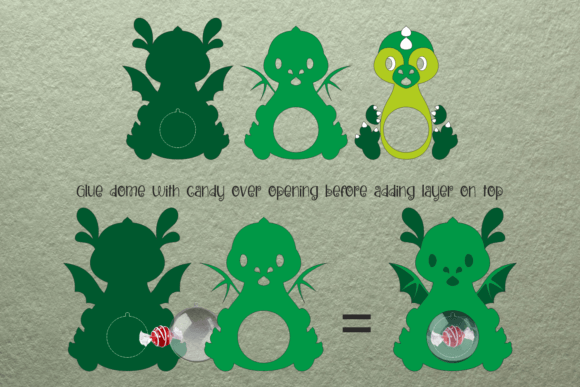
Curling dragon details give this halloween candy dome a fantasy-inspired look that feels darker and more unusual than standard pumpkin or ghost designs. The layered silhouette creates strong depth around the clear treat compartment, while the broad paper sections should remain manageable during cutting and placement. I would arrange every piece in order before gluing so the smaller wings, scales, and facial features stay aligned.
Filled with wrapped sweets, the finished dragon works well as a Halloween party favor, tabletop decoration, classroom gift, or themed ornament. The mythical creature adds a playful gothic touch to seasonal papercrafts and suits anyone who enjoys fantasy motifs. Its visible candy center also makes the piece decorative without hiding its practical purpose.
6. Cute Ghost Halloween Candy Dome Girl
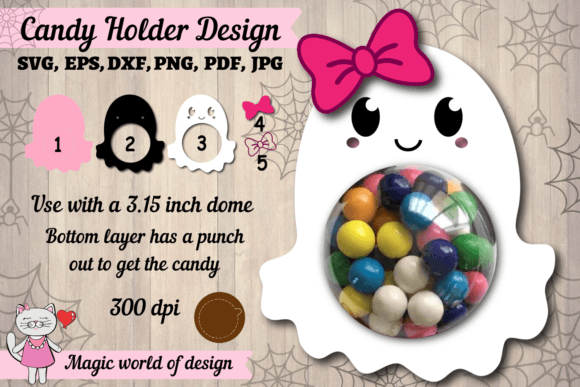
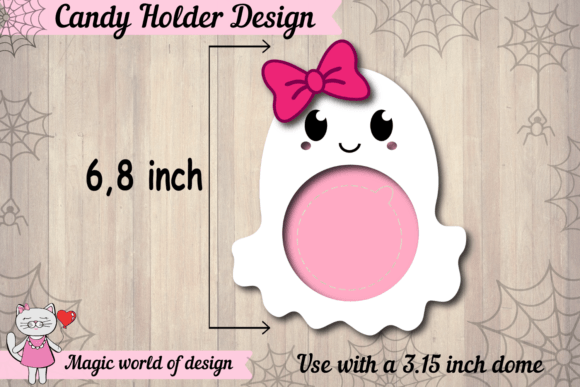
Soft ghostly details give this halloween candy dome a sweet character that feels festive rather than frightening. The girl-shaped figure adds personality around the clear treat compartment, while the pre-sized cardstock layers keep cutting and positioning straightforward. I would arrange the pieces in order before assembly so the smaller facial and decorative elements stay neat.
Begin by securing the filled dome to the bottom layer, then glue each paper section upward until the character is complete. The finished piece works nicely as a classroom treat, party favor, table decoration, or small handmade gift. Its friendly ghost theme suits children’s Halloween celebrations and offers a charming alternative to darker seasonal designs.
7. Witch and Cauldron Halloween Candy Dome
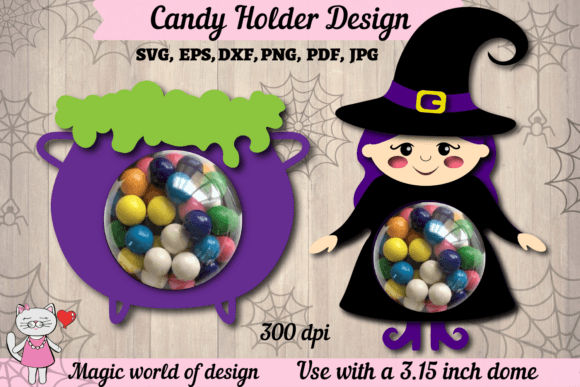
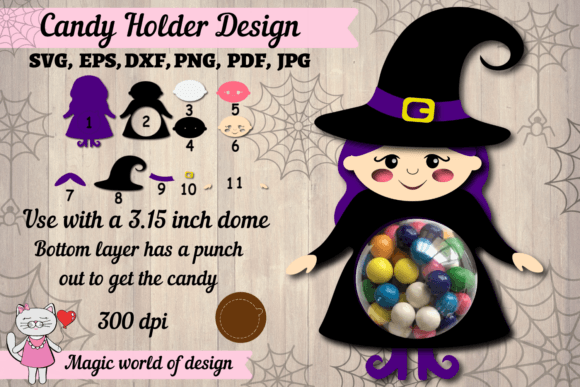
Bubbling potion details and a pointed-hat witch give this halloween candy dome a lively storybook feel. The clear treat compartment becomes part of the cauldron, while the surrounding cardstock layers add depth without making the project difficult to follow. Since the pieces are pre-sized, you can cut them, arrange them in order, and check the placement of smaller accents before applying glue.
Start by filling the dome with wrapped sweets and fixing it securely to the bottom layer. Build the witch and cauldron sections upward until the full scene is complete. This design suits Halloween party favors, classroom gifts, table decorations, and small handmade surprises. The magical theme feels playful, spooky, and well matched to seasonal candy-holder crafts.
8. Terrible Cupcake Halloween Candy Dome SVG
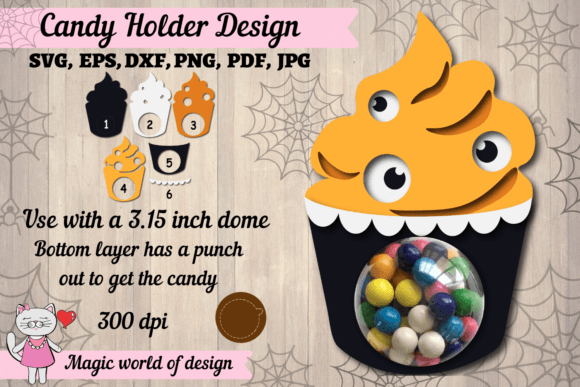
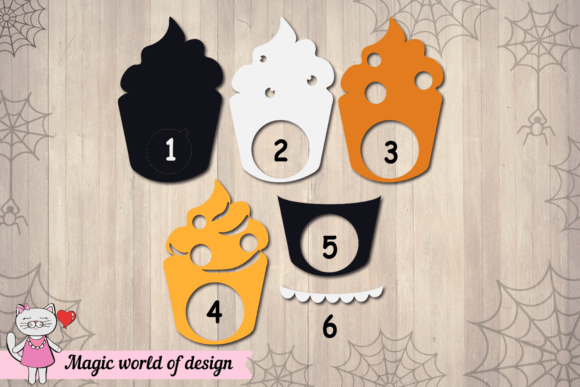
Jagged frosting details and a creepy expression give this cupcake design a darker look than the sweeter versions in the collection. The halloween candy dome is pre-sized for a 3.15-inch or 8 cm round bauble, so the cardstock pieces can be cut at the loaded dimensions. I recommend arranging every layer before gluing, especially around the face and topping, where careful placement keeps the character sharp.
Once the clear dome is filled with wrapped treats, attach it to the base and build the paper sections from back to front. The finished holder works well for party favors, classroom gifts, dessert-table decor, or small handmade surprises. You can also resize the complete file when using a different bauble diameter.
9. Pumpkin Halloween Candy Dome Treat Holder
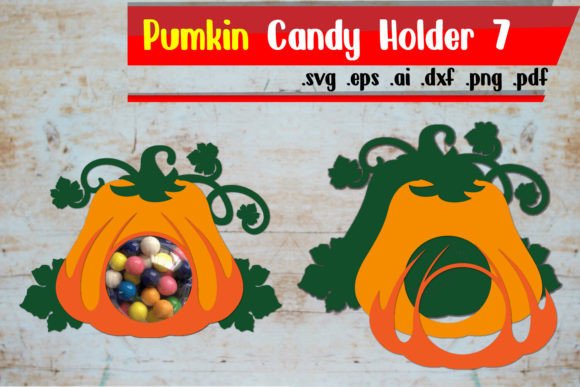
Rounded pumpkin details give this halloween candy dome a friendly harvest look that suits both spooky parties and autumn craft displays. The broad shapes should be comfortable to cut from cardstock, while the layered construction adds enough depth to frame the clear treat compartment neatly. You can prepare the pieces with a cutting machine or print the template for careful hand cutting.
For assembly, secure the filled dome to the base before adding the pumpkin layers in order. The completed holder works well as a classroom surprise, party favor, table decoration, or small handmade gift. Its classic jack-o’-lantern theme makes it easy to coordinate with orange, black, green, or patterned paper for different Halloween styles.
10. Layered Bat Halloween Candy Dome SVG
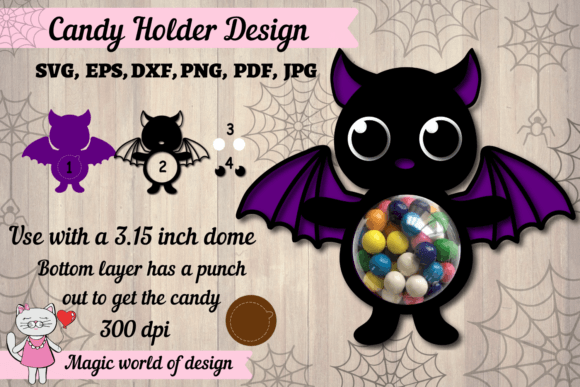
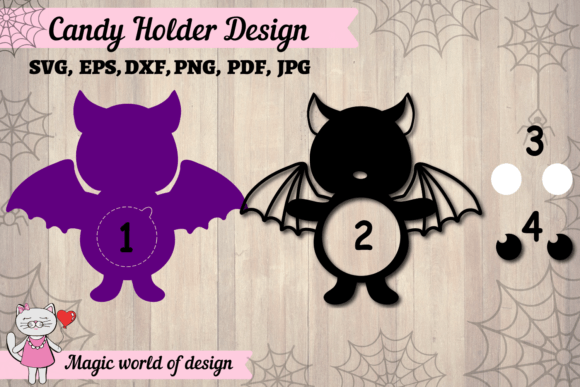
Wide bat wings create a strong silhouette around the clear treat compartment, giving this halloween candy dome an instantly recognizable spooky style. The pre-sized paper layers keep the build approachable, while the smaller cut details add depth without making the design feel crowded. Before gluing, I would dry-fit every section and mark the layer order to keep both wings balanced.
Assembly starts with filling the dome with wrapped sweets and fixing it firmly to the bottom piece. Add the remaining cardstock layers one at a time, checking the edges as you work upward. The finished bat makes a fun classroom gift, party favor, table accent, or hanging ornament for a Halloween display.
11. Spooky Tree Halloween Candy Dome Holder
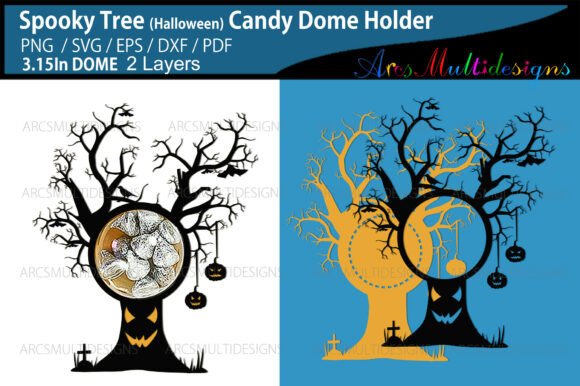
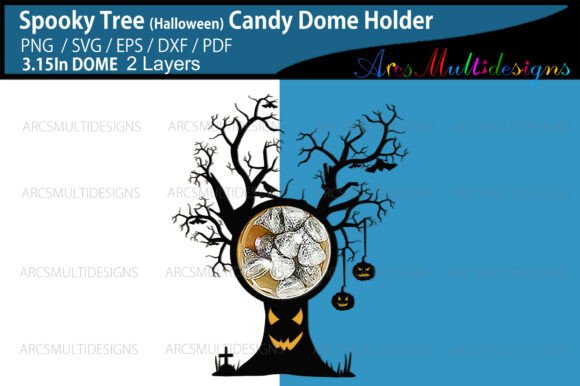
Twisted branches and an eerie silhouette give this halloween candy dome a wonderfully haunted woodland feel. The layered tree frame is sized for a 3.15-inch dome, so the pieces should fit together without manual scaling. I would cut the larger background sections first, then keep the finer branches grouped by layer to avoid mixing them during assembly.
After filling the clear compartment with wrapped treats, attach it firmly to the base and build the paper layers in sequence. The finished spooky tree works well as a party favor, mantel decoration, classroom gift, or tabletop accent. Its dark forest theme pairs naturally with bats, pumpkins, ghosts, and other Halloween papercraft decorations.
12. Monster Halloween Candy Dome Template
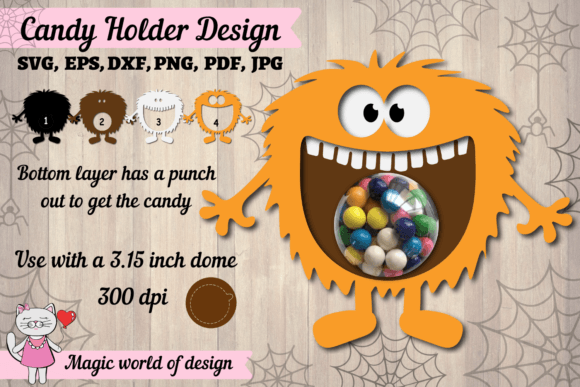
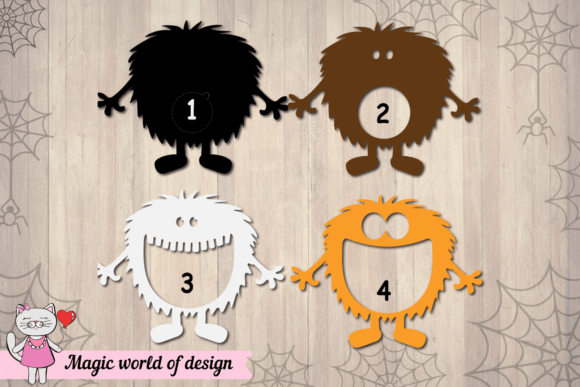
A playful monster character turns this halloween candy dome into a fun treat holder for younger crafters and family-friendly celebrations. The pre-sized cardstock pieces keep the cutting process manageable, while the layered construction builds a clear frame around the transparent sweet compartment. Sorting the smaller facial details before assembly will help everything stay aligned and prevent misplaced layers.
Begin by filling the dome with wrapped candy and securing it firmly to the bottom piece. Glue each paper section in sequence until the monster is complete. The finished project works well as a classroom surprise, party favor, table decoration, or small handmade gift. Its silly spooky style fits Halloween crafting without looking too dark or frightening.
13. Haunted House Halloween Candy Dome Ornament
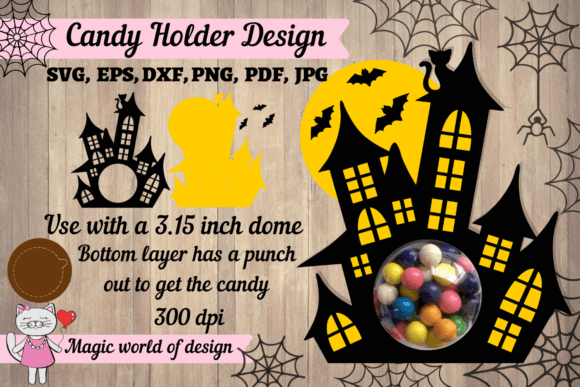
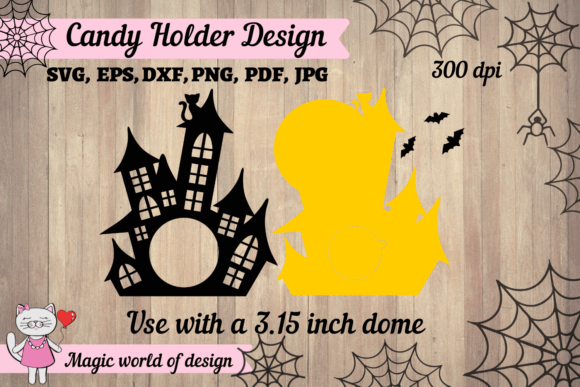
Crooked rooftops, dark windows, and layered architectural details give this halloween candy dome the atmosphere of a tiny haunted mansion. The pre-sized cardstock pieces keep the structure manageable, while the clear compartment becomes part of the spooky scene instead of looking like an added container. I would arrange the walls, roof sections, and smaller decorative cuts before gluing to preserve the intended depth.
Once the dome is filled with wrapped sweets, secure it to the bottom layer and build the remaining pieces from back to front. The completed ornament works well as a party favor, classroom treat, mantel display, or small seasonal gift. Its haunted house theme fits naturally beside bats, ghosts, pumpkins, and other Halloween paper crafts.
14. Bat Pumpkin Halloween Candy Dome Scene
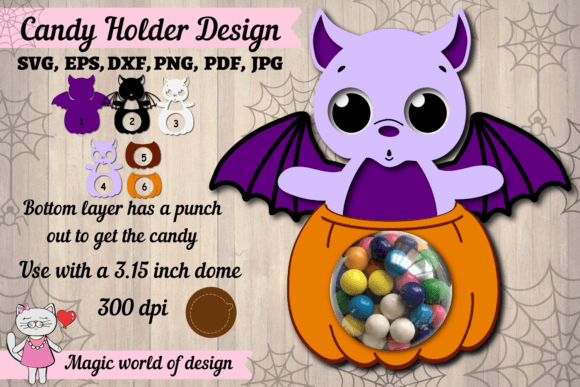
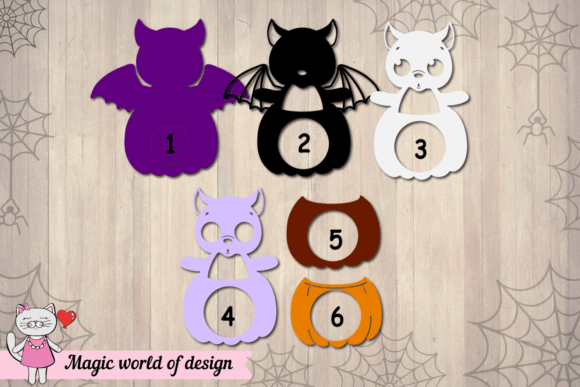
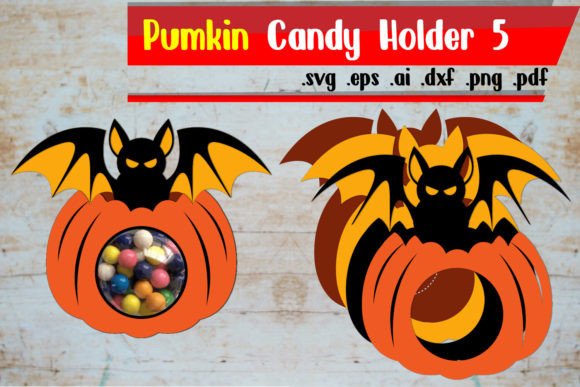
Peeking from inside a carved pumpkin, the little bat gives this layered project a playful spooky character. The pre-sized pieces fit a 3.15-inch or 8 cm half bauble, making the halloween candy dome straightforward to cut and assemble without adjusting the original dimensions. I would arrange the pumpkin, wings, and background layers before gluing so the shapes stay centered around the clear compartment.
After cutting the colored cardstock, join the paper sections in order with a glue stick. Fill the dome with wrapped sweets, apply a small amount of hot glue around its rim, and secure it to the layered base. The finished piece suits party favors, classroom treats, tabletop decor, and small seasonal gifts.
15. Cute Fox Halloween Candy Dome Template
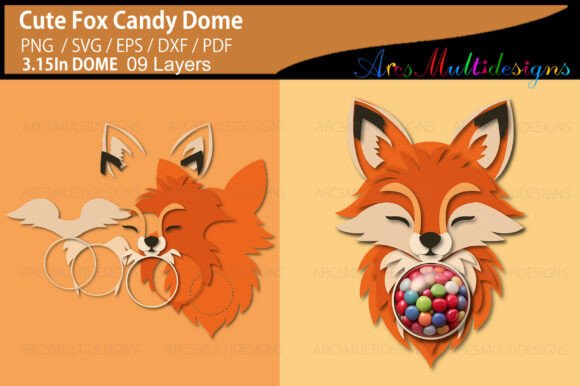
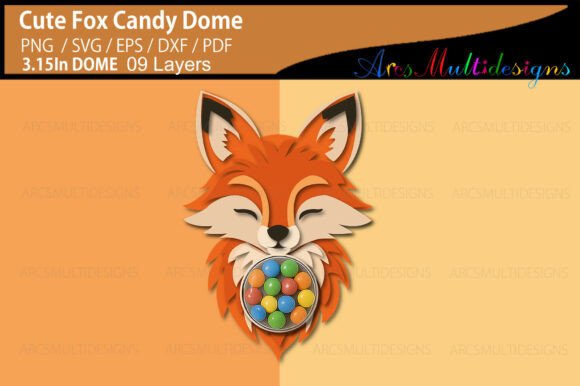
Warm woodland details give this fox character a friendly seasonal look that works especially well for children’s treats. The nine-layer structure adds noticeable paper depth around the clear 3.15-inch compartment without making the assembly feel overly complicated. I would sort the facial pieces, ears, and background sections before gluing so every small feature stays aligned.
Once the cardstock layers are cut, build the halloween candy dome from the base upward and secure the filled compartment firmly in place. The finished fox makes a charming classroom surprise, woodland party favor, autumn table decoration, or small handmade gift. Orange, cream, brown, and black papers will keep the animal recognizable while adding a subtle Halloween mood.
16. Ghostly Halloween Candy Dome Holder
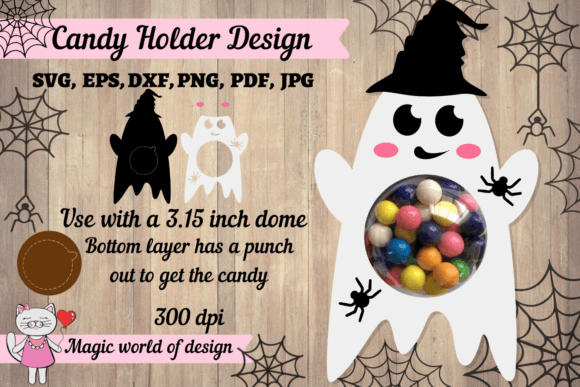
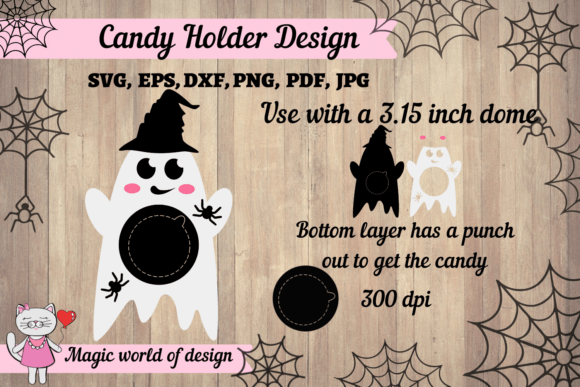
Floating white shapes and a simple spooky face give this halloween candy dome a clean, playful look that works well for family celebrations. The pre-sized cardstock pieces remove much of the guesswork from cutting, while the layered construction creates a tidy frame around the clear treat compartment. Before gluing, I would arrange the smaller features and check how each section overlaps.
Fill the dome with wrapped sweets, secure it to the bottom piece, and attach the remaining paper layers in sequence. The finished ghost holder is a practical choice for classroom treats, party favors, table settings, or small handmade gifts. White, black, purple, and orange cardstock can easily adapt the project to different Halloween themes.
17. Cauldron Halloween Candy Dome Witch Hat
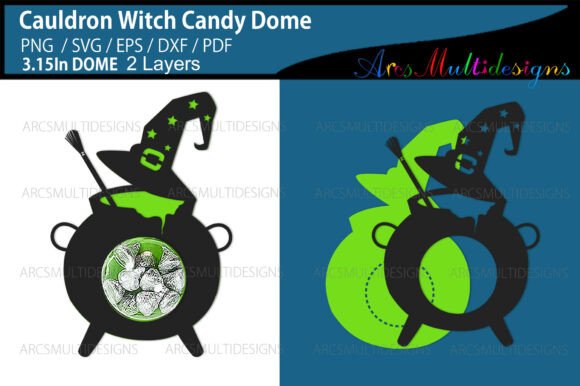
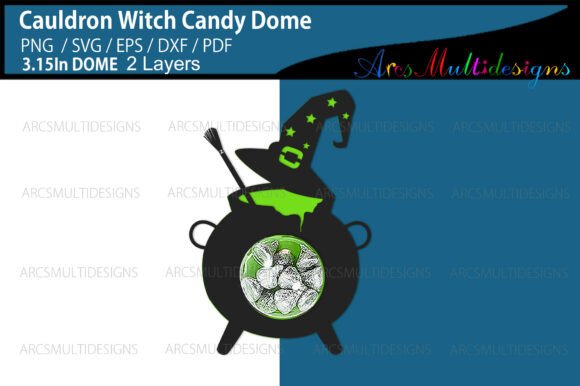
Curved hat details and a bubbling cauldron shape give this project a playful magical mood without making it too frightening. The layered file is sized for a 3.15-inch dome, so the main pieces should fit together without extra scaling. I would sort both versions of the cut layers before assembly and check the smaller accents around the brim and pot.
After cutting the cardstock, build the halloween candy dome from the bottom layer upward and secure the filled compartment firmly in place. The finished holder works well as a party favor, classroom treat, tabletop decoration, or small handmade gift. Purple, black, green, and orange paper will strengthen the witchy theme while keeping the design bright and easy to read.
18. Spider Halloween Candy Dome Web Scene
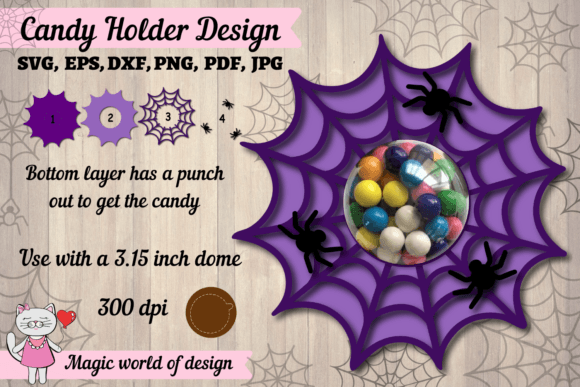
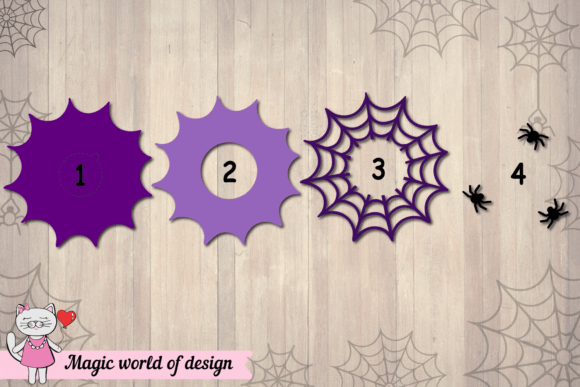
What catches my eye here is the layered web framing, which gives the spider a clean focal point without making the project feel too busy. The file is pre-sized for a 3.15-inch or 8 cm round bauble, so the cutting and layout should stay simple on the first try. I’d keep the original scale unless you already know you need a different dome size.
Once the cardstock pieces are cut, the halloween candy dome comes together in a logical order: attach the filled dome to the base, then build the web and spider layers on top. That makes it a great option for party favors, classroom treats, shelf decor, or small handmade gifts. The mix of spooky detail and visible sweets fits this theme especially well.
19. Pumpkin Halloween Candy Dome SVG
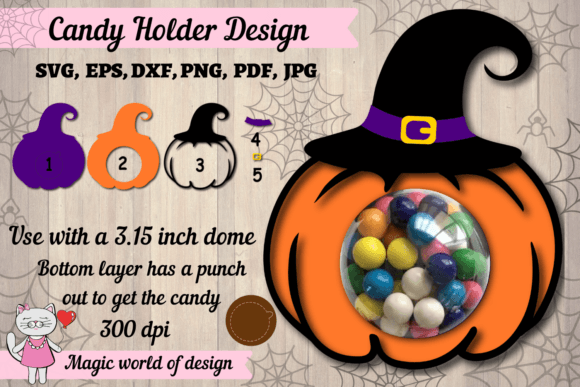
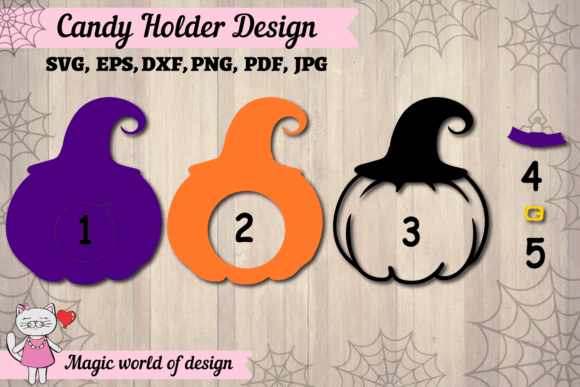
Rounded pumpkin details give this design a cheerful seasonal look that feels spooky without becoming too dark. The pre-sized cardstock pieces make cutting and alignment straightforward, while the clear center keeps the wrapped sweets visible. I would arrange every layer before gluing, especially the facial accents, so the expression stays neat and balanced.
For assembly, fill the dome with candy, secure it to the bottom piece, and build the paper layers upward in order. This halloween candy dome works well as a classroom treat, party favor, table decoration, or small handmade gift. Orange, black, green, and patterned cardstock can easily change the mood from playful to more traditional Halloween decor.
20. Ghost On Halloween Candy Dome Pumpkin
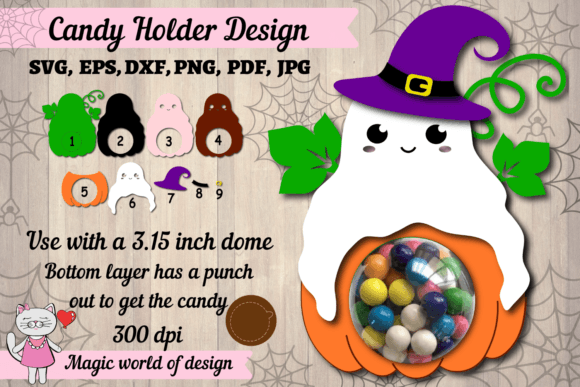
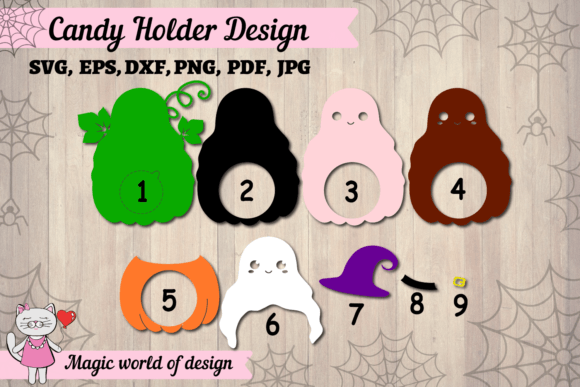
Perched above the pumpkin, the small ghost gives this layered design a playful storybook look that suits family-friendly seasonal crafts. The pre-sized cardstock pieces keep cutting and alignment manageable, while the clear compartment remains visible beneath the character. I would dry-fit the facial details and pumpkin sections first, since careful placement helps preserve the expression and layered depth.
Assembly begins by filling the dome with wrapped sweets and attaching it firmly to the bottom layer. Build the remaining paper pieces upward until the halloween candy dome scene is complete. The finished project works nicely as a classroom surprise, party favor, table decoration, or small handmade gift for autumn celebrations.
21. Pirate Halloween Candy Dome Parrot Craft
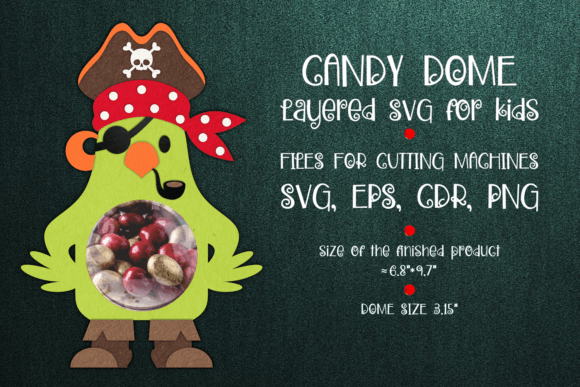
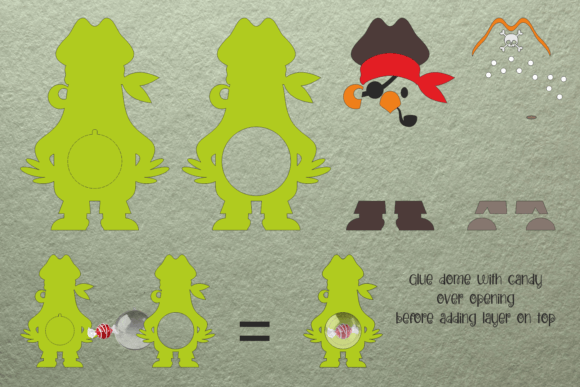
Bright feathers and pirate details give this character a lively look that stands apart from the usual ghosts and pumpkins. The layered paper construction frames the clear treat compartment neatly, while the separate print-and-cut elements make the smaller decorative pieces easier to manage. Before cutting, I would attach the bottom layer to the dotted circular guide so the dome opening stays in the correct position.
Once the pieces are prepared, build the halloween candy dome from the base upward and add the parrot details last. The finished craft works well as a pirate-themed party favor, classroom treat, table decoration, or playful handmade gift. Bold red, blue, yellow, and black cardstock will make the character easy to recognize.
22. Candy Corn Halloween Candy Dome Layers
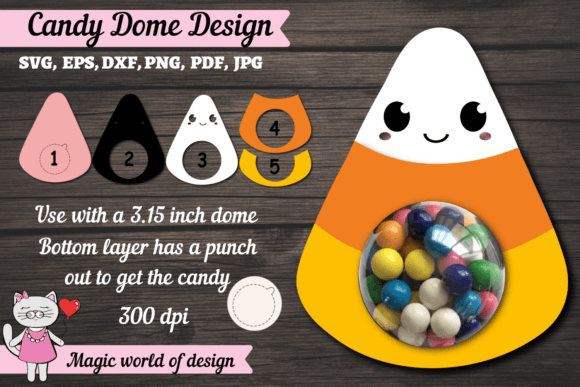
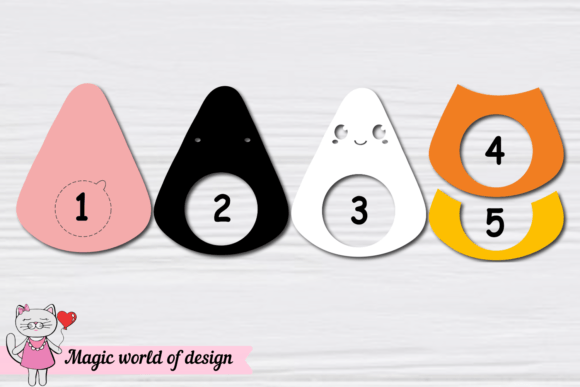
Bright orange, yellow, and white sections give this design the familiar look of classic candy corn while keeping the layered paper structure clean and easy to follow. The pre-sized pieces help simplify cutting and placement, and I would arrange each color section before gluing so the stripes stay even around the clear treat compartment.
For assembly, fill the dome with wrapped sweets, secure it to the bottom layer, and add the remaining cardstock pieces in sequence. This halloween candy dome works well as a classroom treat, party favor, table decoration, or small handmade gift. Its simple shape also makes it a practical choice for beginners who want a seasonal project with bold color and minimal detail.
23. Teacher Apple Halloween Candy Dome Gift
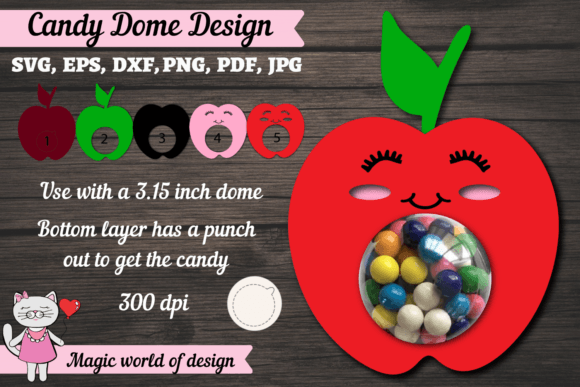
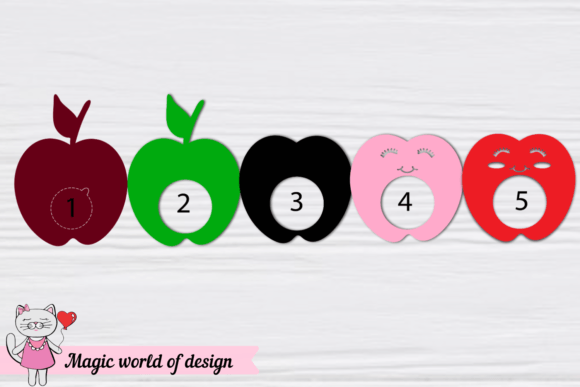
A crisp apple shape gives this classroom-themed design a cheerful, familiar look that feels especially fitting for teacher appreciation gifts. The pre-sized cardstock pieces should cut cleanly and stack in a sensible order, while the clear compartment keeps the sweets visible. I would arrange the leaf, stem, and lettering details before gluing so the finished apple stays balanced and tidy.
After filling the dome with wrapped candy, secure it to the base and add each paper layer from back to front. This halloween candy dome works nicely as a teacher gift, classroom surprise, desk decoration, or party favor. Red, green, cream, and black cardstock will keep the apple easy to recognize while adding enough contrast for the smaller details.
24. Witch Holder Halloween Candy Dome Design
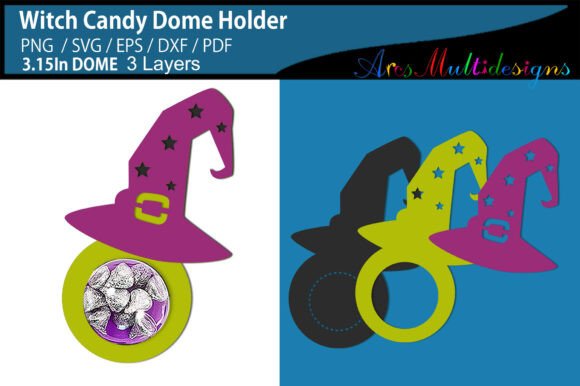
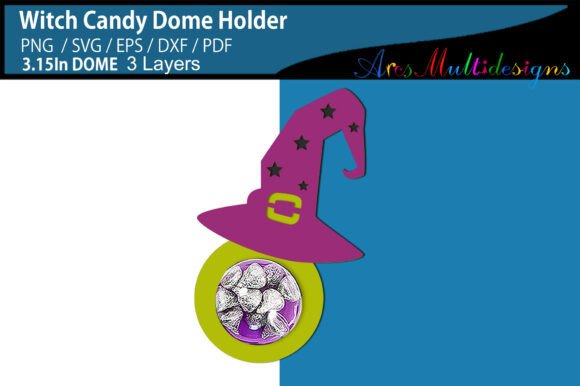
What I like here is the clear witch silhouette, which gives the project a classic spooky look without making the build fussy. Sized for a 3.15-inch dome, this halloween candy dome should line up neatly once the layered pieces are cut and sorted. The separate file options are useful too, especially if you like switching between machine cutting and a printed template for testing colors first.
For assembly, I’d secure the filled dome to the base before adding the witch layers from back to front. That keeps the smaller details easier to place and helps the finished holder stay balanced. It works well as a party favor, a small handmade gift, or a seasonal table accent with black, purple, green, and orange cardstock.
25. Pirate Halloween Candy Dome Craft Template
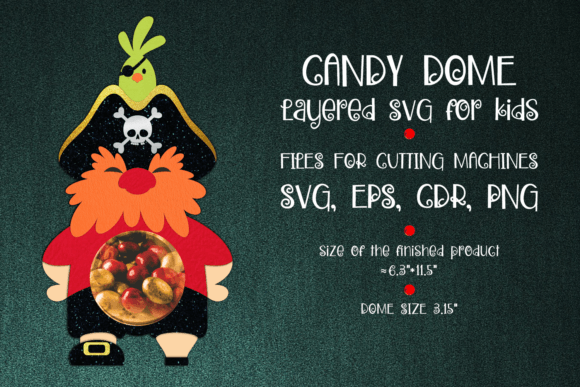
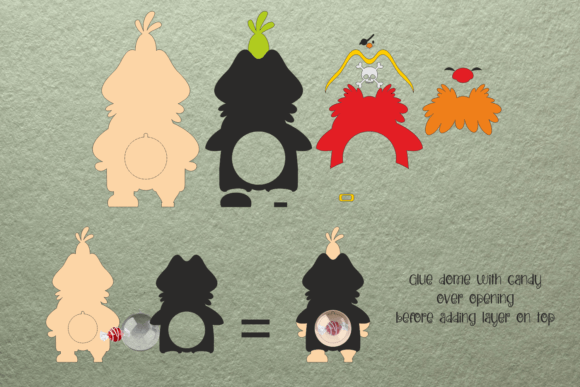
A bold pirate character gives this layered paper project plenty of personality, with the clear treat compartment fitting neatly into the center of the design. The package includes three separate print-and-cut layers, which keeps the smaller facial and costume details easier to organize. Before cutting, attach the lowest layer to the dotted circular guide so the opening stays correctly positioned.
Once the pieces are prepared, fill the halloween candy dome with wrapped sweets and secure it firmly to the base. Add the remaining cardstock sections in order, checking the edges as you build. The finished pirate works well as a party favor, classroom surprise, themed table decoration, or playful handmade gift.
26. Blue Monster Halloween Candy Dome SVG
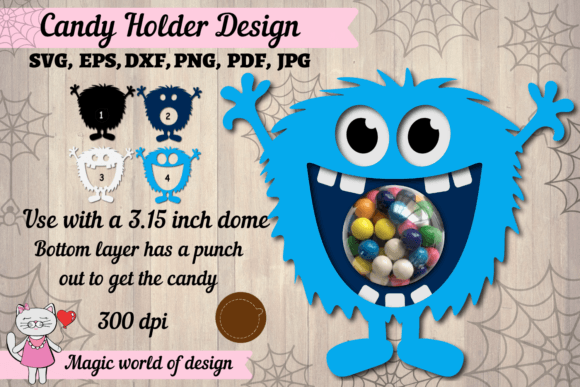
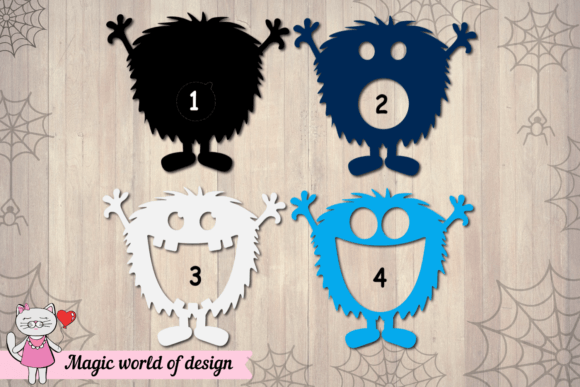
Bright blue cardstock gives this monster a playful personality, while the oversized features make the character easy to recognize at a glance. The pre-sized pieces keep the cutting process straightforward, and the broad layered shapes should align cleanly around the transparent treat compartment. I would place the eyes, mouth, and smaller accents loosely first, then glue them only after checking that the expression looks balanced.
To assemble the halloween candy dome, fill the clear section with wrapped sweets and attach it securely to the base. Build the remaining paper layers upward in sequence until the monster is complete. The finished holder suits classroom treats, children’s party favors, dessert-table decor, and small handmade gifts without feeling overly scary.
27. Carved Pumpkin Halloween Candy Dome Holder
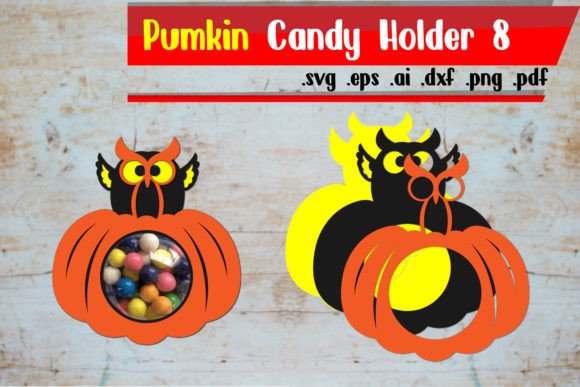
Deep cutout details give this pumpkin a lively jack-o’-lantern expression that feels festive without becoming too complicated to assemble. The layered shapes are broad enough for clean cardstock cuts, and the template can also be printed for careful hand trimming. I would arrange the facial pieces before gluing so the eyes and mouth remain evenly positioned.
After preparing the layers, fill the clear compartment with wrapped sweets and secure it firmly to the base. Build the halloween candy dome from back to front, checking the edges as each section is added. The completed holder suits classroom treats, party favors, autumn table decor, or small handmade gifts in classic orange, black, and green paper.
28. Playful Dog Halloween Candy Dome SVG
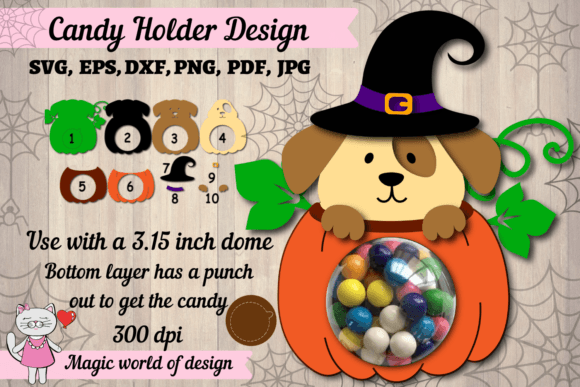
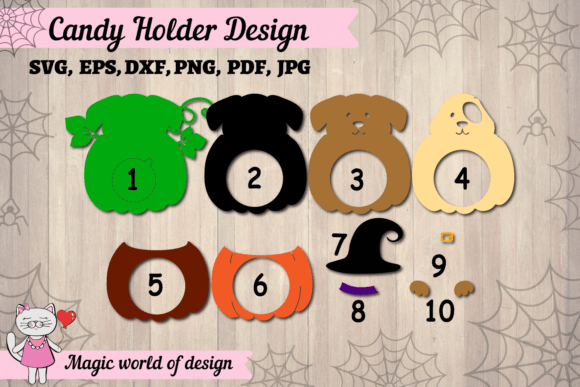
A costumed dog gives this layered design a friendly seasonal character that feels more playful than frightening. The pre-sized cardstock pieces should cut cleanly and frame the clear treat compartment without difficult alignment. I would lay out the ears, face, and smaller costume details before gluing so the expression remains balanced and easy to recognize.
For assembly, fill the dome with wrapped sweets, secure it firmly to the bottom layer, and add each paper section in order. This halloween candy dome works well as a classroom treat, pet-lover gift, children’s party favor, or small tabletop decoration. Black, orange, purple, and brown cardstock can strengthen the Halloween theme while keeping the dog as the main focus.
29. Mushroom Halloween Candy Dome Holder
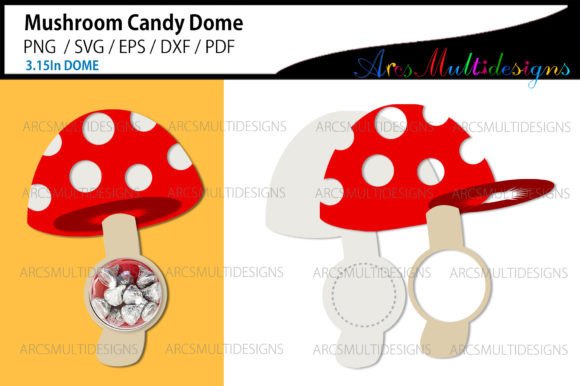
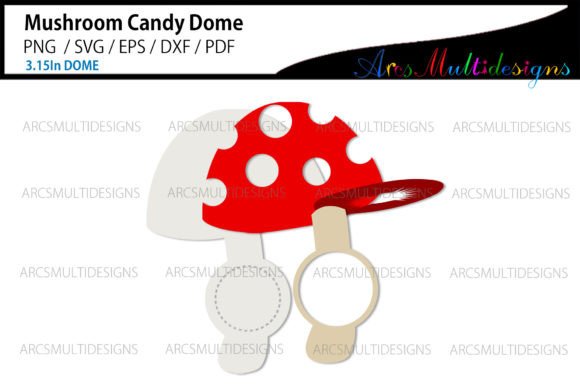
Rounded caps and layered woodland details give this design a cozy seasonal look with just enough spooky charm for autumn crafting. Sized for a 3.15-inch compartment, the halloween candy dome should fit neatly once the pieces are cut and arranged. I would sort the four layer options first, then test the cap, stem, and smaller accents before gluing.
After securing the filled dome to the base, build the paper sections from back to front so the mushroom keeps its depth. The finished holder works well as a party favor, classroom treat, table decoration, or small handmade gift. Red, cream, brown, and black cardstock can create either a cheerful forest style or a darker Halloween version.
30. Bat Halloween Candy Dome Treat Holder
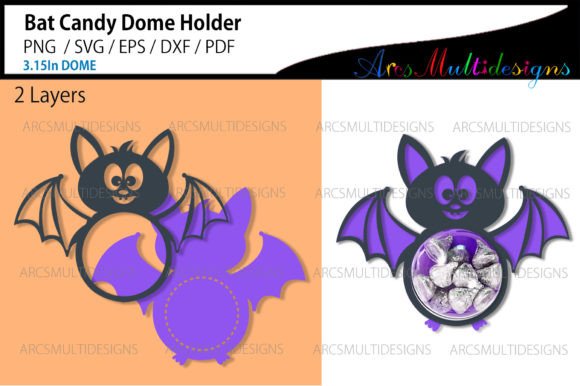
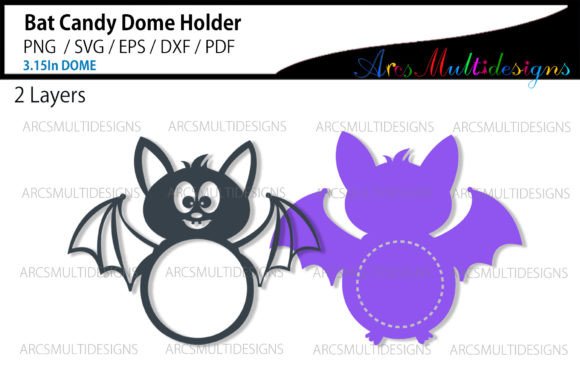
Wide wings and a simple silhouette give this design a clean spooky look that reads well even with only two paper layers. Sized for a 3.15-inch compartment, the halloween candy dome should be quick to cut, align, and assemble. I would test the wing placement before gluing so both sides stay balanced around the clear center.
Once the dome is filled with wrapped sweets, secure it to the base and attach the remaining cardstock layer. The finished bat works nicely as a classroom treat, party favor, table accent, or small handmade gift. Black, purple, orange, and silver paper can shift the style from playful to slightly gothic without adding extra complexity.
31. Spider Halloween Candy Dome Holder
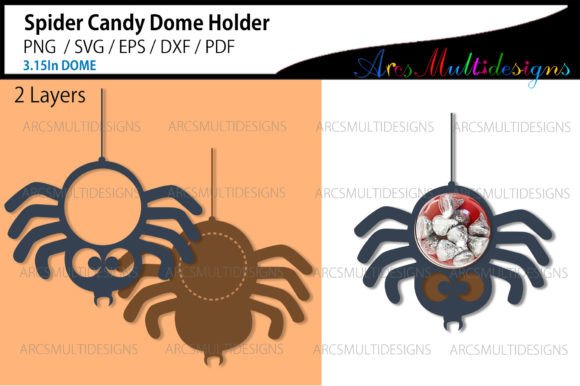
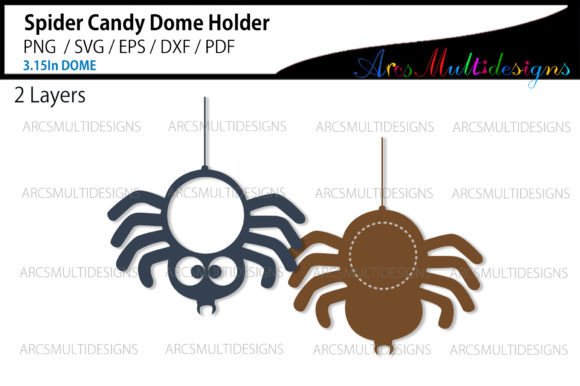
Long curved legs give this spider design a bold silhouette while the simple two-layer structure keeps the project easy to manage. Sized for a 3.15-inch compartment, the halloween candy dome should align neatly around the clear center without extra scaling. I would test the position of both layers before gluing so the body stays centered and the legs remain evenly spaced.
After filling the dome with wrapped sweets, secure it to the base and attach the top cardstock section. The finished holder works well as a classroom treat, party favor, table decoration, or small handmade gift. Black, purple, orange, or metallic paper can make the spider look playful, gothic, or slightly dramatic.
32. Cute Dragon Halloween Candy Dome Favor
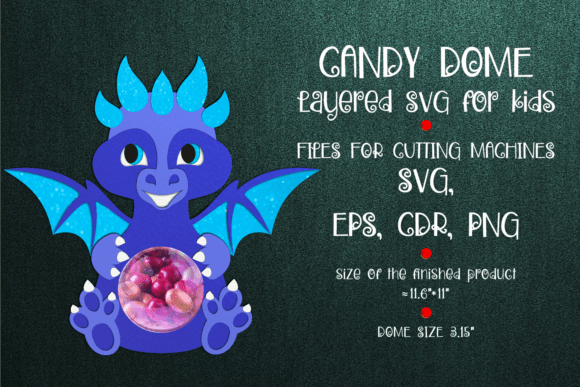
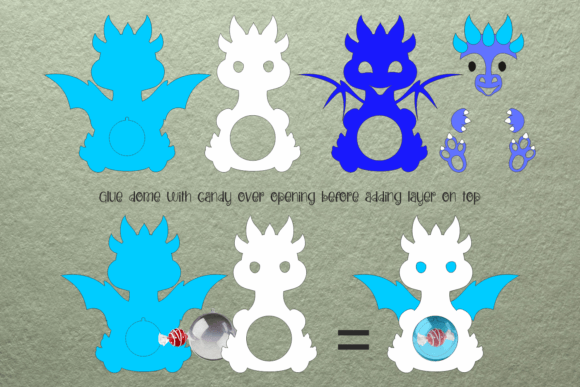
Curled wings, rounded features, and a friendly face make this dragon a fun choice for children’s treats and fantasy-themed parties. The two separate print-and-cut layers keep the small details organized, while the circular opening holds the clear candy compartment neatly. Before cutting, attach the lowest layer to the dotted circle guide in your design software so both parts remain correctly aligned.
Fill the compartment with wrapped sweets, secure it to the base, and add the decorative dragon layer on top. This halloween candy dome works well as a party favor, classroom surprise, hanging ornament, or small handmade gift. Bright green, purple, blue, or red cardstock can give the character a playful storybook personality.
33. Dragon Halloween Candy Dome Ornament
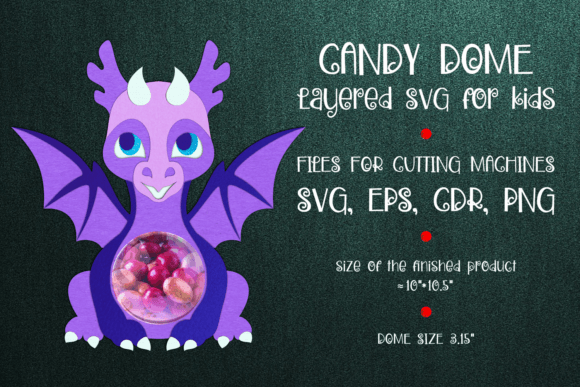
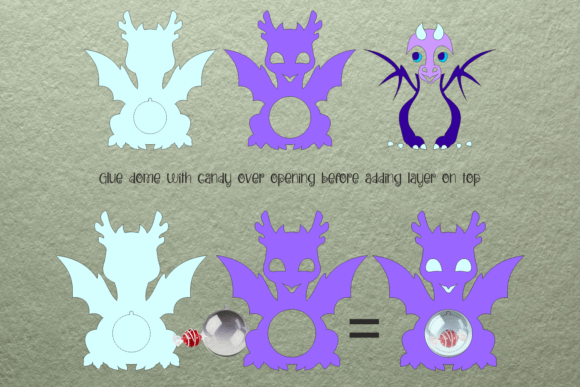
Strong wings and a curled tail give this dragon a bolder fantasy look than the cuter versions in the collection. The two print-and-cut layers keep the construction manageable, while the circular opening creates a tidy place for the clear treat compartment. Before cutting, attach the lowest layer to the dotted circle guide in your software so the opening stays correctly positioned.
Once the pieces are ready, fill the halloween candy dome with wrapped sweets and secure it firmly to the base. Add the decorative dragon layer last, checking the edges before the glue sets. The finished craft works well as a party favor, hanging ornament, classroom surprise, or small handmade gift for anyone who enjoys mythical creatures.
34. Boo Halloween Candy Dome Treat Holder
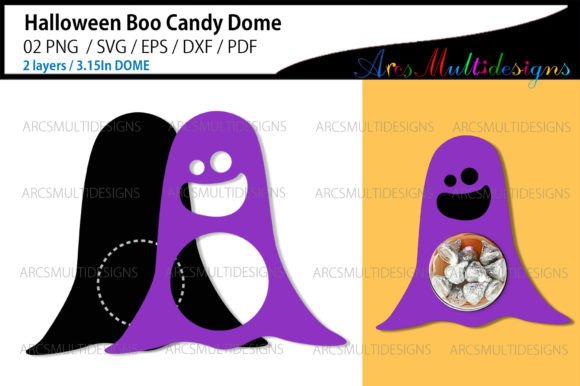
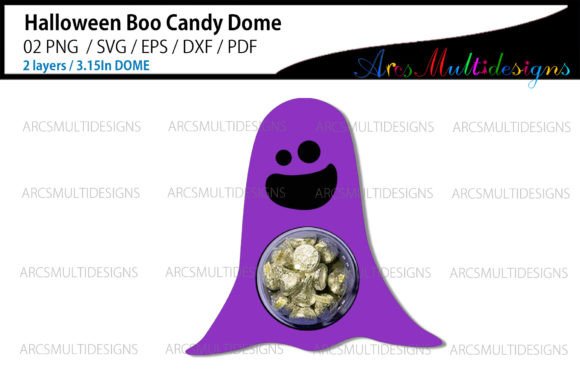
Bold “Boo” lettering gives this two-layer design a clear seasonal look that stays readable around the transparent center. Sized for a 3.15-inch compartment, the pieces should be quick to cut and easy to position without complicated alignment. I would place both cardstock layers together before gluing to check that the circular opening remains centered.
After filling the halloween candy dome with wrapped sweets, secure it firmly to the base and attach the upper paper section. The finished holder makes a practical classroom treat, party favor, table decoration, or small handmade gift. Black, orange, purple, and white cardstock will keep the lettering crisp while letting the candy remain the brightest part of the project.
35. Whimsical Gnome Halloween Candy Dome SVG
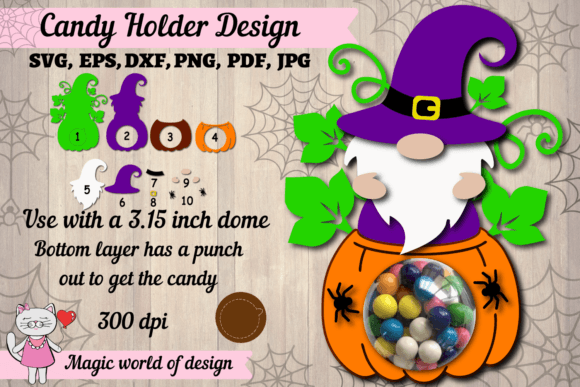
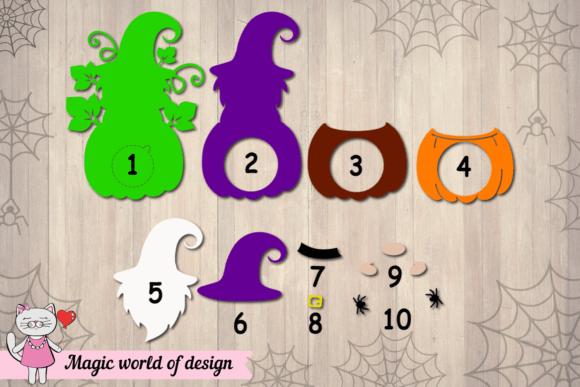
A tall pointed hat and compact bearded figure give this gnome a cheerful spooky character that suits family-friendly crafting. The pre-sized cardstock pieces keep the cutting process simple, while the layered arrangement frames the clear treat compartment without hiding the sweets. Sorting the hat, beard, and facial details before gluing will make the final alignment much cleaner.
Fill the halloween candy dome with wrapped treats, secure it to the bottom piece, and build the remaining paper sections upward in order. The finished gnome works nicely as a classroom surprise, party favor, tabletop accent, or small handmade gift. Orange, purple, black, and cream cardstock can give the design a warm seasonal finish.
36. Funny Monster Halloween Candy Dome Template
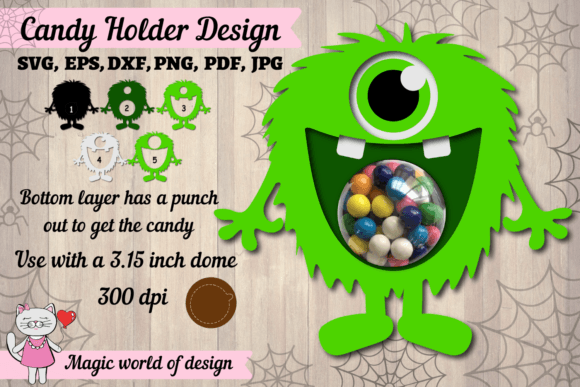
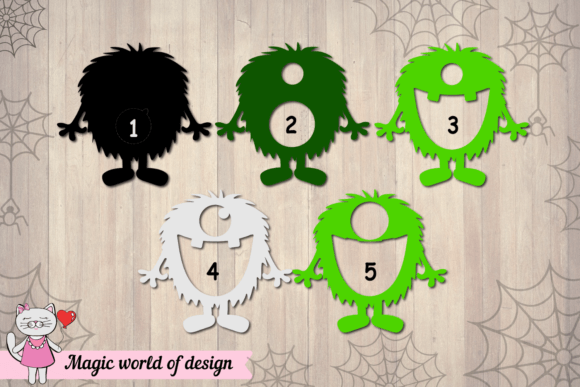
Bright green cardstock and an exaggerated monster face give this project a silly, child-friendly look rather than a frightening one. The pre-sized pieces keep cutting and positioning straightforward, while the layered construction frames the clear treat compartment without covering the candy. I would arrange the eyes, mouth, and smaller facial details before gluing so the expression stays balanced.
Fill the halloween candy dome with wrapped sweets, secure it firmly to the bottom layer, and attach each cardstock section in sequence. The finished monster works well as a classroom surprise, children’s party favor, dessert-table decoration, or small handmade gift. Purple, black, orange, and lime accents can make the character even more playful.
37. Spider Girl Halloween Candy Dome SVG
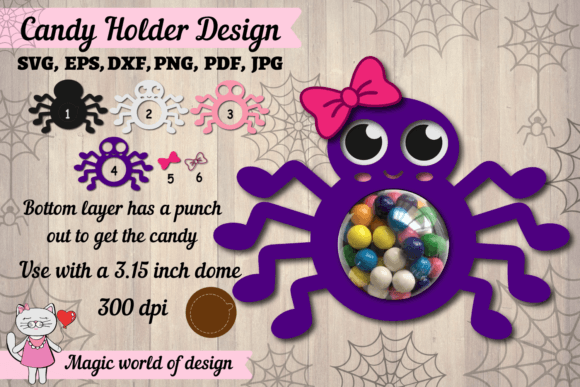
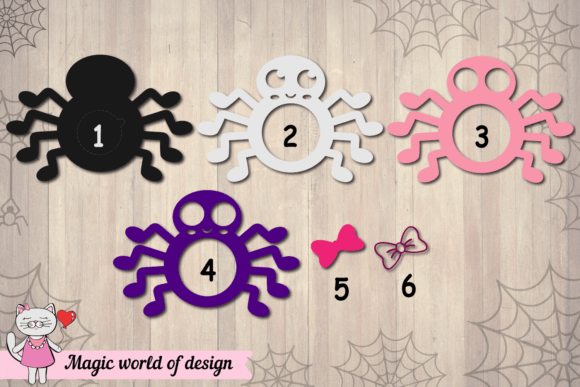
Playful spider details and a charming girl character give this layered design a spooky look without making it too frightening. The pre-sized cardstock pieces keep cutting and positioning manageable, while the clear treat compartment remains the center of the composition. I would sort the web, costume, and facial elements before gluing so the smaller details stay aligned.
Begin by filling the dome with wrapped sweets and attaching it securely to the bottom layer. Build the remaining paper sections upward until the halloween candy dome is complete. The finished project works well as a classroom treat, children’s party favor, table decoration, or small handmade gift. Black, purple, orange, and pink cardstock can create a fun seasonal palette.
38. Cute Monster Halloween Candy Dome Bundle
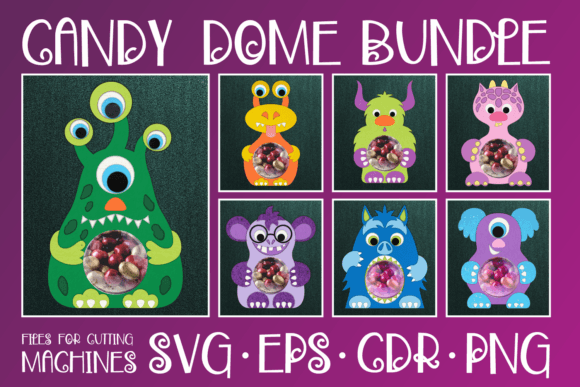
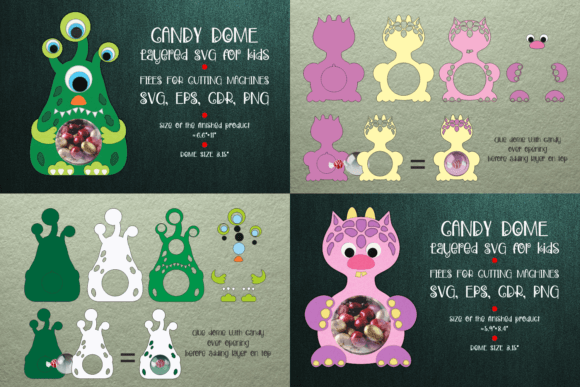
Cheerful faces and layered shapes give this monster collection a playful look that works well for children’s Halloween crafts. Each design uses a clear treat compartment as the center, while the surrounding paper pieces add character and depth. Before cutting, attach the lowest layer to the dotted circle guide so the opening stays correctly positioned.
Once the pieces are prepared, fill the halloween candy dome with wrapped sweets and secure it firmly to the base. Add the decorative monster layers in order, checking the smaller facial details as you work. The bundle is ideal for party favors, classroom surprises, table decorations, or small handmade gifts with different colors and expressions.
Sweeten Your Spooky Crafting Season
These halloween candy dome ideas turn simple cardstock and wrapped treats into decorations that feel thoughtful, playful, and easy to personalize. With themes ranging from pumpkins and ghosts to dragons, pirates, monsters, and witches, there is plenty of room to match each project to a party, classroom, or handmade gift.
Choose a design that fits your style, prepare the layers carefully, and let the clear dome become part of the finished scene. A well-made candy holder can double as festive decor, a memorable party favor, or a small seasonal surprise that looks far more special than an ordinary bag of sweets.
For more seasonal inspiration beyond candy holders, take a look at 55 Brilliant Halloween SVG Designs For Haunted 3D Paper Crafts. The collection includes layered projects for decorations, gifts, party displays, and other spooky cardstock creations that pair naturally with these candy dome ideas.
You may also enjoy 25 Amazing Halloween Coffin SVG Designs For Spooky Crafts, especially if you prefer darker silhouettes and gothic details. These coffin-themed projects offer plenty of ideas for layered decor, handmade favors, shadow boxes, and distinctive Halloween paper crafts.
Frequently Asked Questions About Halloween Candy Dome Designs
What Is A Halloween Candy Dome?
A halloween candy dome is a layered paper craft with a clear plastic compartment that holds wrapped sweets. The surrounding cardstock can feature pumpkins, ghosts, bats, witches, monsters, spiders, or other seasonal characters.
What Size Dome Do Most Templates Use?
Many designs in this collection are pre-sized for a 3.15-inch or 8 cm half bauble. Check the individual template details before cutting, since some files may use a different opening size.
What Materials Are Needed To Make One?
You will usually need cardstock, a clear half dome, wrapped candy, a glue stick, and a small amount of hot glue for securing the dome. Foam adhesive can also be added between layers for extra depth.
How Are The Paper Layers Assembled?
Cut every piece, arrange the layers in the correct order, and dry-fit them before adding glue. Attach the filled dome to the base first, then build the decorative cardstock sections from back to front.
Can The Templates Be Resized?
Most SVG templates can be resized, but the circular opening must match the diameter of your chosen dome. Resize every layer together to preserve the proportions and test the opening on inexpensive paper before using your final cardstock.
Are These Projects Suitable For Beginners?
Many of the simpler two-layer designs are beginner-friendly, including bats, spiders, pumpkins, and “Boo” holders. Templates with delicate webs, detailed faces, or numerous small pieces require more careful cutting and alignment.
How Can Finished Candy Domes Be Used?
They work well as Halloween party favors, classroom treats, table decorations, hanging ornaments, teacher gifts, and small handmade surprises. Changing the cardstock colors and candy selection makes each project easy to personalize.