This post contains affiliate links. As an Amazon Associate I earn from qualifying purchases, at no extra cost to you. Thank you for supporting Diynify!
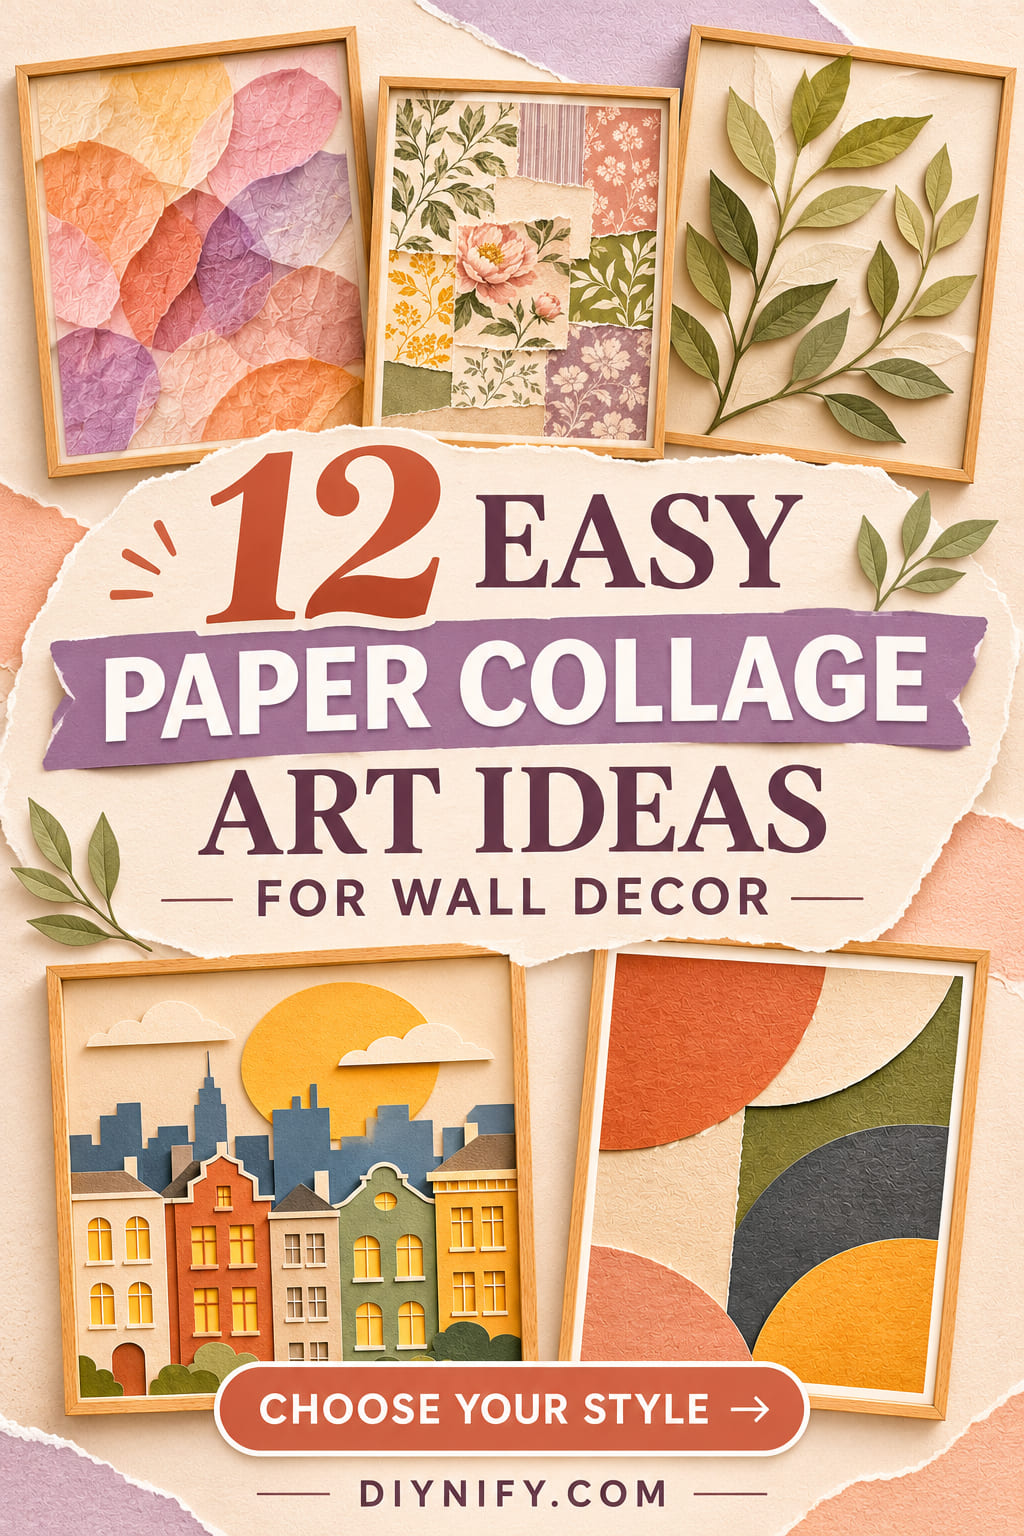
Paper collage art is an approachable way to turn leftover sheets, magazine pictures, and small cutoffs into wall decor that feels deliberately composed. Instead of needing perfect drawing skills, you work with edges, overlap, scale, and the contrast between matte and glossy surfaces. These 12 ideas cover crisp abstracts, photographic scenes, soft translucent layers, and a few shallow reliefs.
Colored paper, cardstock, scissors, a glue stick, and a firm backing board will handle most of them. Set aside tissue paper, a circle punch, corrugated packaging, wallpaper samples, or a frame only for the projects that call for those materials. If you want a quick first piece, start with the color blocks or arch cutouts. Choose the tissue, dot-gradient, or folded skyline projects when you feel like spending more time on arrangement.

1. Oversized Color-Block Abstract Collage
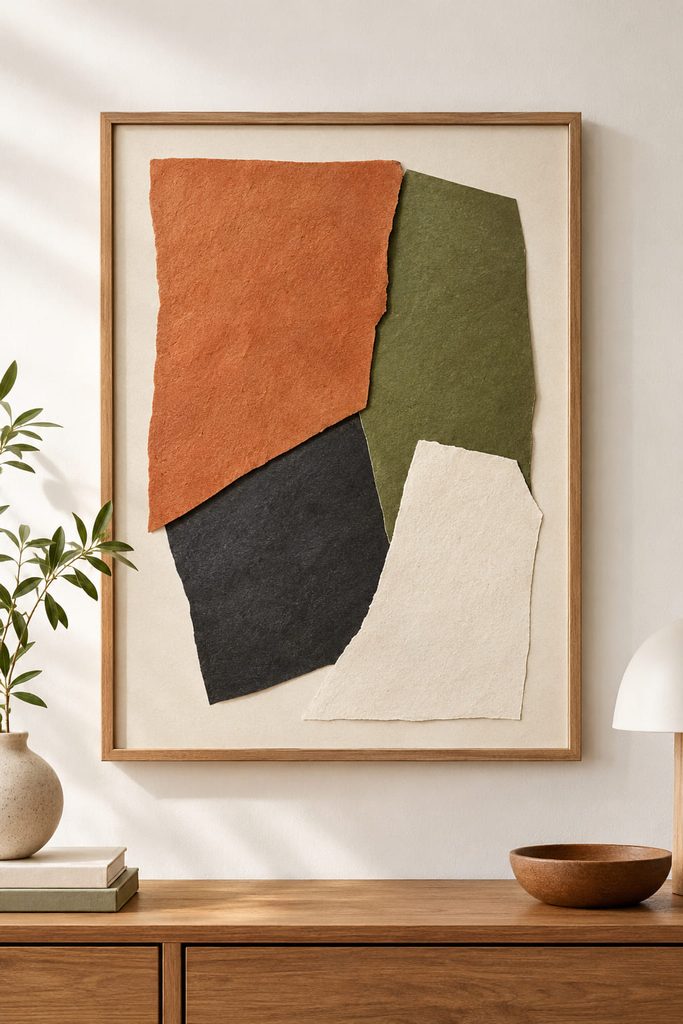
Three or four large shapes can fill a frame without looking busy. Cut rectangles and irregular polygons from heavyweight paper, then overlap them on a neutral backing so one shape clearly dominates. Leave a narrow border of uncovered cardstock; otherwise, the composition can resemble leftover wrapping paper. Try the layout from across the room before gluing. If the blocks merge into one mass, swap a middle-value sheet for a lighter or darker one. This flat collage is a good first project for a desk wall or narrow hallway.

2. Surreal Magazine Photo Scene Collage
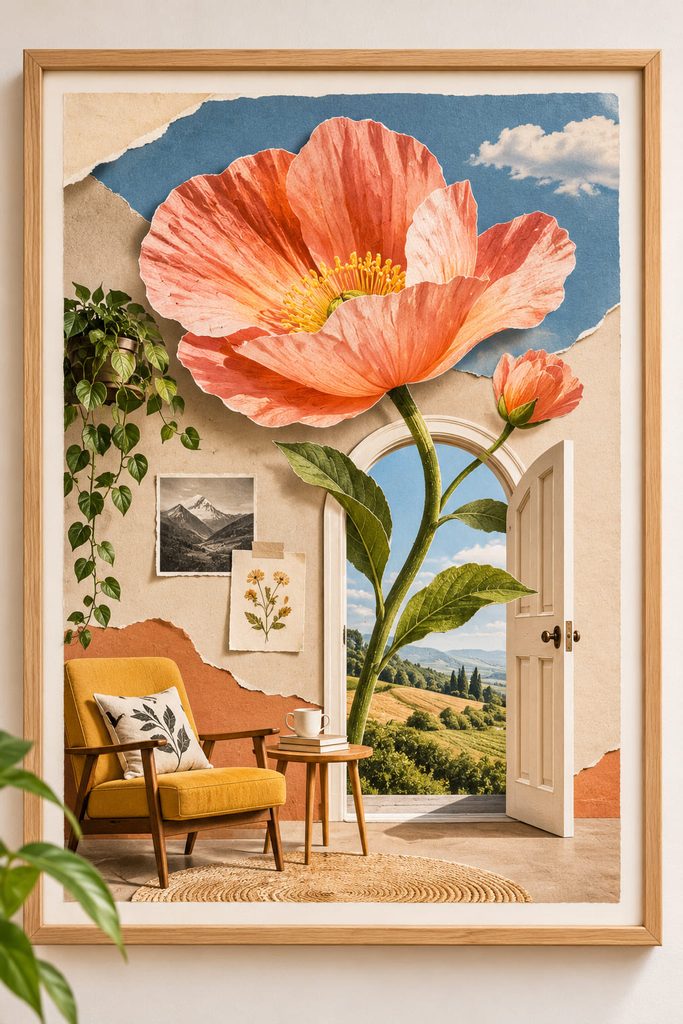
Imagine an oversized flower growing through a tiny doorway, or a landscape appearing inside an ordinary living room. Magazine photographs give this style its visual surprise, but mismatched scale should look intentional rather than accidental. Pick one recognizable setting as your base image, then choose a single impossible object to interrupt it. A small shadow cut from gray paper can help the added object feel grounded without pretending the scene is realistic.
Dry-fit the pieces from back to front before applying a glue stick to the reverse of each cutout. Trim distracting white edges, but keep a little space around delicate stems or furniture legs rather than slicing them off. A simple mat board works better than a patterned background here: the photographic joke needs room to register.
3. Translucent Tissue Color-Wash Collage
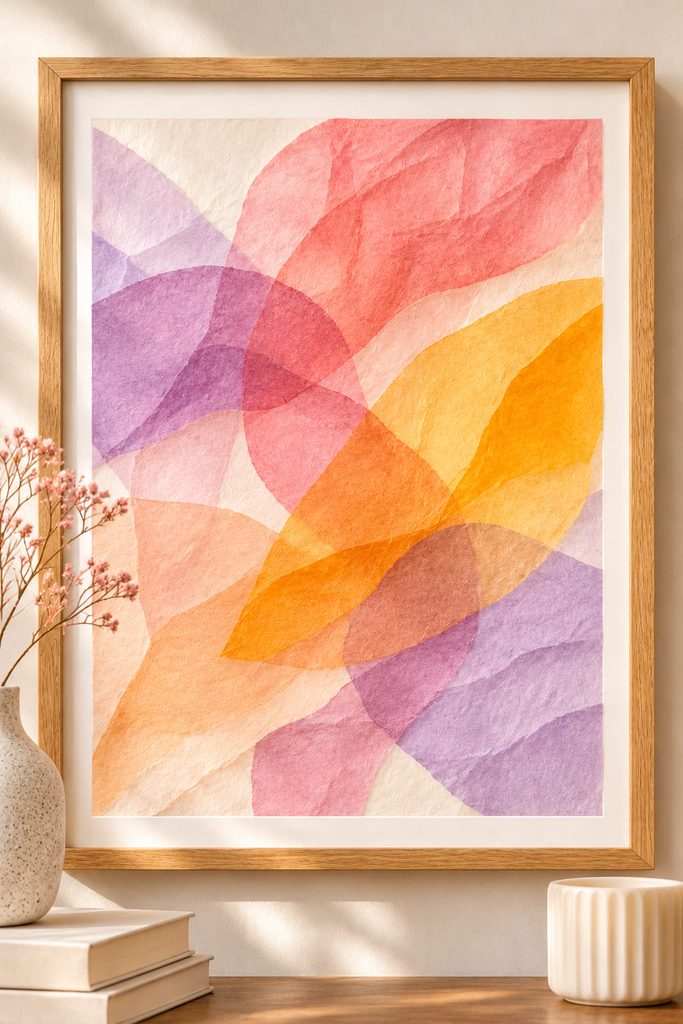
Two layers of tissue paper can produce a third-looking shade wherever they overlap. That makes translucent tissue useful for a color-wash collage with no paint involved. Mount the tissue on smooth white cardstock if you want the colors to read clearly as wall art. Choose a limited palette and let the light background remain visible between a few loose, cloudlike shapes.
Build the panel in a sequence that reduces wrinkles:

- Tear or cut broad tissue shapes and arrange them dry on the backing.
- Apply a very thin coat of paper-safe adhesive to a small area, then lower the tissue gently rather than dragging it across the surface.
- Work outward from the center with a clean soft brush, letting each section settle before adding another transparent layer.
- Leave the piece flat until fully dry before putting it in a frame.
Wrinkle Check: Tissue becomes fragile when wet. If it begins to bunch, stop brushing; pressing harder usually stretches or tears it. A small test swatch will tell you whether your chosen adhesive leaves visible marks.
4. Botanical Cutouts With Lifted Leaf Edges
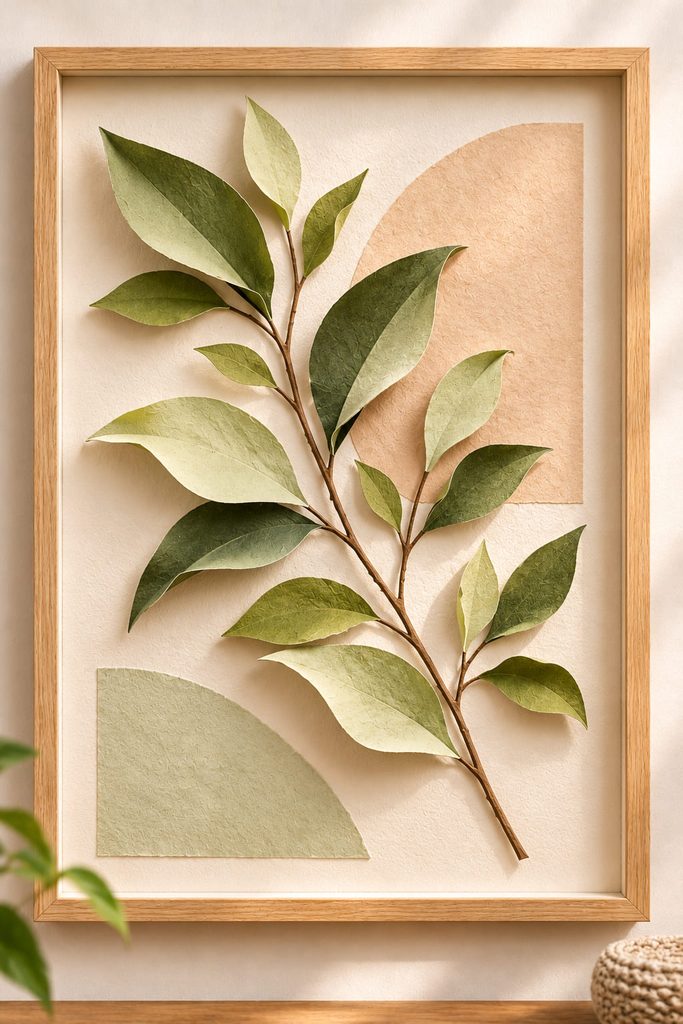
For a botanical collage that casts a little shadow, attach each paper leaf along its center vein and allow the outer edges to rise slightly. Cut one larger branch shape as the visual anchor, then place smaller leaves where a real stem would naturally branch. Use the same paper weight for most leaves so they bend in a consistent way. A pale background gives the silhouettes space to breathe, especially when the stems cross.
The raised edges are the feature, so avoid pressing the entire leaf flat with glue. A shallow spacer frame can protect those curves; ordinary glass placed directly over the work will flatten them. This is a useful choice for a bedroom wall where the composition should feel quiet up close but still read as a branch from several feet away.
5. Confetti Dot Gradient Wall Mosaic
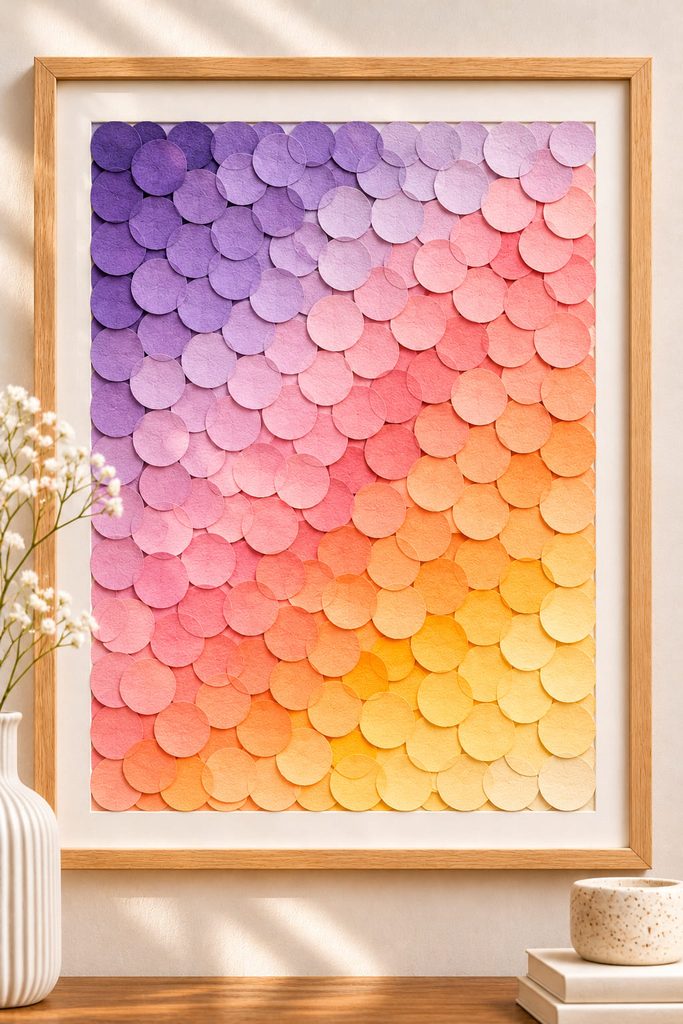
Small circles behave like pixels when viewed from a distance. A circle punch makes the pieces faster to prepare than cutting each disc separately, while a faint pencil grid helps keep the color transition aligned. Arrange the darkest dots near one edge, the palest near the other, and at least two middle shades between them. Leave some backing visible; filling every gap can erase the individual circles. Glue only after the full pattern looks balanced from several feet away.
If the gradient looks striped: The hue changes are probably too abrupt. Mix neighboring shades across their boundary rather than adding more circles to one isolated band.

If the middle looks patchy: Compare the empty gaps, not just the colors. Move a few dots into sparse areas before adding new ones. Keep the outside silhouette tidy, so the irregular interior reads as a deliberate color study.
If the paper lifts: Check whether the glue reaches the edges of each disc. Apply a small, even amount and press briefly under clean scrap paper. A flat frame suits this mosaic better than a deep shadow box.
6. Layered Arch Cutout Paper Collage
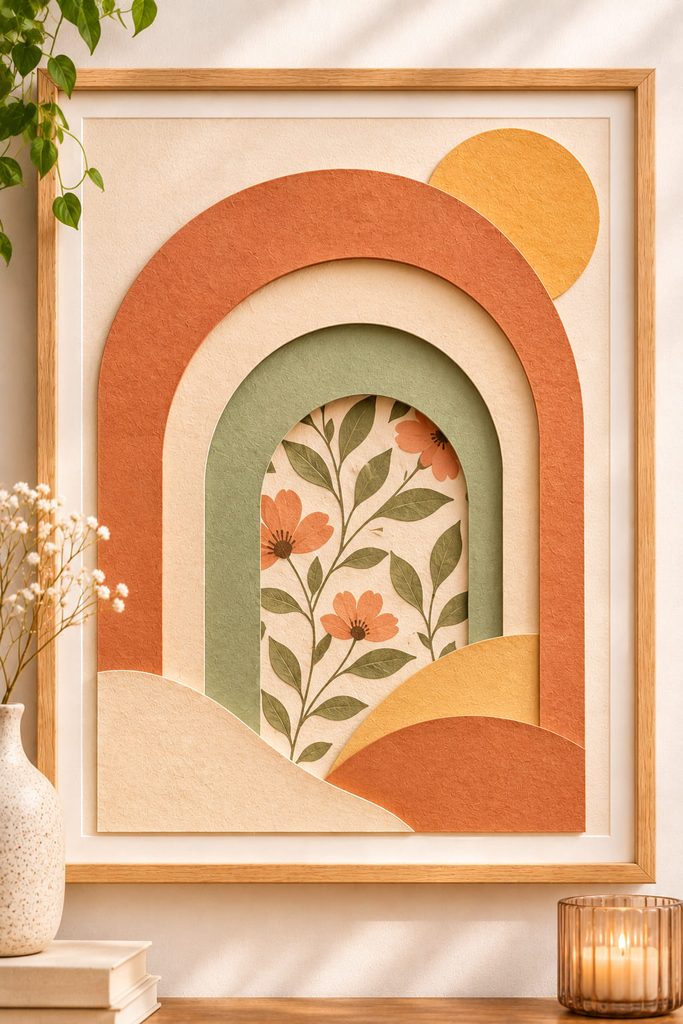
The arch is the opening, not the object. Cut a large arch from one cardstock sheet and place patterned paper behind it. Add one smaller offset opening on top to reveal a second border. The visible backing becomes the picture, while the cut edges create an architectural rhythm. Leave solid paper around the arch’s narrow shoulders so they do not buckle when glued. Press every layer flat, then place the collage in a simple frame. Its restrained shape suits a pair of small prints above a shelf.
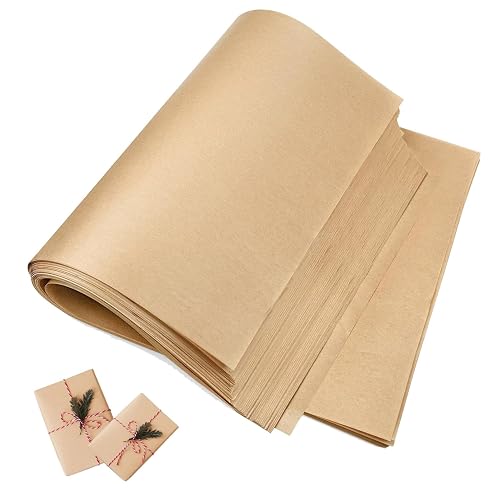
7. Textured Paper Collage Art With Kraft Scraps
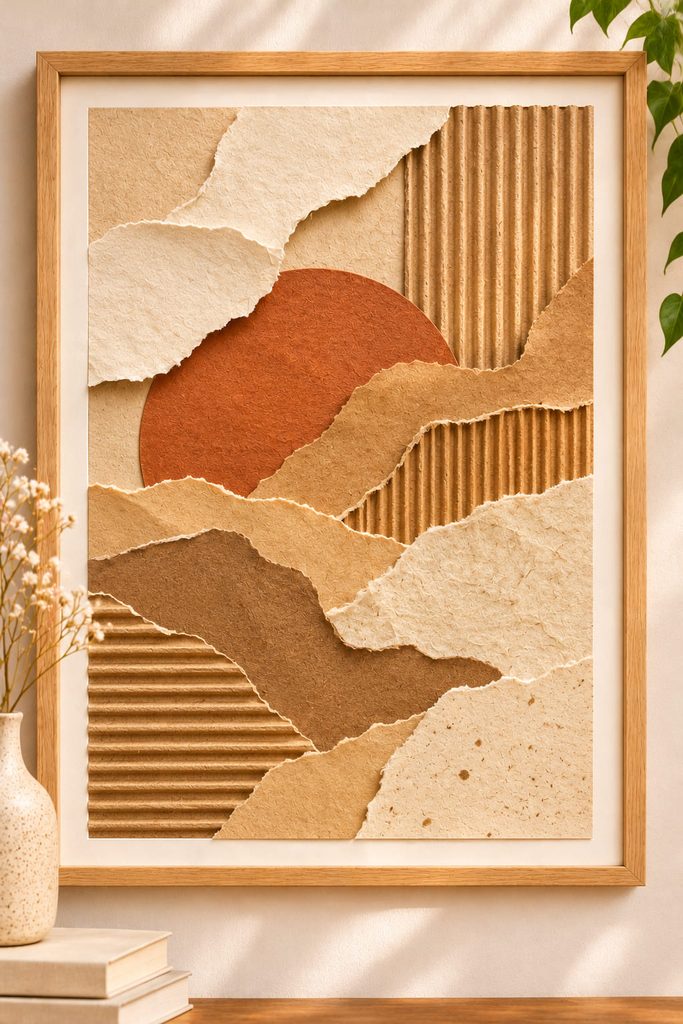
Corrugated cardboard has a natural striped surface that flat colored sheets cannot imitate. For a warm, neutral artwork, combine small pieces of exposed corrugation with smooth kraft paper, brown packing paper, and a few cream offcuts. Strip only the upper liner from selected cardboard areas, leaving the fluted middle attached to its base so the texture remains stable.
A short materials edit keeps the piece cohesive:
- Smooth kraft: larger, restful shapes behind the texture.
- Exposed corrugation: small ridged sections where side light can catch the grooves.
- Cream scraps: gaps and highlights that separate similar browns.
Use a sturdy backing board and a thicker paper-safe adhesive where the cardboard touches it. Mount the finished panel away from damp areas; exposed cardboard edges absorb moisture more readily than sealed art paper.
8. Wallpaper Sample Patchwork Collage
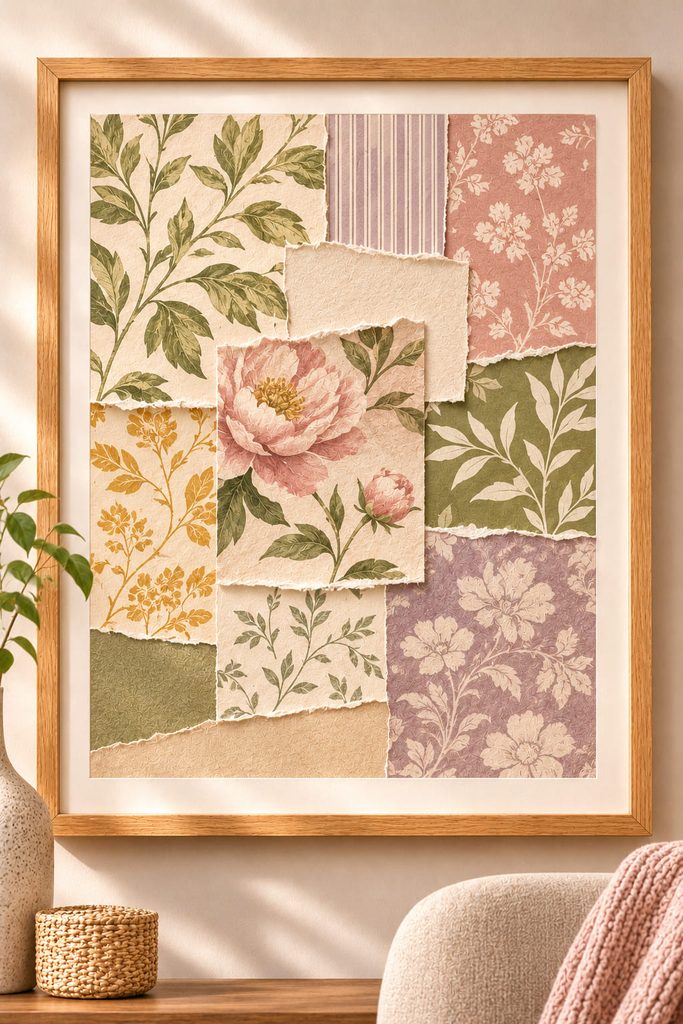
Five attractive wallpaper patterns can still fight for attention when placed together. Pick one dominant print, a quieter companion, and a nearly plain sample to act as visual breathing room. Cut each into paper patches with either straight, tailored edges or slightly irregular ones, depending on how precise you want the finished panel to feel. Compare two joining methods before gluing:
| Joining Method | Appearance | What to Watch |
|---|---|---|
| Butted seams | Tidy, quilt-like blocks | Square cuts and small gaps between pieces |
| Overlapping patches | Casual, layered scrapbook surface | Thick vinyl-coated samples creating ridges |
Repeat one color through the patches to tie the different prints together. This is particularly effective as a framed companion piece near patterned cushions or curtains; it echoes the room without needing an exact fabric match.
9. Folded Paper Skyline Relief Collage
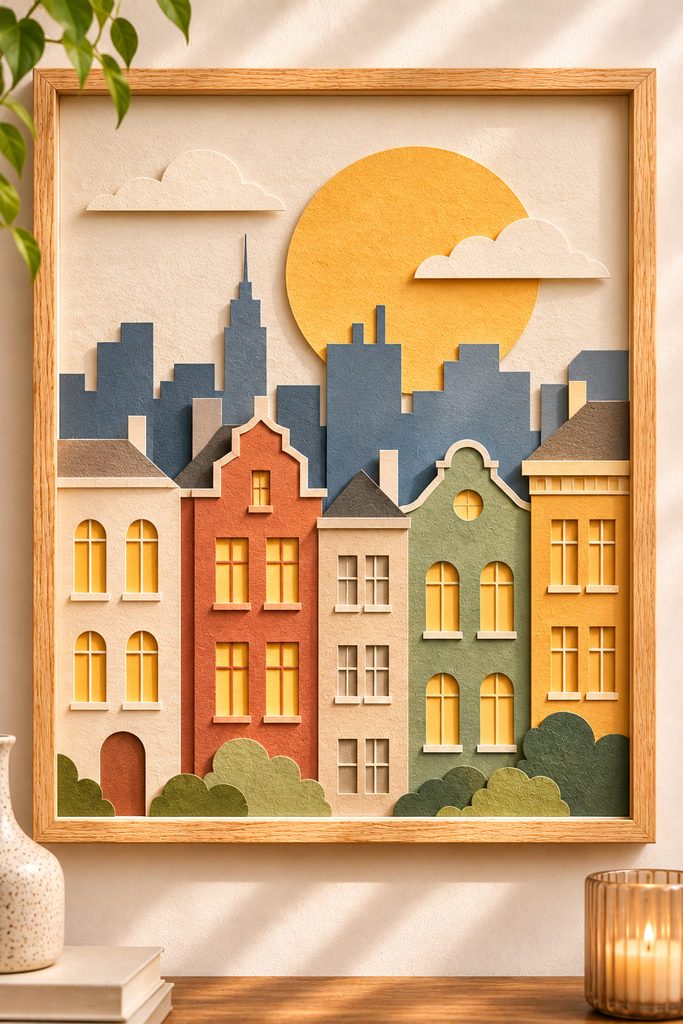
A row of simple building silhouettes becomes a shallow three-dimensional cityscape when selected rooftops stand away from the background. Use medium cardstock and a rigid mount board. Unlike a flat skyline, raised buildings need actual folded tabs reaching the backing; a loose paper flap glued only at its lower edge will lean forward.
Assemble the city in a strict order:
- Cut a continuous flat skyline for distant buildings and glue it directly to the board.
- Cut two or three foreground buildings separately, adding narrow side tabs that fold backward.
- Score those folds, secure the tabs to the backing, and check the buildings upright for a consistent stand-off.
- Add a few large window shapes only after the raised pieces are stable.
Depth Test: If one roof leans, widen its tab or add a hidden second support rather than gluing across the front face. A spacer frame must clear the tallest raised edge without touching it.
Keep the buildings at varied heights, but limit the skyline to one clear horizon. That restraint makes the shadows useful rather than allowing every roofline to compete for attention.
10. Flowing Ribbon-Strip Abstract Collage
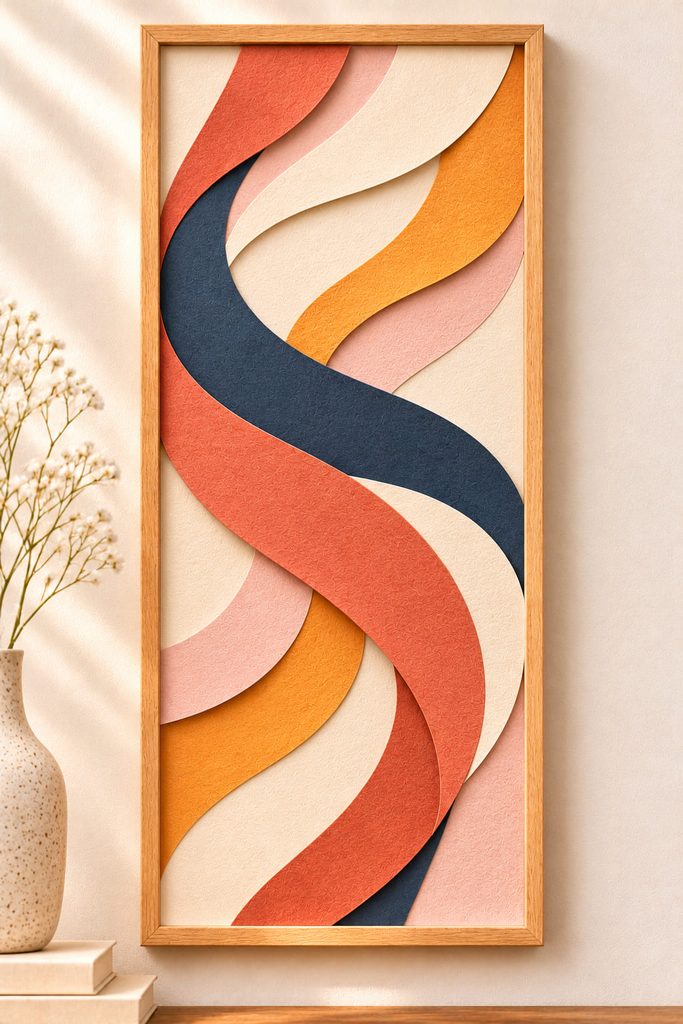
Long curved strips guide the eye across a panel without making a literal picture. Cut several broad S-shaped paper ribbons and let them form a loose diagonal current. They should overlap, but they do not need to pass over and under one another; this is a glued collage rather than a weave.
- Position the longest curve first to establish the direction.
- Add shorter strips that echo its bend, keeping a few open breaks where the backing shows through.
- Tack each ribbon at several points so no loose tip catches against a frame or nearby wall.
This tall, narrow format works well beside a door, especially if the most active curves stay away from the perimeter.
11. Layered Paper Doily Lace Collage
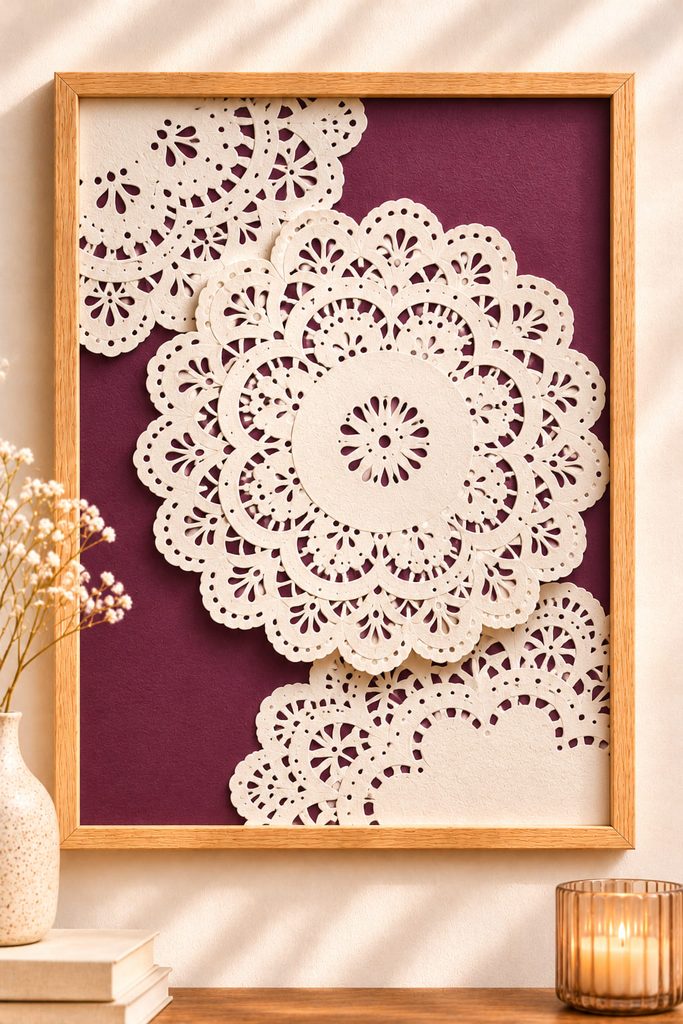
Paper doilies arrive with their delicate holes already cut, so the craft is mostly about placement. Set one complete doily off-center on dark matte backing, then slide trimmed pieces of two others beneath it. Overlapping scallops can make one asymmetric lace shape without cutting a complicated pattern yourself.
Before gluing, check:
- Can you still see the backing through the openwork?
- Is there one clear focal area rather than three competing circles?
- Are there solid edges where a thin line of glue can hold the layers?
A wide paper mat keeps the fragile border away from the frame.
12. Personal Keepsake Paper Collage
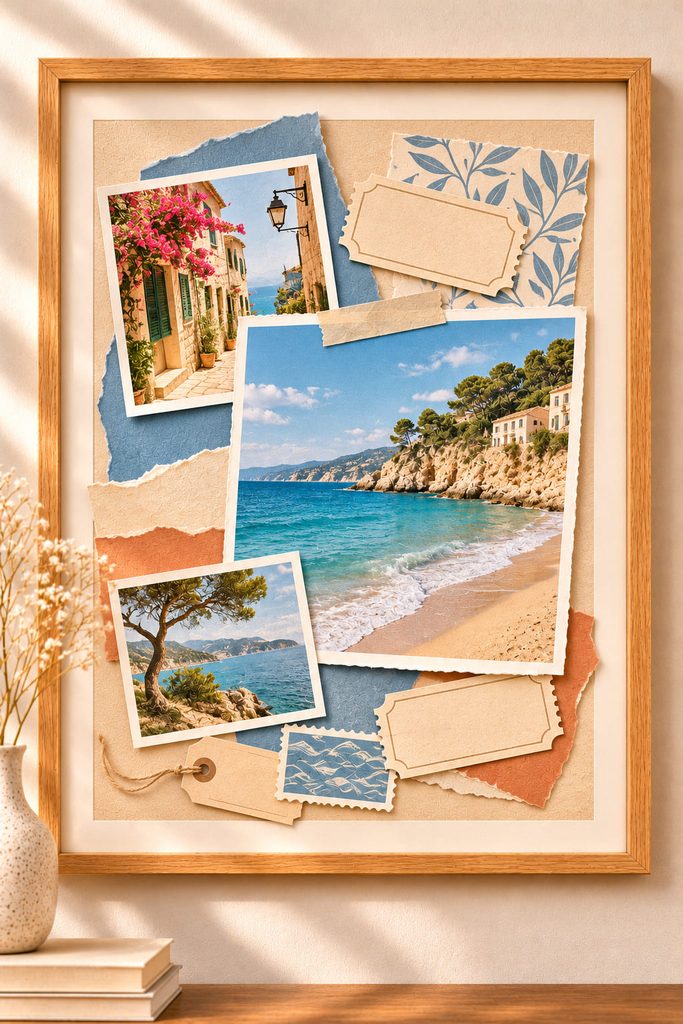
Keep the story to one event or place. A concert ticket, a printed photo, and a scrap of wrapping paper can become a small gallery piece, but an entire box of souvenirs usually produces clutter. Let one photograph lead the arrangement while smaller fragments repeat its colors or recall a particular detail.
Original photos and irreplaceable tickets deserve some care. Scan or photocopy them before cutting, then glue the reproductions instead. Acid-free backing and photo corners are useful if you want to position an original without attaching glue directly to it; the original will still need protection from light and moisture when displayed.
Arrange the pieces loosely and pause before filling the remaining spaces. Uncovered backing lets the important image breathe. For a piece meant to stay on the wall for years, use a sturdy frame and avoid pressing curled souvenirs flat just to make everything fit; copies are much easier to trim or replace.
How to Keep Paper Collages Flat and Frame-Ready
The most common finishing problem is a warped backing rather than a bad color choice. Thin printer paper bends as wet glue dries, especially when adhesive covers only one side. Use heavyweight cardstock or a rigid, archival-quality backing for pieces with many layers, and apply adhesive sparingly. Let the collage dry on a level surface under a clean protective sheet and gentle, even weight only if no raised elements need to remain lifted.
Flat compositions can sit in ordinary frames. Tissue, corrugated strips, curled leaves, and folded skylines need enough clearance that the glazing does not press on the surface. Before hanging, hold each project upright and check for loose edges; repairing them now is easier than finding fallen scraps at the bottom of the frame.
Choose a Collage Technique That Fits Your Wall
If you want a first project with a strong result and little cutting, use large color blocks or a paper doily arrangement. For more controlled color, try a tissue wash or a dot gradient. Choose the skyline or botanical relief only when you have room for a deeper frame and a little extra assembly time.
Once the arrangement feels balanced, resist the urge to fill every empty patch. Those quiet areas help the paper shapes look chosen rather than simply collected. If you want to try a different kind of paper surface next, 16 Paper Weaving Art Ideas for Creative Wall Decor shows how crossing strips can build patterns without using a glued collage layout.