This post contains affiliate links. As an Amazon Associate I earn from qualifying purchases, at no extra cost to you. Thank you for supporting Diynify!
Paper mosaic art uses small cut or torn pieces to build an image, texture, or repeating pattern. The size and spacing of those pieces matter as much as the colors: tight squares create crisp graphics, irregular scraps soften a picture, and translucent fragments change when light passes through them. These 16 projects move beyond framed pictures into useful and seasonal handmade decor.
Most begin with colored paper, scissors, a ruler, a backing surface, and paper-safe glue. Some call for magazine pages, tissue paper, vellum, clear film, a frame, a clock movement, hanging thread, or a cool battery-powered LED. Try the flat pixel panel or bookmark first; the suspended mobile and lantern need more attention to balance and construction.

1. Rainbow Pixel Square Wall Panel
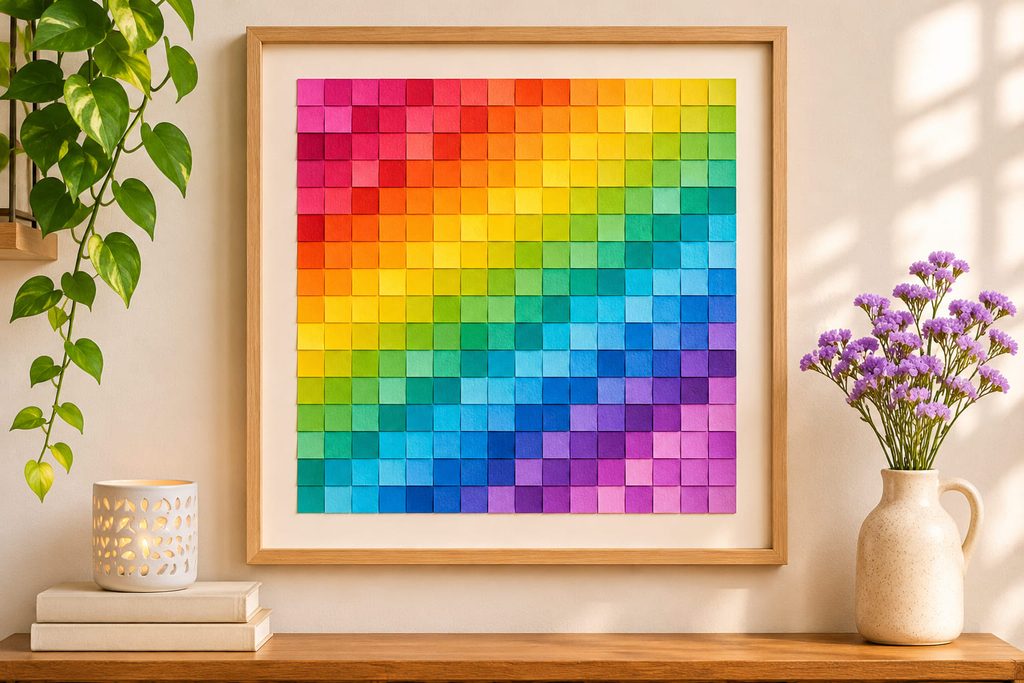
A strict grid makes a rainbow look more like graphic artwork than loose confetti. Cut equal squares, mark a light grid on rigid mounting board, and blend color bands across the surface. Keep the gaps consistent; uneven spacing distracts more than an imperfect gradient. Dry-arrange the whole panel before gluing each row. A plain frame with a cream mat makes the tiny squares readable from across the room, while the rigid backing keeps their spacing unchanged. This is a useful first project because every tile can be moved before adhesive is applied.
2. Sunlit Tissue Paper Window Mosaic
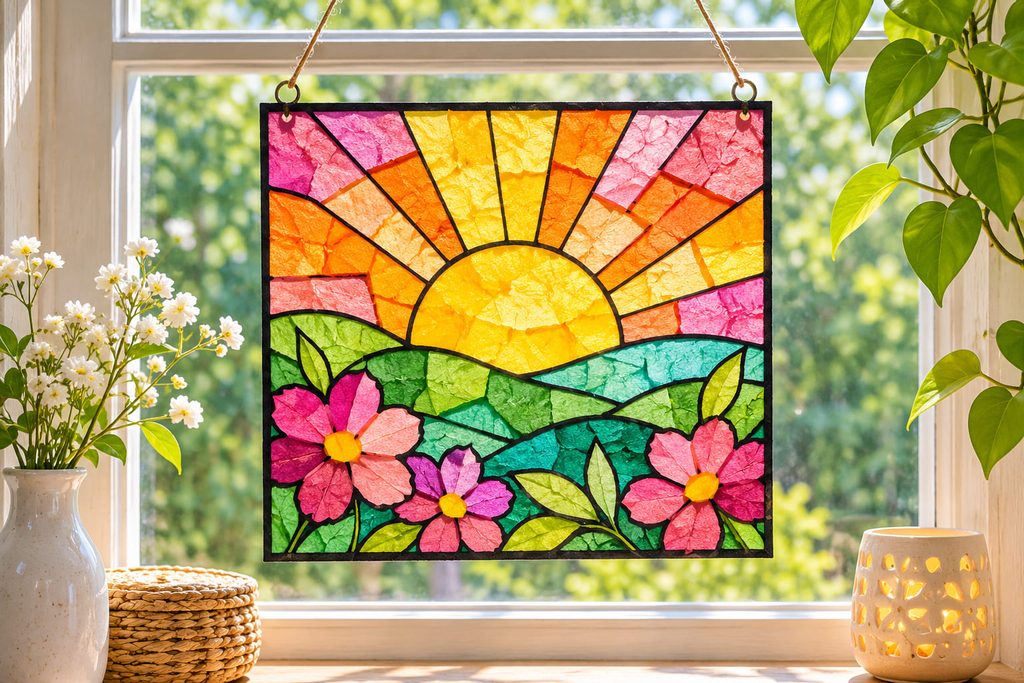
Hold a patch of yellow tissue against a window and it almost glows. Layer orange and pink pieces beside it, and you get a stained-glass effect without thick glass or heavy framing. Build the mosaic on transparent adhesive film or a clear acetate sheet with a suitable transparent glue. Use an outline of black paper strips to divide the larger color areas, but leave some clear sections for daylight.

Keep this decoration lightweight: a small hanging loop attached through a reinforced top tab transfers its weight to the tab rather than the fragile tissue. It belongs on a bright window well away from candles and heat, where changing daylight does most of the visual work.
3. Radial Floral Petal Medallion
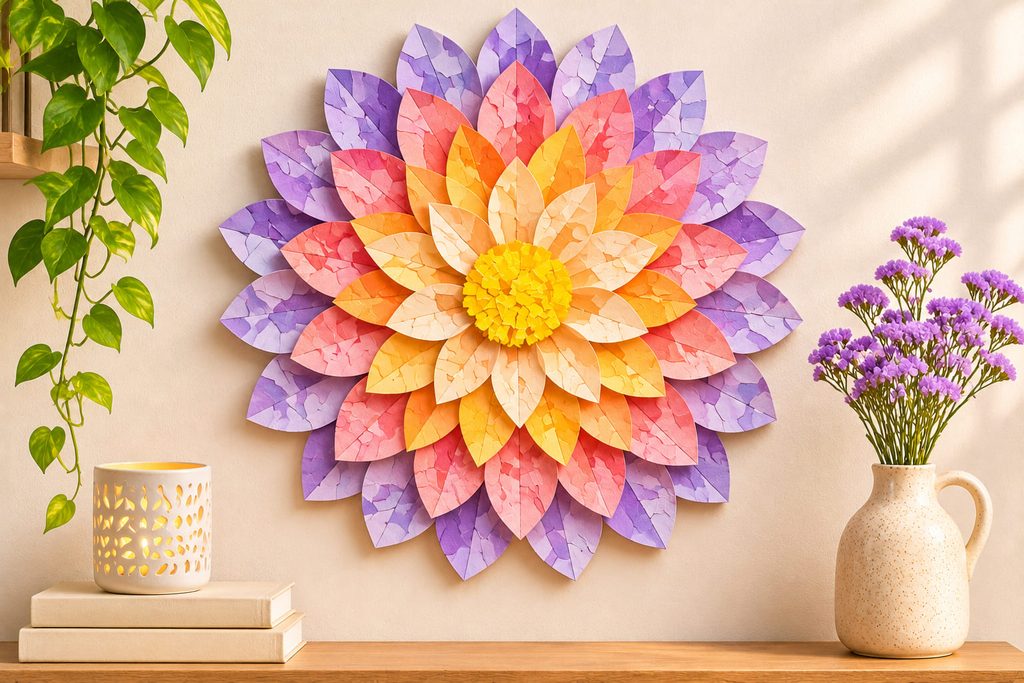
For a flower that reads from several feet away, vary the petal length instead of packing the center with tiny pieces. Cut tapered ovals from cardstock, arrange the longest ones in an outer ring, and use shorter shapes toward the middle. Each ring should overlap just enough to cover its glue points, leaving a small visible gap between neighboring tips.
Build it in this order:

- Draw two or three guide circles on a rigid round backing.
- Dry-fit the outside petals before attaching the inner rings.
- Add a compact contrasting center to cover the innermost joins.
The finished medallion can hang above a shelf without a full frame. Use a backing-mounted hanger rather than piercing the decorative petals.
4. Magazine Scrap Portrait With Value Blocks

Faces can turn into a jumble if every colorful magazine clipping competes for attention. Sort your source pages into light, midtone, and dark piles before worrying about the actual colors. Squint at a simple reference sketch. Hair, facial shadow, and the brightest parts of the forehead should remain legible as large shapes, even without little eyes or lips. Tear scraps for soft cheek transitions; cut sharper fragments around the jaw or hairline.
A portrait that seems noisy from arm’s length may need fewer colors, not finer pieces. Step back from the work to diagnose it:

- If the nose disappears, adjust the value difference between its highlight and neighboring cheek.
- If the face looks outlined, remove heavy dark strips and allow the edges to emerge from adjacent values.
- If the background competes, replace printed scraps around the head with plain muted paper.
Mount it on a firm neutral board. A few visible letters in the printed pieces can be charming, but they should be incidental details rather than the focal point.
5. Geometric Mosaic Mirror Border
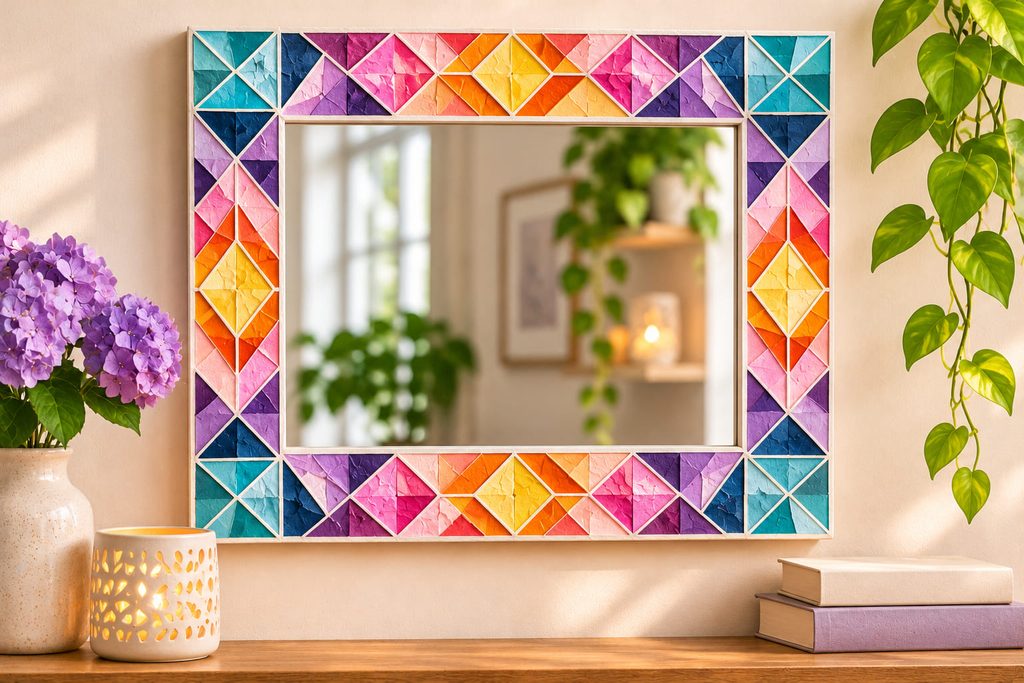
An existing mirror with a flat, removable frame is a more reliable base than gluing paper directly onto reflective glass. Plan the corners first. They determine whether triangular fragments meet neatly or leave a sudden odd-shaped gap. The border should be wide enough for deliberate tile geometry, and the mirror must remain safely attached to its original backing and hanging hardware.

Two layouts create different effects:
| Layout | Visual Result | Construction Trade-Off |
|---|---|---|
| Repeated small triangles | Detailed patterned border | More cuts and alignment points |
| Broad color-block diamonds | Cleaner, bolder frame | Needs a wider flat frame surface |
If your frame is narrow, use one row of larger triangles instead of shrinking everything into fiddly chips. Dry-fit each corner and work along the straight runs only after those turning points are solved. Keep glue and finish away from the glass. For a bathroom or other humid space, a paper border is a poor choice unless the frame is protected from moisture; a dry hallway or bedroom is more suitable.
6. Removable Terrazzo Planter Sleeve
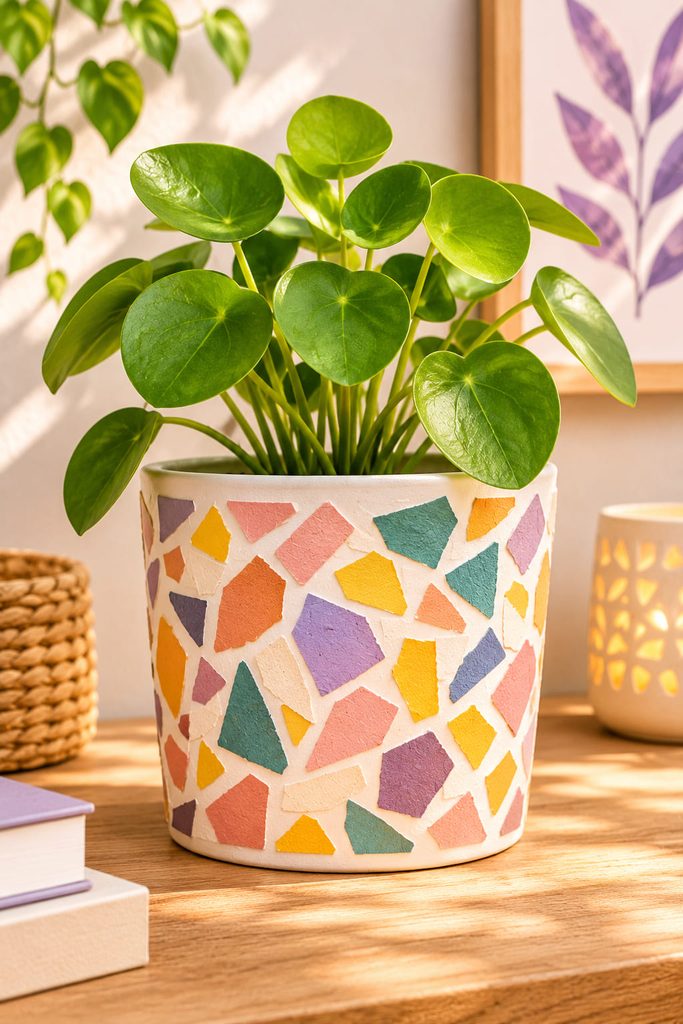
A cardstock cuff gives a plain pot the look of terrazzo without putting paper against wet soil. Wrap a removable band around the outside of a dry cachepot and scatter irregular polygon scraps over a neutral base. Leave the bottom, drainage area, and top opening clear.

Check that the seam stays flat, the cuff slides off for watering, and no paper reaches damp surfaces. This is decorative, not waterproof: remove it whenever you water the plant. Larger scattered chips suit a curved sleeve better than tight squares, which can pull apart along the bend.
7. Slim Mosaic Bookmark With Clear Cover
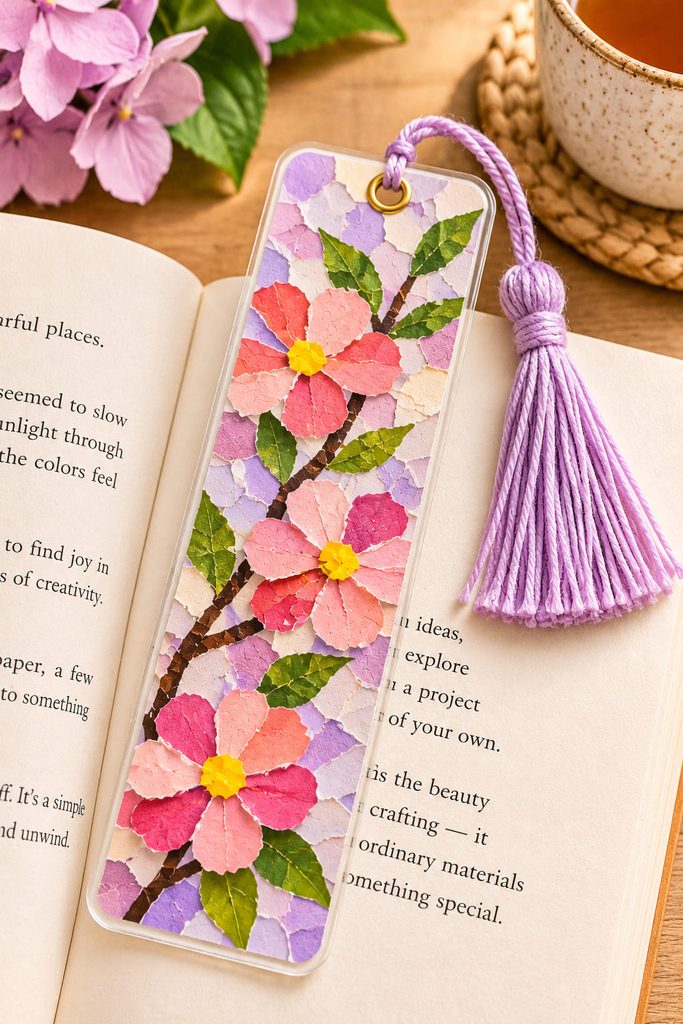
Save the smallest offcuts for a bookmark. Arrange them as a diagonal trail across a slim cardstock strip without stacking the pieces into a ridge. Seal both sides with clear self-adhesive film and leave a narrow film margin around the edges, so loose corners cannot catch book pages. The strip should flex slightly; thick tiles make it awkward inside a closed book. A tassel is optional, but any hole needs enough paper above it to resist tearing.
8. Fold-Flat Mosaic Greeting Card
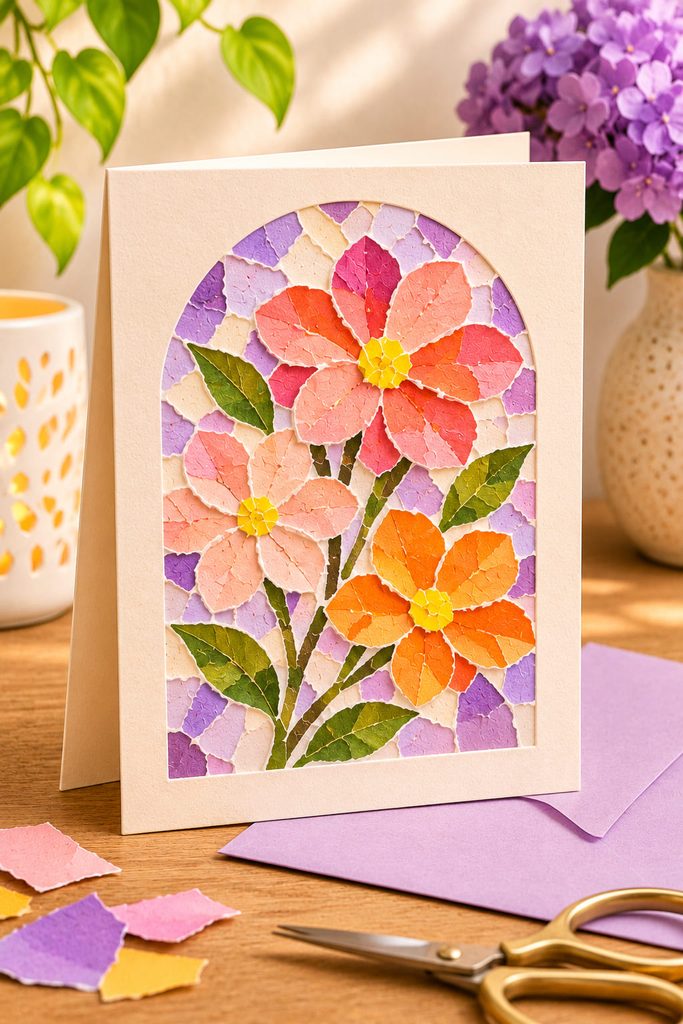
A card needs to close cleanly, so use very thin paper tiles on the front panel rather than raised cardstock chunks. One attractive treatment is a curved mosaic window: lightly draw an arch on the cover and fill only its interior with overlapping scraps, leaving the surrounding card stock visible. The blank margin gives the pattern room to breathe and leaves space for a handwritten message inside.
Try closing the card before the adhesive dries completely. If it springs open or catches near the fold, remove tiles from the crease side. For mailing, slide it into its envelope as a final thickness check; uneven paper layers can snag even when the card looks flat on the table.

9. Folded Triangle Shadow Mosaic Relief
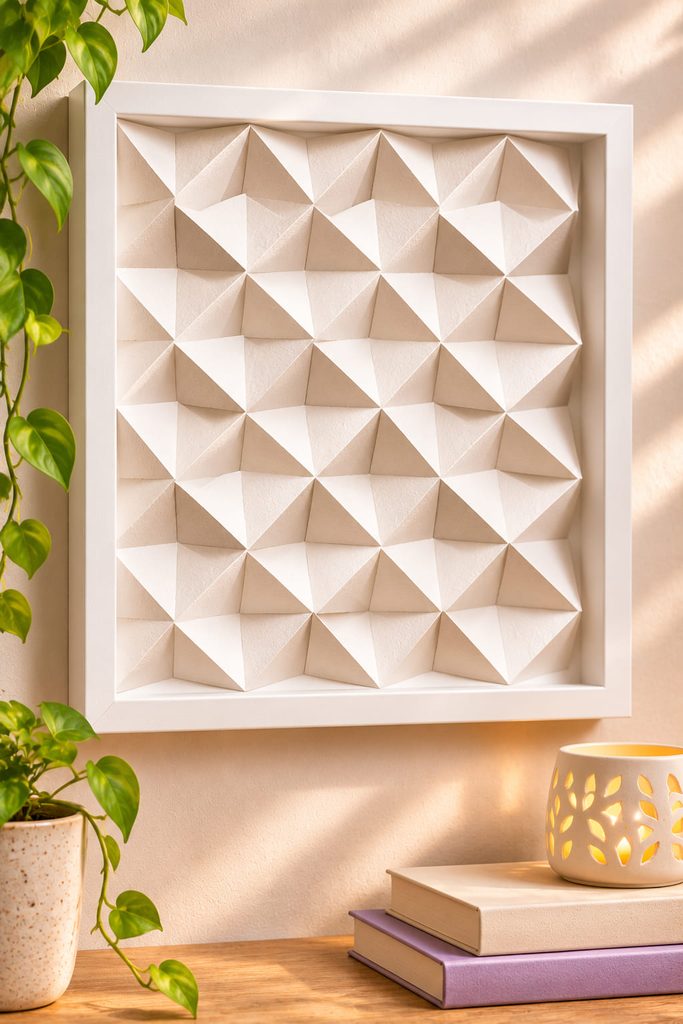
A paper mosaic does not have to rely on bright color alone. Folded triangle tiles can make a single-color wall panel change character as the light moves. Score equal-size squares diagonally, fold them into shallow tents, and attach their base flaps to a rigid board. Orient alternate rows in different directions to create an ordered field of light and shadow. Do not glue the central ridges flat; their height is the point of the piece.
Before building the full field, make a six-tile sample and stand the board upright. If a ridge collapses, choose slightly heavier cardstock or make the unsupported span shorter. If adjoining bases crowd each other, give them more room. Compressing the folds to make them fit changes their height and ruins the repeated shadow pattern.

Relief Clearance Check: When displaying the finished work behind glass, measure the tallest folded tip from the backing. Choose a spacer or shadow-box frame that leaves extra air above that tip. A standard flat frame may crush the raised surface, even if the relief looks fine lying on your worktable.
A restrained palette works here because the actual shadows carry much of the pattern. Side lighting shows the triangular facets especially clearly, but avoid placing the frame where strong direct sunlight could fade dyed paper.
10. Mosaic Memory Box With Lift-Off Lid
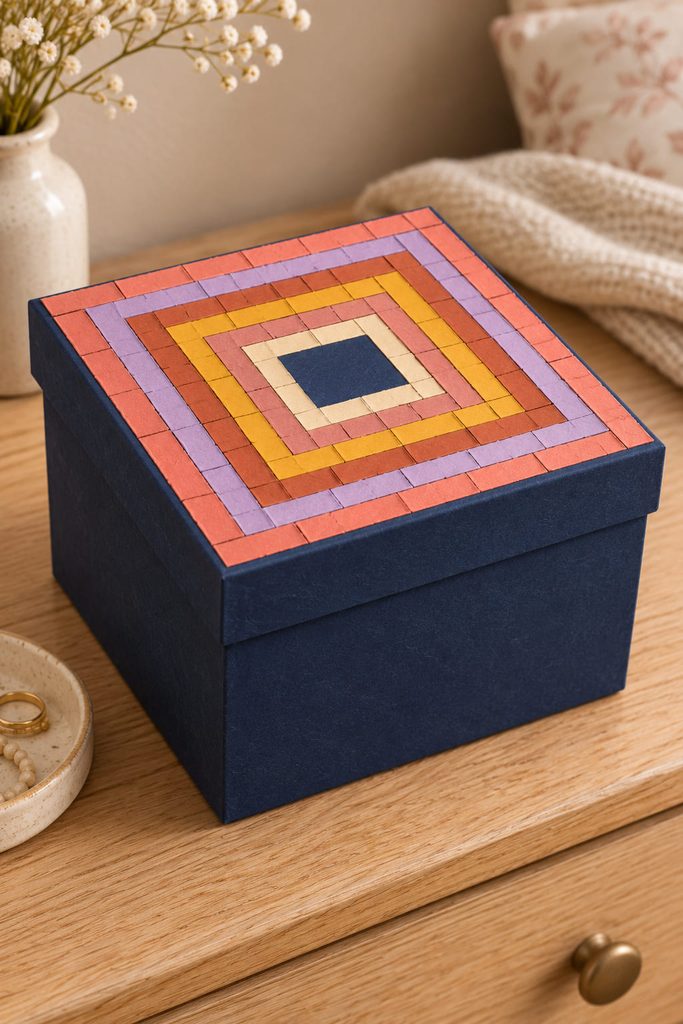
Decorating a box lid is an easier way to add a mosaic to storage than wrapping every surface. Use a ready-made sturdy cardboard box, mark a border on the top, and arrange chipped paper rectangles as a loose concentric pattern around a small blank center. The undecorated patch can hold a photograph or simple label later.
- Close the empty box and mark where the lid overlaps the sides.
- Glue the tiles only inside the top border, leaving the lip and gripping edges clear.
- Let the decorated lid dry flat before opening and closing it several times.
Paper pieces extending over a lid edge can catch and peel each time the box opens. Keeping the mosaic on the flat top preserves access to letters, photographs, and keepsakes inside.
11. Suspended Prism Mosaic Mobile
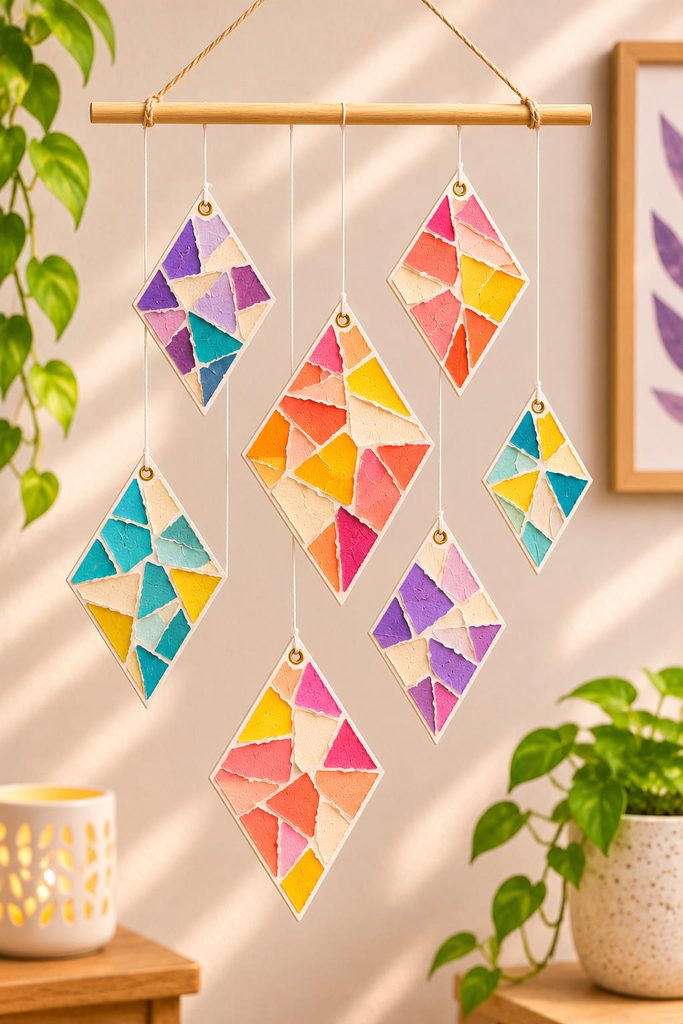
A mobile lets small decorated shapes move independently, so its tiles need to stay secured on both faces. Cut several lightweight cardstock diamonds and cover each with paper chips in contrasting arrangements. Keep the chips thin and away from the tips, which are vulnerable when the pieces spin. Suspend each diamond by its reinforced top hole from a separate thread attached to a dowel or hoop.
Build and balance the hanger before planning the final height. Hold it from the actual suspension point, hang two diamonds at opposite ends, and observe which side drops. Add the remaining shapes gradually. If one side dips, shift its thread closer to the support’s center or redistribute the hanging shapes rather than randomly taping on a counterweight. A deeper hanging shape needs enough clearance to rotate without hitting its neighbor.
Where The Weight Goes: The master hanging cord belongs on the hoop or dowel, never on a paper tile. For a low-ceiling room, use fewer diamonds and stagger their heights more carefully. Keep the finished mobile away from fans, strong drafts, and anywhere a young child could reach the cords. When it moves, the mosaic should read as shifting patches of color rather than a crowded cluster of dangling paper.
12. Vellum Window Mosaic LED Lantern
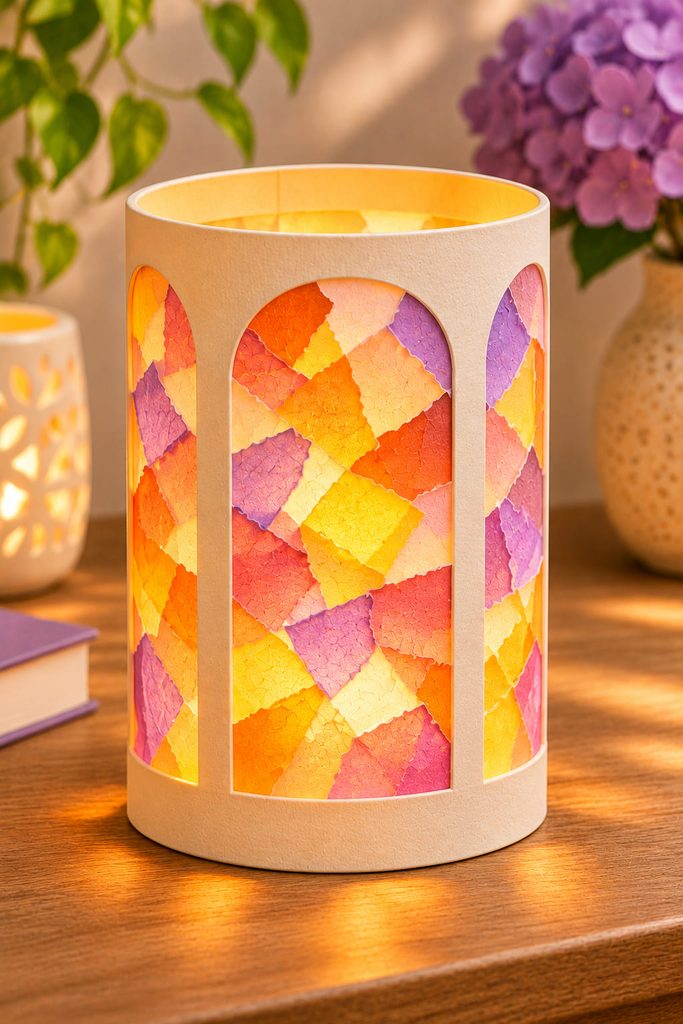
A glowing mosaic needs deliberate openings. If the cardstock wall is solid, the light will be trapped inside and even colorful scraps will appear dark. Build a stable cylinder from firm cardstock, cutting several broad windows into its sides. Cover those openings on the inside with vellum, then layer thin tissue-paper fragments over the vellum. Leave lighter gaps between clusters to prevent the translucent colors from turning muddy.
The cylinder needs a flat base, an opening for access, and a cool battery-powered LED placed securely in its center. The light source must remain separate from all glued paper. Test the effect before closing the wall:
- Turn on the LED and set it at the center of the base.
- Hold the finished vellum panels around it to locate overly dark sections.
- Thin out dense tissue overlaps, then glue each window into the cardstock wall.
- Join the cylinder and confirm you can still operate and remove the LED.
Light Source Rule: Never place a candle, incandescent bulb, or other hot light in a paper lantern. Use a cool LED only.
The useful difference between this project and a window suncatcher is control of the lighting. A window depends on daylight; this tabletop piece needs its own accessible, safely contained light source and a base that cannot easily tip.
13. Radial Mosaic Clock Face
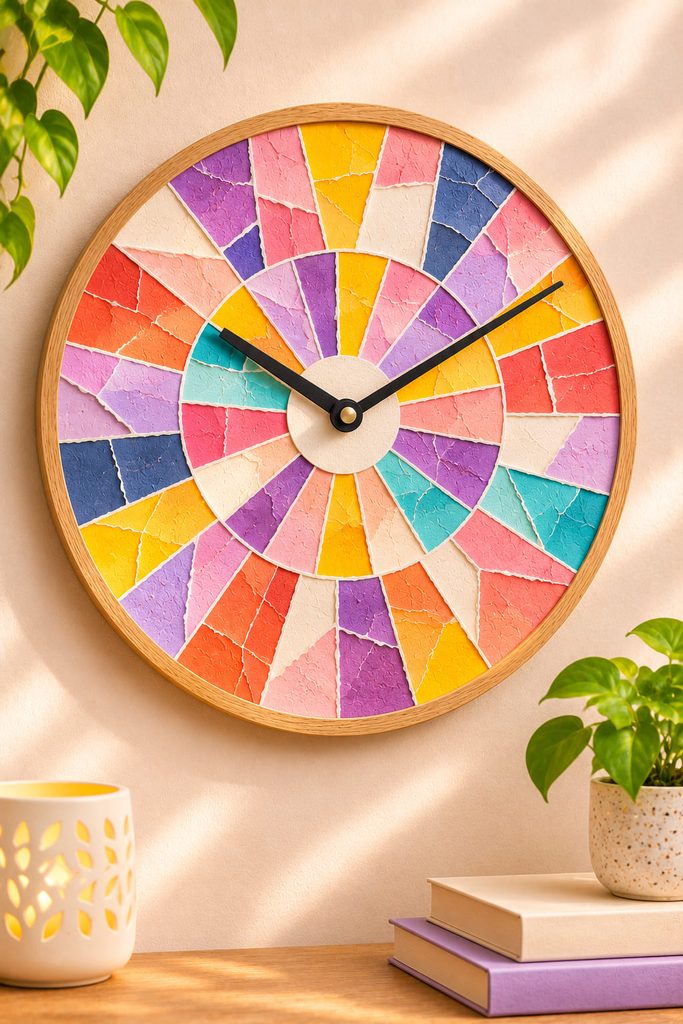
Clock hands need a clear sweep. Arrange thin paper wedges around a rigid clock-face blank, leaving a plain circle around the center shaft. Before fixing the pieces, check that the movement fits the backing, the hands clear every tile, and the hanging hardware supports the complete clock.
Flat wedges are better than stacked scraps here; even a lovely raised tile can interrupt the hands. Choose contrasting marker dots outside the pivot so the time remains readable. Follow the movement kit’s mounting instructions rather than relying on the decorative paper to hold any hardware.
14. Protected Mosaic Serving Tray Insert
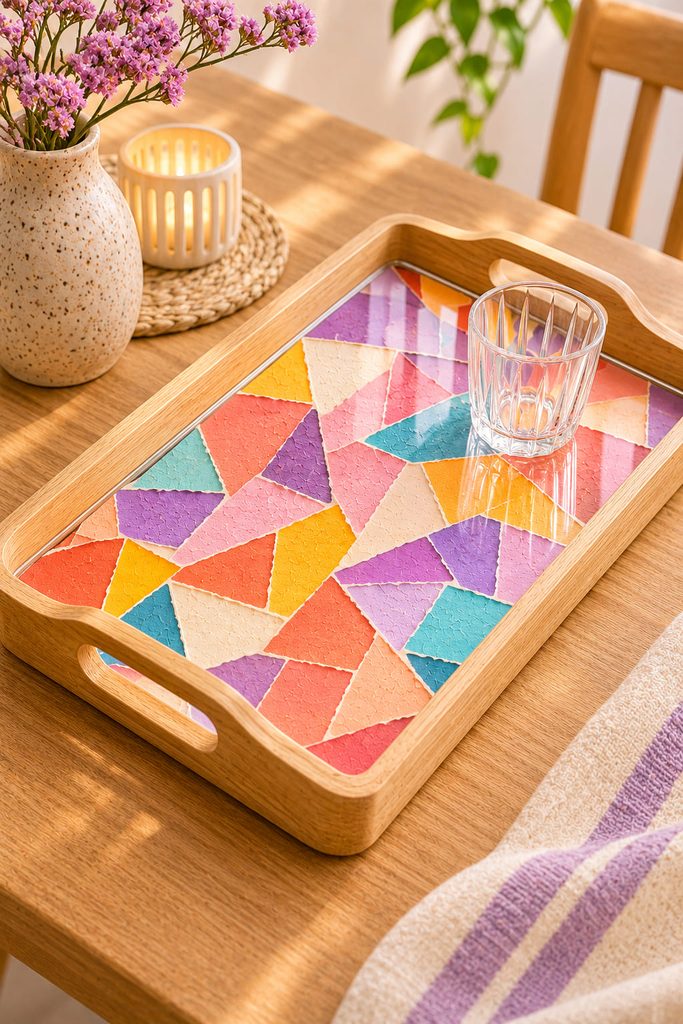
A recessed serving tray can carry a paper mosaic as long as the artwork sits safely under a fitted protective insert. Build the mosaic on a thin board that fits inside the tray’s recessed base. Before committing to a design, make a plain-paper template and check the available depth, including the thickness of the clear acrylic cover. The tray’s original structure must still support whatever you place in it; paper tiles are decorative, not a food-contact surface.
Two finishing choices have different maintenance consequences. A removable acrylic insert lets you swap the artwork or clean beneath it, but it must not slide when the tray tilts. A securely fixed cover is more stable, provided it stays flush, has protected edges, and does not create a lip that catches cups. Neither approach makes the paper itself waterproof or heat-resistant. Avoid hot pans or unprotected wet spills, and check the tray with lightweight, cool objects before using it routinely.
For a visually calm tray, use larger chips near the middle and a tighter border around the edges. The clear layer will slightly soften the visual contrast, so choose distinct light and dark papers rather than near-identical shades.
15. Party Pennant Mosaic Garland
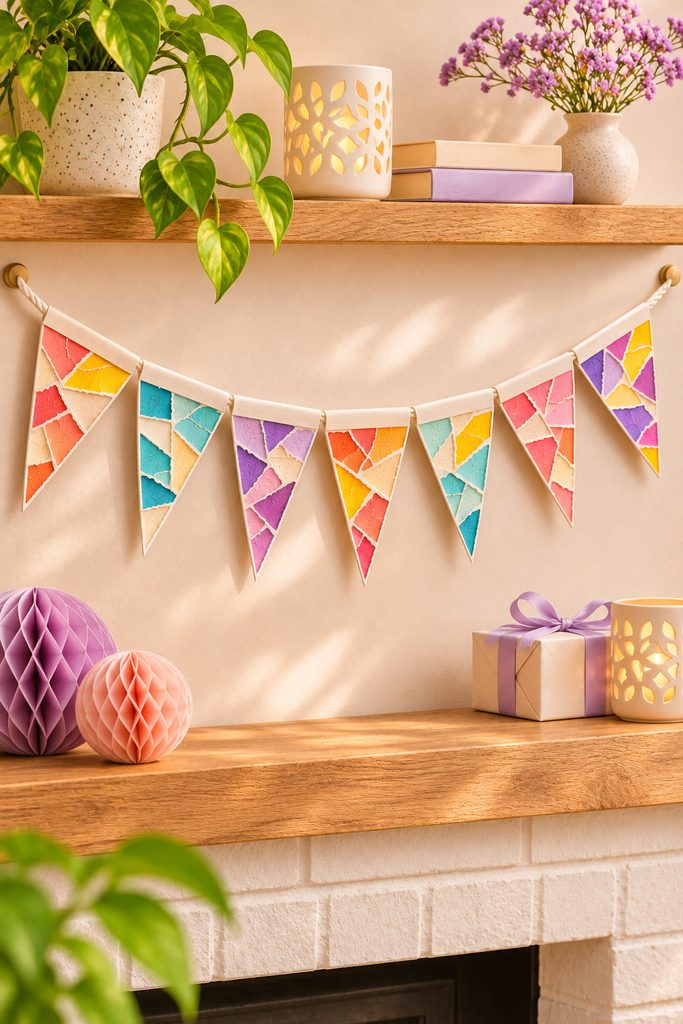
Triangular pennants work well for a party because each one holds a compact patch of bright mosaic tiles. Leave a narrow undecorated strip across the top for a reinforced hanging fold; the little paper fragments are surface detail, not attachment points.
- Cut several equal cardstock pennants and arrange their color patterns before gluing.
- Fold the top strips around a cord and secure the folds without trapping the cord too tightly.
- Hang the line between firm supports, leaving enough slack for the pennants to fall evenly.
Use a contrasting border on each pennant so neighboring patterns remain distinct. The garland rolls or folds for storage once it is dry.
16. City Skyline Mosaic Triptych
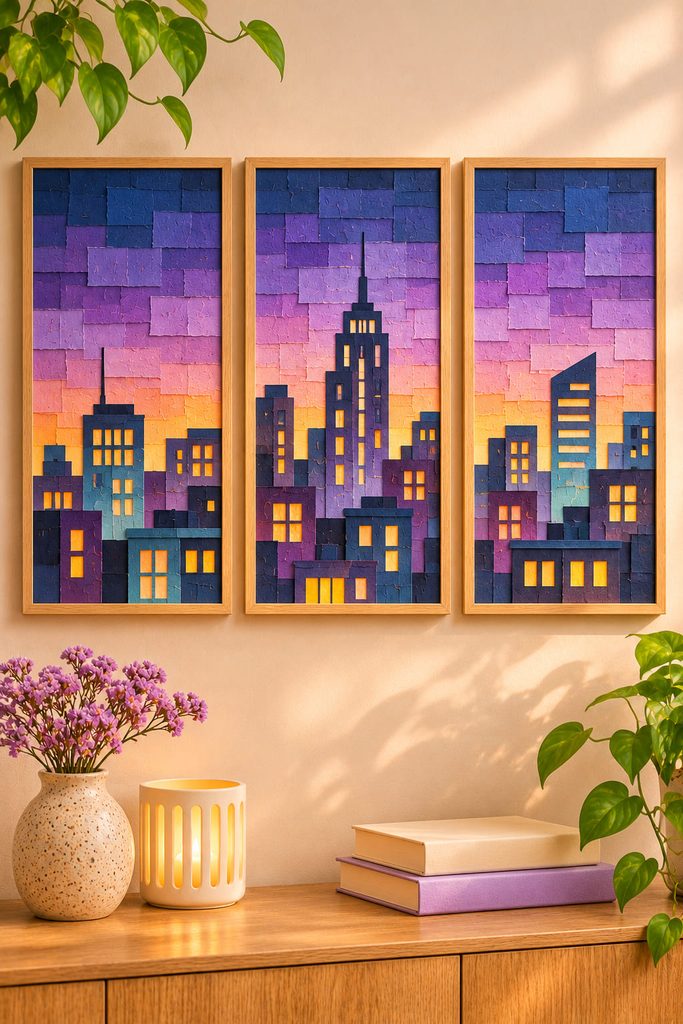
Three narrow panels can suggest a whole city without detailed drawing. Divide a skyline into foreground buildings, middle-distance rooftops, and a lighter sky, then assemble each region with different paper fragments. Vertical rectangular scraps echo windows and facades; wider horizontal pieces create a calm horizon line. Let selected buildings cross from one panel toward the next so the separated artwork still reads as one scene.
Mount all three panels on boards of equal thickness and hang them with consistent gaps. Those gaps are part of the composition, so never place a building’s narrow defining feature where the separation will interrupt it. A city at dusk works especially well when a few pale window pieces punctuate otherwise deep blue and plum silhouettes.
Choosing Backings for Paper Mosaic Art Projects
The most reliable backing depends on how the finished piece will be handled. Use smooth rigid board for pixel grids and portraits, because a flexible sheet makes small gaps change as it bends. Choose transparent acetate or adhesive film for window decorations, and a narrow cardstock base with clear protective film for bookmarks. A curved plant sleeve must be removable, while a clock face needs a backing that supports hardware. On anything handled frequently, settle the adhesive and protective-layer plan before cutting hundreds of tiles.
If paper curls, look first at moisture and glue quantity. A thin even adhesive layer on a stable backing usually behaves better than large wet patches. Keep the mosaic flat under clean release paper while it dries, but do not compress folded reliefs or translucent pieces intended to remain raised.
Pick a Project by What You Want to Display
For an uncomplicated first attempt, start with the pixel wall panel or bookmark: both make spacing mistakes easy to see and correct before the glue sets. Choose the tissue-paper window if you want color without another framed object, and save the mobile, clock, or lantern for when you feel comfortable planning supports and access.
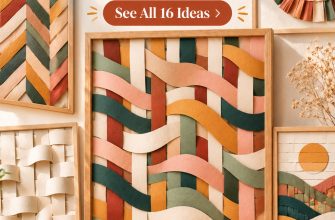
If you like the precision of arranging small paper pieces but want a completely different surface texture next, compare these projects with 16 Paper Weaving Art Ideas for Creative Wall Decor. Weaving uses actual over-under crossings rather than glued mosaic fragments, so the change in technique is substantial.