This post contains affiliate links. As an Amazon Associate I earn from qualifying purchases, at no extra cost to you. Thank you for supporting Diynify!
Newspaper wall decor can use the printed page as more than a flat collage surface. Thin newsprint can be folded into relief, rolled into stiff tubes, woven into panels, coiled into spirals, torn into soft-edged silhouettes, or built up with papier-mâché. That range makes old newspapers useful for recycled wall crafts with very different levels of depth and structure.
Most of these ideas need newspaper, scissors or a craft knife, a ruler, and paper-safe glue. Depending on the project, you may also need scrap cardboard or chipboard, thread, a narrow dowel, a shallow frame, a lightweight acrylic mirror, a skewer, or removable wall-safe hanging hardware. Start with a flat collage or rosette cluster for a simpler build; choose the woven panel, relief tiles, modular pyramids, or shadow box when you want the construction itself to become part of the design.

1. Woven Newspaper Strip Wall Panel
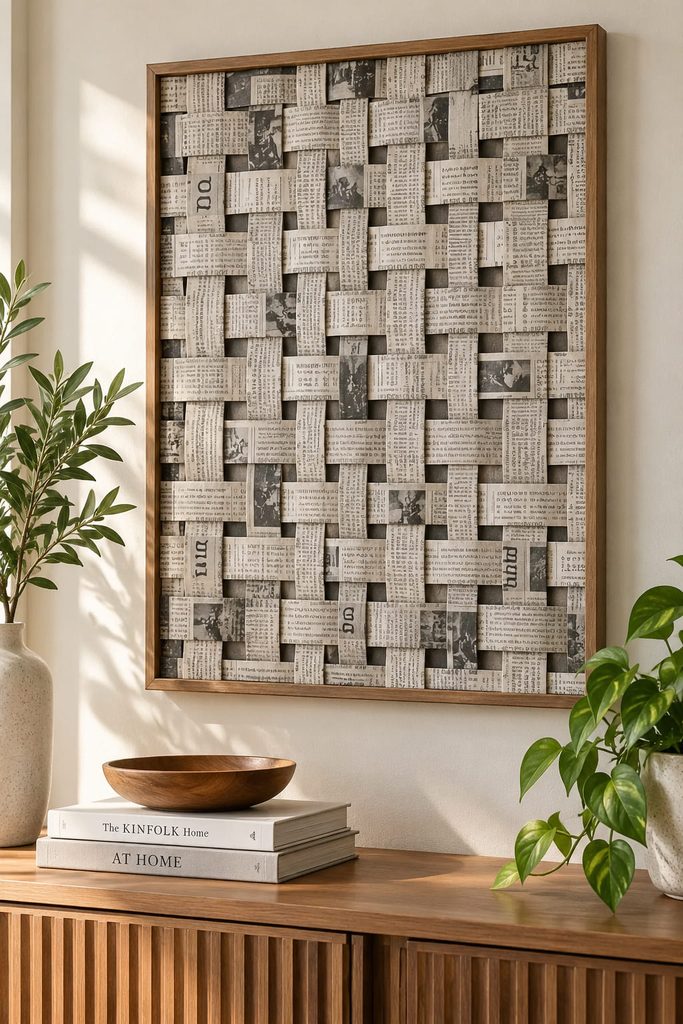
Interlacing folded newspaper bands turns very thin sheets into a surface with enough visual weight to read from across a room. The important part is not simply making strips; it is giving every strip a consistent folded width so the over-under path stays visible. Fold long page sections lengthwise two or three times, crease them firmly, and work over a rigid scrap-cardboard or chipboard backing that is slightly smaller than the finished weave.
- Lay the vertical bands side by side and temporarily secure their top ends outside the visible area.
- Weave the first horizontal band over one vertical strip and under the next, then reverse that path for the following row.
- Square the intersections every few rows instead of pulling the bands tight; excessive tension makes the center buckle.
- Once the panel is even, glue only the perimeter intersections and mount the woven field to its backing or into a shallow frame.
A successful panel should keep a clear over-under rhythm without sagging away from the backing. If the center develops waves, ease the last few rows apart and re-square them before adding more adhesive. Leaving a narrow unprinted or solid-color border around the weave gives the dense newspaper typography a place to stop.
2. Accordion-Fold Newspaper Rosette Cluster
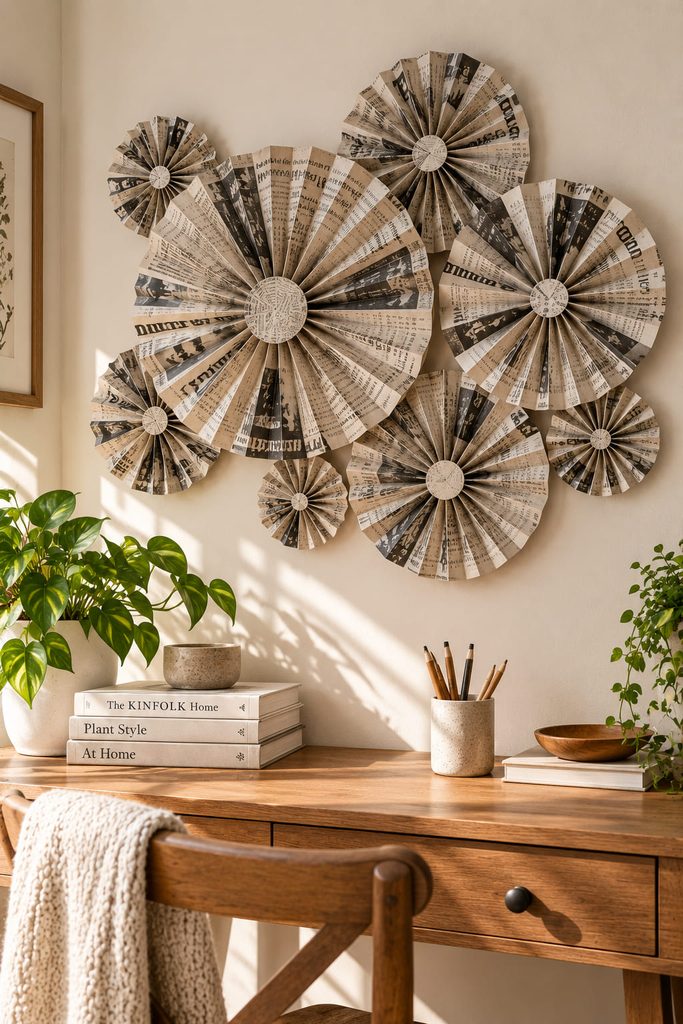
A cluster of accordion rosettes works when you want large wall coverage without building a heavy piece. Cut long newspaper strips, make even back-and-forth pleats, join the short ends into rings, then press each ring inward until it collapses into a circular fan. A small recycled-card disc glued behind the center prevents the folds from springing open.

Vary diameter more than color: one oversized rosette can anchor the arrangement while smaller ones bridge the gaps around it. Keep some printed areas pale and let a few darker headlines or photo fragments become natural accents. Before mounting, arrange the rosettes on the floor and check that the cluster has one clear outer silhouette rather than a row of separate circles.
3. Rolled Newspaper Tube Sunburst Mirror
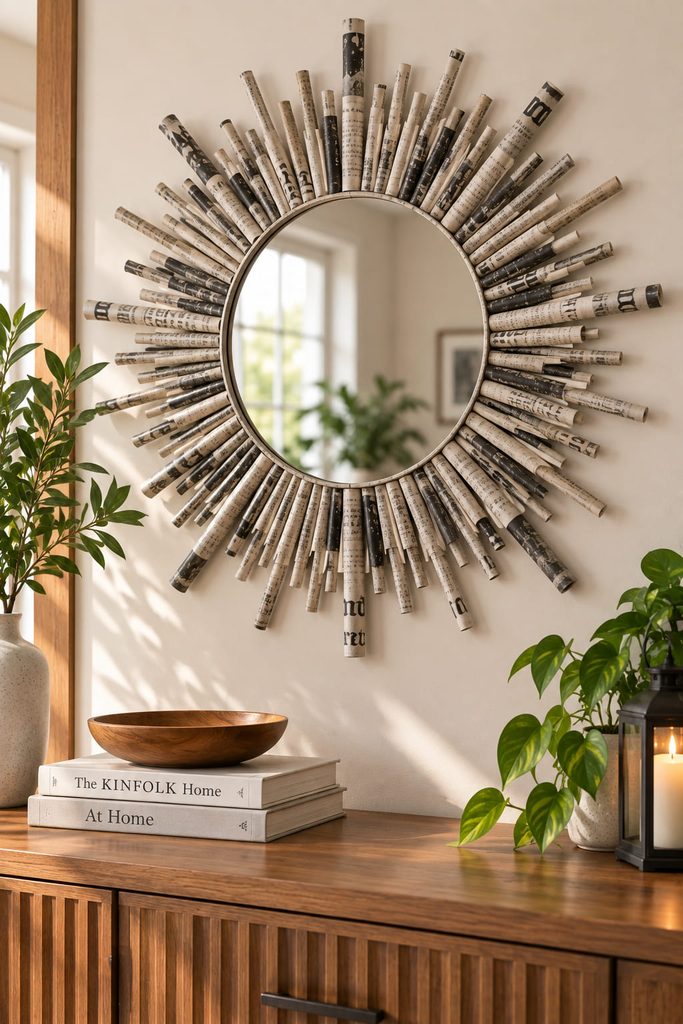
A mirror gives rolled newspaper tubes a practical reason to radiate from one center point. Roll page sections diagonally around a skewer, glue the final corner, and trim the finished tubes to planned lengths. Use a lightweight acrylic mirror on a rigid chipboard or thin plywood backing; the hanger must attach to that backing, not to the newspaper spokes.

Load Path Check
- Dry-arrange the longest tubes first at the cardinal directions, then fill the spaces between them.
- Keep the inner tube ends on a consistent circle so the mirror edge looks deliberate.
- Add shorter tubes between long ones only after the main radial spacing is balanced.
- Test the backing and hanging hardware by holding the finished piece from the hanger before it goes on the wall.
The tubes provide pattern and shadow, but they should not carry the wall load. If a spoke lifts, re-glue it to the backing rather than adding adhesive to neighboring tubes; connecting spokes to one another can pull the entire sunburst out of alignment.
4. Torn Newspaper Botanical Silhouette Collage
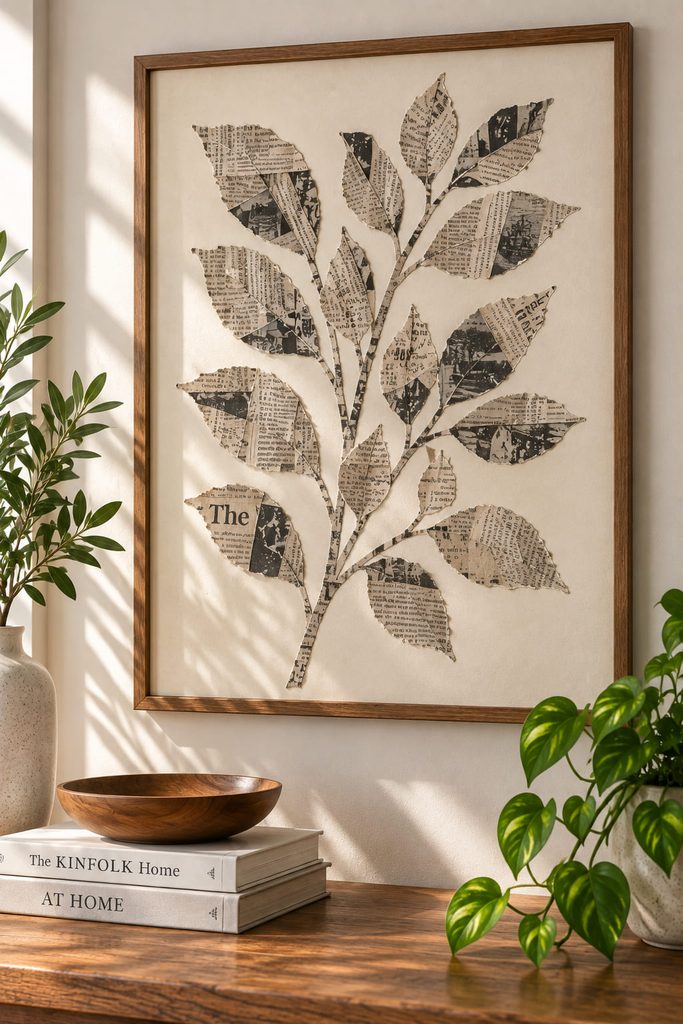
Tear rather than cut the newspaper when you want leaves, stems, and loose botanical shapes with softer, fibrous edges. Build one branch or plant silhouette on a plain backing, overlapping fragments only where a darker value is useful and leaving quiet background around the outer leaves. Rotate pages so lines of text do not all run in the same direction; that keeps the image from reading like a block of pasted paragraphs. A simple frame is enough because the interest comes from the contrast between recognizable plant shapes and broken bits of type.

5. Coiled Newspaper Relief Medallion
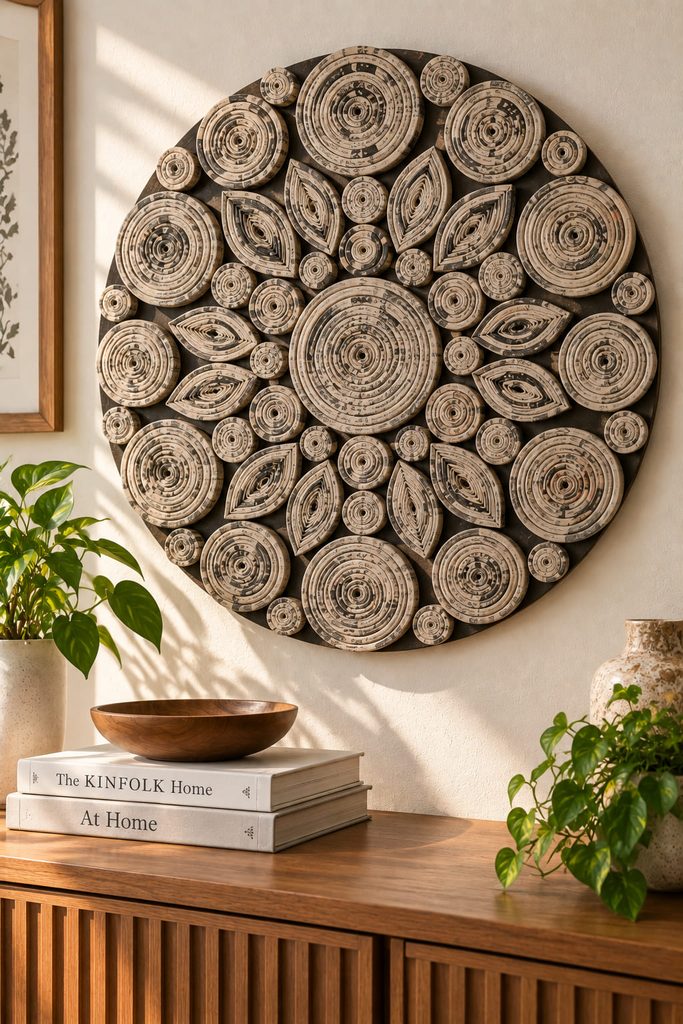
Start this medallion with narrow newspaper cords or tightly folded bands rather than open tubes. Curl each band into a flat spiral, glue the end, and combine small coils into rings, petals, or branching arcs on a sturdy backing. Because the spiral faces the viewer, printed stripes wrap around the coil and create a denser texture than the straight spokes of a sunburst.
Build outward from one central coil and pause after each complete ring. That stopping point matters: adding identical coils until the backing is full usually erases the negative space that makes the pattern legible. For a stronger relief effect, mix two coil diameters but keep their thickness similar so the finished medallion casts an even shadow around its edges.
6. Papier-Mâché Newspaper Texture Tiles
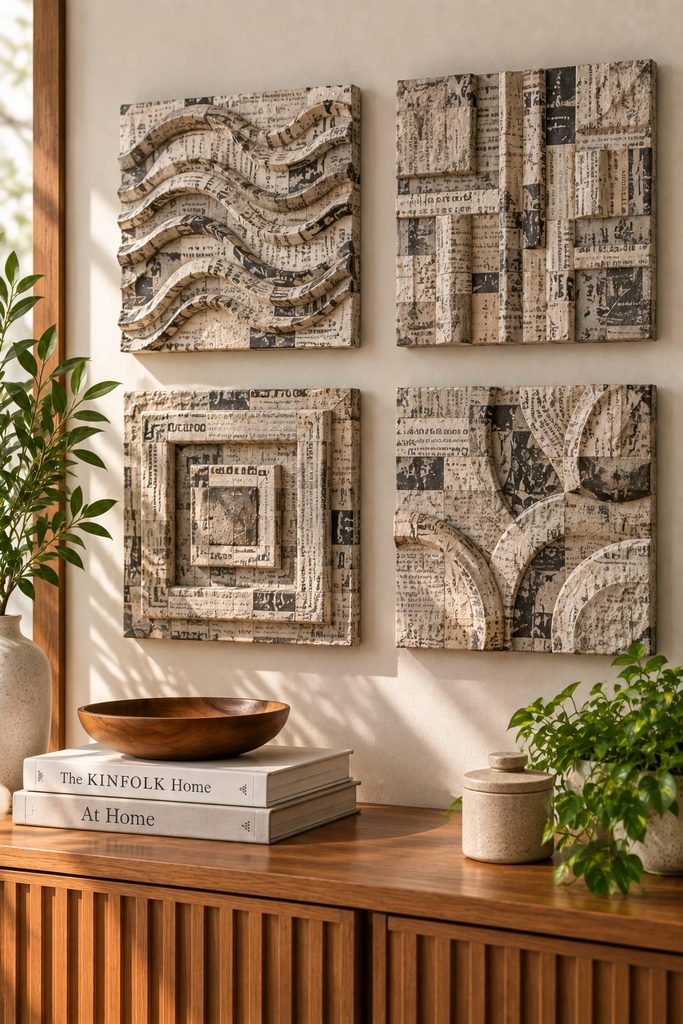
Warping is the first problem to solve with newspaper relief tiles. Instead of soaking a large sheet, make several small rigid bases from recycled corrugated cardboard and add shallow forms with crumpled newsprint, folded ridges, or narrow cardboard ribs. Cover those forms with short pasted newspaper strips, smoothing them across the high and low areas so the print follows the relief. Let each tile dry completely on a flat surface before deciding whether it needs another layer.
Arrange the finished tiles as a spaced grid rather than forcing their edges to touch. Small gaps hide minor dimensional differences and let each raised pattern cast its own shadow. Mounting hardware should belong to the backing system behind the tiles, not to the papier-mâché skin.

If A Tile Misbehaves
- Corners curl upward: the base has taken on uneven moisture; flatten it while it finishes drying and use less paste on the next tile.
- A raised ridge feels soft: let it dry longer before adding another skin layer rather than trapping moisture under fresh paper.
- The surface looks lumpy instead of faceted: switch to shorter strips that can conform to the relief without wrinkling across corners.
This is a good place to leave some typography visible. Painting every tile opaque removes the material contrast that makes newspaper worth using in the first place.
7. Folded Newspaper Butterfly Flight Installation
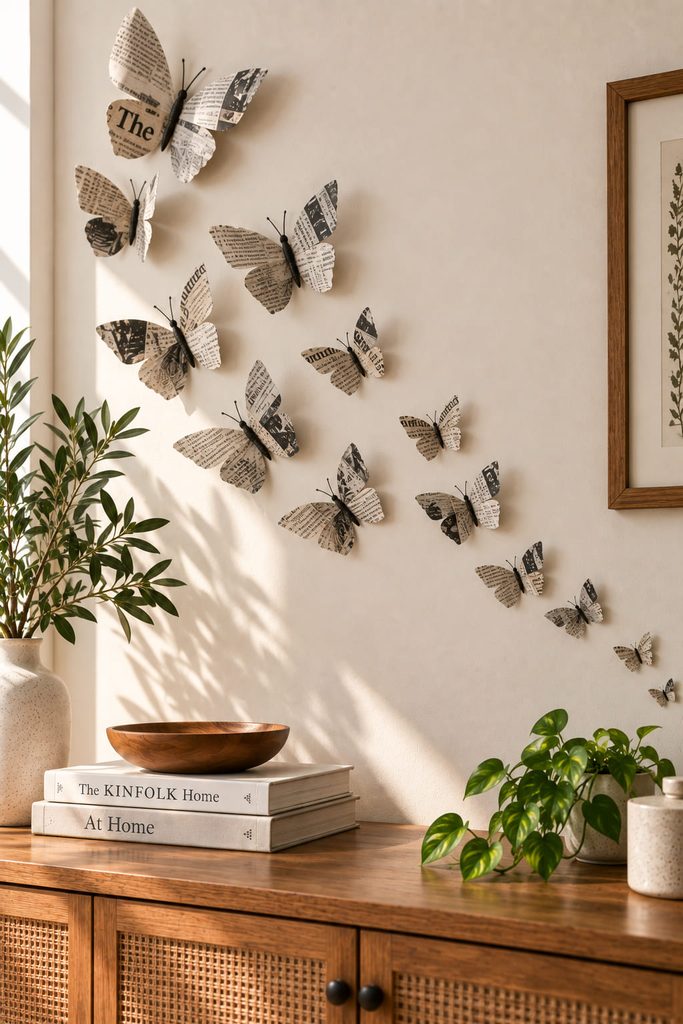
Instead of treating every butterfly as an isolated ornament, use the wall as the path of motion. Fold or cut butterflies from doubled newspaper so the body crease is firmer than the wings, then mount each one only at the center with a small folded paper tab or removable wall-safe adhesive. Free wing edges create the shadow that makes the group feel dimensional.
Distance View Check: step several feet away before adding the last few butterflies. The overall flight line should be readable before individual wing shapes are. A sparse trail that changes direction once usually looks more intentional than filling every open gap, and leaving the wings unattached keeps the installation lighter both visually and physically.

8. Newspaper Tassel Dowel Wall Hanging
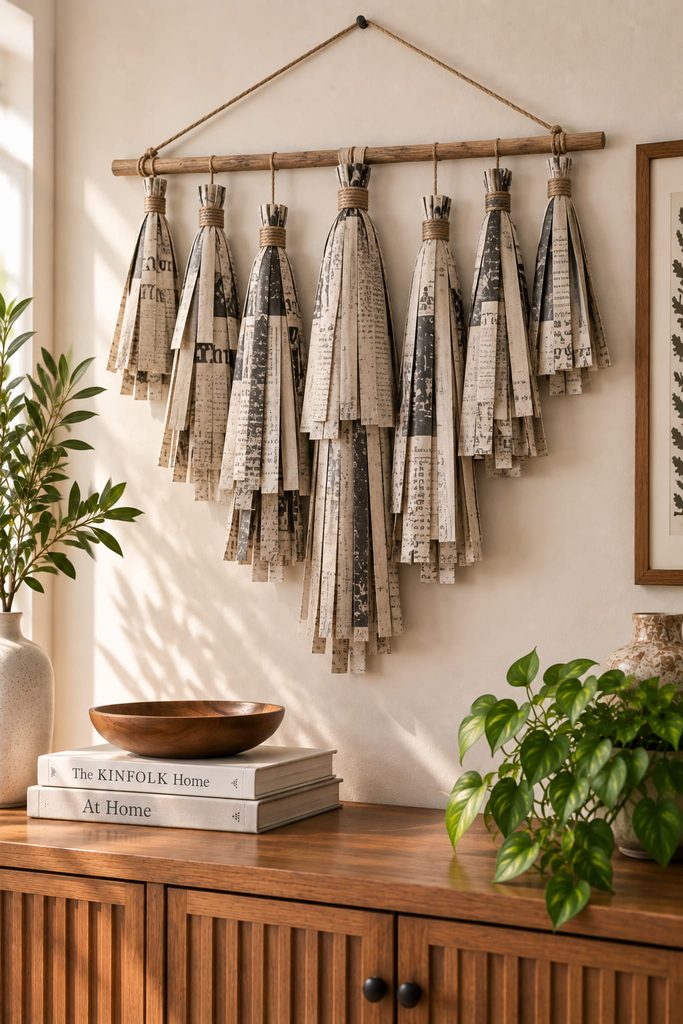
On a narrow wall, long newspaper tassels create vertical movement without requiring a solid backing. Fold a sheet into a long band, cut fringe from the lower edge while leaving an intact header, then roll that header around a short cord loop. Double the paper at the header if the newsprint feels too soft to hold its shape. Tie tassels at uneven but deliberate lengths along a slim dowel, leaving space between groups so the fringe can move independently. The hanging cord should carry the dowel at two points; the tassels themselves should never act as supports.
9. Newspaper Cone Wreath
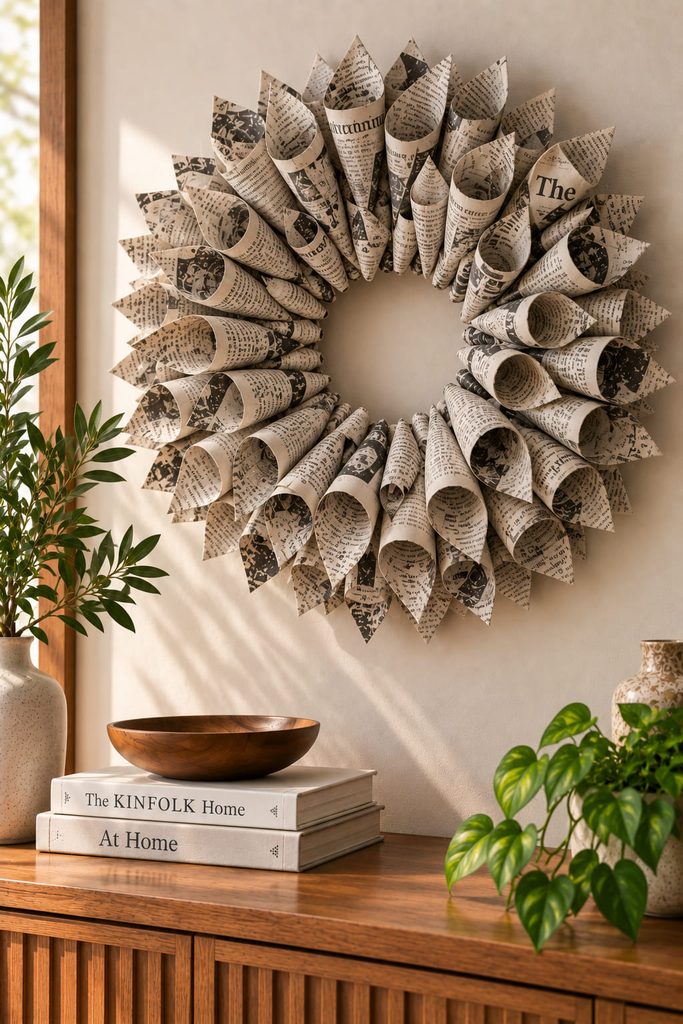
Use rolled newspaper cones when you want a wreath with a deep center and a strong radial silhouette. A ring cut from recycled corrugated cardboard provides the real structure. Roll equal page sections into tapered cones, glue each seam, and arrange them around the ring with the pointed ends facing outward. Overlap the wide ends just enough to hide the cardboard without closing the center opening.
Useful Supplies
- recycled corrugated cardboard for the ring
- newspaper page sections cut to one repeatable size
- tacky craft glue or PVA used sparingly
- a cord or ribbon loop attached to the cardboard base
Keep the center open until the final row is set. That negative space is what makes the piece read as a wreath instead of a dense paper disk, and it also reduces the temptation to keep adding cones after the radial pattern is already complete.
10. Modular Newspaper Pyramid Relief Panel
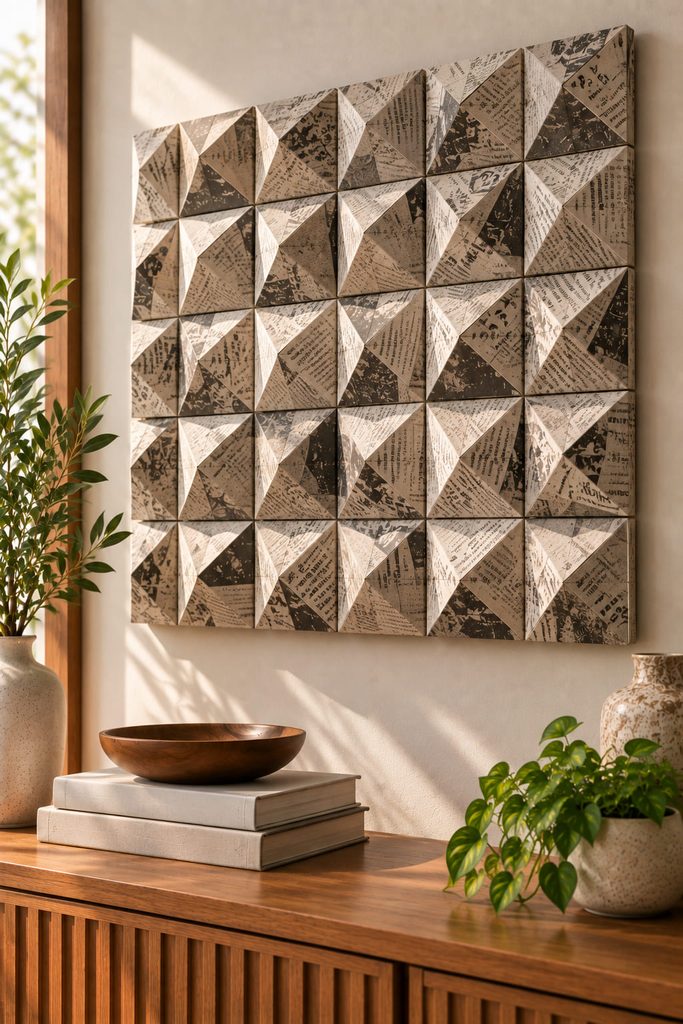
To get a clean, architectural newspaper wall piece, use score-and-fold geometry instead of freehand crumpling. Because single newsprint is too soft for crisp shallow pyramids, laminate selected newspaper areas to thin reclaimed paperboard first. Cut identical squares, mark the center and diagonal fold lines, then form low four-sided peaks with small tabs hidden underneath. The printed face remains visible, while the recycled board supplies the stiffness.
Build one test module before cutting the full batch. Its peak should hold when the square rests flat, and its tabs should close without forcing the corners out of square. Adjust the score depth or peak height at this stage; repeating a bad module multiplies the problem across the whole panel.
- Make the remaining modules from the corrected template.
- Arrange them on a rigid backing with all peaks aligned, or rotate selected modules to create a controlled change in light and shadow.
- Glue the modules by their flat perimeter areas, not by crushing the raised centers.
- View the panel from the side before hanging it and re-seat any module that projects noticeably farther than its neighbors.
For a softer composition, leave a few backing spaces empty at one edge rather than filling a perfect rectangle. The missing modules can create a more interesting transition from relief to bare wall without changing the construction system.
11. Layered Newspaper Contour Shadow Box
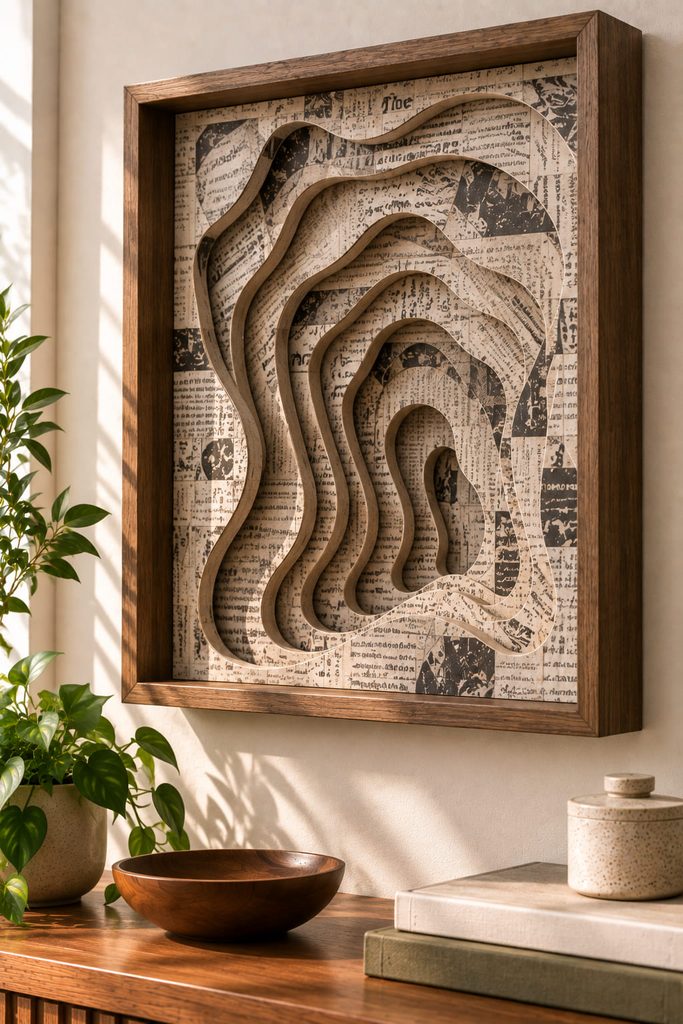
For a shadow box, the cut edge matters as much as the printed surface. Laminate newspaper to light recycled card, then cut a family of related contour shapes: they might resemble topographic rings, abstract waves, or nested arches. The layers need a consistent registration point so the openings step inward rather than drifting sideways as the stack grows.
There are two useful ways to build the depth. Stacked card layers create a denser, quieter relief with narrow shadows between contours. Paperboard spacers create fewer layers but stronger shadow lines and a clearer view into the box. Choose one based on the depth of the frame rather than mixing both randomly.
Dry-stack everything inside the shadow-box frame before gluing. Check that the front layer does not touch the glazing or frame lip, that each opening still exposes the layer behind it, and that no spacer is visible from the normal viewing angle. If one contour disappears, either widen that opening or remove a layer; extra depth is useful only when the nested shapes remain readable.
12. Rolled Newspaper Bead Fringe Hanging
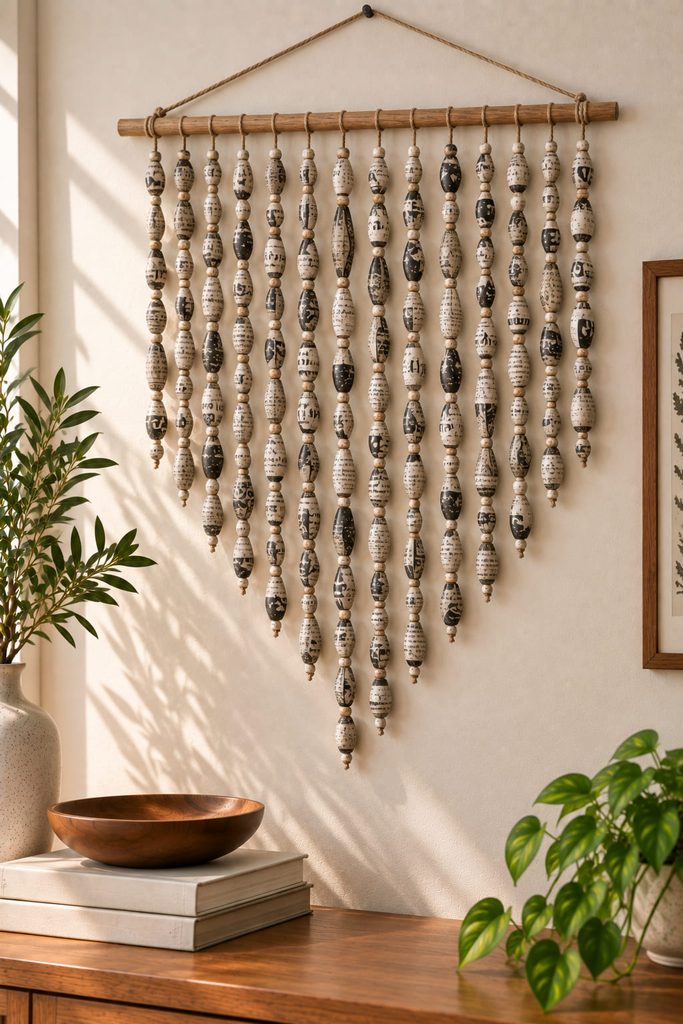
Rolled around a skewer, small tapered strips become paper beads with a more rhythmic look than broad tassels. Cut long tapered triangles, roll each one from the wide end around a skewer, secure the tip with a small amount of glue, and slide the bead off while the hole is still open. String the dried beads on separate threads from a narrow rail or reinforced paperboard header.
Before hanging, check the fringe as a system:
- tie every strand directly to the rail rather than to another strand;
- keep each bead hole large enough for the thread to move without tearing the paper;
- shape the lower edge as a deliberate step or shallow V;
- leave small gaps between beads so the printed surfaces remain visible instead of merging into one dark mass.
13. Cut-and-Layer Newspaper City Skyline Triptych
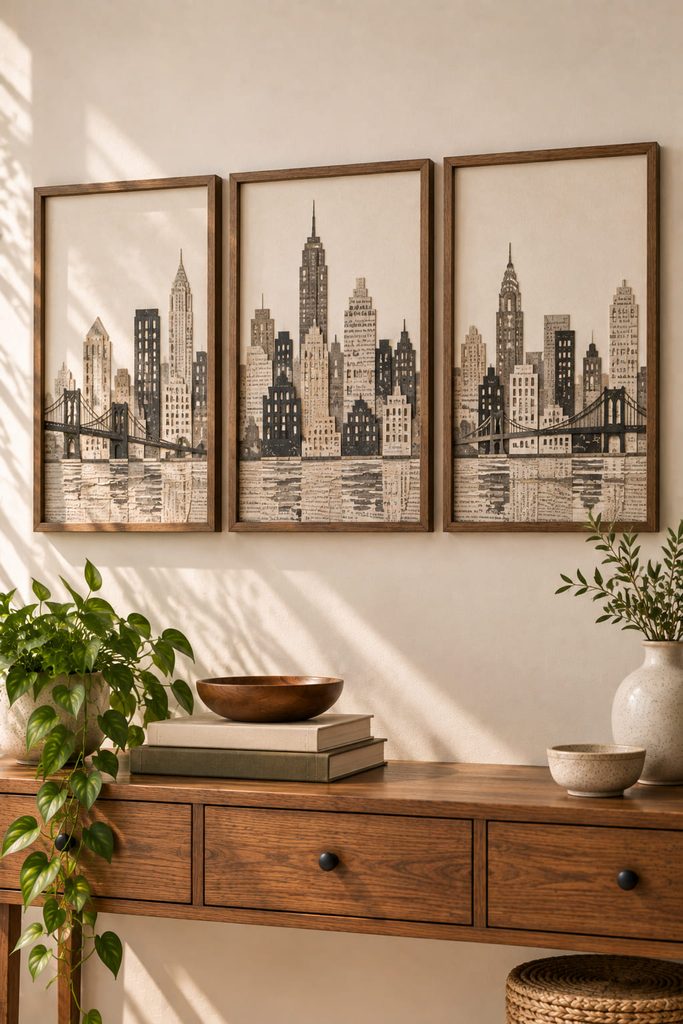
A three-panel skyline is a compact way to use newspaper as graphic texture rather than sculpture. Cut or tear three related building silhouettes and mount them on matching plain backings, keeping one horizon line consistent across the set. Let the tallest structures shift from panel to panel so the composition continues without becoming a copied repeat. Newspaper text works best as the building fill, while windows can be suggested by small areas of exposed backing rather than dozens of added details. Hang the three frames with equal gaps so the interruption between panels becomes part of the skyline rhythm.
How to Make Newspaper Wall Decor Look Intentional
Newspaper already carries a lot of visual information, so the strongest projects usually control one variable instead of adding more decoration. Choose pages with similar print density for a calm monochrome look, or deliberately reserve photo-heavy and headline-heavy sections for focal areas. When a project needs stiffness, reinforce the newspaper with folds, rolled layers, recycled card, or a rigid backing rather than saturating it with extra glue.
The mounting system deserves the same attention as the visible craft. Flat collages can sit in frames; relief panels need a backing that stays flat; hanging pieces need cord, rails, or dowels that carry the load independently of the thin paper. Before committing anything to the wall, check the piece upright. Gravity reveals loose coils, uneven strands, lifting corners, and weak attachment points much faster than a worktable does.
Choose a Technique That Fits the Wall
For the fastest start, use the botanical collage, skyline triptych, or rosette cluster: each gets its character from composition more than engineering. The woven panel, papier-mâché tiles, pyramid relief, and contour shadow box are better choices when you want the recycled material to show a real structural transformation.
For more wall projects beyond newsprint, continue with Paper Wall Decor Ideas, SVG Designs & DIY Crafts – Diynify. The guide covers flat, relief, hanging, and more sculptural approaches to paper wall decor.