This post contains affiliate links. As an Amazon Associate I earn from qualifying purchases, at no extra cost to you. Thank you for supporting Diynify!
Paper clay art ideas are especially useful when you want handmade decor with the soft edges of pottery and the light, fibrous texture of paper. A flat sheet can become a pressed wall tile; the same material, shaped around a temporary form, can become a bowl, sleeve, or little house. The difference is in how each object is supported while it dries and what you expect it to do afterward.
These projects assume air-drying craft paper clay or a suitable homemade paper-pulp modeling mixture, not kiln-fired ceramic paperclay. Keep a protected work surface, simple shaping tools, and paint handy. Some designs also need a backing board, glass bottle, wire, cord, magnets, an existing clock mechanism, or a battery-powered LED. Begin with impressions or magnets if you’re new to the material; try the lighted house or clock once you can control wall thickness and drying.

1. Botanical Impression Tiles for a Small Wall Gallery
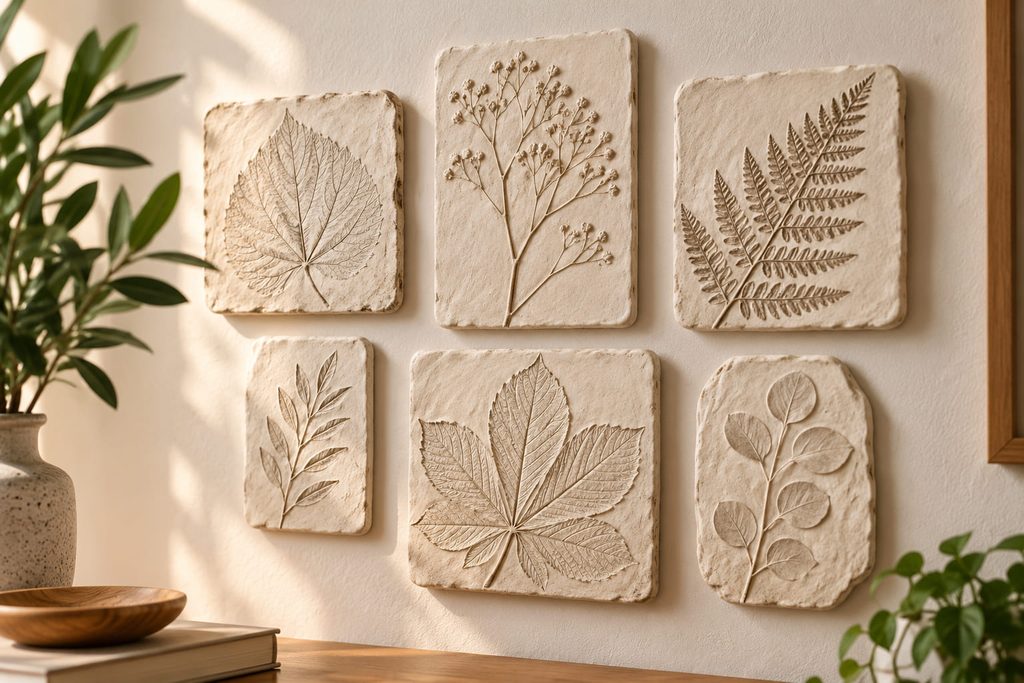
A leaf’s raised veins make a surprisingly clear pattern in damp paper clay. Roll several small slabs to similar thicknesses, lay a clean leaf vein-side down, and press evenly with a flat board before peeling it away. Trim the edges only after the print is established. An irregular outline feels more like a found plaster fragment; a squared tile makes a tidier gallery arrangement.

Let the tiles dry flat on a surface that allows careful turning, then mount them to a lightweight rigid backing rather than expecting small holes in the clay to carry the weight. Arrange the finished pieces with enough space between them that each impression reads from across the room. Dry leaves with fine, pronounced veins usually give clearer impressions than thick, waxy ones.
2. Wavy-Edge Trinket Dish for a Bedside Table
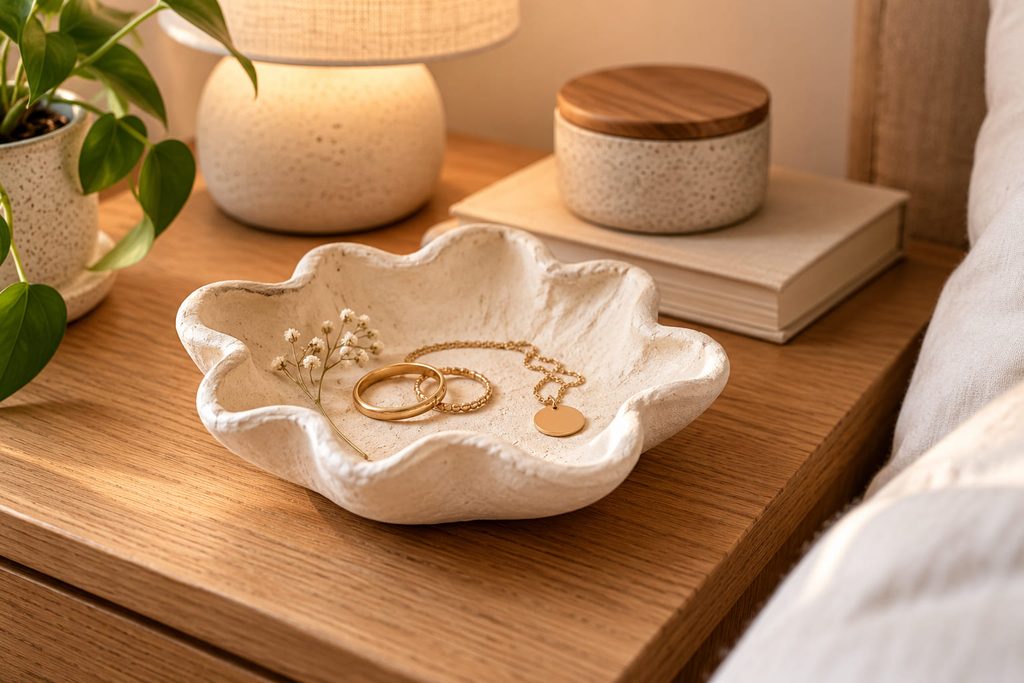
A shallow pinch bowl is a good way to see how paper clay responds to pressure. Start with a ball, push a thumb into the center, and gradually turn the clay while pinching the wall outward. Stop when the floor remains visibly thicker than the rim. The little waves around the edge can follow your fingers instead of a drawn template.

The catch is the base. If the underside is rounded, jewelry will make the dish rock every time you pick something up. Press the bottom gently against a flat protected surface while the clay is still workable, then let it dry without forcing the rim into a perfect circle. This is a home for rings, hair clips, or other dry objects, not water or food.
3. Textured Paper Clay Sleeve Around a Glass Bud Vase
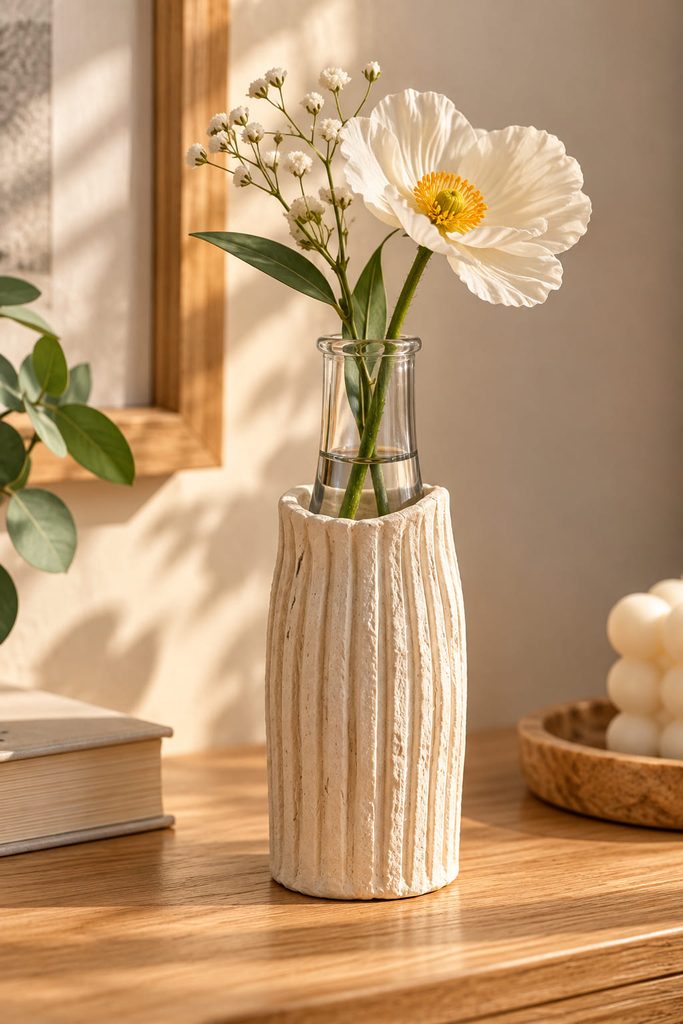
Fresh flowers need water; paper clay should stay out of it. The easiest compromise is a textured outer collar that slips over a narrow glass bud vase. Roll a thin slab, score narrow vertical grooves, and form a cylinder around a removable tube slightly larger than the glass. Keep the bottom open and leave a little clearance for shrinkage.
There are two distinct looks worth choosing between:

- Full-height collar: hides most of the glass and makes the vase read like a matte ceramic object, but needs a smooth, even wall to slide on and off.
- Short neck collar: frames just the upper part of the bottle, leaving the water level visible and making cleaning easier.
Let the shaped sleeve firm up before removing its former, then dry it completely off the glass. The actual vase still does the waterproof work.
4. Open Loop Sculpture on a Broad Foot
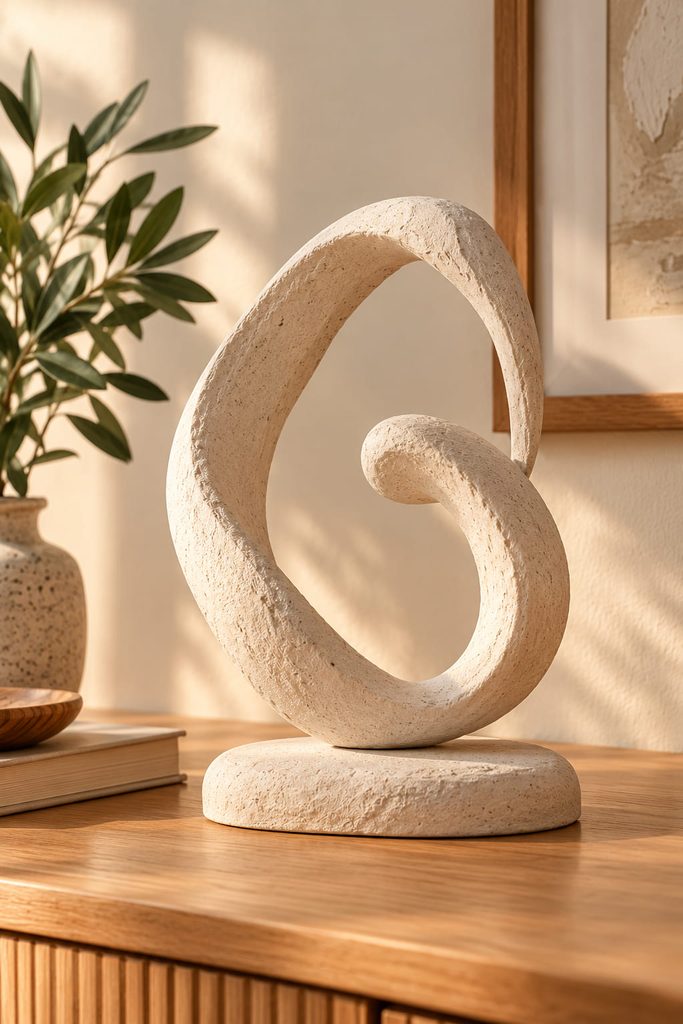
Think of a loose brushstroke standing upright. A thick, tapered rope of clay can be bent into an asymmetrical loop, with one end anchored into a low oval base and the other curling inward. The opening matters: close it too tightly and the silhouette becomes a lump when seen from the side.
Build in this order so the soft structure has a chance to hold:

- Shape the broad base and roughen the spot where the loop will join it.
- Bend the clay rope around a temporary crumpled-paper support; attach its lower end with matching damp clay paste.
- Leave the support in place until the loop can stand without sagging, then remove it gently and allow the whole piece to dry evenly.
A foot wider than the loop’s projection gives the sculpture a better chance of standing without an added hidden weight. Keep it small for a first attempt.
5. Tiny Mushroom Garden on a Desk Tray
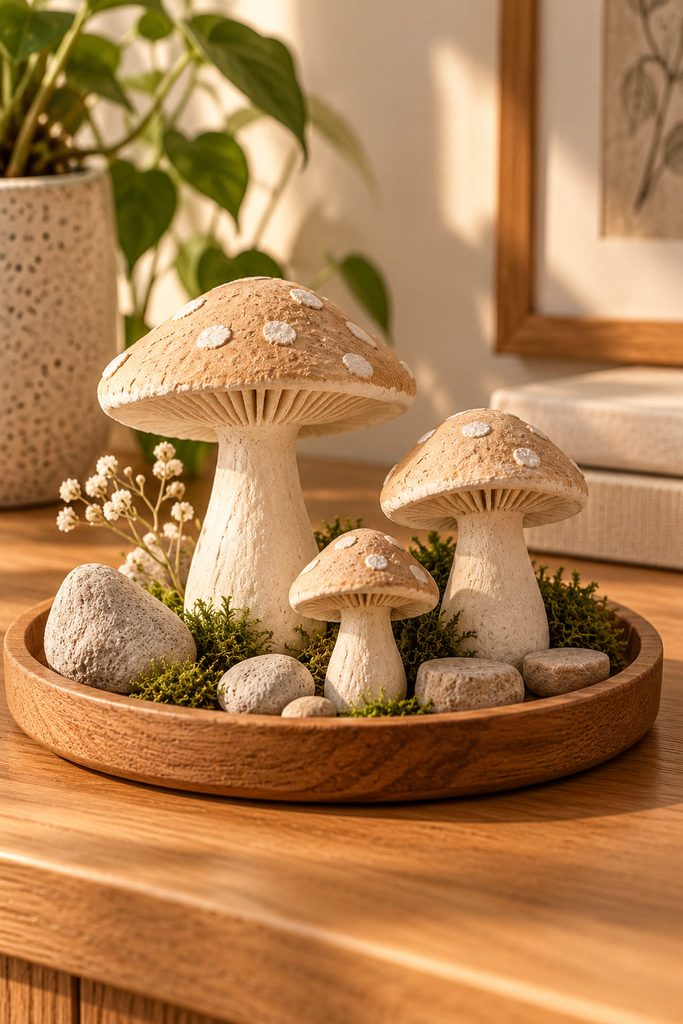
Three mushrooms of different heights can make a complete scene without an elaborate miniature landscape. Shape the caps separately from their stalks; press a shallow socket beneath each cap so the connection has more contact area than a flat butt joint. A dab of fresh clay paste helps the parts meet while still damp. The tallest stalk needs the widest base.
Group the mushrooms on a dry decorative tray with a few sculpted stones, rather than planting them directly into damp potting soil. Matte cream caps with lightly brushed gills look understated on a bookshelf, while earthy colors suit a little woodland display.

6. Layered Landscape Relief Inside a Shadow Frame
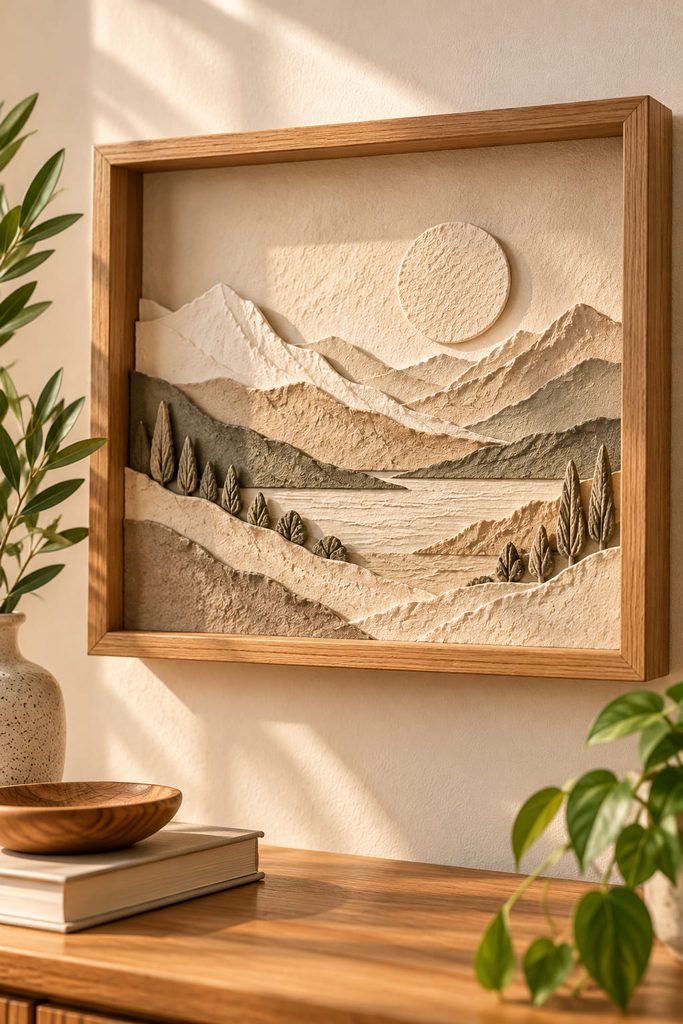
A landscape built from overlapping contour bands gives you actual shadows instead of relying on painted shading. Prepare a rigid backing that fits the frame, then sketch five or six sweeping ridge lines. Make each ridge as a separate thin clay strip, with the closest landform lowest on the composition and the distant horizon higher.
Dry the pieces separately before attaching them to the backing; a large wet slab glued directly across a board may pull or warp as it contracts. Narrow spacers can hold some layers forward, although each spacer needs a secure glue area hidden behind the contour. The foreground can be deeper than the horizon to exaggerate distance.
Before framing, check three things: the highest ridge clears the glazing, no loose clay edge can snag the frame, and the empty sky still occupies enough room to make the terrain readable. This is the stronger choice for a wall that needs one quiet, substantial piece rather than many small tiles.
7. Fluted Napkin Rings for a Handmade Table Setting
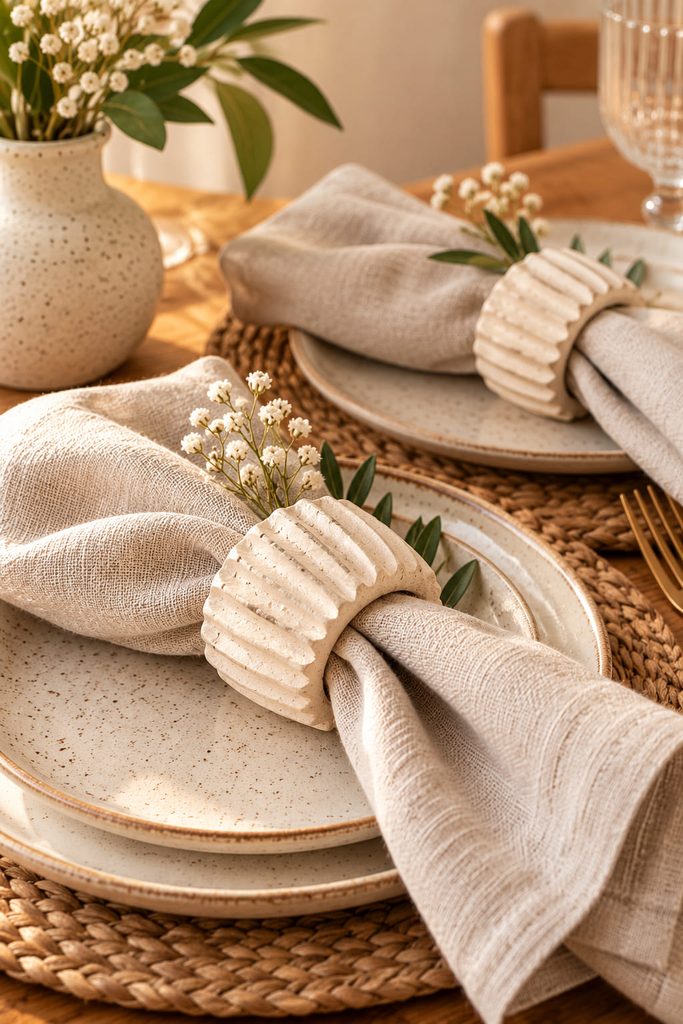
Individual napkin rings have to leave room for actual folded fabric, not just look good on a table. Form each clay strip around a smooth tube protected with a release layer. Use a rounded tool to press broad parallel channels down the outside, stopping before the grooves cut through the wall. Make a single sample ring first and test it with your bulkiest linen napkin.

For a consistent set, prepare these supplies before shaping:
- A smooth tube to act as a former
- A thin release sheet
- A rounded modeling tool
- Fine abrasive paper for smoothing fully dry edges
Remove the former once each piece can hold its shape. Paper clay rings are decorative accessories for dry table settings; they aren’t dishwasher-safe and should be kept away from soaking spills.
8. Windowed Paper Clay House for a Battery LED
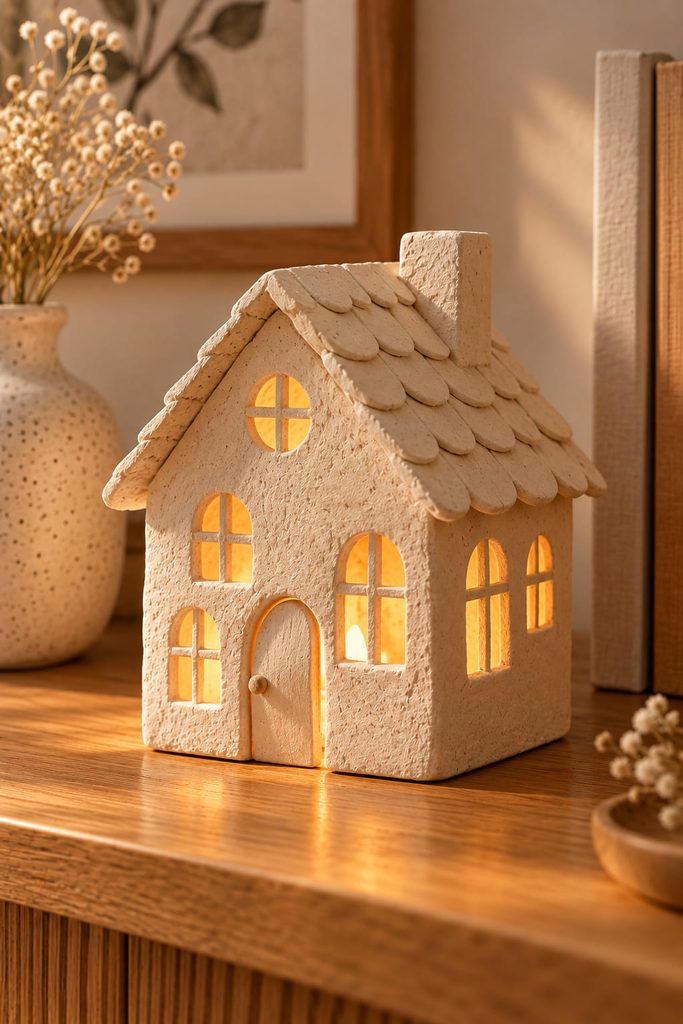
Small lighted houses look charming because the glow comes through specific openings. The construction, though, needs a deliberate route for getting the light inside again after the house is finished. Use a flat rectangular footprint, four thin wall panels, and a separate pitched roof; cut window openings while the panels are still workable. Keep every window bridge wide enough to survive handling.
A sensible assembly sequence is:

- Let the wall panels firm up enough to handle, then join their edges with compatible clay paste.
- Attach the walls to a stable base with an access opening, or leave the roof removable.
- Fit the roof only after checking that a small battery-powered LED can be inserted and removed without scraping the walls.
Light-path check: switch on the LED in the unfinished house. If nearly all the glow disappears behind solid walls, enlarge the openings before final drying. Use a cool LED only, never a flame or hot lamp, and keep the light source accessible.
9. Pebble-Textured Border for a Round Mirror
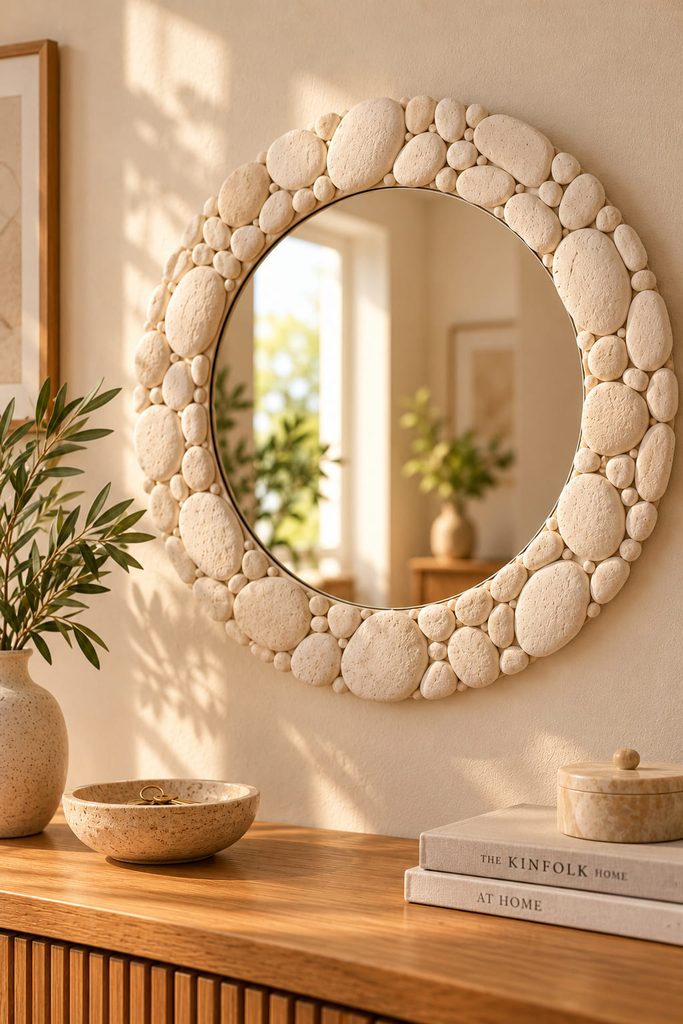
A plain round mirror becomes more tactile when its surrounding frame is covered with irregular, flattened clay pebbles. The mirror itself should be supported by a proper backing; the handmade pieces form a decorative ring around it and carry none of the glass’s weight. Make the pebbles in a few related sizes, flatten their backs, and let them dry before attaching them to the prepared frame.
Place larger forms at uneven intervals, filling the spaces with smaller ones so the border doesn’t look like a perfect necklace. Leave a clean inner gap to avoid covering the reflective edge. This approach is useful when you like sculptural wall decor but don’t want a large unsupported clay slab hanging on its own.

10. Curved-Wire Photo Holder With a Clay Base
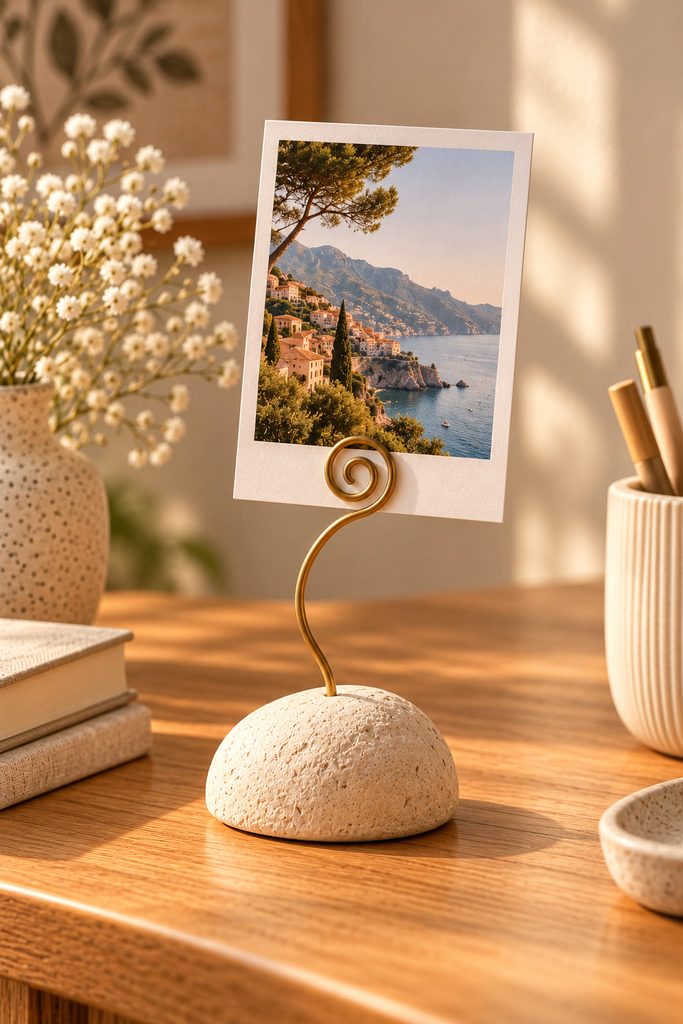
That little metal spiral which grips a photograph can exert more leverage than its size suggests. Give it a low, broad clay pedestal and embed the straight end of the wire well below the upper surface, preferably with a bent foot inside the base so it cannot twist freely. A tall wire arm in a tiny lump of clay will tip as soon as you add a postcard.
If the holder behaves badly, the symptom tells you what to change:
- Base tips forward: shorten the wire or widen the footprint toward the card.
- Wire turns in place: add a buried hook or bent section to resist rotation.
- Photo leans sideways: adjust the top spiral and center the card over the base rather than adding more clay blindly.
Keep the first version for a small photo or place card. The purpose is a useful desk object, not a weight-bearing stand for thick frames.
11. Keepsake Box With a Raised Botanical Lid
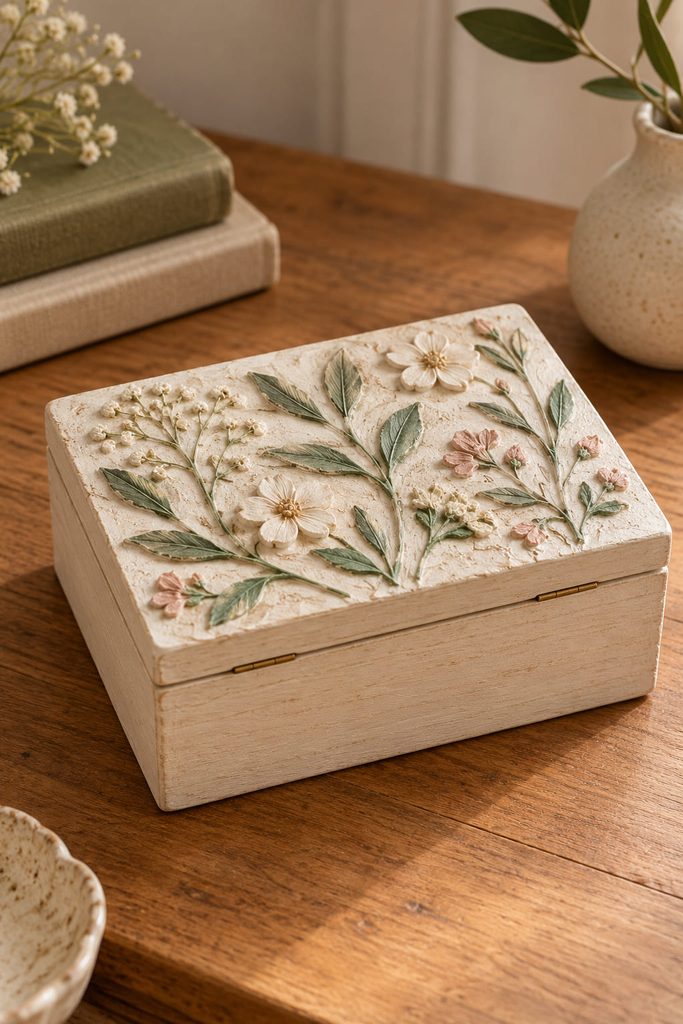
Start with a ready-made small wooden or sturdy cardboard box, then treat the lid as a canvas for shallow paper-clay relief. A few raised stems, seed pods, or petal shapes are enough; tall decorations near the hinge would bump into the box every time it opens. Form the motifs separately on a protected surface and attach them after they have dried, using an adhesive suited to both materials. Lift the lid repeatedly before finishing to see where your fingers naturally grip it. Reserve that edge and keep the original latch or closure clear. A lightly painted surface can bring out the molded texture, while the existing box handles storage, hinges, and load. This gives you a functional keepsake container without asking fragile clay walls to survive daily opening and closing.
12. Sculpted Clock Dial With Clear Hand Clearance
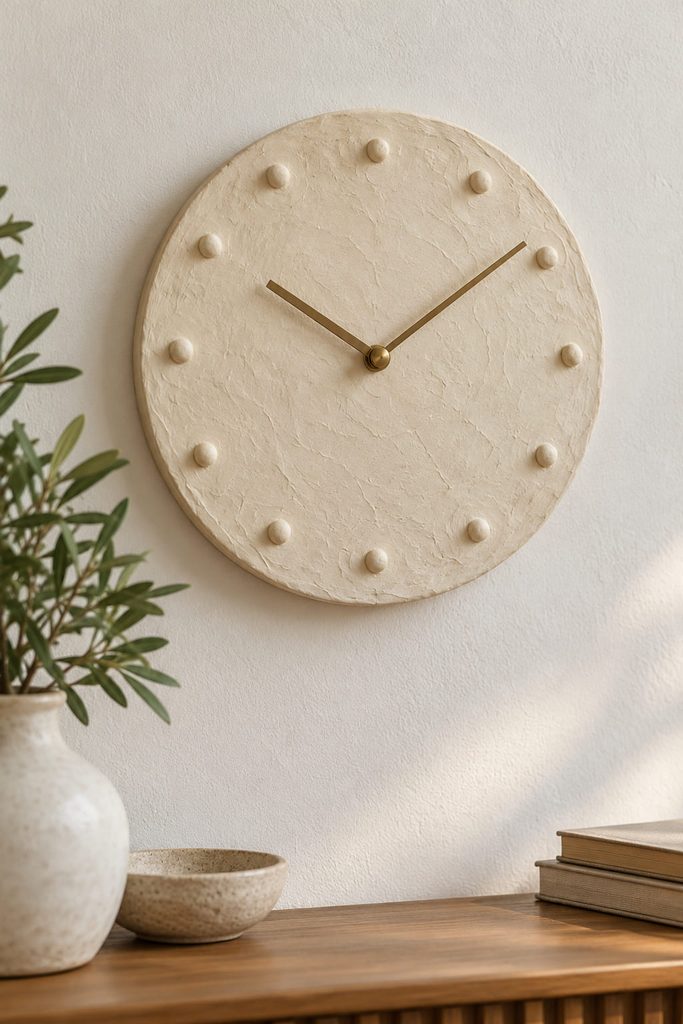
A handmade clock face needs more planning than a decorative round plaque. You can form a thin paper-clay skin on a rigid circular backing, but the purchased clock mechanism must still pass through the center. Check the shaft length against the full thickness of the backing and clay before committing to the surface design. A thick ridge around the center may stop the hands from turning.
Keep the dial tactile without making it crowded: twelve small raised dots, a gently carved outer ring, or a single offset arc are enough. Mount the movement to the backing according to its instructions, not to unsupported clay, and keep the battery compartment accessible.
Before hanging the clock, verify:
- The center shaft extends far enough through the finished dial.
- The hour, minute, and second hands, if fitted, clear every raised marker.
- The movement remains accessible for battery changes.
- The backing supports the clock’s full weight.
If the hands scrape, lower the offending detail or use hands designed for more clearance. This project earns its place when the finished sculpture can actually tell time.
13. Terrazzo-Inspired Letter Magnets
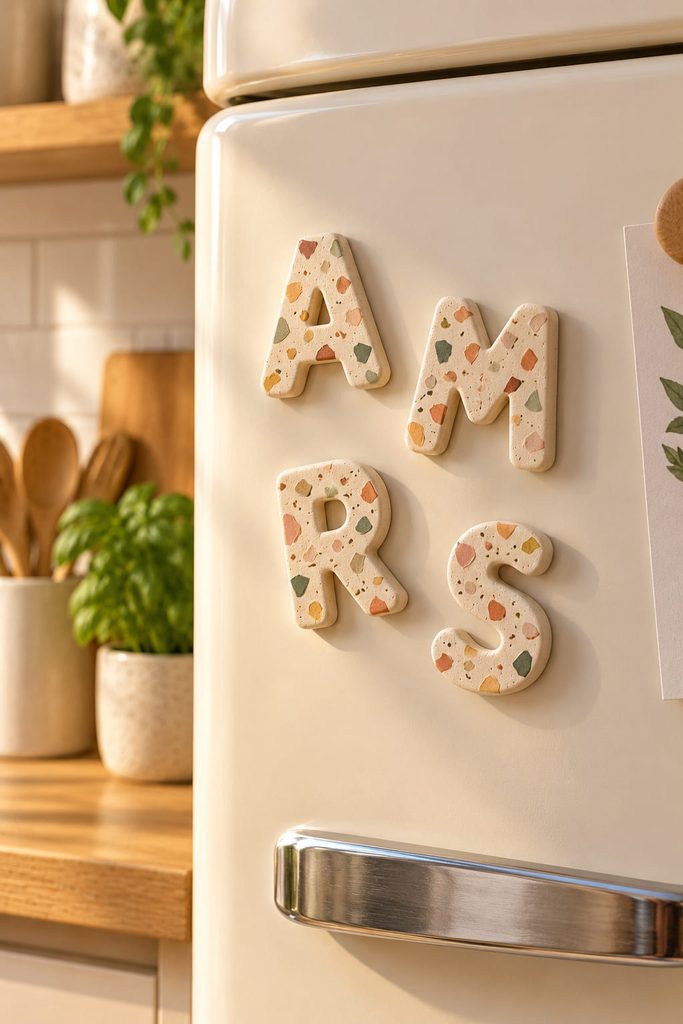
Instead of making tiny sculptures that disappear on a shelf, turn paper clay into a set of fridge magnets. Flatten small rounded letter shapes and press flecks of contrasting, already-dried colored clay into the surface for a terrazzo effect. Keep the backs level and the pieces reasonably thin, then glue appropriately sized magnets to the fully dry backs. Arrange a few letters together to hold a note or spell a short word. The finish can be playful without becoming messy if the flecks remain small enough for each silhouette to read. Because magnets can detach and small parts can be swallowed, these belong in adult-use spaces rather than children’s play areas.
14. Crescent-and-Disc Mobile for an Empty Wall Nook
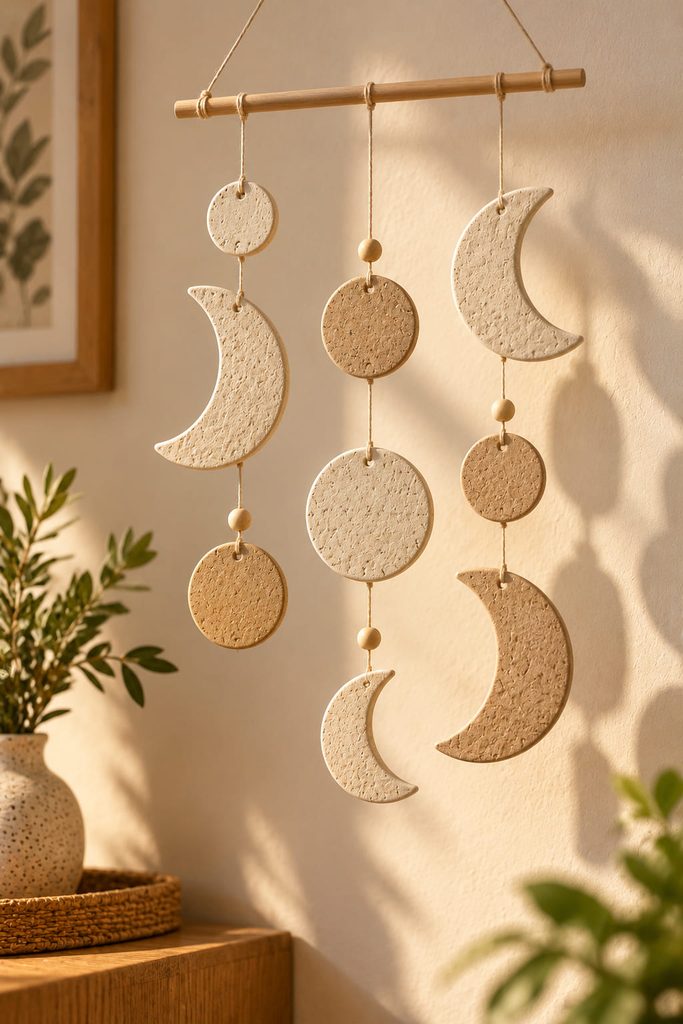
Even a lightweight clay mobile needs the center of mass beneath its suspension point. Make several thin crescent and circle elements, pierce generous holes while workable, and dry them completely before tying them to cord. Suspend the shapes from a short dowel or wire arm, not directly from a fragile clay ornament.
Two arrangements create different effects:
- Symmetric balance: pair shapes of similar weight at comparable distances from the center for a calm, orderly composition.
- Asymmetric balance: hang a heavier piece closer to the pivot and a lighter piece farther away for a more sculptural appearance.
Shift the attachment points before tying permanent knots. Hang the finished mobile against a clear wall so it has room to move without hitting plaster, furniture, or another pendant. Its delicate shadows are part of the appeal; placing it in a crowded corner would hide them. Use secure hardware appropriate to the finished weight.
15. Dry-Stem Display Block With Off-Center Openings
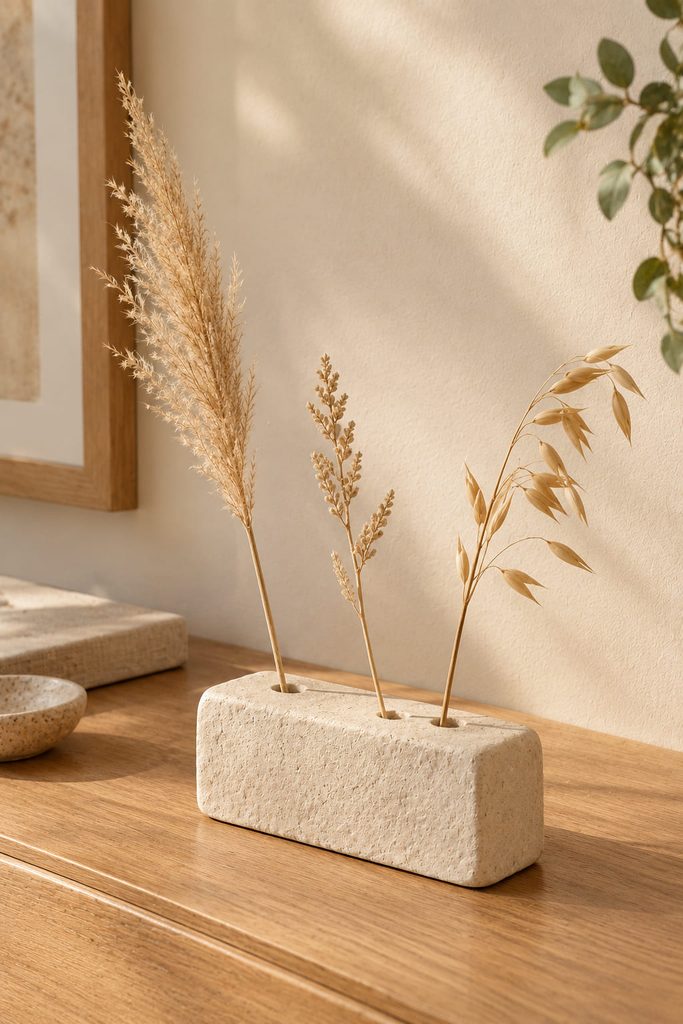
A compact rectangular block can hold a few dried grasses upright like a tiny architectural arrangement. Different hole angles let the stems fan out without needing a full vase silhouette.
- Shape a low block with a broad, flat footprint.
- Press smooth dowels into the damp clay to mark staggered holes, then withdraw them carefully before the clay dries around them.
- Once dry, insert three stems of different heights and check that the arrangement doesn’t tip.
This design has one nonnegotiable boundary: use dried stems only. The block is not a water vessel, and wet florist stems can discolor or soften it. If long grasses make the piece unstable, shorten the tallest stems rather than adding a heavy decorative top.
16. Tapered Ring Cone With a Hollow Center
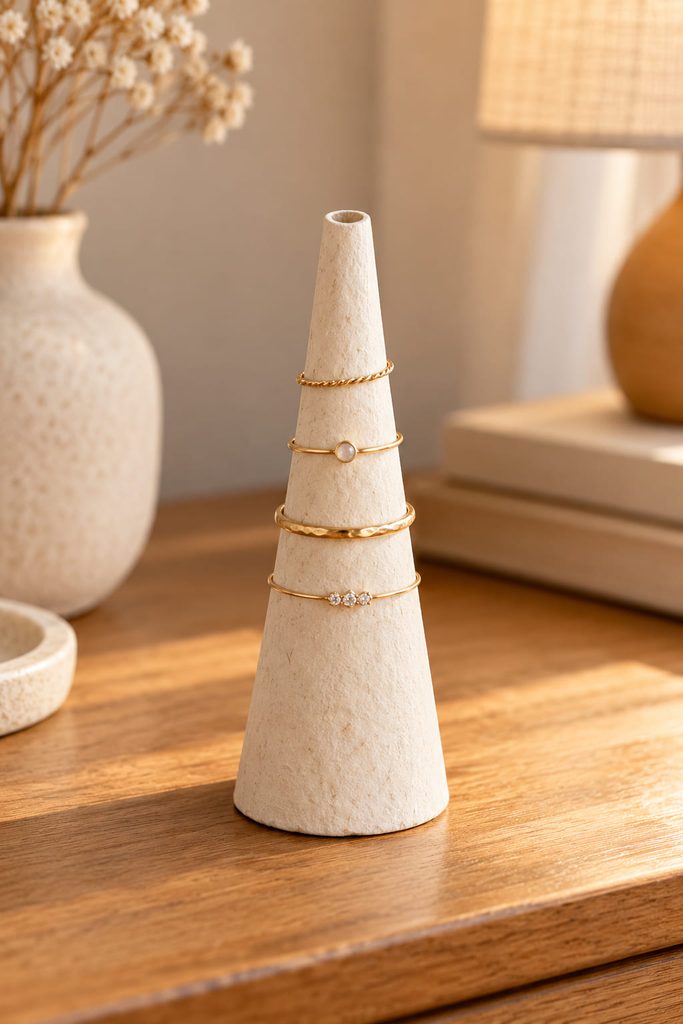
A tall cone gives rings a visible place to live while taking very little space on a dresser. Make it hollow over a removable paper former rather than leaving a thick solid core that dries unevenly. The top must be narrow enough for a ring to pass over; the bottom should flare into a level rim so the piece stands securely.
Try your widest everyday ring against the former before shaping the clay. A cone with sharp ridges may look interesting but can snag jewelry, so smooth the contact surface while damp and again after it has dried. This is a different kind of storage from the open trinket dish: each ring remains separated and easy to see, although chunky rings may stop higher on the taper.
17. Clay-Faced Bookend With a Hidden Metal Support
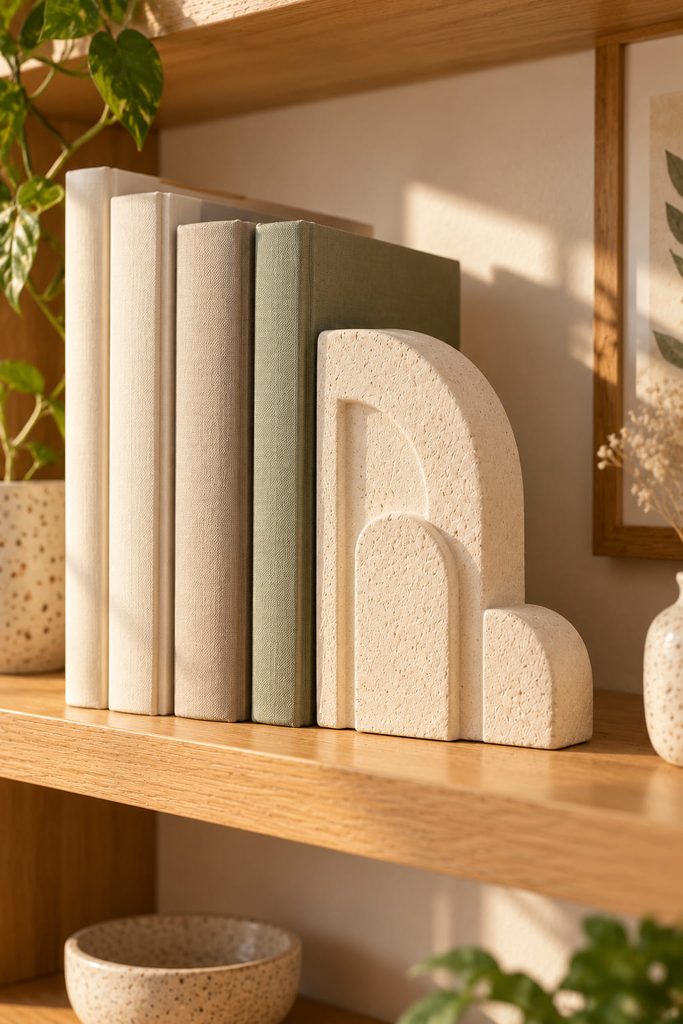
Paper clay can look like a little carved stone sculpture, but it should not be asked to hold a row of heavy books upright. Start with an ordinary L-shaped metal bookend and design a thin sculpted facade that sits against its vertical face. Broad arches or soft geometric blocks give the most convincing stone-like profile without creating delicate projecting tips.
Make the facade separately, dry it fully, and attach it with an adhesive compatible with the metal finish and the cured clay. Do not cover the bookend’s bottom foot: that horizontal plate slips beneath the books and supplies the actual resistance to tipping.
Load-path check: put the finished bookend against a small stack and confirm that book pressure reaches the metal plate rather than a raised clay ornament. If the facade protrudes into the books, reduce its thickness. The hidden structure should do the work; the handmade surface should supply the character.
Choosing Paper Clay Art Ideas by Function
Use the display location to narrow the choice before you mix or open the clay. Wall pieces need a backing and reliable mounting; small tabletop sculptures need flat feet; pieces that hold something need clearance and a way to retrieve it. A mirror border or bookend facade is often a better beginner project than a fully freestanding structure because an existing object provides the engineering.
Paper-pulp craft clay varies by recipe and product, so test a small sample for shrinkage, cracking, and finish before building a fitted sleeve or clock dial. Keep finished pieces indoors, away from standing water and prolonged dampness. Paint or a compatible sealer can change the appearance and make ordinary handling easier, but a coat of finish does not automatically make a piece waterproof, washable, food-safe, or suitable for heat.
Pick the First Piece by What It Needs to Do
If you mainly want to learn the material, start with one botanical impression tile or a small batch of letter magnets. The results are flat enough to show you how the clay shrinks and takes texture. For a useful gift, the keepsake-box lid lets an existing structure do the hard work. Save the lighted house, balanced mobile, or working clock for the point when you’re comfortable making clean joints and allowing parts to dry separately.
For another route to dimensional handmade decor without wet modeling material, see 20 3D Paper Art Ideas for Stunning Handmade Decor. That collection focuses on folded, cut, and layered paper construction rather than shaped pulp.