This post contains affiliate links. As an Amazon Associate I earn from qualifying purchases, at no extra cost to you. Thank you for supporting Diynify!
Paper weaving art ideas can turn simple strips into wall decor with real rhythm, texture, and depth. The basic over-under structure is easy to learn, but changing strip width, direction, tension, transparency, or mounting can make each finished piece feel completely different.
For most projects, you need colored paper or light cardstock, a ruler, pencil, craft knife or scissors, cutting mat, and adhesive for securing the finished edges. Some ideas also use vellum, recycled book pages, a rigid backing board, a frame, or a dowel. Keep the paper flexible enough to bend through the weave without cracking, and build a true alternating over-under path rather than gluing strips side by side.
1. Classic Checkerboard Paper Weaving
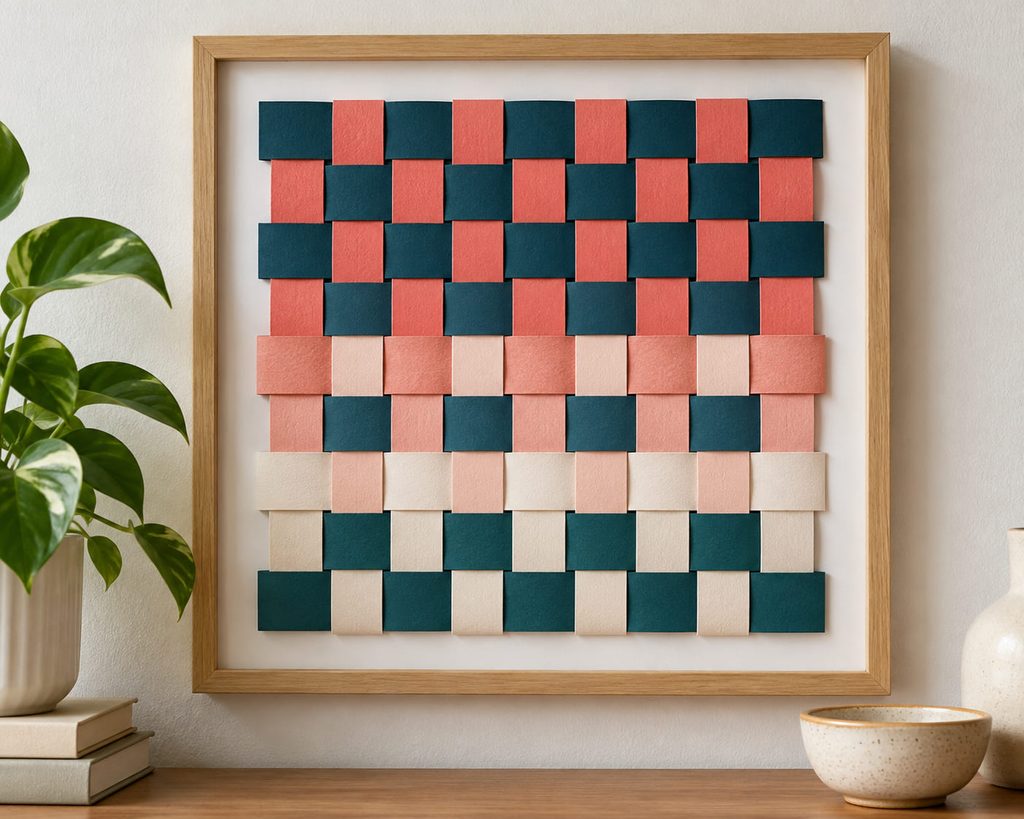
Start with the structure that makes the pattern easiest to read: evenly spaced vertical warp strips crossed by horizontal strips of the same width. Alternate every row so each new weft strip reverses the previous over-under sequence. Two strong paper colors make the grid visible immediately, while a quieter palette gives the panel a more graphic, modern feel.

Square openings reveal tension problems quickly, so straighten the outside rows before securing the ends. Mount the finished weave to a rigid board or place it behind a deep frame so the edges stay square instead of curling toward the wall.
2. Gradient Color-Field Weave
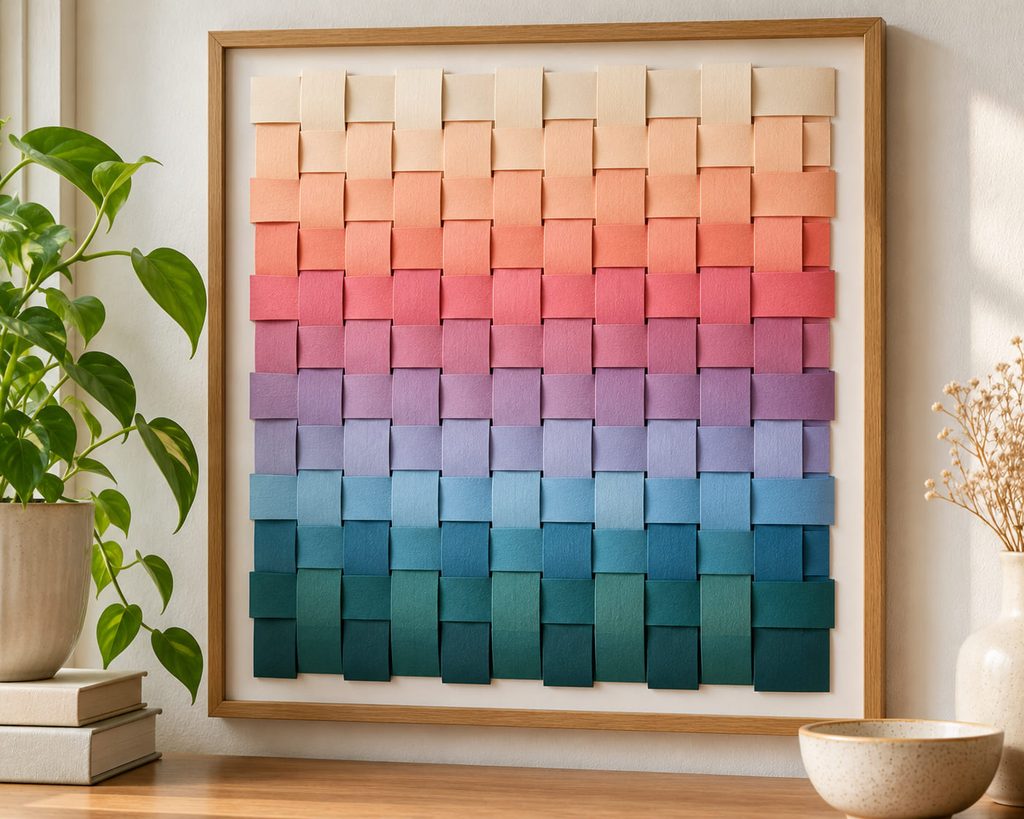
Arrange paper strips from light to dark, warm to cool, or one hue into another before weaving. Keep the crossing pattern simple so the color transition becomes the main feature, then use the panel as a broad rectangular statement piece rather than adding extra motifs.

Before cutting the full batch:
- Place the uncut sheets side by side and remove nearly identical values.
- Number the strip backs lightly so the sequence cannot drift.
- View the palette from several feet away to make sure the gradient still reads.
3. Diagonal Twill Paper Weaving
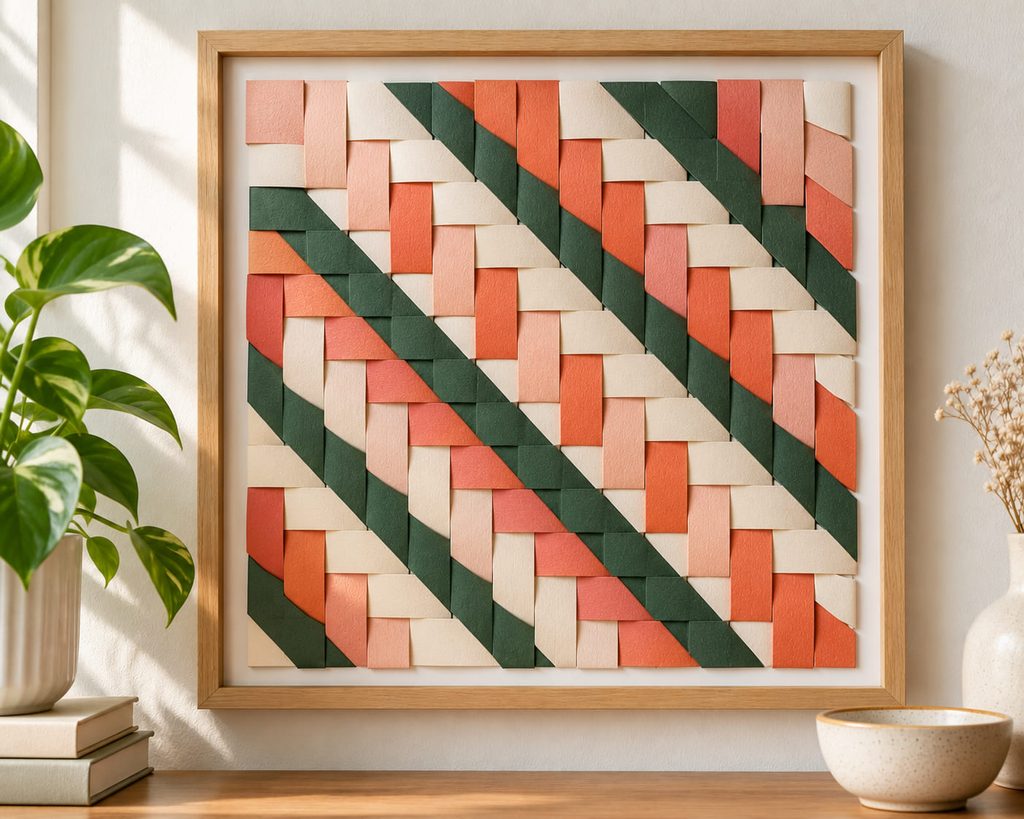
A twill pattern changes the crossing sequence so visible over-under points travel diagonally instead of forming a checkerboard. One approachable route is an over-two, under-two sequence that shifts its starting point by one strip on each new row.
Build the first section in this order:
- Weave four or five rows without gluing.
- Check whether the diagonal bands stay continuous.
- Trace any broken line back to the first wrong crossing.
- Square the perimeter only after the internal pattern is correct.
Medium-weight paper works best because it can still slide during alignment. Heavy cardstock resists repeated crossings, while very thin paper can crease sharply or tear at the same bend.
4. Circular Sunburst Weave
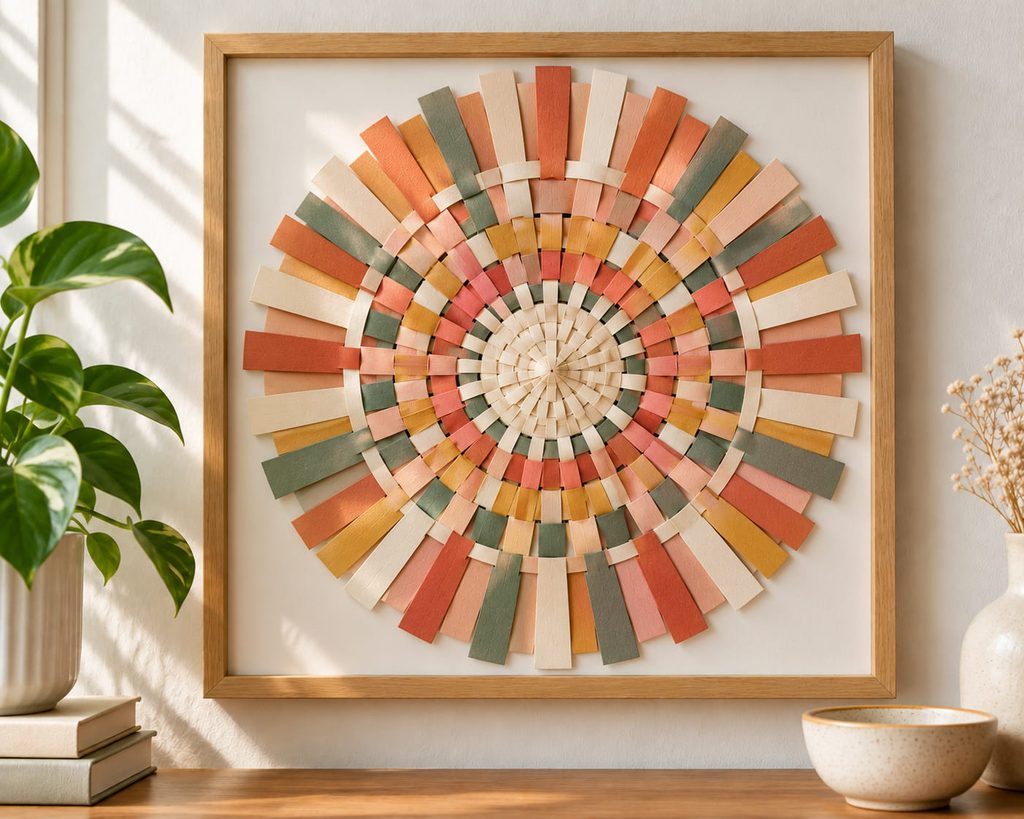
Turn the usual rectangular grid into a radial composition. Arrange narrow strips so they radiate from a center point like spokes, then weave shorter strips around them in expanding rings. Each ring still follows an over-under sequence, but the increasing circumference naturally opens the spacing toward the outside.

A circular backing helps control the shape. Fix the spoke ends temporarily, work from the center outward, and stop before the outer rings become too loose. A small center disc can hide crowded starting joins and give the finished wall piece a clean focal point.
5. Woven Paper Landscape
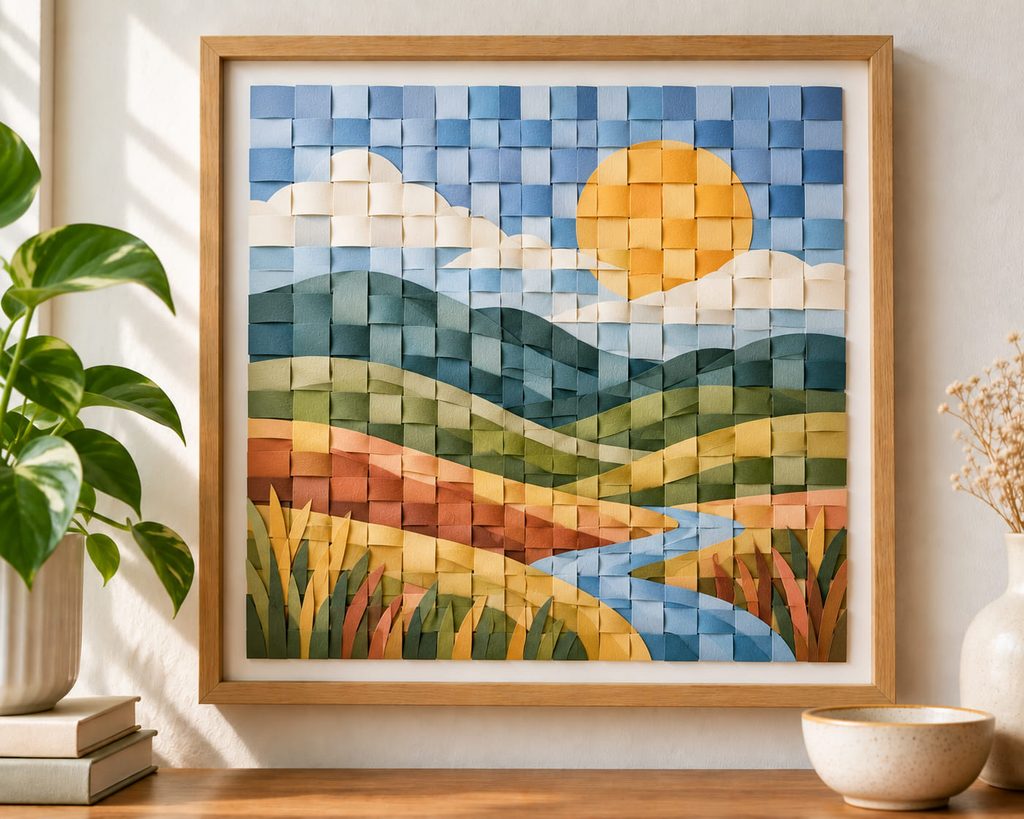
Use the weave itself to build a landscape. Horizontal rows can shift from sky to distant hills, ground, or water, while a neutral warp keeps the scene from turning into a busy multicolor grid. Cut a few weft strips with gentle curves so a horizon or hillside interrupts the strict geometry without breaking the over-under structure. A generous mat around the finished piece helps the irregular woven edges look deliberate.
6. Raised Loop Paper Weaving Relief
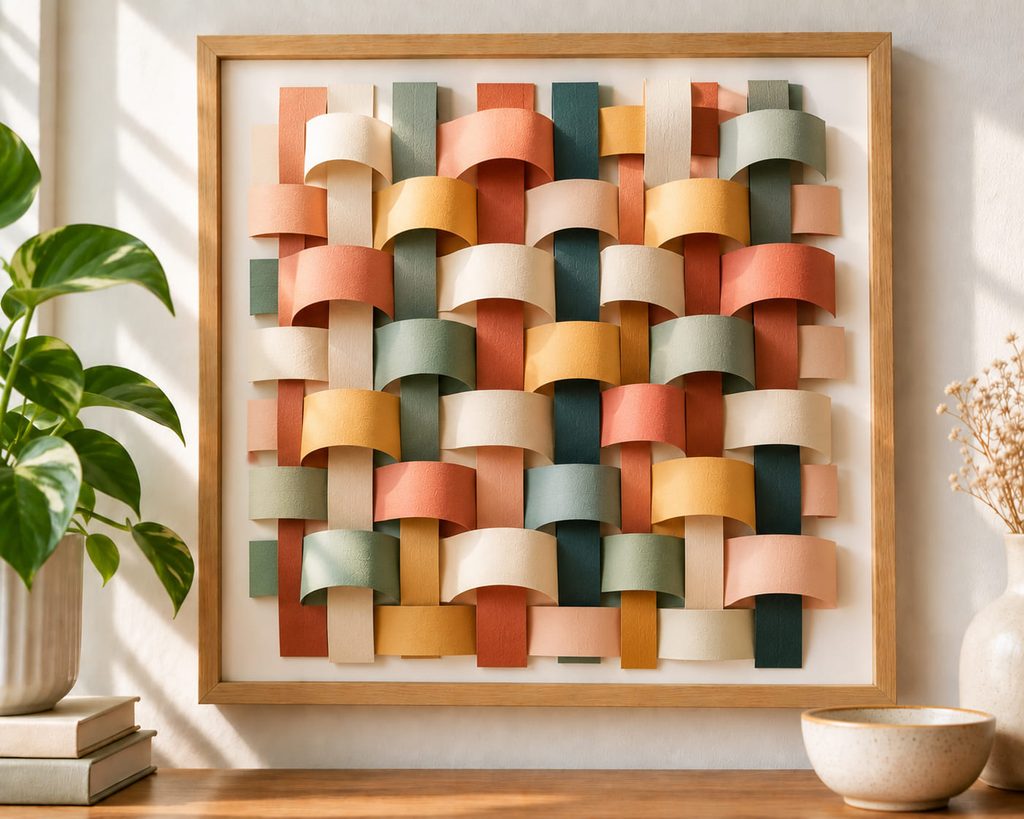
Let selected weft sections rise away from the backing instead of pulling every crossing flat. Weave a stable base first, then introduce longer strips that pass under a warp strip, arch upward, and return under the next planned crossing. The extra length creates controlled loops that cast stronger shadows on the wall.
If the surface starts to sag, diagnose the cause before adding glue. A loop that collapses needs a slightly shorter span or stiffer paper; a whole row that bows usually means the surrounding weave is too tight. Hold the panel upright before mounting it and confirm that the raised sections keep their shape without dragging neighboring rows out of alignment.

7. Translucent Vellum Weave
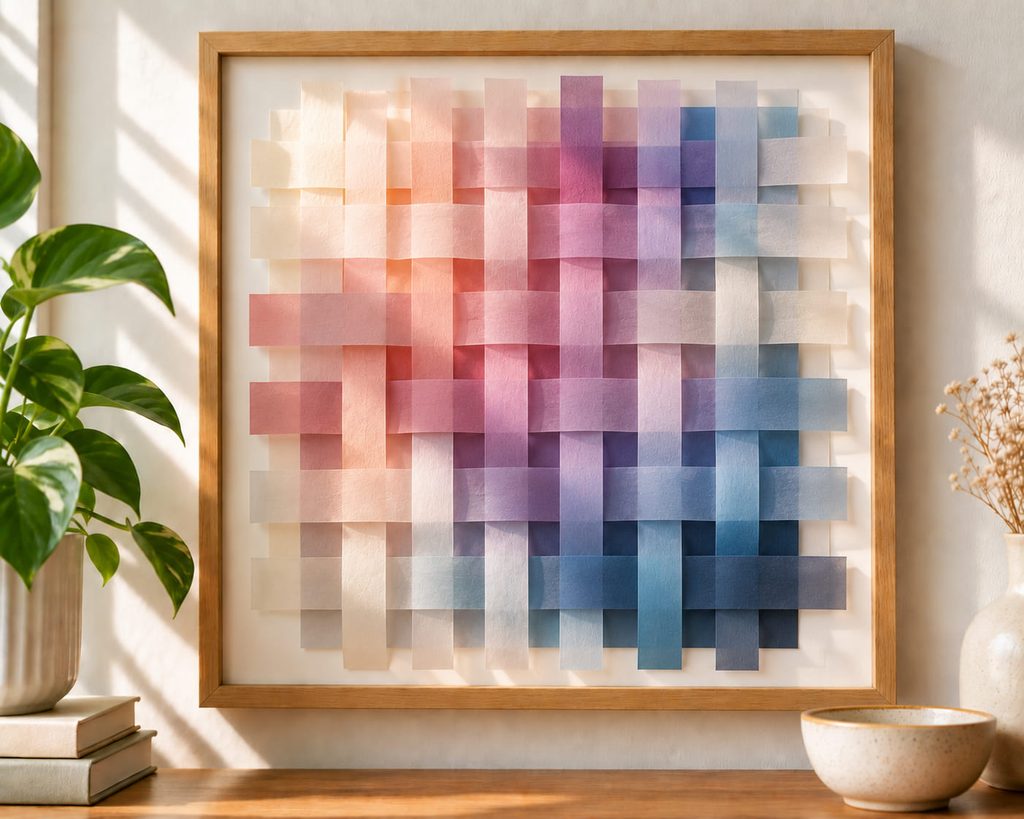
Vellum makes every overlap visible because the crossed areas appear denser than the single-layer sections. Weave translucent strips over a pale or colored backing and the simplest grid becomes a layered light-and-shadow composition without needing many colors.
Fingerprints and glue marks show easily on translucent paper, so secure the weave only at hidden outer edges. A floating or spacer frame also keeps the surface from pressing against glazing and preserves the small shadow between the weave and its backing.
8. Book-Page Typography Weave
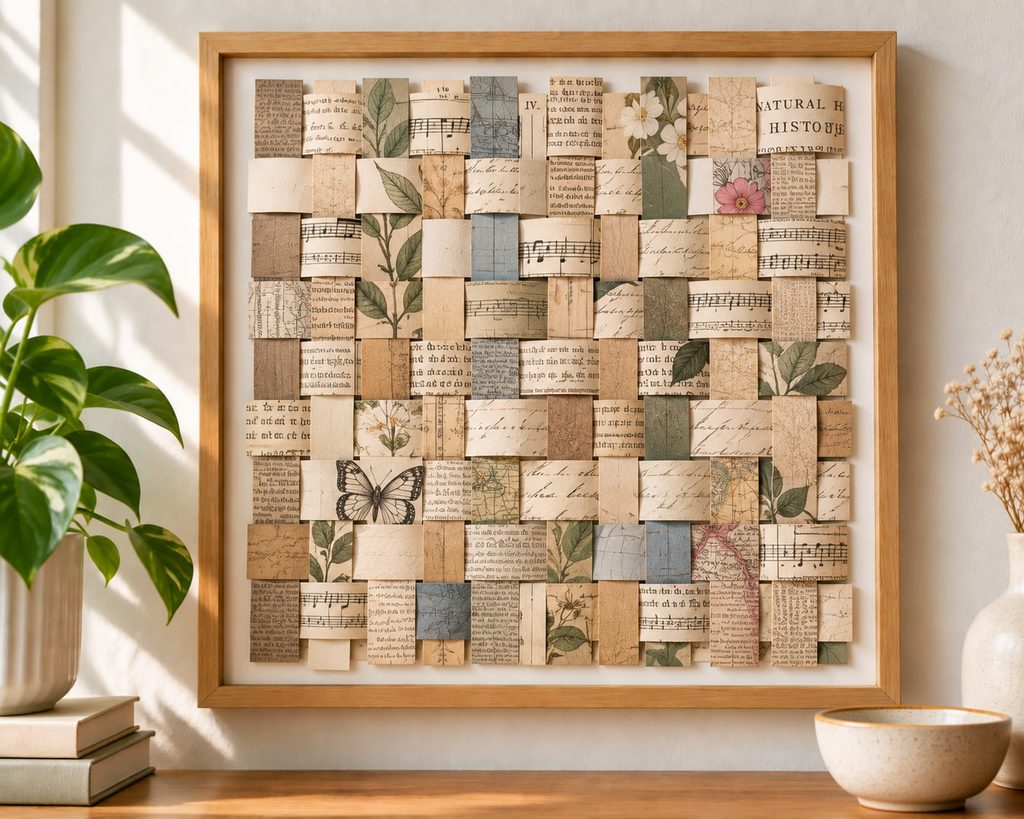
Cut old book pages, sheet music, maps, or other printed paper into uniform strips, rotate some strips by 90 degrees, and weave them into a fragmented typography grid. Keep the source papers close in tone and ink density so the over-under structure remains visible instead of disappearing into visual noise. A plain mat or simple frame gives the busy printed surface a strong boundary.

9. Fringe-Ended Woven Wall Hanging
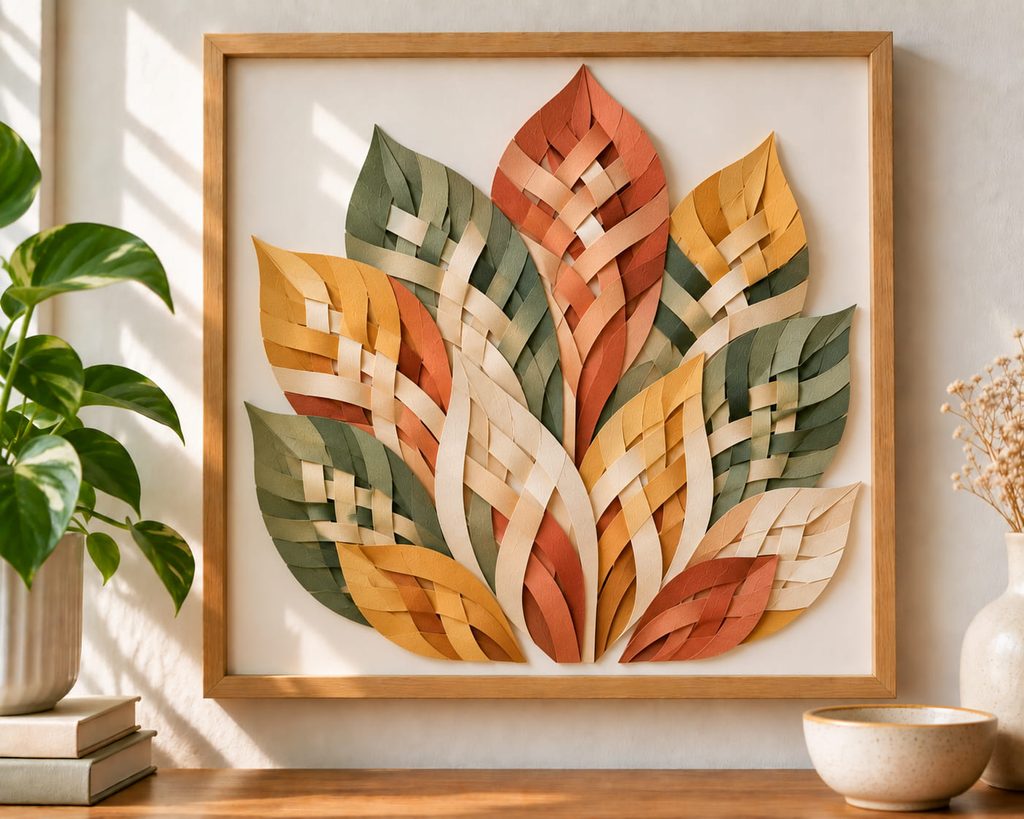
Leave the lower warp strips long rather than trimming the weave into a rectangle. Once the main panel is secure, turn those ends into fringe and hang the top from a light dowel or narrow support strip.
For a clean finish:
- Keep the woven top wide enough to lock every hanging strip.
- Cut the fringe only after the panel is tensioned.
- Attach hanging cord to the dowel, not directly to the paper.
- Reinforce the top edge if the piece twists when lifted.
10. Negative-Space Window Weave
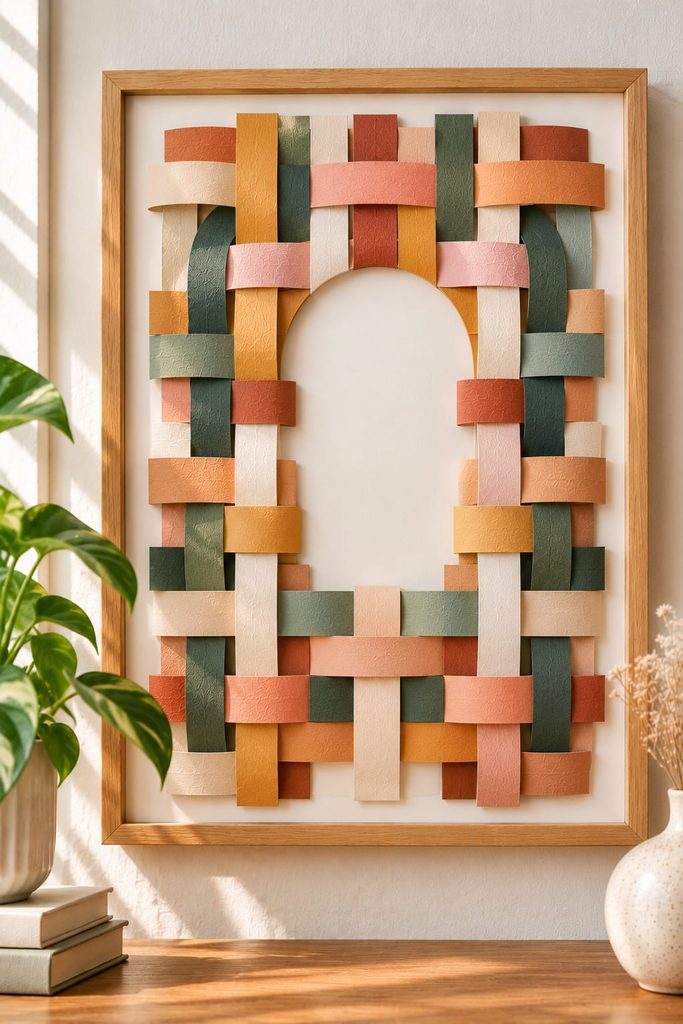
Build the weave around a deliberate open area instead of filling the whole panel. A square, arch, circle, or irregular window can expose the backing color and make empty space part of the design. Plan that opening first so the surrounding strips still have enough crossings to remain stable.
Rigid mat board is useful here because it can support shortened or redirected strips around the gap. Keep the window edge crisp, then repeat one of its proportions elsewhere in the piece, such as the border width or strip spacing, so the opening feels integrated rather than cut out afterward.
11. Wide-And-Narrow Stripe Weave
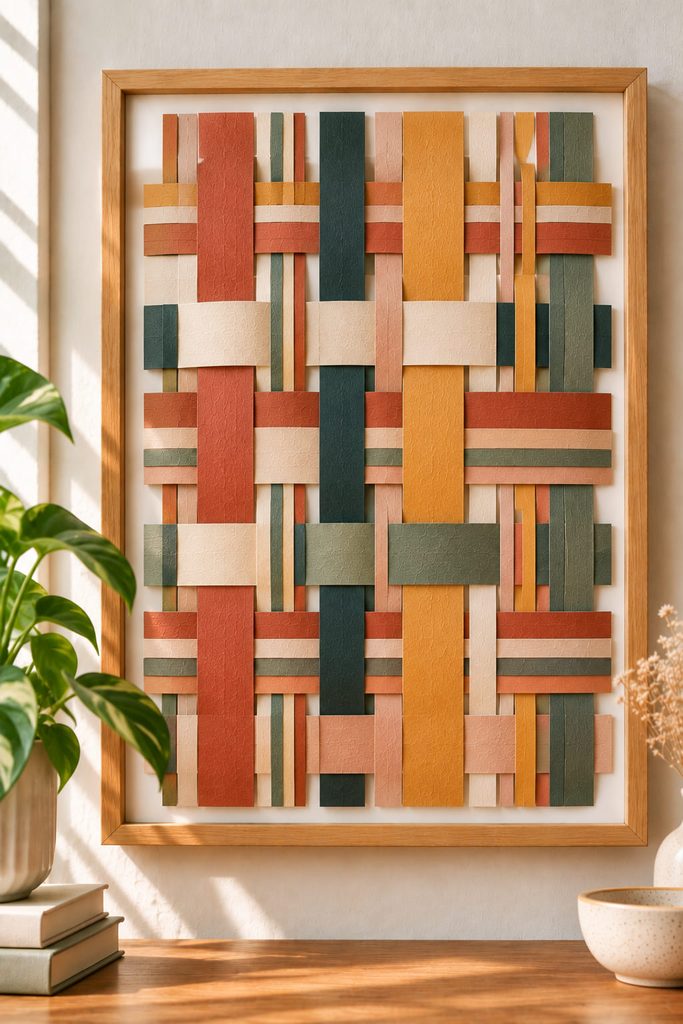
Mix two or three strip widths to create rhythm without changing the basic over-under method. Broad strips behave like visual blocks while narrow strips create finer detail between them. Measure one complete width sequence before cutting a full batch; repeating a tested group is easier than trimming dozens of mismatched strips after the weave is assembled.

12. Herringbone Paper Weaving
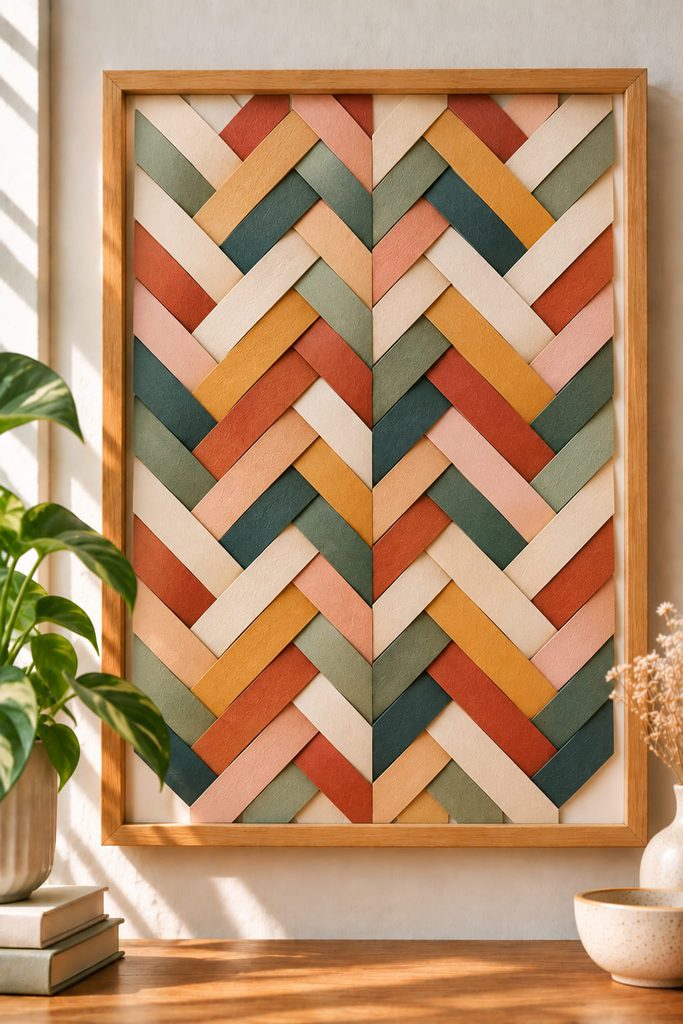
Herringbone gets its character from mirrored diagonals. Instead of letting every diagonal continue in the same direction, reverse the offset sequence so the woven bands meet in repeated V shapes. This creates a sharper, more tailored pattern than a simple twill.
Two construction routes work well:
| Method | Best For | Main Risk |
|---|---|---|
| Separate mirrored sections | Easier correction and cleaner learning curve | A visible center join if alignment is loose |
| One continuous weave | A seamless finished surface | Pattern drift is harder to fix |
Check the meeting points before securing the perimeter. If one side creeps upward, loosen several rows and redistribute the strips; trimming the edge may hide the symptom, but it will not restore the herringbone rhythm.
13. Triaxial Triangle Paper Weave
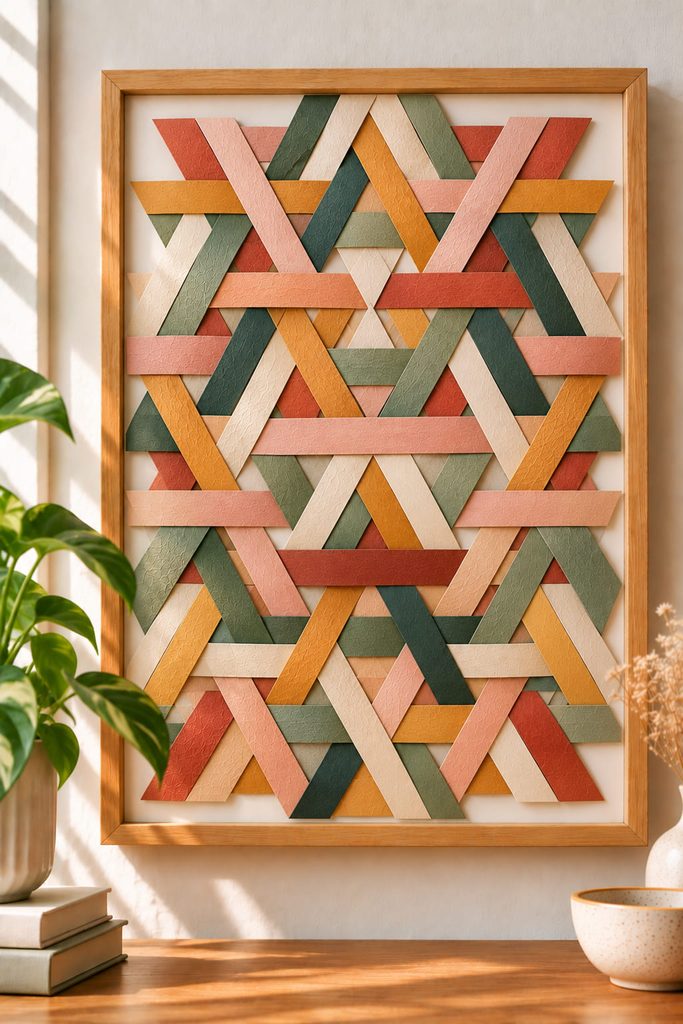
A triaxial weave uses three strip directions rather than the usual vertical-horizontal pair. Lay two sets on opposing diagonals, then thread a third set through their crossings so repeated triangular and hexagon-like spaces begin to appear.
Build a small sample first:
- Tape the outer strip ends lightly to a temporary board.
- Establish the first two diagonal directions.
- Thread the third direction through the existing crossings.
- Compare several center shapes before expanding the panel.
If the repeated shapes become taller on one side, the strip angles are drifting. Correct the angle while the perimeter is still movable; once all outer ends are glued, the distortion is much harder to remove.
14. Monochrome Shadow Weave
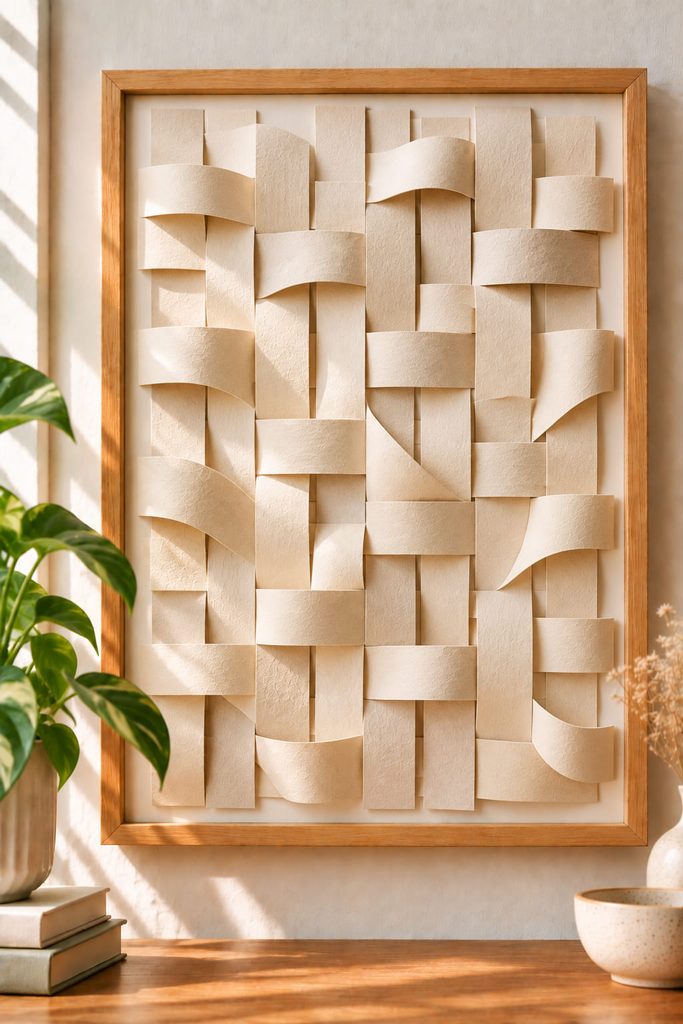
Use one paper color and let depth create the contrast. Fold shallow ridges into selected strips or alternate flat sections with gentle curves, then place the finished piece where side light can catch those raised surfaces. White, cream, kraft, charcoal, or another restrained tone works especially well because the pattern is carried by shadow rather than extra color.
15. Modular Woven Paper Tile Set
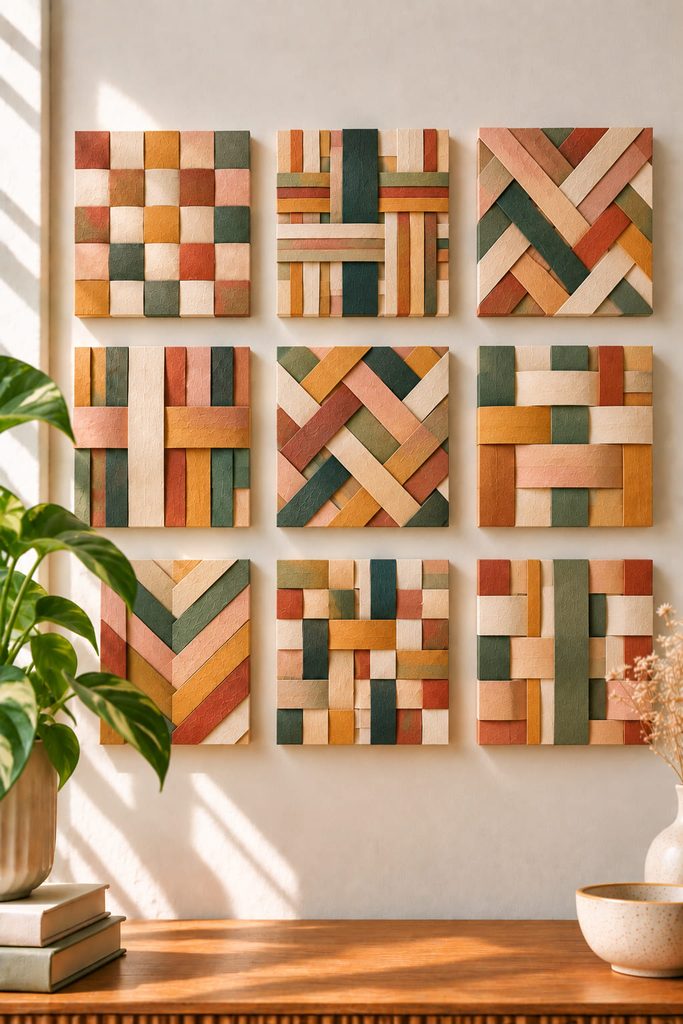
Make several small woven panels instead of one large composition. Keep one element consistent across the set—tile size, palette, strip width, or backing—then vary the internal weave from tile to tile. Equal spacing between the mounted pieces turns the group into one larger wall arrangement, while the modular format makes it easy to replace a weak tile or use smaller paper scraps.
16. Curved-Strip Abstract Weave
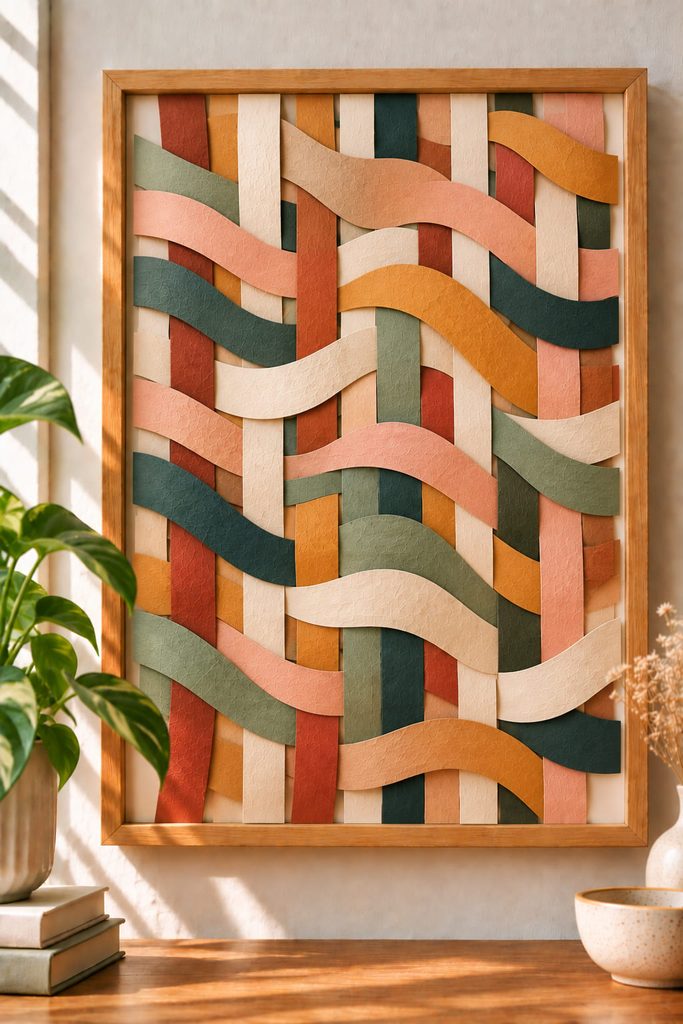
Cut long strips with gentle curves rather than perfectly parallel sides and thread them through a stable set of straight warp strips. The changing width makes some intersections expand and others compress, giving the surface a less mechanical rhythm than a square grid.
If the panel starts bunching, do not force the curved strip straight. Work from the center outward, let the natural arc guide the next crossing, and loosen the neighboring rows until the paper settles without buckling. A solid backing keeps the irregular woven silhouette readable once it is mounted.
Choosing Paper for Woven Wall Art
Paper weight controls both appearance and handling. Lightweight construction paper and text-weight decorative paper bend easily through tight crossings, making them useful for beginner weaves and complex paths. Medium cardstock holds cleaner edges and stronger relief, but it works better with wider strips and looser crossings. Vellum is best where transparency is part of the design, while recycled printed pages add texture without needing extra decoration.
For large wall pieces, test one small section before cutting every strip. The sample should tell you whether the paper cracks at bends, whether ink rubs off, whether the weave stays flat, and whether your chosen strip width is strong enough to span the panel. A rigid backing becomes especially useful once the finished weave is large enough to sag.
How to Keep Paper Weaving Flat and Even
Most warped panels come from uneven tension rather than bad cutting. Keep the warp strips parallel, leave the weft loose enough to slide during assembly, and square the outer rows before securing anything permanently.
A simple finishing sequence works well:
- Align the center crossings first.
- Redistribute tension toward the outer edges.
- Check the panel upright, not only flat on the table.
- Secure the perimeter.
- Trim or hide the ends only after the weave is stable.
Frequently Asked Questions About Paper Weaving Art
What Paper Is Best for Paper Weaving Art?
Medium-weight colored paper or light cardstock is a good starting point because it holds a clean edge without becoming too stiff to weave. Thin paper is easier for tight patterns, while heavier cardstock is better for broad strips and dimensional relief.
How Do You Keep Paper Strips From Tearing While Weaving?
Use wider strips, avoid sharp repeated bends, and leave enough space between warp strips for the weft to pass through without scraping. If the paper begins whitening or cracking at folds, switch to a more flexible sheet or increase the strip width.
Can Paper Weaving Be Framed?
Yes. Flat weaves can sit behind standard glazing if the surface is not compressed. Raised loops, folded strips, or other relief details need a spacer or shadow-box-style frame so the dimensional parts are not crushed.
How Do You Hang a Paper Weaving Without a Frame?
Secure the top edge to a rigid backing, dowel, or lightweight hanging strip, then attach the hanging cord to that support rather than directly to individual paper strips. This spreads the load and reduces tearing.
Can You Make Paper Weaving With a Cricut?
A cutting machine can prepare consistent strips, slits, frames, or shaped components, but the over-under assembly is still a physical weaving step. For complex designs, a test cut helps confirm that narrow strips are strong enough to handle repeated threading.
How Do You Make Paper Weaving Look More Modern?
Reduce the palette, increase the scale, use deliberate negative space, or let texture replace extra color. Wide strips, monochrome relief, gradients, and modular panels can make the finished piece read more like wall art when the edges and mounting are carefully finished.
Turn the Weave Into Finished Wall Art
The strongest paper weaving art ideas use the crossing pattern for a specific purpose: creating a gradient, building diagonal rhythm, shaping negative space, catching light, or adding real relief. Pick one structural idea first, make a small sample, and only then scale it to the wall. That keeps the finished piece intentional instead of relying on extra decoration to carry the design.