This post contains affiliate links. As an Amazon Associate I earn from qualifying purchases, at no extra cost to you. Thank you for supporting Diynify!
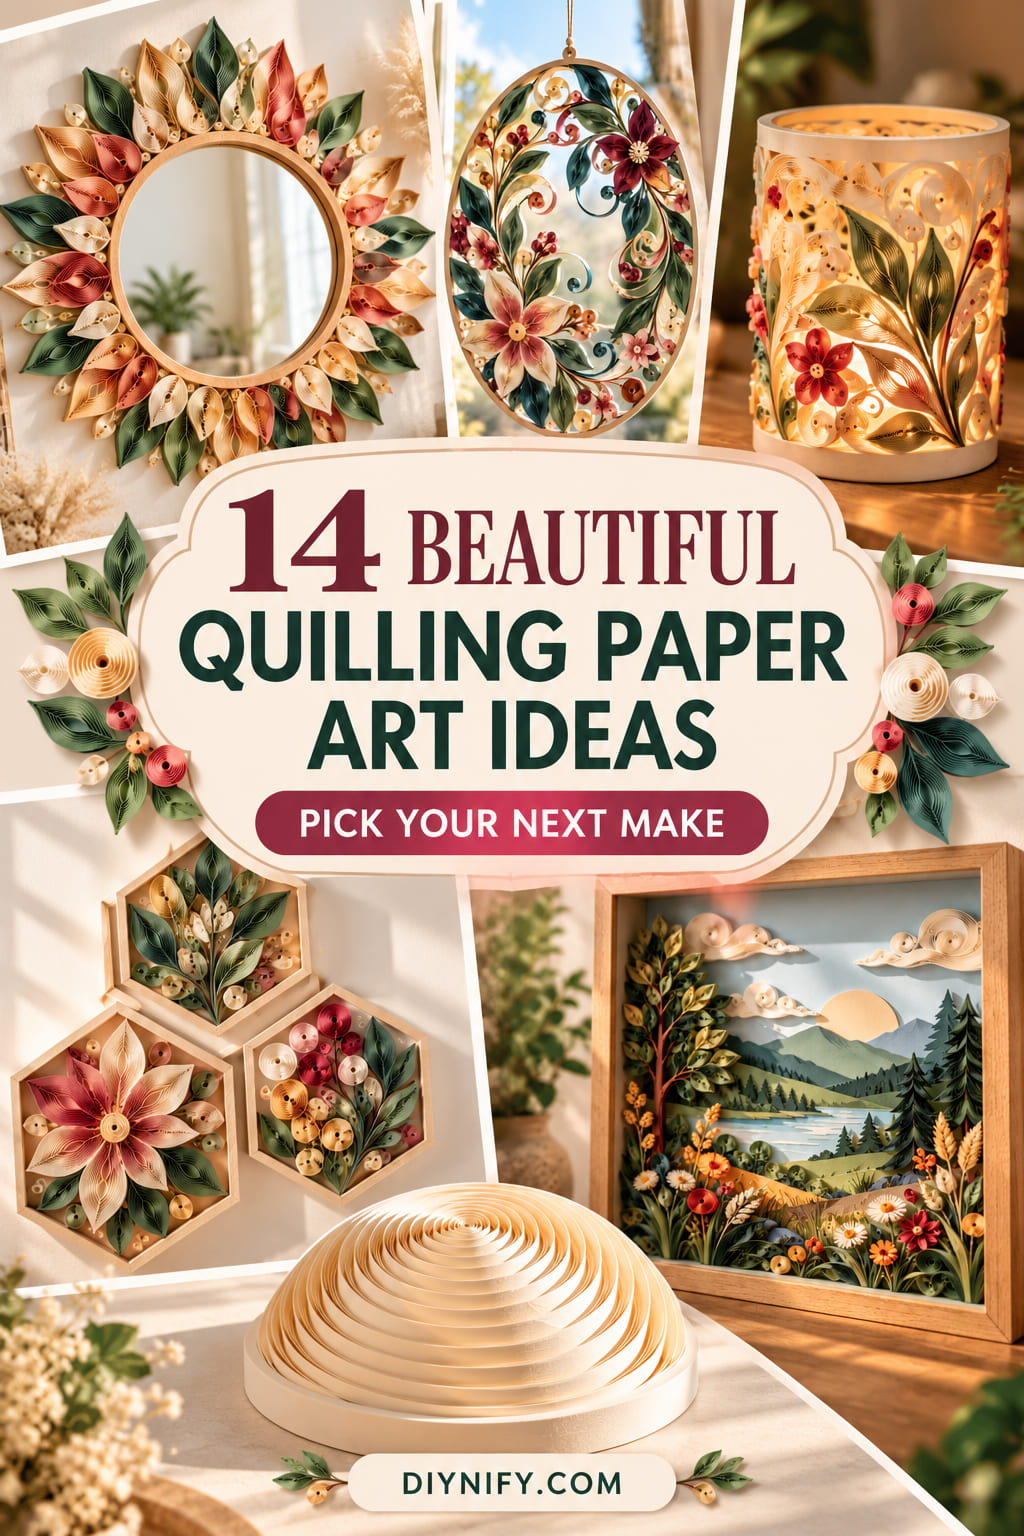
Quilling paper art turns narrow paper strips into dimensional decor through coils, scrolls, pinched shapes, and carefully controlled negative space. Instead of limiting the technique to small cards or ornaments, these ideas use quilling for wall pieces, shelf decor, hanging designs, light-based accents, and functional objects that protect the delicate paper where necessary.
Most projects use quilling strips, a slotted or needle tool, tweezers, cardstock or another rigid paper backing, and paper-safe adhesive. A few designs need additional structure such as a shadow-box frame, paperboard ring, cord, mirror, clock movement, vellum, clear protective sheet, or cool battery-powered LED light. For an easier first project, start with the botanical panel, letter, or planter collar; moving, illuminated, and layered pieces require more attention to support and clearance.
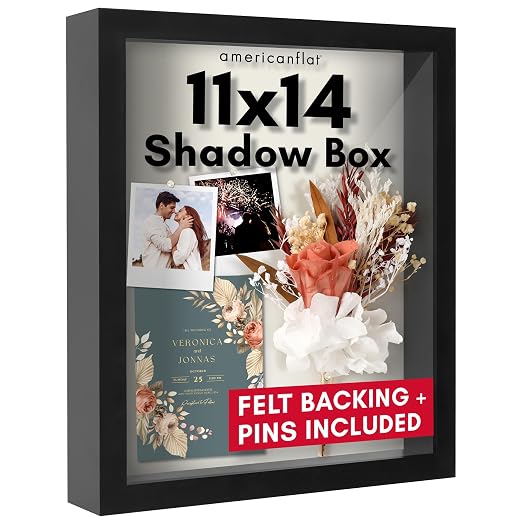
1. Quilled Botanical Branch in a Shadow-Box Frame
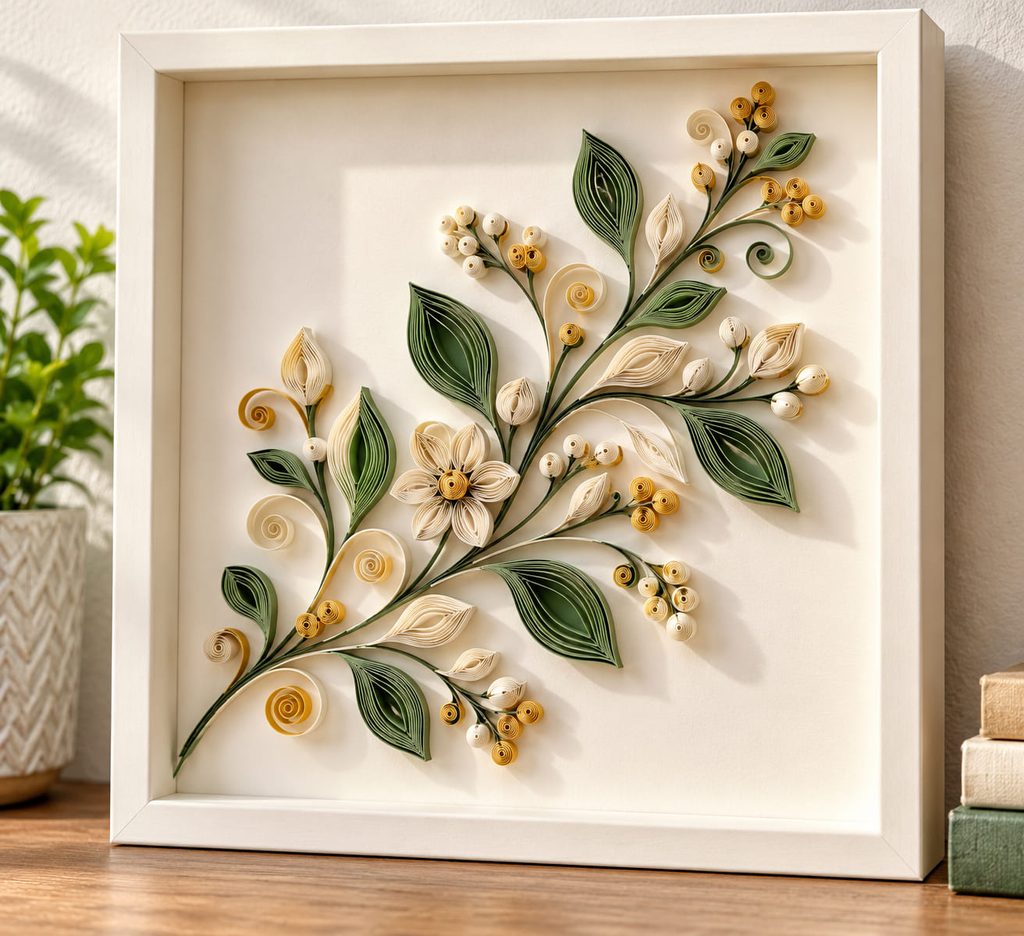
For a narrow wall or small frame, a botanical branch gives quilling room to show line and texture without filling the entire composition. Use loose coils and marquise shapes for leaves, tight coils for buds, and open scrolls to carry the stem direction across a rigid backing. Leaving clear space around the branch keeps the upright paper edges readable from across the room.

Build the stem path first, then attach leaf groups where the line changes direction. Use tiny glue points only where paper touches the backing; pooled adhesive can flatten the shadows that make quilling paper art feel dimensional. A shallow shadow-box frame protects the raised edges without pressing them against glass.
2. Radial Quilled Sunburst Mirror Border
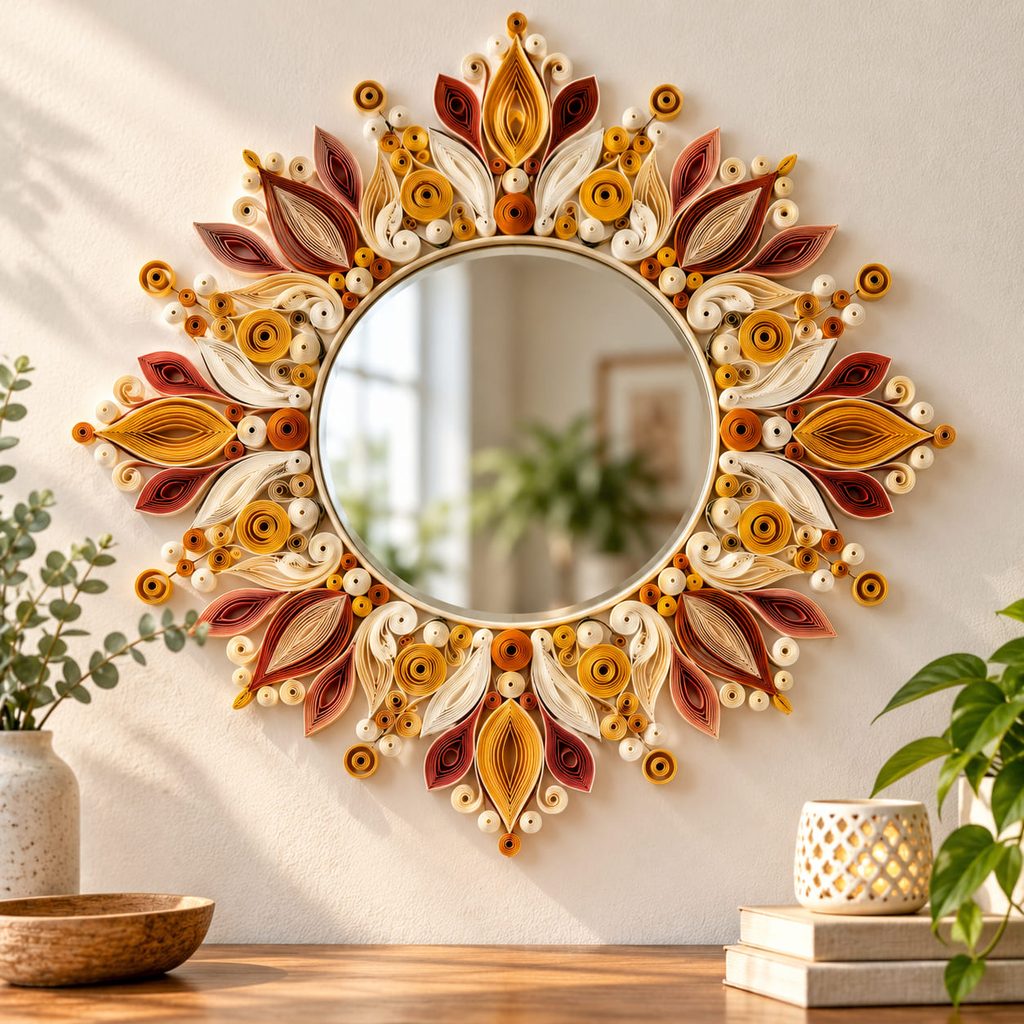
Instead of adding paper directly to the mirror, build a radial quilled border on a separate rigid backer. The backer carries the paper and provides the hanging strength, while the mirror remains a visual center rather than a structural anchor.
- Mark an even ring around the mirror opening on the backer.
- Repeat two or three quilled units—such as teardrops, scrolls, and tight coils—around that ring.
- Dry-fit the complete pattern before gluing so the final gap does not become noticeably larger or smaller.
- Mount the mirror to the backer with a method appropriate for the mirror backing, then hang the finished piece from the rigid support.
A repeating unit works better than improvising every ray. Small variations in coil size are charming; drifting radial spacing is much more noticeable because the eye automatically compares opposite sides of the circle.

3. Freestanding Quilled Letter for a Shelf
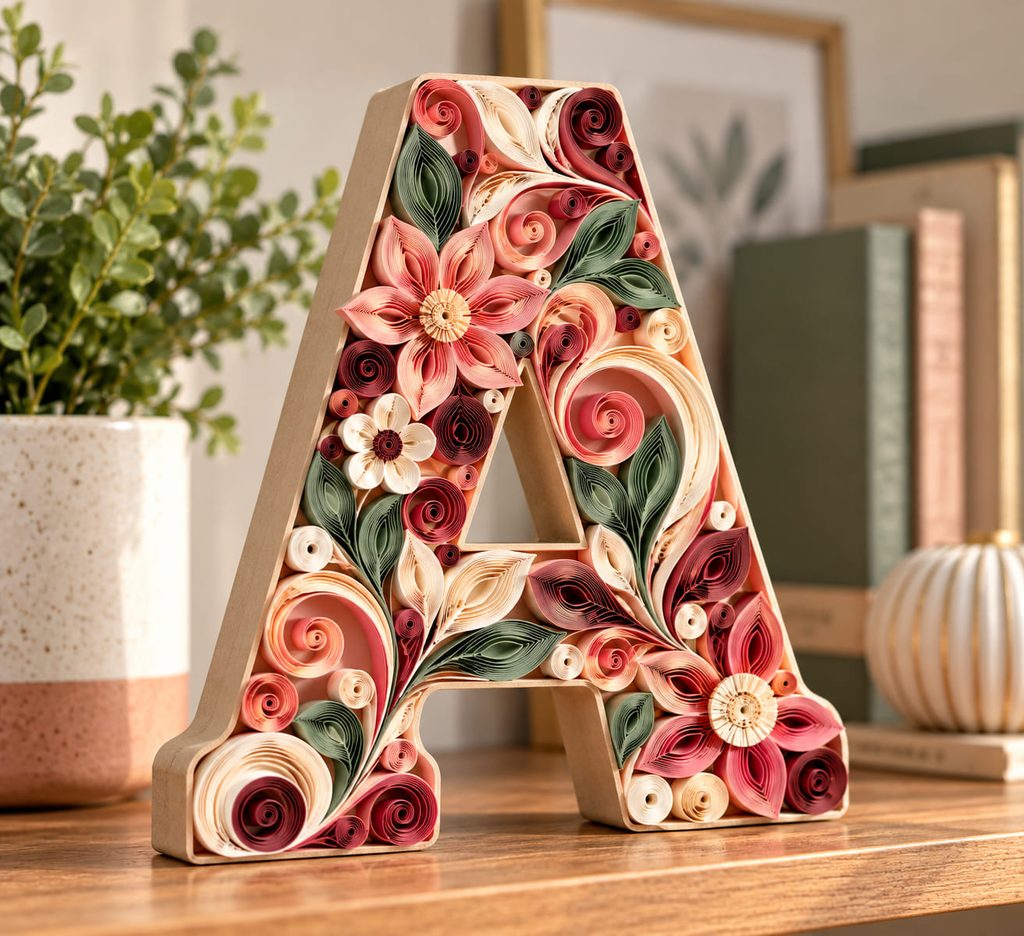
Start with a hidden paperboard core if you want a dimensional quilled letter to stand safely on a shelf. Cut two matching letter faces from heavyweight card, connect them with narrow spacer strips, and decorate the front with coils, scrolls, or edge-set paper strips. The core gives the object a stable footprint while the quilled surface supplies the fine detail. Keep the densest coils low and near the center of the letter so the piece does not become top-heavy, and make the bottom edge wide enough to sit flat without a separate stand.

4. Openwork Leaf-and-Flower Quilled Wreath
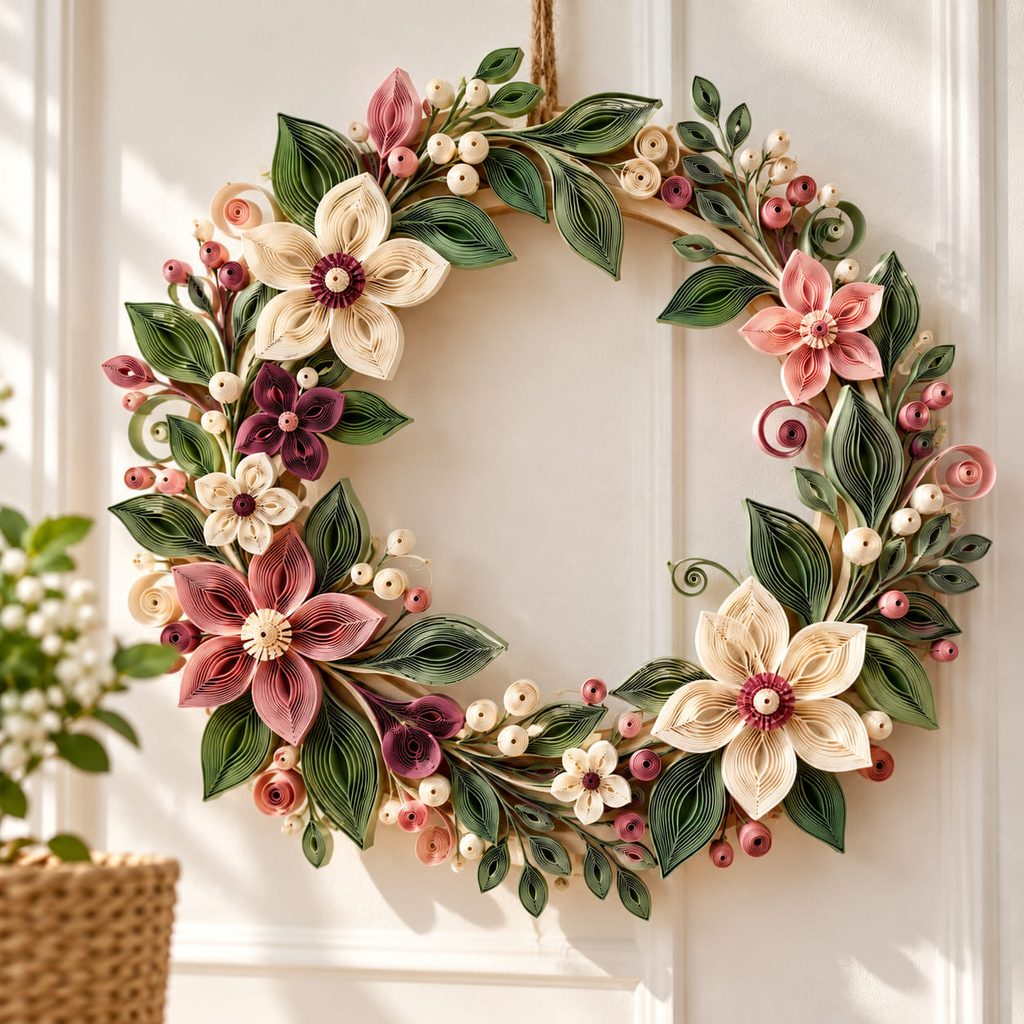
There are two useful ways to approach a quilled wreath, and they produce very different results. A dense floral wreath uses clustered leaves, petals, and coils to hide most of a rigid paperboard ring; it feels lush but needs more pieces and more glue points. An open filigree wreath lets the ring remain visible between repeated quilled motifs, reducing weight and giving the negative space a deliberate rhythm.
For a wall or interior door, the open route is often easier to keep crisp because fewer paper edges can snag. Whichever style you choose, attach the hanging loop to the rigid ring, not to a quilled leaf or flower. Before hanging, hold the wreath vertically and check whether heavy clusters twist the ring forward; shifting one dense group closer to the bottom can restore balance without changing the whole composition.
5. Balanced Quilled Medallion Mobile
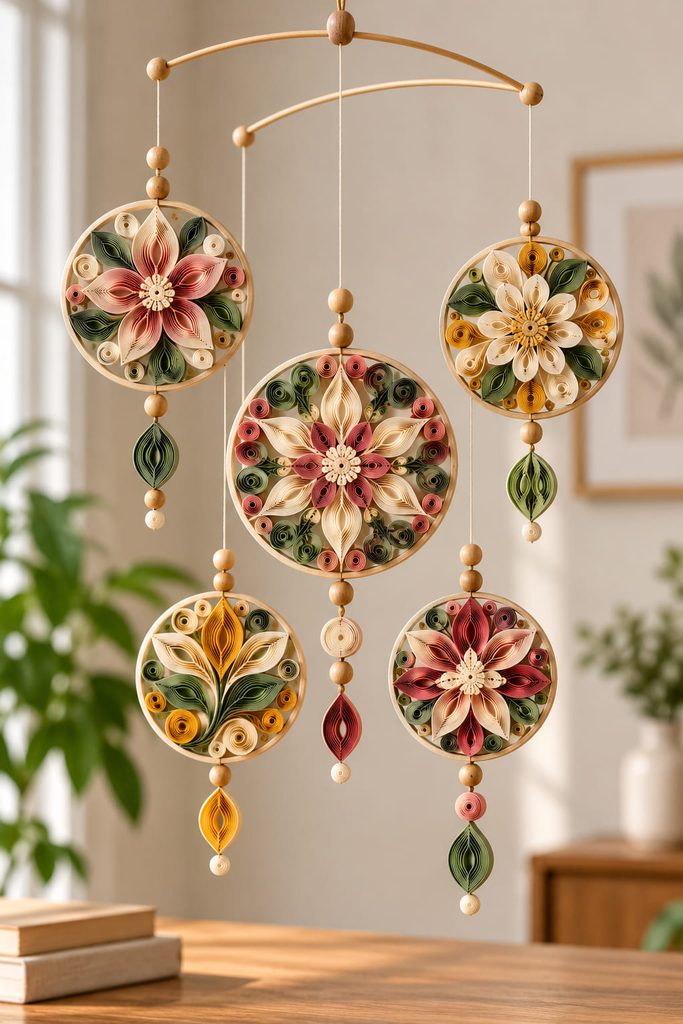
Movement changes the way quilling is read. In a mobile, each medallion needs to look finished from more than one angle, so glue a second lightweight paper circle behind delicate quilled work or sandwich the quilling inside a thin cardstock rim. That backing keeps open coils from deforming where the thread is tied.
- If one side dips, shorten the line on the low side or move its attachment point inward.
- If the whole arm tilts, rebalance the suspended pieces before adding more weight.
- If a medallion spins into another, increase vertical spacing rather than making the pieces smaller.
The goal is not perfect stillness; it is enough clearance for each paper element to move without catching its neighbor.
6. Quilled Vellum Lantern Sleeve for LED Light
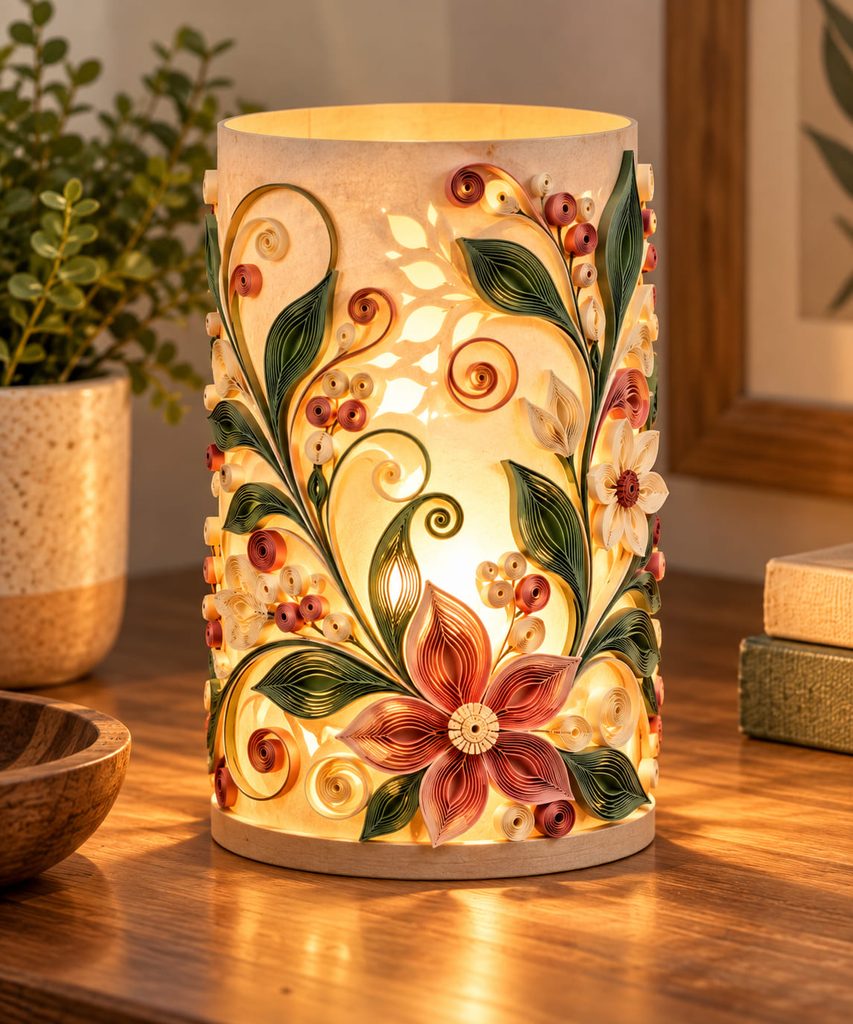
Quilled openwork can cast delicate shadows when it sits on a translucent vellum sleeve around a cool battery-powered LED light. Build the vellum cylinder first, leaving an opening or removable seam so the light can still be reached. Then add quilled scrolls and coils to the outside, concentrating detail near the lower half and leaving larger clear areas where light should pass through.
Keep this project strictly in the cool-LED category. Paper quilling should not surround an open flame or a hot bulb. The sleeve also needs enough diameter that the paper decoration does not press against the light source.

Light-Path Check: switch on the LED before the last decorative pieces are glued. If the center looks muddy, remove one or two dense coils from the brightest zone. The contrast between open vellum and edge-on paper is what gives the lantern its patterned glow.
7. Quilled Paper Wall Clock With a Clear Hand Path
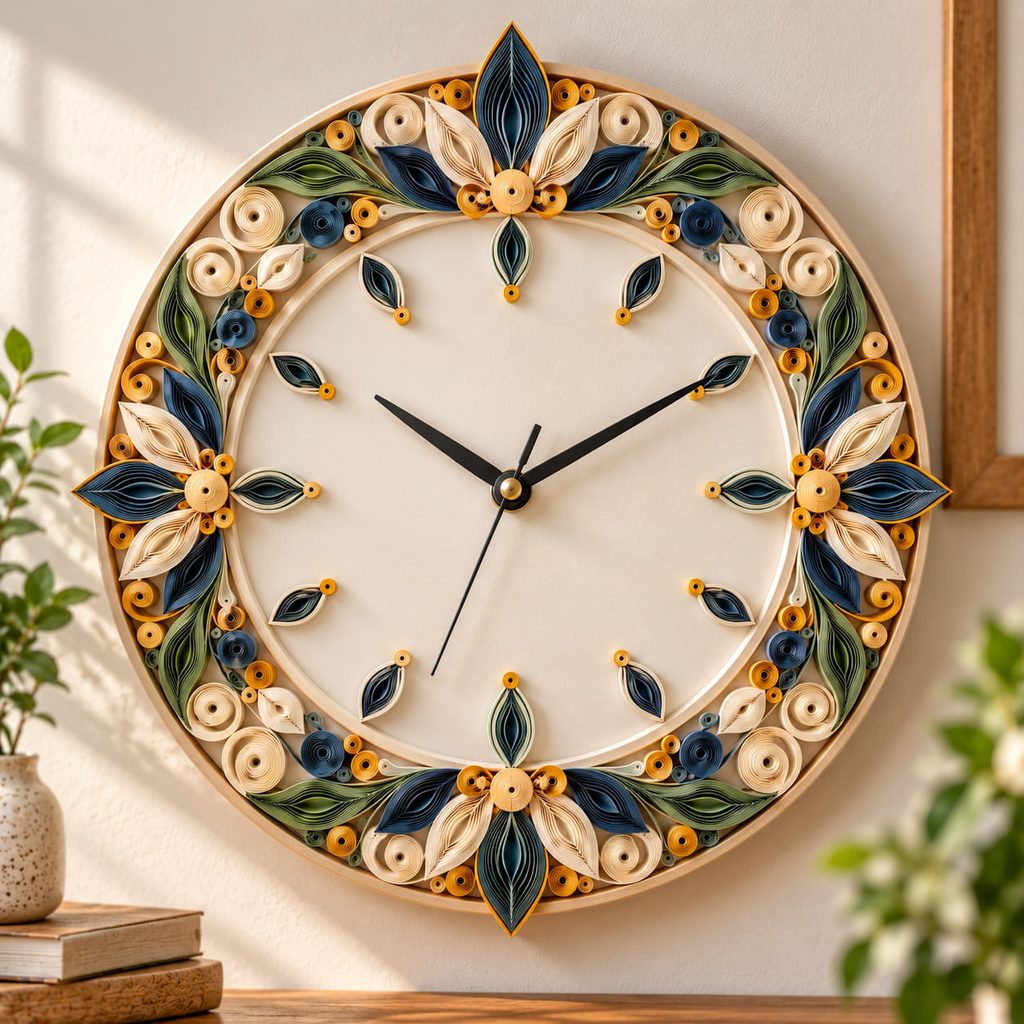
A quilled clock works only if the decoration respects the moving parts. Start with a rigid clock face or backer and install the clock mechanism through the center before placing any paper. Mark the full sweep of the hour and minute hands, including their height above the surface, and keep that circle free of raised coils.

The most practical design is a quilled outer ring rather than a filled center. Repeated marquise shapes can act as hour markers, while larger clusters at 12, 3, 6, and 9 make the face easier to read from across the room. The quilling adds relief without forcing the hands to pass over uneven paper.
This is a good place to favor restraint over density. If a beautiful scroll intrudes into the hand path, move it outward; trimming or crushing it after assembly will be much more noticeable than a slightly wider decorative ring. Hand-Clearance Check: before final assembly, rotate the hands manually through a full circle and view the clock from the side as well as the front. This catches tall coils that look safely outside the printed markers but still rise into the hand plane. Keep the battery compartment and any adjustment wheel accessible from the back.
8. Glass-Protected Quilled Tray Insert
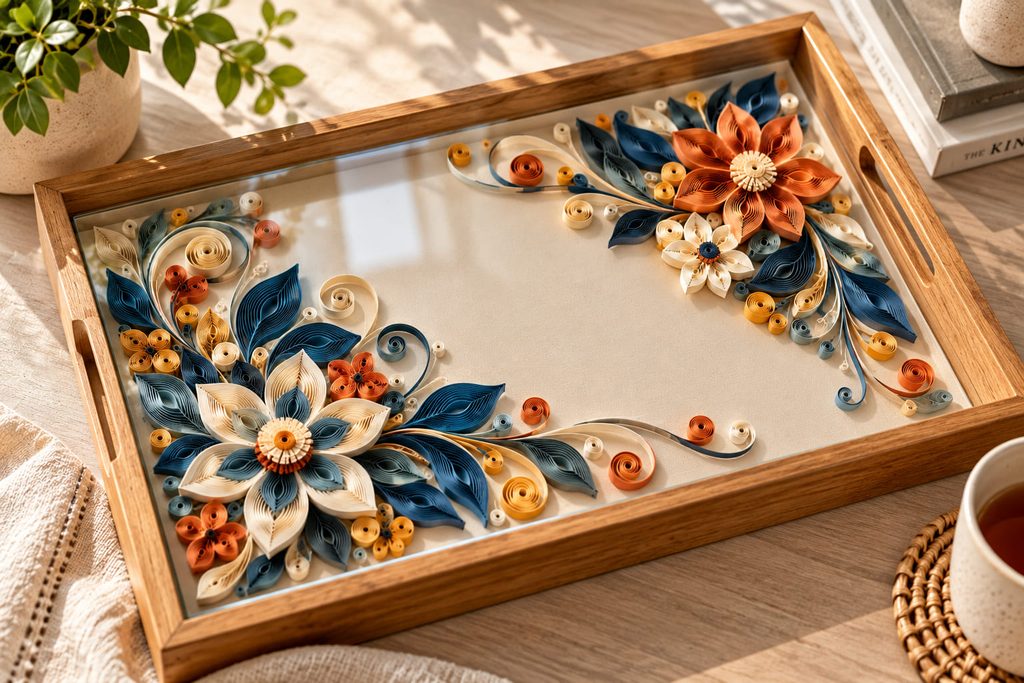
Exposed quilling is too delicate for a working tray surface, but it becomes practical when the paper sits beneath a clear protective layer. Build the artwork on a flat insert sized to the tray base, then cover it with fitted glass or another clear rigid sheet so cups, keys, and cleaning cloths never touch the coils.
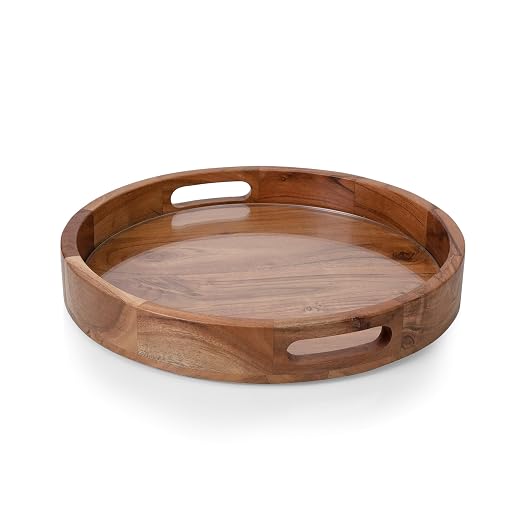
For a calm look, use one off-center motif with generous negative space. For a patterned effect, repeat compact coils around the border and leave the middle quiet. Because the clear cover adds reflections, dense quilling can become visually busy; a simpler composition usually reads better once the protective layer is in place.
9. Modular Hexagon Quilled Wall Tiles
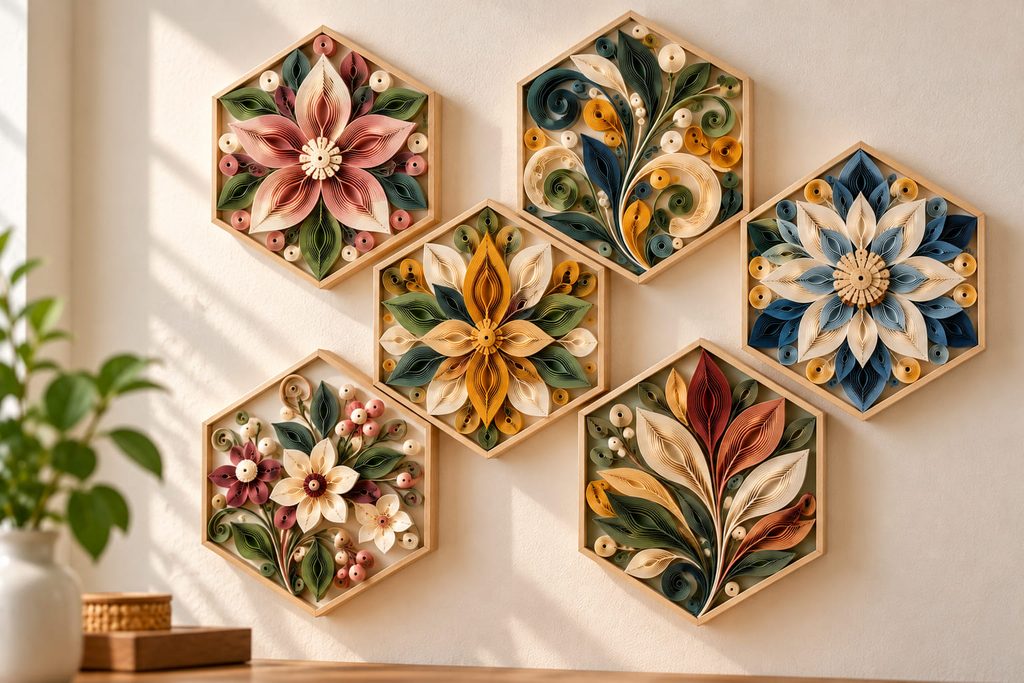
Small hexagonal backers make it possible to build a large quilled wall installation in stages. Give each tile its own arrangement—one may use concentric coils, another a fan of teardrops, another a sparse line of scrolls—but keep one shared rule such as paper width, background color, or edge margin. The repeated tile shape creates the grid; the quilling supplies variation inside it.
Before gluing anything to the wall, arrange the finished tiles on the floor and decide whether they will touch, float with equal gaps, or form an irregular cluster. Equal gaps look architectural, while mixed spacing feels more organic but is harder to align.
Layout Check: photograph the floor arrangement from directly above. Strong accidental stripes or one unusually dark tile will be easier to spot in the photo than while standing over the pieces. Repositioning a tile at this stage is far easier than remaking its quilling. Mount every tile by its backing, never by a quilled element. Removable wall strips can suit lightweight backers when they are rated for the wall surface and load; heavier tile bases need an attachment method appropriate to the wall. Keeping the mounting method identical across the group helps the tiles sit at a consistent depth.
10. Reinforced Quilled Mantel Garland
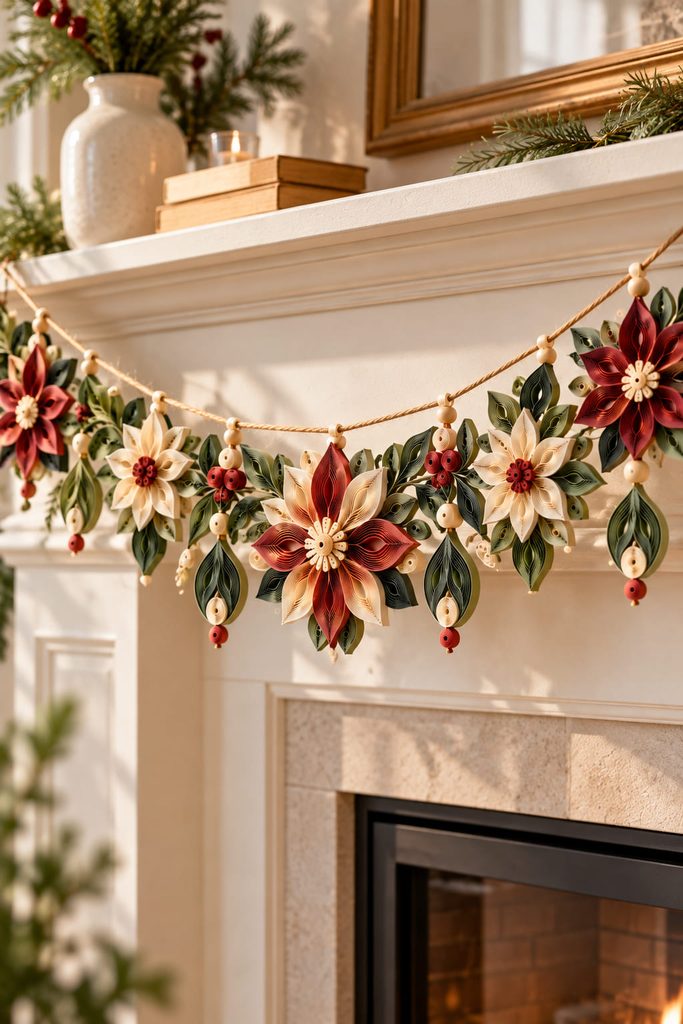
Across a mantel or shelf edge, the hanging system should stay simple enough that the quilled motifs remain the focus. Make a sequence of small reinforced medallions, leaf clusters, or geometric frames, then attach each one to a cord at two points so it faces forward instead of spinning edge-on. Two-point suspension also helps distribute the load across the paper frame.
Use this quick checklist before hanging:
- each motif has a rigid rim or backing where the cord connects;
- spacing is generous enough that neighboring coils do not rub;
- the end loops are attached to the cord, not to decorative paper;
- the finished span has a gentle drape instead of pulling every motif into a straight, tense line.
A mantel, shelf edge, or interior window frame gives the garland enough distance to read as one composition while still letting the small quilled details reward a closer look.
11. Removable Quilled Planter Collar
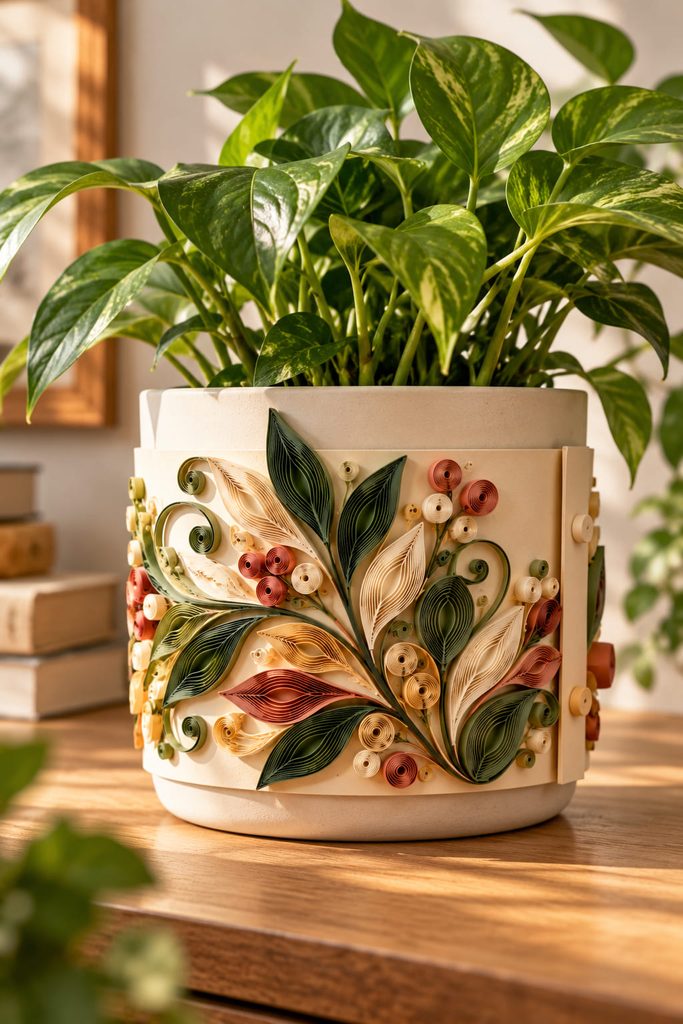
Quilling can wrap a planter without becoming part of the wet pot itself. Create a removable cardstock collar for a dry cachepot, then build the design while the collar lies flat. A vertical band of leaves or scrolls turns the pot into a display piece, yet the paper can be removed whenever the plant is watered.
A narrow front-facing panel is easier on curved containers than a dense full wrap because fewer coils have to follow the bend. Leave a tab at the back instead of gluing paper permanently to the pot, and keep the quilling outside the watering path and away from saucers where splashes collect.
12. Layered Quilled Landscape Shadow Box

Depth is the point of a quilled shadow-box landscape, so plan the scene as separate foreground, middle, and background zones. Quilled trees, grasses, or waves can sit on the front plane, while cut-paper hills or clouds on spacers establish larger shapes behind them. The result depends on controlled distance, not on packing every layer with coils.
Build from back to front so later elements never block access to earlier glue points. Keep the deepest spacer gaps behind broad shapes; tiny quilled details need a firmer support plane or they can appear to float without purpose. A shallow paper ledge at the base can also hide spacer edges and visually anchor the foreground.
Before closing the frame, test the scene under the side lighting it will actually receive. If the front quilling casts one solid dark band, reduce density or stagger the heights. If the layers collapse visually into one plane, increase the spacing between the large background shapes rather than simply adding more paper detail.
13. Openwork Quilled Window Hanging
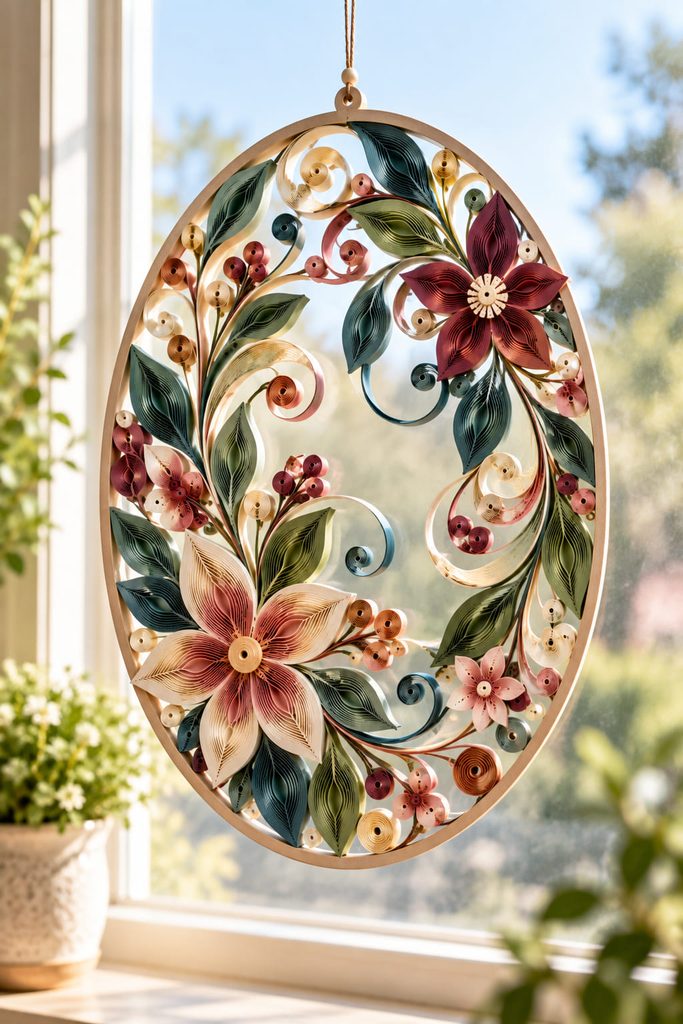
Against a bright window, open quilling can read like filigree, but the load should still be carried by a stable outer frame. A cardstock hoop, oval, or narrow geometric frame gives you a secure place for the hanging thread and lets scrolls bridge inward from several directions.
Choose larger open shapes than you would for a small framed piece. From a few feet away, generous loops and negative spaces stay legible while tightly packed coils merge into a dark patch. Hang the finished piece where it can glow with ambient daylight but is not exposed to condensation or repeated splashes.
If the frame twists when suspended, add a second thread point or reinforce the top edge with another matching paper layer. The quilled center should remain decorative; the outer frame should handle the load. Paper also changes color under prolonged strong sunlight, so this is better treated as a decorative window accent than a permanent UV-proof suncatcher. If preserving color matters, choose a position with bright indirect light or rotate the hanging periodically rather than relying on saturated strips to stay unchanged.
14. Shallow Spiral Quilled Dome Sculpture
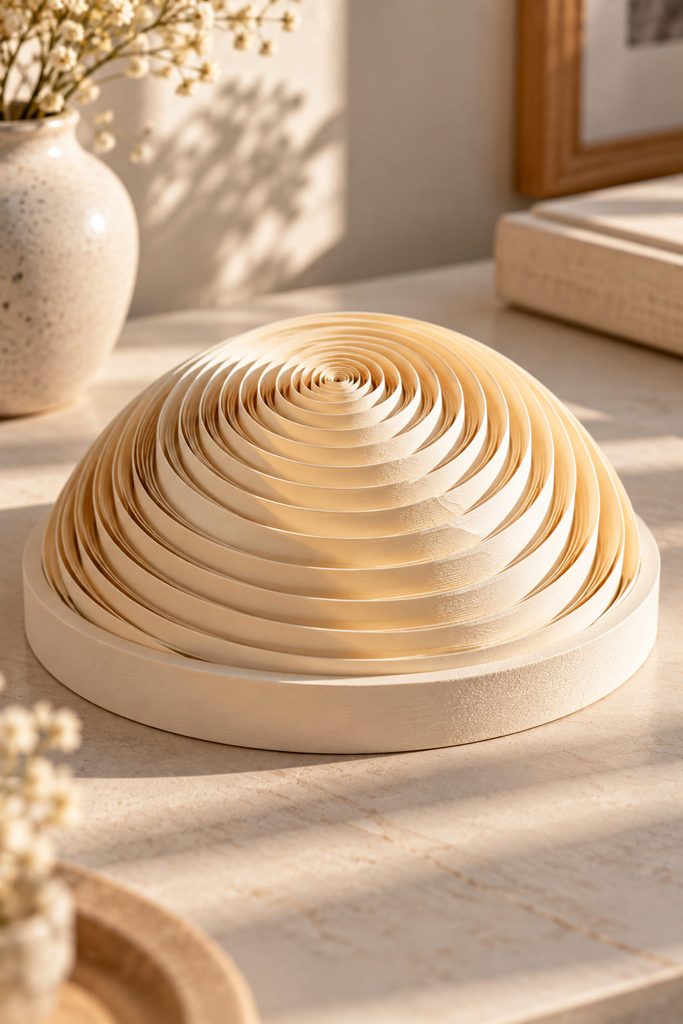
One continuous spiral can become a small tabletop sculpture when a large tight coil is shaped into a shallow dome. Start with a large, tightly wound circular coil made from joined paper strips, glue the final strip end, and let the coil set flat. Then press gradually from the center to form a low dome, supporting the outside edge so the rings expand evenly instead of stepping abruptly.
The safer goal is a decorative shell, not a load-bearing bowl. Seat the dome on a wide cardstock ring or low pedestal so the curved coil does not rock on the table. If one ring begins to separate while shaping, stop and ease the dome flatter before reinforcing the underside with a thin layer of paper-safe adhesive.
A restrained height shows the spiral clearly and keeps the paper under less stress. The visual payoff comes from the continuous concentric edge pattern, especially when side light catches the tiny steps between rings. Dry-fit the shaped dome on its base before securing anything. A dome that touches the ring at only one or two points will wobble; a broad, even contact line distributes the shell’s weight and keeps the spiral centered. If the base looks too bulky, widen the ring rather than making the dome steeper.
How to Keep Quilling Paper Art Clean and Dimensional

The easiest way to lose the crisp character of quilling is to use more adhesive than the paper needs. Small contact points preserve the upright edges and the narrow shadows between coils. Keeping strip widths consistent within one visual area also helps individual shapes feel related even when their sizes and forms change.
Think about protection according to where the finished piece will live. Framed work can sit behind a deep frame, working surfaces need a clear barrier, hanging pieces need reinforced attachment points, and projects near plants or windows need distance from moisture. These choices let the paper stay visually delicate without asking the quilled elements to perform structural jobs they were never meant to handle.
Choose the Finished Job Before the Motif
A useful way to choose your first project is to decide what you want the paper to do. Pick the botanical panel for controlled relief, the wreath or garland for repetition, the mobile for movement, the lantern for light, or the shadow box when you want to combine quilling with deeper layered construction.
If dimensional paper decor is the direction you want to continue, the next useful collection is 20 Stunning 3D Paper Art Ideas for Handmade Decor, where quilling sits alongside folded, layered, suspended, and sculptural paper techniques.