This post contains affiliate links. As an Amazon Associate I earn from qualifying purchases, at no extra cost to you. Thank you for supporting Diynify!
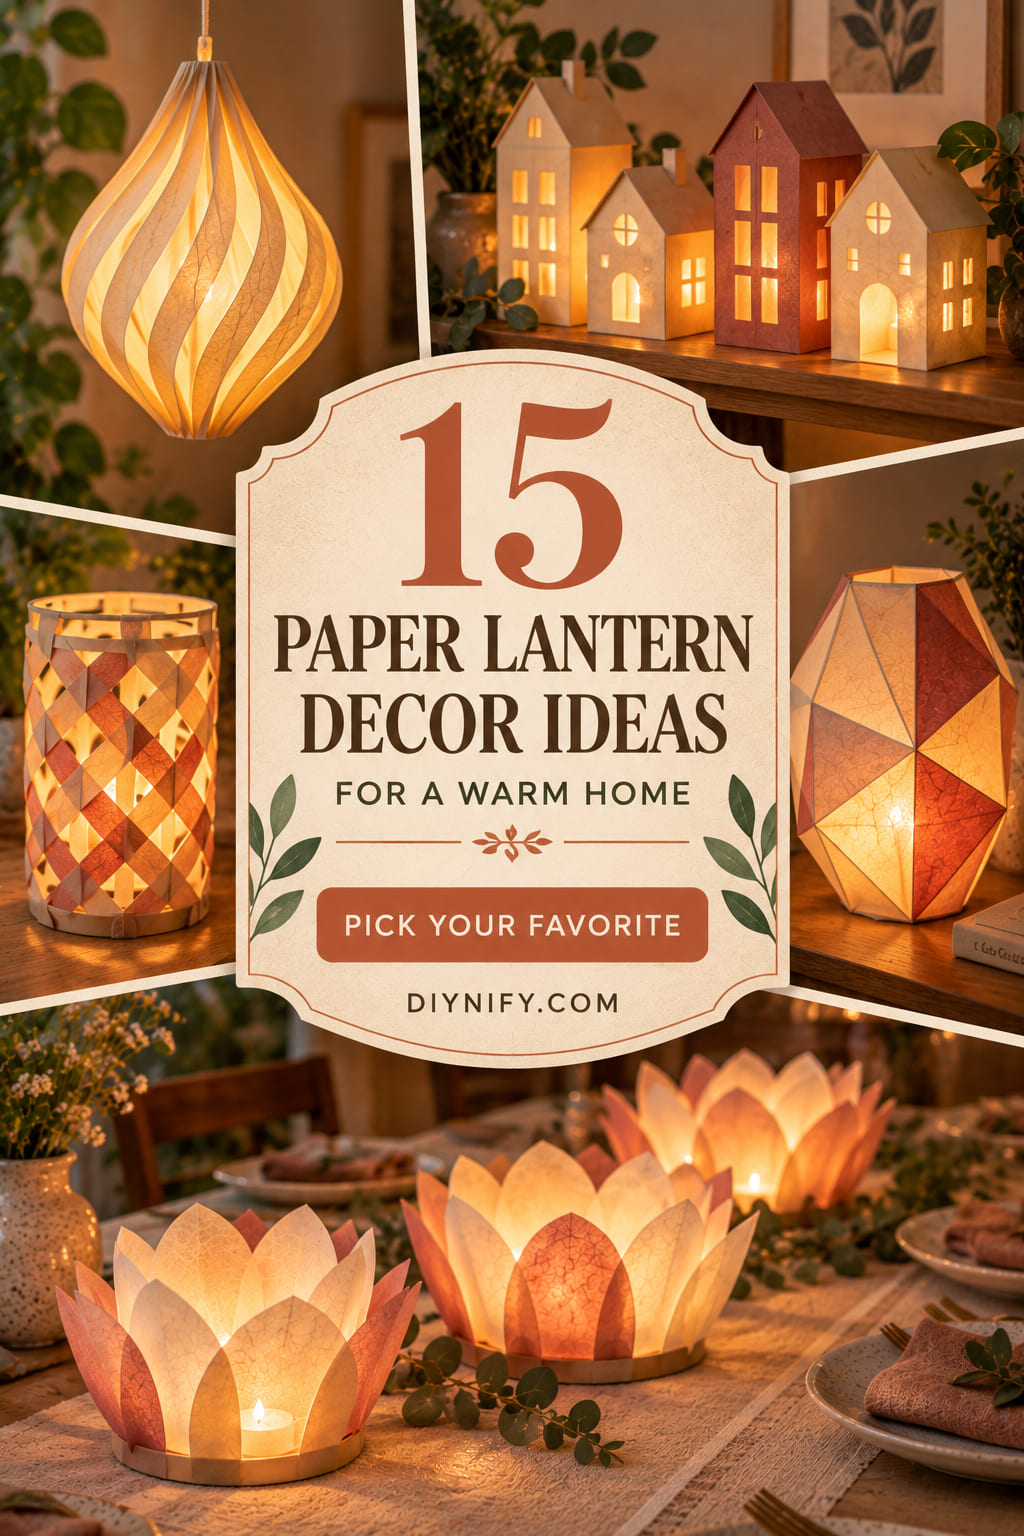
Paper lantern decor can make a room feel warmer without asking every project to look like the same glowing cylinder. These 15 ideas use pleats, weaving, pierced openings, layered cut paper, honeycomb cells, folded geometry, quilling, and collapsible structures to change both the shape of the lantern and the way light moves through it.
Most projects use cardstock, vellum or another translucent paper, scissors or a craft knife, a ruler or scoring tool, and paper-safe adhesive. Individual ideas may also need tissue or kraft paper, thread or cord, paperboard rings, chipboard, quilling strips, a dowel, a battery micro-LED string, or a cool-running battery LED. The illuminated projects below are designed around flame-free light rather than candles or hot bulbs.

Choose by the effect you want in the room: translucent surfaces give a broad soft glow, cutouts and weaving create more graphic patterns, hanging designs preserve table space, and fold-flat constructions make sense when storage matters.
1. Pleated Vellum Drum Lantern for a Console Table
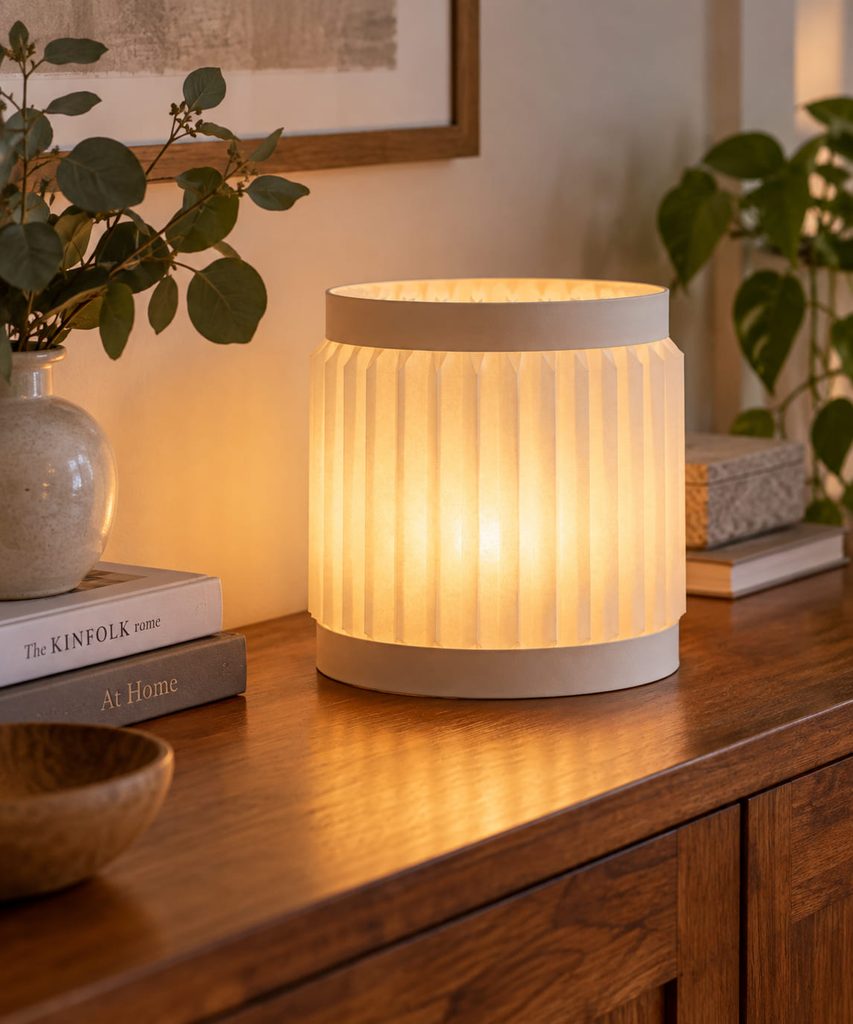
Soft light works especially well on a console when the lantern has enough structure to look finished even while it is switched off. Score a wide sheet of translucent vellum into narrow vertical pleats, then wrap it around two cardstock rings so the pleats cannot collapse inward. A narrow outer sleeve of warm white or oatmeal cardstock can hide the ring edges without covering the glowing center.
Keep the bottom ring broad enough to sit flat, and leave the center open so a cool, battery-powered LED puck or tea light can be inserted and removed without crushing the pleats. If the light source is visible through the vellum, add a short inner diffuser cylinder rather than another decorative layer; that softens the bright spot while preserving the vertical ribbed texture.
2. Tiny House Lantern Village for a Bookshelf
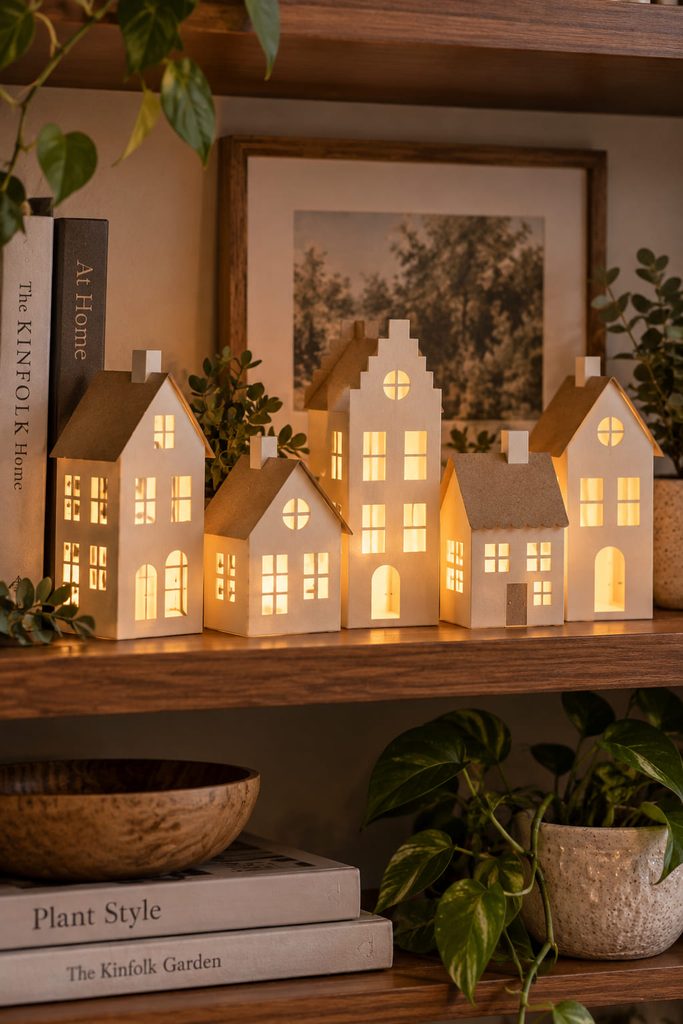
A row of small paper houses can turn one shelf into a quiet evening vignette, but each house needs to function as a real lantern rather than a closed paper box. Use heavier cardstock for the walls, cut generous windows before assembly, and back those openings with vellum. Build the floor as a shallow tray so the walls register squarely instead of drifting out of alignment.
- Score and fold the wall strip, keeping the roof tabs unglued.
- Attach the walls to the tray base and add the vellum window liners from inside.
- Close the roof around a removable tab or rear flap rather than sealing every edge.
- Set a separate cool LED inside only after the shell is complete.
Vary roof height, footprint, and window rhythm rather than simply changing colors. The village reads as a collection because the houses share material and light quality, while the different silhouettes keep the shelf from looking like a row of identical favor boxes.

3. Woven Paper Strip Lantern With an Open-Weave Glow
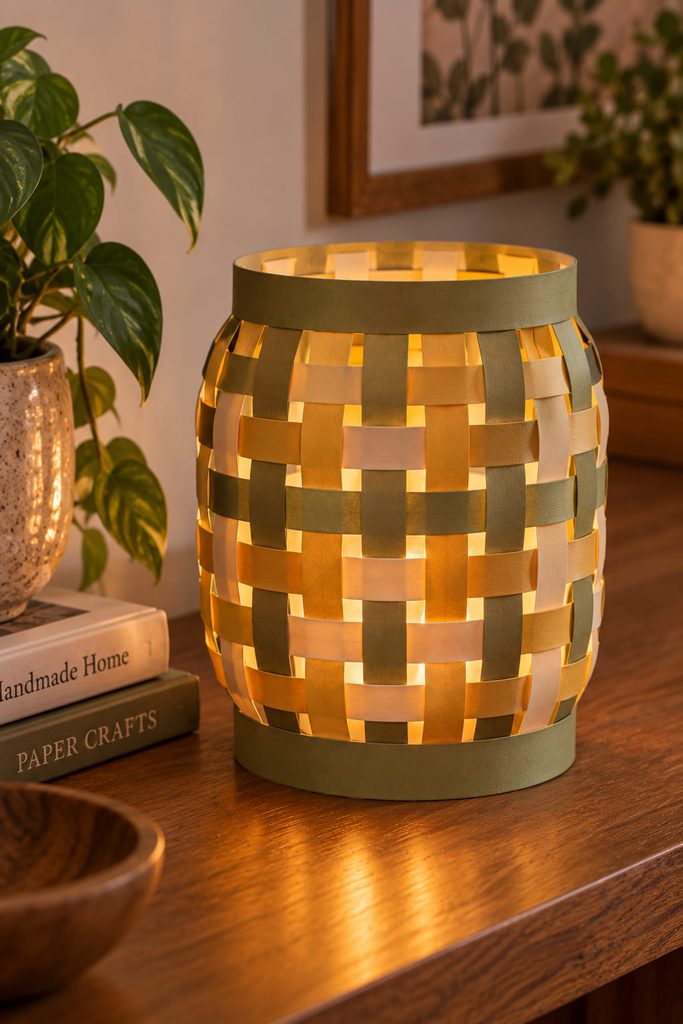
The weave itself can control how much light a lantern releases. Build a light cardstock cylinder first, add narrow vertical ribs between top and bottom rings, then weave paper strips over and under those ribs. The frame carries the shape; the woven strips create the surface pattern, so they do not need to be pulled tight enough to deform the cylinder.

- Loose weave: wider slits release stronger bands of light and make the over-under path obvious.
- Tight weave: the surface feels more textile-like and hides the inner diffuser, but it can darken the lantern quickly.
For a warm home accent, combine the woven shell with a separate vellum liner and a cool battery LED so the pattern remains visible without exposing a harsh point of light.
Light-Path Check: Hold the unlit lantern near a window. If very little daylight passes through the weave, widen a few intervals before adding the vellum; a fully packed surface will also suppress the LED glow.
4. Layered Botanical Cutout Lantern Box
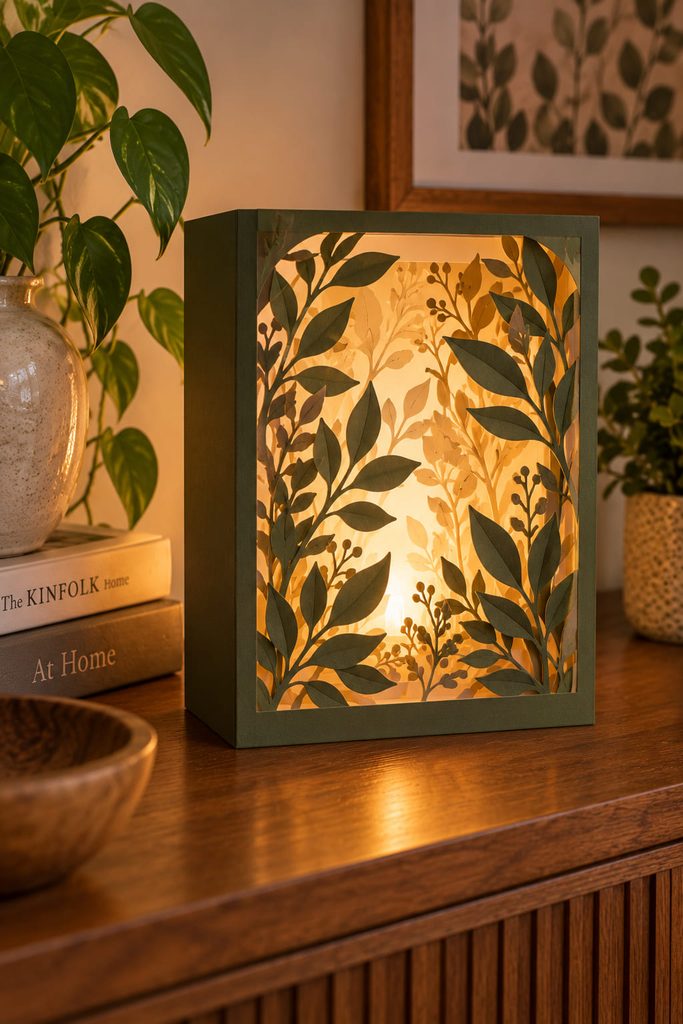
Instead of wrapping decoration around a cylinder, treat the lantern as a shallow illuminated paper box. Cut a bold leaf or branch opening in the front panel, place a simpler second cut layer behind it, and separate the two with narrow cardstock spacers. A vellum back panel becomes the diffuser, while solid side walls keep the glow aimed forward.
The useful decision is depth, not the number of leaf shapes. Too many closely stacked layers turn the opening into a dark tunnel. Leave clear negative space around the main stems and test the front from normal viewing distance before closing the box. A removable base panel gives access to a cool LED and also lets the lantern stand securely on a sideboard or deep shelf.
5. Folded Star-Pod Lights for a Window Garland
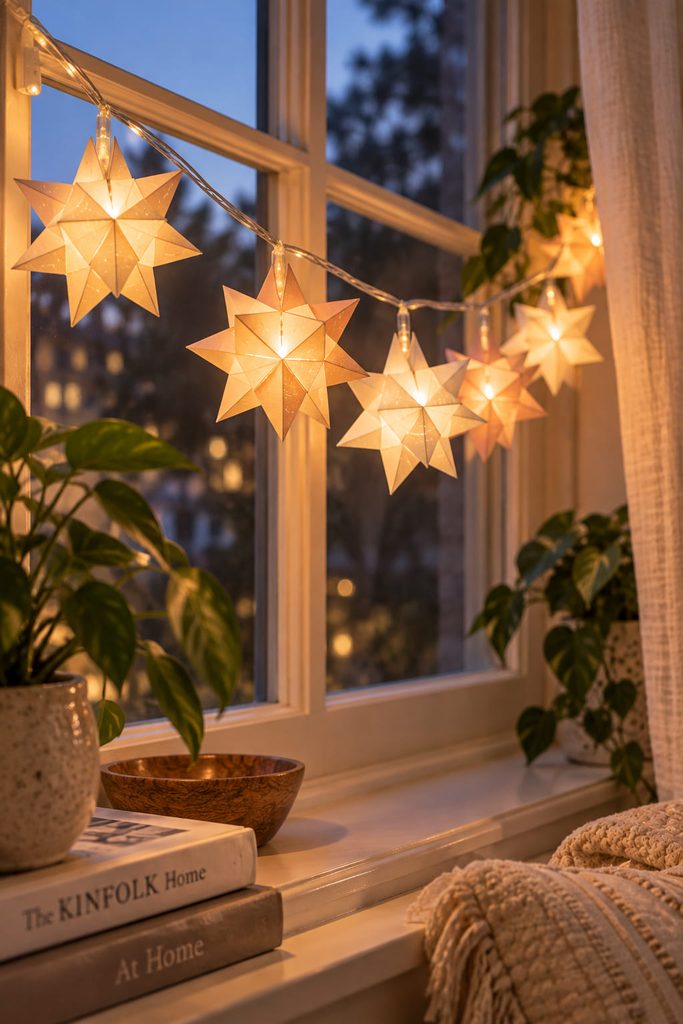
For a window, tiny lantern covers should stay light enough that the wire carries them without sagging into a heavy curve. Fold small translucent paper modules into faceted star or pod shapes and fit each one around a bulb on a battery-powered micro-LED string. The paper is only a shade; the light string remains the structural line.
Before hanging the garland, check:

- each pod closes around the wire without pinching or cutting it;
- adjacent covers have enough clearance to hang freely rather than stacking together;
- the battery pack remains reachable at one end;
- no paper encloses a hot bulb or plug.
Use slightly varied pod sizes only if the larger pieces still hang straight. In a window, the negative space between lights matters as much as the folds because it lets the individual shapes read from both inside and outside the room.
6. Suspended Ribbed Cocoon Lantern for a Reading Corner
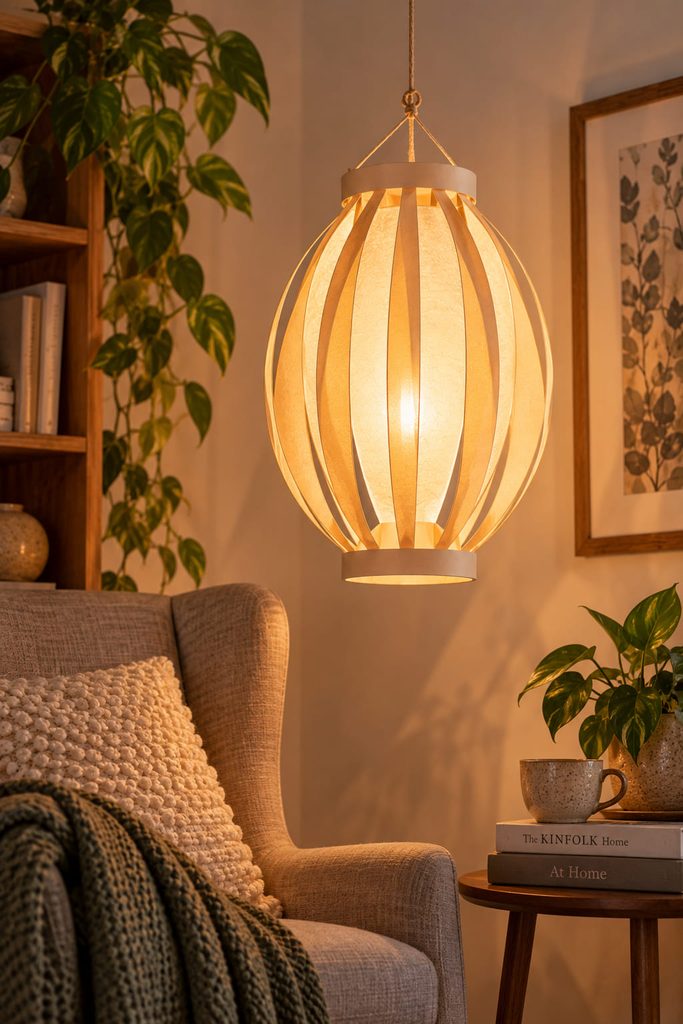
A hanging paper lantern can feel sculptural without relying on a ceiling light socket. The safer craft route is a lightweight ribbed shell suspended from its own cord, with a separate cool battery LED hanging in the center. Two paperboard rings establish the top and bottom openings; curved cardstock ribs bow outward between them to create the cocoon profile. Translucent paper strips can bridge selected gaps, but some openings should remain clear so the light has an uninterrupted path.
Build the shell in a sequence that protects symmetry:
- Mark matching attachment points around both rings.
- Glue opposite ribs first, then fill the spaces between them so tension stays balanced.
- Add translucent strips only after the rib cage hangs evenly.
- Suspend the LED from the top ring on an independent thread so its weight does not pull on a paper panel.
- Check that the LED can be removed from above without dismantling the shade.
The hanging point should sit directly over the lantern’s center of mass. If the cocoon tilts, do not hide the lean with a longer cord; compare opposite ribs and correct the side that is shorter or more tightly curved. A little air around the inner light also keeps the glowing center visually separate from the paper skin.
Balance Test: Hang the empty shell first. It should settle vertically before the LED is added; otherwise the light’s weight can exaggerate an existing twist.
7. Honeycomb Paper Lantern That Folds Flat for Storage
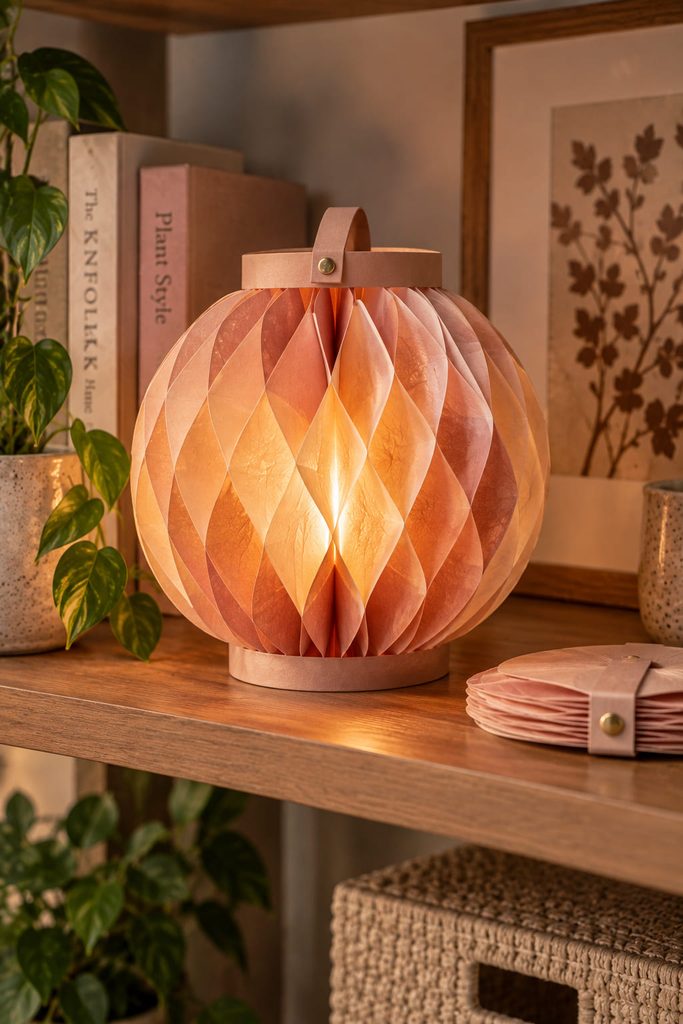
Honeycomb tissue paper earns its place in seasonal or occasional decor because the volume can disappear almost completely when the lantern is closed. Attach two half-honeycomb sections to a stiff central spine, then bring the outer covers together around a small separate LED base. Magnets are unnecessary; simple paper tabs or a reusable paper belly band can hold the open body in shape. The important check happens after the first full opening. Close the lantern again and make sure the honeycomb cells compress without catching on the base or tearing away from the spine. If the bottom edge drags, raise the honeycomb body slightly and let the LED sit on its own low platform rather than gluing the light into the folding structure.

8. Rolled Paper-Tube Column Lantern for a Floor Shelf
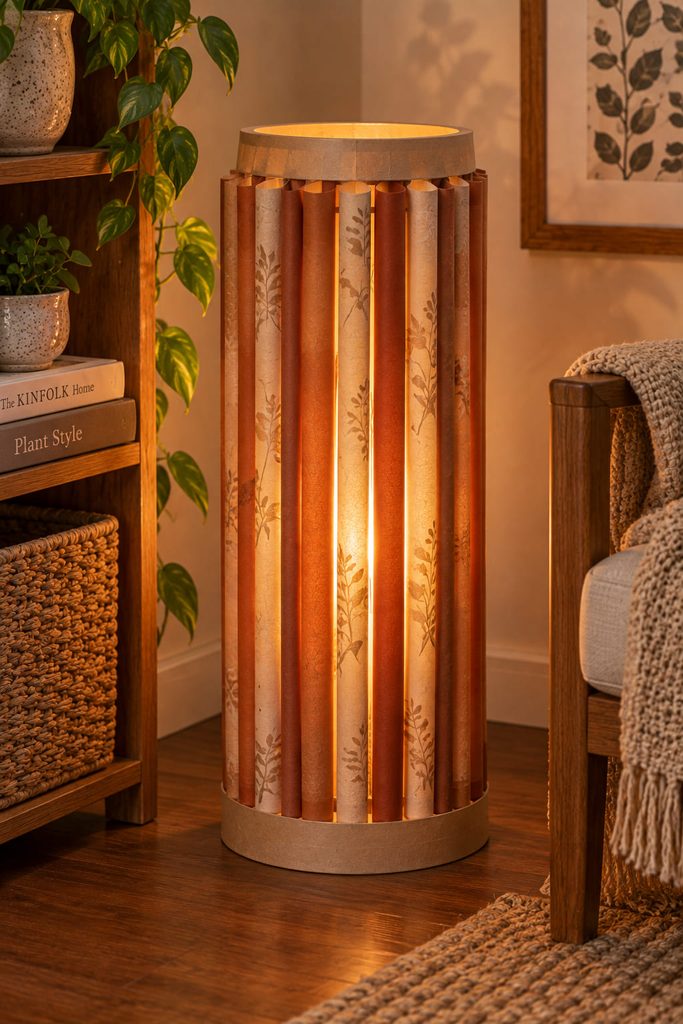
A taller lantern needs a rigid footprint before decorative paper tubes are added. Cut two matching chipboard or heavy-cardstock rings, join them with a few hidden straight supports, and place a vellum cylinder inside that frame. The rolled tubes then attach vertically around the outside like spaced wooden slats, creating a warm screen without carrying the lantern’s structural load.
- Roll all paper tubes around the same dowel so their diameters match.
- Dry-fit the first four at quarter points to confirm the frame stays round.
- Fill the remaining spaces, leaving visible gaps for light.
- Add a wide lower foot or recessed base disk so the tall body resists tipping.
- Insert a cool battery LED through the open top or a removable bottom panel.
For a low floor shelf, make the lantern broad rather than extremely tall. A narrow tower magnifies small alignment errors and becomes easier to knock over, while a slightly wider base lets the vertical rhythm do the visual work.
9. Pinhole Kraft Lantern for Quiet Patterned Light
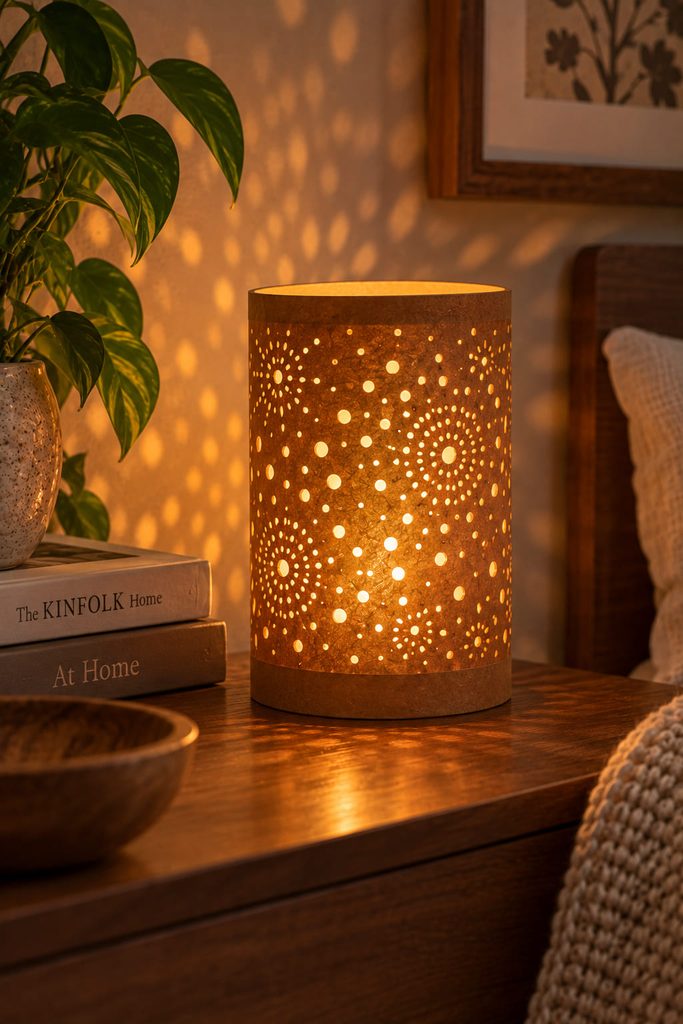
If a punched-paper lantern looks almost black when lit, the problem is usually not the LED—it is the ratio of solid paper to openings. Kraft paper gives a warm surface, but tiny holes spaced too far apart cannot release enough light to read as a pattern. Start with a simple constellation of larger and smaller punched holes, concentrating them in one area rather than covering every inch evenly.
Support the kraft with a translucent inner sleeve and a firm top and bottom ring so repeated punching does not leave the finished cylinder floppy. A cool battery light should enter through an open base or removable cap. Before sealing the side seam, test the sleeve in a dim room; if the motif disappears, enlarge selected holes instead of adding a brighter or hotter light source.
10. Faceted Geometric Lantern With Translucent Windows
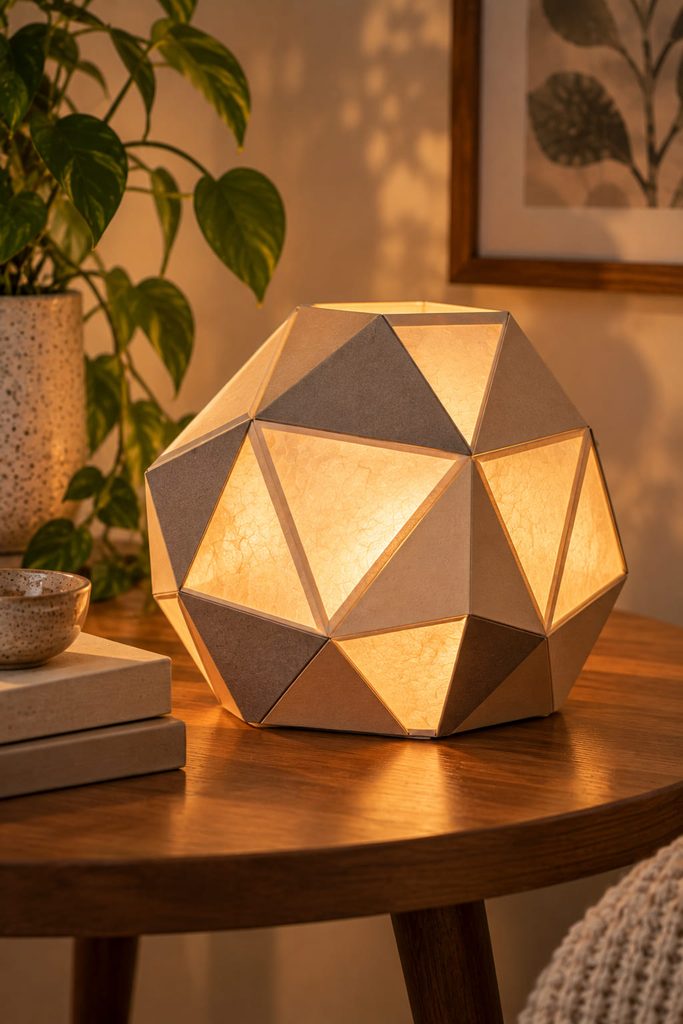
Crisp geometry makes a paper lantern look architectural, but it also exposes every scoring error. Build the shell as connected polygon panels with narrow glue tabs, then replace selected faces with vellum or translucent paper so the light escapes through deliberate windows rather than every seam. A squat polyhedron is easier to stabilize than a tall one and gives more room for an access hatch at the base.
If the finished shell looks twisted, diagnose it before forcing the last seam:
- One corner rises: a score line is probably off-angle; reopen that joint and realign the neighboring faces.
- The base rocks: one lower tab may be folded inside the footprint; flatten or trim it before adding the LED.
- A translucent panel buckles: the insert is too large or glued on all four edges under tension; remount it with a small paper allowance.
- The final seam will not meet: several earlier folds have accumulated error; release two adjacent tabs and redistribute the correction instead of stretching one panel.
A removable bottom facet is more useful than a permanently sealed shell. It lets the lantern keep its clean silhouette while preserving access to a cool battery light.
11. Arched Paper Wall Lantern Over a Battery Puck
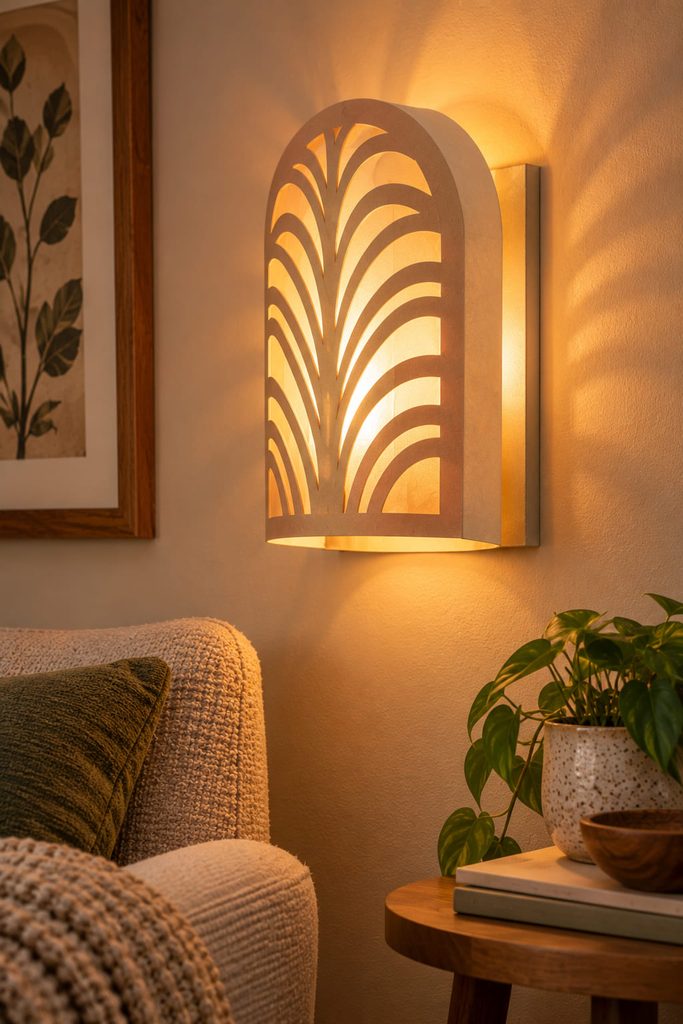
A shallow wall lantern works where a tabletop piece would consume useful surface space. Build a lightweight cardstock back plate with a small folded ledge for a battery LED puck, then arch a cut-paper screen several inches in front of it. The gap between the wall and screen is what creates the glow; if the paper sits directly against the light, the cut pattern loses depth.
Keep the top or one side open enough to reach the switch, and mount the paper structure with removable hardware appropriate to the wall rather than relying on the lantern shell to carry the light. This design is strongest beside a reading chair, along a hallway, or above a narrow console where the curved silhouette can be seen from an angle.
12. Rotating Double-Sleeve Lantern for Changeable Color
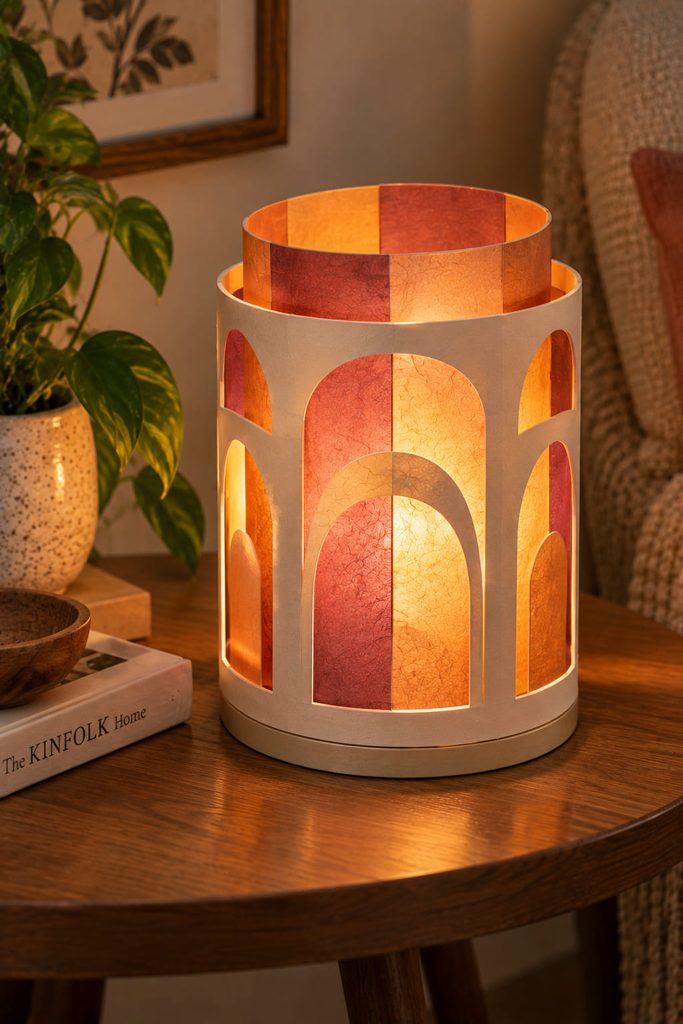
Two independent paper skins can make one lantern behave differently without rebuilding it. The inner cylinder is translucent colored paper or vellum; the outer cylinder is heavier cardstock with broad cut windows. When one sleeve rotates against the other, the visible color fields and overlap pattern shift while the basic light source stays in place.
- Free-rotating outer sleeve: easiest to adjust and especially effective with large geometric windows, but it needs a little clearance between cylinders so the paper does not scrape.
- Notched-position sleeve: small paper stops hold a few preset angles, so a chosen composition does not drift, though the stops add assembly work.
Support both sleeves on the same stable base without gluing them to each other. The LED should remain in a central open cavity and be removable from above. Test the darkest overlap position before choosing the paper colors: two beautiful translucent papers can become muddy when stacked.
13. Quilled Filigree Panel Lantern for a Side Table
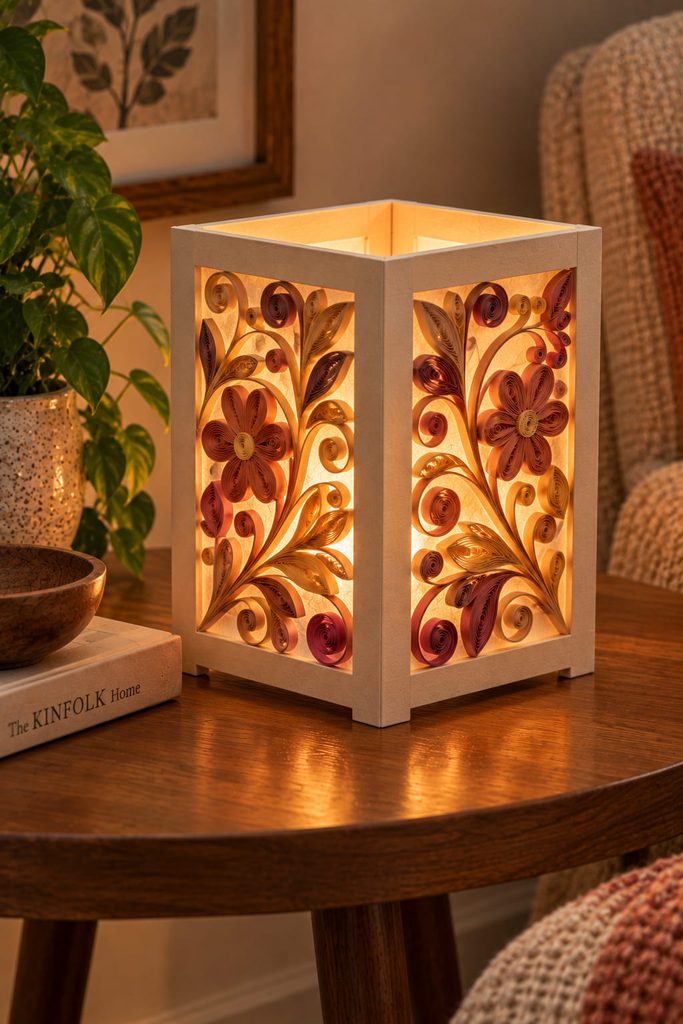
Quilled coils can create lace-like lantern panels, but the coils should decorate a frame rather than form the frame themselves. Make four narrow cardstock window panels, back each opening with vellum, and glue the paper coils to that supported surface. The rigid perimeter keeps the lantern square while the quilling adds shadow and detail without carrying corner loads.
Useful supplies for this version:
- medium-weight cardstock for the four-panel frame;
- vellum or translucent paper for diffusion;
- narrow quilling strips and a quilling tool or fine dowel;
- paper-safe glue applied sparingly;
- a separate cool battery-powered LED.
Leave a plain border around every panel so the corner tabs have clean surfaces to bond. Dense quilling near the seams can stop the box from closing squarely and also blocks more light than the same pattern placed toward the center of a window. If the coils begin to detach when the panel flexes, reinforce the vellum with a thin cardstock window frame rather than adding more wet glue. That extra frame distributes handling stress and keeps the delicate paper curls out of the structural job.
14. Pop-Up Bellows Lantern That Packs Into a Drawer
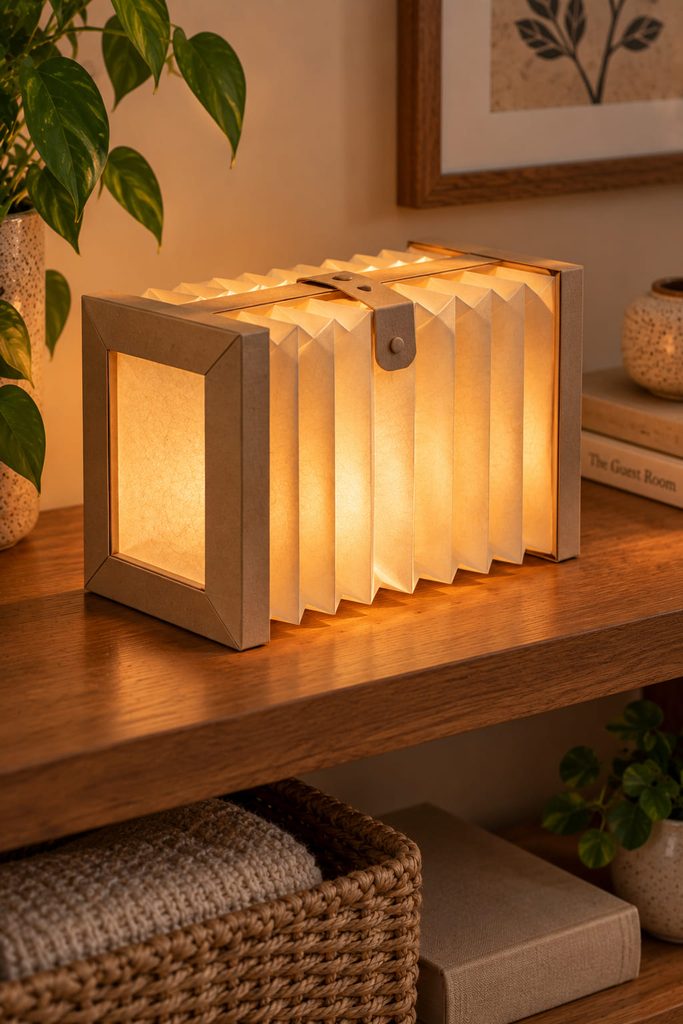
A fold-flat lantern needs its storage state designed at the same time as its open shape. Use two stiff rectangular end frames joined by accordion-folded side panels, then add a translucent inner lining that follows the bellows rather than bridging straight across it. When the frames pull apart, the pleats open into a boxy light chamber; when pushed together, the same creases collapse into a thin stack.
The sequence matters because trapped glue or an oversized liner can ruin the motion:
- Score and pre-fold both bellows sidewalls completely.
- Attach them to one end frame and cycle the folds open and closed before adding the second frame.
- Add the translucent liner in narrow sections or soft pleats so it has enough slack to compress.
- Join the second frame and test the full travel again.
- Add a paper locking tab or removable band that holds the lantern open; insert the cool battery LED only after expansion.
Fold-Flat Check: Close the lantern with the light removed. The end frames should approach each other without a hard stop in the middle. If they do not, look for a liner caught across a valley fold or a tab protruding into the collapsing path.
This design is useful for guest rooms, holiday shelves, or small apartments because it stores as a flat object instead of a permanent hollow volume. The trade-off is precision: every side pleat has to mirror its partner or the open lantern will skew.
15. Low Petal-Collar Lanterns for a Dining Table
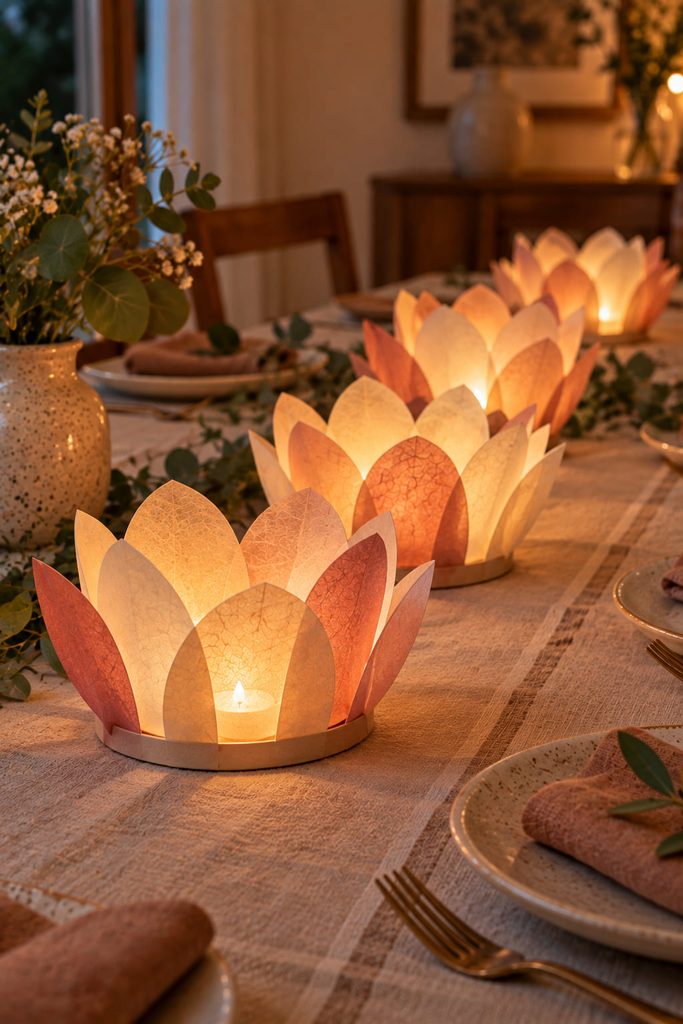
For dining-table decor, height matters more than maximum glow. Cut broad translucent paper petals, curve them outward, and anchor their bases around a low cardstock ring that surrounds—but does not cover—a cool battery tea light. The open top keeps the light accessible, while the petal collar diffuses the bright point and creates a soft pool of light across the table. Make several at the same low height rather than one tall centerpiece, leaving clear sightlines between seats and enough space for serving dishes. Because the petals are open and widely spaced, this project reads more like luminous paper flowers than a closed lantern box, which makes it a good choice when you want the handmade paper to remain visible even before evening.
Choosing Paper Lantern Decor by Light, Space, and Storage
The easiest way to choose between these projects is to decide what the lantern needs to do before choosing its decorative surface.
| What You Want | Construction to Consider | Main Thing to Check |
|---|---|---|
| Broad, soft ambient glow | Pleated vellum or honeycomb paper | Keep a clear diffuser around the LED |
| Graphic bands of light | Woven strips | Preserve open gaps in the weave |
| Small points of patterned light | Punched kraft paper | Use enough open area for the motif to read |
| Architectural shadows | Layered cutouts or faceted panels | Protect negative space and accurate folds |
| Adjustable color | Rotating double sleeves | Leave clearance between the two skins |
| Decor that stores compactly | Honeycomb or bellows construction | Test the fully closed state before finishing |
| No tabletop footprint | Wall lantern or suspended cocoon | Separate the support system from delicate paper surfaces |
| A low dining-table glow | Petal collars | Keep sightlines and access to the LED open |
Whatever style you choose, design access to the battery light before sealing the lantern. A beautiful shell becomes frustrating if switching, replacing, or removing the LED requires crushing a panel. Cool-running, flame-free LEDs also let the paper remain the decorative material without introducing an open flame inside it.
Start With the Light Effect You Actually Want
For a first project, the pleated vellum drum or pinhole kraft lantern keeps the construction manageable while still making the light part of the design. The woven, faceted, suspended, and fold-flat lanterns make better next projects when you want the paper structure itself to become more noticeable.
It also helps to choose the room before choosing the silhouette. A narrow console favors a compact lantern, a window can carry a light garland, and a wall-mounted version leaves a busy surface untouched. If you want to continue that room-first approach beyond lighting, Diynify’s broader guide is 19 Creative Paper Room Decor Ideas for a Creative Handmade Space.