This post contains affiliate links. As an Amazon Associate I earn from qualifying purchases, at no extra cost to you. Thank you for supporting Diynify!
Paper lampshade ideas are worth choosing by the kind of light you want, not just by the color of the paper. A translucent sleeve can soften a bedside glow; an open lattice paints stripes nearby; a shaped dome sends more light toward the tabletop. These 13 designs focus on actual shades and supported light covers rather than freestanding party lanterns.
Most use art paper, cardstock, a cutting tool, a ruler, and paper-safe adhesive. Depending on the project, you may also need vellum, a rigid lampshade frame, metal shade rings, cord or lightweight supports, a mold, tissue, or a separate battery-powered LED display light. Do not improvise electrical fittings: match any shade to the light manufacturer’s instructions, maintain ventilation and clearance, and keep paper away from heat.

1. Pleated Vellum Drum Shade
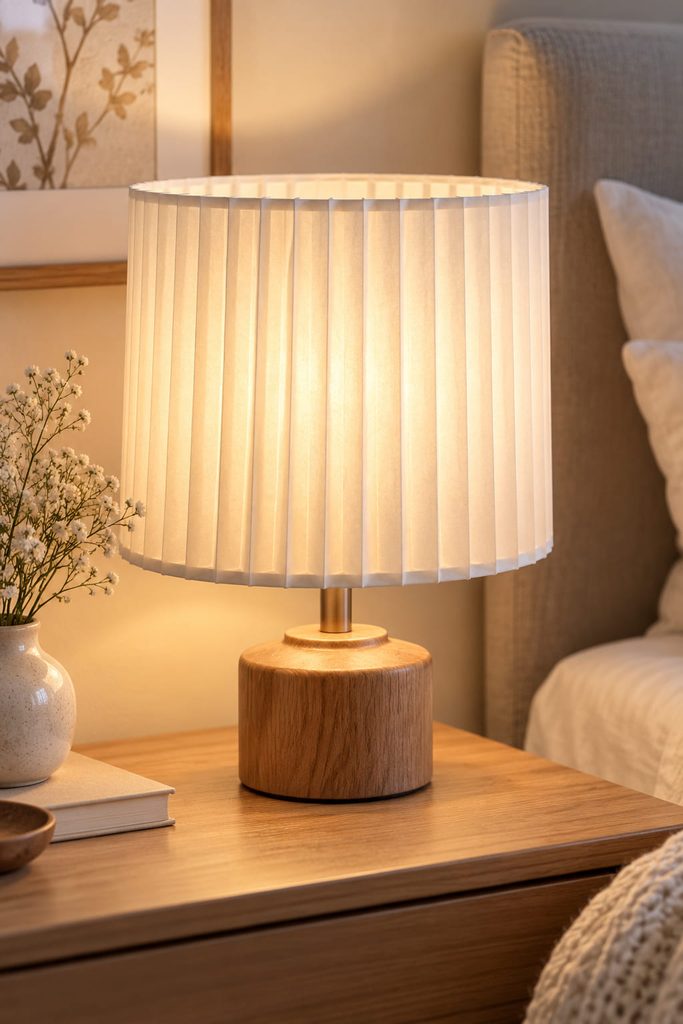
In a reading corner, a pleated vellum drum softens glare while its narrow folds create darker vertical ribs. Upper and lower shade rings keep the sleeve from collapsing inward. Score the strip to the frame’s circumference before joining the seam; the pleats need to meet without stretching.

Choose this for a bedside corner where glare matters more than patterned shadows. Fit it only to a compatible existing shade frame, never over a bare bulb. Backlighting reveals glue, so hide the narrow seam at the rear.
2. Folded Geometric Pendant Shell
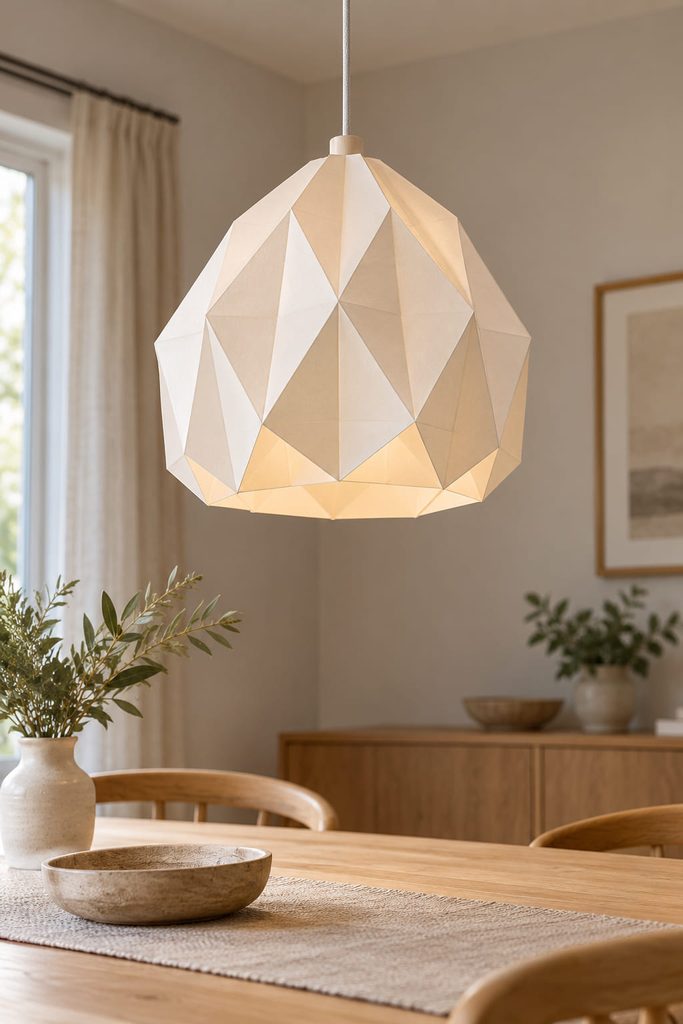
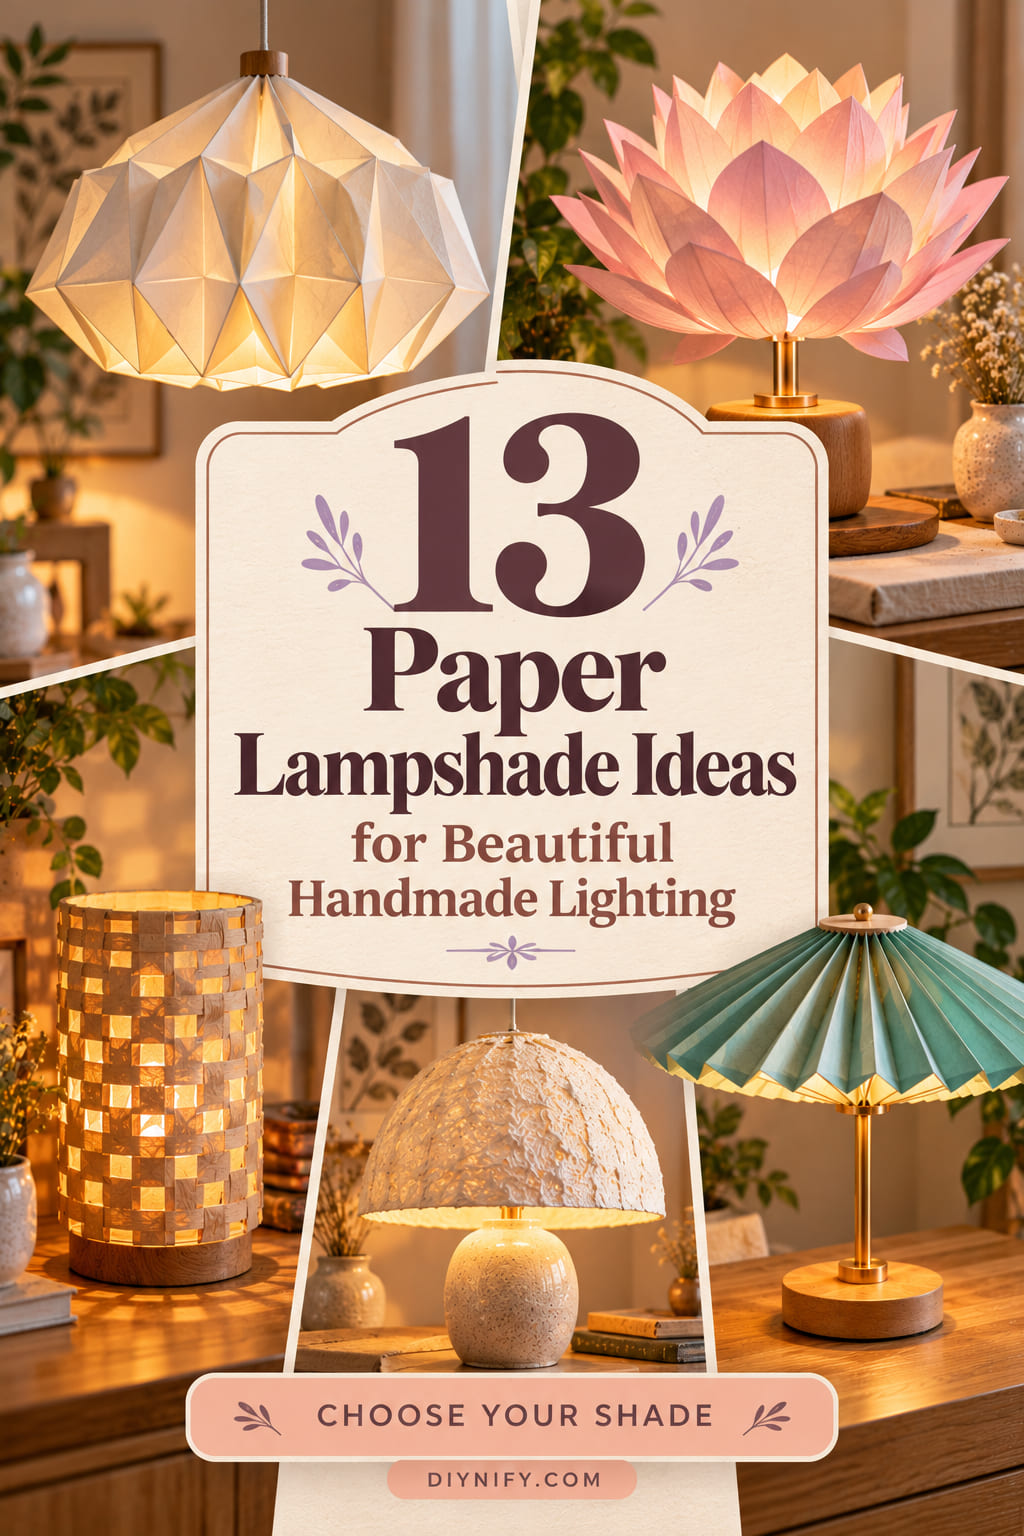
Picture a pendant made of flat triangular and diamond-shaped planes, each catching the room light differently. A scored paper net can create those facets without the weight of a molded housing, but the suspension is a separate engineering problem. The paper shell must never carry the weight of a socket, cable, or bulb.
For the geometric form:
- Make a paper prototype and mark every mountain and valley fold before cutting the final panels.
- Join wide tabs on the inside so they do not interrupt the sharp outer edges.
- Leave an access opening and mount the finished shell only on a compatible, independently supported LED pendant assembly that explicitly permits this shade material.
The faceted outline suits a dining nook where the shade itself is visible from several sides. If no approved mounting arrangement exists, keep the same sculpture as an unlit hanging decoration instead of improvising a ceiling fixture.
3. Sculpted Papier-Mâché Dome
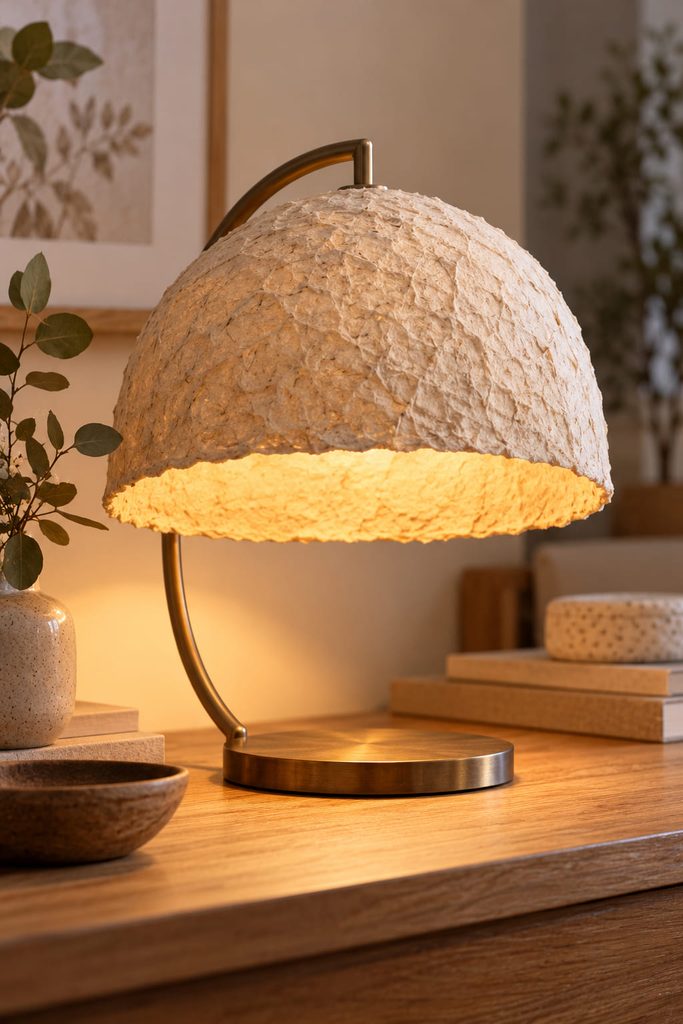
A papier-mâché dome has an irregular, almost ceramic surface, with a little texture around the rim that flat paper cannot imitate. Build it over a bowl-shaped form, layering small pieces of paper with paste. Let the shell dry completely before removing the mold; damp areas can distort when the support disappears. A broad opening underneath lets a separately housed battery LED cast light onto a table, while the heavier dome remains mostly opaque.
The real challenge is keeping the dome centered above the light without relying on brittle paper as its only support. Use a separate nonflammable stand with a broad footprint and manufacturer-approved spacing. Because the light exits mainly below the rim, this is an atmospheric accent rather than an all-around diffuser.

Dome Fit Check
- The stand supports the shell without pressure on its thinnest edge.
- The LED can be reached and removed without lifting a connected cable.
- The rim is level, with no paper sagging toward the light.
4. Woven Paper Strip Cylinder
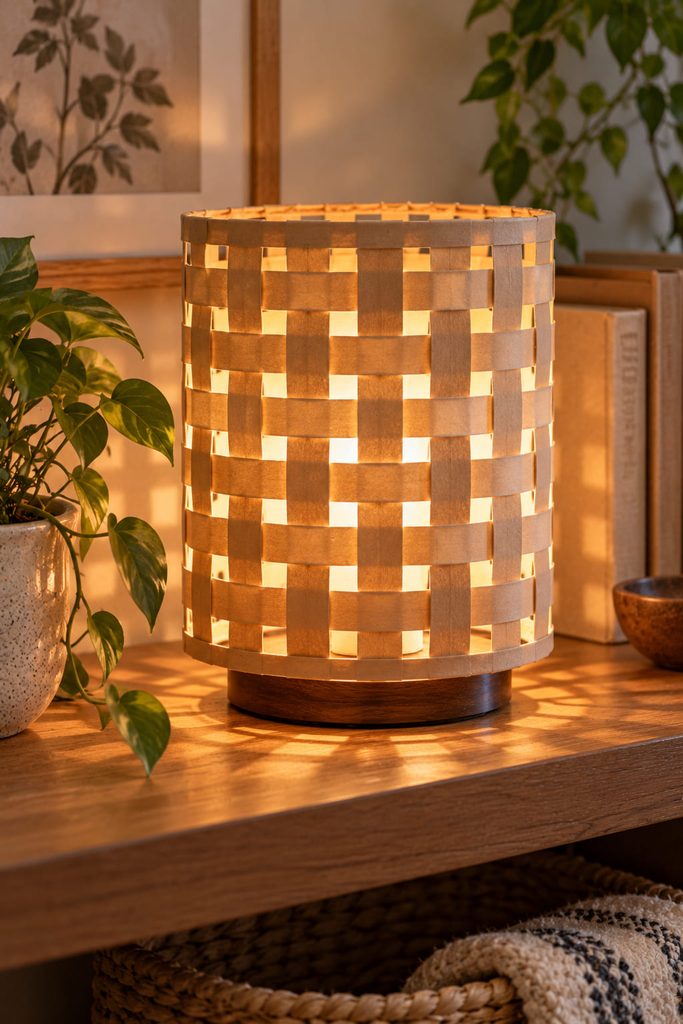
To cast a soft checked light pattern, weave paper strips around an open cylinder. That effect depends on real interlacing, not on rows simply glued across each other. Use a rigid open cylinder as the carrier, and keep the inner battery LED separately housed with the required clearance.
- Anchor evenly spaced vertical paper bands to the upper and lower frame rings.
- Pass the first horizontal strip over one vertical, under the next, and repeat around the circumference.
- Reverse that sequence on the following horizontal strip to create a stable over-under surface.
- Fix the ends at the rear only after the weave lies flat; leave some openings clear rather than filling every gap.
Wider strips produce a graphic basket-like texture. Narrow strips make a delicate mesh but need more attachment points to prevent buckling.

5. Layered Lotus Petal Shade
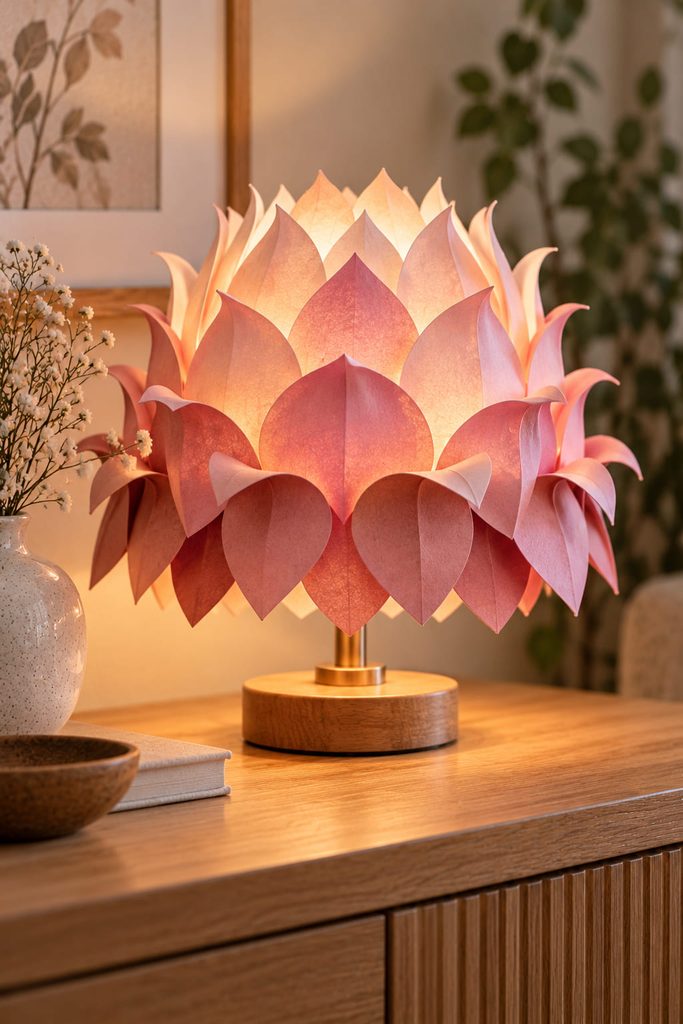
Unlike a smooth cylinder, a lotus-inspired shade gets its outline from individual petals. Cut elongated shapes from cardstock, curl their free tips, and attach their firm ends in staggered rows to an independent carrier. The outer layers should rise slightly above the inner ones, like a flower opening. Position the petals outside an approved enclosed light unit, never against a bulb. This looks strongest on a low console where the curved edges are visible from the side. If the tips sag, shorten their unsupported length rather than coating them with more glue.

6. Botanical Cutout Shadow Shade
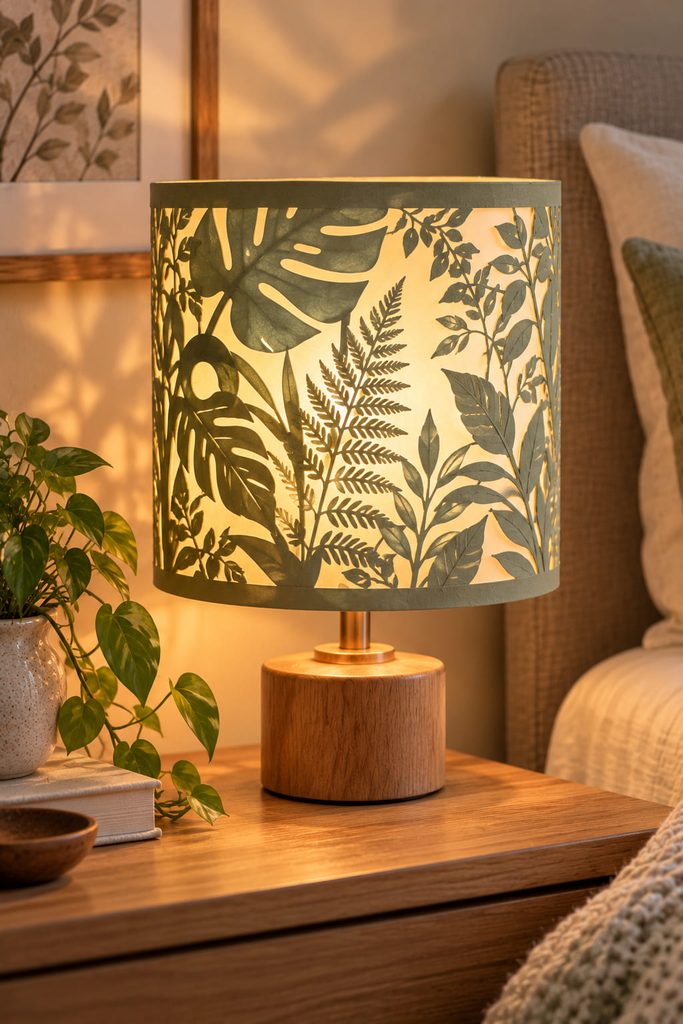
When a dark cardstock sleeve has translucent vellum behind it, leaf silhouettes become more legible. Cut broad botanical openings in the outer paper, then attach vellum across the backs of those openings so the light source itself remains concealed. Mount the decorated sleeve on a rigid shade frame approved for the intended LED setup.
Two layouts make different kinds of lighting:
- Sparse fern fronds: more open space allows a brighter, recognizable botanical pattern.
- Dense overlapping leaves: the image feels richer when unlit, but the glowing sections shrink and the shade reads darker.
For a bedroom accent, keep the shapes large enough to recognize from across the room. Tiny cut veins usually disappear once the lamp is on. This shade produces a graphic display rather than the even spread of a plain vellum drum.
7. Vertical Rolled-Paper Tube Shade
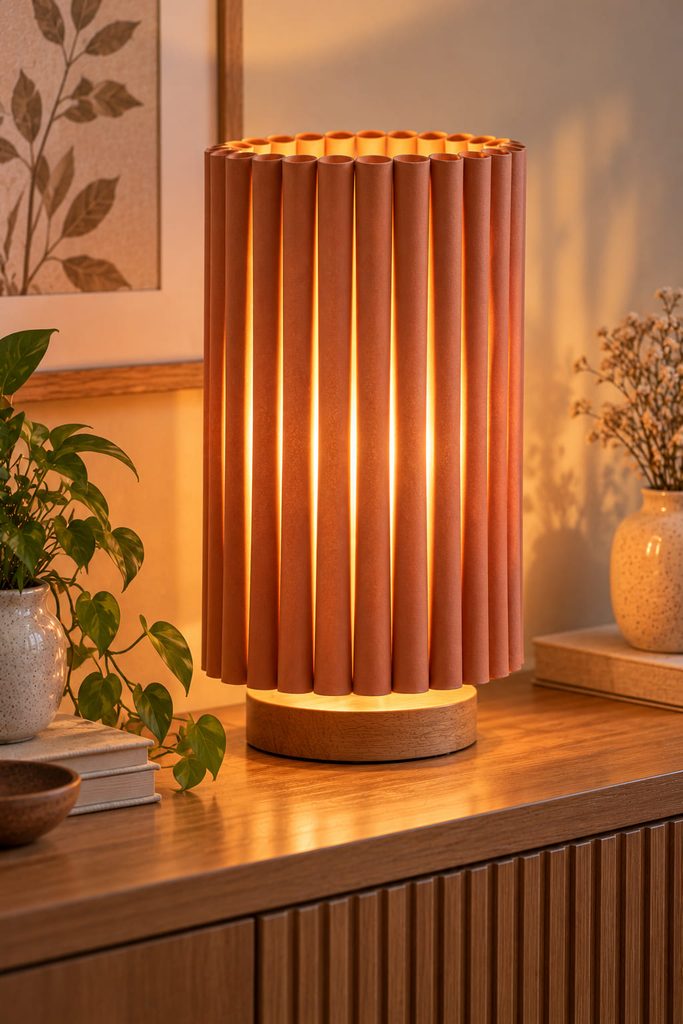
Rolling sturdy paper strips into short upright tubes creates a fluted shell with narrow channels that let light escape sideways. Wrap the strips around a dowel, secure each seam, and fix the finished tubes to a pair of rigid support rings. The tubes are decorative, not a load-bearing cage or a substitute for an approved lamp housing.
If the surface looks uneven, diagnose the cause before adding more tubes:
- Wavy upper edge: tube lengths vary; trim or remake the outliers before attachment.
- Pinched light gaps: tubes are too close; increase the spacing rather than forcing a brighter LED.
- Leaning cylinder: the support rings are not parallel or the base is too narrow.
A tall silhouette works well on a sideboard, where the vertical ridges resemble small architectural columns. Keep the tubes away from the electronics and ensure the LED enclosure remains accessible.
8. Expanding Honeycomb Paper Shade
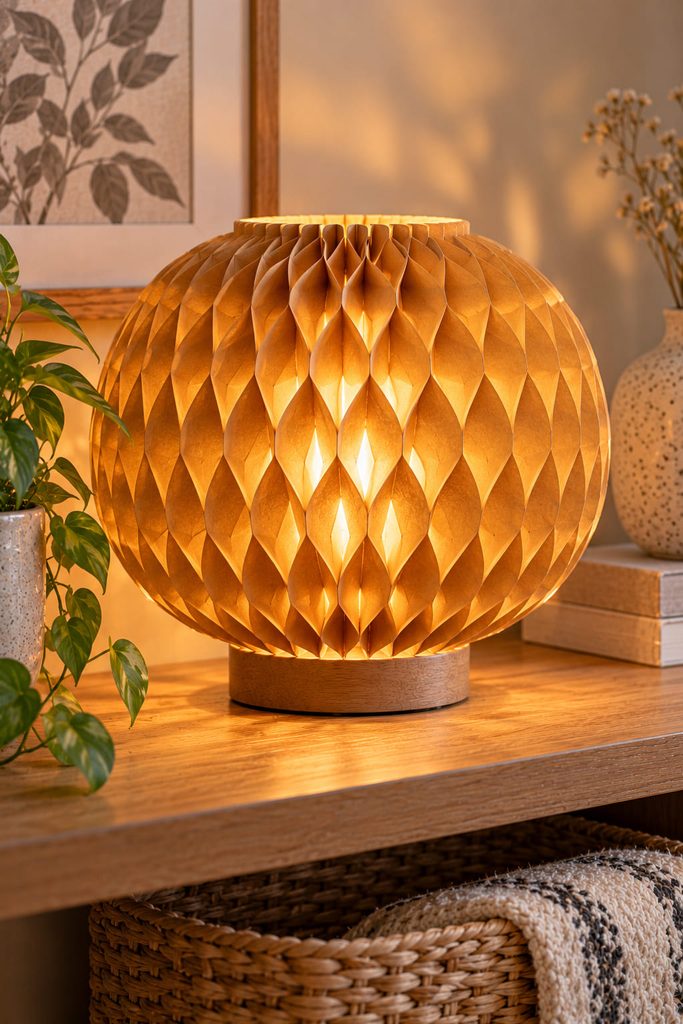
Honeycomb paper creates depth through repeated glued cells. Unlike an accordion fold that bends along creases, this structure opens into little pockets; the cell walls become most visible when the shade is lit from the side. It is useful for a collapsible decorative sleeve that you can store flat between seasonal displays.
Begin with thin, consistent paper sheets. Alternate adhesive lines between layers, let the stack cure, and only then pull the ends apart into a rounded section. The exposed honeycomb is delicate, so an outer support and a separately housed battery LED are essential.

Build in this order:
- Assemble a small test section to confirm that the alternate glue lines produce open cells rather than a solid block.
- Expand the full section around a removable support ring, checking that the cells open without tearing.
- Join the ends using reinforced tabs and leave the assembly removable for battery access.
Expansion Check: If the honeycomb twists or one sector remains flat, inspect the glue-line spacing. Adding force will not correct a misaligned cell pattern.
9. Suspended Paper Spiral Shade
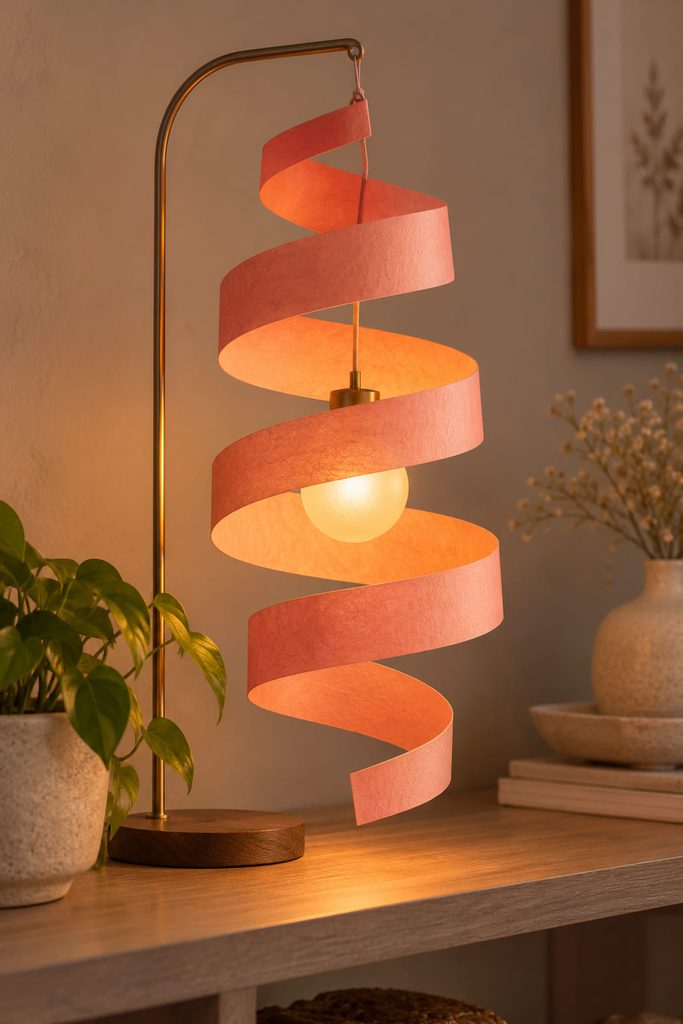
Cut a broad paper disc into one continuous spiral, leaving an uncut reinforced center for hanging. Suspended from a separate rigid arm, the ribbon drops in a loose helix around an enclosed battery LED display light. Its shadow changes with viewing angle, and even a slight draft can make the coil turn. Keep the spiral well clear of the light housing and any nearby wall. For more control, make fewer, wider turns: thin strips twist, tear, and tangle easily. This is a playful shelf accent, not a freestanding lamp body or an electrical pendant.
10. Floating Paper Ring Halo Shade
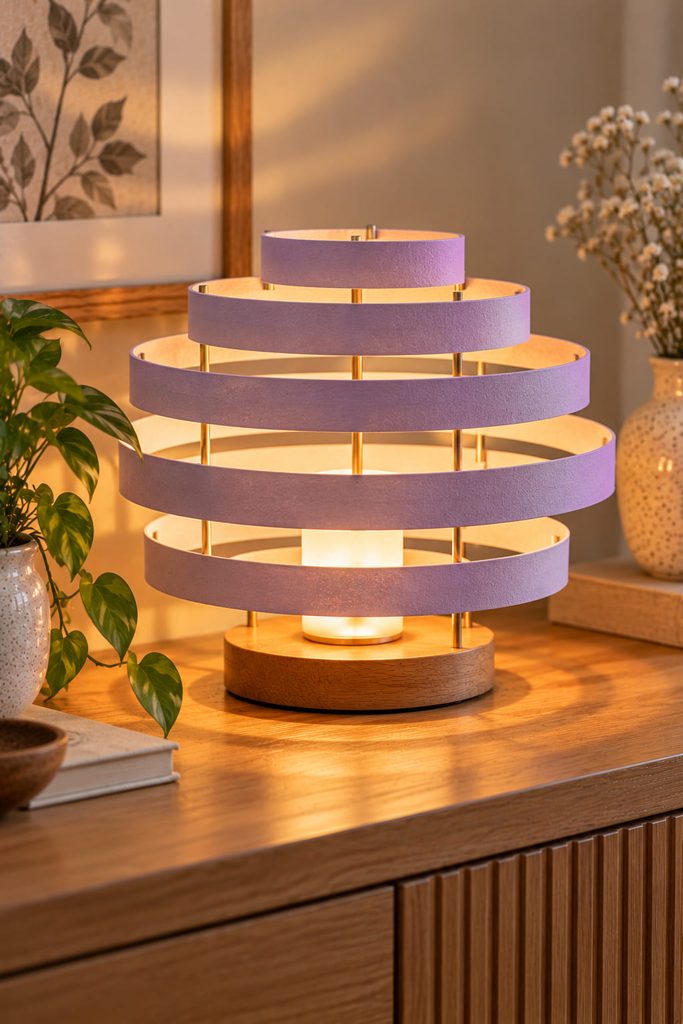
Stacked at measured heights, concentric paperboard rings surround a compact LED display light without forming a solid cylinder. Seen from the side, the spaces between the rings become luminous horizontal bands. This idea is about carefully aligned negative space; a lopsided stack makes the light seem crooked even when the source is centered.
Useful components are:
- Lightweight but rigid paperboard hoops of gradually changing diameters.
- Three or four slender nonflammable uprights fixed to a broad base.
- A separate enclosed battery LED that does not touch the paper assembly.
Fix each ring to the uprights at marked heights rather than hanging it from the ring above. That keeps the weight on the base and lets you replace one damaged hoop without dismantling the whole shade. Choose this for sculptural shelf lighting with visible layers.
11. Marbled Paper Wrap Shade
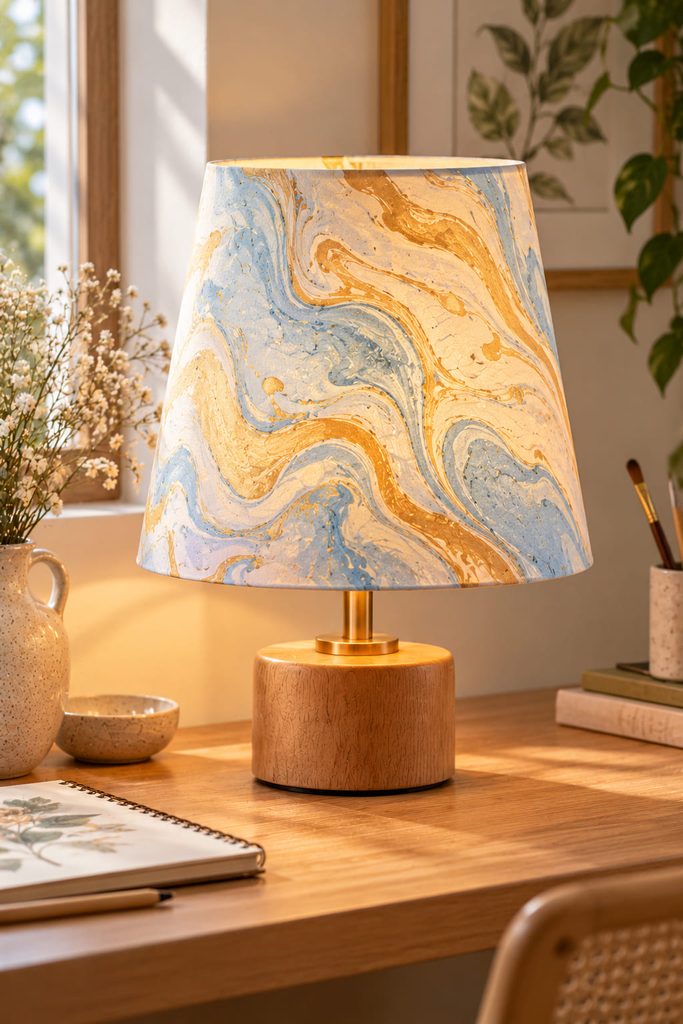
In daylight, hand-marbled paper turns a plain shade into an abstract painting; at night, the print must remain legible. Pale swirls often look striking in daylight and nearly disappear against a bright light; darker veins stay legible. Test one sheet against a separate cool LED display before cutting the full sleeve.
For a compatible existing shade frame, use a removable paper panel secured at the frame edges, keeping the original ventilation and all specified clearances. Avoid putting paste, paint, or an extra liner inside the bulb cavity. The design is more about color and surface than projected shadows. It works in a studio corner where the shade is seen in daylight as often as at night, and a muted marbled palette will be easier to pair with patterned furniture.
12. Paper Bead Fringe Lampshade
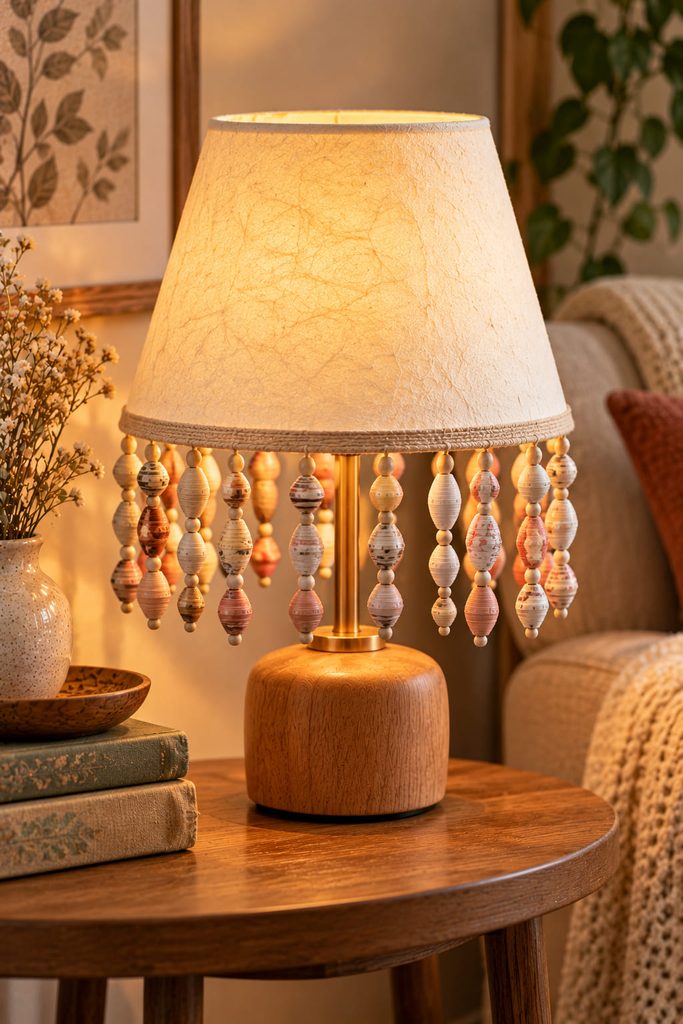
Along an existing shade’s lower edge, paper beads add gentle movement. Roll long triangular strips around a skewer, seal each bead, and thread short strands onto an independent trim ring. Keep the ring outside the light enclosure and clear of ventilation openings. The beads should not touch the lamp base or swing near electrical parts. They catch small highlights when someone passes, which makes this a better choice for a low-traffic decorative corner than a bedside switch you reach for often.
13. Radial Folded Fan Lampshade
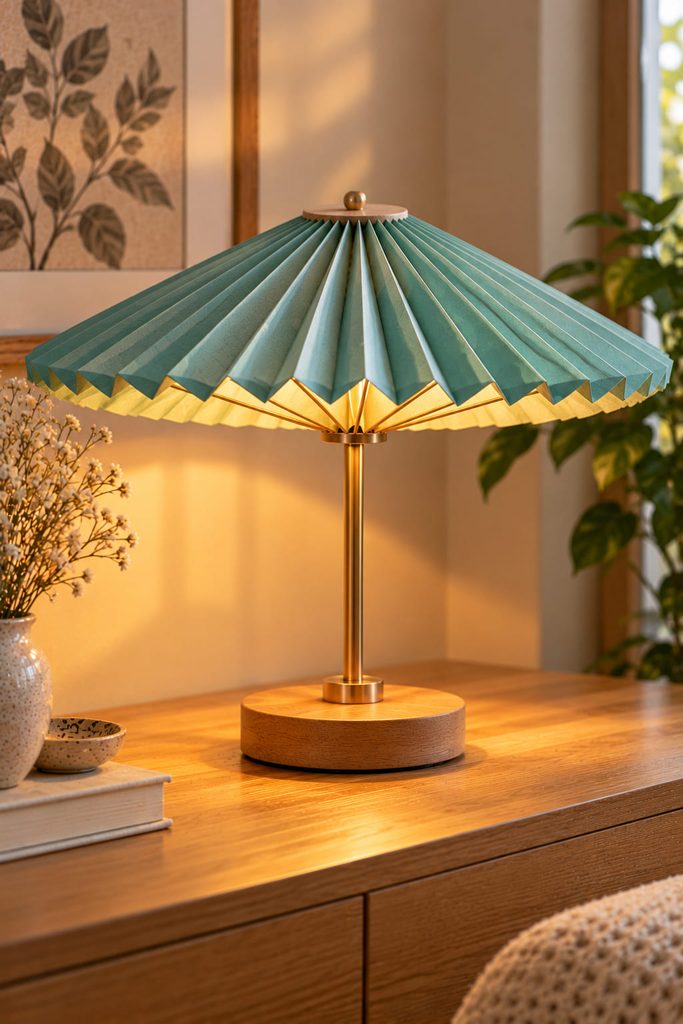
Viewed from above, a wide paper shade spreads outward like a parasol rather than rising into a drum. Score identical fan-shaped wedges with narrow pleats, join each wedge along its long edge, and fasten the assembly to a rigid radial support. The support must hold the weight; the paper wedges only define the silhouette and control the outgoing light.
Spacing decides whether it looks deliberate. If the outer rim dips between spokes, add supports or use shorter wedges. If the center bunches into a thick knot, reduce the overlap at the inner tabs rather than cutting the light opening smaller. A removable cover over a compatible enclosed LED display light makes the structure easier to access. Viewed from a chair, the shallow brim sends most of the illumination downward. That makes it a strong candidate for a tabletop accent with a broad pool of light.
Choosing Paper Lampshade Ideas for LED Lighting
Treat these as design concepts, not an invitation to modify electrical wiring. Use a separately housed, low-heat battery LED where the design calls for one. For a wired table lamp or pendant, follow the exact fixture and bulb instructions, use compatible shade hardware, respect the maker’s required clearances and ventilation, and do not add flammable paper to a fitting that does not approve it. LEDs still produce heat; paper should never touch a bulb, driver, or socket. Never use an open flame, incandescent bulb, or halogen bulb with these projects.
Choose a light effect before settling on a silhouette. Vellum and thin translucent sheets are the natural choice for diffused glow. Woven openings, cutouts, and spaced rings create more distinct light patterns. Opaque domes and heavy cardstock direct brightness through openings instead of turning the full paper surface luminous. For ceiling-mounted fixtures, leave the electrical installation and assessment of suitability to a qualified professional.
Find Your First Lighting Project
For an uncomplicated first build, a vellum drum on a compatible frame makes the role of paper easy to understand: it changes the spread of light without requiring elaborate geometry. Try the woven cylinder when the shadow pattern is the attraction; save the faceted pendant or honeycomb construction for a project where fit and support matter more.
If you would rather make an entirely separate decorative light than work with a lamp frame, 19 Creative Paper Room Decor Ideas for Handmade Spaces includes a translucent paper LED lantern direction that belongs on a shelf rather than on a wired fixture.