This post contains affiliate links. As an Amazon Associate I earn from qualifying purchases, at no extra cost to you. Thank you for supporting Diynify!
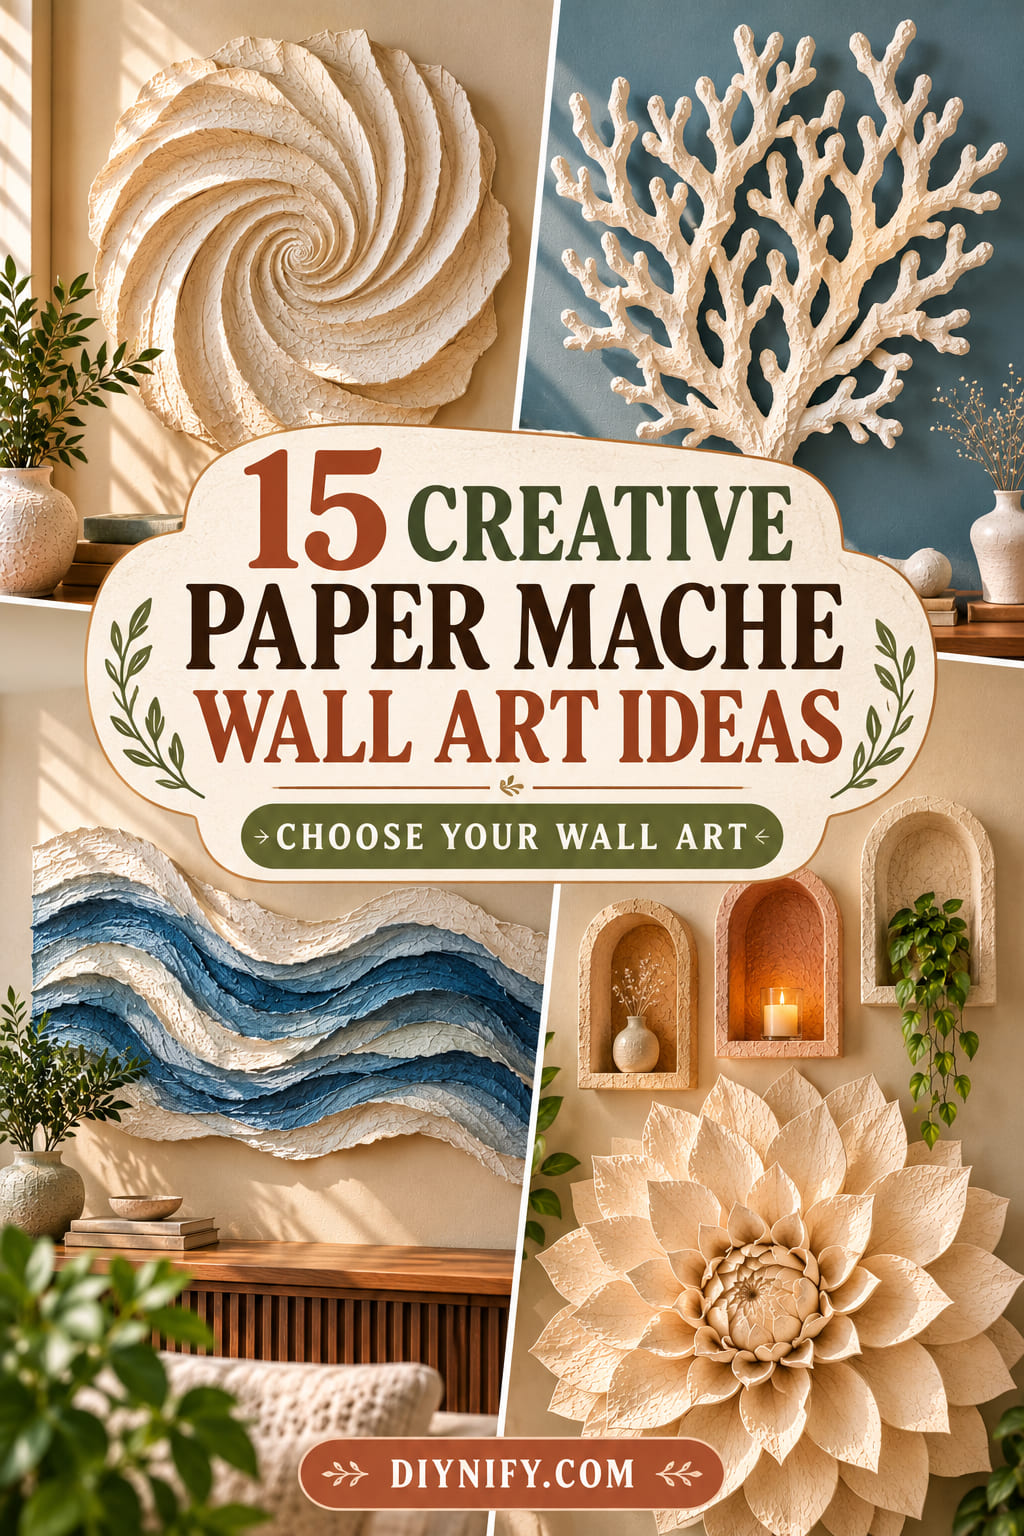
Paper mache wall art is a wonderful way to make sculptural decorations using recycled paper, simple adhesive, and a little patience. Unlike flat paper crafts, these projects build real depth through molded surfaces, raised textures, hollow forms, and dimensional details that interact with natural light.
These 15 ideas include abstract reliefs, botanical sculptures, architectural pieces, and modern wall installations. Most use newspaper, cardboard, paper pulp, and glue, although a few require wire, molds, wooden supports, or mounting hardware. Start with a textured panel or molded tiles if you’re new to paper mache, then try a hollow sculpture or floating installation for a more ambitious project.
1. Textured Spiral Paper Mache Relief
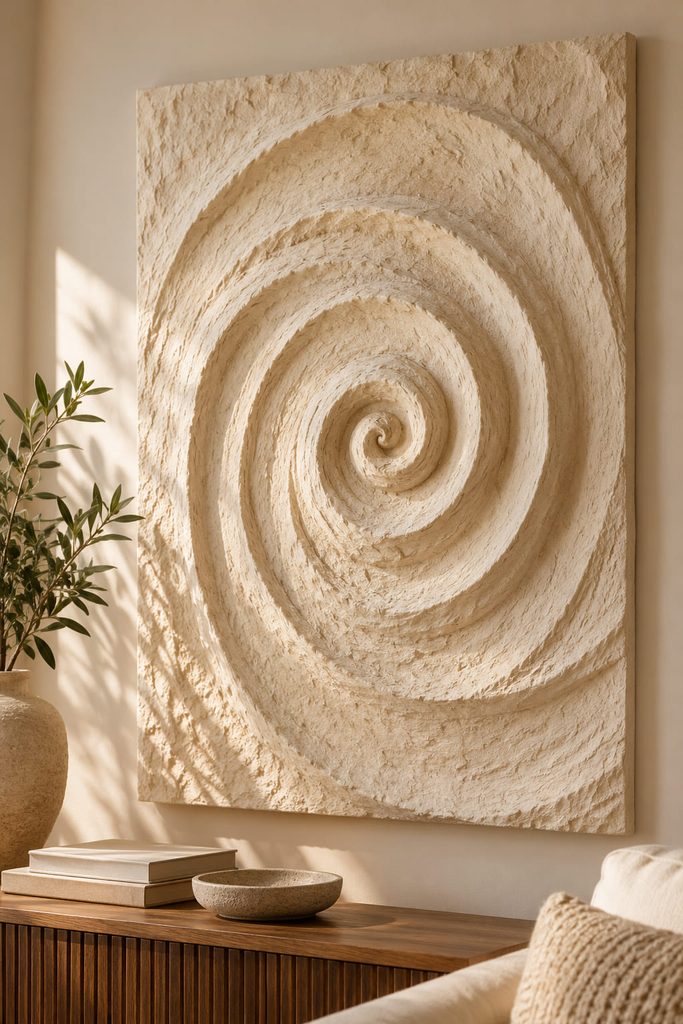
A broad spiral with uneven, hand-shaped ridges can turn a plain wall panel into an abstract sculpture. Start with a rigid cardboard or lightweight wood backing, then shape damp paper pulp into a continuous raised curve. Rather than piling on thick material, build the spiral gradually in thin layers. A spoon or rounded sculpting tool can create smooth grooves between the raised sections.

For a convincing plaster-like finish, coat the completely dried surface with gesso and matte paint. Warm ivory, chalk white, or muted clay tones let the shadows emphasize the spiral without additional decoration.
Before finishing, check three details:
- The center remains clearly defined rather than filling with pulp.
- The outer ridges taper smoothly toward the backing.
- The panel stays flat enough to hang securely against the wall.
2. Sculpted Botanical Vine Wall Panel
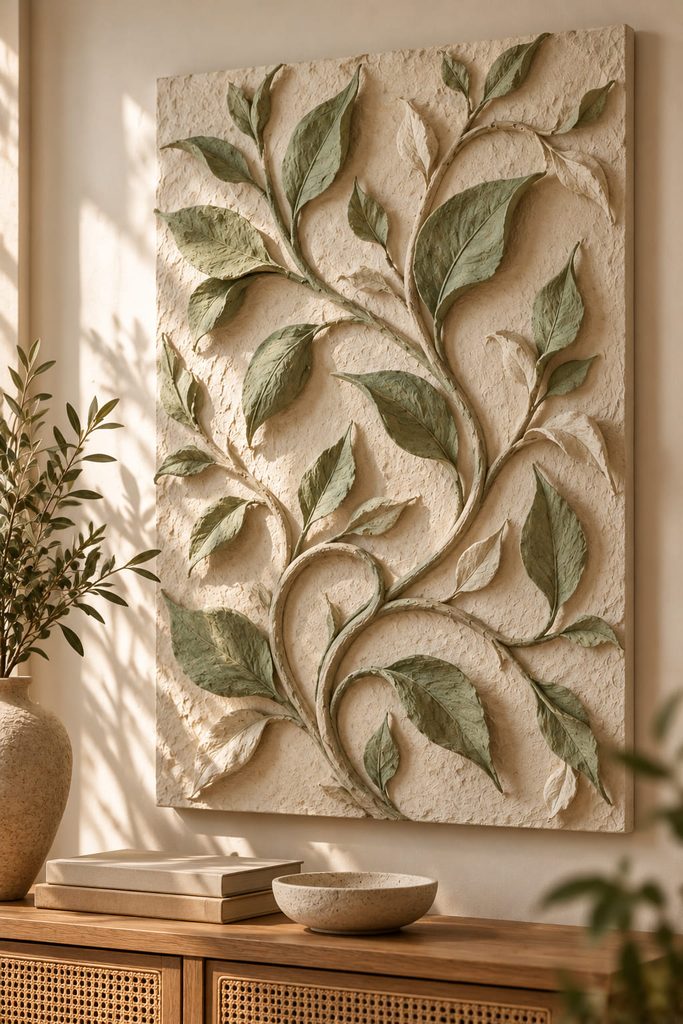
Long, twisting stems give a botanical composition more movement than flat leaf cutouts. Roll newspaper into narrow cords, attach them to a firm backing, and cover the connections with thin paper mache strips. Shape individual leaves over small curved cardboard supports so they rise gently away from the surface.

Let some stems cross while leaving open areas between the leaves. Those gaps prevent the composition from becoming a solid mass and help the botanical shapes remain recognizable. A soft sage-and-cream finish suits a living room or bedroom, while a single earthy color creates a more sculptural effect.
3. Arched Paper Mache Wall Niche Triptych
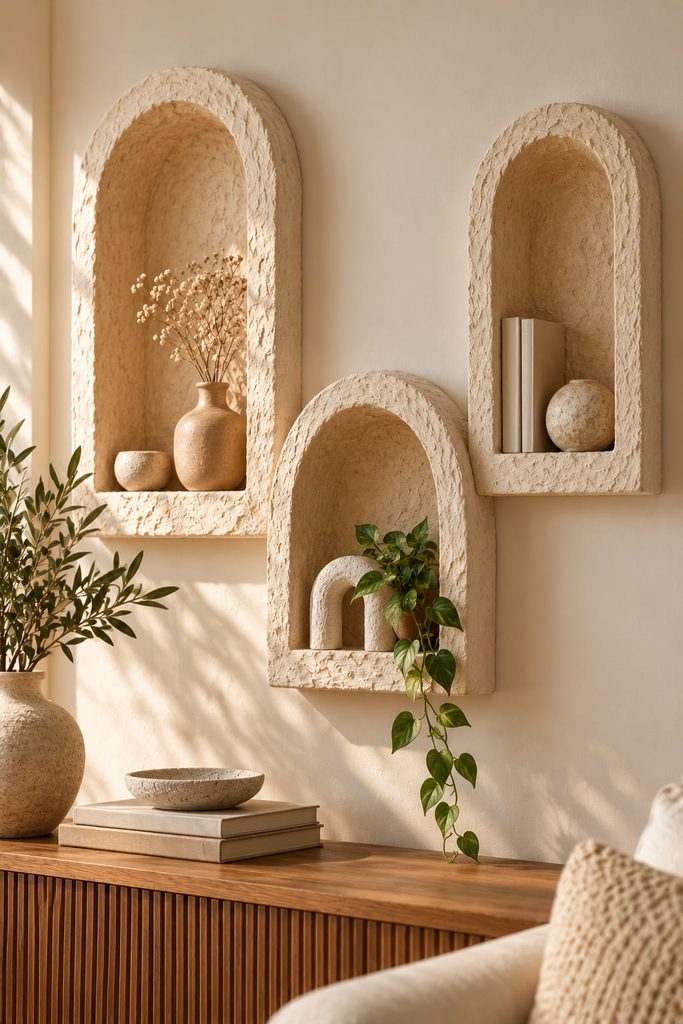
Three shallow arches at different heights can resemble miniature architectural niches without the weight of plaster or ceramic. The important distinction is that each niche has a real recessed interior, rather than a painted arch on a flat surface.

Build each form around a lightweight cardboard structure with side walls, a curved top, and a recessed back panel. Paper mache strips cover the seams and create the appearance of one continuous surface. Keep the interiors decorative; thin cardboard niches should not be treated as shelves for heavy objects.
A reliable construction order is:
- Cut matching front arches and backing panels, allowing space for the recessed interiors.
- Add cardboard strips between the front and back to create shallow side walls.
- Reinforce the joints, cover exposed surfaces with overlapping paper strips, and dry thoroughly before removing temporary supports or painting.
Recess Depth Check: Keep the niche openings wide enough for light to reach the back walls. If the recesses are too deep and narrow, their interiors may look like dark holes.
Mount the finished arches together on a rigid support panel with appropriate hanging hardware. Alternating heights and widths gives the group architectural rhythm without making the three pieces identical.
4. Moon Phase Paper Mache Wall Garland
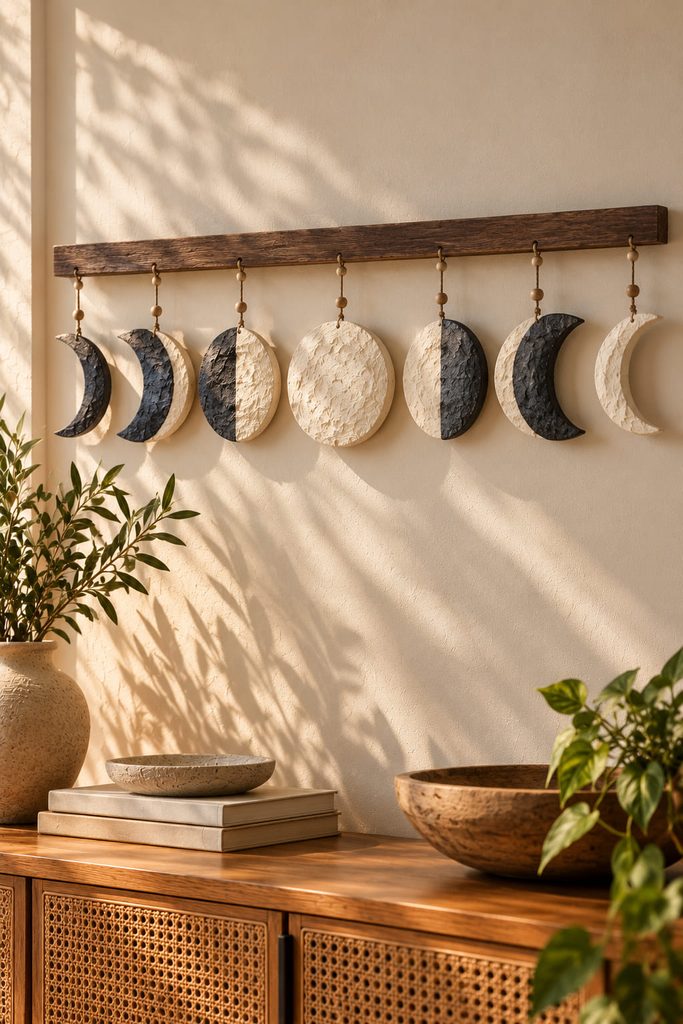
Instead of painting moon phases onto a flat board, create a row of lightweight sculpted lunar forms. Shallow paper mache discs can be shaped over reusable curved molds, then painted to represent crescents, half moons, and full moons.

Arrange the dried pieces along a wooden strip or connect them with cord through reinforced attachment points. A restrained charcoal and warm-white palette makes the different silhouettes easy to recognize. Keep the spacing consistent so the sequence reads clearly across the wall, even when viewed from a distance.
5. Organic Pebble Paper Mache Wall Cluster
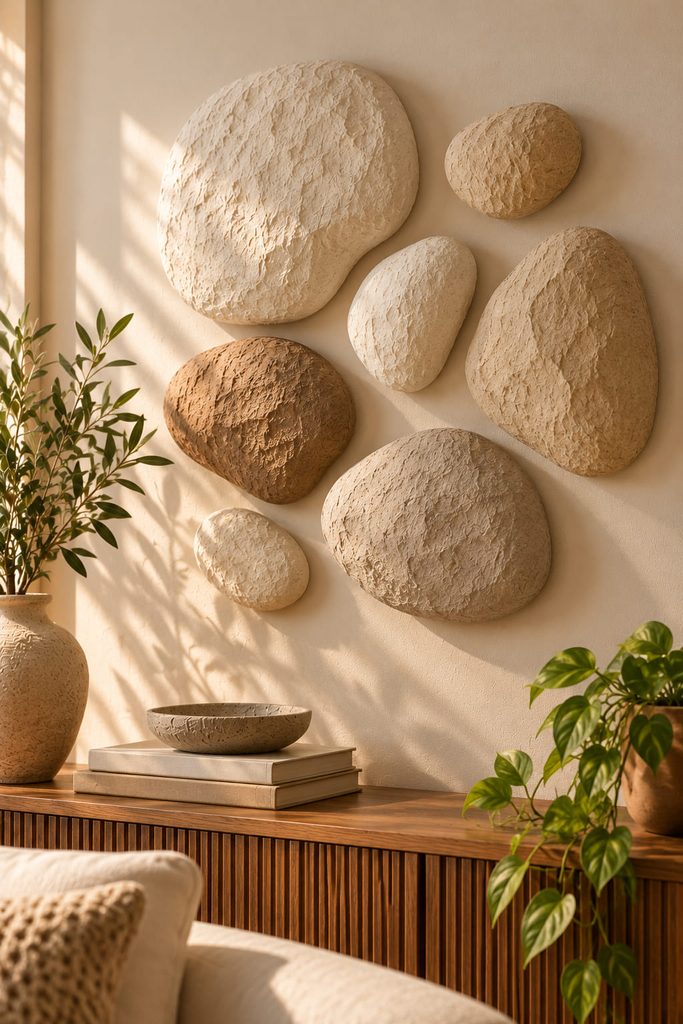
A collection of irregular, stone-like shapes works well when a wall needs texture without a framed picture. Form lightweight hollow domes over small bowls, crumpled-paper molds, or rounded temporary supports. After drying, remove the forms where practical and refine the edges so each piece sits neatly against the wall.
There are two useful approaches. Smooth, closely grouped pebbles create a quiet minimalist arrangement, while rougher shapes with wider gaps give each piece a stronger individual shadow. Before mounting, arrange the finished domes on the floor and photograph a few compositions.
For larger clusters, use separate secure mounting points rather than relying on adhesive alone. Mixing three or four sizes produces a more natural grouping than repeating identical ovals.
6. Ribbed Sunburst Wall Sculpture
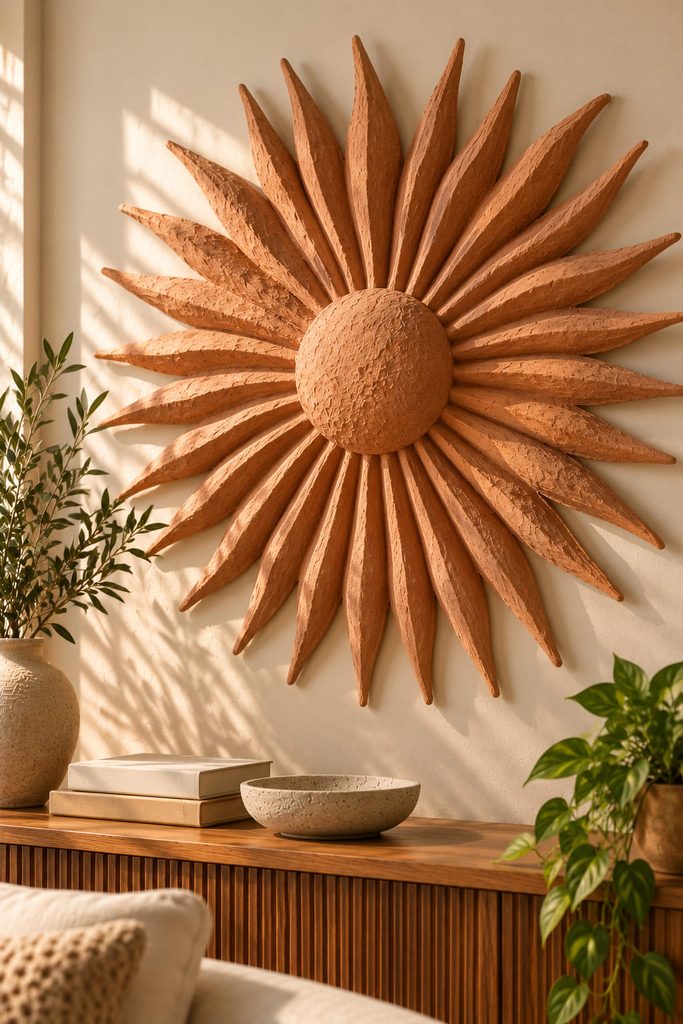
Radiating cardboard ribs make it possible to create a large sunburst without filling the entire object with wet pulp. Cut narrow tapered strips, arrange them around a central circular support, and secure their inner ends before covering the structure with paper mache.

Build the piece in this order:
- Attach the ribs to a rigid central disc, checking that they radiate evenly.
- Bridge the gaps with thin paper strips to create a continuous sculptural surface.
- Reinforce the back, allow both sides to dry, then apply a matte finish.
The ribs can remain slightly visible beneath the surface to create alternating highlights and shadows. A warm terracotta or sandy beige finish suits this shape especially well. Because the rays extend outward, leave enough space around the finished piece that the tips do not compete with nearby frames or shelves.
7. Sculptural Face Paper Mache Wall Mask
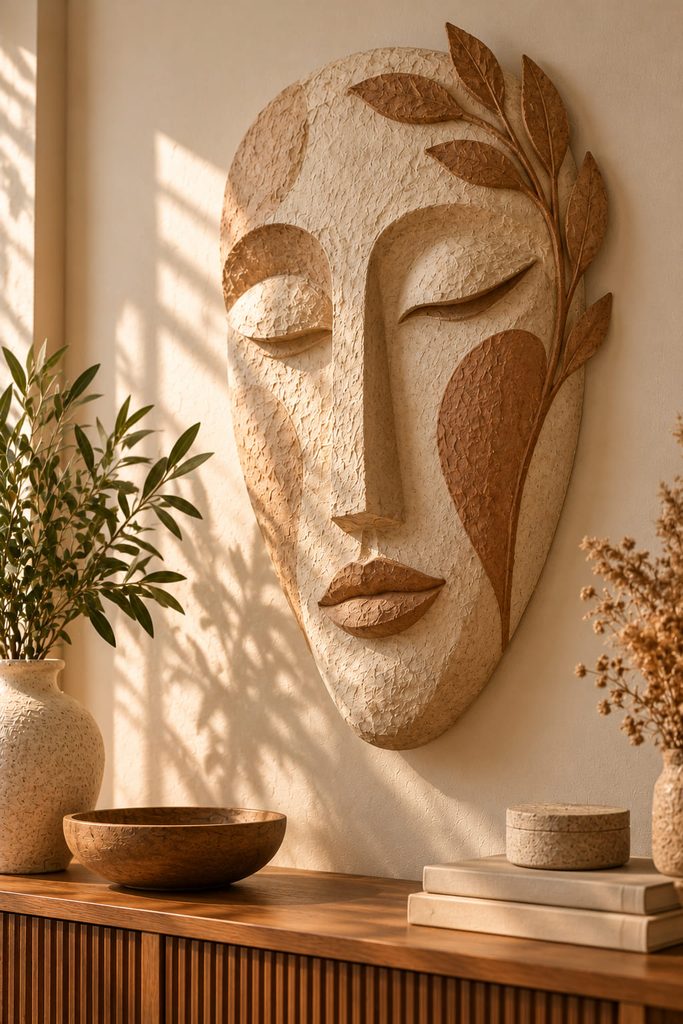
A decorative face mask makes a striking focal point above a console table or within an eclectic gallery wall. Build the underlying form from a lightweight face mold or shaped cardboard armature, paying particular attention to the forehead, nose, and cheekbones. Cover it with overlapping paper strips, allowing them to follow the contours without bunching around narrow features.
For a modern interpretation, simplify the facial details rather than trying to reproduce a realistic portrait. Asymmetrical eyes, an elongated nose, or an abstract mouth can make the sculpture feel more intentional. Small textural imperfections often work better here than a perfectly smooth surface.
Once dry, reinforce the back and incorporate a secure hanger into the supporting structure. This is a decorative wall sculpture, not a wearable mask.
8. Layered Ocean Wave Paper Mache Panorama
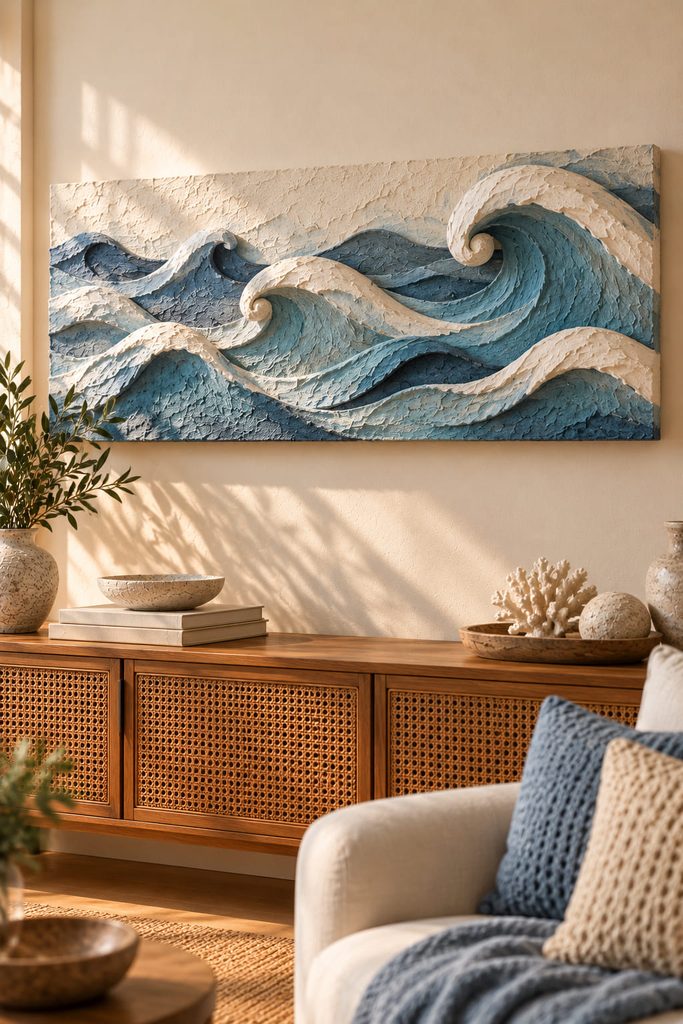
Curved wave crests create strong shadows when several raised forms overlap across a wide horizontal panel. Shape low cardboard arches at different heights, secure them to a rigid backing, and cover them with paper mache strips. Keep the lowest wave near the front and allow the taller ridges to rise behind it.
For a calmer coastal look, use broad, smooth curves in pale blue and off-white. Narrower crests with sharply defined troughs create more dramatic movement, but they need stronger supports beneath the paper shell.
If the waves flatten while drying, the cardboard ribs may be too widely spaced or the wet layers too heavy. Add intermediate supports and reduce the amount of paste before continuing. Display the finished artwork above a sofa or sideboard where its horizontal movement can balance the furniture below.
9. Botanical Fossil Impression Wall Tiles
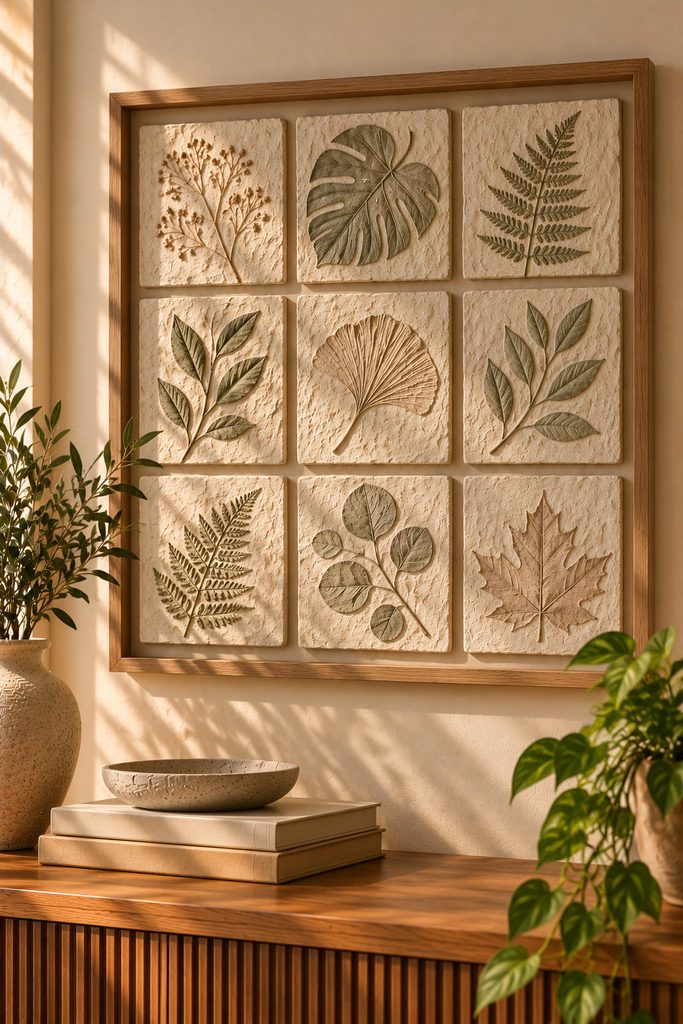
Pressing real leaves into soft paper pulp creates delicate impressions that resemble botanical fossils. Spread a thin, even layer of fine pulp into shallow square molds, press a textured leaf into each surface, and carefully lift it away while the material is still workable. Deep veins and distinct leaf shapes usually produce more readable impressions than very delicate foliage.
Once fully dry, arrange the tiles in a small framed grid with consistent gaps. Their recessed patterns catch side lighting differently from raised decorations. This project suits a quiet botanical gallery wall, especially when the tiles share the same warm stone-colored finish.
10. Oversized Paper Mache Monogram Wall Art
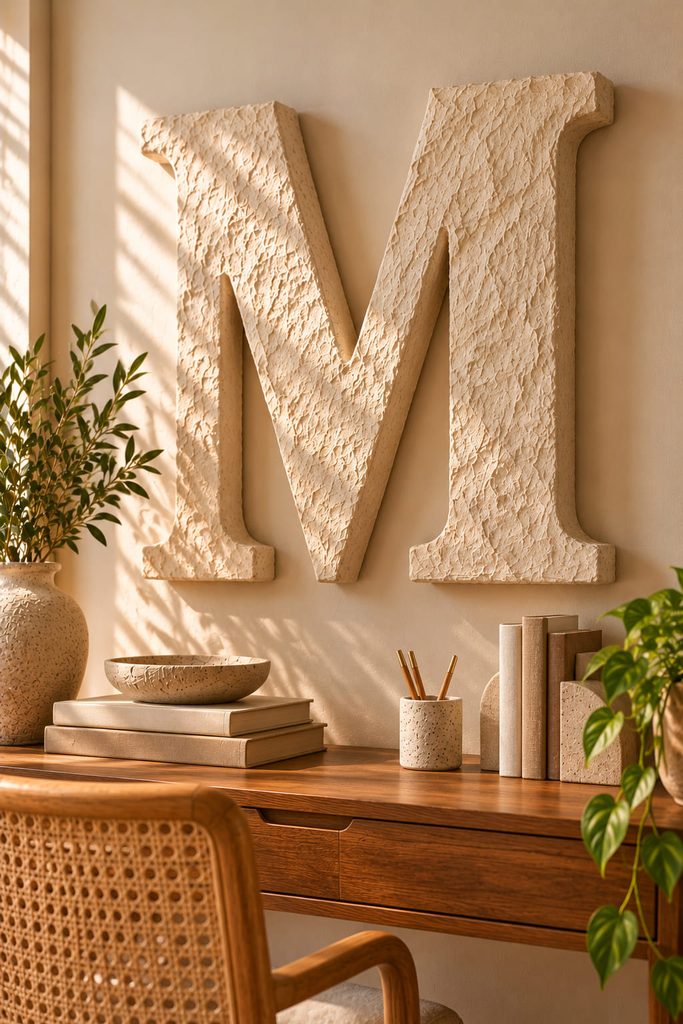
Large sculpted letters offer a more personal alternative to ordinary framed initials. A hollow cardboard letter is the best starting structure because it creates the thickness of a dimensional sign without the weight of a solid pulp sculpture.
To construct a clean letterform:
- Cut two matching letter silhouettes from sturdy cardboard.
- Connect them with short cardboard side strips to create a hollow shape.
- Reinforce the corners, cover the surfaces with paper mache, and let everything dry before painting.
Letters with enclosed openings, such as A, B, or R, need careful reinforcement around their internal cutouts. Keep those spaces open rather than filling them with wet pulp.
Finish the piece with a matte neutral color or a subtle textured coating. A single large initial works above a desk, while smaller matching letters can form a name display in a bedroom or creative workspace.
11. Floating Halo Paper Mache Wall Sculpture
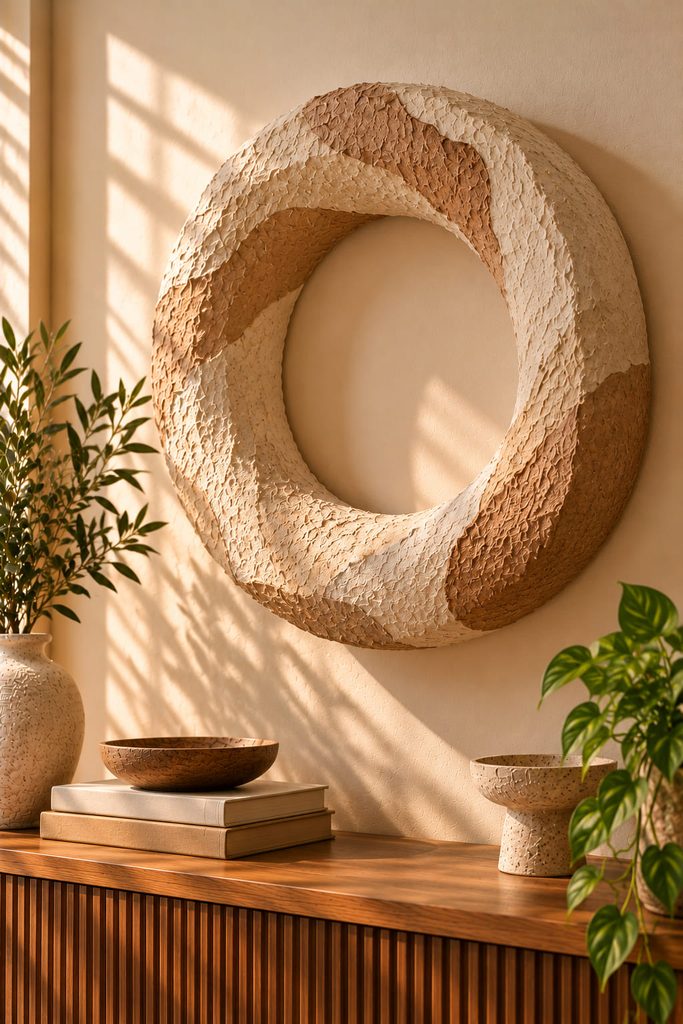
An open circular halo mounted away from the wall creates its own shadow as part of the artwork. Unlike a flat ring painted onto a board, this sculpture has a continuous hollow center, rounded dimensional edges, and a visible gap between the paper surface and the wall.
Build the ring around a sturdy lightweight cardboard structure. Connect front and back ring profiles using narrow spacer strips, then bridge the surfaces with paper mache. Leave the central opening clear and keep the ring depth consistent. The result should resemble a thick sculpted loop rather than a solid disc.
Mounting and Balance: A floating ring needs rigid supports attached to its underlying structure, not merely to the dried paper shell. Use two or more stable attachment points and suitable wall hardware so the ring cannot rotate or tip forward.
Before final painting, temporarily position the sculpture against a vertical surface and check its balance. If one side pulls outward, reinforce the underlying support rather than hiding the problem beneath additional pulp. A matte sand or chalk-white finish makes the gap behind the ring especially noticeable in side lighting.
12. Branching Coral Paper Mache Wall Sculpture
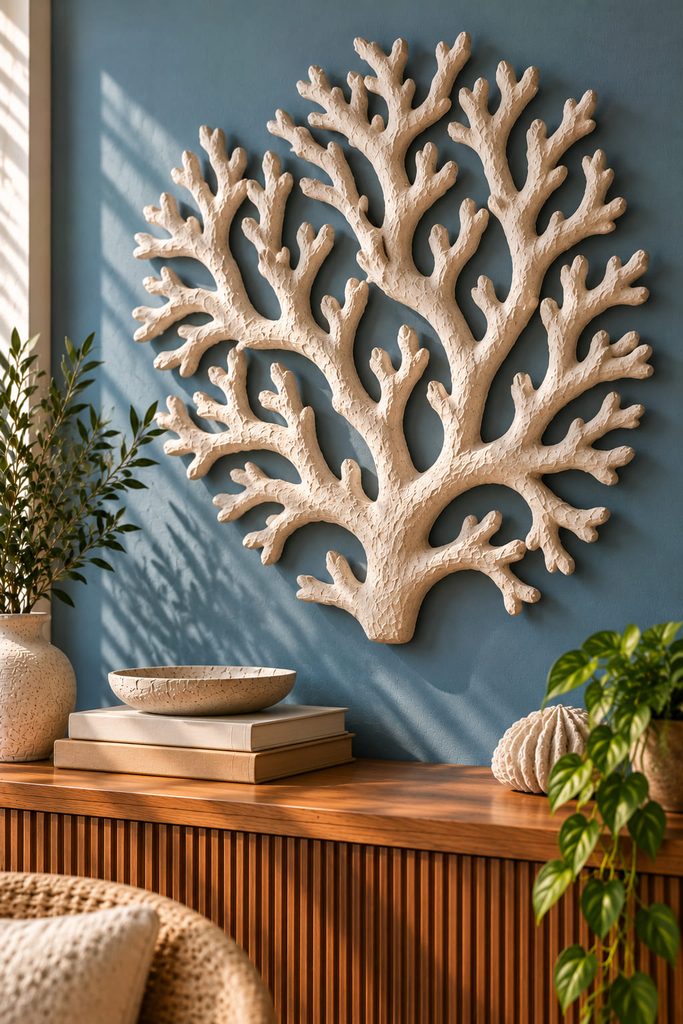
Coral-inspired branches create an irregular sculptural silhouette that looks especially interesting against a plain wall. Form the main branches from tightly rolled newspaper or lightweight wire wrapped in paper, then connect smaller offshoots at different angles. A thin paper mache covering turns the individual supports into one continuous organic form.
The thinner branches are vulnerable while wet, so support their tips during drying and avoid attaching large, heavy pulp clusters at their ends. Once rigid, finish the sculpture in chalk white, muted terracotta, or a soft coral tone.
Use a concealed backing frame to support the branching structure. An open composition with several visible gaps between the branches feels much lighter than a dense arrangement and casts more interesting shadows.
13. Faceted Fan-Fold Paper Mache Wall Panel
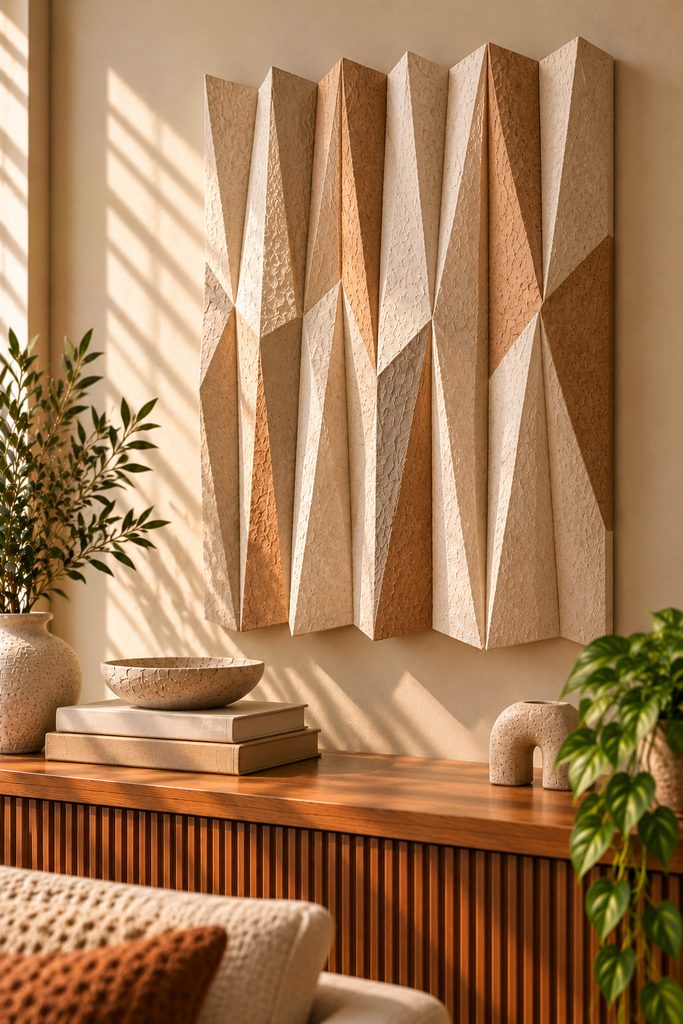
Sharp folds and soft paper mache texture create an appealing contrast in a geometric wall panel. Begin with accordion-folded cardstock or thin cardboard, then attach the folded sections to a rigid base, alternating the direction of their ridges. The resulting surface changes between light and shadow as the viewing angle shifts.
Apply thin paper mache strips over the folds without flooding the creases with paste. Too much moisture can soften the ridges and erase the intended geometry. Keep the peaks supported until the covering has dried completely.
A vertical arrangement of narrow folds gives the artwork an architectural appearance. For a larger piece, combine several separate folded modules rather than attempting one oversized sheet that may distort during drying.
14. Cascading Paper Mache Rain Drop Wall Hanging
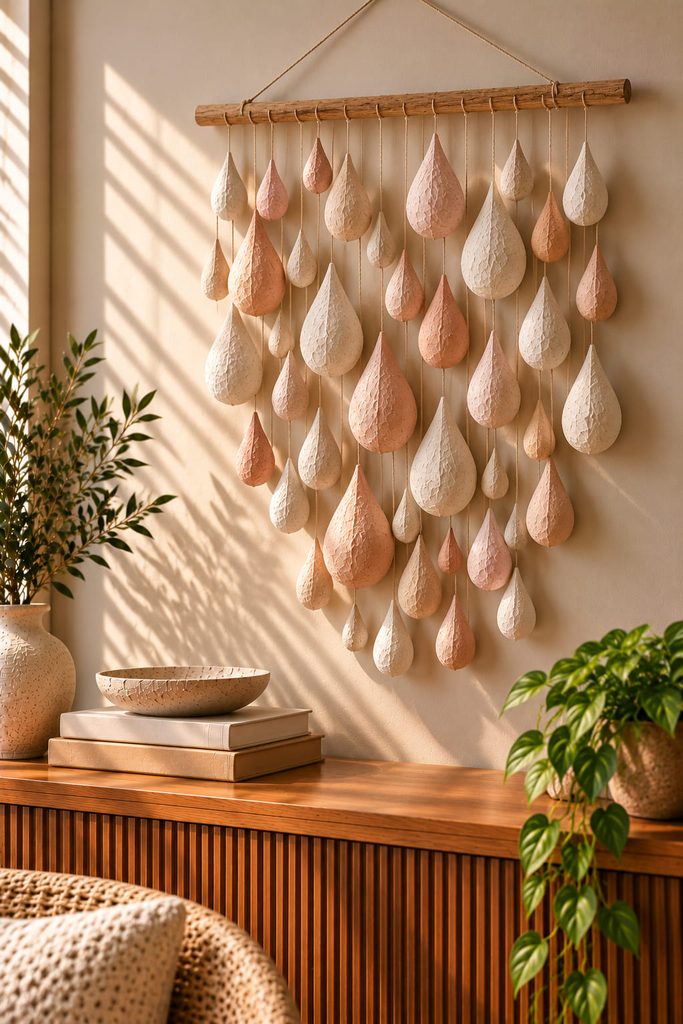
Vertical strands of sculpted droplets make use of a paper mache quality that is easy to overlook: hollow molded pieces can remain relatively light. Form small teardrop shells over temporary molds, leave an opening where necessary for removal, and reinforce their attachment areas before the shells dry completely.
Suspend the droplets at varied heights beneath a smooth wooden dowel. Leave enough space between neighboring strands for gentle movement without constant contact. The dowel carries the load, while the paper mache forms provide the visual rhythm.
Before hanging, check that:
- Each droplet is supported through a reinforced attachment point.
- The dowel hangs level under the combined weight.
- The lowest pieces clear nearby furniture and cannot repeatedly strike the wall.
An ivory palette with a few pale blue or muted blush accents gives the hanging a delicate appearance. It is particularly effective in a sheltered bedroom corner away from strong drafts.
15. Oversized Sculpted Dahlia Paper Mache Bloom
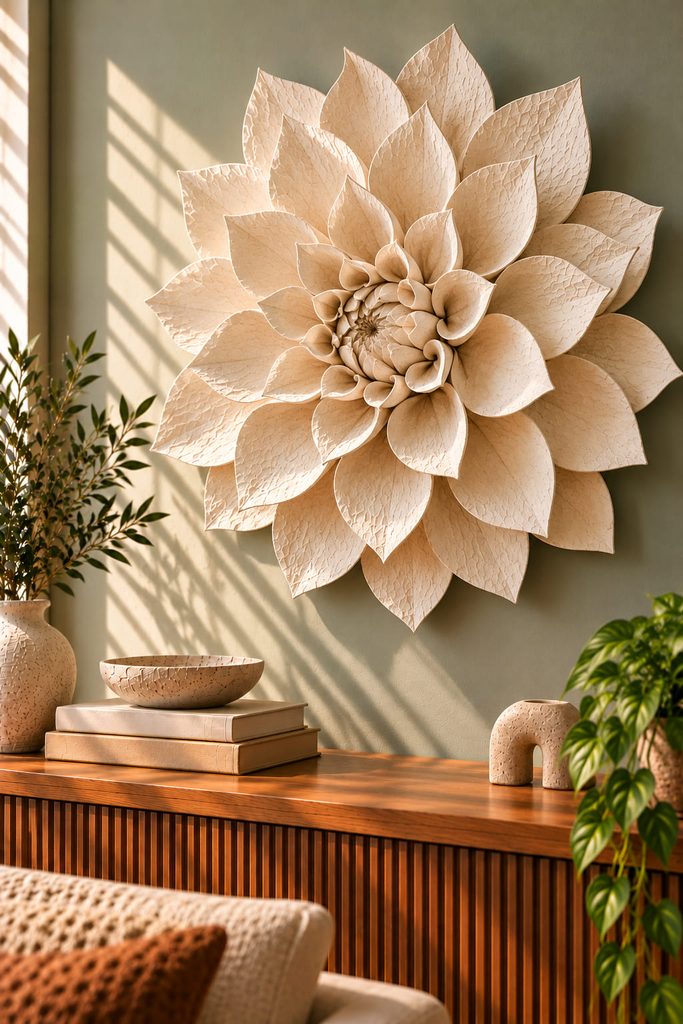
A large dimensional dahlia creates a floral centerpiece with much more structure than a conventional paper flower. Instead of relying on thin folded petals, make shallow curved petals over reusable forms and reinforce their undersides with narrow paper strips. The repeated curves give the bloom its rounded, layered appearance.
Work outward from a small raised center, attaching shorter petals first and longer ones behind them. Keep the outer petals supported while their joints dry, since unsupported wet tips can droop. Mount the finished bloom onto a rigid circular backing with secure hanging hardware.
A single oversized dahlia looks particularly good above a narrow console or as the central piece in a botanical gallery wall. Subtle tonal differences between inner and outer petals help reveal the layered construction without making the flower look overly colorful.
How to Prepare Paper Mache Wall Art for Hanging
Paper mache needs to dry completely before priming, painting, or sealing. A surface may feel dry while thicker areas still hold moisture, especially around joints and enclosed forms. Use thin layers, allow air to circulate around the work, and check hidden or reinforced areas before applying the finish. Sealing damp paper mache can trap moisture and encourage mold.
Choose the mounting method according to the underlying structure and the finished weight. Small relief panels can use hangers secured to rigid backing boards, while hollow sculptures and larger installations need reinforced attachment points. Keep finished pieces away from persistent dampness and avoid assuming that a painted or sealed paper surface is waterproof.
Frequently Asked Questions About Paper Mache Wall Art
What is the best paper for paper mache wall decor?
Newspaper and other absorbent uncoated papers work well for overlapping strips. Finely shredded paper pulp is better for molded textures and sculpted details. Sturdy cardboard is useful for armatures, backing panels, and structural ribs.
Is paper pulp better than paper strips for wall art?
Neither method is universally better. Paper strips are useful for wrapping armatures and creating hollow shells, while pulp is more suitable for pressing into molds, shaping rounded details, and building textured reliefs. Many projects benefit from combining both.
How long does paper mache take to dry completely?
There is no single reliable drying time. Thickness, humidity, ventilation, and the amount of adhesive all affect the process. Thin layers dry more readily than thick masses of pulp, and enclosed forms may need additional drying time before finishing.
Can paper mache wall art be painted with acrylic paint?
Yes. Once the project is completely dry, apply a suitable primer or gesso if a more even painting surface is needed. Acrylic paint works well for matte finishes, layered color effects, and subtle highlighting of raised textures.
Why does paper mache crack or warp?
Thick pulp applications, uneven drying, excessive moisture, and weak underlying supports can contribute to cracking or distortion. Use thin applications, reinforce vulnerable areas, and let each substantial layer dry before adding more material.
How do you hang heavy-looking paper mache sculptures?
Even lightweight sculptures need reliable mounting. Connect the hanging hardware to a rigid internal support or backing panel, choose wall fasteners appropriate for the actual weight and wall material, and test the assembly before display.
Can paper mache wall decorations be used in bathrooms?
They are better suited to dry interior spaces. Humidity and direct moisture exposure can affect paper-based materials over time, even when painted or sealed. Bathrooms with frequent condensation are generally a poor location.
Choose a Paper Mache Project That Fits Your Space
The best starting point depends on how much depth and structure you want. Textured relief panels and botanical fossil tiles are manageable choices for a first attempt, while floating halos, architectural niches, and large sculpted flowers require more careful planning and reinforcement.
For another approach to dimensional handmade decor, see 20 Stunning 3D Paper Art Ideas for Handmade Decor. It covers additional ways to create raised surfaces and sculptural forms using folded, layered, and assembled paper.