

This post contains affiliate links. As an Amazon Associate I earn from qualifying purchases, at no extra cost to you. Thank you for supporting Diynify!
Paper plate Christmas tree crafts turn an inexpensive craft-supply staple into trees kids can paint, cut, lace, weave, hang, or stand on a table. Instead of making twelve versions of the same green triangle, these projects use the plate in different ways—from curved cones and spirals to pockets, window decorations, and interactive countdown trees.
Most ideas need paper plates, washable paint, construction paper, a glue stick, child-safe scissors, and markers. Some also use yarn, tissue paper, a hole punch, ribbon, pom-poms, or a printed photo. Adults can handle tougher cutting, punched holes, and any step that feels beyond the child’s current skill level.
1. Stacked Paper Plate Christmas Tree
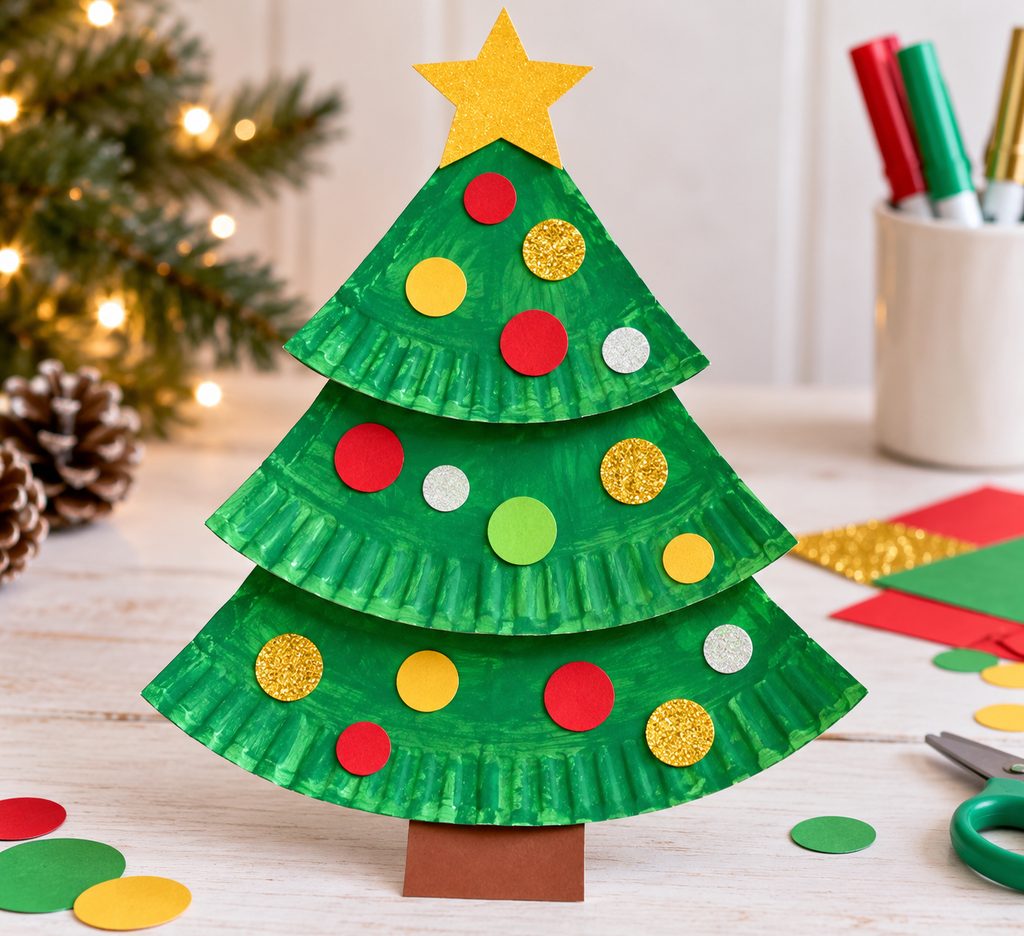
Cut one paper plate into three wedge-shaped sections, making one wide piece for the bottom of the tree, a medium piece for the center, and a smaller piece for the top. Paint each section green, then overlap the pointed wedges so the curved plate edges create three naturally rounded rows of branches.

Glue the pieces onto cardstock or directly to one another once the paint dries. A small brown paper rectangle works as the trunk, while paper circles, stickers, fingerprints, or punched shapes can become ornaments. Keep the overlaps fairly shallow so all three tiers remain visible instead of collapsing into one solid triangle.
2. Standing Paper Plate Cone Tree

A curved paper plate can become a freestanding tree without needing a separate cardboard frame. Cut from the outer edge toward the center, overlap the two cut edges, and keep tightening the shape until the plate forms a cone. Glue or tape the overlap on the inside so the seam stays less noticeable.
Test the undecorated cone on the table before adding anything heavy. If it rocks, trim only a tiny amount from the bottom edge or adjust the overlap until the base sits evenly. Lightweight paper stars, sequins, foam dots, or tiny construction-paper ornaments are easier for the curved surface to support than bulky decorations.
Add a paper star by gluing two matching stars back-to-back around the top rather than trying to balance a heavy topper on the point.
Standing Tree Check: Finish the base before decorating. Extra ornaments can add weight, but they cannot correct a cone that already tips to one side.
3. Yarn-Laced Paper Plate Tree

Turn a painted plate into a simple threading activity by cutting out a large triangular tree shape and punching holes around its edges. Space the holes far enough apart that the paper between them stays strong.
Thread a blunt yarn needle or a piece of yarn with tape wrapped around the end through the holes.
- Start at one bottom corner and secure the yarn on the back.
- Lace across the tree in any direction instead of following a strict sewing pattern.
- Leave some green surface visible between the yarn lines.
- Tie or tape the final end securely on the back.
A loop added through the top hole can turn the finished tree into a lightweight hanging decoration.
4. Tissue Paper Christmas Tree Suncatcher
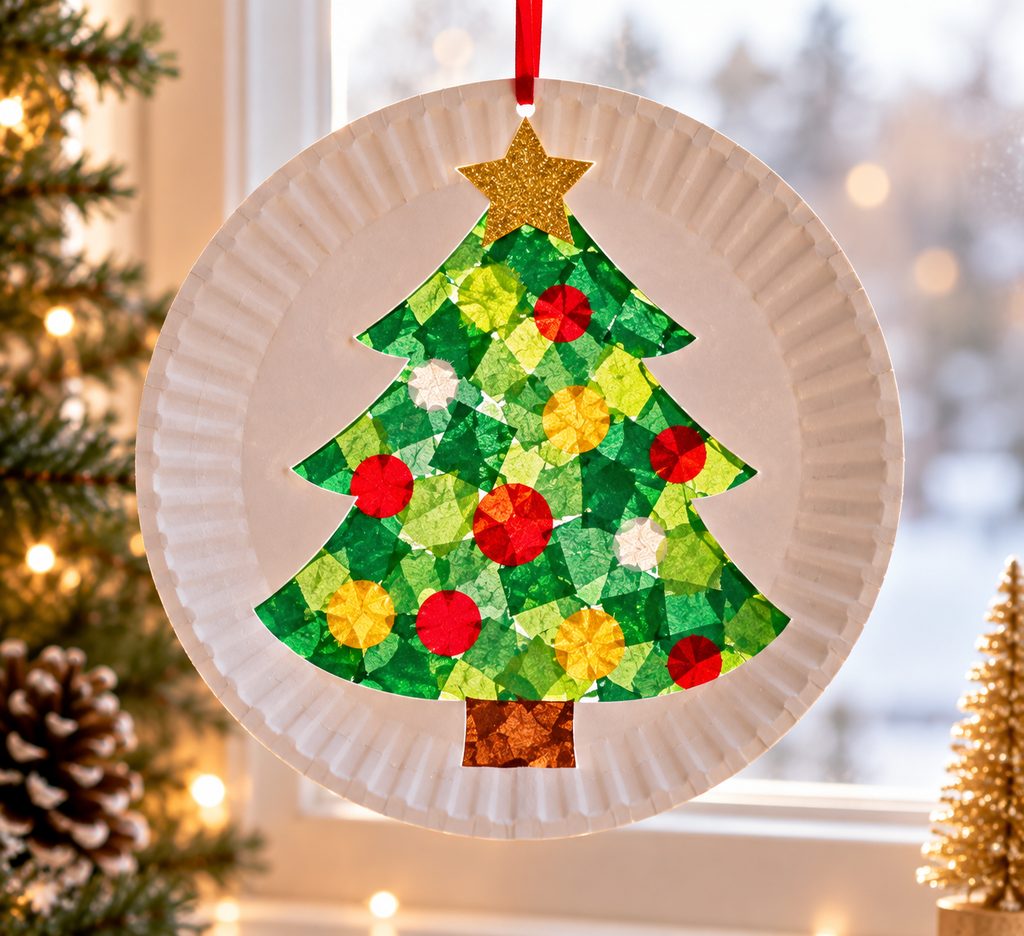
Use the paper plate as a sturdy frame instead of as the visible tree itself. Cut a Christmas tree opening from the center of the plate, leaving enough plate around the shape to keep the frame rigid.
Cover the opening from the back with clear adhesive film or another transparent craft backing, then press small pieces of green tissue paper across the sticky area. Yellow, red, gold, and blue tissue scraps can be scattered between the green pieces like ornaments. When the opening is covered, add another transparent layer over the back if needed to trap loose edges.

Hang the finished plate near a bright window where light can pass through the tissue rather than placing it flat against an opaque wall.
5. Spiral Paper Plate Hanging Tree

A single spiral cut changes a flat plate into a decoration that drops downward when hung. Paint both sides of the plate green first and let it dry completely. Starting near the rim, cut continuously around the plate in a narrowing spiral toward the center.

Leave the center attached because it becomes the top of the hanging tree. Punch a hole there for ribbon, then gently pull the outer end downward to open the spiral.
If the shape hangs almost flat, the spiral is probably too wide. Narrower turns create more length, while overly thin strips can tear under their own weight. A small paper star at the top and a few lightweight decorations along the spiral are enough to keep the structure recognizable as a Christmas tree.
6. Slot-Together 3D Paper Plate Tree

Two matching tree pieces can cross through each other to create a surprisingly sturdy tabletop tree. Flatten two paper plates as much as possible, draw the same simple Christmas tree silhouette on each one, and cut out both shapes.
On the first tree, cut a straight slot from the top down to the middle. On the second, cut from the bottom up to the middle. The width of each slot should be close to the thickness of the plate material rather than a wide open gap.

Slide the two trees together at a right angle. If one piece leans, separate them and extend the shorter slot by a few millimeters instead of forcing the pieces farther together. When the slots meet at the correct depth, all four lower sections help form the footprint.
Decorate before final assembly if kids want to paint both sides. That makes the surfaces easier to reach and keeps wet paint from collecting where the two pieces intersect.
7. Fringed-Branch Paper Plate Tree

Give a simple triangular tree more texture by turning its outer edges into flexible paper branches. Cut a large wedge from a green-painted paper plate, keeping the curved rim as the bottom of the tree.
Make short snips inward along both sloping sides without cutting all the way through the center. Bend or curl alternating strips slightly forward so the branches separate from the flat surface. Small paper ornaments can sit between the fringed edges, but leave enough undecorated space for the cut texture to remain visible.
8. Paper Plate Christmas Tree Pocket

A tree-shaped pocket gives the finished craft somewhere to hold a note, candy cane, drawing, or small paper surprise. Start with a paper plate folded so two curved sides overlap toward the center, forming a pointed lower shape. Adjust the folds until the front reads as a Christmas tree rather than a narrow cone.
Glue only the overlapping side edges and bottom areas that need to stay closed. Keep the upper opening clear.
Before filling the pocket, check that:
- the opening is wide enough for the intended item;
- the bottom is completely sealed;
- decorations are attached outside the opening;
- the plate can support the item without bending forward.
Add a paper trunk below the pocket and a star near the pointed top. For classroom use, write each child’s name on the front and use the trees to hold holiday notes or lightweight treats.
9. Lift-Flap Christmas Countdown Tree
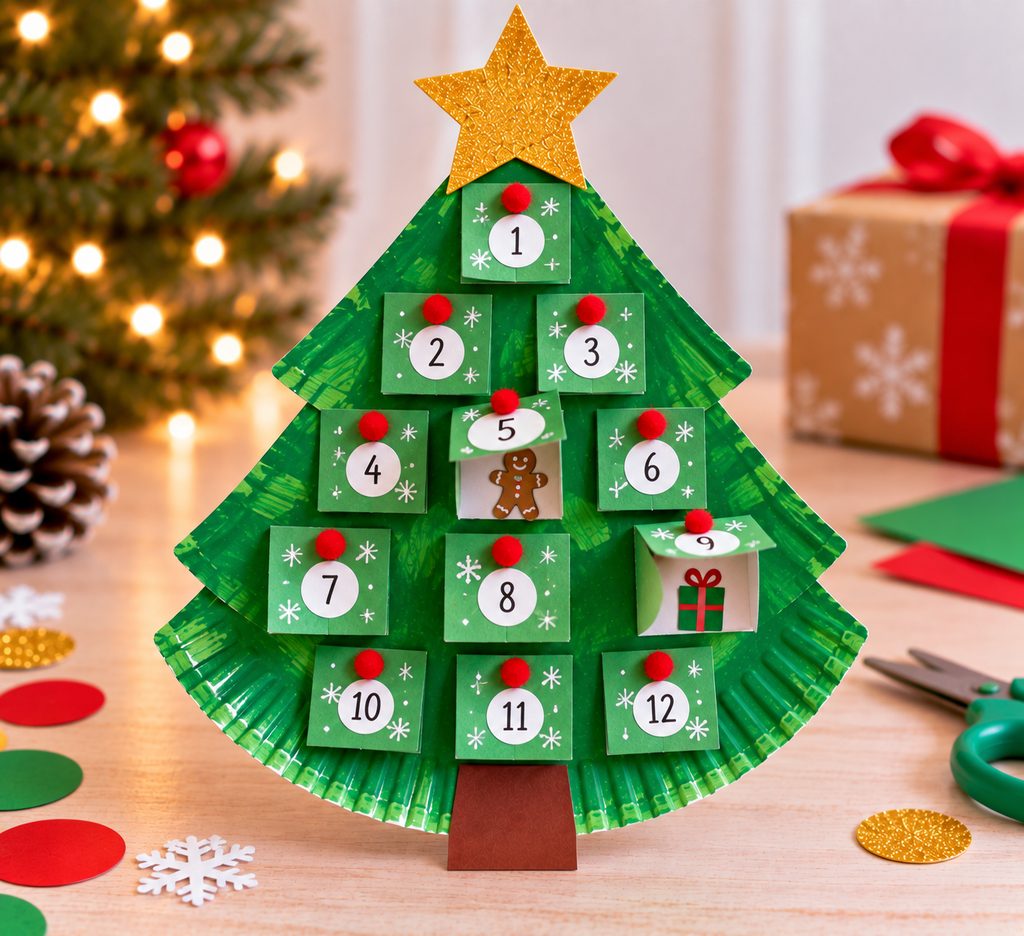
A paper plate makes a convenient backing for a small Christmas countdown because it keeps several movable flaps together in one place. Paint or cover the center with a large green tree shape, then attach twelve small folded paper squares or circles across its branches.
Number the flaps from 1 to 12 and hide a tiny drawing, sticker, holiday prompt, or simple activity underneath each one.
- Glue only the folded hinge of each flap.
- Check that neighboring flaps can open without overlapping.
- Add the hidden surprises after the glue is dry.
- Start with flap 12 and work toward 1, or reverse the order depending on how the countdown will be used.
The finished project can stay on a wall or refrigerator throughout the countdown instead of being completed and immediately put away.
10. Ornament-Matching Paper Plate Tree
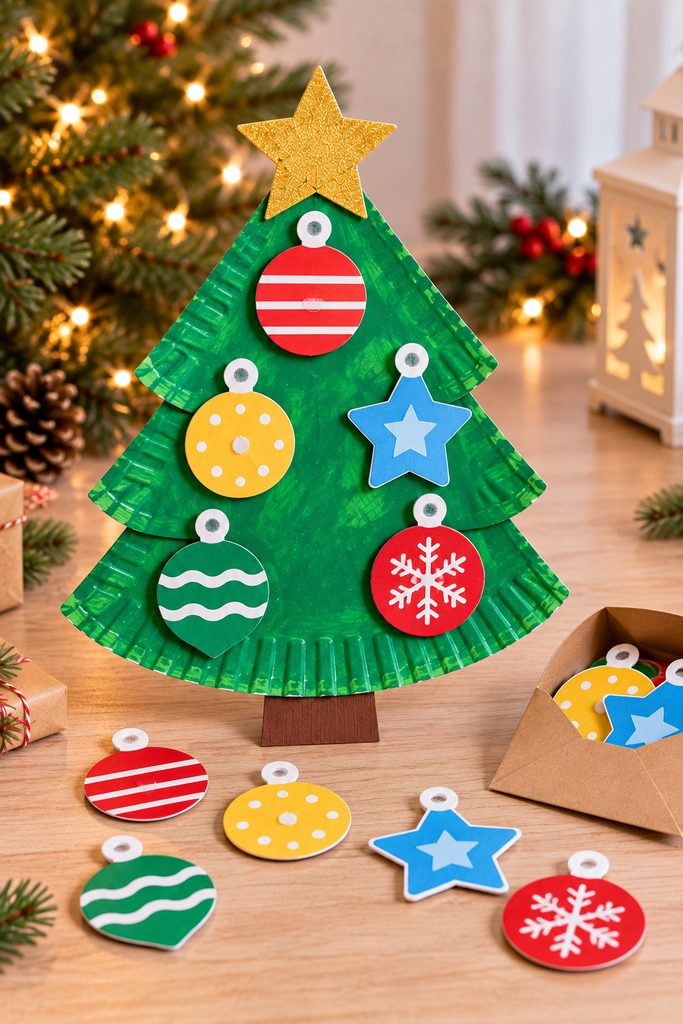
For younger makers, the decoration step can become a reusable matching activity. Cut a tree shape from a paper plate and paint it green, then add several large paper circles in clearly different colors, shapes, or patterns.
One version can use matching pairs: a striped red circle on the tree matches a removable striped red ornament. Another version can use simple numbers, with three dots matching the ornament marked “3.” Removable paper pieces can be attached with reusable adhesive dots if the craft will be played with more than once.
For a purely decorative version, glue everything permanently. For an activity version, keep the pieces large enough to handle easily and store them in a small envelope attached to the back when the tree is not being used.
11. Woven Paper Plate Christmas Tree
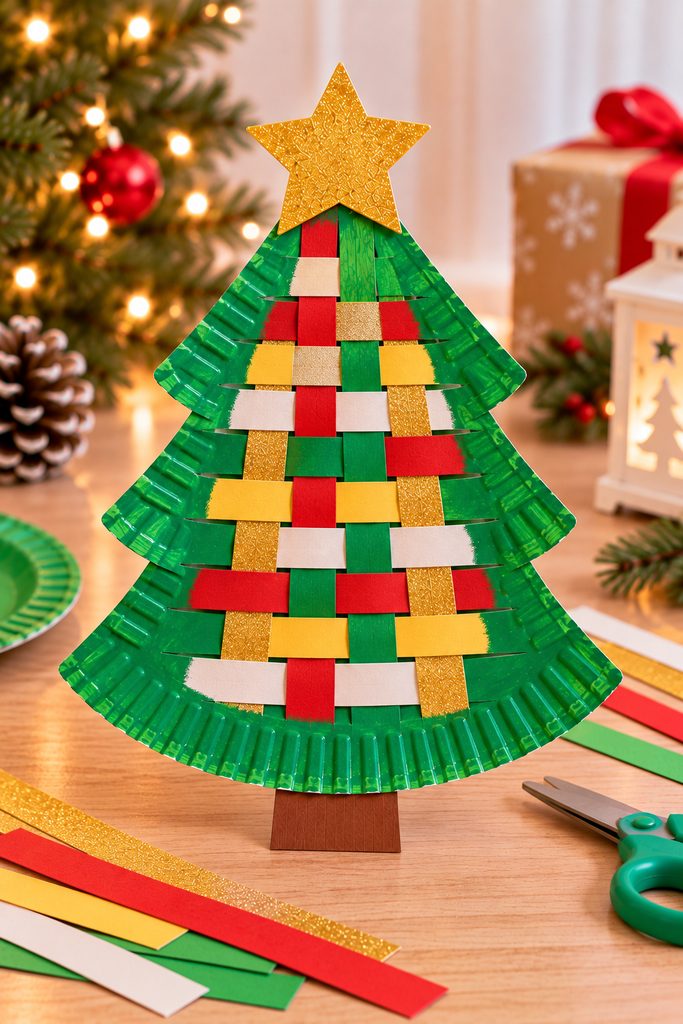
Cut a broad triangular tree from the flat center of a paper plate, then make several parallel slits across the middle while leaving the outer edges intact. These uncut sides act as the frame that holds the weaving together.
Prepare narrow construction-paper strips in contrasting colors. Feed the first strip over one section, under the next, then continue alternating across the tree. Begin the following strip with the opposite pattern so the woven surface locks visually into place.
Do not cut the slits too close to the tree edges. A narrow frame can split when a child pulls a strip through, especially if the plate has already softened from paint.
Once the woven center is filled, trim the strip ends and glue them on the back. A trunk and star can be added afterward without covering the woven pattern.
Weaving Fix: If every strip sits on top of the same sections, it is not really woven. Alternate the over-under pattern on each new row.
12. Paper Plate Christmas Tree Photo Keepsake
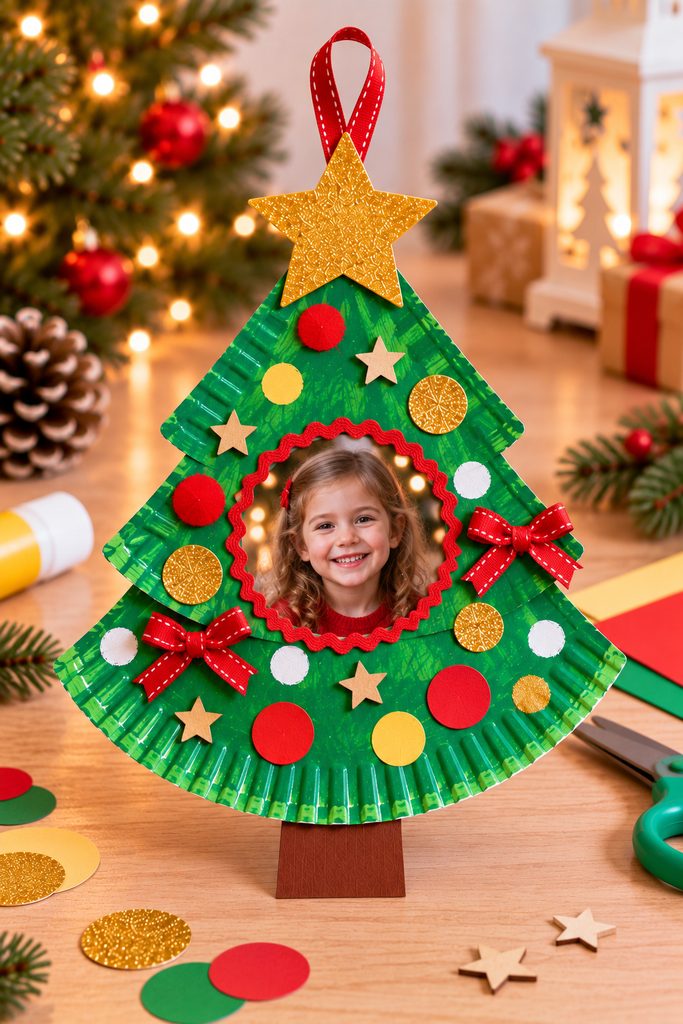
Turn the tree into a holiday keepsake by making the photograph part of the structure rather than simply gluing one on top. Cut a tree silhouette from a paper plate, then remove a small circle, oval, or ornament-shaped window from the center.
Tape or glue a printed photo behind the opening so the face or chosen detail is centered before sealing the backing. Add a second scrap of cardstock behind the photo if the plate bends around the cutout.
Kids can decorate the surrounding tree with fingerprints, paper dots, stars, or short written messages. Punch a reinforced hole near the top for ribbon if the keepsake will hang, or glue a folded cardstock support to the back if it will stand on a shelf.
Choosing an Easy Paper Plate Christmas Tree Craft for Kids
For the shortest project, start with the stacked tree, fringed tree, or ornament-matching version. They use large shapes and do not depend on precise construction. The laced and woven trees add more repeated handwork, while the slot-together tree requires more accurate cutting because the two pieces need to meet correctly.
Choose by what should happen after the craft is finished, too. The cone and slot trees can stand on a table, the spiral and laced versions can hang, the tissue-paper tree works in a window, the pocket holds something, and the countdown or matching tree stays interactive after decorating is over.
Paper Plate Christmas Tree Crafts FAQ
What kind of paper plates work best for Christmas tree crafts?
Plain uncoated paper plates are usually the easiest to paint, cut, fold, and glue. Very glossy or plastic-coated plates can make paint and adhesive harder to use.
Can kids paint the plates before cutting them?
Yes. Painting first is convenient for projects with many exposed edges, such as the spiral or cone tree. Let the plate dry completely before folding or cutting so damp paper does not tear.
What paint works well on paper plates?
Washable tempera or children’s craft paint works well for most projects. Use a thin coat rather than soaking the plate, since too much moisture can make it curl.
How can I make a paper plate Christmas tree stand up?
Use a cone construction, a cross-slot design, or add a folded cardstock support behind a flat tree. Test the undecorated structure before attaching heavy ornaments.
What can kids use instead of glitter?
Paper dots, tissue paper, stickers, crayons, washable paint, yarn, punched shapes, and small pieces of patterned paper all add color without loose glitter.
Can these crafts work for a classroom Christmas activity?
Yes. Choose versions with repeatable preparation, such as stacked trees, lacing trees, or simple matching trees. Adults can pre-cut difficult shapes or punch holes before the activity begins.
How can I hang a paper plate Christmas tree without tearing it?
Punch the hanging hole away from the edge and reinforce the area with a small piece of cardstock or tape on the back before adding ribbon or yarn.
Make the Tree Match the Kind of Craft Time You Want
A paper plate can do much more than serve as a round background for paint. Cutting, folding, slotting, weaving, lacing, and opening the plate in different ways gives each Christmas tree a different purpose and level of challenge.
For a quick afternoon project, choose one of the flat trees and keep the decorations simple. For a craft that stays useful afterward, try the pocket, countdown, matching tree, hanging spiral, or photo keepsake.