This post contains affiliate links. As an Amazon Associate I earn from qualifying purchases, at no extra cost to you. Thank you for supporting Diynify!
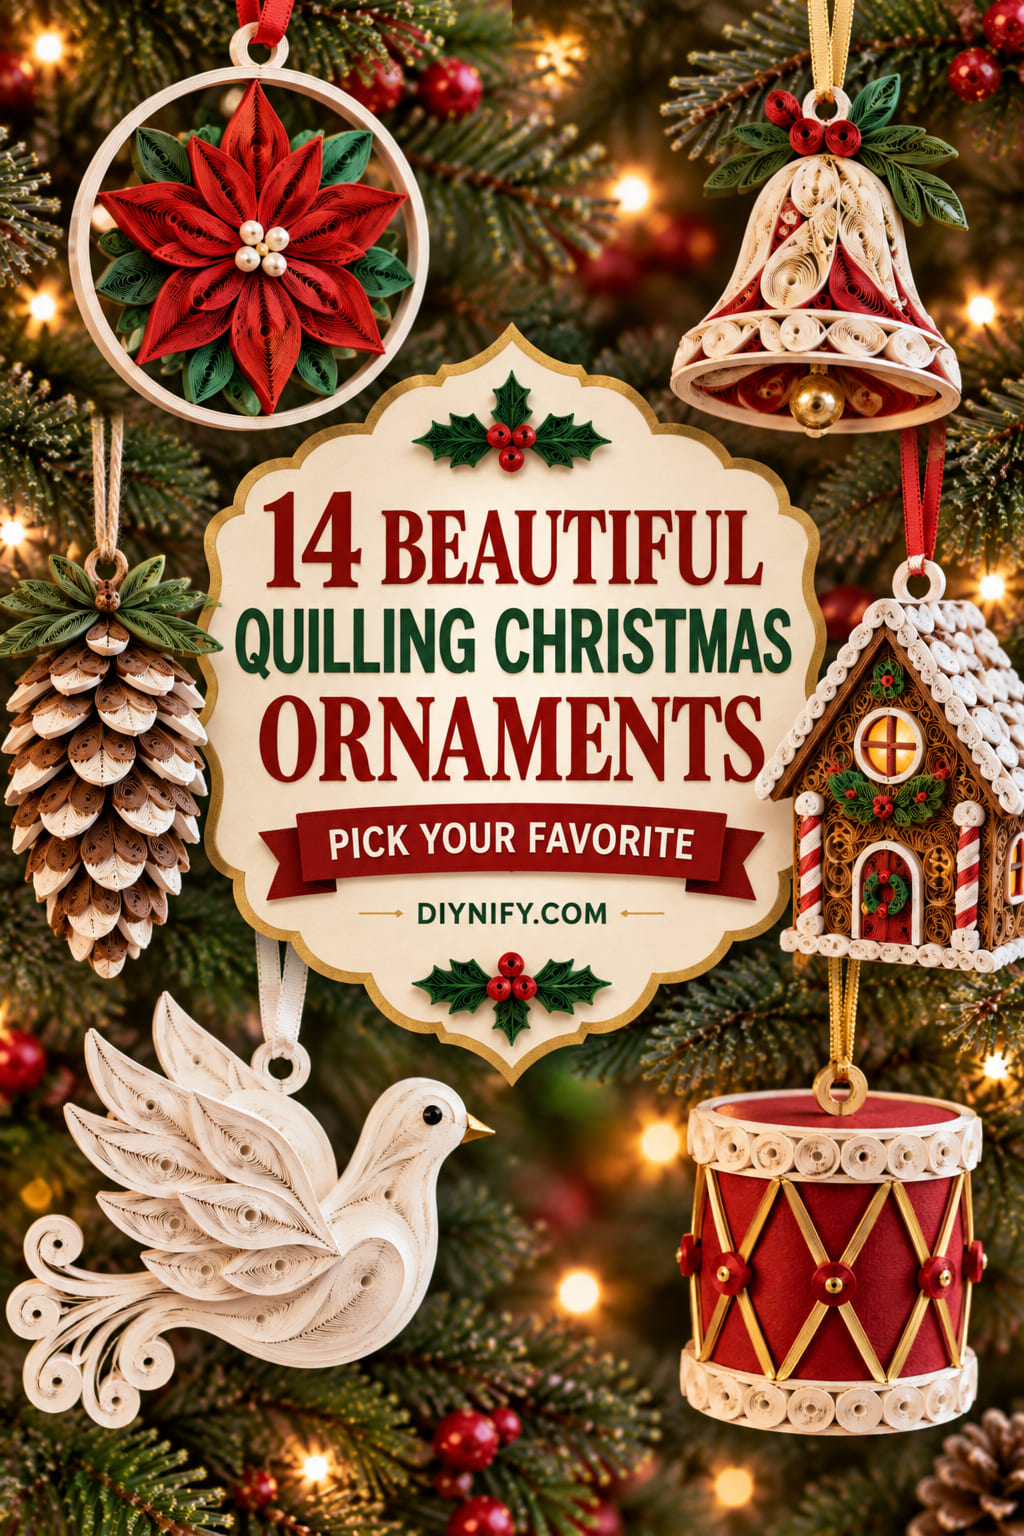
Quilling Christmas ornaments reward close-up viewing: narrow paper strips become berries, feathers, scrolls, petals, and tiny architectural lines that still feel light enough for a tree branch. The strongest designs do more than fill a holiday silhouette with coils. They use the direction, density, and spacing of the quilling to help the ornament hold its shape and remain readable once it is hanging.
Most of these projects use standard quilling strips, a slotted or needle tool, tweezers, paper-safe glue, lightweight cardstock, and thread or narrow ribbon. A few also use vellum or small cardstock formers for pockets, cones, cylinders, and dimensional cores. If you are choosing a first project, start with a flat openwork shape; the domed bell, pinecone, and drum ask for more control over depth, support, and balance.

1. Quilled Poinsettia Hoop Ornament With Layered Petal Rings
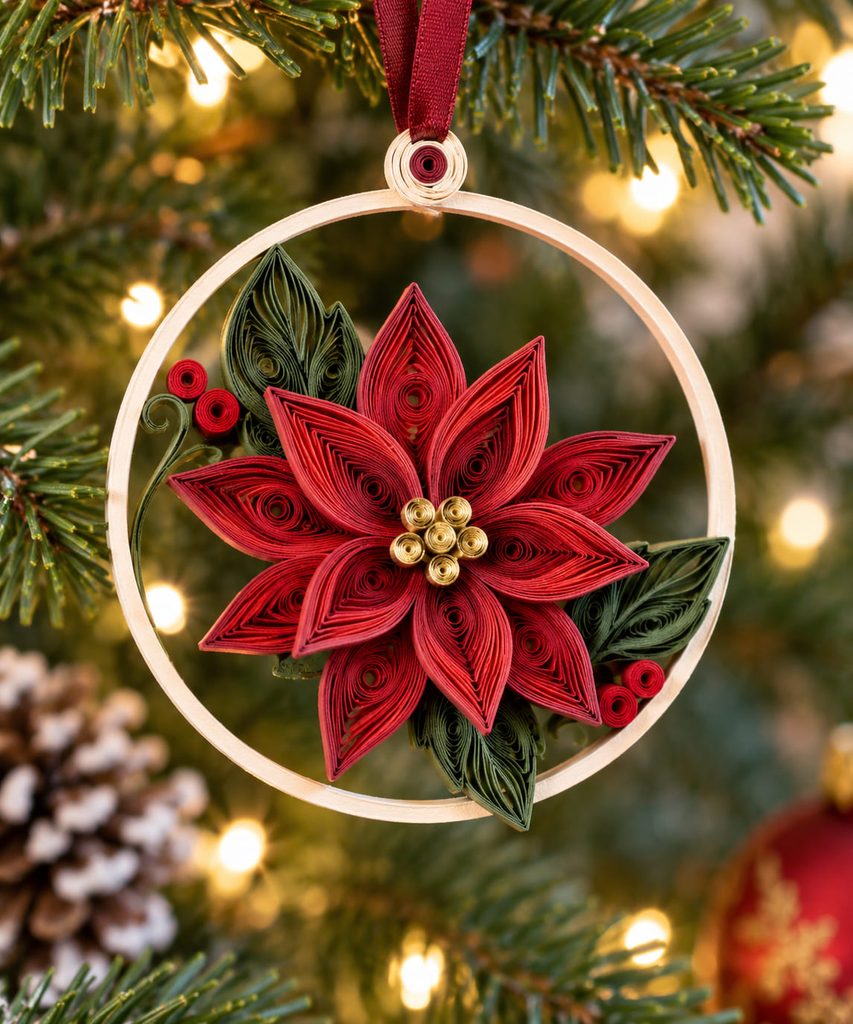
At ornament scale, a poinsettia looks fuller when the petals change size rather than when more of them are added. Shape long red marquises for the outer ring, shorter ones for the upper ring, and a tight cluster of tiny yellow or gold coils for the center. Offsetting the two petal rings keeps the flower from turning into one flat starburst, while the small center gives the eye a clear stopping point.
Mount the flower on a narrow cardstock hoop instead of asking the outer petals to carry the hanger. The hoop can disappear behind two or three green quilled leaves, yet it spreads the pull of the ribbon around a stable ring. Keep the flower slightly below the top of the hoop so the suspension point remains visually separate from the petals.

Scale Check: Hold the dry ornament at arm’s length before adding more coils. If the center and petal tiers still read clearly, extra micro-details will probably add weight faster than value.
2. Openwork Quilled Bauble Ornament With Scroll-Filled Sections
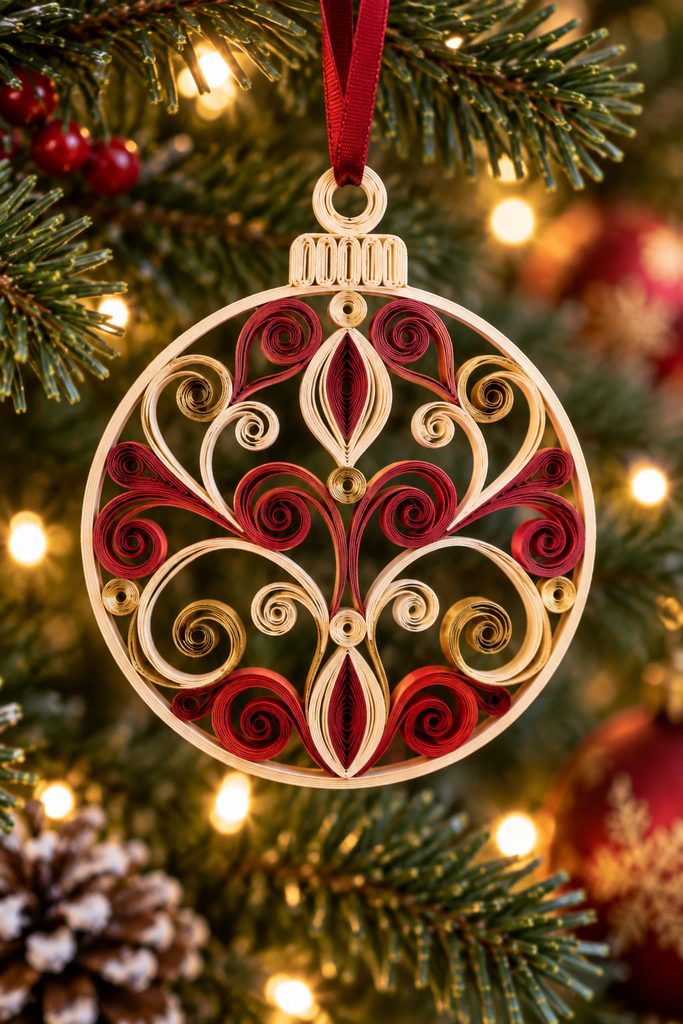
Build the rim before you fill the bauble. A narrow cardstock circle or a paper strip formed into a closed ring gives loose S-scrolls, C-scrolls, and teardrops a dependable boundary, so the interior can stay lacy without becoming fragile around the outside. Divide the circle visually into a few broad sections rather than scattering tiny coils everywhere; the open spaces are what make the filigree readable against dark evergreen branches.
A reliable order is:

- Form the outer ring and glue a small closed hanging loop at the top.
- Add two or four larger anchor shapes so the composition has a stable framework.
- Fit smaller scrolls between those anchors, leaving intentional gaps instead of filling every pocket.
- Let the joints dry flat, then lift the ornament by the reinforced loop rather than by an open curl.
The finished bauble should feel like paper lace, not a solid disk. If one side looks visually heavier, remove or enlarge a gap before adding more paper to the opposite side.
3. Quilled Candy Cane Ornament With Alternating Curved Scrolls
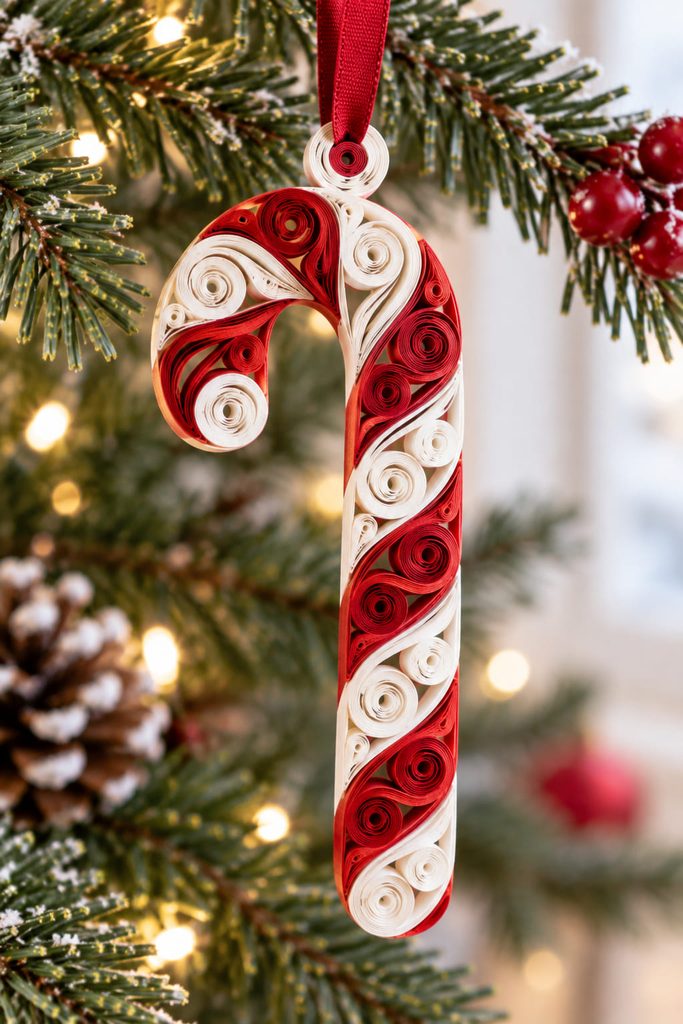
For a candy cane that survives handling, establish the hook with a slim cardstock spine and let the quilling create the striped rhythm around it. Alternating red and white curved coils or compact C-scrolls can follow the bend without forcing each strip to carry structural load. Keep the outer edge clean and the inner hook slightly open; too many projecting curls near the bend are easy to snag on needles or neighboring ornaments. A reinforced paper loop at the top of the straight section keeps the cane hanging vertically instead of rotating around a delicate decorative coil.

4. Domed Quilled Bell Ornament With a Free-Hanging Paper Clapper

The bell only looks convincing if the curved body holds its depth after it leaves the work surface. Roll a broad, tight coil for the main shell, ease the center outward gradually to make a shallow dome, then brush a thin layer of paper-safe glue inside the formed coil and let it dry before handling. This established quilling method uses adhesive inside a shaped tight coil to help preserve the dome. All Things Paper A second shallow dome can close the back, or a lightweight cardstock circle can keep the ornament flatter while still giving the front a rounded profile.
The clapper should hang from the center rather than being glued to the lower rim. Thread a narrow paper strip or fine cord through a reinforced point inside the bell, add one small tight coil at the bottom, and check that it clears the rim. Put the ornament’s main hanger through a separate reinforced loop at the crown so the pulling force does not travel through the clapper assembly.
If the dome starts flattening: the interior glue skin may not be fully dry.
If the bell tilts: the crown hanger is probably off center or the clapper is pulling sideways.
If the rim buckles: reduce the dome depth rather than adding more glue to the edge.
5. Quilled Reindeer Profile Ornament With Clean Negative Space
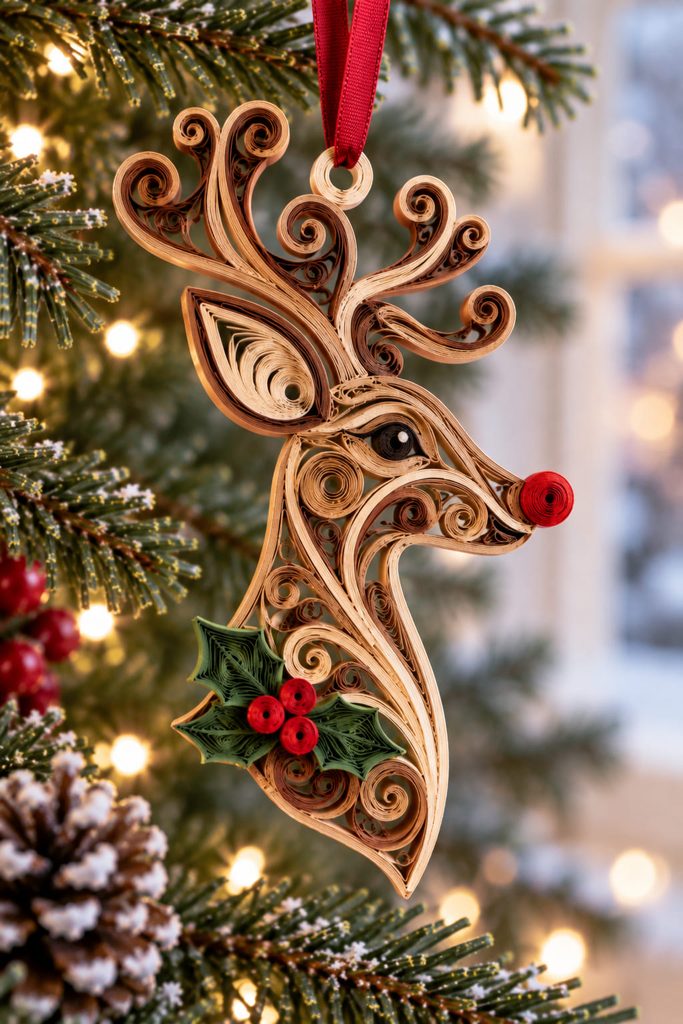
From a few feet away, the reindeer has to read as a silhouette before anyone notices the tiny coils. Use an on-edge paper strip or a slim cardstock outline to establish the forehead, muzzle, neck, and chest, then reserve quilling for the features that benefit from it: a tight nose coil, compact eye, leaf-shaped ear, and a few controlled scrolls suggesting the antler branches. Leaving open space inside the neck and between antler sections keeps the profile from becoming a dark tangle.

Before gluing the last details, check that:
- the nose projects clearly beyond the face line;
- the antlers have two or three strong branches rather than many fragile tips;
- the hanging point sits above the shoulder or upper neck so the head does not tip forward;
- no open curl carries the full weight of the ornament.
A warm neutral or kraft-toned outline makes the tiny red nose or metallic accent look deliberate without depending on extra embellishment.
6. Eight-Point Quilled Star Ornament With Matched Marquise Units
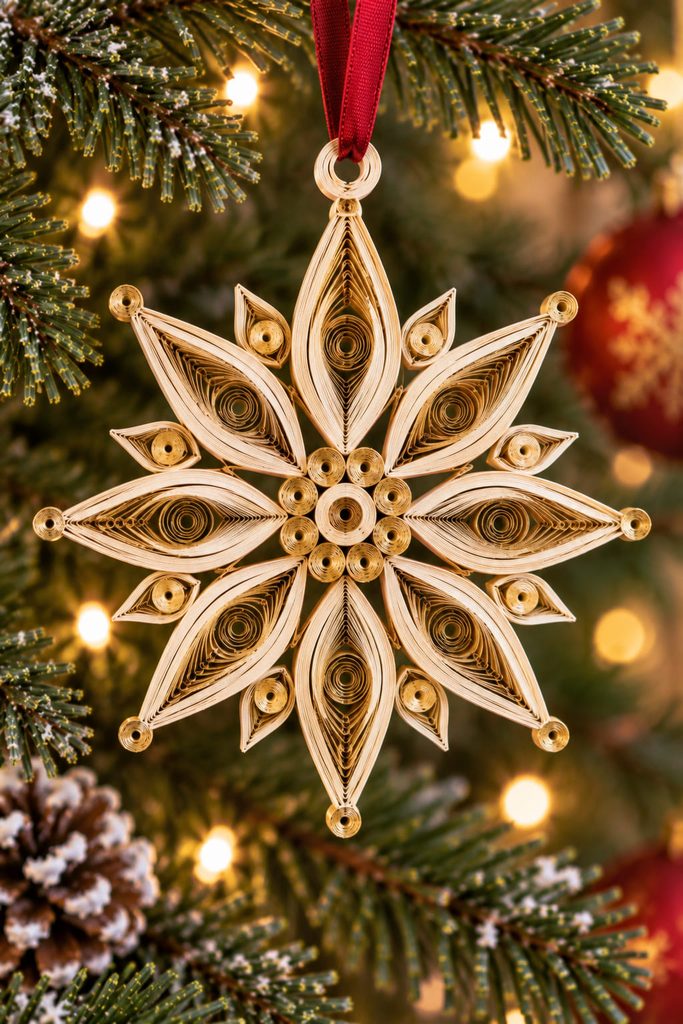
Symmetry matters more than coil count on an eight-point star. Start with a compact center ring or tightly closed coil that can also support the hanger, then make the longest four points as matched marquises. Fit four shorter points between them only after the first cross is aligned. Working in opposite pairs makes small size differences easier to see than completing the star clockwise.

A circle template or simple drawn guide helps keep the tips on one radius. Let the center joints dry before attaching small inner loops or accent coils; those tiny additions should reinforce the rhythm between points rather than hide an uneven foundation. When the star is lifted, the top point should stay directly above the center. If it twists, adjust the hanging loop instead of weighting the bottom with extra paper.
7. Quilled Mitten Wish-Pocket Ornament With a Decorated Cuff

Turn the mitten into a real tiny pocket instead of treating it as a flat silhouette. Cut matching front and back shapes from lightweight cardstock, glue around the sides and rounded bottom, and leave the cuff edge open for a folded wish, name slip, or small paper message. A row of compact coils or short fringed paper along the cuff gives the quilling a protected place to sit, while one or two snowflake-like curls can decorate the front without obstructing the opening. Punch or trap the hanger near the upper side seam rather than through the quilled cuff, and test the pocket with the actual paper slip before adding the last decoration.

8. Sculpted Quilled Pinecone Ornament With Layered Paper Scales
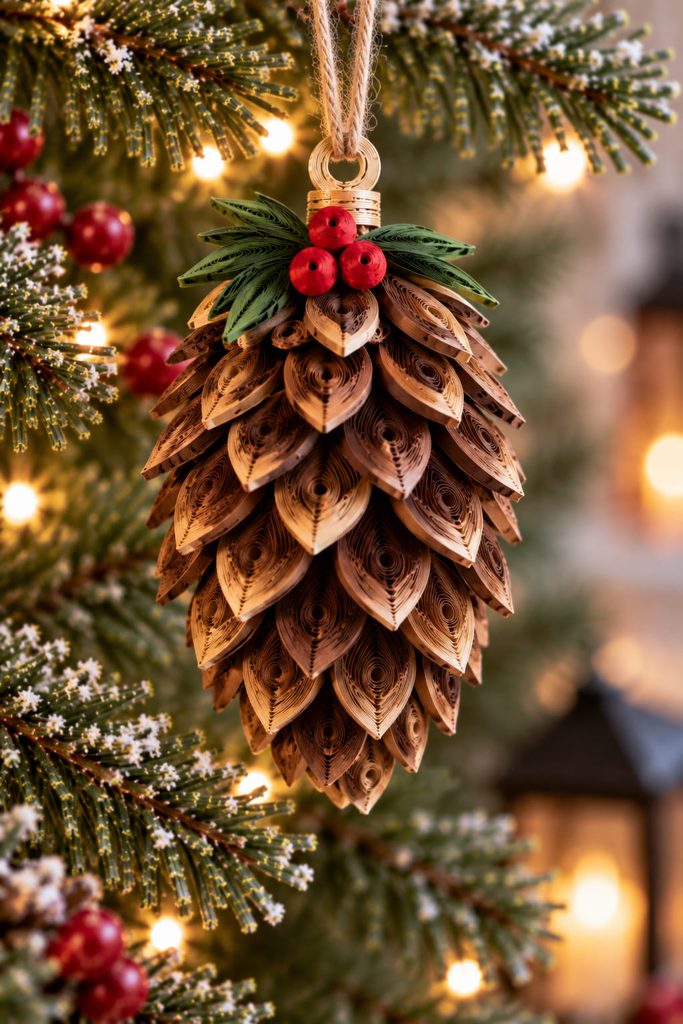
A convincing pinecone needs a tapered core because stacked quilled scales alone tend to spread into a ball. Roll a narrow strip of lightweight cardstock into a small cone or spindle-shaped former, then build the visible surface from pinched teardrops or elongated marquises. The upper pieces should be smaller and tighter; lower layers can open slightly as the form widens.
Build it from the hanger downward:

- Fix a thread loop through the top of the core before covering it.
- Add the smallest scales around the narrow tip, keeping their upper ends close to the core.
- Overlap the next row so each scale sits between two above it rather than directly under one.
- Increase scale size gradually through the widest section, then shorten the final row around the base.
- Hang the unfinished pinecone and correct any heavy side before adding the last decorative tips.
The overlap is doing structural work as well as creating texture. If every scale stands away from the core, the ornament becomes bulky and catches easily on branches; if every scale lies flat, the pinecone loses its layered shadow.
Correction Path: A lopsided pinecone is easier to fix by replacing one oversized scale or shifting a row than by adding another full layer.
9. Quilled Angel Ornament With Scroll Wings and a Light Paper Body
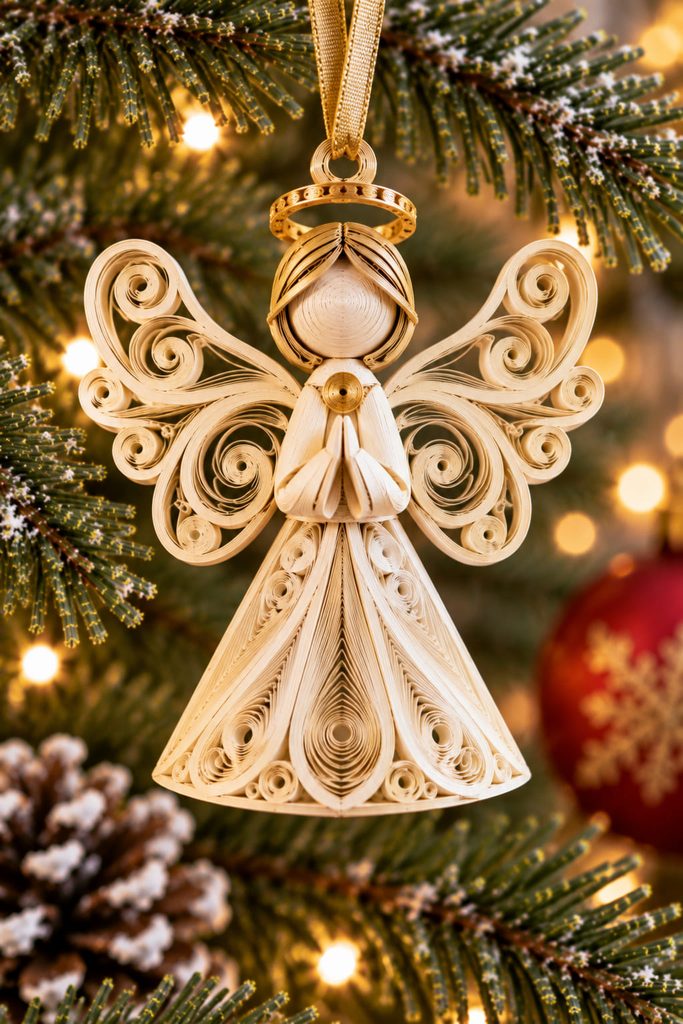
Two constructions work well for a small angel, and the better choice depends on how much depth you want. A flat angel can use a closed head coil, long teardrops for the robe, and mirrored S-scroll wings, all joined around a narrow vertical spine. It is light, stores flat, and shows the filigree clearly from the front.
For more volume, form a shallow cardstock cone for the robe and attach quilled wings to the back rather than building the cone from delicate scrolls. The cone gives the figure a stable lower shape, but it also moves the wings farther from the centerline, so keep them broad and lightweight. In either version, put the hanger through a small reinforced halo or hidden loop above the head; do not let one wing become the load-bearing part.
Choose the flat route for a branch crowded with other ornaments and the shallow cone for an open outer branch where the side profile can be seen.
10. Quilled Gingerbread House Ornament With a Translucent Window
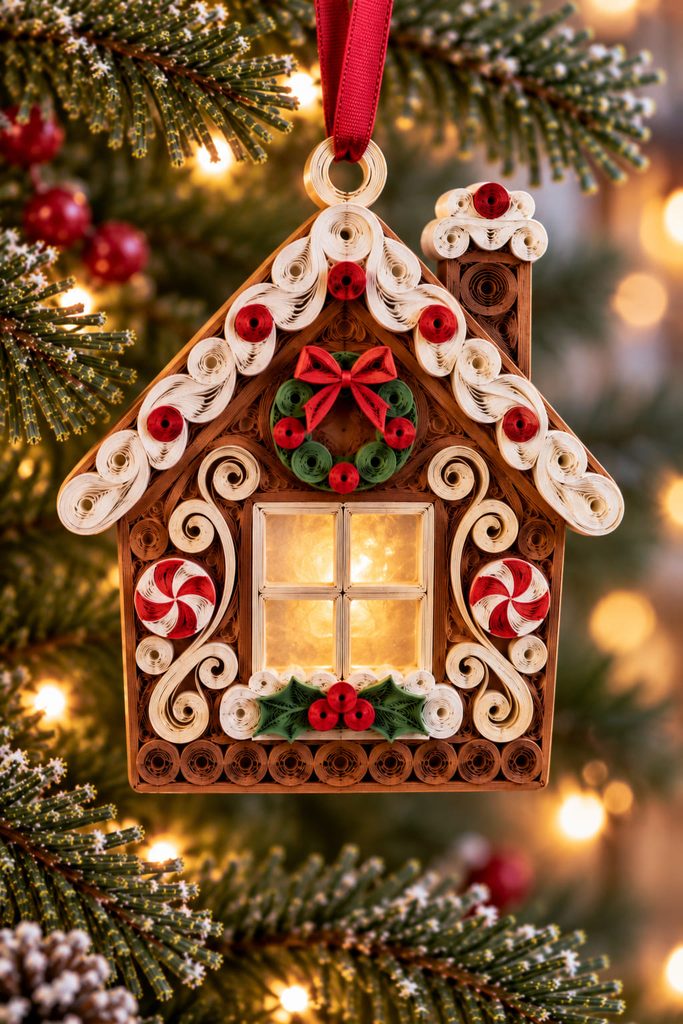
Use the window as the quiet center of this miniature house. A small vellum panel behind a cut cardstock opening can catch nearby tree lights without needing its own light source, while quilled candy trim, roof scrolls, wreath coils, and tiny gumdrop-like circles create detail around the brighter space. Keeping the translucent area mostly uncovered prevents the facade from turning into one dense patch of paper.
Build the house on a lightweight backing and reinforce the roof peak before adding the hanger. The roof is a better suspension point than a side wall because it keeps the rectangular body upright. Tiny coils can mark the door handle or roof candies, but keep deeper shapes away from the outer corners where they are easiest to crush.
Keep the Window Clear: View the piece against a lamp or bright window before final gluing. If the vellum opening is already hard to see, remove nearby coils rather than outlining it with more detail.
11. Graduated Quilled Icicle Ornament on a Hidden Paper Spine
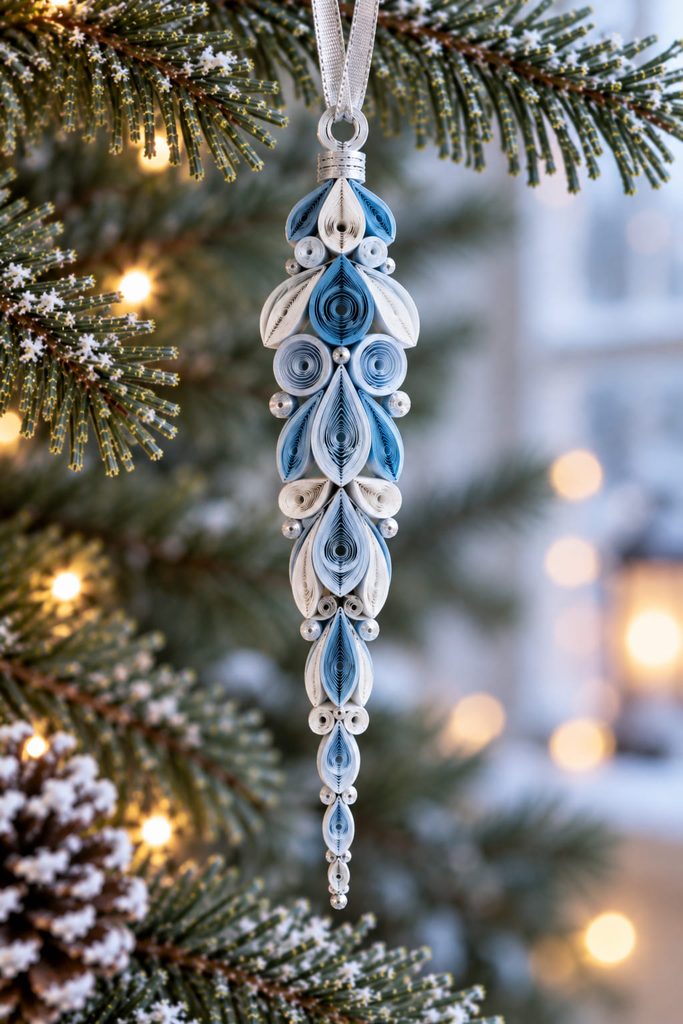
An icicle can look delicate without being structurally delicate. Use a slim folded cardstock spine or a tightly rolled paper stem as the vertical carrier, then stack small closed coils, narrow teardrops, or ring coils from widest near the top to finest at the tip. The gradual reduction matters more than perfect repetition because it creates the long taper that reads as an icicle. Hide the hanger connection inside the topmost coil so the pull stays aligned with the spine.
If the icicle twists, check where the problem begins: a single off-center coil can pull the taper sideways, while several coils with uneven glue can rotate the whole lower section. Re-center the first misaligned unit instead of compensating farther down. Leave a little space around the finished ornament on the tree; a narrow paper drop looks best when it can hang straight without brushing a branch tip.
12. Quilled Dove Ornament With Layered Feather Coils
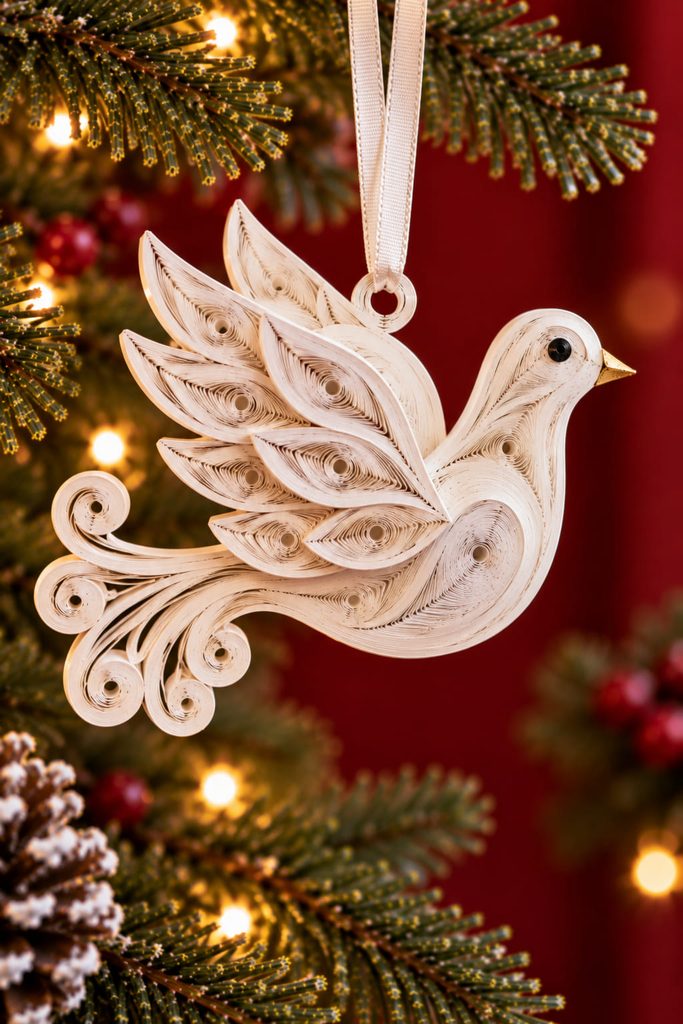
The dove needs one strong wing shape more than it needs dozens of feather marks. Establish the body with a slim cardstock silhouette or a few large teardrop forms, then layer three to five smaller marquises along the wing so their pointed ends step backward like feathers. A loose scroll can define the tail without making it heavy. Place the hanging loop slightly forward of the body’s midpoint and test the bird before the glue fully sets; moving that loop a small distance is cleaner than adding decorative weight to force the dove level.
13. Mini Gift Box Ornament With a Quilled Paper Bow

The bow sets the scale for this ornament. On a tiny folded paper cube, oversized quilled loops can hide the box completely, so choose either two low C-scroll loops with short tails or a cluster of four small teardrops arranged like ribbon loops. The first route reads more like a tied bow and stays flatter; the second gives a fuller floral look but needs a slightly larger top panel.
Build and square the cube before attaching any quilling, with the hanging loop trapped through or under the top panel so the load is carried by the box rather than the bow. A narrow paper band can wrap around the cube like ribbon and also hide the top seam. Leave enough clearance around the quilled loops for fingers to hold the ornament by the box during storage.
14. Mini Quilled Drum Ornament With Wrapped Bands and Crossed Lacing
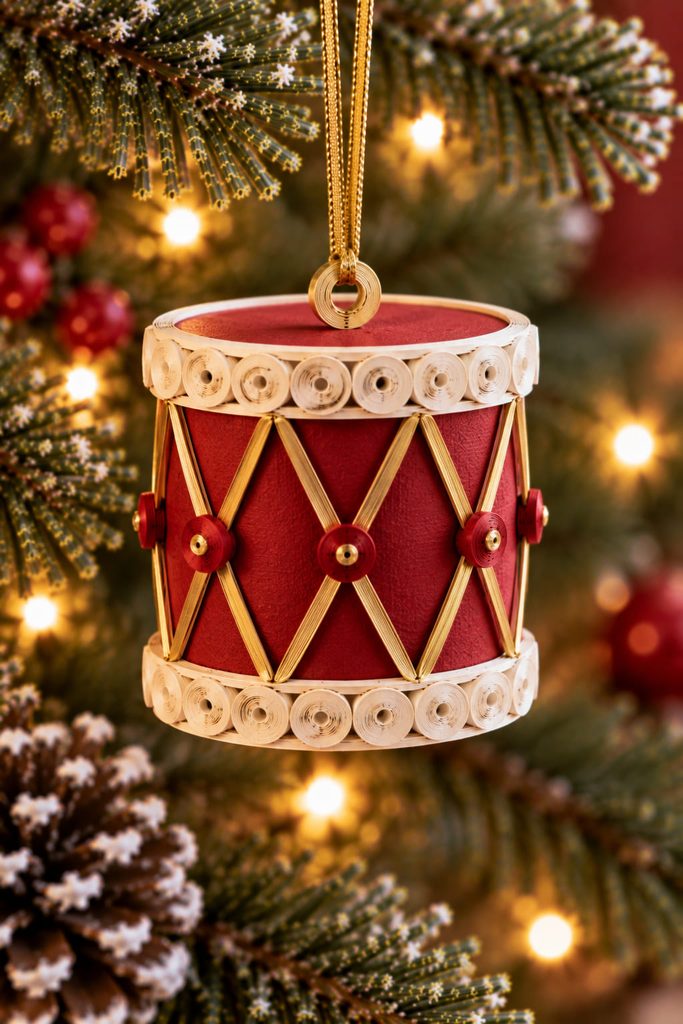
A miniature drum works best when the cylinder is the structure and the quilling supplies the raised trim. Form a short cardstock tube with a clean overlap, close the top and bottom with fitted paper disks, then add tight coils or narrow rolled bands around the rims. Thin quilling strips can cross diagonally between the bands to suggest rope lacing without needing to carry tension.
Center the hanger through the top disk before decorating the sides. If the loop is attached only to the upper rim, the drum can cant toward the seam; a centered anchor keeps the cylinder vertical and lets the crossed strips remain purely decorative. Small closed coils can mark the lacing intersections, but keep them shallow so they do not snag.
Check the finished form in three ways: roll it gently on a table to spot a warped cylinder, hang it to confirm the top disk stays level, and look down from above to make sure the rim bands remain circular. If the body has gone oval, correct the tube before adding more side details; extra quilling will only lock the distortion in place.
How to Choose Quilling Christmas Ornaments by Skill Level
If you want quick control over basic coil size, begin with the candy cane, star, or dove. They keep the construction mostly flat and make alignment easy to see. The poinsettia hoop and filigree bauble add more composition work without requiring a dimensional core.
Move to the bell, pinecone, gift box, or drum when you want the quilling to interact with a three-dimensional form. Among these quilling Christmas ornaments, those projects ask you to think more carefully about where the hanger pulls, how paper thickness changes the silhouette, and which details must remain decorative instead of structural.
Tiny Details Work Best When the Structure Stays Simple
The most convincing small ornaments usually have one clear silhouette and only a few details that reward a closer look. Pick one construction skill to practice first—matched coils, clean scrolls, layered scales, a balanced hanger, or a crisp paper former—then let the tiny quilling support that structure instead of covering it.
For a broader set of holiday projects that uses quilling on cards, gifts, decor, and dimensional pieces as well as hanging designs, continue with 15 Christmas Quilling Ideas Full of Festive Detail.