
This post contains affiliate links. As an Amazon Associate I earn from qualifying purchases, at no extra cost to you. Thank you for supporting Diynify!
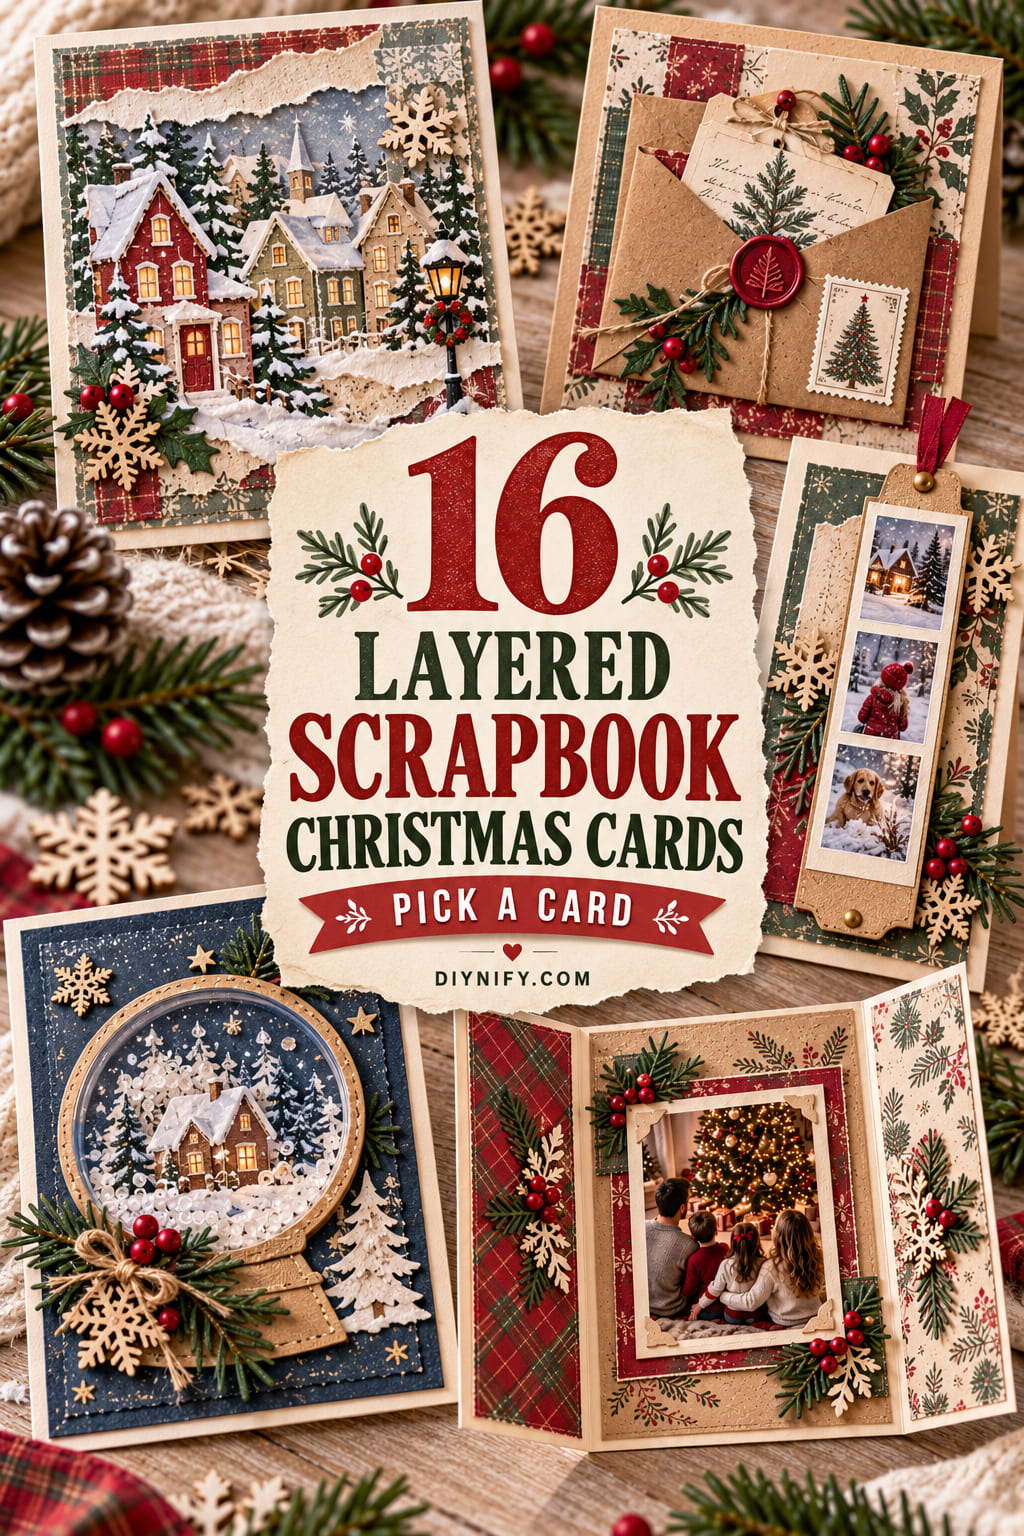
Scrapbook Christmas cards borrow the most personal parts of a memory album: a favorite photograph, a dated note, a piece of wrapping paper, or handwriting worth keeping. These 16 ideas turn those pieces into greetings that feel collected rather than mass-produced. Some are flat enough for a regular envelope; others open, slide, shake, or unfold like tiny keepsakes.
Start with folded cardstock, patterned paper scraps, scissors, a ruler, a scoring tool, and paper-safe adhesive. Photo prints and a journaling pen are useful for memory-based designs. Depending on your choice, you may also need vellum, acetate, foam tape, ribbon, embroidery floss, fabric, a paper fastener, or a perforating tool. Pick a construction based on how the recipient will handle the card, then choose the Christmas details.

1. Torn-Paper Winter Street Collage
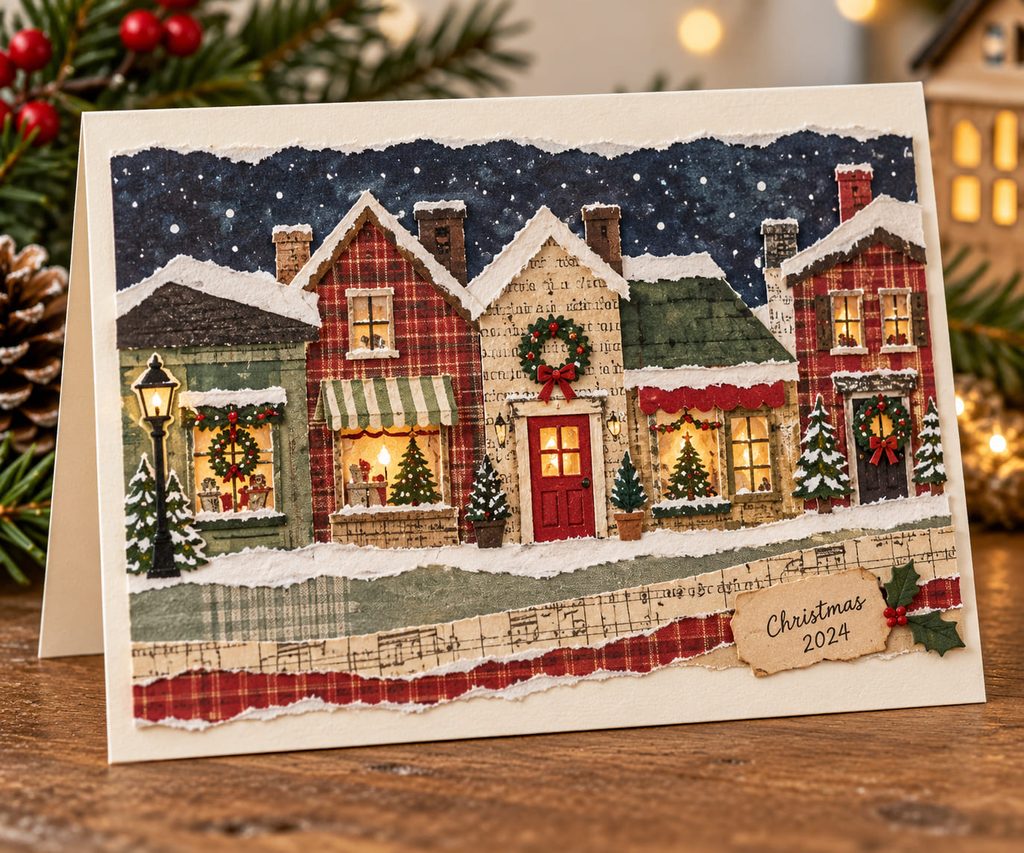
Uneven paper edges can make a row of little Christmas shops feel hand-built rather than illustrated. Tear narrow strips from plaid gift wrap, book-page copies, and muted patterned paper for the street, then cut simple rooflines from darker cardstock. Overlap the roofs at different heights and reserve one bright doorway as the focal point. A tiny handwritten date on a scrap label gives the scene its scrapbook character.

Glue broad background scraps down first so the roof pieces have a stable surface. Keep all the layers thin and stop the street well above the card’s fold. The result is a textured holiday greeting that can still be pressed flat for an envelope, with no need to cut dozens of miniature windows.
2. Photo-Mat Scrapbook Christmas Cards With Depth

Choose a favorite holiday photograph and let the paper borders do some of the visual work. Trim a small print of a decorated tree, winter doorway, or family gathering, then mount it on two or three slightly offset rectangles of contrasting scrapbook paper. Let one border show more at the bottom so there is space for a handwritten caption or year.

Choose the mounting depth to match the delivery:
- Flat adhesive: crisp stacked borders that slip into an ordinary envelope.
- Thin foam pads under the top mat: a small shadow that suits a hand-delivered greeting but needs more clearance.
The photo stays the subject; patterned mats should frame it, not compete with its details. Use a replaceable print rather than cutting an irreplaceable original.
3. Vintage Postal Pocket With A Hidden Letter
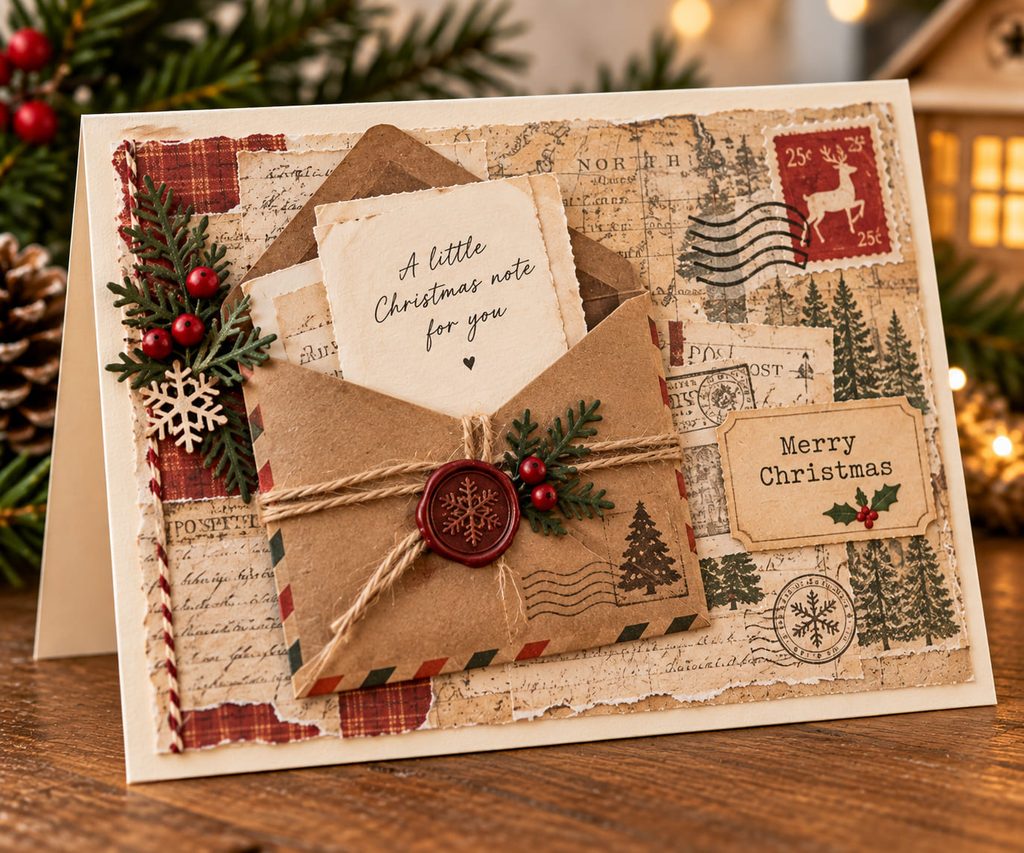
For someone who keeps letters, make the front of the card function like a miniature mail desk. A small kraft envelope, a cancelled-stamp-style paper scrap, and an old-map reproduction establish the postal mood. The envelope’s real job is to hold a folded message, not merely decorate the cover.
- Cut a pocket envelope that fits comfortably within the closed card’s edges, and glue only its back to the front panel.
- Add flat paper ephemera around the pocket without covering the opening or sealing the flap.
- Fold a personal note small enough to slide in and out without catching on the envelope corners.
Put the greeting’s most meaningful words on the removable letter. The card can then be displayed while the note is taken out and read again. When cutting the envelope, allow a little extra width beyond the folded note; thick paper catches at the corners. Avoid a heavy wax-style seal on the flap, since this pocket needs to open repeatedly. A small paper tab is easier to lift.
4. Ribbon-Bound Mini Memory Book Card
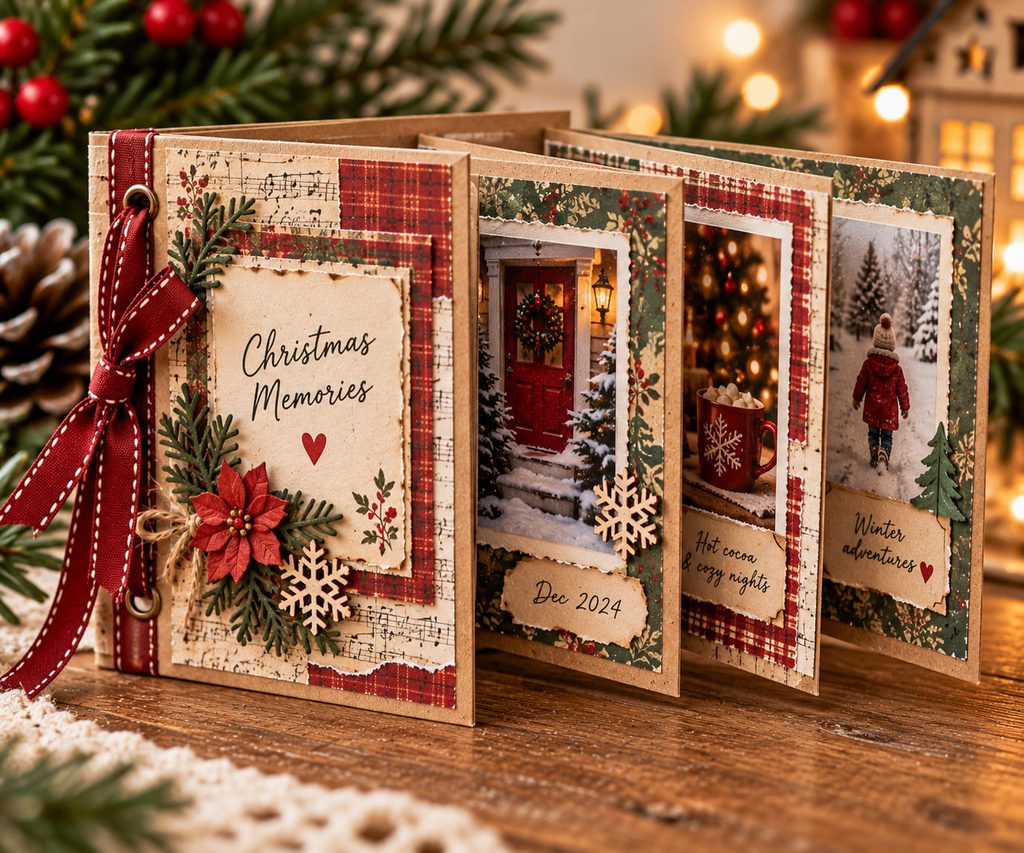
Three small pages can hold more Christmas history than one crowded cover. Build a folded cardstock cover with a narrow spine, then nest two or three lighter paper leaves inside it. A pair of aligned holes near the spine lets narrow ribbon bind the pages into a pocket-sized booklet. The inner spreads might pair a photo with a brief handwritten moment: decorating the tree, making cookies, or taking the last walk before snow.

The awkward part is thickness at the fold. Punch holes through a measured stack before tying, keep knots on the outer spine, and leave the ribbon loose enough for each leaf to turn. Heavy cardstock on every page will make the booklet spring open; use lighter paper inside and reserve thick matting for the cover. If photos are added after binding, keep them clear of the ribbon holes; adhesive near the spine can lock a page in place. A narrow blank strip along each inner page creates space for the page to bend without creasing a photograph. This makes the little book pleasant to flip through rather than merely thick.
Page-turn check: Close the booklet without pressing it. If its front cover lifts, remove a bulky embellishment or give the spine a little more width. This is a hand-delivery card or keepsake, not the best choice for a thin envelope.
5. Lift-Up Vellum Snowfall Photo Card
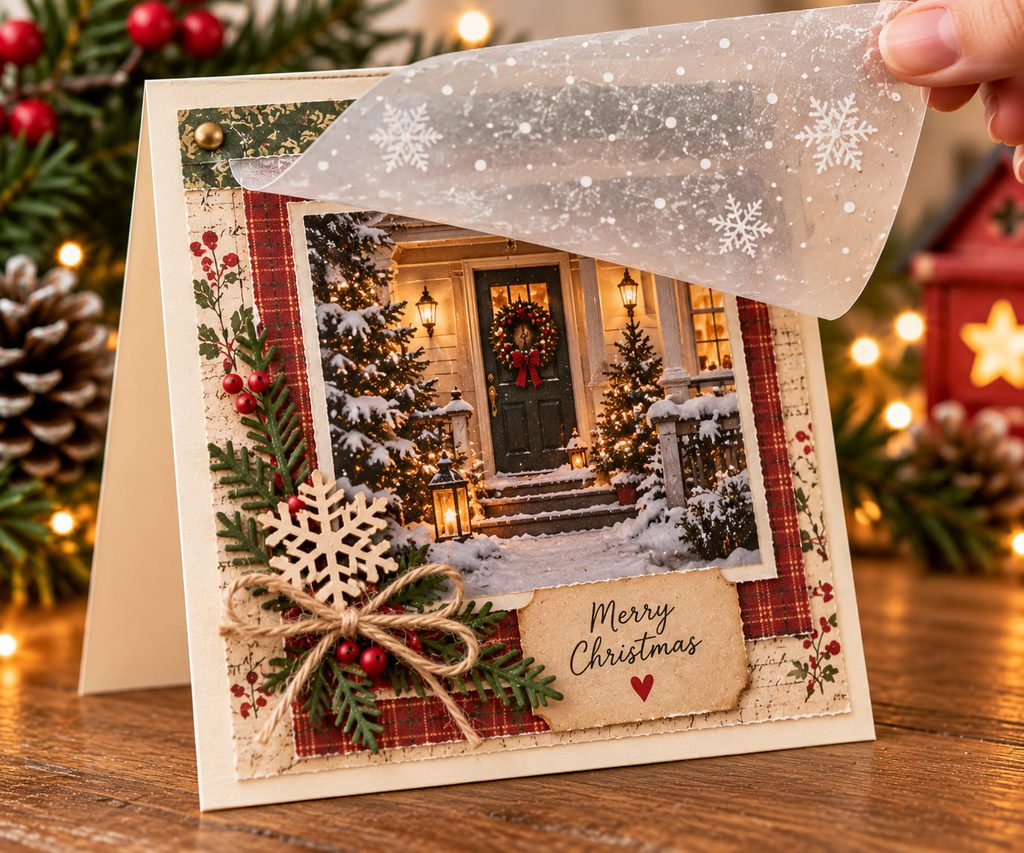
Snow-dotted vellum changes what a winter photograph reveals at first glance. Place a small photo of a porch, pine tree, or snowy walk on the card front. Cover it with a translucent flap carrying sparse white marks, and hinge the vellum along its top edge under a thin strip of patterned paper. When lifted, the photo becomes crisp and the snowfall disappears.

Printed snow dots work for a subtle effect; hand-drawn white marks feel looser and more personal. Either way, leave a small unmarked area over the photo’s main subject so the image is recognizable before the flap opens. Attach adhesive only beneath the hinge strip, where it cannot show through the translucent sheet. This is a reveal card, not a thick dimensional build, so it travels well when the vellum lies flat.
6. Patchwork Paper Tree With Folded Corners
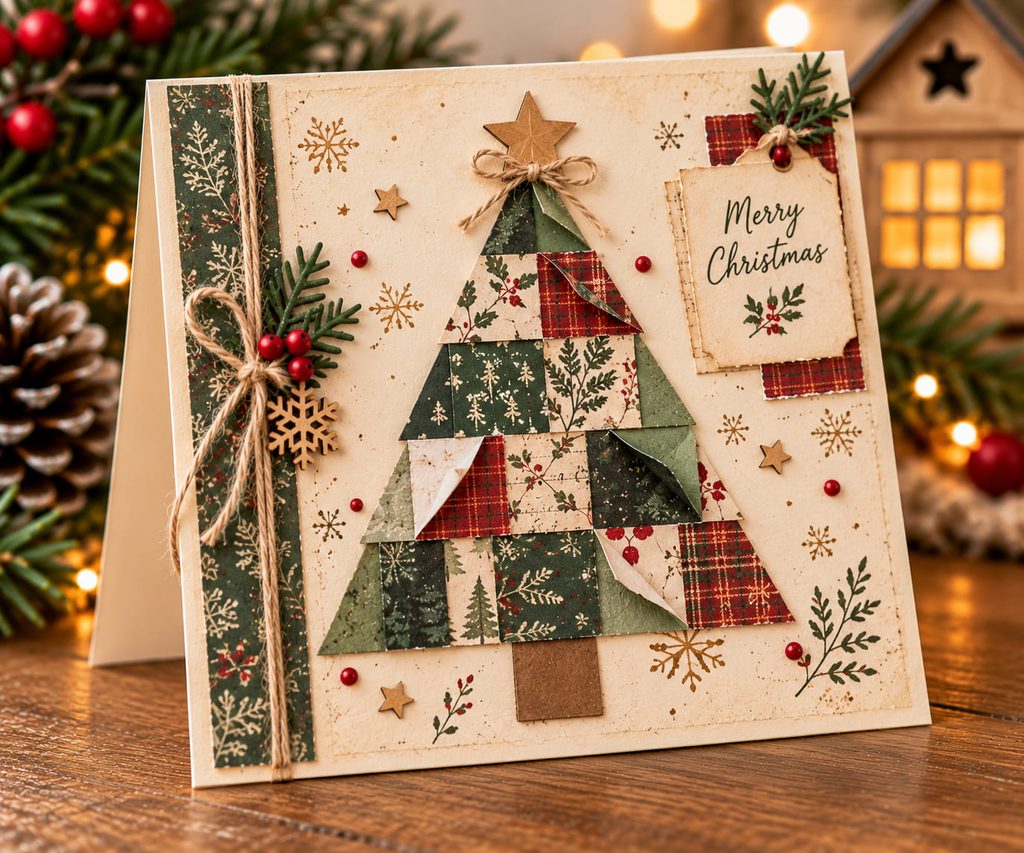
The little squares left after trimming larger scrapbook layouts are enough for a Christmas tree. Cut them to a consistent size and arrange them into a triangle, with a narrow kraft trunk underneath. Alternate quiet solids with small-scale prints; two loud patterns next to each other can blur the tree’s silhouette.
- Lay out the entire tree without glue, leaving a slim gap between its squares like quilt seams.
- Fold back one corner on a few selected squares to expose the paper’s reverse side and create restrained relief.
- Mount the finished arrangement on a plain card front, keeping the folded corners away from the envelope’s opening edge.
A simple star cut from a leftover gold paper strip is enough at the top. The charm comes from the patchwork rhythm and the visible paper folds.

7. Sliding Filmstrip With Three Tiny Memories
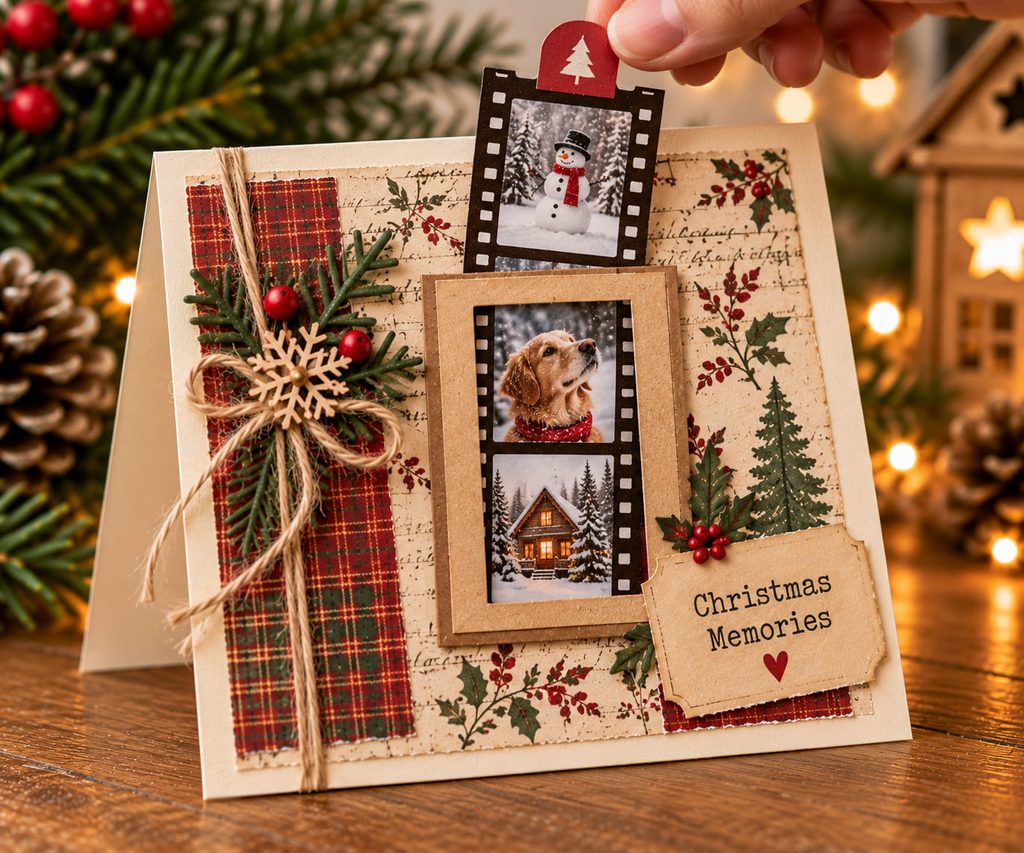
The filmstrip travels behind one small window, revealing three moments without crowding the cover like a full photo collage. Make a long, narrow slider with three evenly spaced miniature photos and a pull tab at the top. On the card front, build two shallow paper rails beneath a windowed cover panel; the rails keep the strip traveling straight without glue touching the moving piece.
The window must be shorter than the spacing between photo centers. Add a small paper stop at the slider’s bottom so it cannot be pulled completely free. Before sealing the window panel, run the strip through its entire travel and check that every photo centers in the opening.
If the strip jams: Check for glue squeezed into the rails, foam tape that pinches the channel, or a tab wider than the exit slot. The tab also needs a visible stop mark: a small printed dot or contrasting paper end helps the reader know when the last photograph is in place. Keep the photo edges flush against the slider with a glue stick or photo-safe tape; raised corners can catch in the channel even when the rails are wide enough. When the whole mechanism is assembled, hold the card vertically and make sure gravity alone does not send the strip sliding out. This mechanism is better hand-delivered because the working pull tab needs room to move.
8. Snow Globe Shaker With Captured Confetti
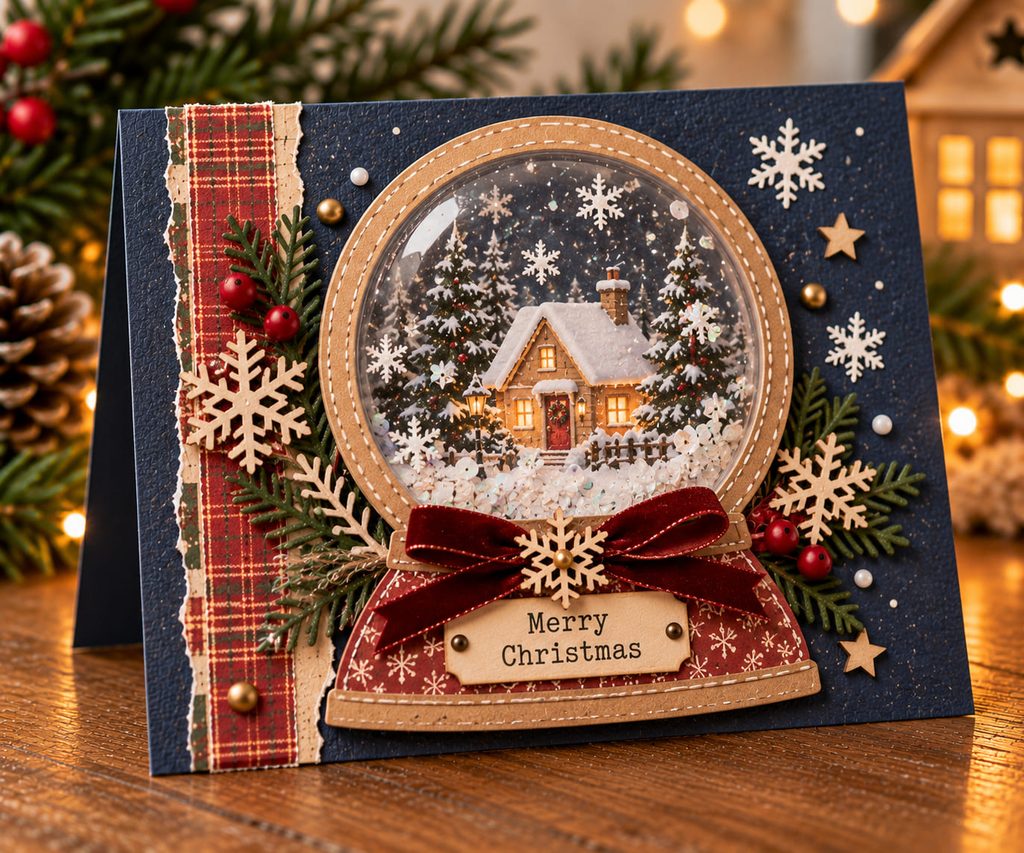
A scrapbook-style snow globe can hold loose paper snow without spilling it inside an envelope. Cut a circular window in a top panel, adhere clear acetate to its underside, then build a continuous spacer ring behind the acetate. Add a small number of lightweight paper stars or snowflakes, seal the cavity with a background scene, and mount the whole unit on a sturdy folded base.
A printed winter house or a tiny photo makes the background feel personal; the loose pieces should drift across it rather than hide it. Avoid fine glitter if you want fewer leaks and easier cleanup. The card must remain upright while the chamber is open, and the spacer ring needs an unbroken adhesive seal before you shake it.
Seal check before gifting
- Hold the card over clean paper and tap its edges gently.
- Look for escaped confetti or a lifted corner around the acetate.
- Fix gaps before adding the final globe base decoration.
Choose confetti smaller than the visible opening but larger than any gap in the edge seal. If the shaker pieces stick to static-charged acetate, substitute a few heavier paper cutouts and make the background less busy. Before closing the card, check its back: the shaker assembly should sit on a rigid panel, not a flimsy paper layer that flexes when handled. This is a thicker card; use a protective mailer or give it by hand.
9. Accordion December Moments Along The Edge
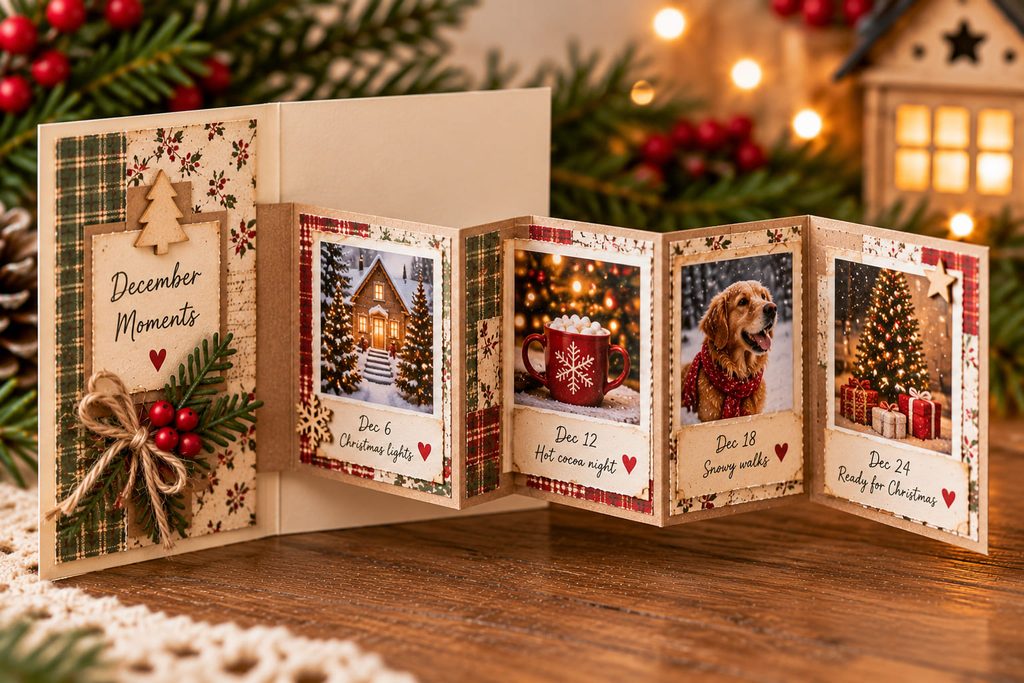
Instead of putting all the photos on the cover, tuck a miniature December timeline inside the greeting. Score a long strip of lightweight cardstock into equal panels and attach its first panel to the inside right edge of the card. Add a small photograph or copied keepsake to each remaining section, leaving the folds free of bulky decorations.
- Mark and score every panel before attaching the strip.
- Fold the sequence back and forth, testing that the stack stays within the closed card’s outline.
- Add dates or short captions beside the memories, then glue only the anchor panel to the card.
The recipient can unfold the story sideways while the ordinary greeting remains readable on the other half. Use thin photo prints so the concertina closes neatly.
10. Stitched Stocking From Fabric Offcuts
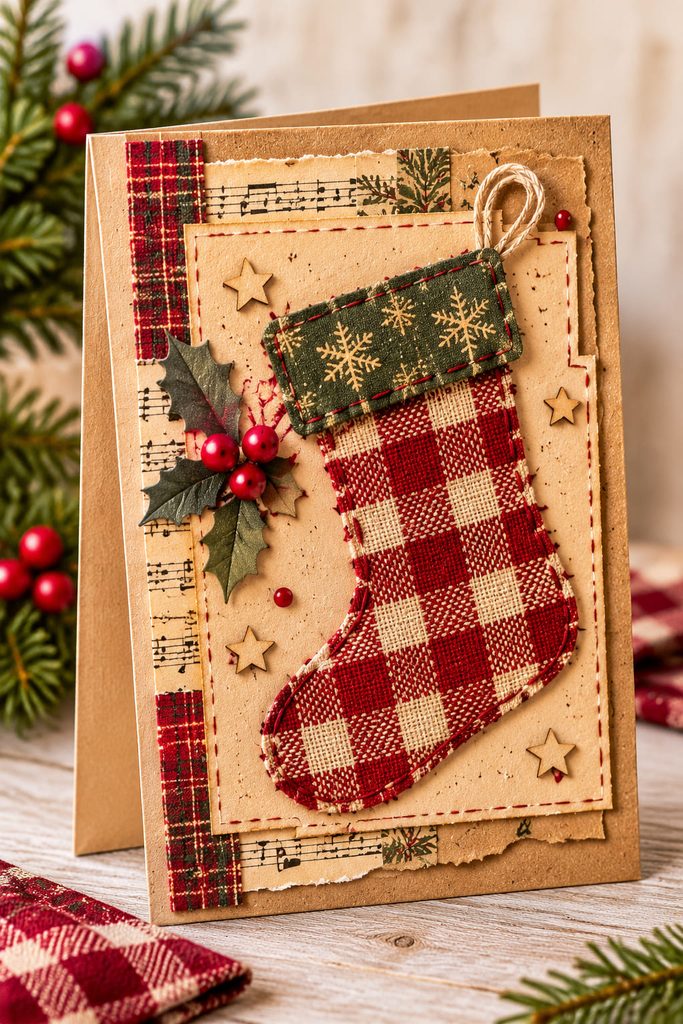
Checked cotton left from a sewing project makes a convincing stocking without elaborate embroidery. Cut the stocking silhouette from fabric, back it with thin paper for stability, and lay it over an old-book-page-style cardstock panel. A narrow cuff from contrasting fabric gives the shape its identity, while a few visible stitches connect the textile to the scrapbook background.
Small supply set: fabric offcuts, a thin paper backing, heavy cardstock, embroidery floss, a needle or pre-piercing tool, and a little paper-safe adhesive.
Pierce the stitch holes in the cardstock before sewing, especially near the edge. Pulling thread too tight can buckle the front panel; the stitches should hold the fabric, not gather the card. For a sturdier textile edge, use a tiny amount of adhesive beneath the fabric before sewing, and let it dry so the needle does not drag wet glue through the fibers. If you do not want to stitch through the folded card itself, sew the stocking to a separate cardstock panel first, then mount the entire panel on the front. This tactile design works best with a roomy envelope that will not snag the cuff.
11. Washi-Wrapped Present Stack Collage
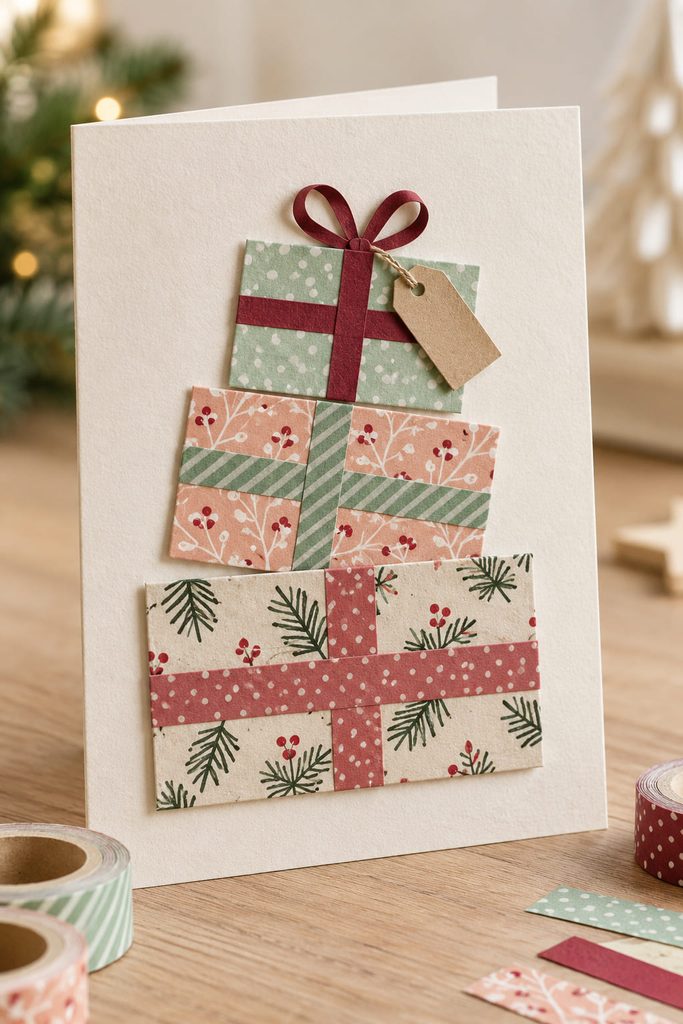
Use narrow washi strips as miniature gift wrap on three rectangles cut from spare cardstock. Fold each tape end around the back of its rectangle before mounting the parcel shapes, rather than leaving loose sticky ends exposed. Stack the presents at slight angles with the largest at the bottom, then add slender paper-strip ribbons that actually cross the boxes. A small gift tag bearing a person’s initials turns the arrangement into a personal greeting. Because each parcel is a separate flat piece, you can rearrange the composition until the gaps look balanced, then glue it down. It is an easy design to repeat with short leftover tape lengths.
12. Perforated Holiday Promise Ticket Card
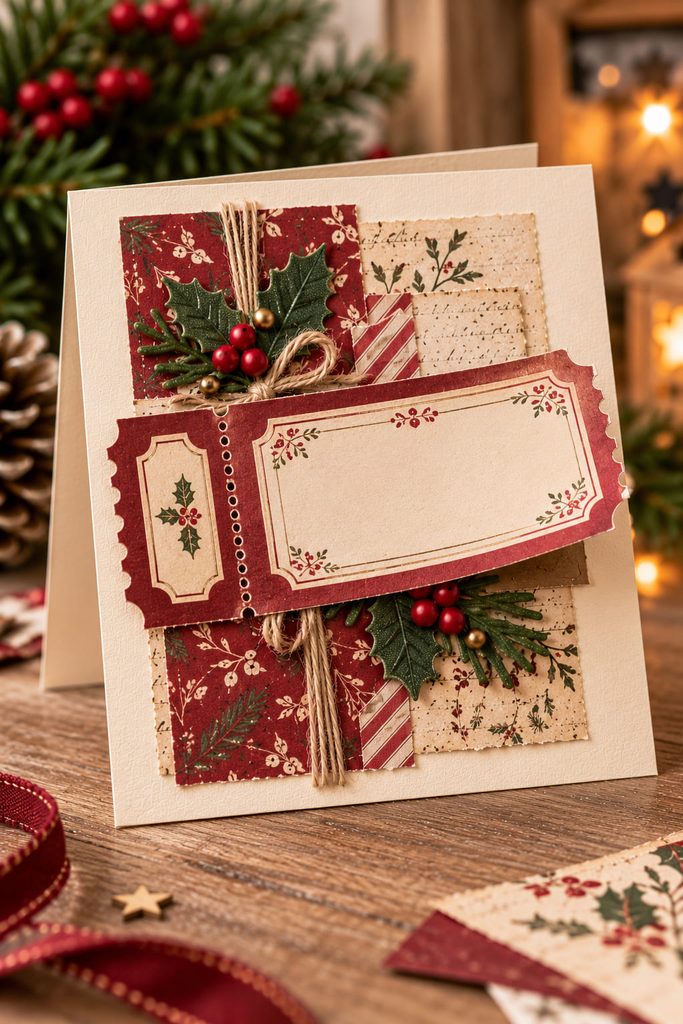
A detachable promise gives the recipient something to use after the Christmas greeting has been read. Print or hand-letter a simple ticket for a winter walk, cookie afternoon, or coffee together. Make the ticket from a separate strip of cardstock, perforate a narrow tear line along one end, and glue only the stub to the card front. The rest of the strip remains free to tear away.
Keep the perforation on the ticket, not across the structural fold of the greeting card. A few collage scraps around the stub can echo old admission tickets without burying the promise itself.
Before attaching it: Tear a spare test strip made from the same paper. If it needs a hard pull, make the perforations closer or change to lighter stock. The recipient should be able to remove the ticket without damaging the card.
13. Swinging Ornament Photo Reveal
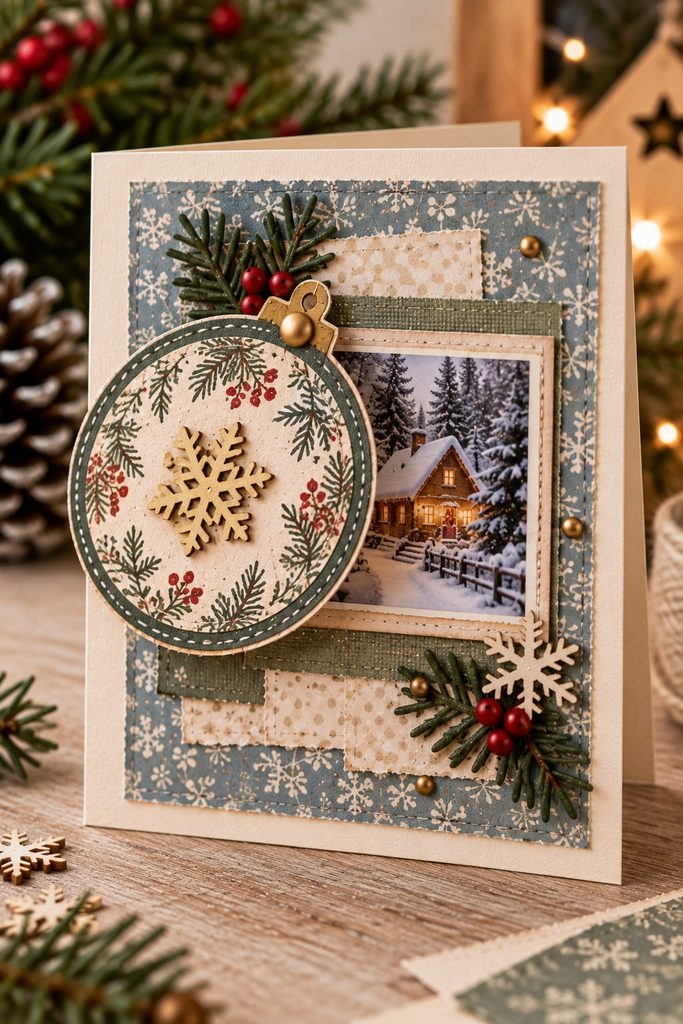
One round paper ornament can hide a favorite photograph in plain sight. Attach a small square photo to the card front, then place a larger ornament-shaped cardstock cover over it. Use a miniature paper fastener through the top of the ornament so the shape swings sideways and uncovers the image beneath. A thin decorative paper collar around the pivot makes the attachment look intentional.
- Position the ornament over the photo and mark a pivot point above the image.
- Pierce both layers, fasten them loosely enough for movement, and check that the ornament clears the card’s edges.
- Cover the fastener legs inside the card with a flat paper patch so they do not catch the written greeting.
A short caption beside the hidden image makes the reveal rewarding. Keep embellishments away from the swing path. Check the pivot position with the ornament rotated fully left and right: if the lower tip strikes the card border, move the fastener inward or shorten the ornament. The hidden photograph also needs an unobstructed viewing area when the shape moves aside. A flat paper washer under the fastener head can reduce scraping without making the cover wobble.
14. Thread-Wrapped Star On A Kraft Panel
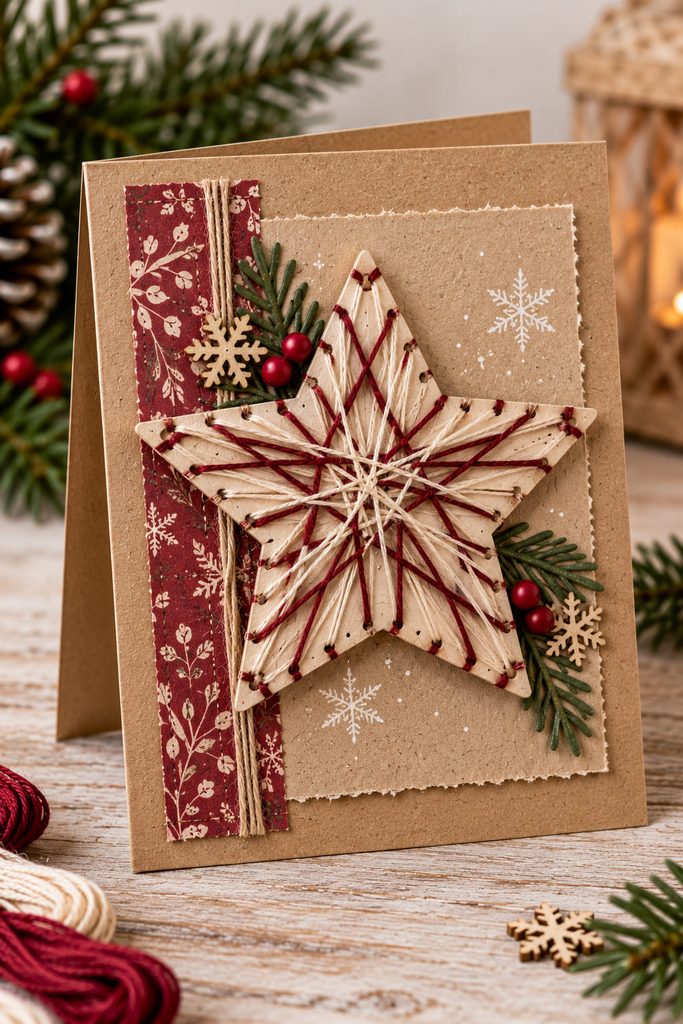
A notched paper star turns embroidery floss into the focal texture of a Christmas card. Cut a sturdy star, snip shallow notches around its points, and wrap floss between alternating notches until the center develops a web of crossing lines. Leave portions of the paper visible so the thread does not become a solid knot.
Before mounting the star, check:
- Are the notches deep enough to hold the floss without splitting a point?
- Is the loose thread end secured behind the star?
- Does a small cardstock spacer keep the wrapped back from rocking on the card?
Mount it over a simple kraft panel with a few handwritten date marks. The thread carries the detail; extra printed patterns would only compete with it.
15. Gatefold Family Portrait Reveal
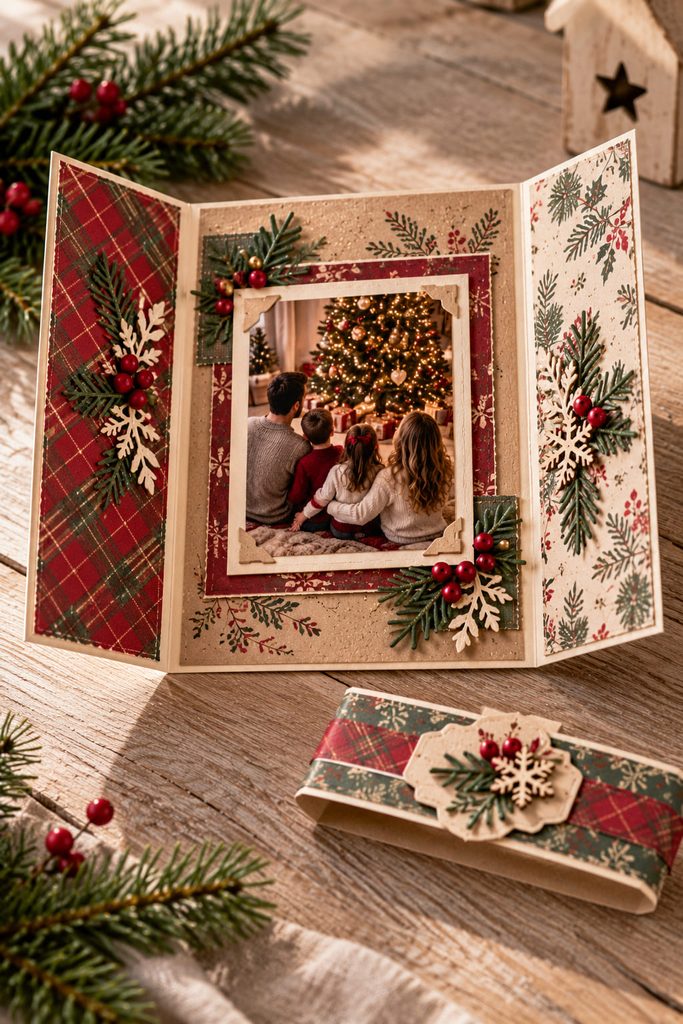
Two front flaps can make a small Christmas photo feel like an event. Start with a cardstock sheet divided into a broad center panel and two narrower side flaps. Score the folds carefully so both doors meet without overlapping. Cover each flap with different, coordinating scrapbook patterns, then wrap a narrow paper belly band completely around the closed card and attach a small dated tag to the band. The sleeve holds the doors shut without gluing them together.
Inside, a central photo sits on a broad plain mat with small handwritten labels or copied keepsake fragments at the sides. The quiet mat is important: patterned doors already provide movement and visual noise. Keep raised photo corners and thick stickers away from the lines where the flaps close.
Close the gatefold with the belly band off, then on. If the doors bow or the band scrapes, reduce the inner layers or widen the band slightly. The inside photo should not straddle either fold, where repeated opening could crease it. If the recipient prefers to stand the card on a shelf, open the flaps partway and let them act as angled supports rather than forcing them perfectly flat. Unlike a conventional photo card, the closed patterned doors create anticipation before the portrait appears. The finished card can stand open as a tiny scrapbook display.
16. Hanging Keepsake Tag Garland Card
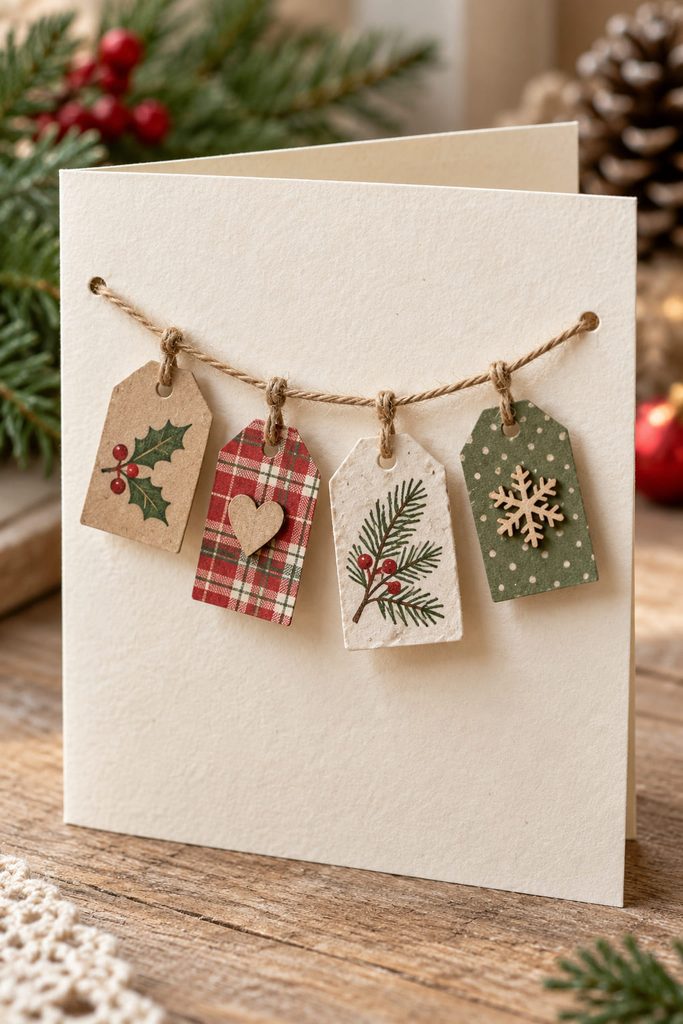
Small tags strung across a card feel like ornaments saved from past Christmases. Cut three or four lightweight tags from different scrapbook papers and punch a hole near the top of each. Add a date, an initial, or a tiny copied piece of a holiday drawing to each tag. Thread them onto thin twine, space them apart with small knots, and anchor the twine ends through two discreet holes in the card front. Secure the ends on the reverse with flat paper patches so they cannot pull through. Give the tags a little slack to hang naturally, but keep every tip within the card’s outline when it is closed. A restrained background lets those miniature memories read as a collection instead of a busy banner.
How To Keep Layered Cards Ready To Give
A card’s thickest point matters more than the number of layers. Before choosing an envelope, close the finished design and look at the folds, moving tabs, and raised corners. Do not press a shaker cavity or ribbon knot flat just to make it fit.
| Construction | Best Delivery Choice | Check Before Giving |
|---|---|---|
| Flat collage, quilt squares, washi parcels | Regular envelope | No loose corners or exposed adhesive |
| Photo mats, vellum flaps, stitched fabric | Roomy envelope with protection | No snagging, bending, or visible glue |
| Shakers, moving sliders, mini books | Hand delivery or protective mailer | Mechanism moves freely and parts stay attached |
If you use an irreplaceable letter, ticket, or old photograph, make a copy for the card and preserve the original separately. That keeps the greeting personal without putting the only surviving keepsake at risk.
Let The Memory Choose The Layers
For a card you need to mail, begin with a torn-paper street, photo mats, or a paper-quilt tree. For someone who saves every note, the little letter pocket or ribbon-bound booklet gives that habit a place to live. A shaker or sliding filmstrip makes sense when the act of opening the card is part of the gift.
If a single greeting brings back several stories you want to keep, 14 Christmas Scrapbook Ideas for Meaningful Holiday Memories offers ways to give those photos and paper keepsakes a full page instead of squeezing them onto one card.