

This post contains affiliate links. As an Amazon Associate I earn from qualifying purchases, at no extra cost to you. Thank you for supporting Diynify!
Origami angel ideas can go in very different directions once you move beyond the familiar folded skirt and two wings. Some models work best as lightweight tree ornaments, while flatter versions make practical card decorations, gift toppers, bookmarks, tags, and even small keepsakes.
The 16 projects below deliberately use different silhouettes and construction ideas. You’ll find narrow pleated angels, wide standing figures, tiny garland pieces, sculptural modular designs, flat card angels, a tree topper, a bookmark, a gift pocket, and more. That variety also makes the finished collection much more interesting when several angels are used together.
1. Pleated Origami Angel Tree Ornament

Sharp accordion folds give this angel a long, narrow robe that looks especially good when it hangs freely between evergreen branches. Start with a rectangular sheet and build the body from evenly spaced pleats rather than trying to shape a conventional figurine. A second folded piece can open sideways into broad fan wings, while a small paper circle or folded polygon forms the head.

The hanging point matters more than it first appears. Thread the loop through the upper body where the wings and robe meet instead of relying on the head alone. That keeps the angel vertical and prevents the pleated skirt from leaning forward. Metallic paper works nicely for the wings, but lighter paper is usually better for the robe because deep accordion folds become bulky surprisingly quickly.
2. Standing Angel With A Wide Origami Robe
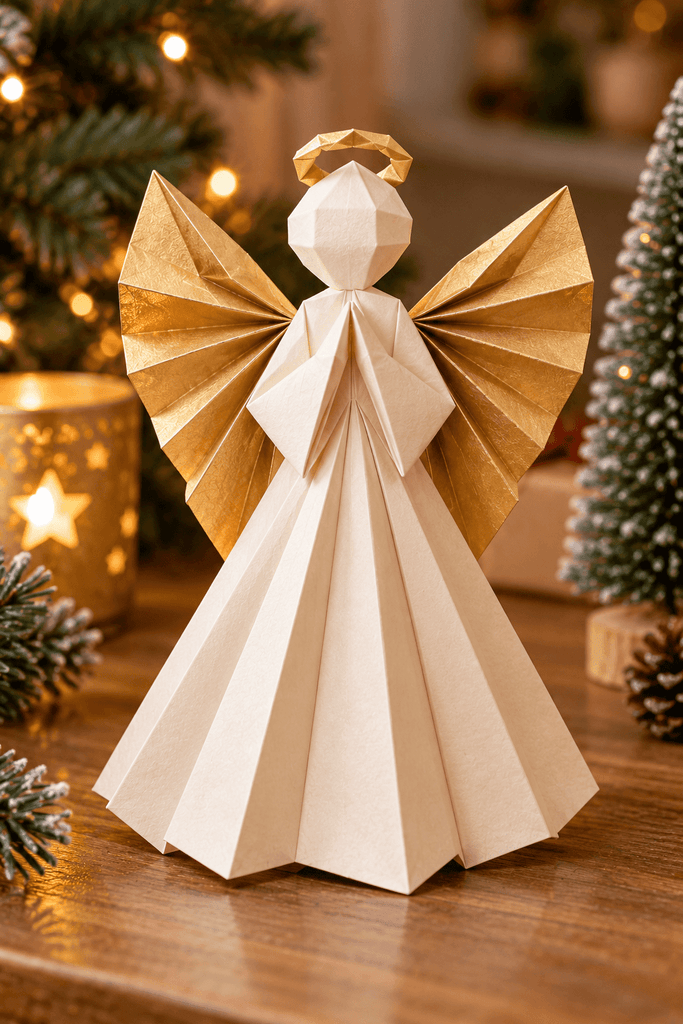
A tabletop angel needs a completely different lower half from a hanging ornament. Here, the robe opens into a broad triangular footprint so the figure can stand without a separate base. Creases running from the shoulders toward the bottom edge help the body flare naturally while keeping the upper section narrow.
Before finishing the wings, place the model on a flat surface and check whether all lower corners touch the table. A standing angel that rocks at this stage will usually become less stable once the wings are added.

For a simple holiday arrangement, make several in different heights rather than changing only the paper color. A tall ivory angel beside two shorter kraft-paper versions creates a much more natural little group for a mantel, shelf, or Christmas table.
3. Book Page Angel Gift Topper

Old book pages give this small angel a softer, more nostalgic appearance than standard origami paper. The printed lines also make the folds visible, which suits a design built around a compact fan-shaped body and short symmetrical wings.
Keep this version fairly flat. A bulky three-dimensional angel can get crushed when gifts are stacked, while a shallow folded figure sits neatly over ribbon or baker’s twine. Leave a small unglued channel behind the body so the topper can slide onto the ribbon instead of being permanently attached to the wrapping.

Avoid pages that have become brittle with age. They may look attractive but often split directly along hard creases. A newer discarded paperback or printed craft paper gives the same visual effect with much more reliable folds.
4. Flat Origami Angel For Christmas Cards
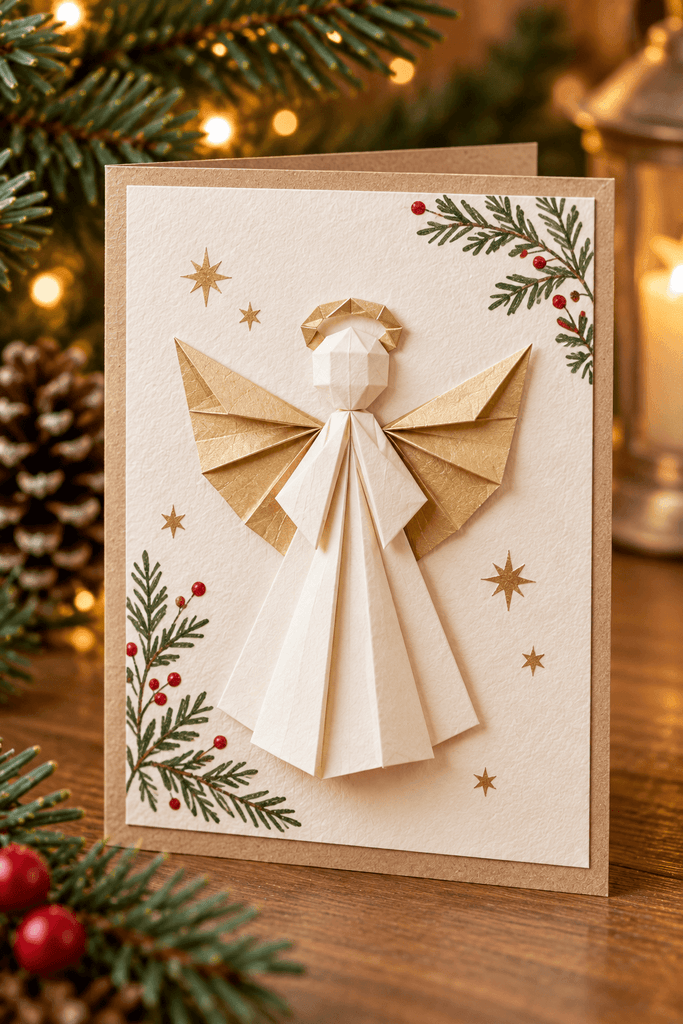
Cards call for a model that stays low enough to fit inside an envelope. Fold the robe as a flattened kite shape, then spread two shallow wings across the shoulders instead of building a full fan behind the body. The result still reads clearly as an angel but adds very little thickness.

A useful test is simple: close the finished card and run a hand over the front. If one part of the angel creates a hard bump, reduce that fold before making the rest of the set.
This style works especially well as the central element on an otherwise quiet card. A narrow paper halo, a tiny star, or a hand-drawn border is usually enough around it. Leaving some empty space also makes the folded geometry easier to notice.
5. Bell-Skirt Angel For Holiday Place Settings
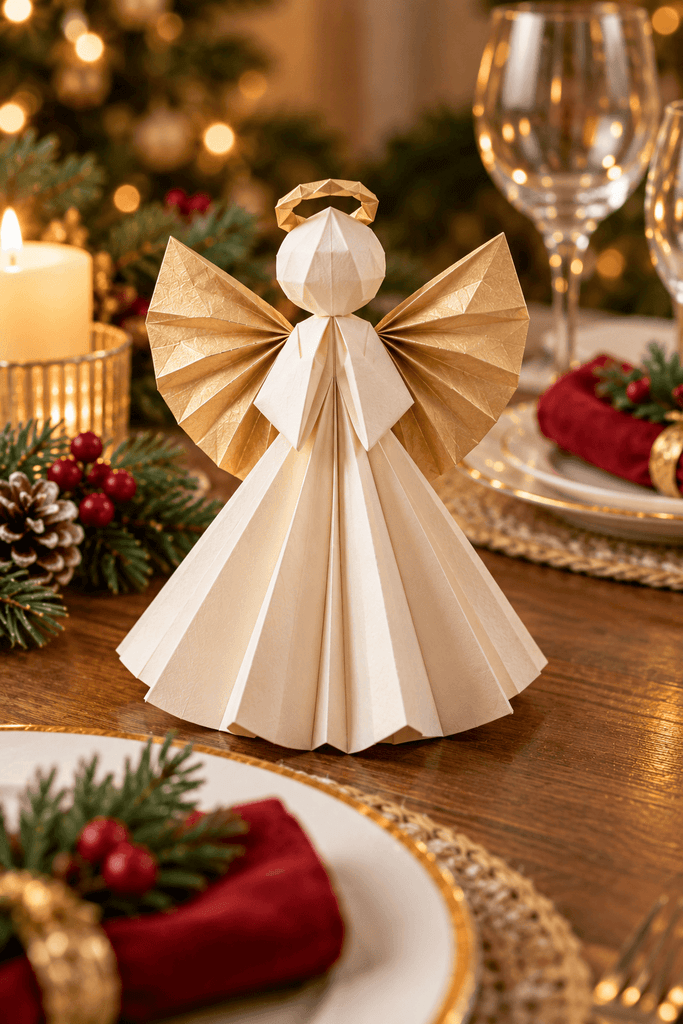
Instead of a pointed robe, this version opens into a rounded bell-like skirt. Several radial folds spread the lower section into a stable circular form, while the wings stay upright near the shoulders. Viewed from the table, the silhouette is noticeably fuller than the standing triangular angel earlier in the collection.
Place a small folded name slip against the front rather than writing directly on the body. That keeps the angel reusable for another dinner.
The critical point is the skirt opening. Too narrow and the figure topples easily; too wide and the body loses its angel shape. Make one test model before folding a whole table set, then use that finished piece as your reference for the remaining place settings.
6. Star-Holding Origami Angel Ornament
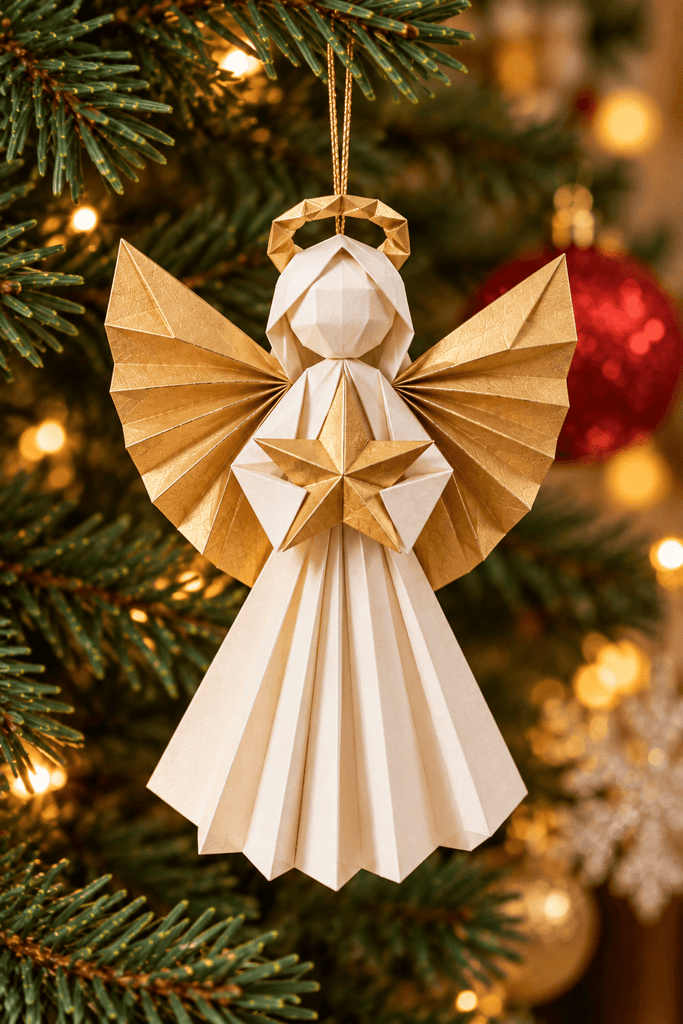
Here the folded arms become part of the design rather than disappearing into the body. Two narrow flaps come forward and lightly trap a separate paper star between them, creating an angel that looks as though it is carrying the ornament.

Fold the angel first and size the star afterward. Trying to force an oversized star between the arms can pull the chest crease open.
A contrasting star also gives you an easy way to change the mood without rebuilding the model. White paper with a gold star feels traditional, kraft with a red star looks rustic, and pale patterned paper with a simple white star works well for softer Christmas decor. Hang the loop slightly behind the head so the added weight at the front does not tip the figure downward.
7. Trumpet Angel Origami Gift Tag

A side-facing angel gives this idea a silhouette unlike the mostly symmetrical models in the collection. Fold the body with one shoulder slightly forward, then add a narrow paper trumpet extending diagonally from the hands. Keep the wings compact so the trumpet remains the obvious focal point.
Because this version works as a gift tag, leave one flat section of the robe untouched for a short name or message. Another option is to attach a tiny blank paper slip behind the figure.

The trumpet should remain lightweight. A tightly rolled tube looks convincing but can become unexpectedly heavy at this scale. A shallow folded cone is easier to attach and keeps the tag flat enough to sit against a wrapped present.
8. Tiny Origami Angel Garland

Garland angels need to be readable at a much smaller scale, so complicated facial or wing details work against the project. A compact diamond body, two crisp side wings, and a tiny folded head are enough to create the silhouette.
Fold one sample before cutting all the paper squares. Then check three things:

- The wings remain visible from several feet away.
- The hanging point does not make the angel rotate sideways.
- The spacing leaves enough room for each figure to move independently.
Thread the angels several inches apart instead of packing them into a continuous chain. The negative space becomes part of the design and keeps individual folds visible. Alternating two paper sizes can also create rhythm without making every angel look identical.
9. Winged Angel Corner Bookmark

A corner bookmark turns the robe into a functional paper pocket. The lower portion slips over the corner of a page, while two shallow wings extend sideways above the book. Unlike a decorative ornament, every crease here has to survive repeated handling.
Start with medium-weight origami paper that holds a sharp fold without becoming stiff. Reinforce the pocket by tucking its layers rather than adding thick embellishments around the opening.
The wings should stay fairly short. Long pointed wings might look dramatic on a card, but they bend easily when the book is closed or placed in a bag. A small halo above the pocket and a simple tapered body give the bookmark enough character while keeping it genuinely usable.
10. Rosette Angel Gift-Wrap Medallion

This angel begins with a circular pleated rosette instead of a recognizable robe. Pinch the upper section inward, add a small folded head, and let two separate wing folds overlap the outside edge. The finished piece feels more like a holiday medallion than a miniature figure.
That broad circular shape works beautifully on square gift boxes because it fills space that a narrow ornament would leave empty. Position it where ribbon lines cross and the whole package gets a strong central focal point.
For cleaner folds, use thin paper for the rosette and slightly firmer paper for the wings. Trying to make every component from thick cardstock creates a dense center that refuses to lie flat.
11. Large Origami Angel Tree Topper

Scale changes the construction problem completely. A tree topper cannot simply be an enlarged ornament because the finished figure needs enough internal space to sit securely over the top branch.
Build the robe as a hollow folded sleeve with an open base. The lower folds create the angel’s silhouette while also forming the cavity that receives the tree tip. Wide wings spread behind the sleeve, but their weight should stay close to the central body.
Before adding decorative details, test the unfinished topper on the tree. If it leans, fix the sleeve depth or wing balance first. Extra decoration will not solve a structural problem.
Lightweight paper is especially useful here. Large sheets create plenty of visual presence without putting unnecessary weight on the top of the tree.
12. Pocket Angel For A Tiny Gift Note

One fold can turn the front of the robe into a small open pocket, giving this angel a practical job on a present. Slide in a handwritten wish, a tiny paper heart, or a narrow gift message while the wings frame the opening.
Keep the pocket shallow enough that its contents remain visible. If the note disappears completely inside the robe, the feature becomes awkward to use.
A simple fit check helps:
- The note should slide in without forcing the side creases outward.
- The angel should remain flat after the note is inserted.
- The pocket edge should stay below the face and wings.
This is a particularly nice alternative to a standard rectangular gift tag because the message becomes part of the folded design itself.
13. Modular Angel With Layered Origami Wings

For a more sculptural project, build the robe and wings from separate folded modules. The body can use a narrow faceted form while three or four overlapping wing sections gradually increase in size toward the outside.
The advantage of modular construction is control. If one wing section looks too heavy, you can replace that module without rebuilding the entire angel. It also lets you combine translucent vellum-like paper with opaque origami sheets for more depth.
Alignment becomes the real challenge. Assemble the complete left wing first, note where each module overlaps, then mirror those measurements on the right. Even small differences become obvious on a strongly symmetrical figure.
This is one of the projects worth folding slowly rather than turning into a large batch.
14. Floating Origami Angel Mobile

Long horizontal wings make this angel feel as though it is gliding rather than standing. The body stays compact beneath them, shifting most of the visual width into the upper half of the model. Suspend the figure from two points instead of one and you can control its angle much more precisely.
Balance the angel before adding it to the mobile. Rest a thread beneath the wing area and move the support position until the body hangs vertically.
Several angels can then be suspended at different heights from a lightweight hoop or branch. Change the wing positions slightly between figures so the mobile feels animated rather than like repeated copies of the same ornament. Leave generous clearance between them because even a gentle air current can make the folded wings swing.
15. Fan-Wing Angel For A Gift Bag Handle

Large wings are the main feature here. Fold two semicircular fans, join them at the center, and attach a compact diamond-shaped body in front. A small loop hidden behind the shoulders lets the entire angel slip over a gift bag handle.
Unlike the rosette gift topper, this model is deliberately tall and open. The fan wings extend well beyond the body and create a visible decoration even on a plain kraft bag.
Choose paper with a strong front-to-back contrast if possible. The accordion folds expose both surfaces of the wings, so double-sided paper or a subtle printed reverse produces a much richer result than a sheet with an unfinished white back.
After the gift is opened, the same angel can be removed and hung as a small ornament.
16. Pop-Up Origami Angel Christmas Card
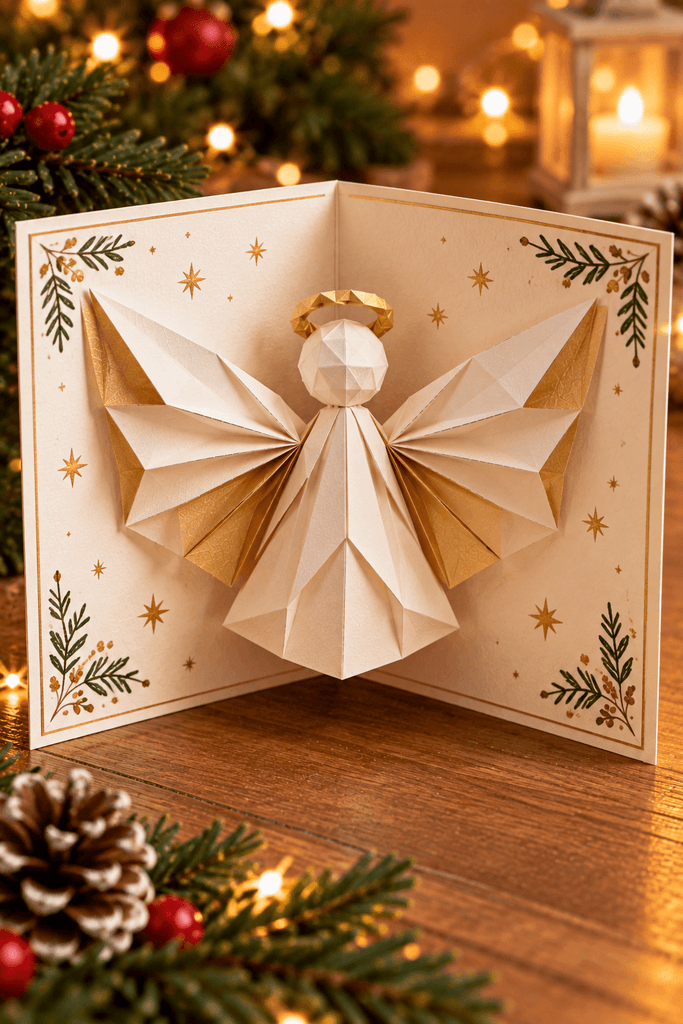
Finish the collection with an angel that changes shape when the card opens. A folded central robe sits across the card’s center crease, while the wings collapse inward when closed and spread as the two card panels move apart.
The closed-state test is essential here. Assemble the mechanism with scrap paper first, slowly shut the card, and watch where the wings travel. Any section that crosses the outer edge or bunches against the center needs to be shortened before you use your decorative paper.
Keep the front of the card relatively simple because the surprise happens inside. A small star or plain Christmas greeting outside gives no hint that a dimensional angel will open between the pages.
Choosing Paper For Origami Angel Ideas
Thin origami paper is the easiest choice for models with multiple layers, small folds, or moving parts. Heavier decorative paper works better for standing angels, gift tags, and larger pieces that need to hold a shape. Book pages and lightweight gift wrap can also work when the model relies on pleats rather than locked pockets.
Scale matters just as much as paper weight. A fold that behaves perfectly on a six-inch square may become awkward when miniaturized for a garland. Make one prototype at the intended finished size before cutting paper for a whole set.
FAQ About Origami Angels
Can Beginners Make Origami Angels?
Yes. Start with a flat card angel, pleated ornament, or simple standing model. Modular wings, pop-up mechanisms, and large tree toppers require more careful alignment.
What Paper Works Best For Origami Angels?
Standard origami paper works for most designs because it creases cleanly without creating excessive bulk. Larger structural pieces may benefit from slightly heavier paper.
Can Origami Angels Be Used As Christmas Ornaments?
Many can. Add the hanging point near the structural center of the model and check the balance before placing the ornament on a tree.
How Can I Keep A Standing Paper Angel Upright?
Use a wide, symmetrical lower body and make sure the bottom folds touch the surface evenly. Heavy wings can pull the model backward, so keep them lighter than the base.
Can I Make Origami Angels From Book Pages?
Yes, provided the paper is still flexible. Very old or brittle pages may split when sharply creased.
How Small Can Origami Angels Be?
Simple silhouettes can be folded quite small, but detailed pockets, layered wings, and narrow reverse folds become difficult as the paper shrinks. For garlands, simplify the model instead of merely reducing a complicated one.
Make Each Angel Do Something Different

A good set of origami angels does not need sixteen variations of the same folded figure. Mix pieces that hang, stand, open, hold notes, decorate cards, finish gifts, and move in the air. The different functions naturally create different silhouettes, which makes the finished collection much more useful.
For more folded holiday projects, continue with 20 Charming Christmas Origami Ideas to Fold This Holiday Season.