This post contains affiliate links. As an Amazon Associate I earn from qualifying purchases, at no extra cost to you. Thank you for supporting Diynify!
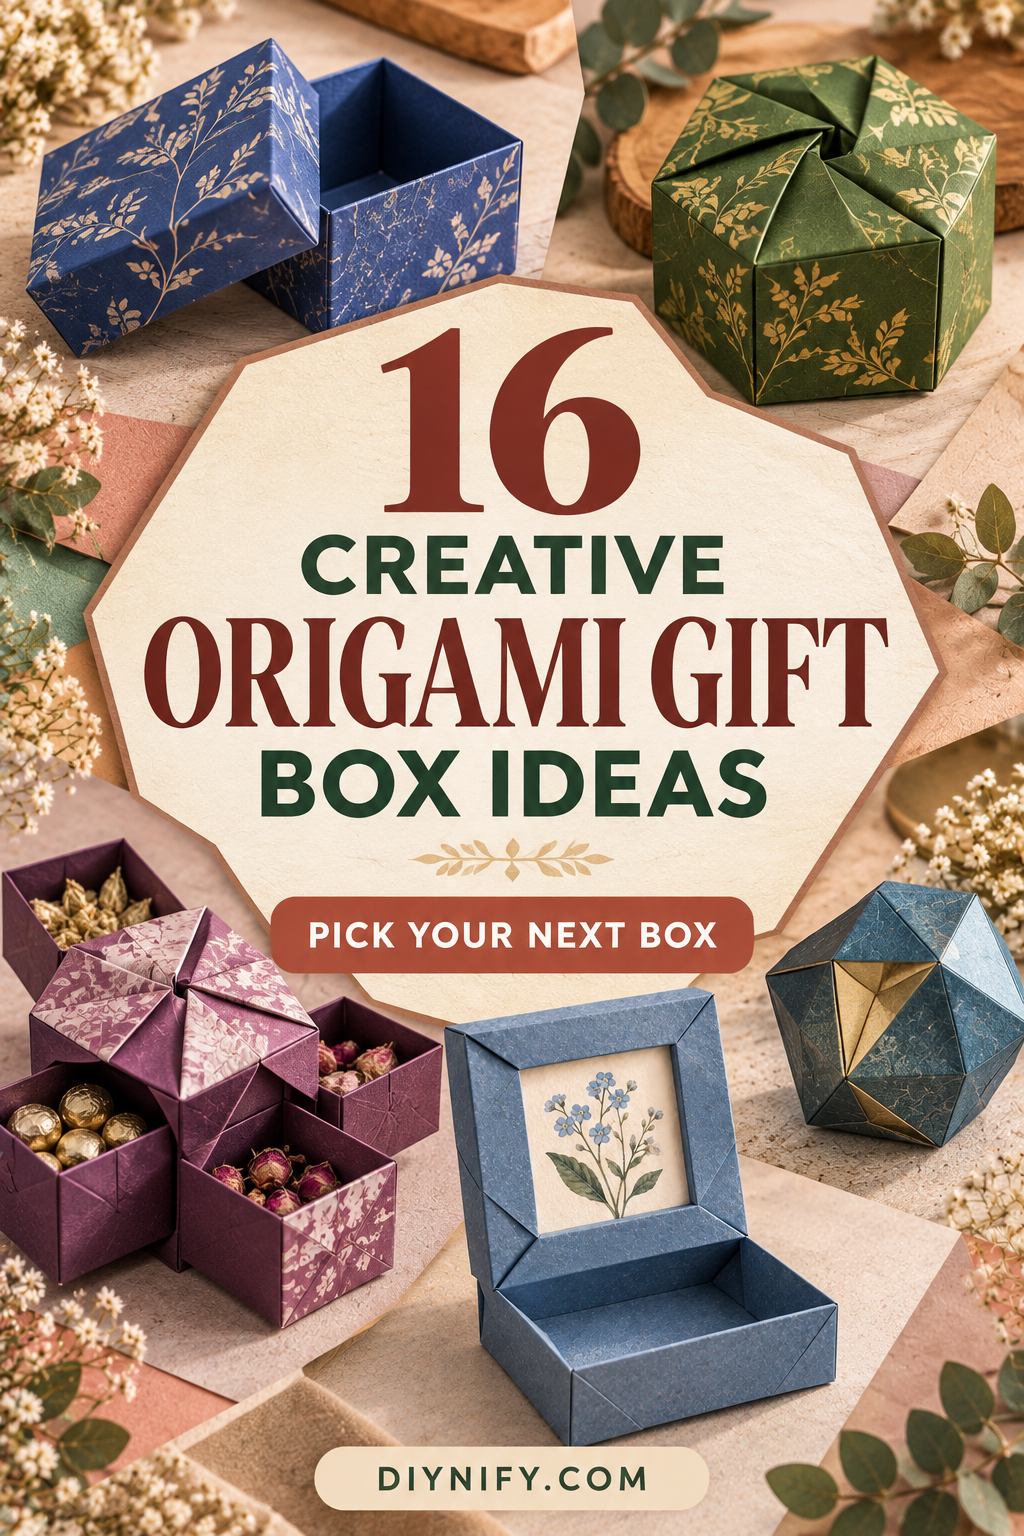
Origami gift box ideas become much more useful when the fold changes how the gift is held, opened, or revealed—not just the color of the paper. A classic lidded square works for almost anything small, but a drawer box creates a slow reveal, a divider keeps a set organized, a hinged box keeps its lid attached, and a star or sanbo-style container turns the open rim into part of the presentation.
Most of these projects use origami paper, decorative paper, or light-to-medium craft paper plus a firm surface for sharp creases. Some need two or more sheets because the lid, drawers, dividers, or stacked modules are separate folded parts. A ruler and pencil are useful for models divided into thirds or repeated sections; scissors may be needed when a square must be cut into a rectangle or another starting shape. Optional ribbon, thread, or a small amount of paper-safe adhesive can help with closure or presentation, but the structure of each idea comes from the folds themselves.

1. Classic Masu Box with a Separate Lid
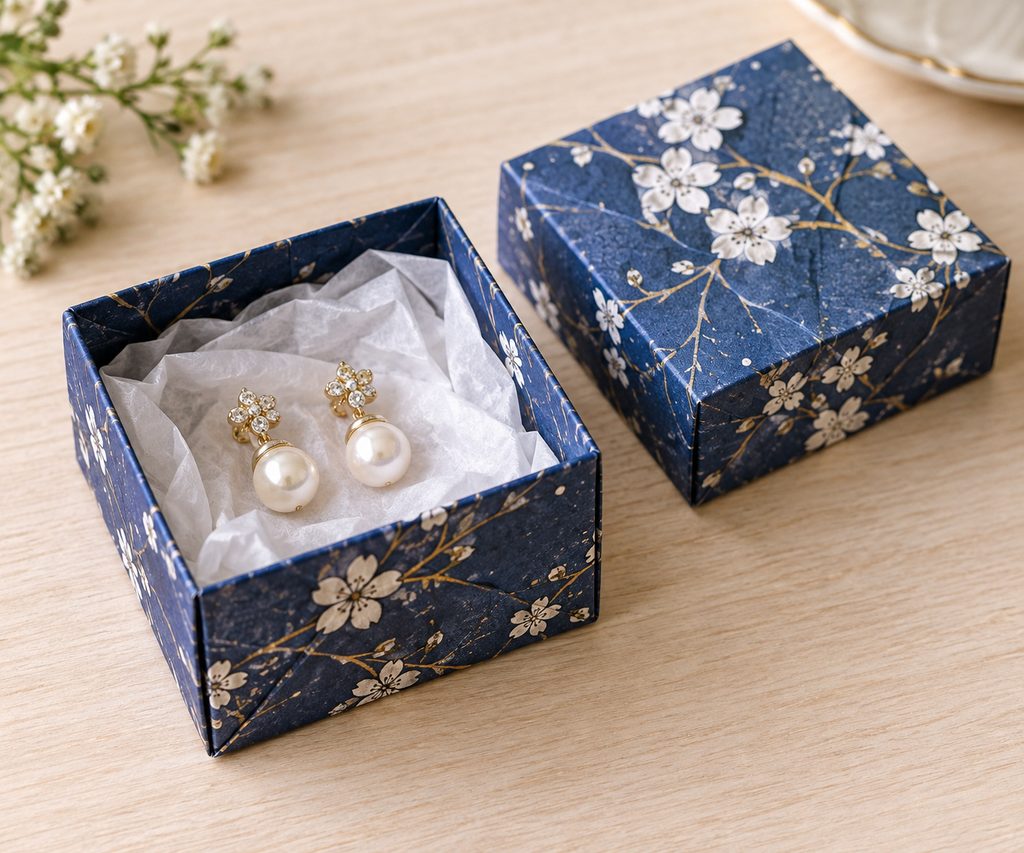
If you want one folded box that teaches nearly every useful packaging habit at once, start with a classic masu-style base and a separate lid. The shape is simple—a square footprint with straight walls—but that simplicity exposes uneven creases immediately. The corners need to meet cleanly at the center, and the four wall folds need to rise to the same height or the rim will twist instead of sitting level.
For a gift box, the real design problem is clearance between the two halves. Fold the base first, then make the lid from paper that is slightly larger or from a version of the fold that leaves the lid walls a little farther out. Test the empty pieces together before adding a bow, label, or bulky topper. The lid should settle over the rim without bowing the base inward, and it should lift off without pulling the whole box off the table.

Lid Clearance Check: If the lid jams, do not force sharper creases into the finished box. Reopen the lid and ease the wall placement outward a little, then refold and test again. This box works especially well for earrings, wrapped candy, small soaps, and other light gifts because the straight walls are easy to line with tissue without stealing much interior space.
2. Traditional Star Box for an Open Gift Presentation
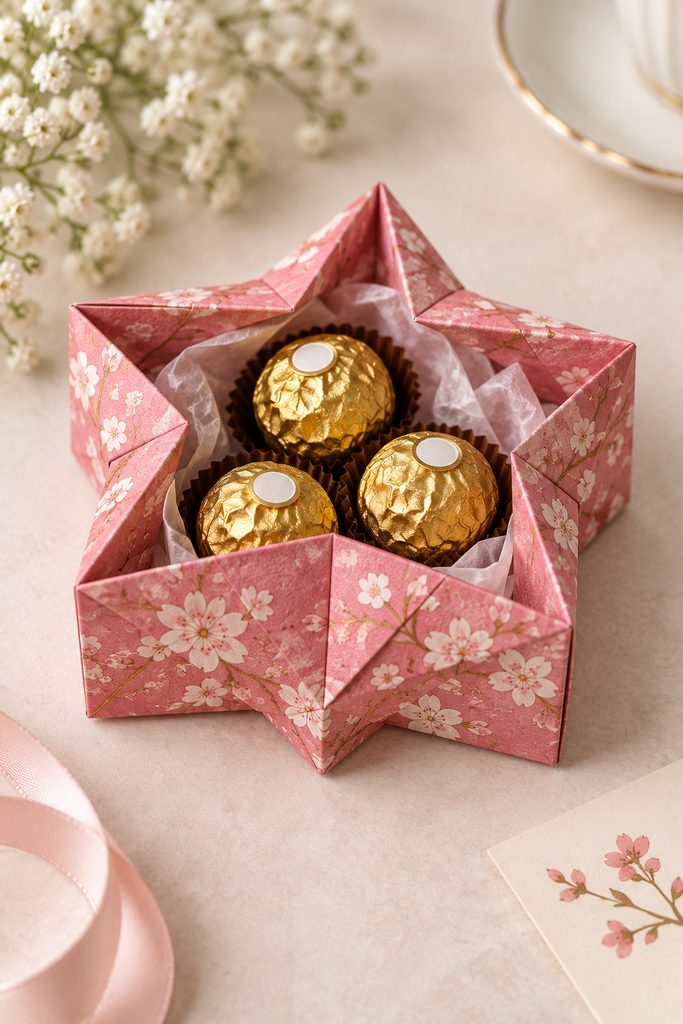
For a gift that looks finished before you add a lid, a star box turns the rim itself into the decoration. The model begins as a compact folded base and opens into a shallow container with pointed corners around the top, so the negative space between the points becomes part of the presentation. It is best for gifts that can stay visible—wrapped truffles, a folded note, a small ornament, or a pair of earrings on tissue—because the star edge does not provide the same dust protection as a closed box. Keep the contents below the lowest points of the rim; once an item rises above them, the star silhouette starts to disappear.
3. Raised Sanbo Box for Treats and Small Favors
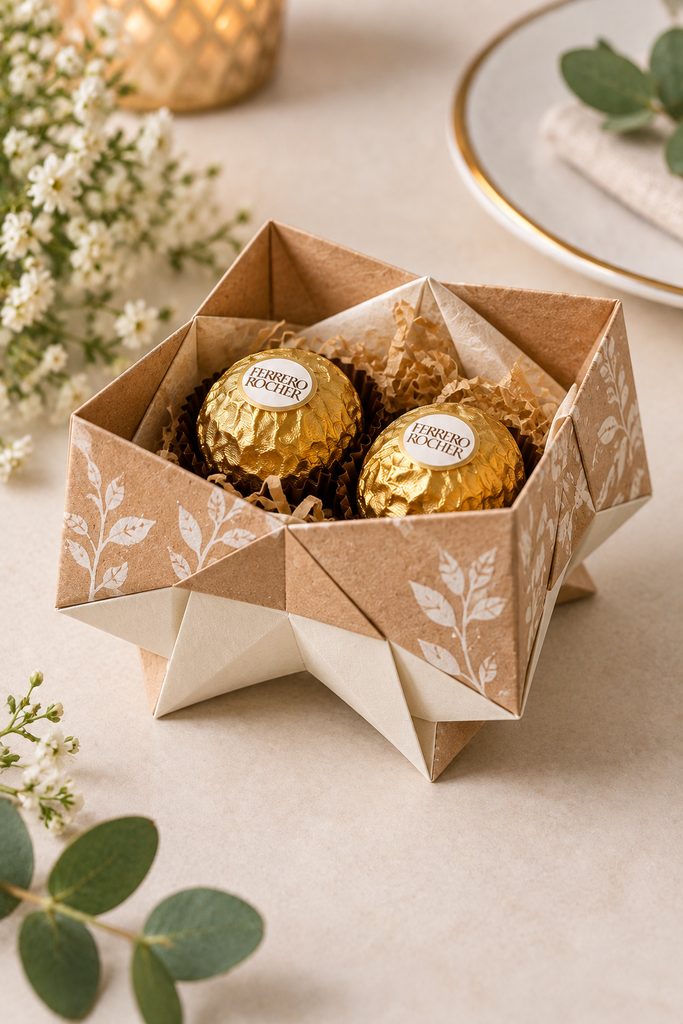
Raised above the table by its folded lower structure, a sanbo-style box reads more like a tiny presentation stand than an ordinary tray. Its open top makes loading easy, while the lifted base and projecting side details give even a very small favor more visual presence. Use it when the container is part of the table setting rather than something that needs to travel sealed in a bag.
Crisp paper matters more here than heavy paper. The box needs to open cleanly from a compact folded state and hold several directional creases at once; paper that is too thick can fight the squash and reverse folds that shape the sides. A patterned sheet with a clear reverse side can also make the raised geometry easier to read, especially when the box holds one or two light treats rather than a dense pile.
4. Long Triangular Prism Box for Pens or Candy Bars
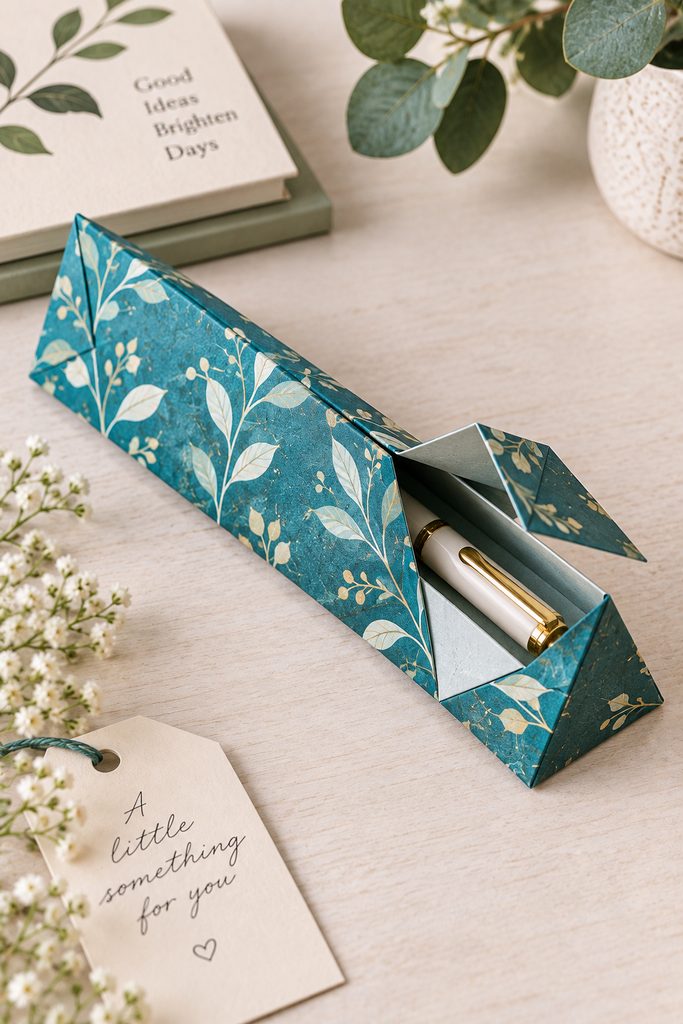
Long gifts are awkward in square boxes because empty corners add bulk without protecting the item. A triangular prism box keeps the package narrow and gives you a broad face for patterned paper, a name strip, or a small folded tag. One-sheet triangular gift-box designs can open from the top while keeping the long prism body intact.
- Size the length around the gift first. Leave enough paper beyond the object for the top opening or tuck to work without crushing the ends.
- Build the three long faces evenly. If one panel is narrower, the prism will corkscrew and the gift will push against a seam.
- Check the opening before loading. The top should spread far enough to insert the item and return to its intended shape without whitening or tearing the fold.
This shape suits pens, slim cosmetics, wrapped candy bars, and other light narrow gifts particularly well because the triangular cross-section resists rolling on a table.

5. Hexagonal Twist-Lid Gift Box
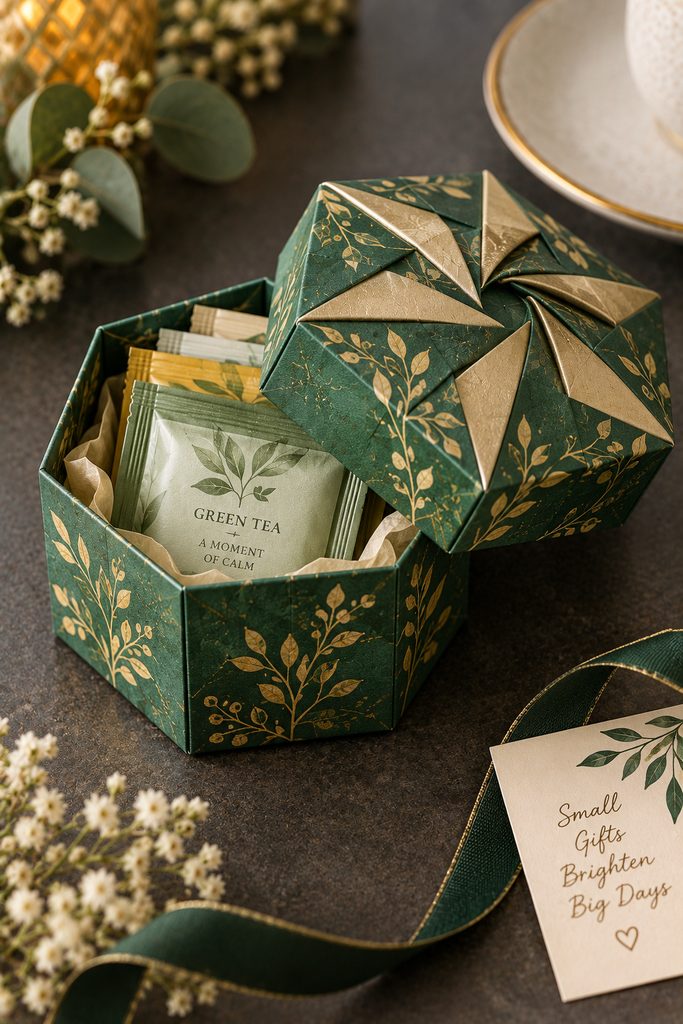
Six sides change the way a folded box closes. Instead of relying only on four upright corners, a hexagonal version can use repeated angled creases that collapse in sequence and create a twist-like top surface. That makes the lid visually active even with plain paper, but it also means one inaccurate sector can pull the whole rim out of round. Make the base and lid as a matched pair and keep every repeated division consistent before you start shaping the walls.
Twist Symmetry Check
- If the top forms a neat star or centered hexagon but the box rocks, recheck the lower wall folds rather than the decorative top.
- If one point of the twist sits higher, that sector was probably folded at a different depth; reopen only that area and match it to its neighbors.
- If the lid fits when empty but binds after loading, the contents are pressing the walls outward. Reduce the fill height or switch to a slightly firmer paper rather than squeezing the lid down.
Medium-weight paper gives the facets enough memory to stay crisp without making the repeated collapse too bulky. This is a strong choice for a small roundish gift—a brooch, wrapped cookies, tea sachets, or a cluster of candies—when you want the folded geometry to replace a separate bow.
6. Hinged Prism Box for a Keepsake Reveal
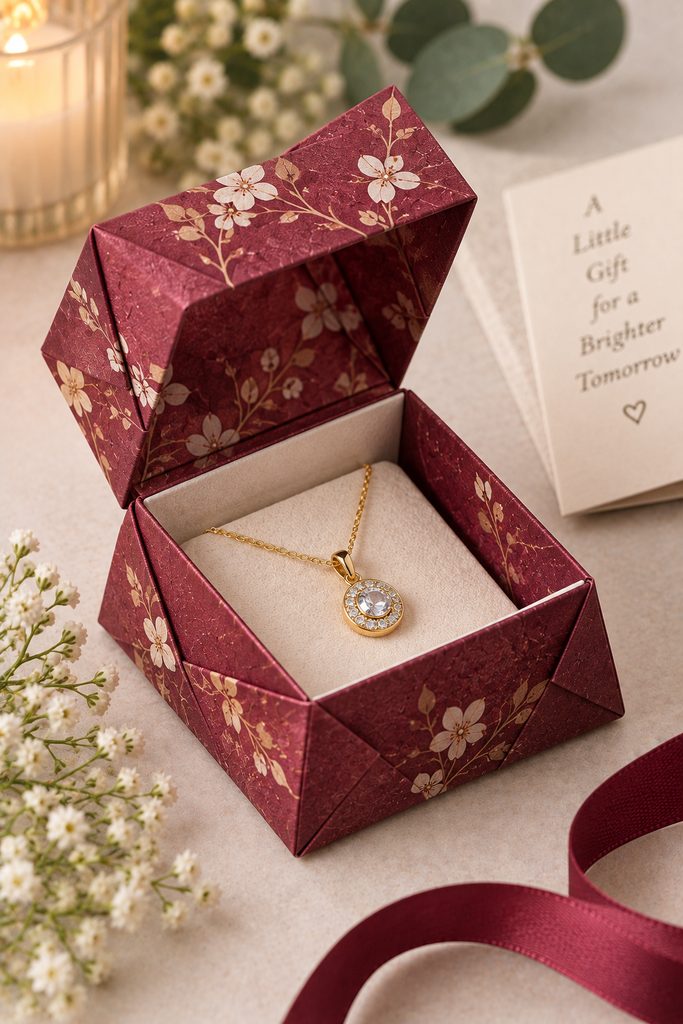
The hinge changes the unboxing experience because the lid stays attached instead of becoming a loose second piece. A prism-style hinged box can be folded from coordinated sections that create a lower compartment and a lid joined along one edge, giving a ring, charm, or tiny keepsake a more deliberate reveal than a lift-off top. The continuous back edge also helps the two halves stay visually aligned when the box is open. Two-sheet, glue-free hinged versions are practical examples of this format.
Plan the hinge before you decorate the outside. It needs enough flexibility to open fully without pulling the back wall upward, while the front edge needs enough overlap or friction to stay closed. Open and close the empty box several times and watch the back corners: they should flex at the hinge rather than buckle into the compartment. If the finished box will be tied, position ribbon so it wraps around the body instead of crossing directly over the hinge line. The attached lid is useful for gifts that may be opened repeatedly because there is no separate top to misplace.
7. Pull-Out Drawer Box with a Paper Handle
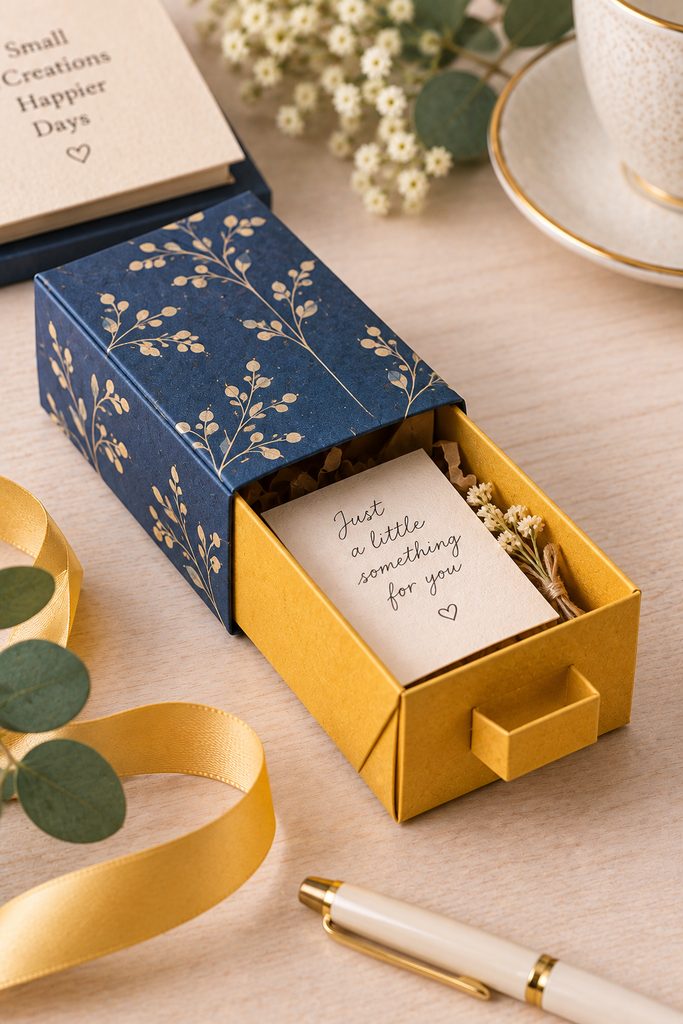
Instead of lifting a lid, a drawer box turns the gift into a horizontal reveal. The inner tray carries the item, while an outer shell or connected side structure keeps the tray aligned; a folded paper handle can also stiffen the drawer front. Origami drawer designs can be built without glue or cutting, with the handle contributing extra structure to the drawer.
- Fold the tray first and confirm that its side walls stay square under light finger pressure.
- Build the outer section around the tray with a little sliding clearance rather than matching it tightly.
- Pull the empty drawer in and out several times before loading it. It should move without catching at the corners, yet stop feeling loose enough to sag.
Use this format for a small bracelet, handwritten note, seed packet, or wrapped sweet. It also stores well after gifting because the contents remain accessible without removing and replacing a lid.

8. Secret Four-Drawer Box for a Multi-Part Gift
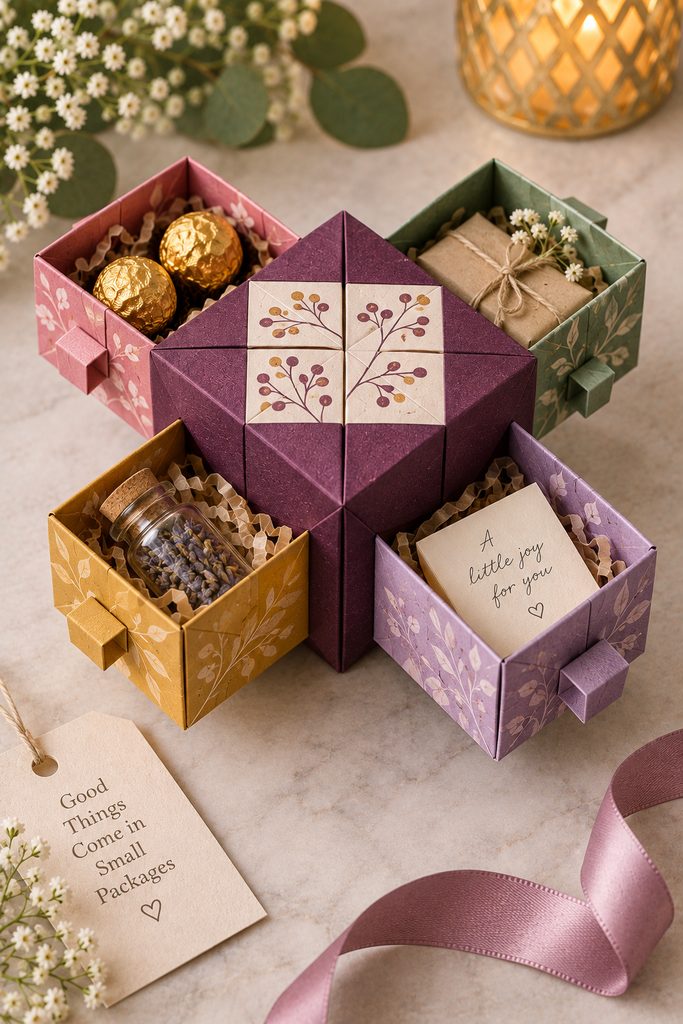
Four drawers arranged around one central body let a single package reveal several small gifts one at a time. The value is not extra decoration; it is the architecture. Each drawer must travel independently, the outer structure must keep the set from spreading, and the top and bottom pieces need to hold the assembly square when the drawers are closed. Multi-drawer origami boxes with four inner compartments are an established modular format.
For a reliable build, treat the project as repeated modules rather than four separate experiments. Fold all drawer trays to the same crease pattern before assembling the outer structure, then compare their finished widths side by side. Small differences that are harmless in a single drawer become obvious when four units have to meet around one center.
Drawer Load Check
- Keep each compartment lightly filled so one heavy drawer does not make the box tip when it is pulled out.
- Place similarly sized items opposite one another when possible.
- If one drawer binds, test it empty. A smooth empty drawer points to overfilling; a sticky empty drawer points to inconsistent wall depth or a tight outer channel.
This format works well for coordinated gifts such as four tea samples, tiny notes, wrapped chocolates, or a set of small craft findings because the recipient discovers them in stages rather than all at once.
9. Nine-Section Divider Box for Tiny Gift Sets
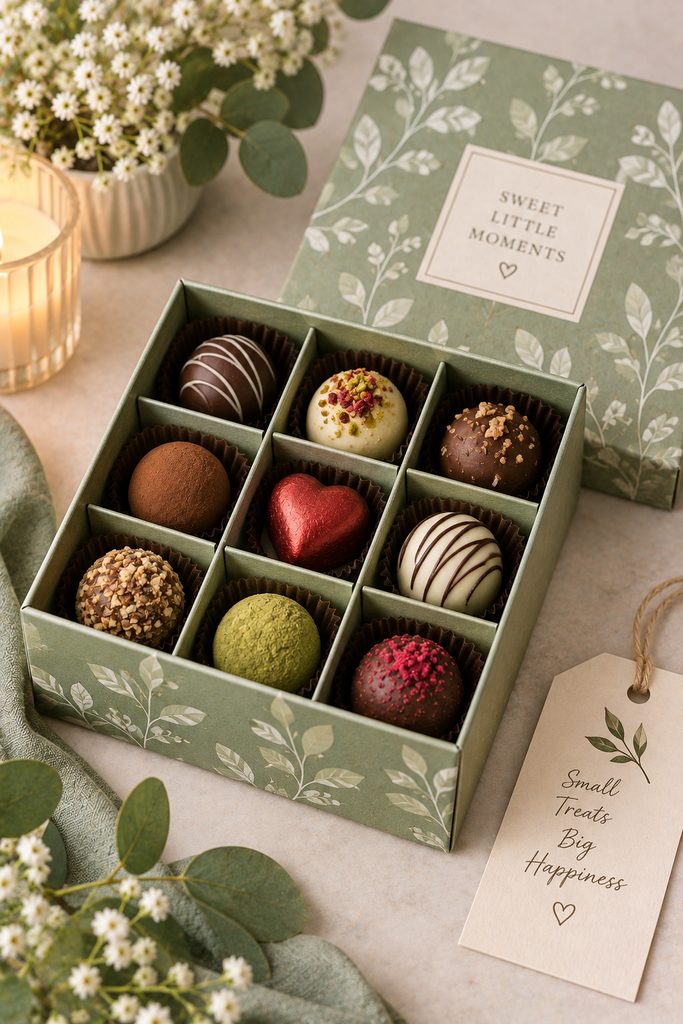
When a gift has many small parts, one large cavity usually creates more mess than generosity. A divided box uses a folded grid inside a lidded outer box so each item gets its own pocket of space. Nine-section origami dividers can be folded as separate inserts for a matching base and lid, making the format useful for small assortments.
Before you commit to the divider, check three things:
- Cell size: every compartment must be wider than the item plus a little finger clearance.
- Divider height: the grid should be tall enough to stop pieces migrating, but low enough for the lid to clear.
- Outer-box rigidity: a divider can brace the base, but it cannot rescue walls that are already bowed or undersized.
If the contents vary a lot in size, reduce the number of cells rather than forcing everything into equal squares. The best divider is the one that matches the actual gift set, not the one with the most compartments.
10. Candy-Shaped Box with Folded Fan Ends
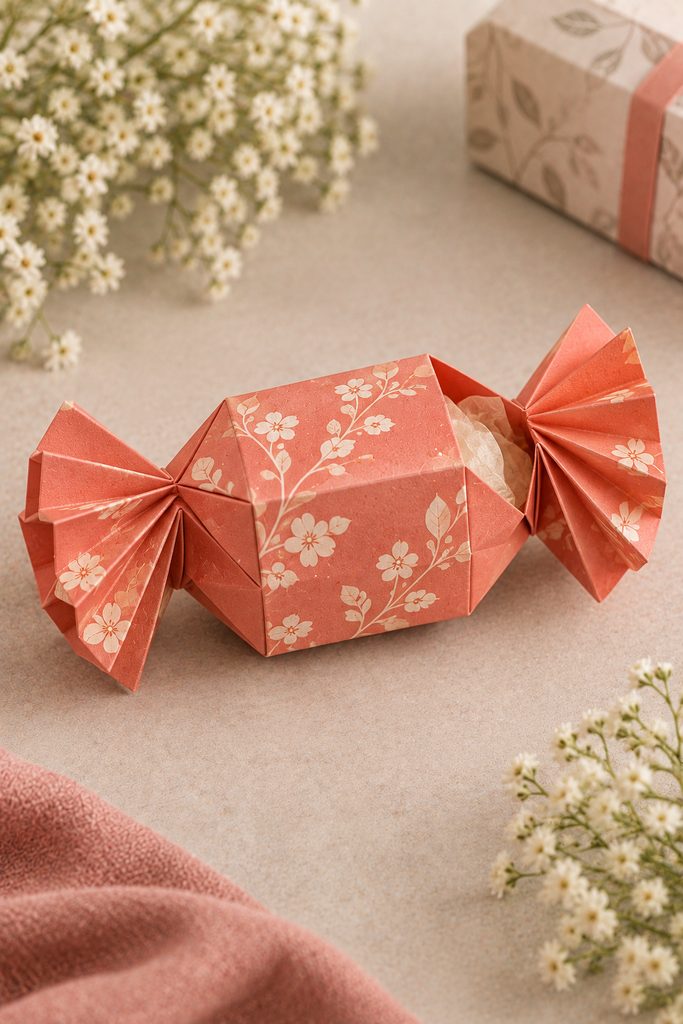
A candy-shaped box earns its space through the ends: reverse-folded or fanned sections flare away from the central cavity so the package resembles a wrapped sweet before any ribbon is added. Versions of this form can use a single folded outer sheet with an optional smaller inner box for extra support. Use the middle as the real container and treat the decorative ends as light structure rather than handles. Small wrapped candies, a pair of socks rolled tightly, or a lightweight party favor can work well, but heavy contents will make the flared ends collapse or pull away from the center. If you want extra stiffness, nest a small inner tray inside the candy form instead of trying to make the decorative folds carry the load.
11. Heart-Shaped Box for Jewelry or a Folded Note
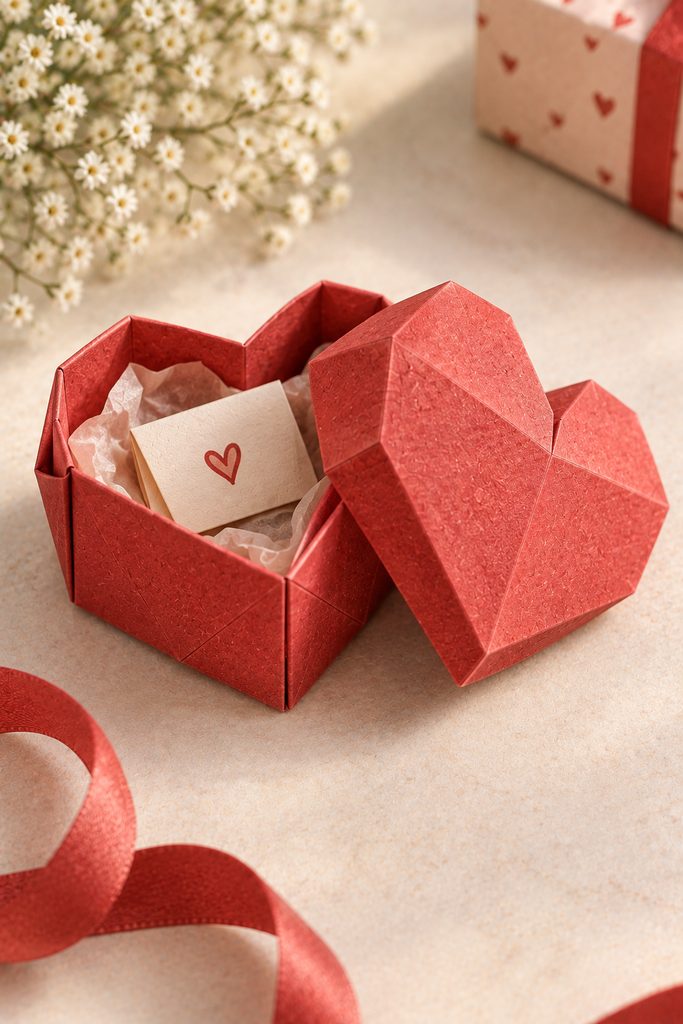
For jewelry, a tiny letter, or one symbolic keepsake, a heart box makes the folded motif part of the message. Heart-box designs can turn a rectangular starting sheet into a locking container suitable for a note, chocolate, or another very small gift. The main challenge is preserving the heart detail while still leaving enough interior width for the contents, so choose the gift before choosing the paper size.
Keep bulky tissue away from the most shaped areas; overpacking can distort the silhouette and push against the folded lock. A thin paper liner or a small folded card under the gift keeps the form readable and makes delicate items easier to lift out without pinching the side walls.
12. Faceted Gem Box for a Small Jewelry Gift
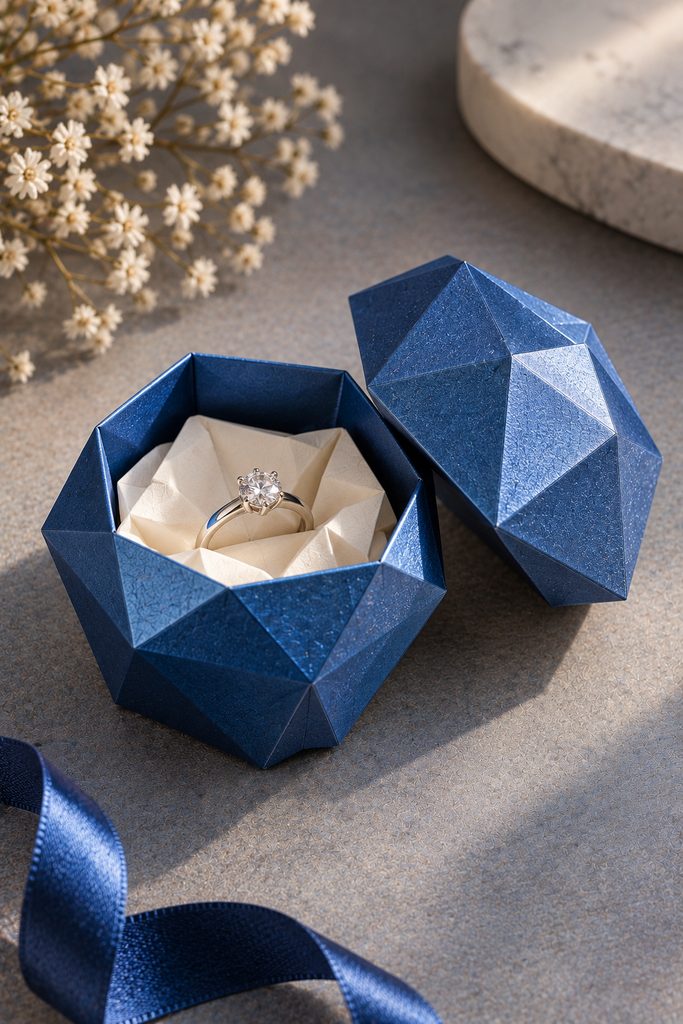
Faceted sides trade some interior volume for a much stronger silhouette. A gem-shaped box uses angled walls and a polygonal lid so light catches several planes at once, making plain metallic or solid-color paper look more dimensional than it would on a square box. Origami gem-box designs commonly use separate folded base and lid pieces to create this faceted profile.
Choose the gem shape when: the gift is compact, the packaging itself should feel ornamental, and you can keep the contents centered.
Choose a square masu-style box instead when: the object needs every bit of usable floor space, you want easy tissue lining, or you are folding many identical boxes quickly.
For rings, earrings, charms, or one polished stone, the gem version can make the reveal feel intentional without extra embellishment. Test the lid on the empty base first; faceted edges are less forgiving of misalignment than straight square walls.
13. Tall Box with a Crown-Style Lid
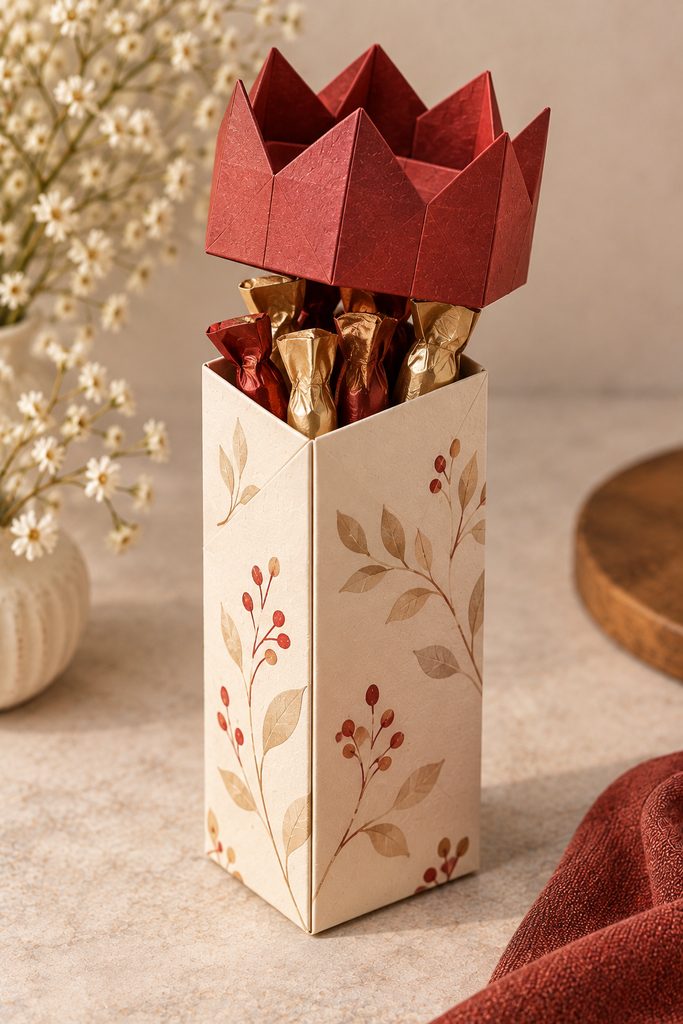
Tall packaging makes sense when the gift has more height than width, but paper walls become easier to bow as they get taller. A narrow upright base can be paired with a crown-style folded top, and crown-box constructions can function either as containers themselves or as decorative lids for compatible bases. That makes the format useful for wrapped sweets, a rolled note, or another light vertical gift.
If the box leans: check that the four lower corners reach the table at the same time.
If the crown lid spreads: use a firmer sheet or reduce the height of the lid walls.
If the lid looks straight but will not seat: the base may be flaring outward near the top; recrease the upper wall folds before enlarging the lid.
Load the box and set it down before decorating. If it stands only when empty, the proportions are too ambitious for the paper weight.
14. Interlocking Stacking Boxes for a Layered Gift
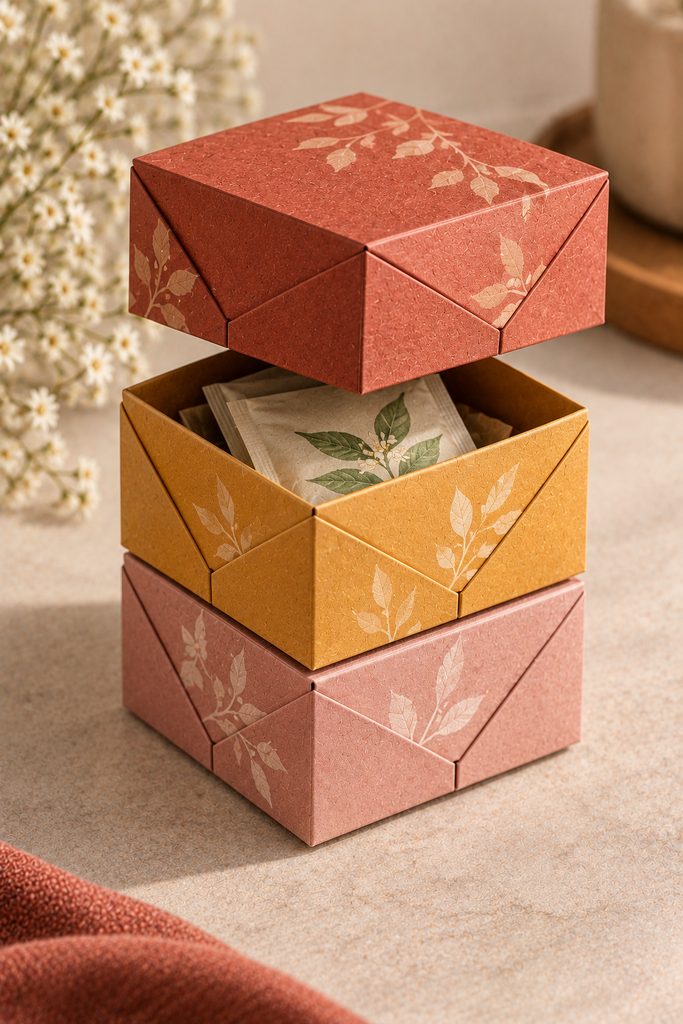
Stacking turns several shallow containers into one gift system. Each module can hold a different small item, while folded rims or interlocking edges keep the levels aligned so the recipient can lift them apart in sequence. Unlike a nesting set, the boxes stay roughly the same footprint; the changing experience comes from moving vertically through the stack. Interlocking folded boxes are specifically useful for grouping several small gifts while allowing the modules to separate afterward.
Build every module from the same paper size and crease plan before deciding how many levels to use. Consistency matters more than decoration because one rim that is too tight can lock two layers together, while one loose unit makes the whole tower shift. Keep the heaviest gift in the lowest box and use lighter pieces above it.
Stack Lock Test: Assemble the empty stack, lift it gently from the lowest module, then set it down and rotate the top layer. The boxes should remain centered without needing force to separate. If a joint grips too hard, relax that rim rather than weakening every module.
This is a useful format for a small themed set—tea and sweets, jewelry plus a note, or several tiny handmade items—because each layer can reveal one part of the gift while the boxes later separate into reusable trays.
15. Two-Section Handle Box for a Paired Gift
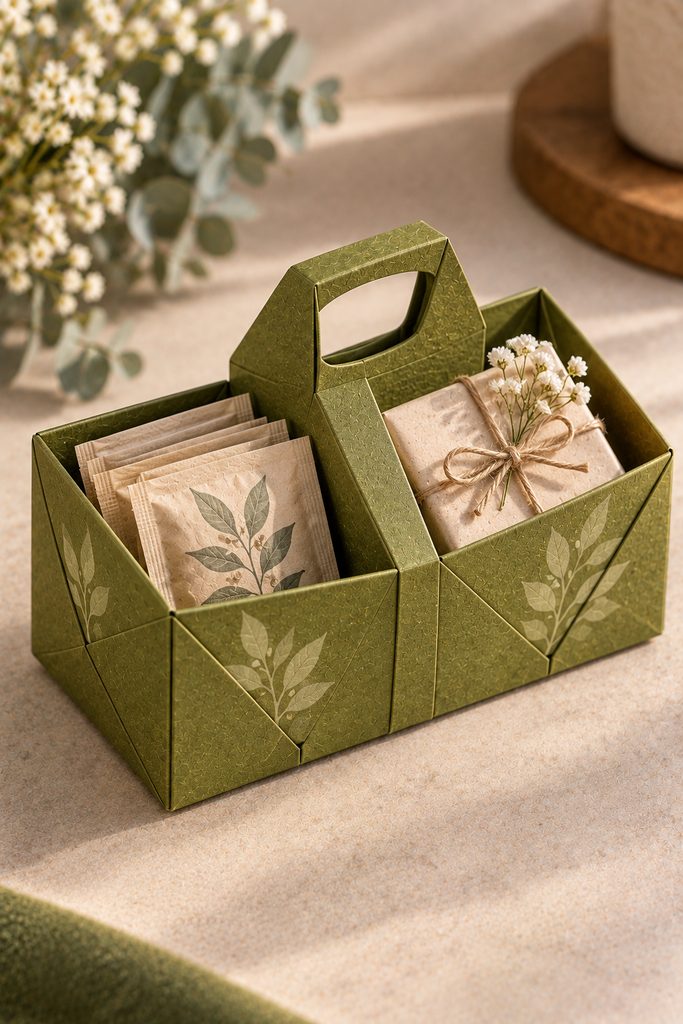
Two small gifts can share one folded container without knocking into each other if the divider also becomes the handle. Toolbox-like origami trays use a raised center section to split the container into two areas while providing a grip between them.
Before loading it, check:
- both compartment floors sit flat rather than rising toward the handle;
- the center divider is vertical and creased firmly enough to resist twisting;
- the two gifts are similar enough in weight that one side does not drag downward;
- tissue stays below the grip so the hand can wrap around it cleanly.
Use this for paired favors such as two wrapped soaps, two tea packets, or a note plus a small treat. Lift the loaded box only a few centimeters over a table first; if the center folds open under the imbalance, lighten one side or switch to a sturdier sheet.
16. Pop-Up Frame Box for a Photo or Tiny Artwork
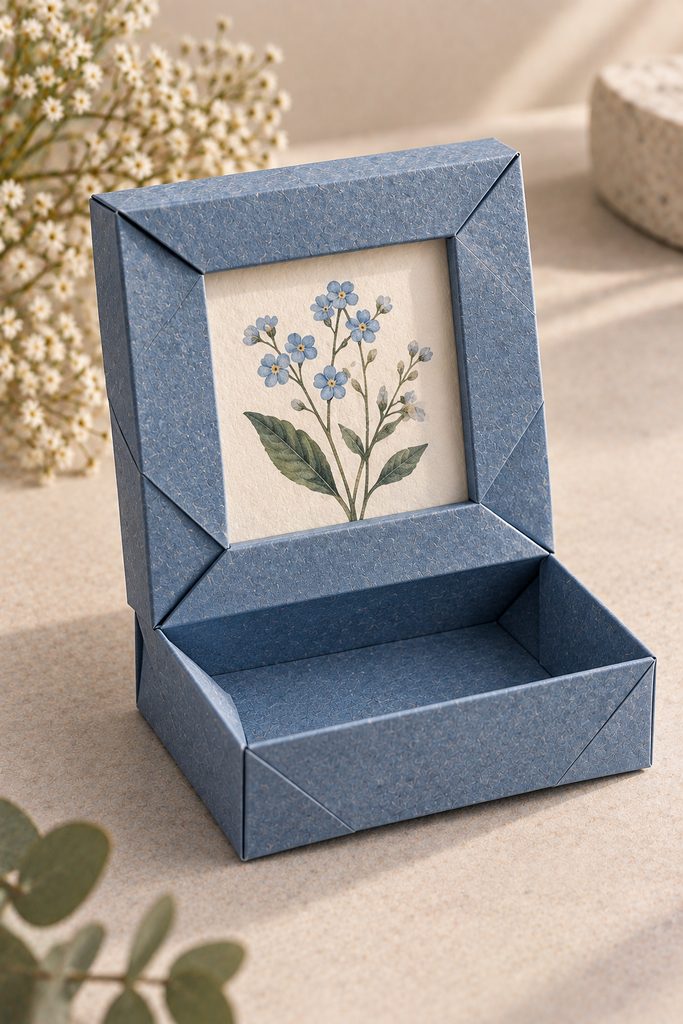
Open it as a box, then let the inside act as a frame. Pop-up origami frame designs can change from a flat photo frame into a shallow dimensional box, allowing a small image or artwork to become part of the folded object rather than a loose insert. The frame edge also gives the viewer a clear focal area, which is useful when the keepsake matters more than the container pattern.
Keep the display piece thin enough that the frame can rise without colliding with it, and test the transformation before attaching anything permanent. A removable paper insert is especially practical: the box can present the image during gifting, then the recipient can reuse the container or stand the framed insert separately. This idea works best when the packaging is meant to become part of the keepsake rather than disappear after opening.
Choosing Paper for an Origami Gift Box
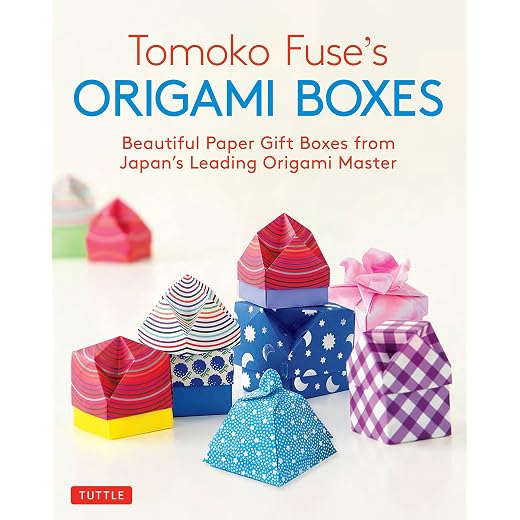
Paper choice should follow the mechanism. Thin kami or lightweight decorative paper is forgiving when a model uses many reverse folds, collapses, or tight repeated layers, while firmer paper is more useful when tall walls, drawers, handles, or stacking rims need to keep their shape. Very heavy cardstock can make a small box harder to fold because each layer steals interior space and increases spring-back at the corners.
A simple way to choose is to look at what the paper must do after folding:
- Collapse or twist: favor thinner, crisp paper that can accept several intersecting creases.
- Stand tall or carry a handle: move slightly firmer so the walls resist bowing.
- Slide as a drawer: use paper smooth enough to move against another folded surface without grabbing.
- Fit as a lid: avoid excessive thickness, because doubled edges can make clearance disappear quickly.
- Show a pattern: place the most important motif where it will remain visible after the final walls or flaps turn inward.
For an unfamiliar model, make the first version from inexpensive paper. Once the fit and crease logic make sense, refold it in the paper you want to give away.
Pick the Box by the Way the Gift Should Open
Choose the structure before the paper pattern. For a first functional fold, the masu box gives you the clearest lesson in square walls and lid clearance. Use a drawer, hinge, or stacked set when the reveal matters; choose a divider when several tiny items need order; and reach for the star, heart, gem, crown, or frame versions when the container itself is part of the visual message.
If you want to keep folding after the packaging is finished, Diynify’s 20 Christmas Origami Ideas to Fold This Holiday Season moves into ornaments, place settings, toppers, and other dimensional paper projects. The page and title were verified on Diynify.