

This post contains affiliate links. As an Amazon Associate I earn from qualifying purchases, at no extra cost to you. Thank you for supporting Diynify!
Hanging paper stars can make a Christmas room feel festive without filling every shelf or covering the walls. A few carefully suspended shapes catch the daylight, move gently in the air, and leave plenty of breathing room between decorations.
These 14 ideas focus on lightweight folds, translucent surfaces, openwork details, and creative hanging arrangements. Most call for decorative paper or cardstock, scissors, a ruler, adhesive, and thread. Some also need vellum, tissue paper, wooden dowels, a lightweight hoop, or removable hanging hardware. Start with simple folded stars for a small space, or try a balanced mobile when you want something that moves.
1. Pleated Paper Star Drops Above a Dining Table
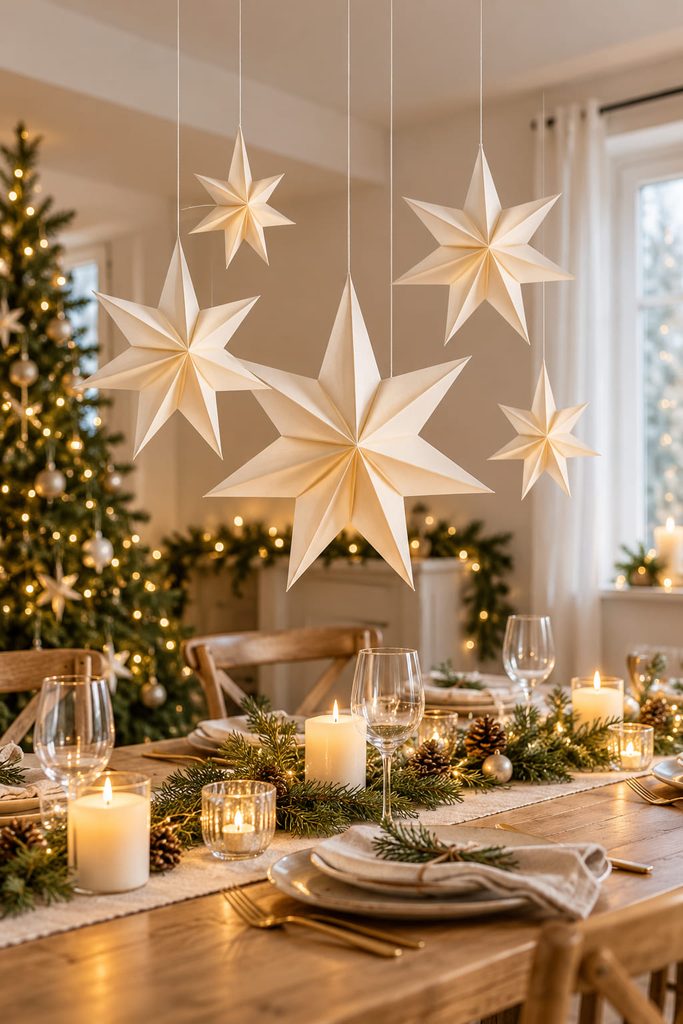
A cluster of softly folded stars can define a Christmas dining area without taking up any table space. Score five-point cardstock shapes along their centerlines and fold alternating ridges and valleys to give each one a shallow dimensional face. Cream, pale ivory, or warm white paper lets those creases catch the light without adding visual weight.
Suspend three or five stars on separate lengths of fine thread, with the largest near the center and smaller pieces at different heights. Reinforce each hanging hole with a small paper patch on the reverse. Keep the entire arrangement above head height and away from candles or hot lighting fixtures. The empty space between the stars is as important as their folds.
2. Translucent Vellum Star Veil for a Window
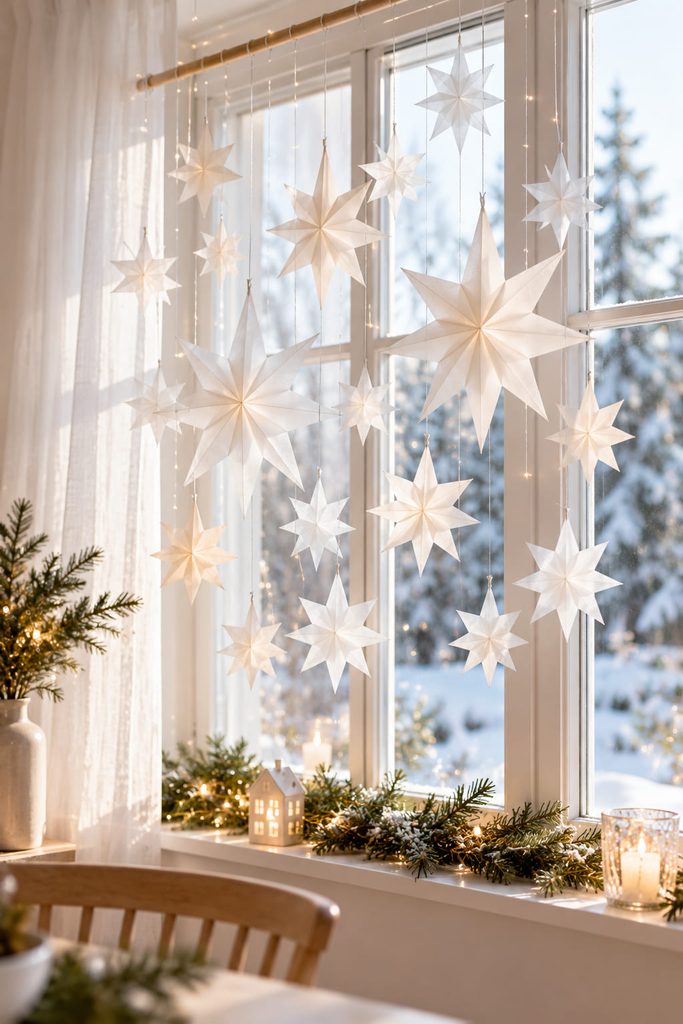
Morning light changes this decoration throughout the day. Thin vellum stars appear almost white against a bright window, while their edges and overlapping shapes become more noticeable as the light shifts.
Cut broad star silhouettes from translucent paper, then score a shallow ridge through selected pieces so they do not all hang completely flat. Attach individual threads to a slender horizontal rail rather than to the window glass. A rail also makes the whole veil easier to take down without disturbing the stars.

Avoid arranging them into a solid curtain. Leave generous gaps between strands and vary the vertical positions so the view remains open. Vellum can crease permanently, so store the finished pieces flat with tissue between them.
3. Open-Frame Star Halo on a Hanging Hoop
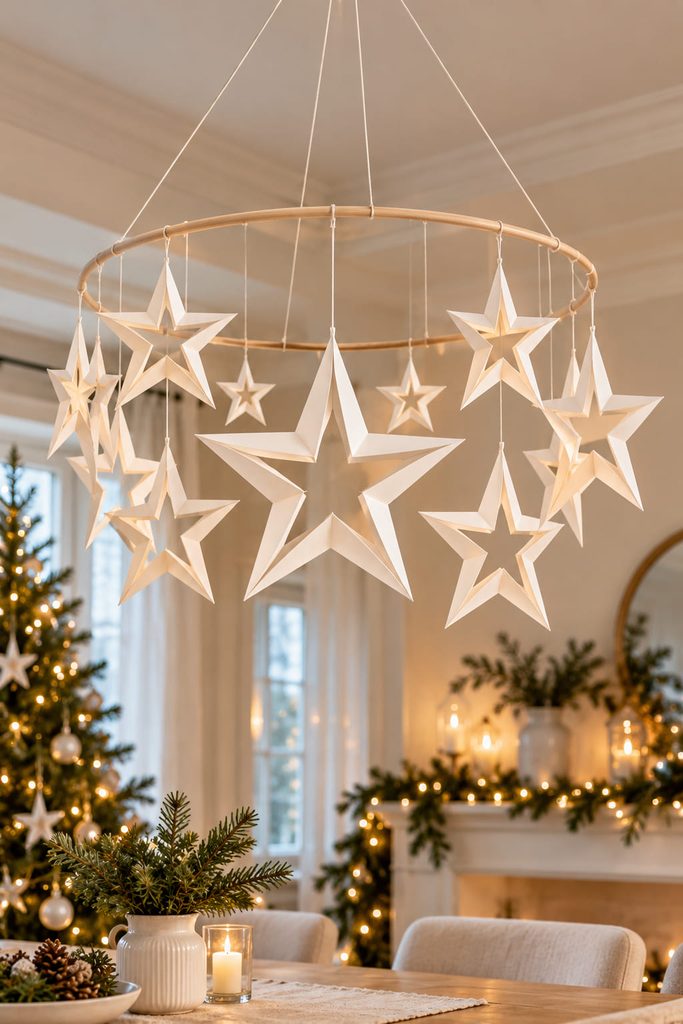
Instead of filling a ceiling decoration with solid paper shapes, a suspended hoop can carry a ring of open star outlines. The negative space keeps the result delicate even when the finished arrangement is fairly wide.

Use firm cardstock for the star frames and a lightweight craft hoop as the support.
- Cut star silhouettes with wide enough borders to keep their points from bending.
- Remove the center of each star, leaving a clean open shape.
- Tie the stars around the hoop on short, separate threads, alternating inward-facing and outward-facing positions.
- Suspend the hoop from three evenly spaced cords that meet at one overhead point.
- Lift the arrangement before final hanging and adjust the cords until the hoop stays level.
Balance Check: If the halo tilts, check the three support lengths and the distribution of stars around the ring. Adding weight to the opposite side is less useful than correcting the attachment geometry.
A simple white ceiling or pale wall makes the open silhouettes especially easy to see.
4. Loose-Loop Star Garland Between Ceiling Beams
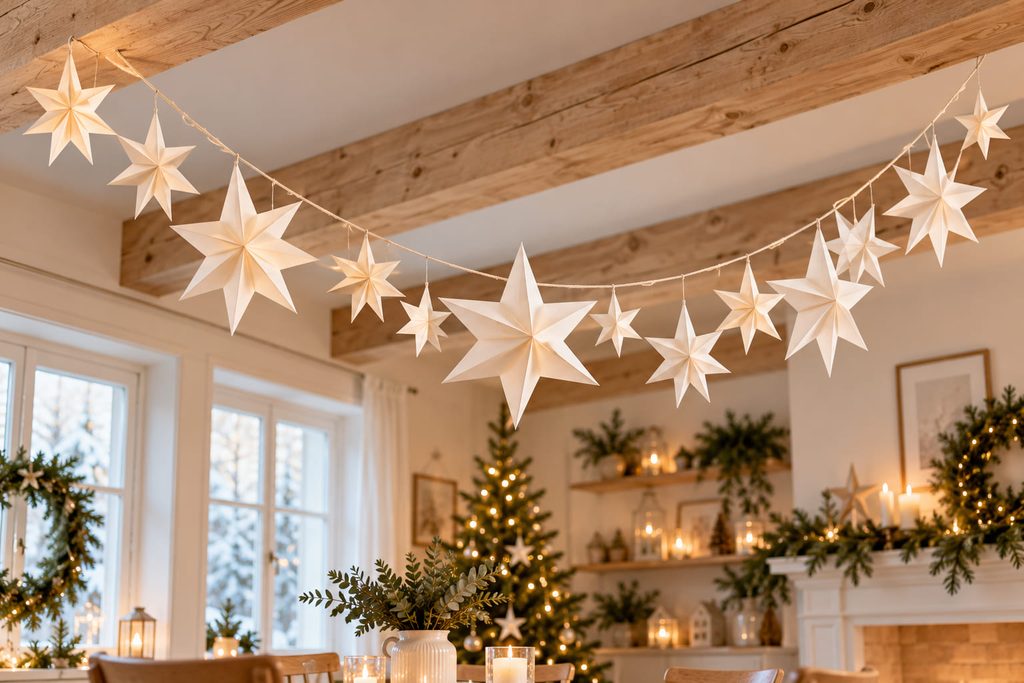
A straight row of stars can feel stiff, particularly in a room with high ceilings. A loose paper garland creates a softer line and gives each shape a little freedom to move.
Cut shallow-folded stars from lightweight paper, then connect them with narrow folded paper hinges or short lengths of cotton thread. Each connection should carry the weight of only the neighboring star, while the main suspension line supports the overall swag. Hang the garland in a broad curve between secure anchor points.
Paper hinges produce a more architectural shape, while thread allows the individual stars to turn. For a light Scandinavian-style Christmas look, leave longer intervals between the stars than you might use on a traditional tree garland. The ceiling remains visible through the arrangement, which keeps the decoration from feeling crowded.
5. Origami Star Drops From a Natural Branch
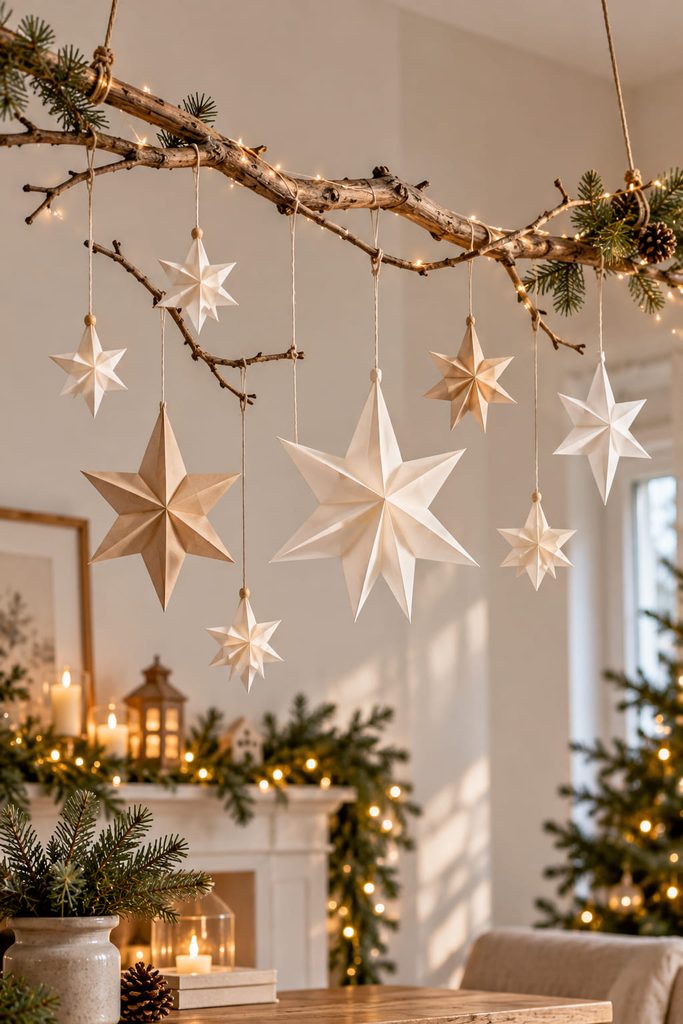
A slender branch makes an attractive support for delicate folded paper ornaments. Its irregular outline contrasts with the precise geometry of the stars, particularly when both are displayed against a pale wall.
For this project, gather:

- A dry, clean, lightweight branch with no loose bark
- Thin origami paper for crisp modular folds
- Cotton thread or fine decorative cord
- Two secure suspension cords for the branch
Fold several small stars with interlocking paper units, taking care to complete their locking pockets before attaching hanging threads. Space the ornaments along the branch according to its natural bends rather than measuring identical gaps.
The branch needs two overhead suspension points so it cannot roll unexpectedly. Position the largest star near its visual center and use smaller ornaments toward the ends. Unlike a dense holiday wreath, this arrangement benefits from seeing the branch itself.
6. Three-Level Balanced Star Mobile
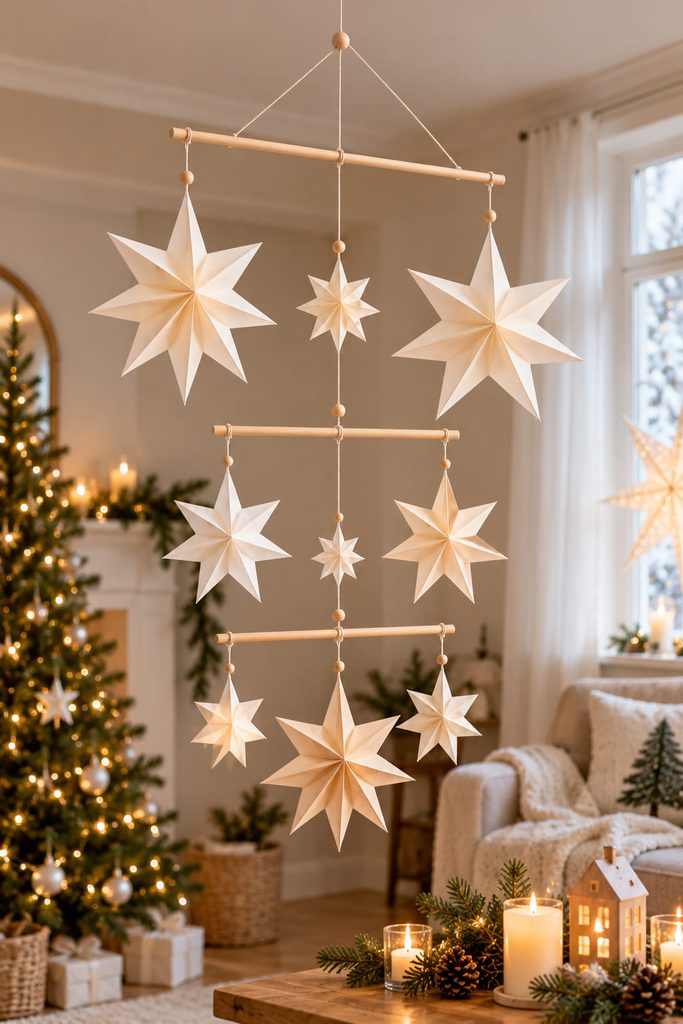
A moving star mobile looks effortless once it is hanging, but its balance depends on the relationship between the arms, attachment points, and paper weights.
Build the lower level first using a slender dowel with one lightweight folded star at each end. Tie a temporary suspension thread around the dowel and slide it until the bar hangs level. The midpoint may not be the balance point if the stars differ in size.
Create a second arm with another pair of stars. Suspend the completed lower assembly from one side of a longer upper dowel and a separate star from the other. Shift the upper suspension point until both sides remain reasonably level. Continue upward only when the earlier connections are balanced.
If the Mobile Refuses to Balance
- If one side dips continuously, shorten its arm or reduce the suspended weight.
- If the dowels cross during movement, increase the vertical distance between levels.
- If the stars turn edge-on, reposition their individual hanging threads closer to their centers of balance.
- If the entire mobile twists against a wall, move the display farther into the room.
Leave enough clearance for a gentle rotation without the arms touching one another. The changing angles make this arrangement particularly effective near a softly lit window, away from strong drafts.
7. A Falling Star Trail Along a Stairwell
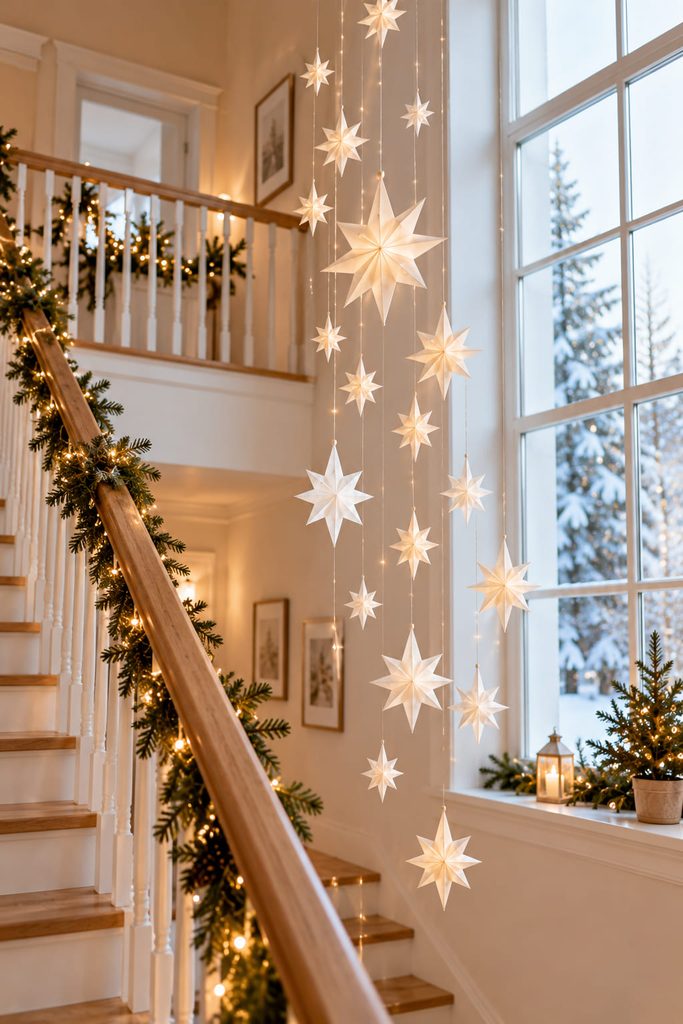
A tall stairwell gives suspended decorations something a flat wall cannot: room for a long, descending composition.
Instead of creating a dense vertical curtain, use one or two fine suspension lines carrying small folded stars at irregular intervals. Fix each ornament to its thread at a reinforced center attachment. Small knots or secure thread loops prevent the stars from sliding together near the bottom.
Arrange the sizes gradually rather than repeating the same silhouette all the way down. Larger stars can occupy the upper section, with smaller shapes becoming more widely spaced near the end. The result resembles a scattering of stars through open space.
Stair Clearance: Keep every element outside the walking path, away from handrails and well beyond head height. Do not suspend long, loose strands where they could be caught while using the stairs.
8. Layered Paper Star Shadows Against a White Curtain
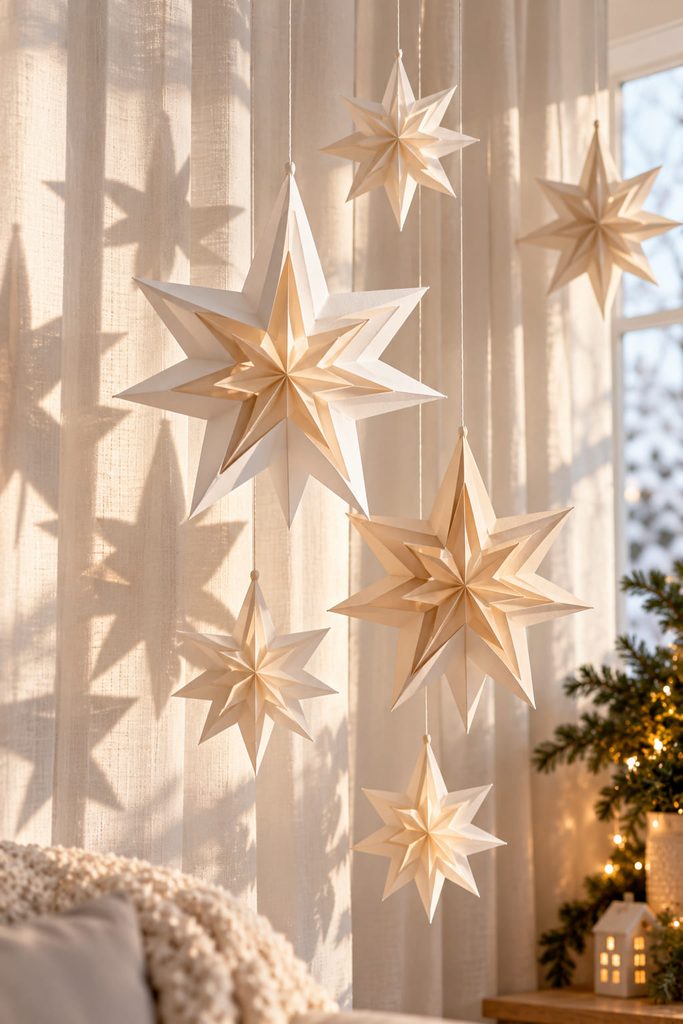
A shallow paper construction can cast interesting shadows without needing a bulky three-dimensional body.

For this arrangement, prepare two sizes of star silhouette in lightweight cardstock. Place a small folded paper spacer between their centers, keeping the points slightly offset. The spacer creates a narrow gap that becomes noticeable when light falls across the layers.
Suspend each assembled piece on a separate thread in front of a plain white curtain. The soft background makes the outer edges readable, while directional daylight can create a second, less defined silhouette behind the decoration.
Keep the layers shallow and the hanging line clear of the curtain so the pieces can move independently. This works especially well with a small number of stars: too many overlapping shadows can turn the quiet layered effect into a busy pattern.
9. Quilled Paper Starburst With an Open Center
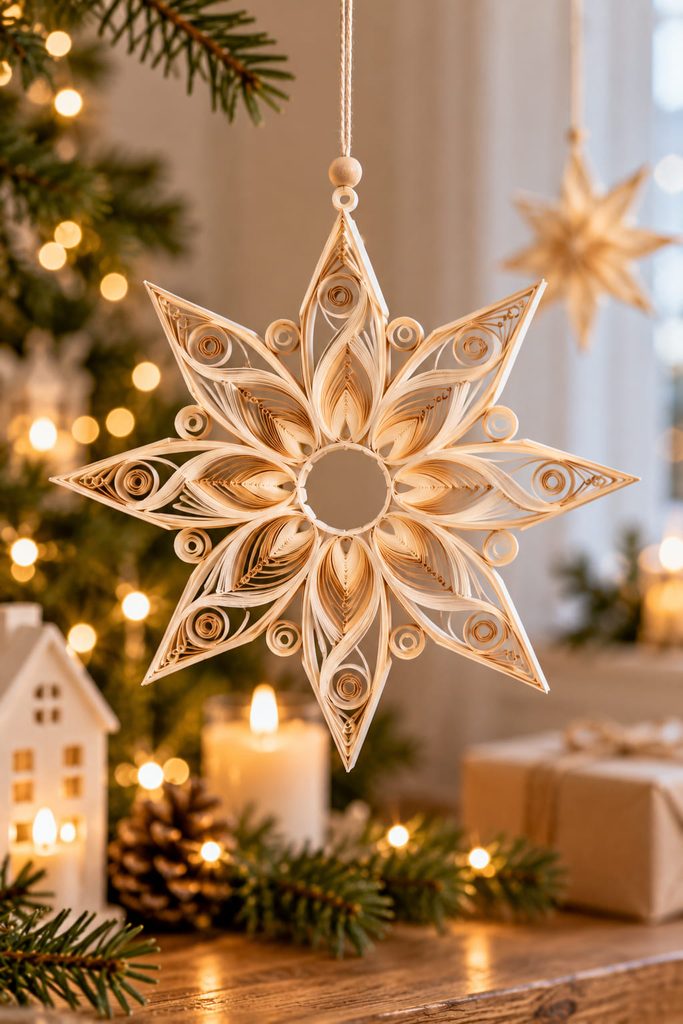
Narrow strips of paper can form a star that looks almost weightless. The trick is to build its points from curved coils while keeping enough structure near the center to support the finished ornament.

Work around a small, doubled-cardstock ring, attaching paired teardrop coils with their pointed ends facing outward. Use matching strip lengths so opposite points have similar dimensions.
Before suspending the star, check the following:
- The center ring stays flat when lifted.
- The outer coils are attached at their bases rather than relying on neighboring tips.
- None of the paper strips has been pulled so tightly that the curves collapse.
- The hanging thread is fixed to the reinforced center structure.
Leave the middle open. That small circle of negative space distinguishes the quilled starburst from a solid paper ornament and allows the background to show through its delicate outline.
10. Fold-Flat Accordion Stars on a Removable Rail
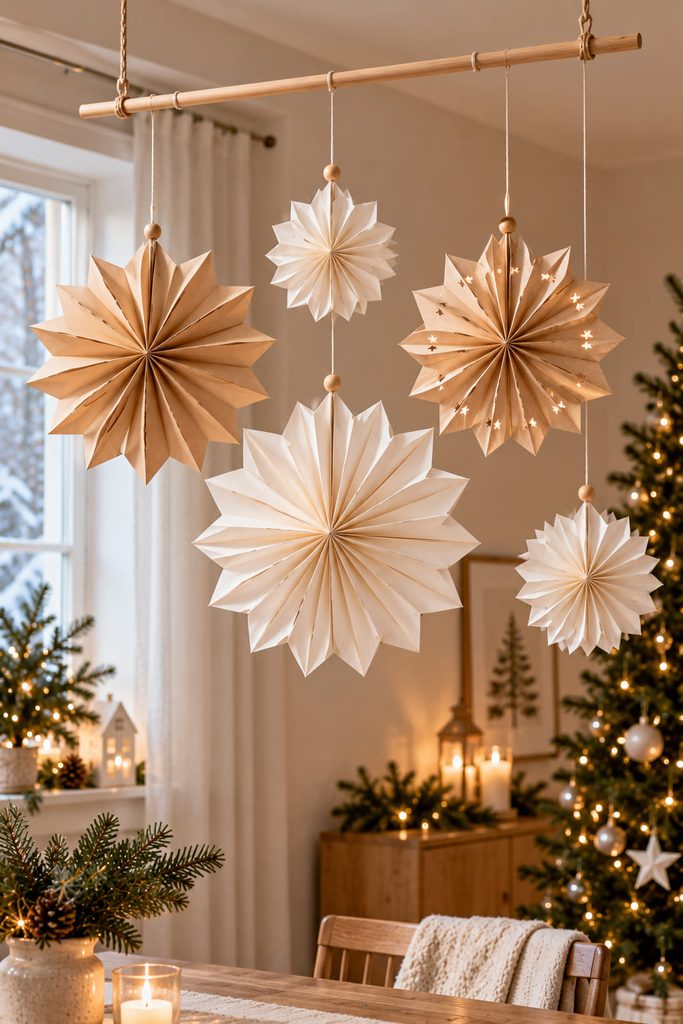
Reusable Christmas decorations become much easier to store when their volume comes from folds rather than permanently joined layers.
Accordion stars work especially well for this purpose. Fold narrow paper sections into even pleats, join their ends, and spread the resulting fan into a radial shape. A reinforced center helps distribute tension, while a removable closure between the outer faces allows the decoration to collapse when the season ends.
For a temporary ceiling installation, hang several fans from a lightweight rail supported by appropriately rated removable hardware.
| Construction | Best Use | Storage Trade-Off |
|---|---|---|
| Permanently glued fan | Long-term hanging display | Keeps its full opened shape |
| Removable tab closure | Seasonal decorations | Can close into a compact folded stack |
Keep the paper grain and pleat widths consistent if you are making several stars. Uneven folding makes the outside edge look irregular and can prevent the fan from closing properly.
Before decorating the whole rail, open and collapse one sample to make sure the removable connection can be reached without pulling on delicate paper points.
11. Hollow Paper Strip Star Cages for a Reading Nook
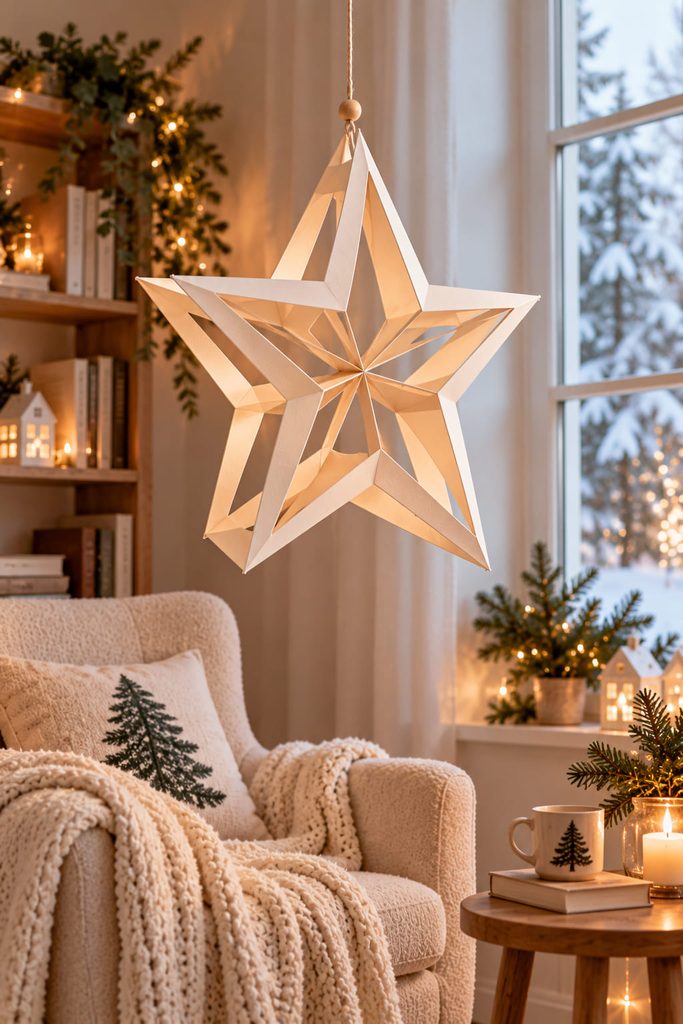
A hollow star can look dimensional from several angles while remaining light enough to hang above a small seating area.
Start with a narrow cardstock star-shaped frame for the front and an identical frame for the back. Join matching corners with folded paper strips that act as short connecting ribs. The distance between the two frames determines the thickness of the finished cage.
For a cleaner result, assemble the side ribs while the frames lie on the work surface. Keep the rib lengths consistent so the front does not lean toward the back. Reinforce the upper central connection and attach the hanging thread through both frame layers.
Unlike a solid faceted ornament, the open construction lets the wall color remain visible through the middle. It also needs fewer large paper surfaces, so the shape feels particularly light when suspended near a bookshelf or a quiet reading corner.
Make a single larger cage rather than crowding the space with many tiny ones. Its silhouette will be easier to appreciate from a seated position.
12. Interlocking Star Chain Columns for a Doorway
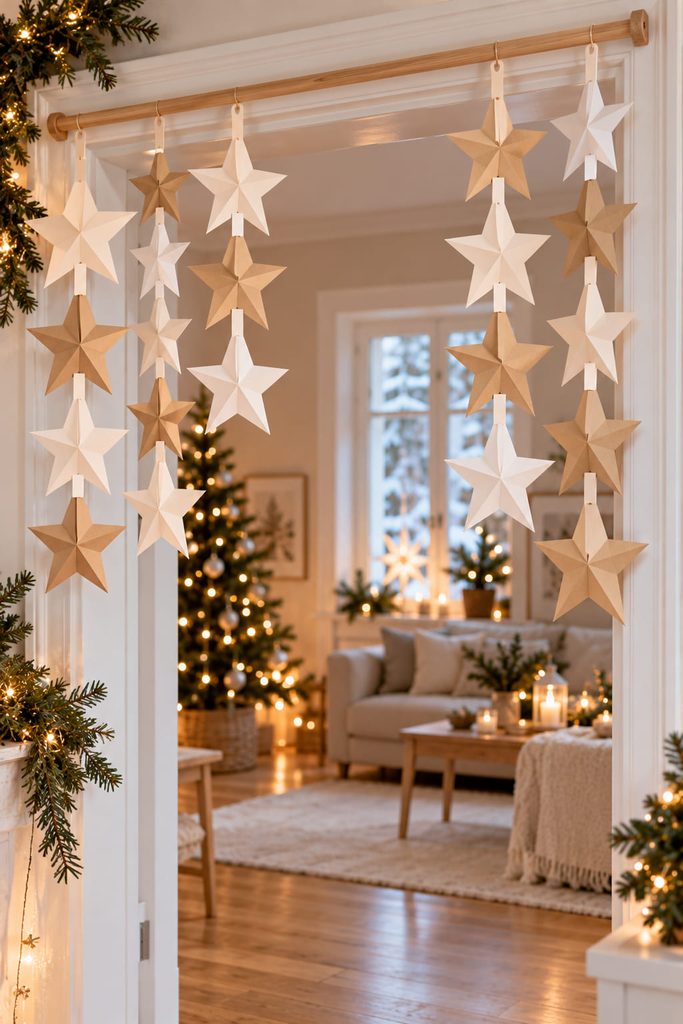
Traditional hanging garlands depend on thread between separate decorations. Interlocking star columns use the paper shapes themselves as the connectors.
Cut stars with short reinforced tabs and matching slots along their vertical centerlines. The tabs slide through the slots of neighboring pieces, creating a flexible column. Each connection must be wide enough to carry the ornament below it without tearing.
If the column curls toward one side, first check that the slots are centered. If the connections pull open, widen the retaining tabs or use a slightly firmer paper rather than adding heavy glue.
Suspend several short columns from a secure overhead rail, leaving the central doorway completely clear. The open spaces between the columns prevent the installation from becoming a solid partition.
This is a good choice when visible paper connections are part of the design. It has a more graphic appearance than the nearly invisible threads of a falling-star arrangement.
13. Tissue-Fringe Star Comets for Playful Holiday Decor
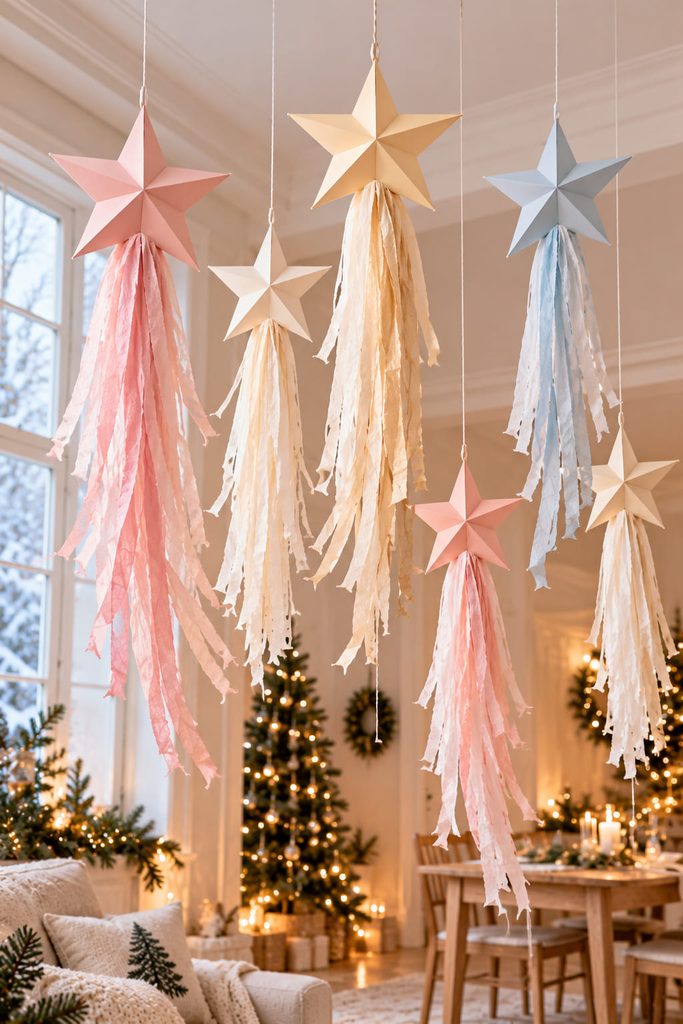
Long, narrow tissue-paper tails introduce a different kind of motion to a suspended star. Even a small movement of air can make the fringe flutter while the main paper shape stays relatively steady.
Cut a lightweight star with a shallow center fold, then attach several thin tissue strips behind its lower points. Keep the fringe shorter than the height of the star if you want the silhouette to remain recognizable. Longer tails create a more dramatic comet shape but require more room beneath the hanging point.
A small group above a holiday craft corner or along the edge of a high ceiling creates a playful atmosphere without adding glitter or heavy ornamentation. Choose pale tissue colors if the surrounding decorations already have strong patterns.
14. Offset Star Ladder on Twin Cotton Cords
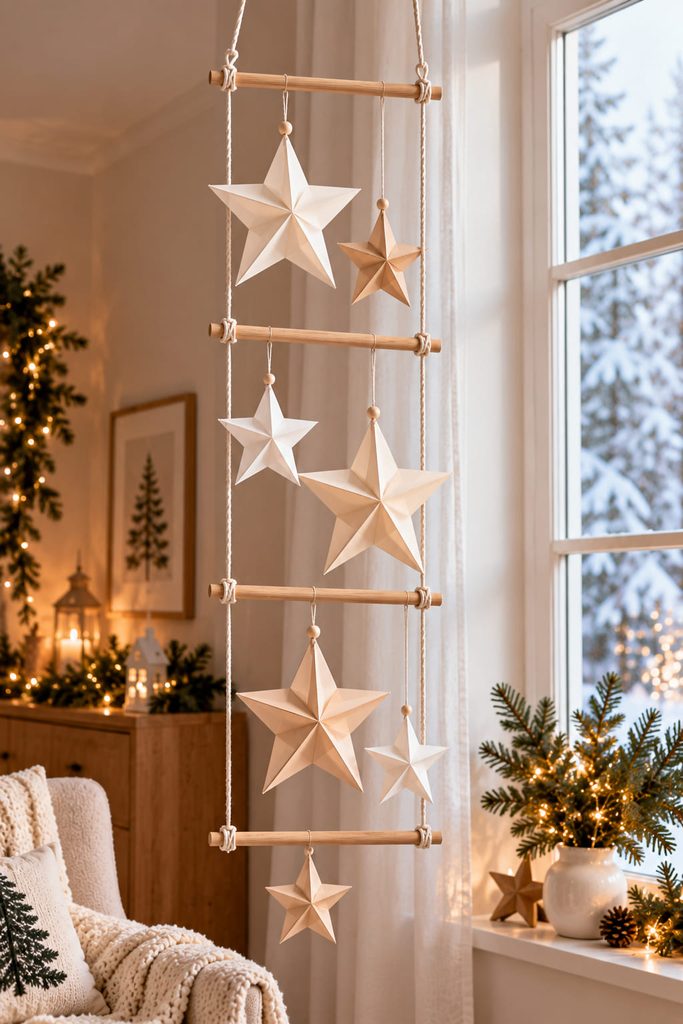
Two parallel lengths of cord can support a narrow vertical arrangement that feels architectural rather than like a loose garland. Small wooden dowels act as rungs, and the stars hang in the spaces between them.
Begin with a lightweight upper dowel and attach matching cord lengths near its ends. Tie a second rung farther down, then a third if the installation needs more height. Check the rung spacing before adding paper decorations; the cords should remain parallel when suspended.
Hang shallow folded stars from the rungs on short central loops. Keep the pieces offset rather than forming perfectly straight columns. A star on the left of one rung can be balanced visually by a slightly smaller ornament near the right side of the next.
The ladder’s structure has one important advantage: the cords carry the weight, so the stars are not supporting one another.
Keeping the Ladder Straight
Lift the complete arrangement from its final suspension point. If the rungs slope, compare the knot positions on the left and right cords. If the entire piece curls toward the wall, check whether the front ornaments are pulling unevenly and move the suspension slightly outward.
This format works well in a narrow alcove or beside a tall window where a wider mobile would not have enough clearance.
Spacing Hanging Paper Stars in Open Rooms
The most common visual problem with suspended Christmas decorations is overcrowding. A lightweight ornament can still make a room feel busy if every available gap contains another shape.
Start by identifying one main viewing direction and one area where the stars will be most noticeable. Use larger gaps around detailed pieces such as quilled starbursts, and let simpler folded ornaments form small groups. When a composition includes multiple suspension levels, keep the lowest points clear of furniture, walkways, doors, and moving curtains.
Thread strength and overhead attachments deserve the same attention as the paper. Secure suspension to hardware suitable for the location and the total weight; decorative tape alone is not a reliable ceiling anchor. Avoid placing paper near hot bulbs, open flames, heaters, or other heat sources.
Let the Space Between the Stars Do the Work
For a quiet Christmas arrangement, begin with the pleated dining-table drops or a short vellum window veil. Both create a noticeable seasonal change using relatively few pieces. If you have a larger open corner, the balanced mobile offers a more involved project with gentle movement.
Keep the paper palette restrained and give the finished shapes room to hang freely. A handful of carefully positioned stars can feel more intentional than a ceiling filled from edge to edge.
For projects that also work directly on walls, windows, and Christmas trees, see 12 Paper Star Decorations for Walls Windows and Trees.