
This post contains affiliate links. As an Amazon Associate I earn from qualifying purchases, at no extra cost to you. Thank you for supporting Diynify!
Flat cutouts are only one way to make snowflakes from paper. These 3D paper snowflakes use slots, rolled cones, folded modules, honeycomb cells, curved strips, and raised layers to create real depth that catches winter light and casts visible shadows.
Most ideas need paper or cardstock, scissors, a ruler, and glue. A few also use thread or narrow ribbon for hanging, removable adhesive for window display, a thin skewer or quilling tool, or a small paper collar for a tree topper. Choose thinner paper for tight folds and curves; use firmer cardstock where the snowflake has to hold its shape across a wall or support projecting pieces.
1. Interlocking Slotted Snowflake Window Spinner
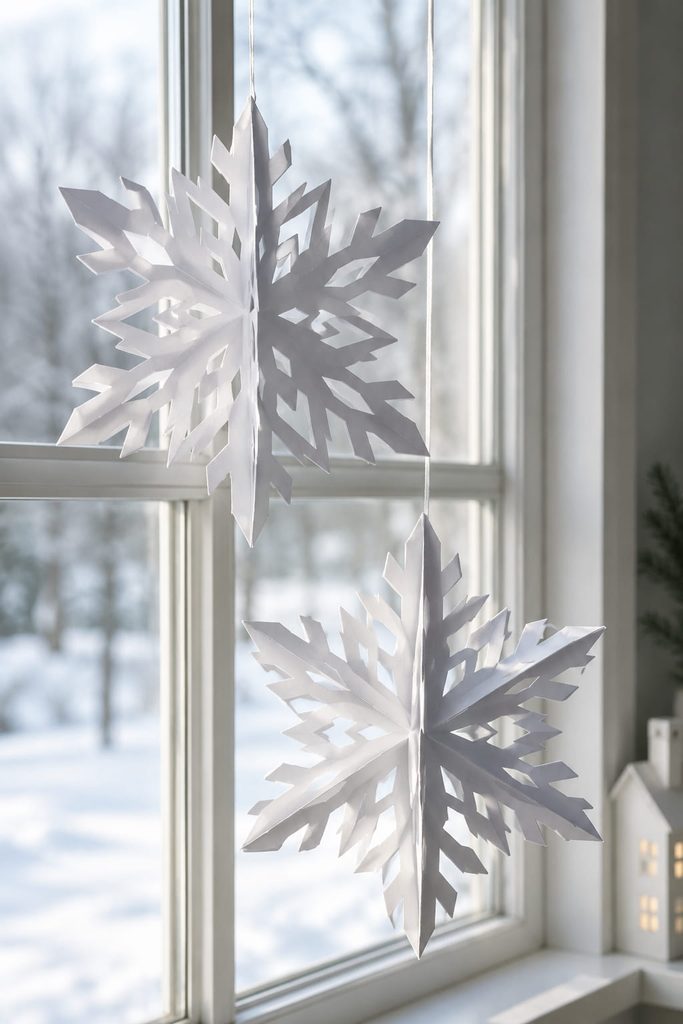
Cut two matching six-point snowflakes from medium-weight paper, then make a straight slot from the outer edge to the center of one and from the center to the outer edge of the other. Slide the cuts together at right angles. The two planes brace each other, so the snowflake reads as a dimensional form instead of a flat silhouette even when viewed from the side.

Punch or pierce the hanging point through a reinforced area near the top of one plane, not through a narrow tip. In a window, the crossed planes catch light differently as the ornament turns. Hang it slightly forward of the glass so both planes have clearance to rotate without scraping the pane.
Center-Slot Check: The two pieces should meet at the exact center and sit close to 90 degrees. If one side droops, lengthen the slot only enough to let both centers align; an oversized slot makes the joint loose.
2. Rolled Cone Snowflake Wall Medallion
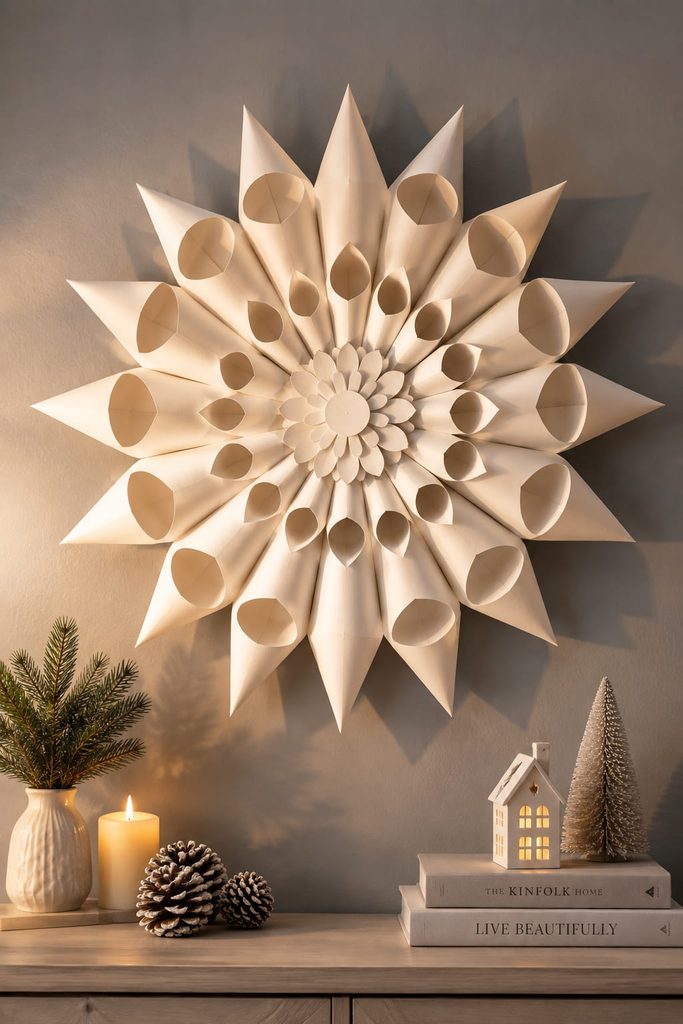
For a wall piece that needs to read from several feet away, replace tiny lace cuts with six or twelve rolled paper cones. Each cone becomes one bold snowflake point, while the open mouths create dark recesses that make the whole piece look deeper under side light.

- Cut equal paper squares or tapered pieces and roll each into a cone with the seam at the back.
- Arrange the cones radially around a sturdy cardstock disk before gluing; check that opposite points line up.
- Glue the cone bases to the disk, then add a smaller center medallion over the joins.
- Attach the hanger to the backing disk so the load stays on the hidden support rather than on a cone tip.
Use fewer, wider cones for a graphic modern snowflake and more narrow cones for a denser starburst. The change affects silhouette and shadow, not just decoration.
3. Folded Kite-Arm Snowflake Tree Ornament
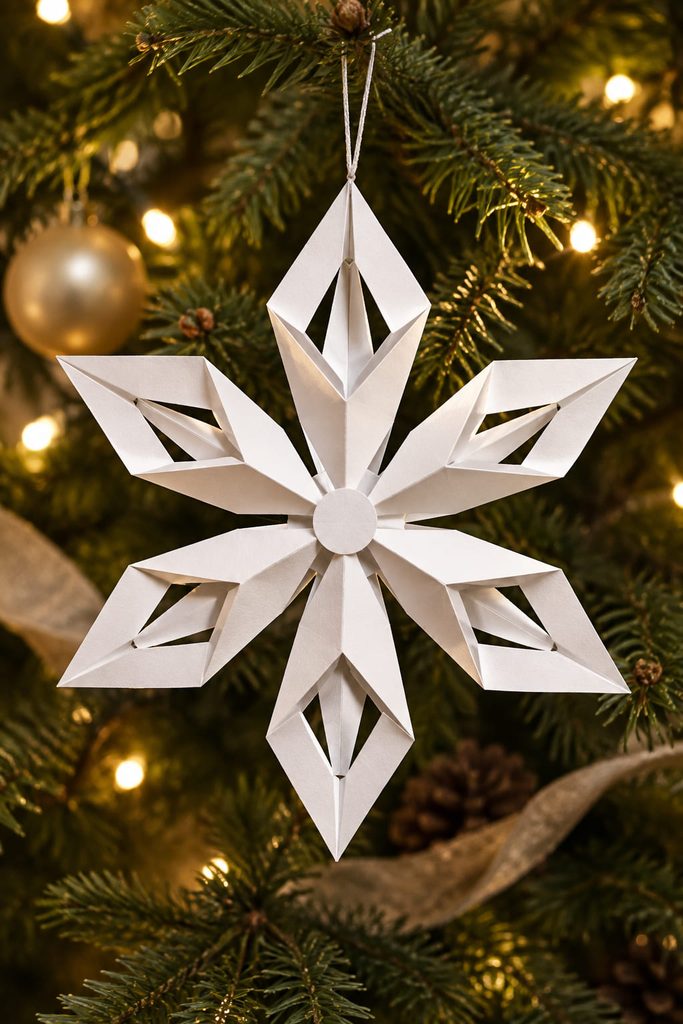
On a Christmas tree, projecting details have to stay light enough for a branch to carry them. Six small diamond-shaped pieces can be scored down the middle, folded into shallow kite-like ridges, and joined around a compact center disk. The crease gives every arm a spine, so even a simple outline catches highlights and stays visibly dimensional among needles and lights. Keep the center small and the tips broad enough to resist bending, then hang the ornament from the reinforced hub rather than from one folded arm.
4. Honeycomb Snowflake Window Ornament
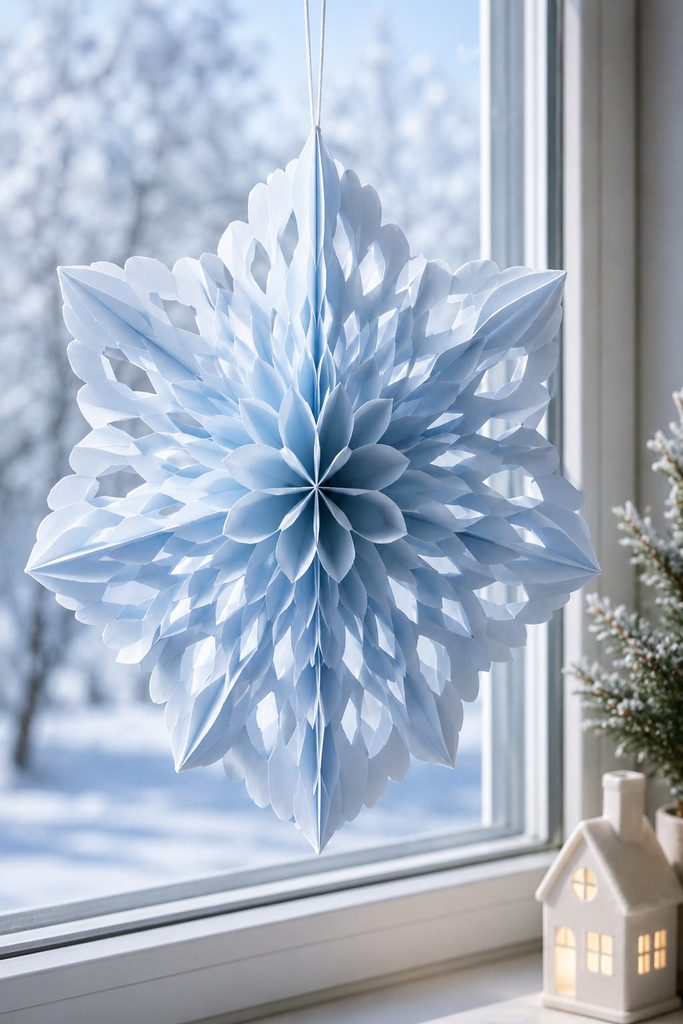
Build volume by controlling where neighboring paper layers are glued. Cut a stack of identical symmetrical snowflake profiles from lightweight paper and fold each on the same central spine. On one folded layer, apply narrow glue lines at selected inner zones; on the next, shift the glue to alternate outer zones. Repeating that pattern bonds the stack into cells that expand when the outside faces are opened around the spine.
Before committing to a full ornament, open the stack like a book. The cells should separate evenly without tearing narrow bridges. If one section stays flat, a glue line is probably missing; if two arms refuse to open, adhesive likely crossed into a space that was meant to expand. Only after that check should the first and last outer faces be joined.
For a window, lightweight white or pale translucent paper lets daylight reach into the cells. Suspend the ornament from the reinforced central spine with thread and leave a small gap from the glass; the layered edges can then turn freely instead of being pressed flat.
Glue-Line Check: Alternate glue zones consistently from sheet to sheet. Random placement produces lopsided cells and makes one section expand farther than the others.
5. Quilling-Coil Snowflake Wall Rosette
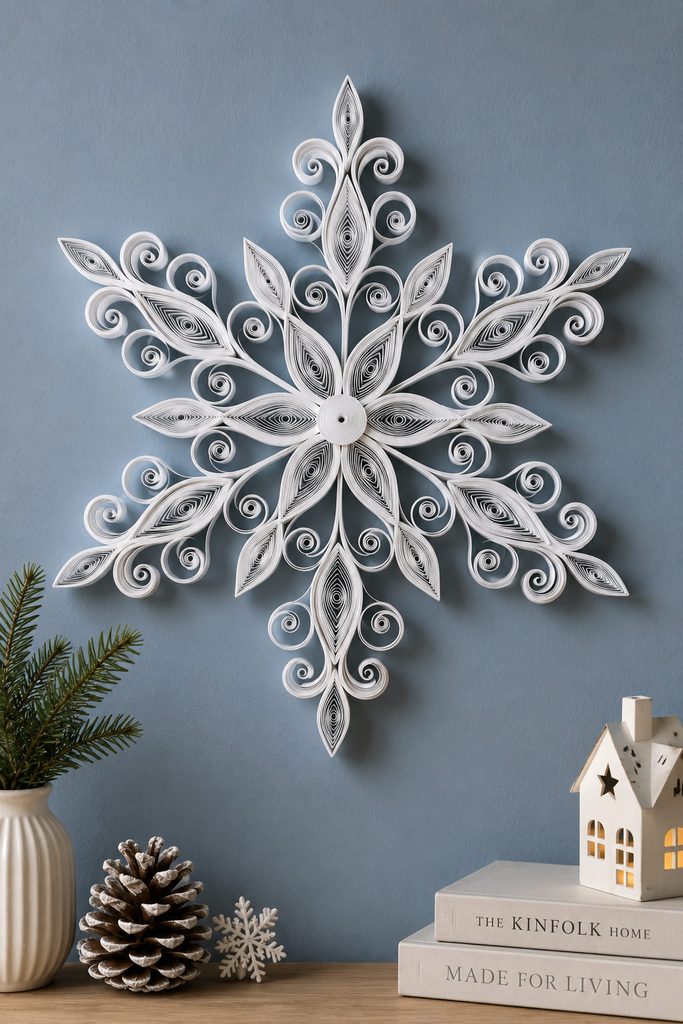
With narrow paper strips, a snowflake can gain depth without becoming visually heavy. Roll the strips into coils, pinch some into teardrops or marquises, leave others as open scrolls, and arrange six repeated groups around a small center. The raised strip edges become the visible surface, so the design reads almost like shallow paper filigree on the wall.

Useful supplies:
- narrow quilling strips or hand-cut paper strips;
- a slotted quilling tool or thin skewer;
- tacky paper glue;
- a temporary circle guide.
Build one arm first and use it as the spacing reference for the other five. Glue only where neighboring coils actually touch; flooding the underside with adhesive flattens the relief that makes the rosette interesting.
6. Layered Spacer Snowflake Tree Ornament
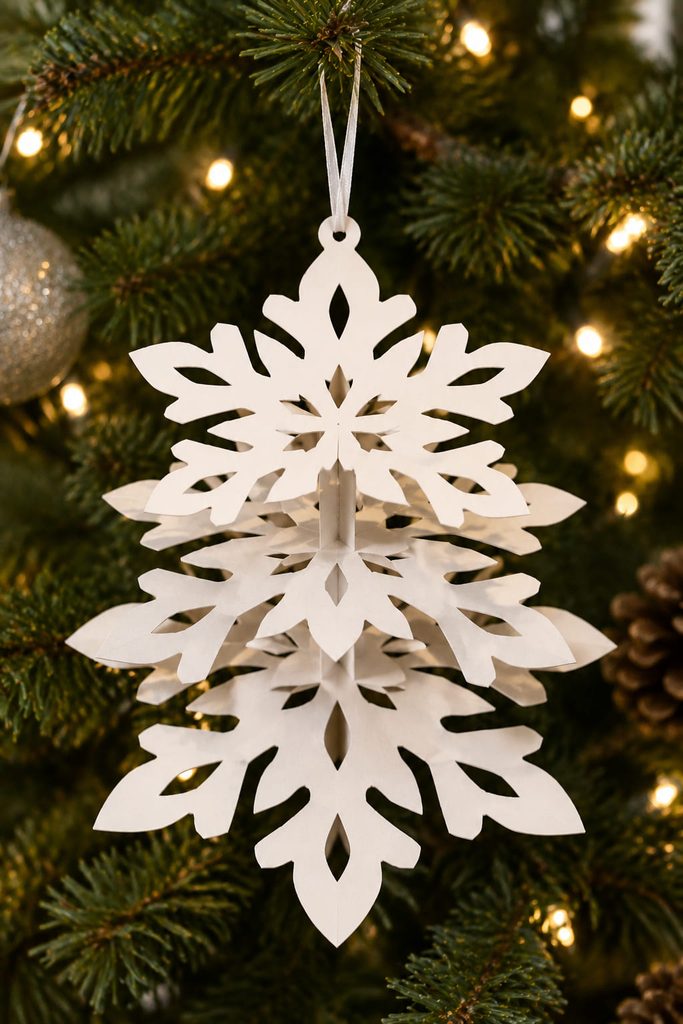
Instead of gluing several silhouettes face to face, separate them with small folded paper spacers. Cut three related snowflakes in descending sizes and place the spacers only at their centers. The front layer then floats ahead of the back one, creating visible shadow gaps while leaving the outside edges free.
Keep the spacers compact enough to hide behind the central motif. For a tree ornament, too much separation makes the stack twist more easily on the branch, while too little reduces it to ordinary layered cardstock. Pass the ribbon or thread loop through the rear layer and the center spacer so the hanging load travels through the structure rather than through the smallest front snowflake.

7. Kirigami Pop-Out Snowflake Window Panel
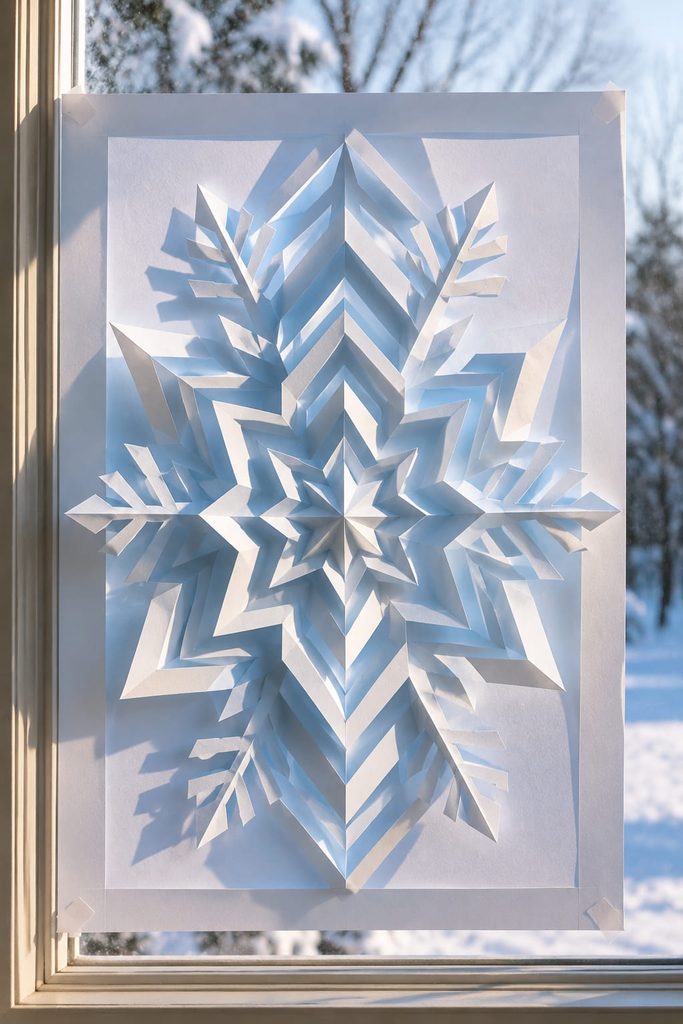
If the cut sections cannot move in opposite directions, a kirigami snowflake stays mostly flat. Begin with a folded square or hexagonal sheet, cut a symmetrical set of nested slits without separating the center bridges, then unfold it completely. Push selected inner frames forward while neighboring frames stay back, creating a stepped snowflake relief from one sheet.
The critical part is crease direction. Score the hinge lines gently, then alternate mountain and valley folds so each cut frame can project without twisting the next one. Mount the finished sheet only at its outer corners or along a broad border; taping every inner section to the glass destroys the pop-out effect.

If the geometry misbehaves:
- If one frame buckles: a hinge is folding in the wrong direction; reverse that crease before sharpening it.
- If the center tears: the connecting bridge is too narrow for the paper weight; simplify the innermost cut.
- If the relief collapses on the window: move adhesive farther from the projecting sections or use slightly firmer paper.
Pop-Out Test: Hold the panel upright before mounting it. The stepped sections should remain separated under their own light weight without being pulled open by your fingers.
8. Modular Origami Snowflake Wall Star
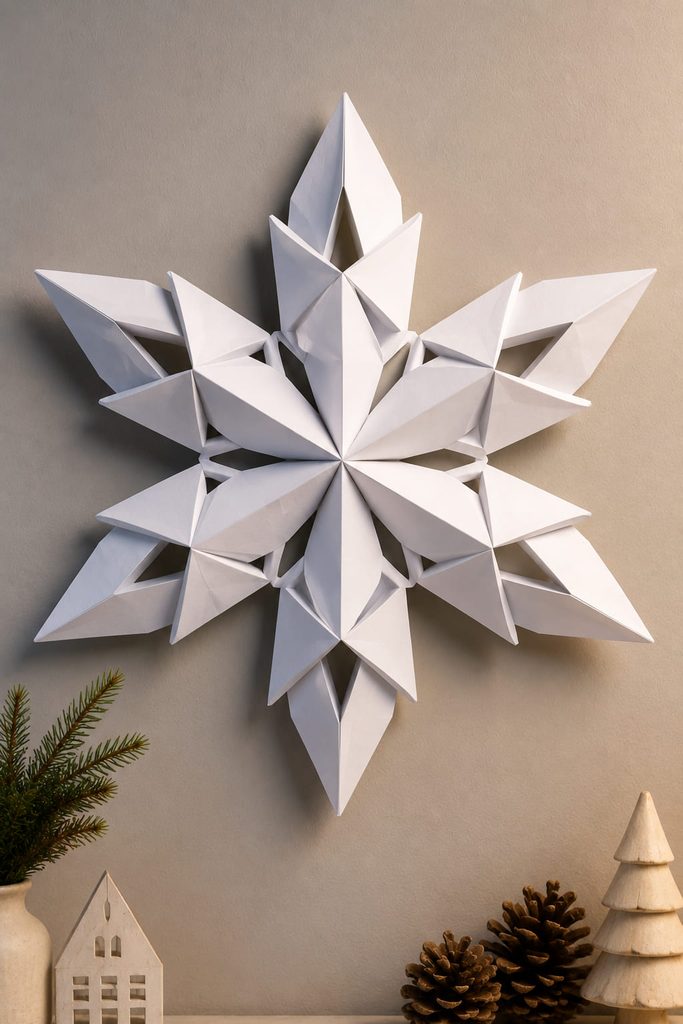
Fold six matching origami units, each with one pointed outer end and two locking pockets near the base. The project becomes a snowflake only when the units share a stable central geometry, so accuracy at the pockets matters more than adding extra decorative cuts.
- Crease all six units from the same paper size so their locking tabs land in identical positions.
- Dry-fit three units into a half-star and build the second half separately.
- Join the two halves around the center, tucking tabs fully into the neighboring pockets.
- Flatten only the center connection; leave the folded ridges on the arms intact so they keep their faceted profile.
For a wall display, attach a small hidden backing loop behind two neighboring modules rather than piercing a finished origami point. If the center twists, one unit is probably inserted at a different depth from the others; correct that joint before tightening the whole ring.

9. Accordion-Bellows Snowflake Tree Topper
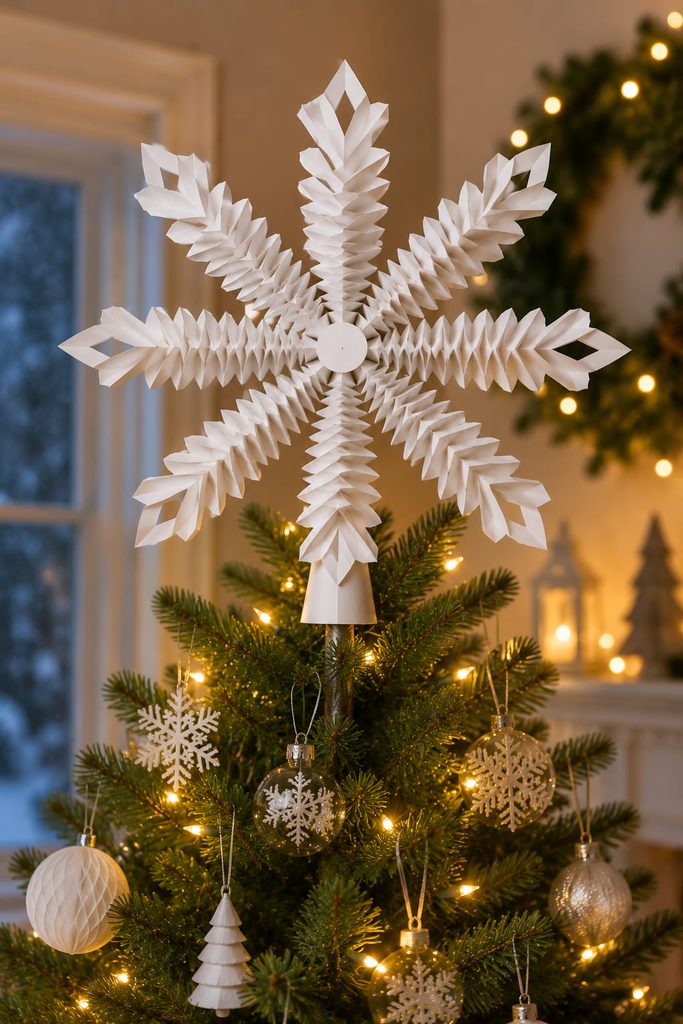
Which support you use depends on the shape of the tree top. Build six narrow accordion-folded arms and join them around a reinforced center so the pleats radiate outward like bellows. The ridges create strong depth without requiring a heavy solid layer.
There are two useful mounting routes. A rolled paper cone works when the tree has one clear upright leader: slide the cone over the stem and attach the snowflake to its broad side. A wide paper sleeve is better for a fuller cluster of top branches because it can sit around several stems without forcing them into one narrow point. Dry-fit either support before gluing it to the snowflake.
Topper Balance Check: Set the unfinished topper on the tree and look from the side. If it leans forward, reduce front weight or move the mounting support slightly upward behind the center; adding more decoration to the back rarely fixes the underlying leverage.
10. Looped Paper-Strip Snowflake Window Pendant

To soften the geometry, form matching paper strips into long teardrop loops, glue their ends together, and arrange six loops around a small center ring with the curves facing outward. A second, smaller loop inside each arm can add depth without closing the negative space. Because the construction is mostly air, it works especially well in a window where backlight can pass through the openings. Hang from the center ring, leave a little clearance from the glass, and keep strip width consistent so one arm does not curl more tightly than the others.
11. Pyramid-Tip Snowflake Wall Sculpture
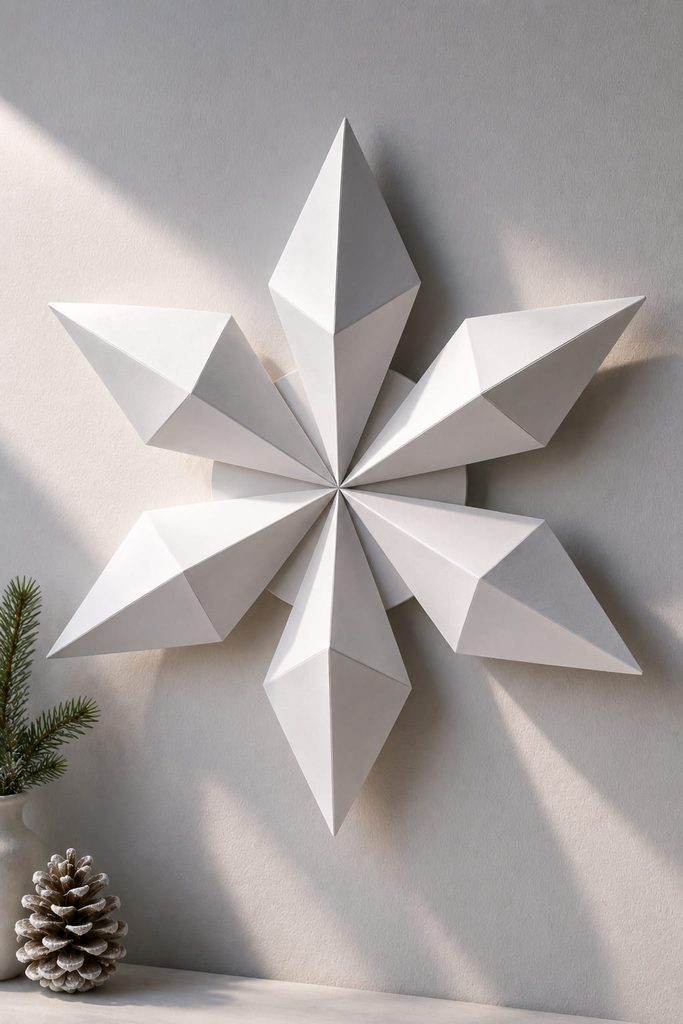
Six shallow paper pyramids can turn side light into part of the design. Make triangular or diamond-based pyramids from scored cardstock, tuck their glue tabs inside, then arrange the six forms around a broad central backing disk. Their peaks should project outward from the wall while the bases stay flush, creating six strong facets and predictable shadow wedges.
The backing disk both controls radial spacing and gives the wall hanger a solid place to carry the weight. Before gluing, place all six pyramids around the disk and view the layout from across the room. If the center feels crowded, shorten the pyramid bases rather than trimming the tips; the tips preserve the snowflake silhouette at distance.
12. Rolled Paper-Tube Snowflake Tree Ornament

Because tree branches bend under added weight, rolled paper tubes are useful when you want more body than a flat cutout without building a solid ornament. Roll narrow rectangles tightly around a skewer, glue the seams, and trim the finished tubes to matching lengths. Six tubes can radiate from a small double-layer cardstock hub, with shorter tubes added between them only if the ornament still hangs comfortably.
Before hanging, check:
- every tube meets the hub along a real glued surface, not just at one corner;
- opposite arms are close in length so the ornament does not rotate to a heavy side;
- the thread loop passes through or around the reinforced hub;
- the finished diameter leaves clearance from nearby branches and ornaments.
A metallic or printed paper can add surface detail without adding another physical layer.
13. Paper-Chain Snowflake Wall Statement Piece
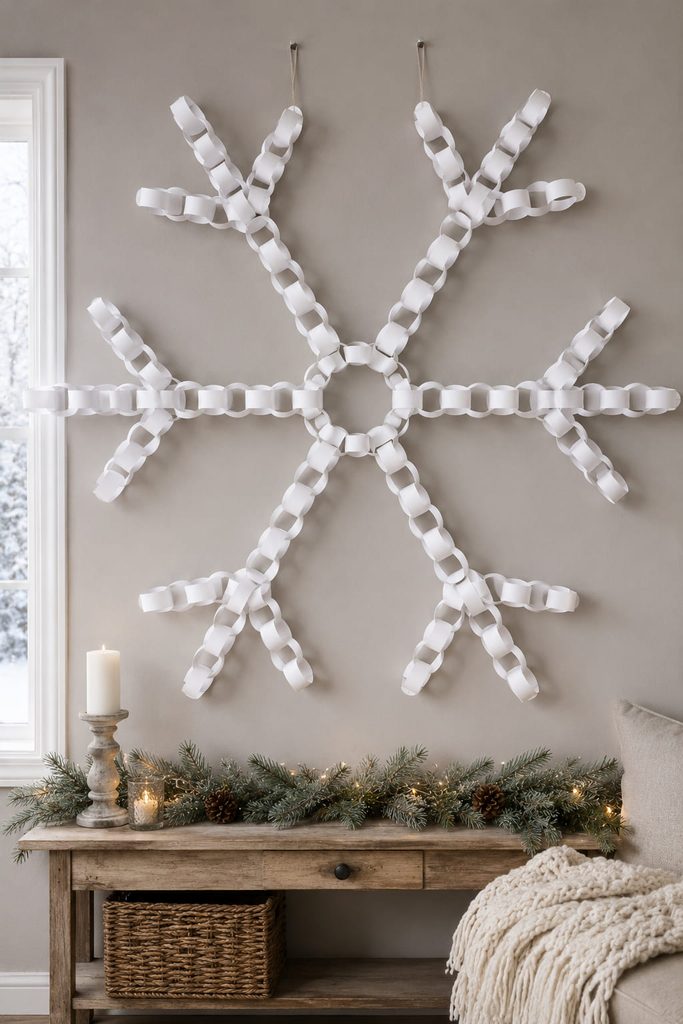
When you need a snowflake large enough for an entry wall or party backdrop, individual paper-chain links can become the structure rather than a separate garland. Build a sturdy central ring, then attach six short chains of equal link count around it. At the outer end of each chain, split into two smaller link branches to create the forked silhouette associated with a snowflake arm.
Scale changes the construction. Large links are light, but six long arms create leverage at the center, so reinforce the hub with a second paper ring and spread the attachment area of each arm across a broad section of the circle. Hang the piece from two points on the upper half of the hub instead of one decorative link; two suspension points reduce twisting and help the snowflake face the room.
For batch assembly, make all center links first, then all middle links, then all forked tips. That keeps arm lengths consistent without measuring each finished chain against the wall.
Hanging Load Check: Lift the completed snowflake by both intended hanger points before mounting it. If the center ring ovalizes, add another backing ring or shorten the arms rather than trusting a thin hub to carry the full span.
How to Display 3D Paper Snowflakes Without Flattening Them
Match the construction to the viewing condition. Windows favor open forms such as slotted planes, honeycomb cells, kirigami relief, and looped strips because daylight can pass around or through the structure. Walls reward deeper shadows and stronger silhouettes, so cones, quilling, pyramids, modular origami, and oversized chains can project farther without competing with branches or glass.
Tree pieces need the opposite discipline: keep the center compact, the weight low, and the hanging or mounting point stronger than the decorative arms. A snowflake that looks dramatic on a tabletop can pull a branch downward once it hangs several inches away from the stem. Test the support before adding extra layers, and leave enough clearance that neighboring ornaments do not crush projecting folds.
For storage, avoid pressing dimensional snowflakes under flat decorations. Slotted designs can usually be separated, honeycomb forms can be left unjoined at one seam so they close like a book, and looped or quilled pieces are best stored in shallow boxes with space around their edges.
Choose the Shape Before the Pattern
The easiest way to choose among these projects is to decide where the snowflake will live. For a bright window, start with the slotted spinner or honeycomb ornament. For a blank wall, the cone medallion, quilled rosette, pyramid sculpture, or paper-chain version gives more readable depth. For a Christmas tree, the folded kite ornament and rolled-tube snowflake stay comparatively light, while the accordion-bellows version is designed specifically to work as a topper.
Once the display job is clear, the decorative pattern can stay simple. Real dimension already supplies shadow, rhythm, and contrast, so every surface does not need intricate cutting. For more seasonal formats beyond snowflakes, explore Christmas Paper Crafts, DIY Ideas & SVG Projects – Diynify.








