

This post contains affiliate links. As an Amazon Associate I earn from qualifying purchases, at no extra cost to you. Thank you for supporting Diynify!
Handmade Christmas cards feel most personal when the construction says something about the recipient—not when the front is crowded with generic holiday decoration. These 14 ideas use portraits, stitching, weaving, windows, moving parts, pockets, and small paper keepsakes to build character into the card itself. Most use cardstock, decorative paper, scissors or a craft knife, a scoring tool, and adhesive; a few also need embroidery floss, vellum or acetate, foam tape, or a hole punch. Choose by interaction: flat collage for easy mailing, tactile detail for texture, or a moving or removable element when the card should become part of the gift.
1. Torn-Paper Portrait Card With Recognizable Details
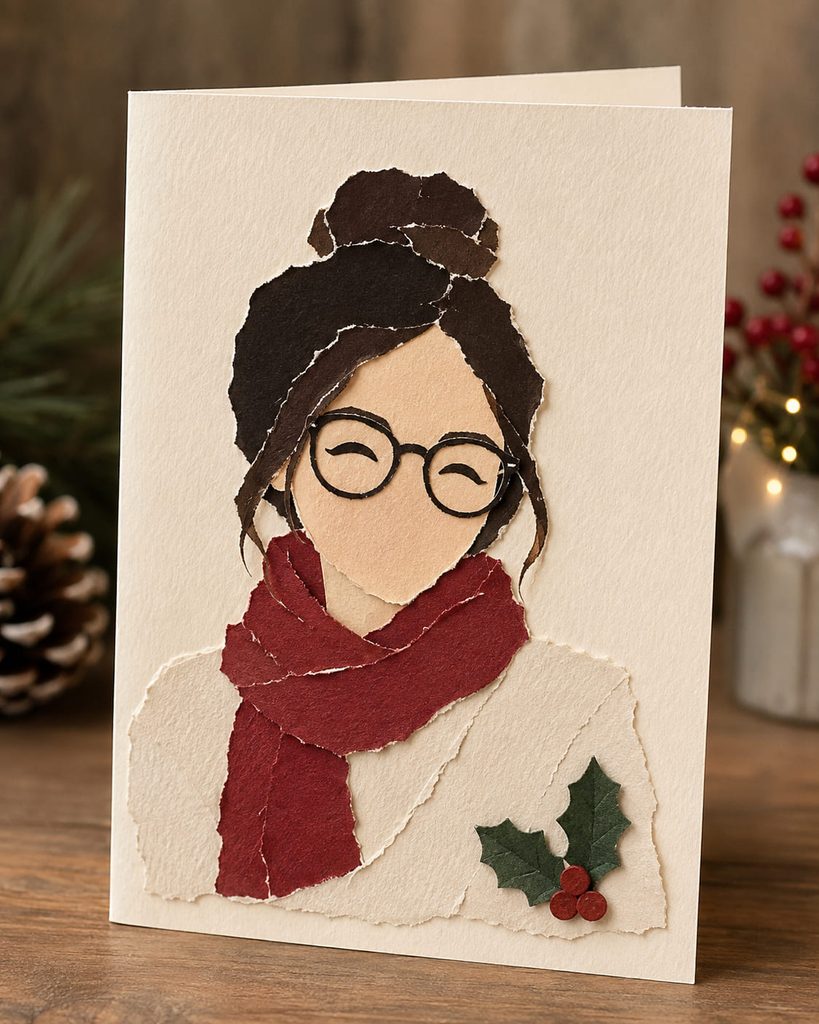
Recognition matters more than realism here. Build the front of the card from torn or hand-cut paper shapes that suggest a person, couple, pet, or family member through a few unmistakable cues: a familiar hairstyle, round glasses, a favorite knit hat, a dog’s floppy ears, or the shape of a beard. Keep the face or figure intentionally simplified so the handmade edges look deliberate rather than like a failed attempt at illustration.
Start with the largest silhouette, then add only the features that do the recognition work. A quiet background gives those clues room to read, while one small Christmas detail—a paper holly sprig, scarf, or star—sets the season without turning the portrait into a generic holiday character. Before gluing, view the loose pieces from arm’s length; if the subject is recognizable without tiny details, the composition is doing its job.
2. Stitched Christmas Sweater Card
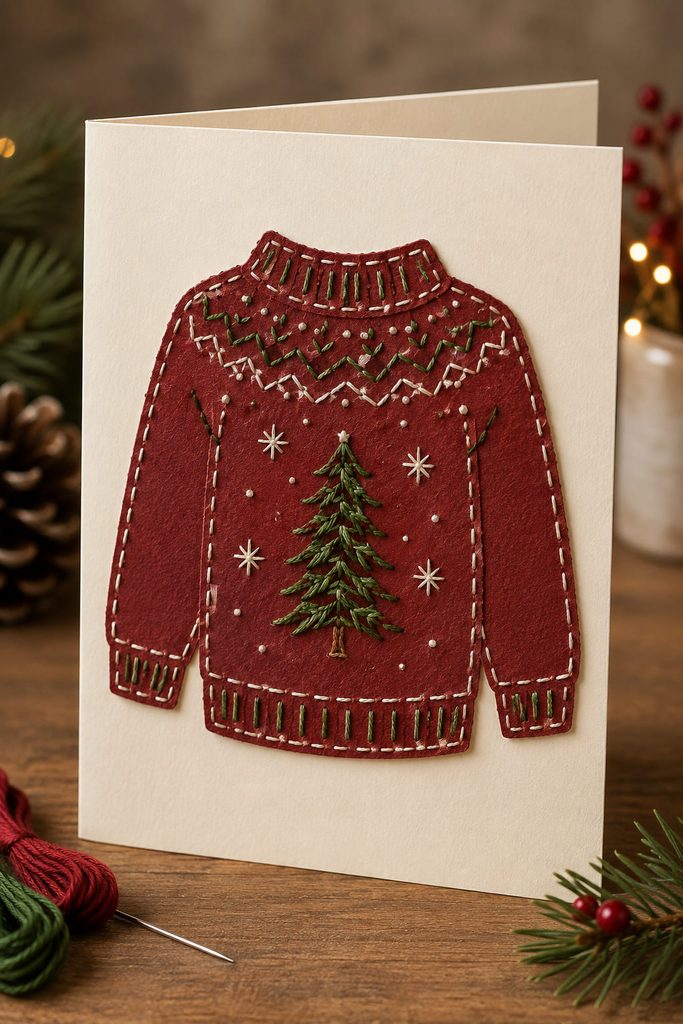
Punch the stitch path before attaching anything to the card base; once paper layers are glued down, piercing them cleanly becomes harder and the back can look messy. A sweater front, mitten, stocking, or simple evergreen can all carry stitched lines, but the holes need enough paper between them to resist tearing.

- Lightly mark a simple stitch path on a separate cardstock panel.
- Pierce evenly spaced holes over a protective mat, keeping them away from cut edges.
- Sew with embroidery floss or thin yarn, using short spans so the paper is not pulled into a curve.
- Tape or knot the thread tails flat on the back, then mount the stitched panel to the folded card.
The second cardstock layer hides the thread ends and keeps the inside clean. If the panel starts bowing, loosen the tension rather than pressing it flat with more adhesive.
3. Woven Plaid Christmas Tree Card
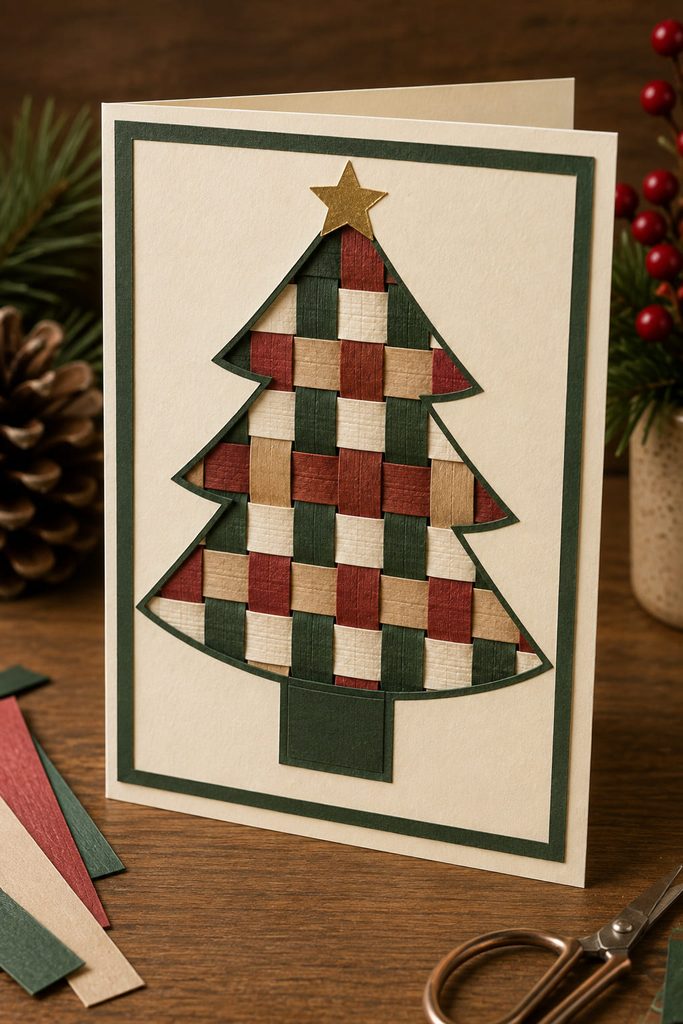
Plaid only reads as weaving when the strips actually travel over and under each other. Cut a small set of parallel slits in a cardstock rectangle, leaving an uncut border as the frame, then feed narrow paper strips through the openings in alternating order. Once the woven panel is stable, trim or cover it with a simple Christmas-tree silhouette so the textile-like grid becomes the focal texture instead of a busy background.
Use contrasting but related papers: two colors can create a clean gingham effect, while three or four tones make the surface feel more like a scrap-made quilt. The finished tree does not need extra ornaments if the intersections already carry enough visual rhythm.

Weave Check
- Every new strip reverses the over–under order of the strip beside it.
- The outer border stays intact so the slits cannot spread.
- The weave lies flat before the tree silhouette is trimmed or mounted.
- If one row bunches, pull that strip back and re-feed it rather than forcing the whole panel flatter.
This is a good place to spend extra time on alignment. A slightly uneven outside silhouette still feels handmade; a broken over–under sequence reads as an assembly mistake.
4. Vellum Window Snow Globe Card
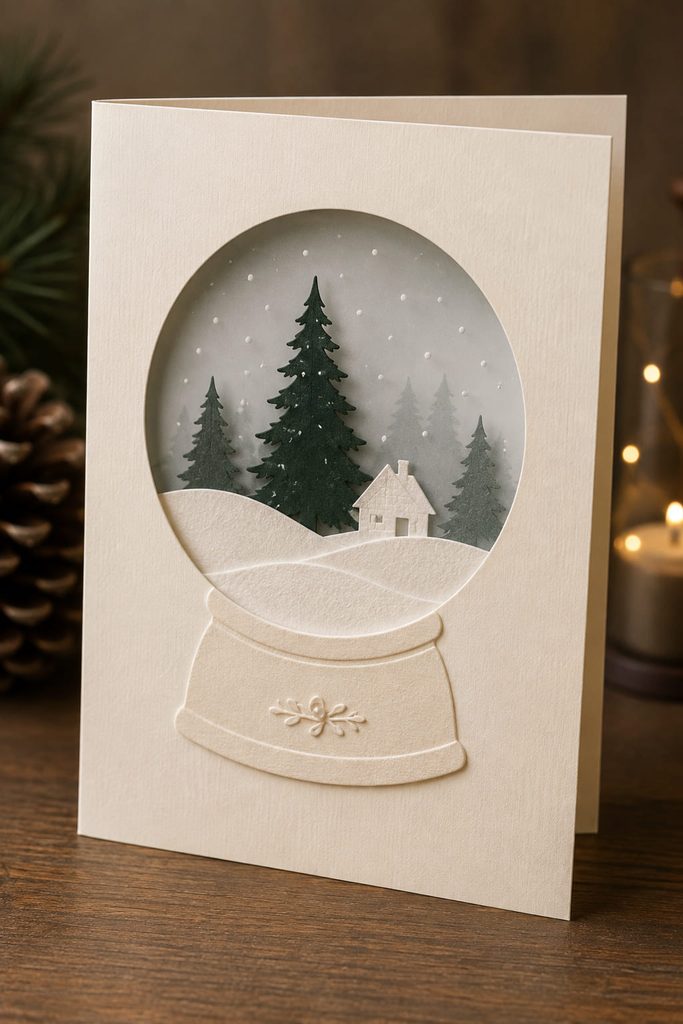
A translucent window gives a quiet card more atmosphere than another decorative layer. Cut a round, arched, or house-shaped aperture in the front panel, back it with vellum, and place a simple paper winter scene behind it—a dark evergreen, tiny roofline, or layered snowbank works well. The vellum softens the contrast and makes the scene change subtly as the card moves between daylight and warmer indoor light.
Keep adhesive on the hidden rim of the aperture, because glue marks can show through vellum. The strongest version uses a restrained front: one window, one scene, and enough blank cardstock around it to make the glowing-looking center feel intentional.
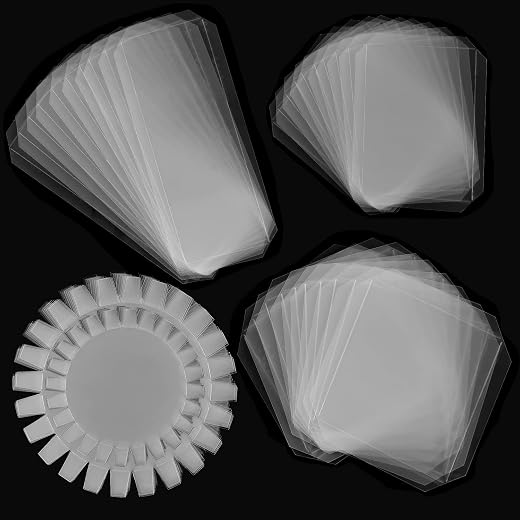
5. Shaker Ornament Card With a Sealed Paper Pocket
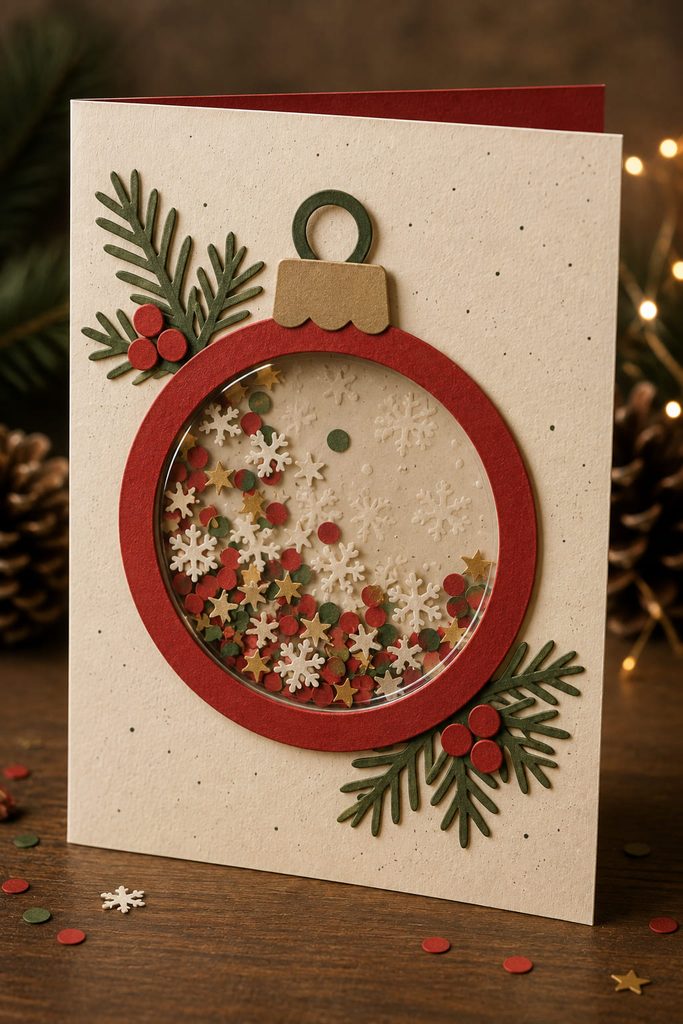
The fastest way to ruin a shaker card is to seal it before checking where the loose pieces can travel. Treat the shaker as a shallow paper container, not as decoration pasted onto the front. A clear acetate window sits over a cut opening; a foam-tape or stacked-cardstock wall creates the cavity; small paper confetti or punched shapes move inside that enclosure.
Build it in this order:
- Cut the ornament-shaped opening in the front panel and attach acetate to the back of that opening.
- Create a continuous raised wall around the aperture, with no gaps wider than the smallest shaker piece.
- Add a modest amount of paper confetti to the center of the backing panel.
- Close the cavity with the window panel, press the perimeter firmly, then tilt the card in every direction before mounting it to the folded base.
Seal Before the Shake: if confetti wedges at the edge, the cavity is either too shallow or too crowded. Remove some filler or add another thin spacer layer; do not compensate by making the card bulge.
A personalized palette works better here than more filler. Use colors the recipient actually wears, decorates with, or associates with Christmas, and let the movement provide the visual energy. The finished card should still lie reasonably flat when resting on a table, with the loose pieces moving freely instead of collecting permanently in a gluey corner.
6. Accordion Memory Strip Card
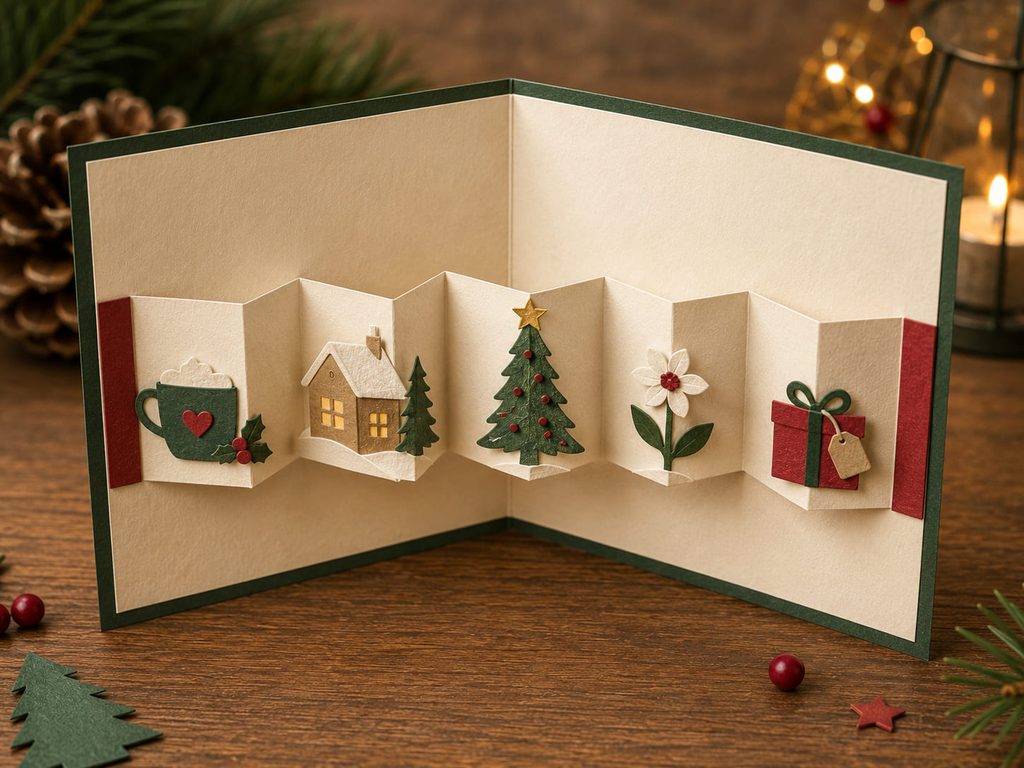
Open the card and let the personality appear in stages. An accordion strip attached inside the covers can hold a sequence of tiny paper vignettes—a coffee cup, a little house, a concert ticket shape, a snowy tree, a favorite flower—each standing in for a shared memory without requiring a long written explanation on the front.
Score the strip into equal panels first, then fold it back and forth so it collapses neatly inside the closed card. Build the small motifs on the strip while it is still flat, keeping bulky layers away from the fold lines. Leave the first and last panels comparatively quiet so they can attach securely to the inside covers.

The useful test happens before final glue: collapse the accordion completely. Nothing should catch between folds or extend beyond the card edges. If one vignette is too deep, simplify that panel rather than increasing the thickness of the whole card.
7. Keepsake Pocket Card With a Removable Insert
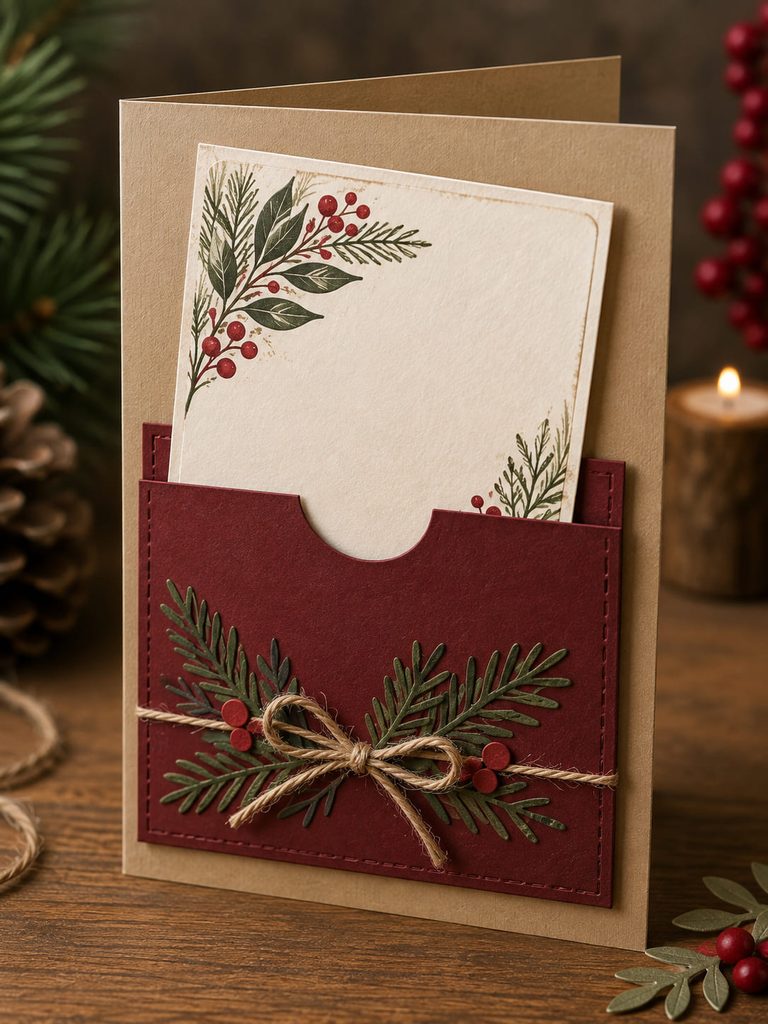
Because the insert has to slide in and out, the pocket needs more planning than a decorative envelope shape. Attach only the side and bottom edges of a shallow cardstock pocket, leaving the top fully open and adding a small thumb notch if the insert sits deep. A handwritten family recipe, holiday tradition, short list of movie-night favorites, or private note can live on a separate card that the recipient removes and keeps.
Pocket Clearance Checklist

- Make the insert slightly narrower than the pocket opening.
- Keep dimensional embellishments away from the pocket mouth.
- Use a sturdy base so repeated removal does not peel the pocket away.
- Test the insert after the card is fully assembled, not just before decoration.
- For mailing, keep the insert seated below the outer card edges.
The pocket is what gives this card a second life: the greeting can be displayed while the removable insert moves to a recipe box, memory box, or desk.
8. Layered Familiar-Place Christmas Card
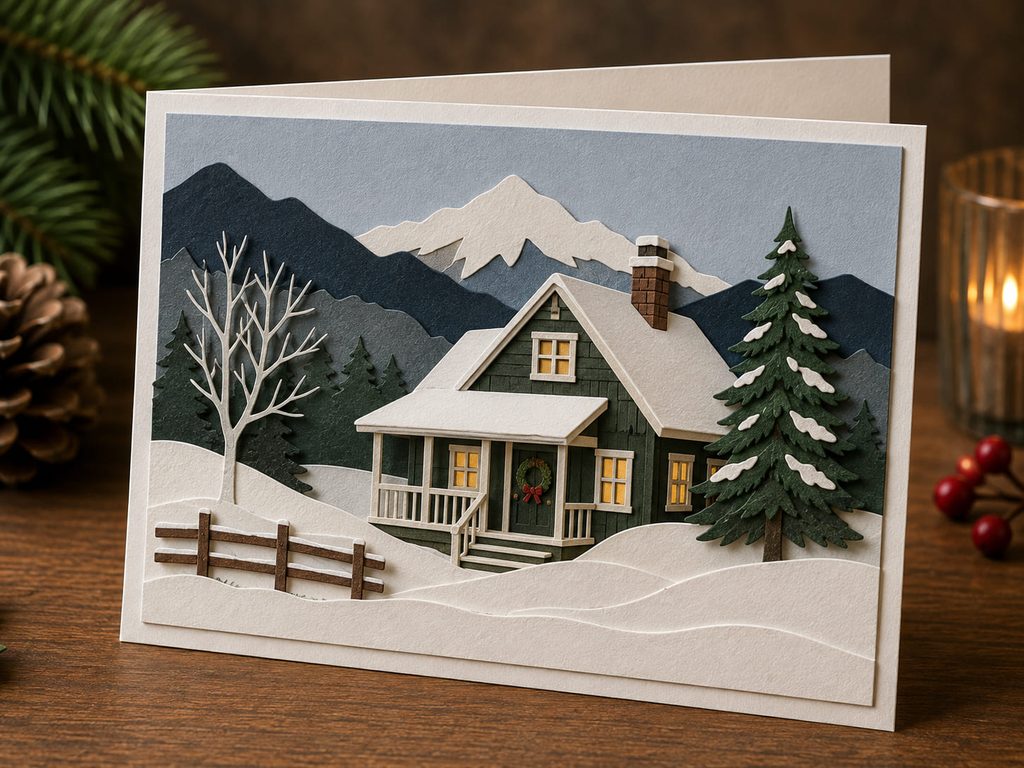
What makes a familiar place recognizable is rarely every window or roof tile. Choose two or three structural cues from a meaningful location—the steep porch roof of a family home, a cabin chimney, a row of city windows, a mountain line behind a cottage—and rebuild those shapes as flat or lightly raised paper layers.
Simplify aggressively. One dark layer can establish the silhouette, a lighter layer can define the facade, and a small foreground shape can create depth without turning the card into a miniature model. The personal value comes from selecting the landmark the recipient would identify, not from adding generic Christmas detail. Snow, a wreath shape, or one paper star is enough to place the scene in December.
9. Paper-Quilt Star Card From Folded Scraps
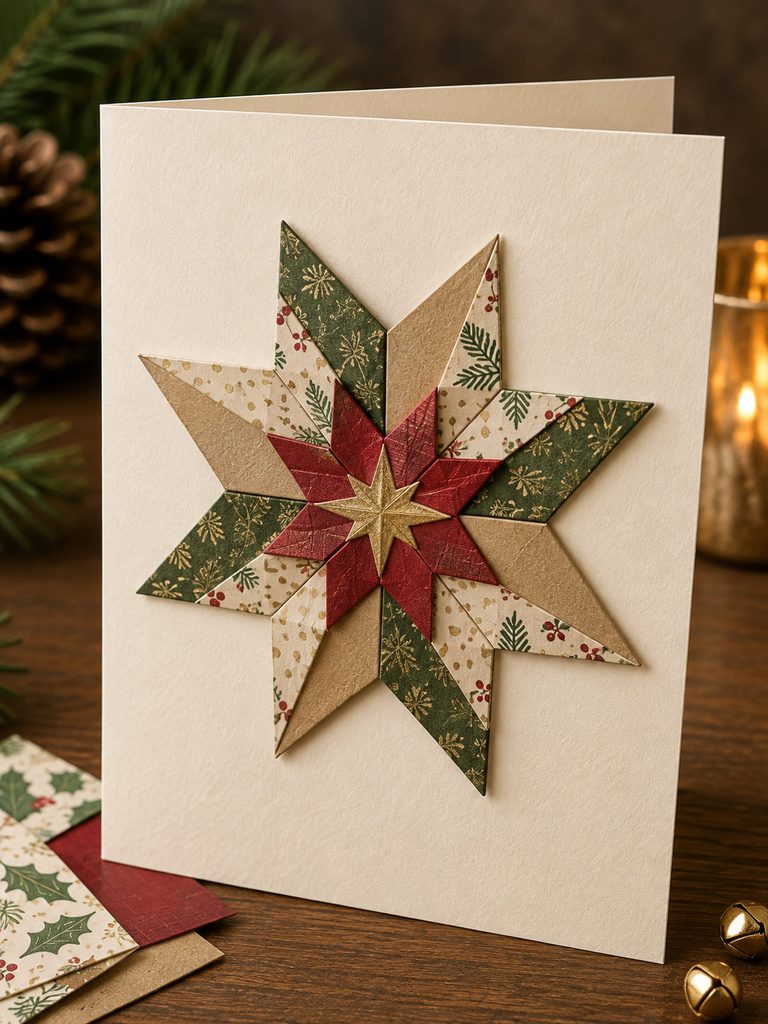
Rather than one cut shape, the star can be assembled from folded paper units that meet like a tiny quilt block. Small squares or rectangles can be folded into points, then arranged around a center so the seams become part of the design. This works especially well with papers that carry a memory—kraft from holiday packaging, a leftover patterned sheet, or colors pulled from someone’s home.
Dry-arrange the units before gluing because a small change in rotation alters the geometry. Keep the center tight and let the outer points vary slightly; ordered structure beside handmade edges gives the star its character. If the joins feel weak, hide a slim backing circle underneath rather than adding visible layers.
10. Fringed Gift-Wrap Scrap Tree Card
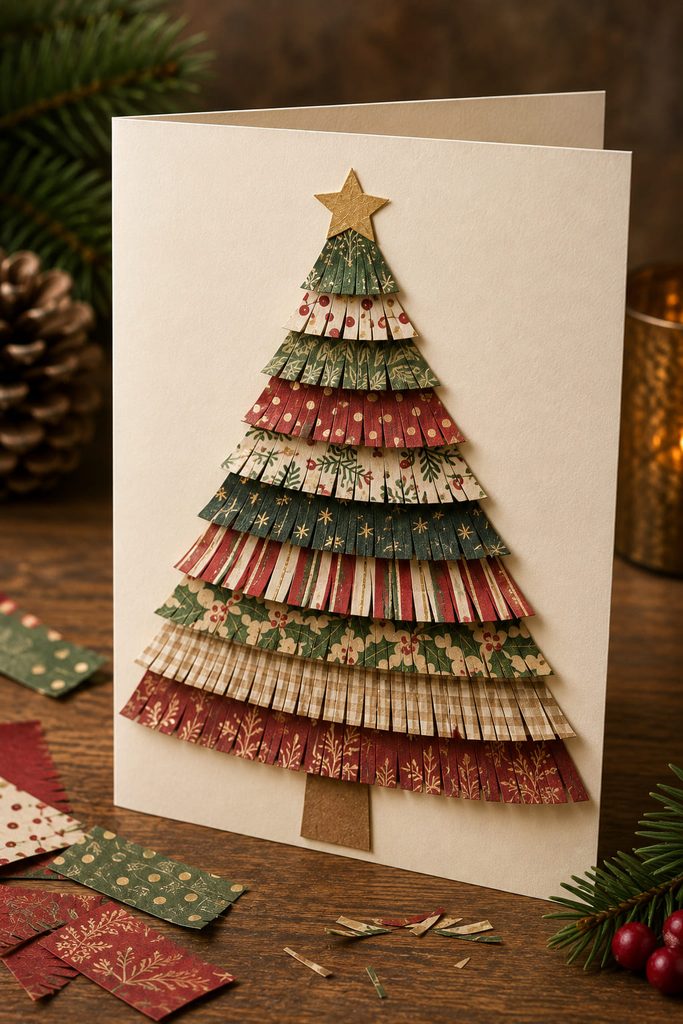
Save the patterned scraps that are too small for another full card front. Cut them into narrow horizontal pieces, fringe the lower edges with many shallow snips, and stack the strips from bottom to top so each row overlaps the cut edge above it. A simple triangular trimming line turns the layered fringe into a Christmas tree while preserving flashes of different prints.
- Arrange the scraps by contrast before cutting.
- Fringe each strip without cutting through the uncut top margin.
- Glue only that top margin so the fringe can lift slightly.
- Stack wider rows first, then narrower rows, and trim the final tree silhouette after the adhesive sets.
The surface should feel lively, not bulky. If several papers are heavy cardstock, use fewer rows; wrapping paper and lighter decorative paper can handle denser layering without making the folded card fight to stay closed.
11. Removable Bookmark Christmas Card
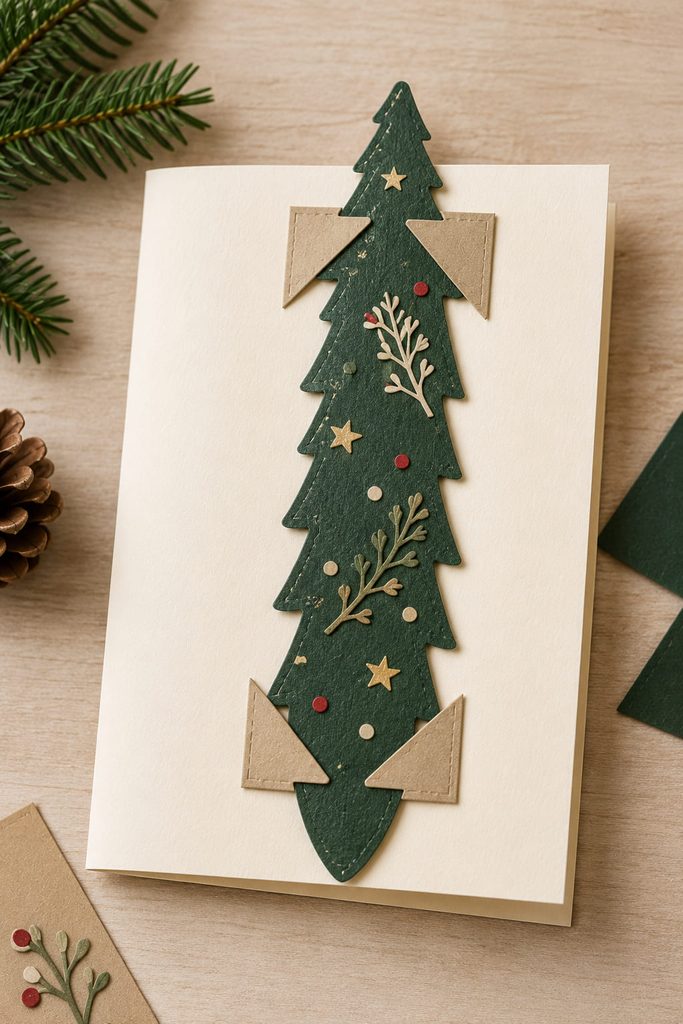
A removable bookmark can sit on the card front in two useful ways, and the choice changes both appearance and handling.
- Corner slots: best for a thin, flat bookmark. The card stays visually quiet, and most of the bookmark remains visible.
- Paper belly band: better for a thicker layered bookmark or an irregular top edge, though the band adds more visual weight.
A long evergreen, winter botanical sprig, starry strip, or geometric ornament pattern can become the bookmark itself. Keep the base restrained so the removable piece still feels intentional once it is taken away.
The attachment should release without damage. Dry-fit the bookmark several times before final assembly; the recipient needs to slide it out without bending a point or tearing the card front. After removal, the base should still look finished rather than like a card with something missing.
12. Pull-Tab Color-Change Tree Card
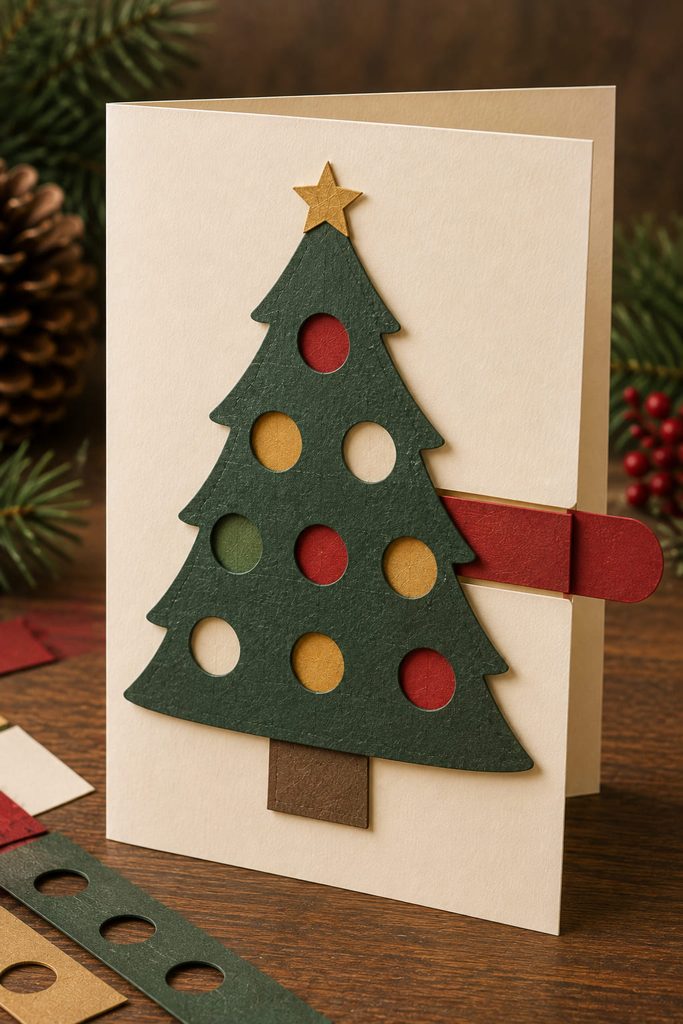
Movement comes from a hidden slider strip traveling inside a controlled channel. For a color-change Christmas tree, cut several small circular openings in the tree layer, place a strip of colored paper spots behind those openings, and trap the strip between side rails so it can move vertically or horizontally without drifting sideways. A pull tab extends beyond one edge of the panel; as it moves, different colors pass behind the same ornament openings.
The rails matter more than the decoration. They must be close enough to guide the strip but not so tight that friction stops it. Keep glue outside the travel path and leave a hard stop at both ends so the strip cannot be pulled completely free.
Slider Clearance Test
- Move the tab through its full range before attaching the mechanism to the folded base.
- Check that every opening stays covered by the slider at both extremes.
- If the strip catches, look for glue squeeze-out or a rail that has shifted inward.
- If the tab twists, widen the guide area rather than making the pull tab thicker.
This card earns its detail through interaction, so keep the outer tree silhouette simple. The changing ornament colors are the surprise; extra layered branches would only hide the mechanism and increase friction.
13. One-Sheet Mini Story Christmas Card
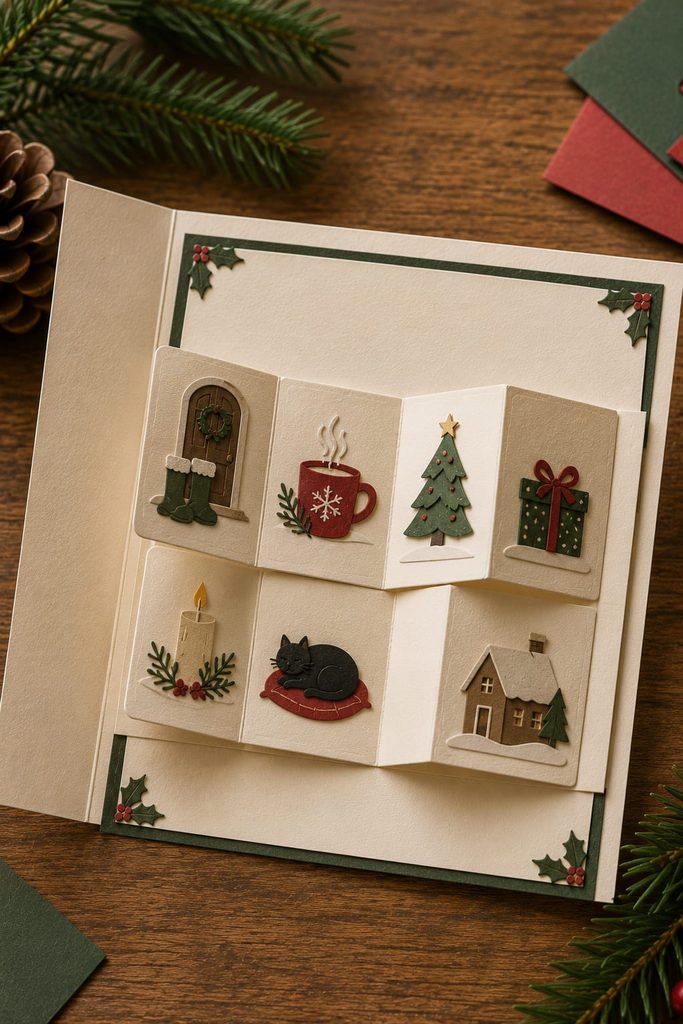
A one-sheet mini booklet makes the fold—not the decoration—control the sequence. Start with one rectangular sheet divided into eight equal panels, make the standard center slit used for a one-sheet mini booklet, then fold the sheet into a compact little book that can be mounted inside or tucked into a larger card base. Each panel can carry one tiny paper vignette from a shared Christmas ritual: boots by a door, a mug, a wrapped box, a tree, a candle, or a sleeping cat. Add those low-profile scenes only after the fold direction is confirmed so pieces do not cross a crease and force the booklet open.
- Score the panel grid and make the single center slit.
- Fold the sheet into the booklet form and mark the panel order lightly in pencil.
- Open it flat again to add the paper scenes.
- Refold, erase guide marks, and check that the mini book closes without collisions.
The charm comes from sequence rather than scale. Simple silhouettes let the recipient read the little visual story one panel at a time.
14. Hinged Door Reveal Card
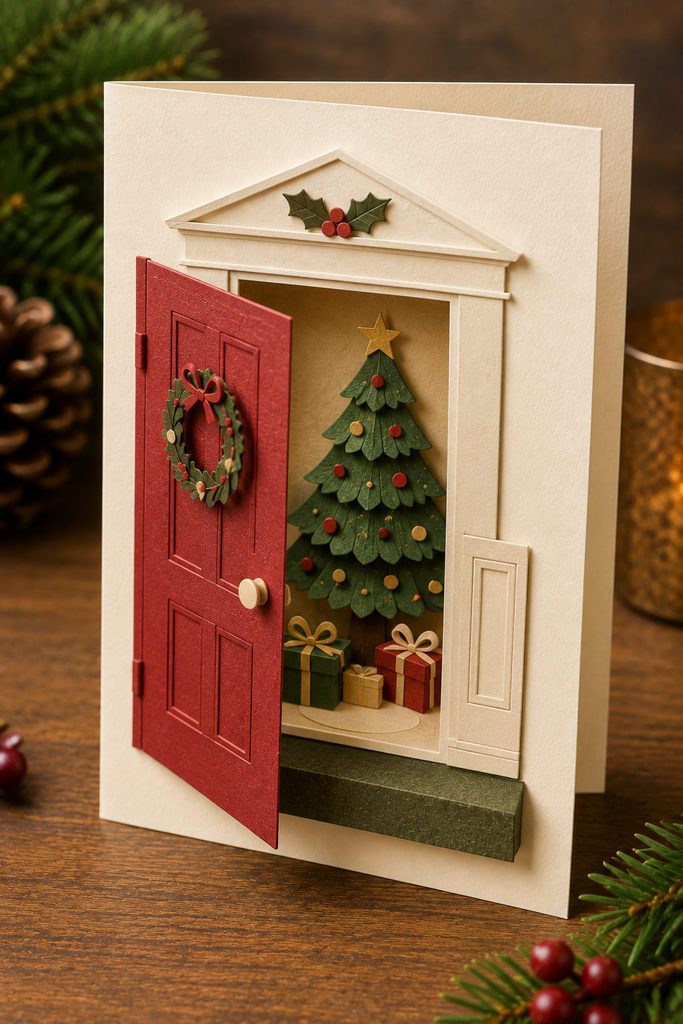
Thin hinges tear when a reveal flap is treated like a loose cutout. For a doorway card, leave one long edge of the paper door connected to the surrounding front panel and score that hinge before folding it open. Behind the door, build a small recessed or flat Christmas scene—a tree shape, stacked gifts, a candle silhouette, or a tiny paper wreath—so opening the flap creates a private reveal.
If the door springs shut, the cardstock may be too heavy for the hinge width; score it more decisively or use a slightly lighter front panel. If the hinge starts whitening or cracking, widen the connected edge rather than reinforcing it with bulky tape.
The outside should stay restrained. A strong door shape, a knob made from a tiny paper circle, and one seasonal detail are enough; the card’s personality lives in what the recipient discovers by opening it.
How to Make Handmade Christmas Cards Feel Personal
Personality is easiest to build into handmade Christmas cards by choosing one detail that belongs to the recipient and letting it control the design. That could be the silhouette of a familiar place, a color combination from their home, a tiny paper symbol of a shared ritual, or scraps from wrapping paper they would recognize. One specific reference usually feels more personal than a front crowded with generalized Christmas icons.
Construction can carry personality too. A recipe pocket invites the recipient to remove and keep something. A bookmark turns the card into a useful object. A slider gives someone a small interaction, while a woven or stitched surface feels tactile before the card is even opened.
For a batch, repeat the reliable structure and vary the evidence. Use the same card size or pocket dimensions, then change the portrait cues, memory symbols, scrap papers, or removable insert for each person. That keeps production manageable without making the finished cards feel interchangeable.
Choose the Personality Before the Decoration
Start with the kind of recognition you want the recipient to have. If the reaction should be “that looks like us,” choose the portrait, familiar-place, or mini-story card. For texture, the woven tree, stitching, and paper-quilt star do more than extra embellishment. If the card should invite handling, the shaker, slider, pocket, bookmark, or hinged reveal gives the recipient something to open, move, or keep.
For a broader seasonal next step beyond cards, the Diynify Christmas hub expands into ornaments, villages, garlands, folded projects, and other paper formats: Christmas Paper Crafts, Ideas & SVG Projects








