
This post contains affiliate links. As an Amazon Associate I earn from qualifying purchases, at no extra cost to you. Thank you for supporting Diynify!
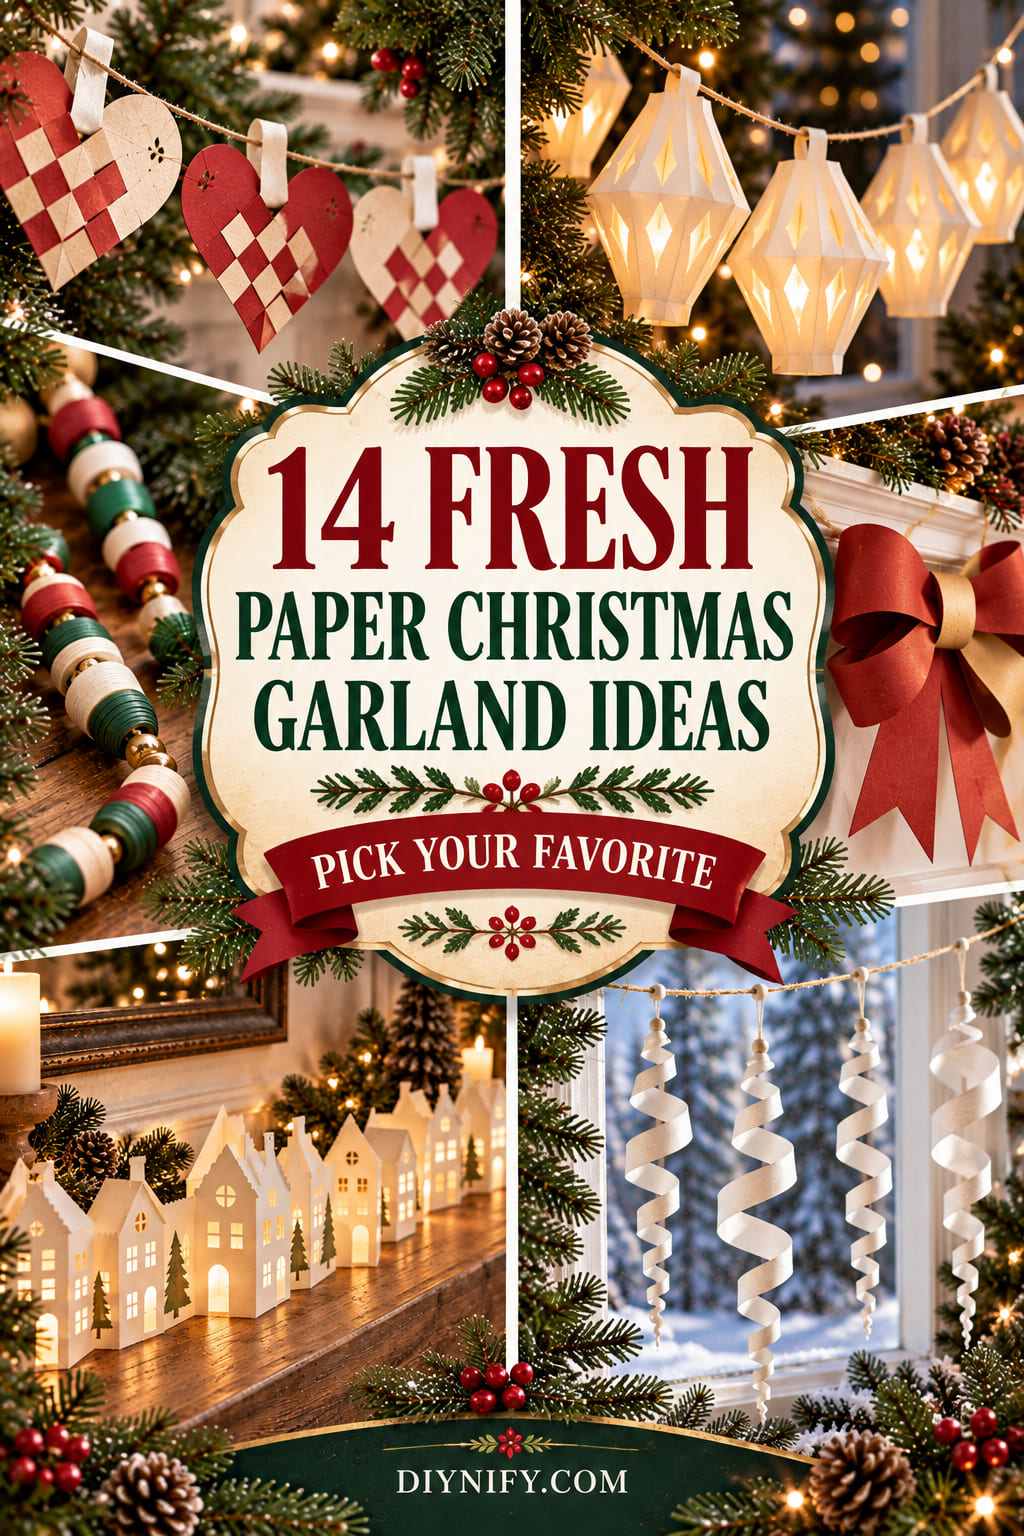
Paper Christmas garlands can look festive without falling back on the same looped chain in different colors. The ideas below use folds, weaving, fringe, rolled paper, quilling, slots, translucent layers, and stitched movement, so each strand has its own construction logic as well as a different finished look.
Most projects use paper or light cardstock, scissors or a craft knife, a ruler, paper-safe adhesive, and string or thread. A few need vellum, quilling strips and a quilling tool, a skewer, a needle or sewing machine, or a battery-powered LED light string. Pick by where the garland will live first: compact units suit trees and shelves, broad silhouettes read better across a mantel, and translucent pieces make the most sense where light can pass through them.

1. Honeycomb Paper Bauble Garland
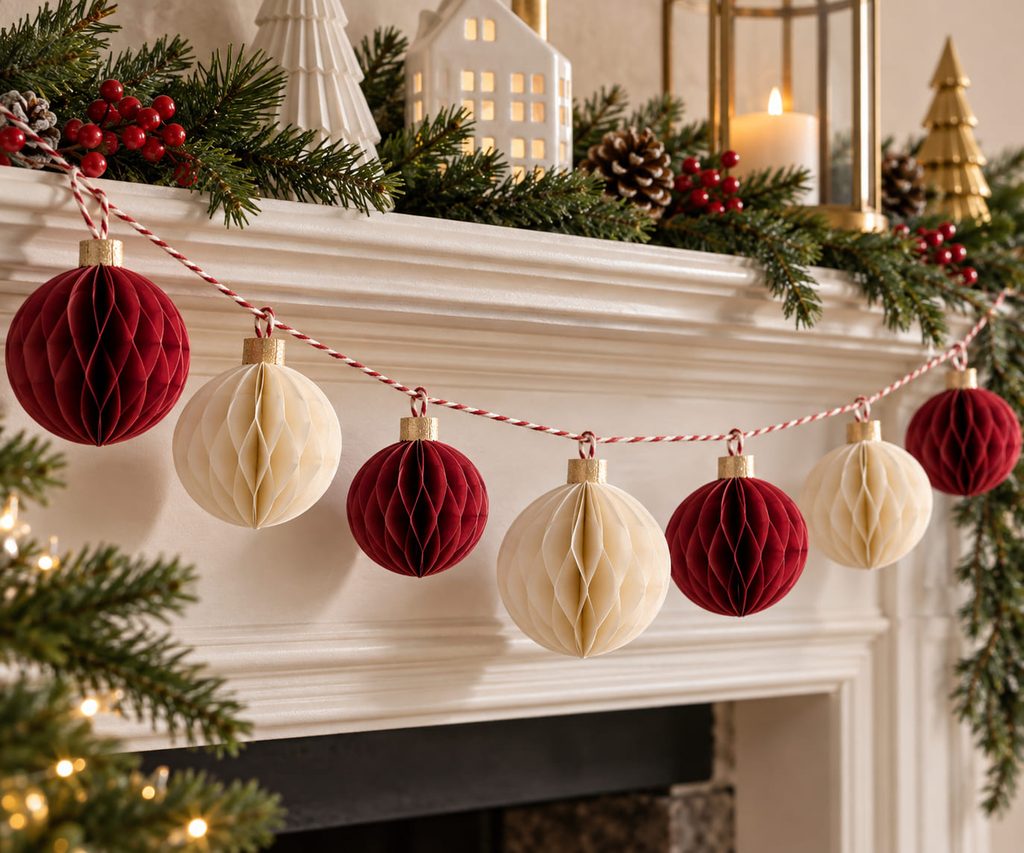
Across a mantel or tree, rows of small honeycomb baubles give a garland real volume while still letting the paper itself stay visible. Each ornament begins as a stack of matching folded shapes. Glue alternating points on one layer, then the opposite points on the next; when the stack opens, those staggered glue lines pull the paper into a cellular fan. Thin text-weight paper opens more easily than stiff cardstock, while a cardstock cap at the top can reinforce the hanging hole.
String the baubles with enough empty cord between them for each sphere to read as a separate form. The useful feature here is storage: if one seam is left as a temporary clip or removable tab rather than permanently glued, the bauble can close flat after Christmas instead of taking up a full box of space.

2. Pleated Starburst Garland With Crisp Shadows
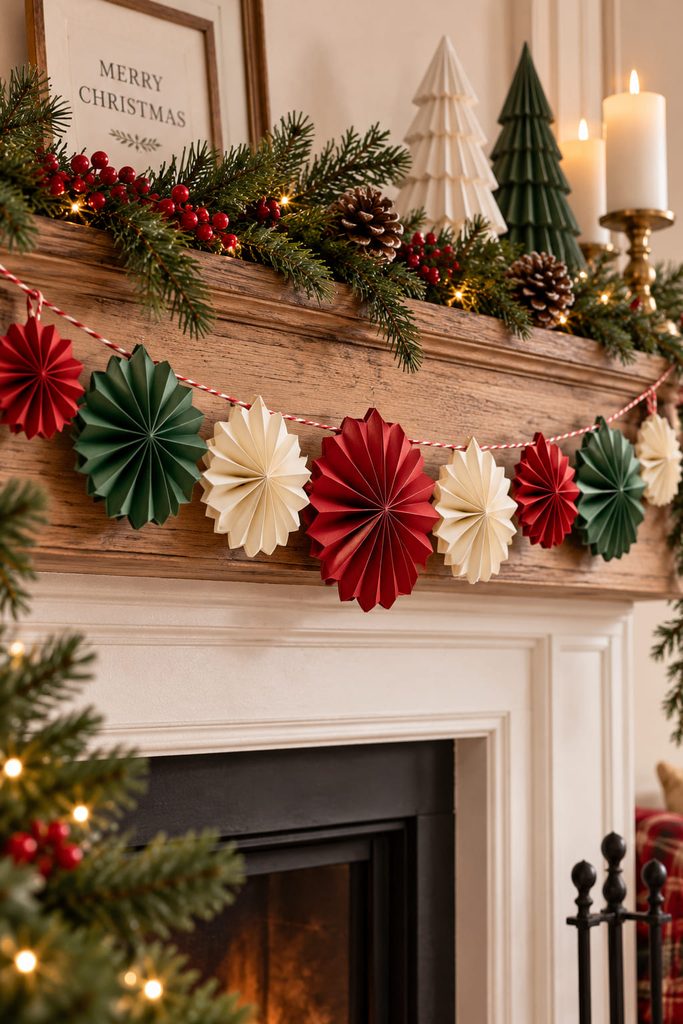
Score first, decorate later. A starburst looks clean because the pleats are regular; extra glitter or tiny cutouts cannot hide an uneven accordion.
- Cut long strips and mark equal fold intervals with a ruler.
- Accordion-fold each strip, then join the short ends to make a pleated ring.
- Push the inner edge toward the center so the ring flattens into a rosette.
- Secure the center with a small paper disk on the back, then add a reinforced hole or tab for the hanging thread.
- Alternate two or three sizes along the cord instead of changing every color and pattern at once.
Fold Consistency Check: Stack two finished pleats edge to edge. If their ridges drift apart, correct the scoring spacing before making the rest of the batch. A small error repeated twenty times becomes much more visible once the stars hang in one line.
3. Scandinavian Woven-Heart Pocket Garland
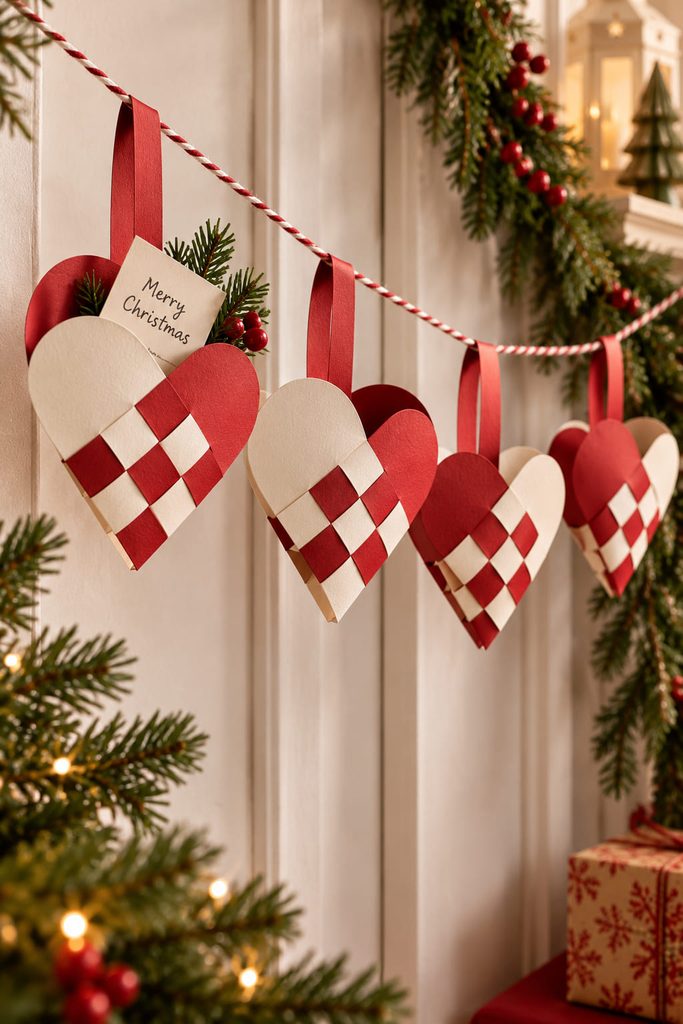
Want a garland that can do more than decorate? Woven paper hearts make small open pockets for handwritten wishes, table prompts, or lightweight countdown slips. The pocket is created by the weave itself: two folded, rounded paper loops are cut into parallel legs, then those legs pass alternately through and around one another. A true over-under path is what locks the two halves together; simply gluing strips on top would create the look of weaving without the flexible pocket.
Use paper that bends without cracking, and make one full test heart before cutting a batch. The opening needs enough clearance for two fingers to reach a note without pulling the weave apart. Add the hanging loop through a reinforced top corner or through a separate narrow paper handle so the load pulls upward rather than spreading the pocket mouth.
Pocket Load Test
- Slip in the actual paper note you plan to use.
- Hold the heart by its hanger and check that the woven legs stay nested.
- If the top widens, shorten the note or add one more woven section rather than gluing the opening shut.
- Leave space between hearts so each pocket can be reached while the garland is hanging.
4. Sculpted Holly-Leaf Vine Garland
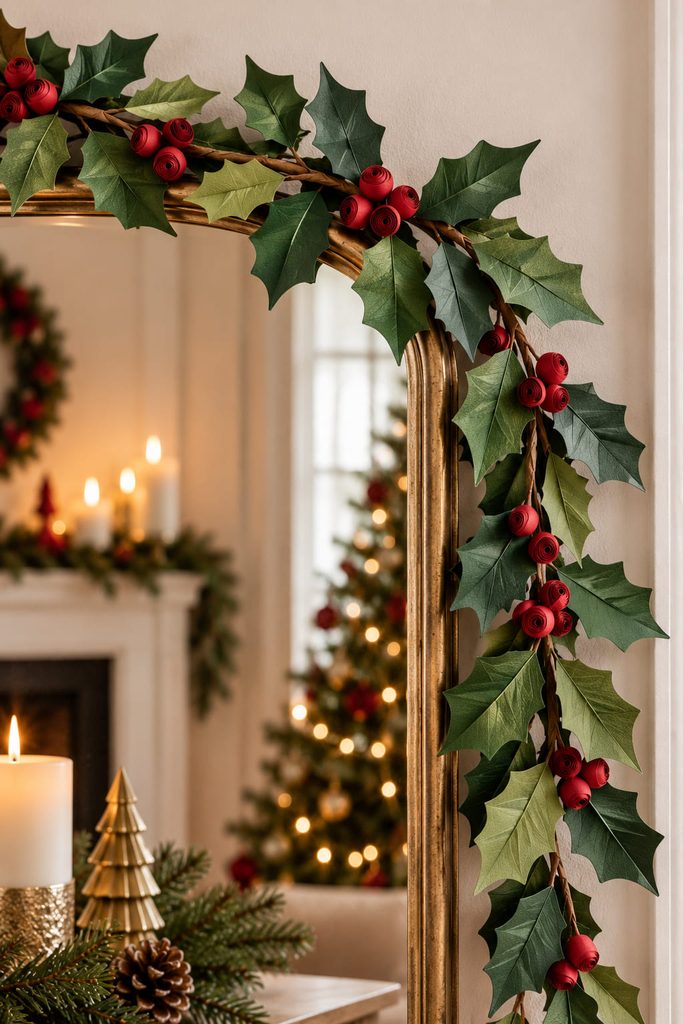
Run a light score through the center of a cardstock leaf and the material starts behaving differently. Fold gently along that vein, curve the outer edges with a bone folder, and flat holly shapes start to catch light like shallow relief instead of reading as stickers on a string. Small rolled-paper berries can be tucked into the leaf clusters without adding heavy dimensional ornaments. Build the strand along a twisted kraft-paper cord or narrow paper-wrapped string, attaching clusters at irregular intervals so the stem can still bend around a mirror, shelf, or doorway. From across the room, the alternating leaf angles matter more than tiny cut serrations, so keep the silhouettes bold enough to survive the viewing distance.
5. Fringed Paper Tree Tassel Garland
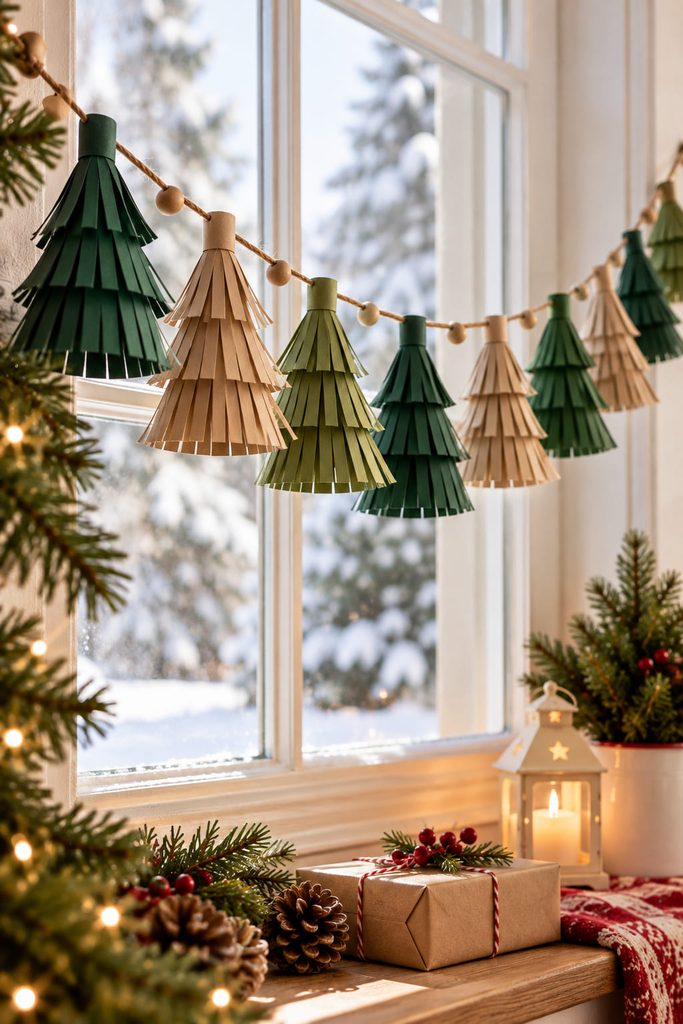
Batch-making is the advantage. Cut several rectangles at once, fringe the lower two-thirds, and leave an uncut band at the top of each piece. Wrap that solid band around a short paper tube or folded paper stem, then stack two or three fringed layers so the narrow top and wider skirt suggest a tiny evergreen without requiring individual branches.
The rhythm comes from density rather than detail. Closer spacing creates a full mantel garland; wider spacing makes the tassels feel lighter around a tree or window. If the fringe starts to curl inward and hide the stepped outline, use slightly heavier paper for the outer layer and thinner paper inside. That material change preserves the tree shape without making every tassel stiff.

6. Cross-Slotted Paper Bell Garland
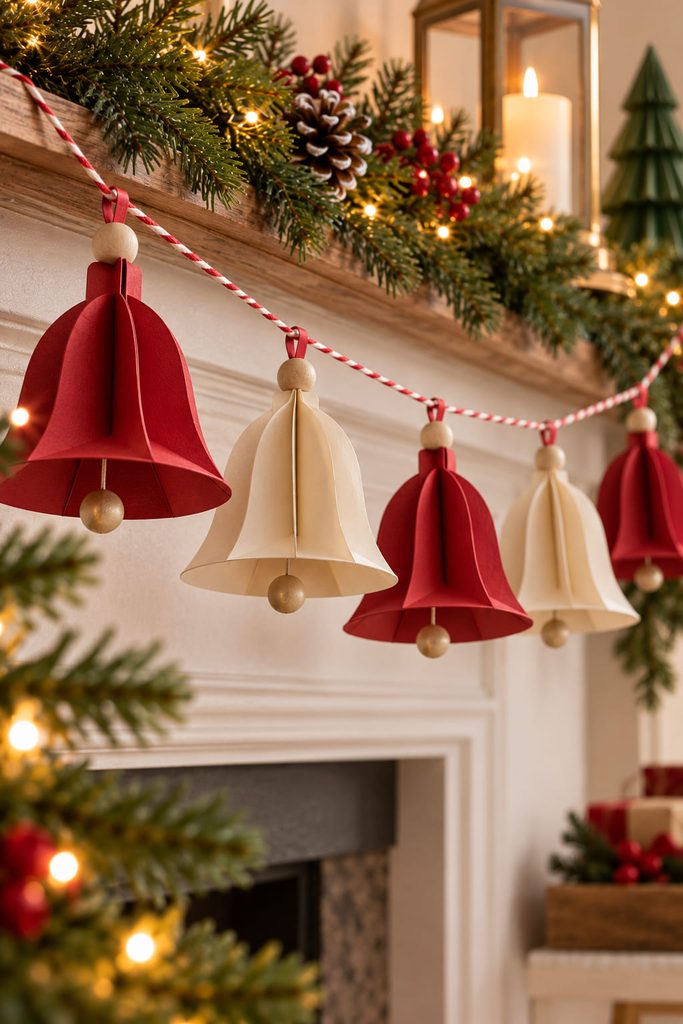
Cross two matching bell silhouettes with one centered slot in each piece: cut one slot down from the top, the other up from the bottom, then slide the pieces together at right angles. The crossed planes make the bell readable from several directions and give the hanging thread a centered path. A small paper clapper on the same thread can move beneath the bell without needing to carry any structural load.
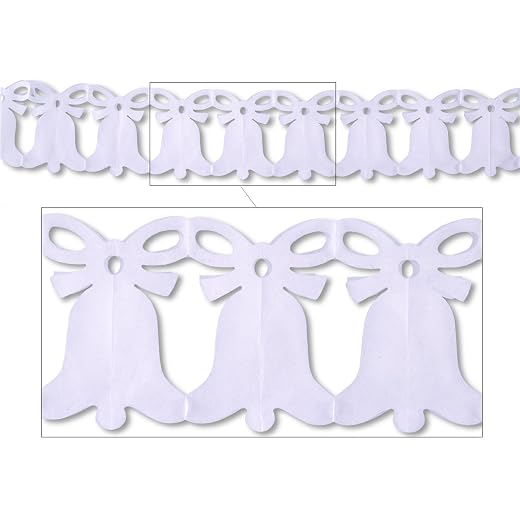
If a finished bell misbehaves, the symptom usually points to the fix:
- Bell leans sideways: The hanging hole is off-center or one half is heavier; recenter the hole before trimming the silhouette.
- Slots gape open: The cuts are wider than the paper thickness; remake the slot as a snug friction fit.
- Clapper catches the sides: Shorten its thread or reduce the clapper diameter.
- Bell twists into the wall: Add a little more cord between the bell and the main garland line so it has clearance to rotate.
7. Vellum Lantern-Shade Light Garland
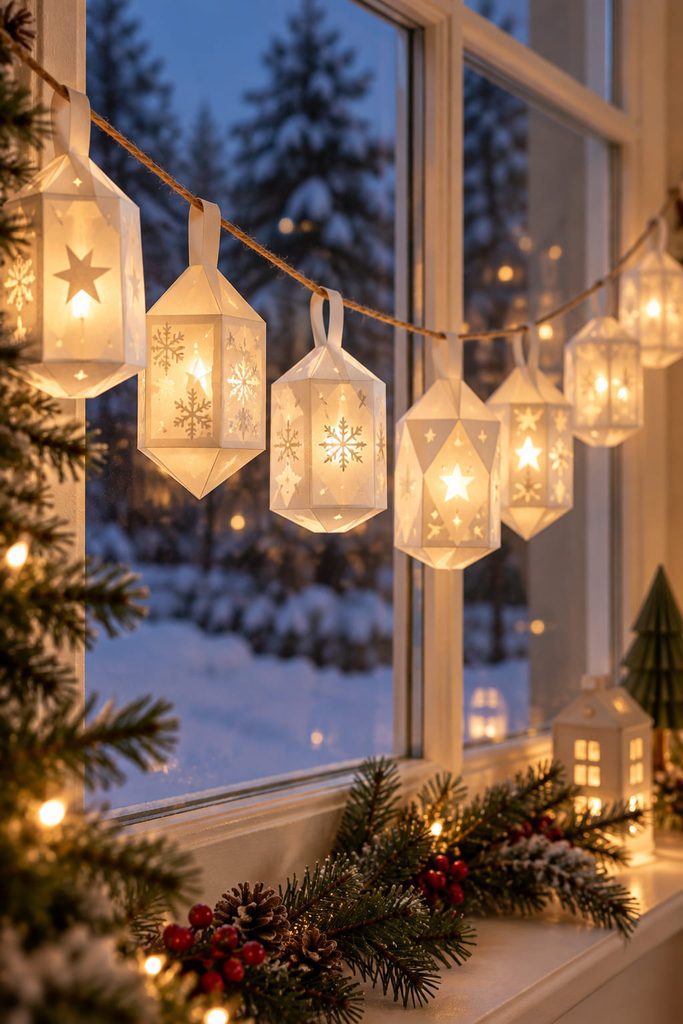
If the garland needs to glow, the paper should shape the light rather than trap the light source. Build small vellum prism or cylinder shades with open tops and bottoms, then suspend each shade around a node on a battery-powered LED string using a separate paper tab or tiny hanging bridge. The vellum should surround the light with air space; it should not be wrapped tightly around the LED or wiring.
A repairable build is easier if the order stays deliberate:
- Make one vellum shade and close its side seam.
- Add the hanging tab at the top edge before the shade goes near the light string.
- Slip the tab over or around the string so the shade hangs independently of the LED node.
- Check that the LED remains visible through the vellum and that both open ends stay unobstructed.
- Repeat only after the first shade hangs straight and can be removed without cutting the string.
Keep The LED Accessible: Paper shades should come off individually so batteries, wiring, and light nodes remain reachable. Use only undamaged battery-powered LED string lights, follow the light maker’s clearance instructions, keep the garland away from open flame and hot fixtures, and remove any shade that touches a component that becomes warm.
8. Quilled Snowflake Medallion Garland

What keeps a quilled snowflake from turning into a dense paper disk? Negative space. Build each medallion from a small central ring, then repeat loose coils, teardrops, or marquise shapes around it while leaving open gaps between the arms. Once the glue is dry, attach the hanging thread to two reinforced points on the outer structure rather than to one delicate coil. That two-point connection stops the medallion from tipping edge-on in a window and makes the lace-like pattern easier to see. Keep the snowflakes modest in size; enlarging quilled units without a stronger outer ring makes the small glued joints carry more leverage than they need to.

9. Slot-Together Faceted Sphere Garland
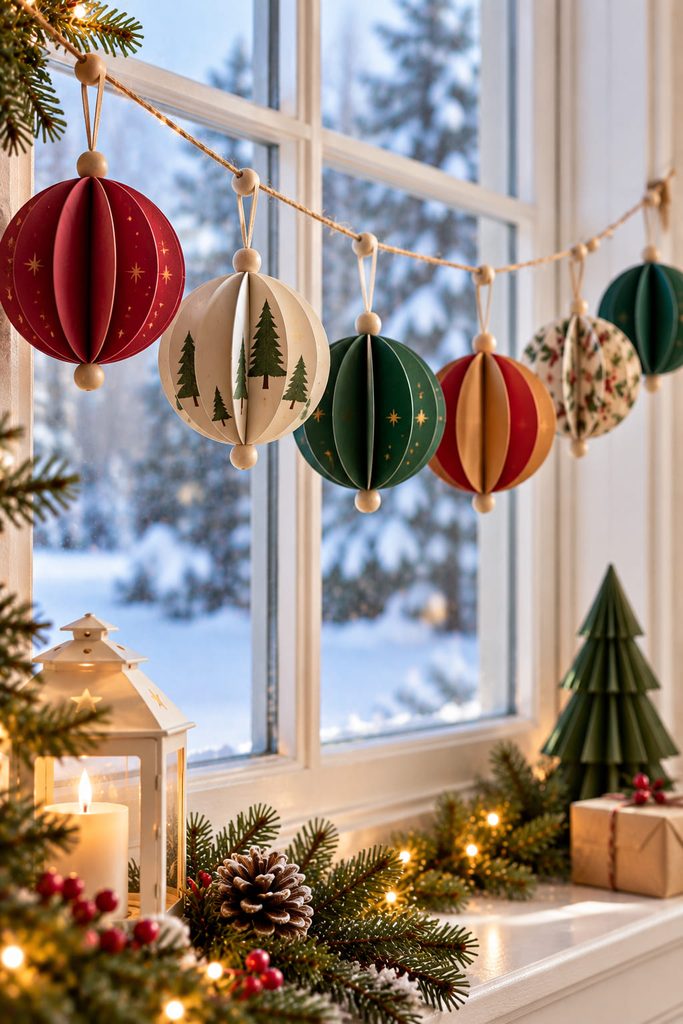
As panel count rises, a paper sphere becomes rounder, but it also gets heavier and harder to align. That trade-off makes this garland worth choosing by scale rather than by maximum complexity.
| Build Route | Best For | What Changes |
|---|---|---|
| Four slotted disks | Small tree or shelf garlands | Faster assembly, stronger graphic facets, easier flat storage |
| Six slotted disks | Larger window or mantel garlands | Rounder silhouette, more shadow lines, greater demand for accurate slots |
Whichever route you choose, cut every disk from the same template and stop each slot exactly at the center point. The pieces should meet with light friction, not force. If a sphere bows or twists, widen one tight slot slightly rather than trimming the outer edges; changing the circumference would make the silhouette uneven. Thread the cord through a small reinforced top hole so the assembled sphere hangs from the structure instead of from one removable panel.
10. Rolled Paper Bead Garland

With a tapered strip and a skewer, leftover wrapping paper becomes a lightweight bead with surprisingly clear geometry. Roll each strip around the skewer from the wide end toward the point, keeping the edges centered as the bead thickens, then secure only the final tip with paper-safe glue. Slide the dry bead off the skewer and thread it onto cord with small knots or spacer beads between groups so the paper cylinders do not grind against one another.
For a consistent strand, keep this tiny setup beside the cutting mat:
- one strip template for width and taper;
- a smooth skewer or paper-rolling tool;
- a shallow dish for finished beads;
- cord thin enough to pass through the rolled channel.
The hole is the success check. If the skewer cannot slide out cleanly, the first wrap was too tight or glue migrated inward. Fix that before rolling the rest of the batch.
11. Accordion Christmas Village Mantel Garland
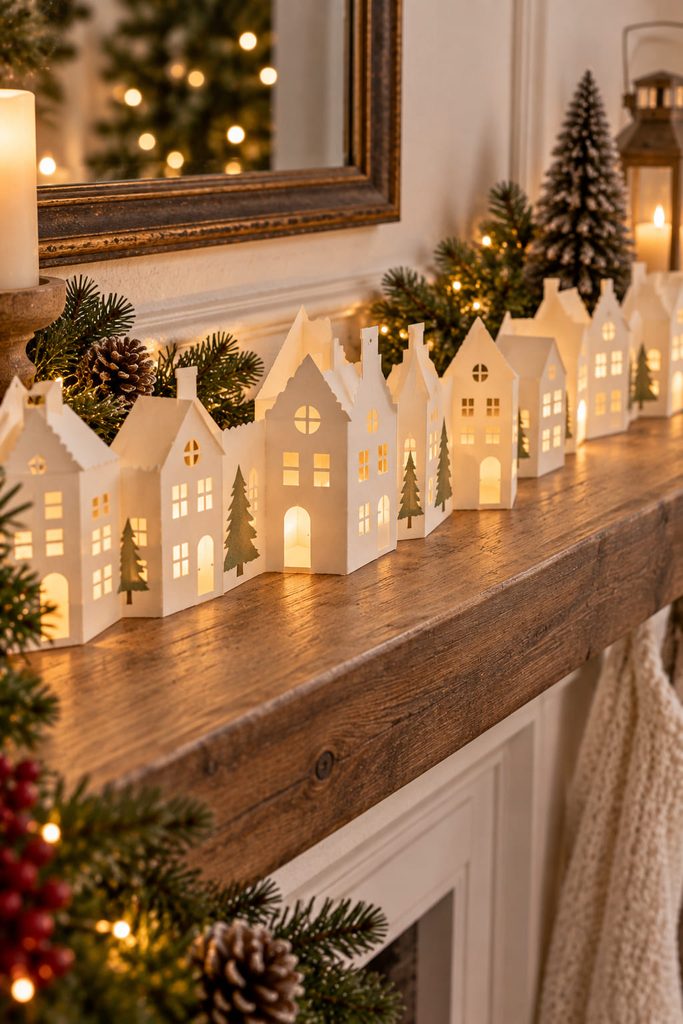
No hooks above the mantel? A freestanding village garland works where hanging hardware would be awkward. Start with one long paper strip, accordion-fold it into equal panels, and draw a simplified house silhouette so each building touches the folded edges at solid side bridges. Cut through the stacked layers but preserve those bridges. When the strip opens, the folds become a zigzag footprint that lets the row stand on a mantel, console, or windowsill.
Windows and rooflines need restraint. Large door and window openings can make the houses more readable, but too many cuts near the side bridges weaken the only parts connecting the village. If the row slumps, first widen the accordion stance; if it still leans, shorten the tallest roof peaks or switch to slightly firmer paper rather than gluing a hidden support along the whole back.
Closed-State Check: Refold the village before you call the pattern finished. Roof points, chimneys, and window flaps should nest without colliding, and no glue or raised detail should block the folds. A village that closes neatly can be stored flat between seasons and reopened without forcing the joints.
12. Sculptural Paper Bow Garland
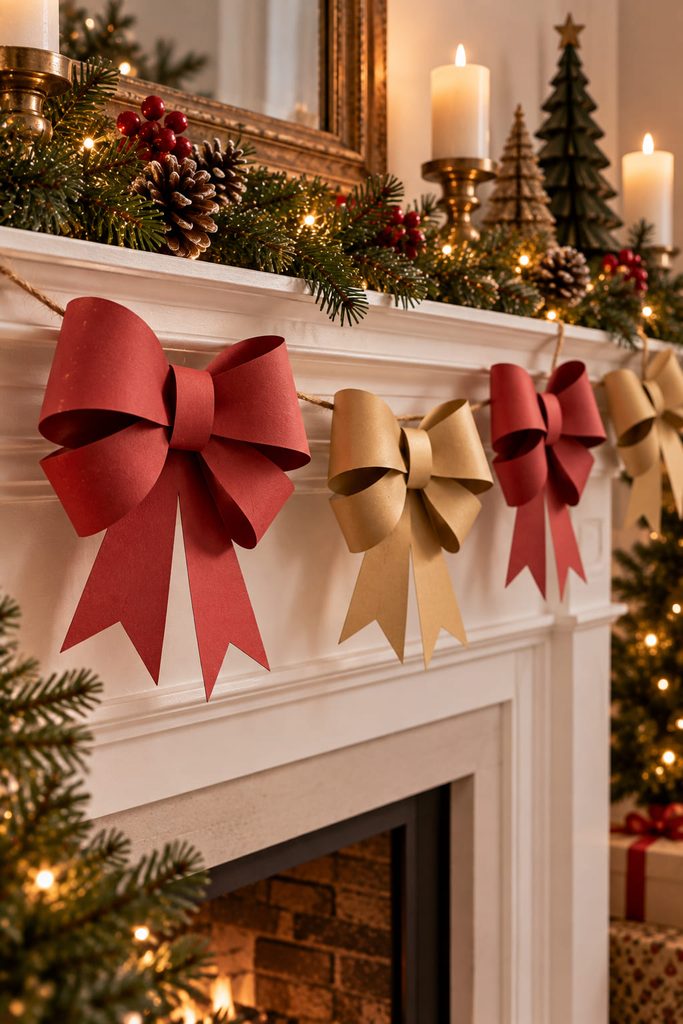
Instead of crowding the cord with tiny gift-wrap bows, place one oversized paper bow every few inches to create a stronger focal rhythm. Form each bow from two curved loops attached to a narrow center band, then mount that band on a small backing tab with the garland cord running behind it. The tab takes the pull from the cord, so the curved loops only have to keep their shape. Alternate bow sizes or rotate the angle slightly, but keep the center bands aligned; that repeated anchor line makes the strand feel intentional even when the loops are not perfectly identical.
13. Spiral Paper Icicle Drop Garland
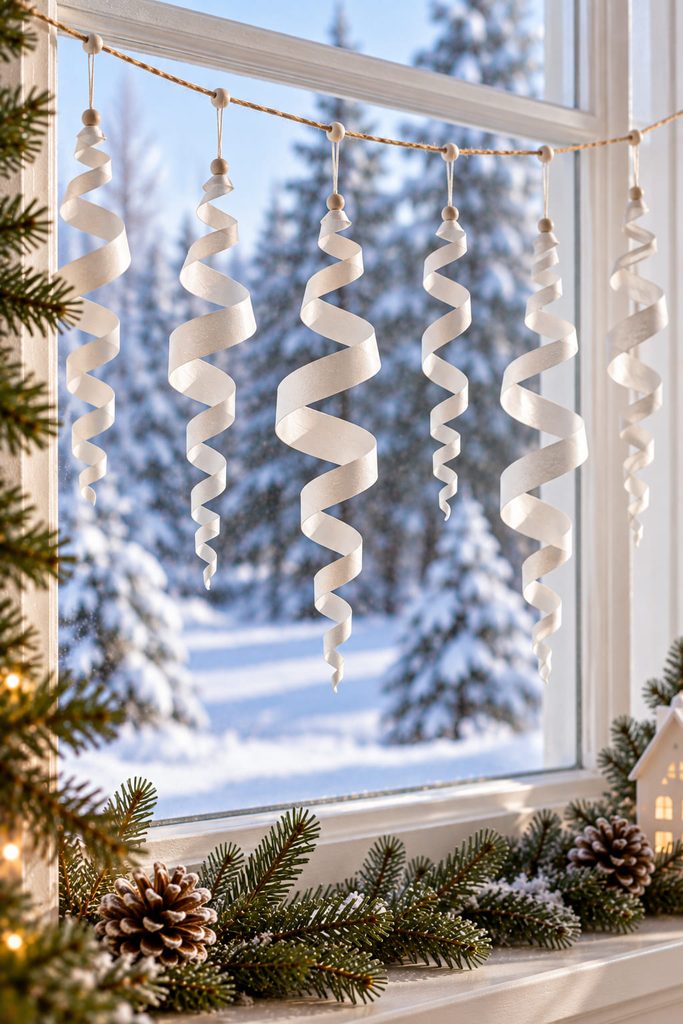
Once a spiral is suspended, gravity does the finishing work. Cut circles or tapered disks into continuous spirals, suspend each one from its center, and the paper falls into a twisting vertical drop that moves with small air currents. Thin paper gives a longer, softer spiral; light cardstock produces a shorter coil with stronger edges and more pronounced shadows.
Do not crowd the drops. Their value is motion, which disappears if neighboring spirals constantly catch one another. Hang the garland temporarily, turn the longest spiral by hand, and watch the sweep before deciding the final spacing. Near a wall, shorten the drops or move the cord forward so the paper can rotate without scraping the surface.
Tangling Clearance: The widest moving radius of one spiral should stay clear of the next. Test that radius with the garland in its real location, not flat on the worktable.
14. Stitched Paper Ornament-Disc Garland
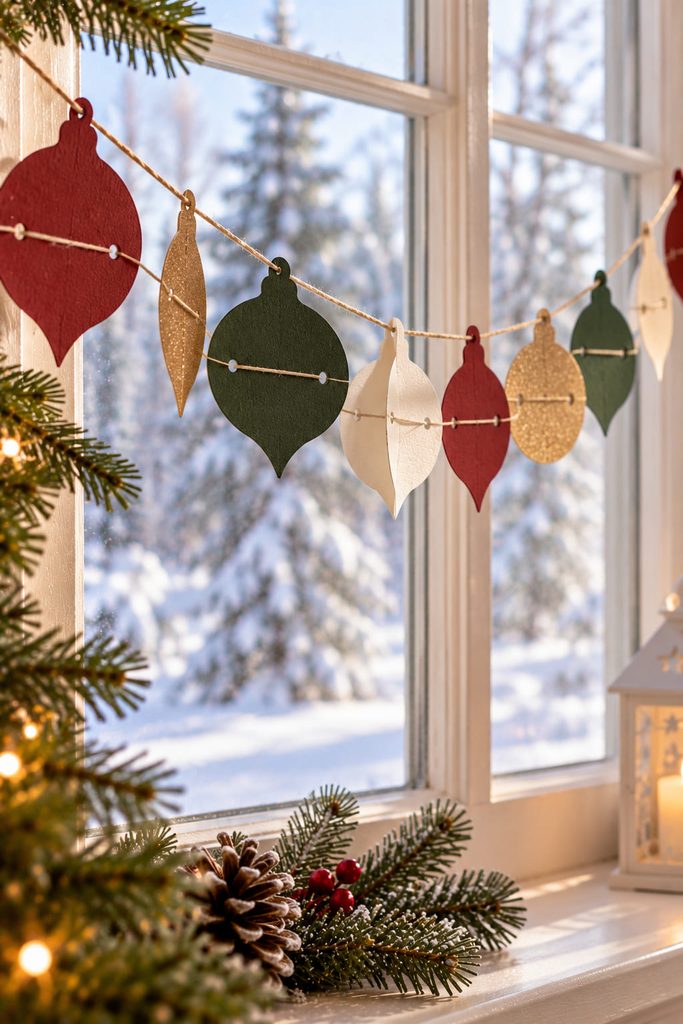
When flat ornament-shaped disks are stitched through their centers, scraps of metallic paper, printed gift wrap, and solid cardstock become a flexible strand. The thread acts like a hinge, so each disk can turn slightly and catch light without needing a separate hanging loop.
There are two useful construction routes:
- Machine-stitched: Feed evenly spaced paper disks under a long straight stitch, leaving a short thread gap between shapes. This is the fastest route for a long window or tree strand.
- Hand-threaded: Pierce two small holes near the centerline of each disk and pass thread through them. It takes longer, but it gives more control over delicate paper and makes individual pieces easier to replace.
Avoid placing a stitch too close to a cut edge, especially on narrow ornament necks. A broader central body gives the thread enough paper to hold while still letting the shapes rotate.
How to Choose Paper Christmas Garlands by Display Location
Start with the surface, not the motif. A mantel can support broad rosettes, bows, or a freestanding village because the viewer sees them from the front and there is room for depth. A Christmas tree needs lighter units that can drape around branches without dragging them down; rolled beads, honeycomb baubles, small bells, and stitched disks are better fits. Windows reward transparency and movement, which gives vellum lights, quilled medallions, slotted spheres, and spiral drops a reason to exist beyond their color.
Also think about storage before committing to quantity. Accordion villages, slotted spheres, and some honeycomb units can flatten or disassemble. Quilled snowflakes and sculptural bows need more protection. If you make garlands for several rooms, mixing one compact flat-storing design with one more dimensional statement strand can keep the storage box from becoming the hidden cost of the project.
Choose One Construction Detail to Repeat
The freshest handmade garlands usually have one repeatable idea that carries the whole strand: the same pleat depth, the same woven pocket, the same slotted sphere, or the same spiral drop. Start with the mechanism you actually want to make more than once, then let size, spacing, and paper texture provide the variation.
If classic linked loops are still the look you want, take that narrower route next with 19 Christmas Paper Chains That Feel Fresh, Not Childish.








