
This post contains affiliate links. As an Amazon Associate I earn from qualifying purchases, at no extra cost to you. Thank you for supporting Diynify!
Paper gingerbread house ideas become much more interesting when the “cookie” look is only the surface and the paper construction changes underneath it. A steep folded roof can become a simple shelf cottage, while the same gingerbread theme can also turn into a glowing lantern, a treat box, a pop-up card, a hanging ornament, or a whole fold-flat village. This is a construction-first inspiration list rather than an SVG file roundup, so the focus stays on how each paper object stands, opens, hangs, glows, stores, or carries something.
Most of these projects work best with medium or heavy cardstock, a scoring tool, scissors or a craft knife, and paper glue. A few need something extra: vellum for windows, thread for hanging, a small cool LED for the luminary, a shallow box or frame for layered art, or lightweight chipboard for the wreath support. The gift sleeve also assumes you already have a small boxed present. If you want the fastest start, choose the A-frame cottage or ornament. For more structural paper work, save the pop-up card, advent drawer, and flat-pack slot house for later.
1. Folded A-Frame Gingerbread Cottage
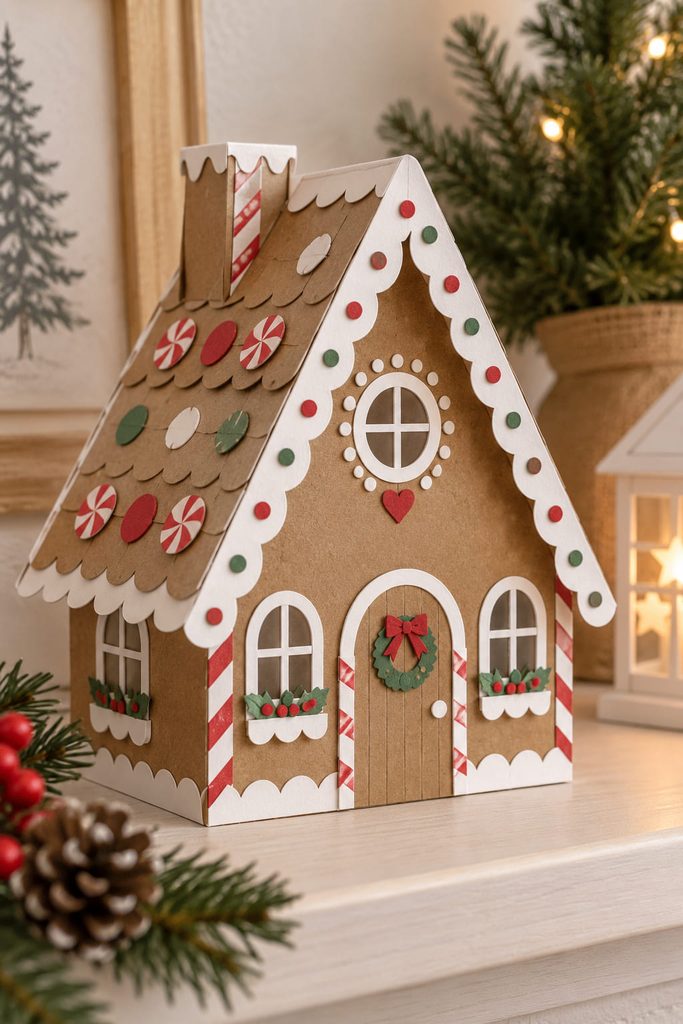
Score a long cardstock body so it wraps into two roof slopes and two short wall sections, then close the ends with separate triangular panels. That simple geometry gives you a freestanding cottage without asking the roof to sit on top as a separate heavy part. The steep A-frame silhouette also leaves plenty of room for scalloped “icing” strips, oversized candy circles, and a tiny crooked door while keeping the footprint compact enough for a shelf or place setting. Keep the lower wall edges straight even if the windows, chimney, and frosting trim lean into a storybook look; a house can look whimsically crooked above the base and still stand cleanly if the two bottom contact edges remain level.

2. Crooked Gingerbread Tower House
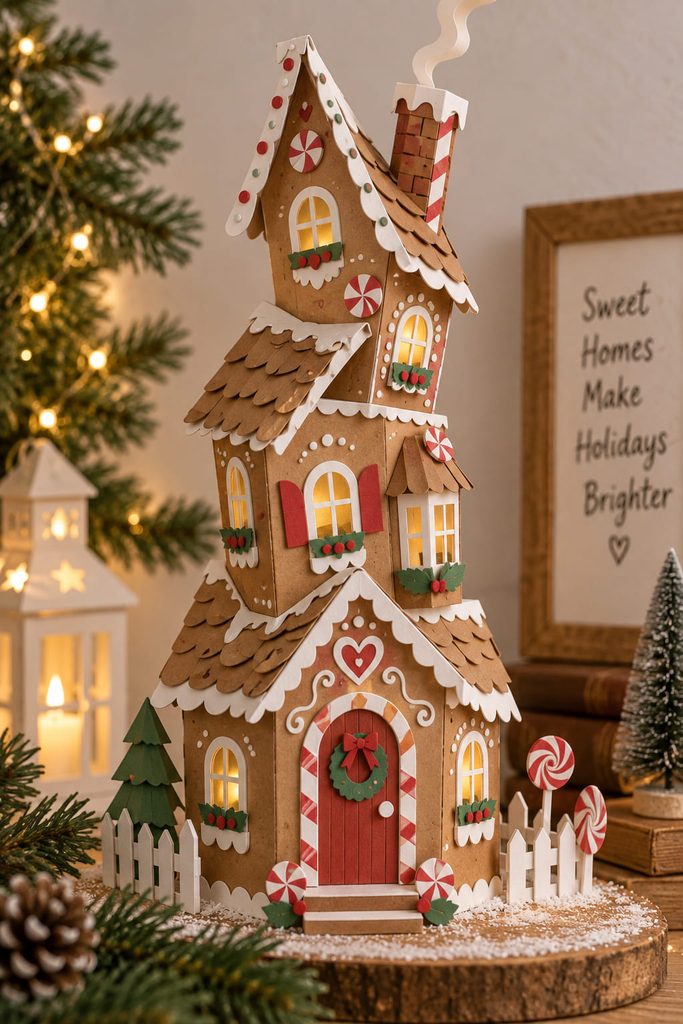
The storybook effect is strongest here when the tower is intentionally uneven but not structurally unstable. Build the height from two or three separate paper sleeves, each slightly narrower than the one below, and offset their rooflines or window positions instead of trying to force one tall sheet into a dramatic lean. Stacked sleeves let the weight travel down through several short walls rather than through one soft, top-heavy shell.
Use the lowest section as the visual anchor: a wider footprint, darker kraft cardstock, and fewer delicate cutouts. Higher tiers can become more fanciful with bay-window layers, curled paper shingles, a skinny chimney, or a tiny turret. If the finished tower looks as though it is tipping, correct the tier alignment before adding more decoration; decorative asymmetry reads as charming only when the base still feels dependable.

3. Vellum-Window Gingerbread House Luminary
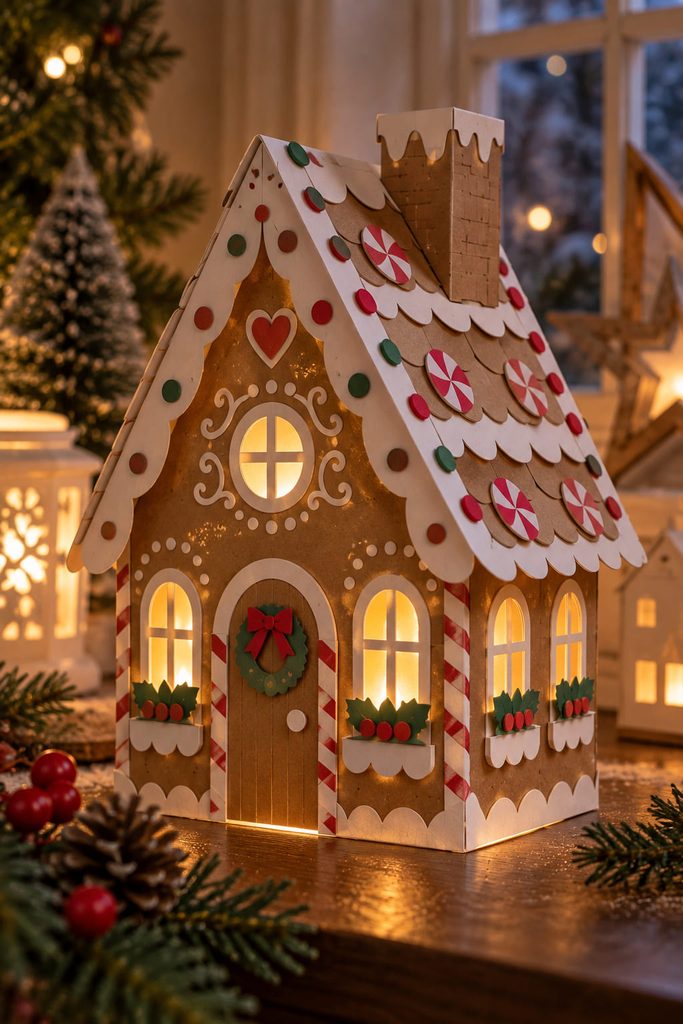
A warm glow only works if the light has a clear path through the paper. Cut the window openings before assembly, back them with vellum, and leave the interior uncluttered so frosting layers and candy trim do not accidentally cover the translucent panels. Use sturdy cardstock for the walls and roof, because the cut windows remove material from the very panels that still have to hold the house square.
The light source should be a small cool-running LED, never a real flame. Give the house a stable base and a deliberate access point—a removable bottom panel, open back, or lift-off roof—so the LED can be inserted and removed without crushing the walls. Test the house in a dim room before gluing the last decorative layers; if the windows look dull, the problem may be blocked openings or overly opaque vellum rather than the light itself.

Keep The Light Path Open: Hold the assembled shell over the switched-on LED before final decoration. If a window goes dark, check for an interior tab, roof flap, or paper layer crossing behind it and move that obstruction before sealing the house.
4. Removable-Roof Gingerbread Treat Box
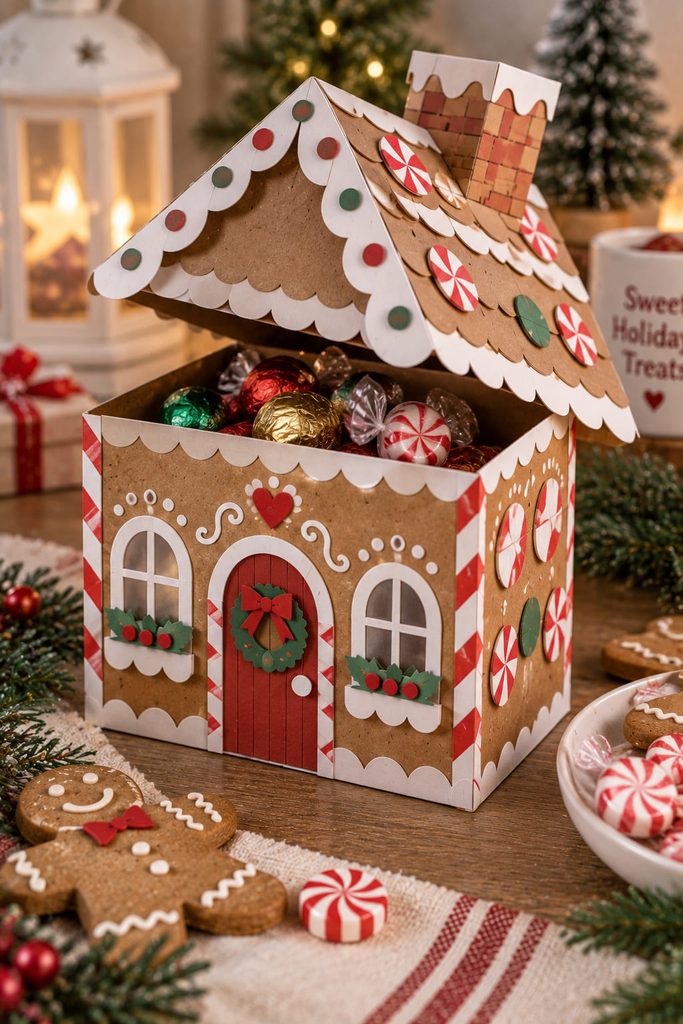
For a house that earns its space on the holiday table, turn the wall section into a real box and let the gabled roof act as the lid. The body needs a closed base, enough interior clearance for wrapped treats, and side walls stiff enough to stay square after the contents are removed. A separate roof sleeve or shallow roof cap can then slide over the upper walls without asking decorative shingles to serve as the closure.
| Box Check | What Should Happen |
|---|---|
| Lid fit | The roof seats without bowing the walls |
| Interior clearance | Wrapped treats stay below the roof line |
| User access | Two fingers can lift the roof without catching on a chimney or candy piece |
If the lid is tight, enlarge the roof cap slightly rather than forcing it over the decorated box.
5. Mini Gingerbread House Tree Ornament

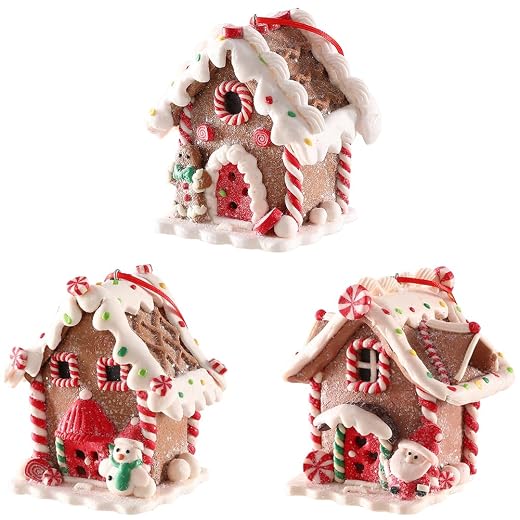
At ornament scale, silhouette matters more than tiny decoration. Make a compact hollow cottage with simple folded walls, a short gable roof, and one reinforced area along the ridge where the hanging loop can be trapped between layers. Threading a string through a thin roof tip can tear the cardstock; sandwiching the loop inside a doubled ridge spreads the load across a stronger area.
Keep projecting details light and shallow so the ornament does not twist toward the heaviest side. Leave enough loop length for the roof peak to hang free below the branch instead of rubbing against it. One door, two windows, a scalloped roof edge, and a few candy dots will usually read better on a tree than dozens of miniature cutouts.
Reinforce The Hanging Point: Lift the unfinished ornament by its loop before decorating. If the roof pulls inward or the house pitches sharply forward, strengthen the ridge or shift the loop toward the true balance point.
6. Pop-Up Gingerbread House Christmas Card
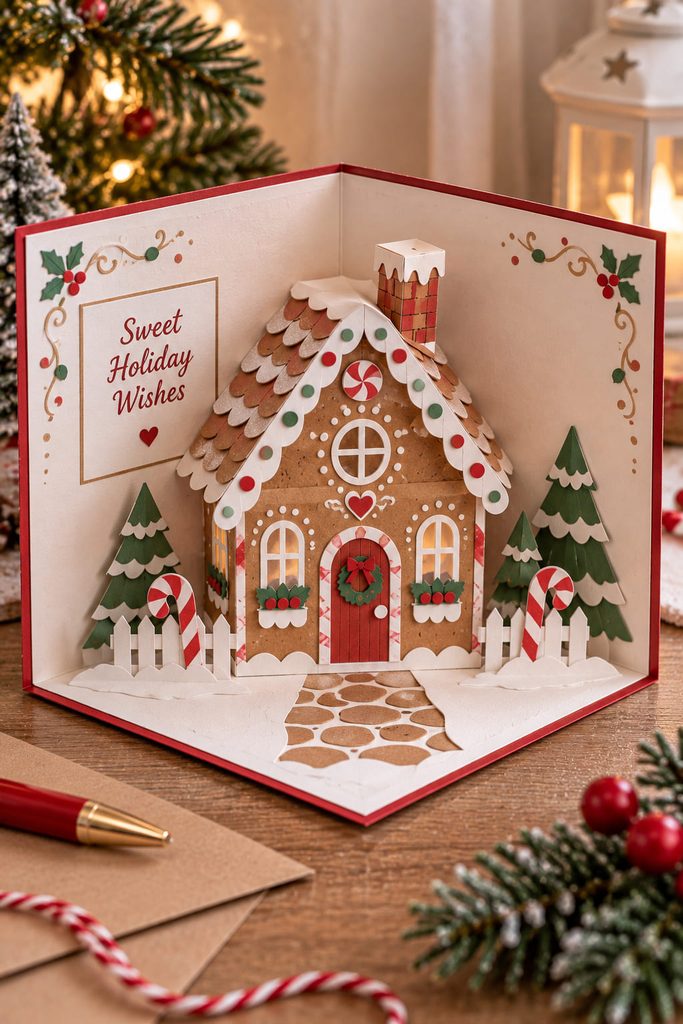
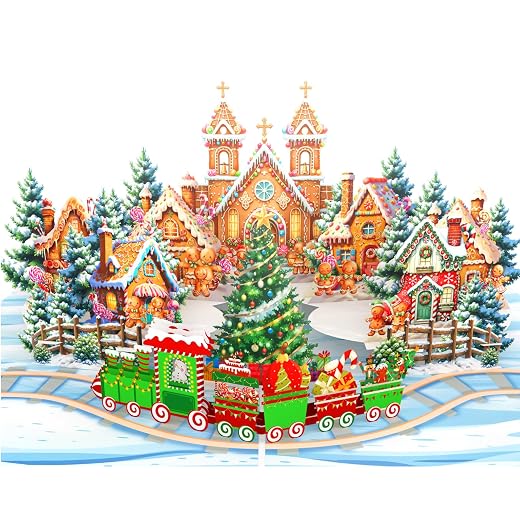
A pop-up cottage feels magical only when the house rises cleanly and still disappears inside the closed card. A simple box-fold or paired V-fold can push the facade forward, but the roof, chimney, trees, and candy trim all have to remain inside the card’s closing path. This makes the hinge geometry more important than the amount of decoration.
- Build and crease the pop-up mechanism first, with no decorative layers attached.
- Add the house facade and roof while the card is open at roughly a right angle.
- Close the card slowly and watch where the roofline, side walls, or chimney approach the outer edges.
- Shorten or reposition any piece that buckles, crosses the center fold, or protrudes beyond the closed card before gluing the final icing details.
Closed-State Check: Press the card shut with light fingertip pressure only. If it needs force, something is colliding; find the contact point instead of flattening the paper until it behaves.
A fold-flat card gives you a full gingerbread-house reveal without storing a freestanding model, and it is the better route when the finished project is meant to be mailed or slipped into a gift rather than kept as tabletop decor.
7. Accordion Gingerbread Village Book
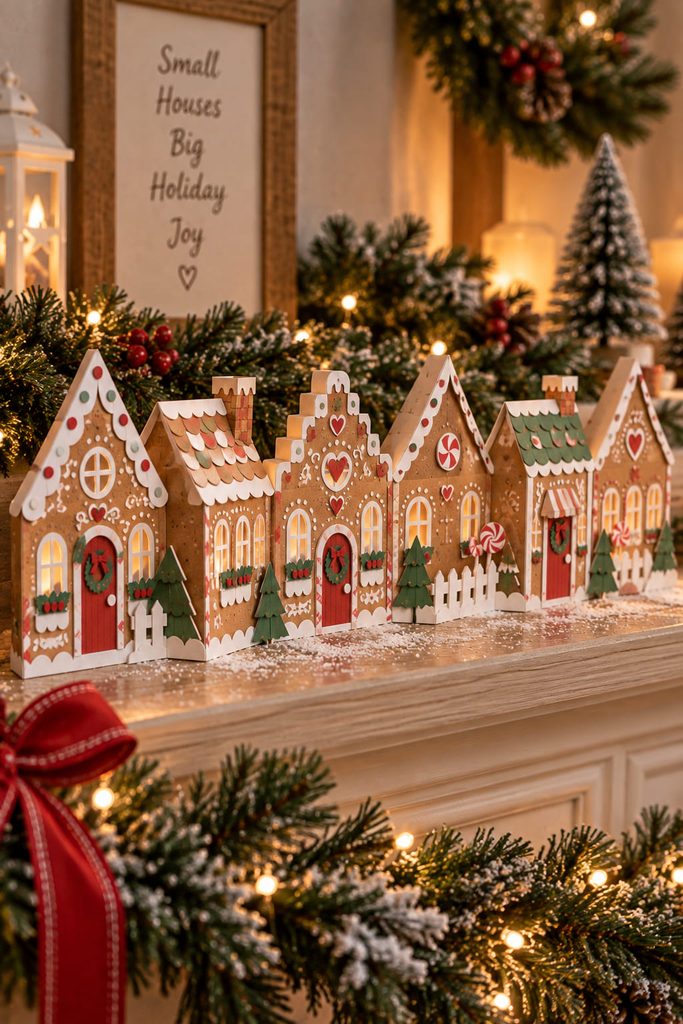
One long scored strip can become an entire row of storybook houses without building fourteen separate boxes. Fold cardstock into alternating mountain and valley creases, then cut the upper edge into changing rooflines while keeping each vertical fold continuous enough to act as the hinge between buildings. The accordion opens into a freestanding street but compresses into a slim stack for storage.
Batch the decorative work before assembly: cut all windows, roof trims, and candy circles by size, then vary them from panel to panel. Repeating the same kraft paper and white “icing” keeps the village cohesive, while the changing roof shapes make each house feel like its own little shop or cottage. If the row tips, widen the end panels or reduce heavy layered details near the outermost folds rather than gluing the accordion to a permanent base.
8. Layered Gingerbread Street Shadow Box
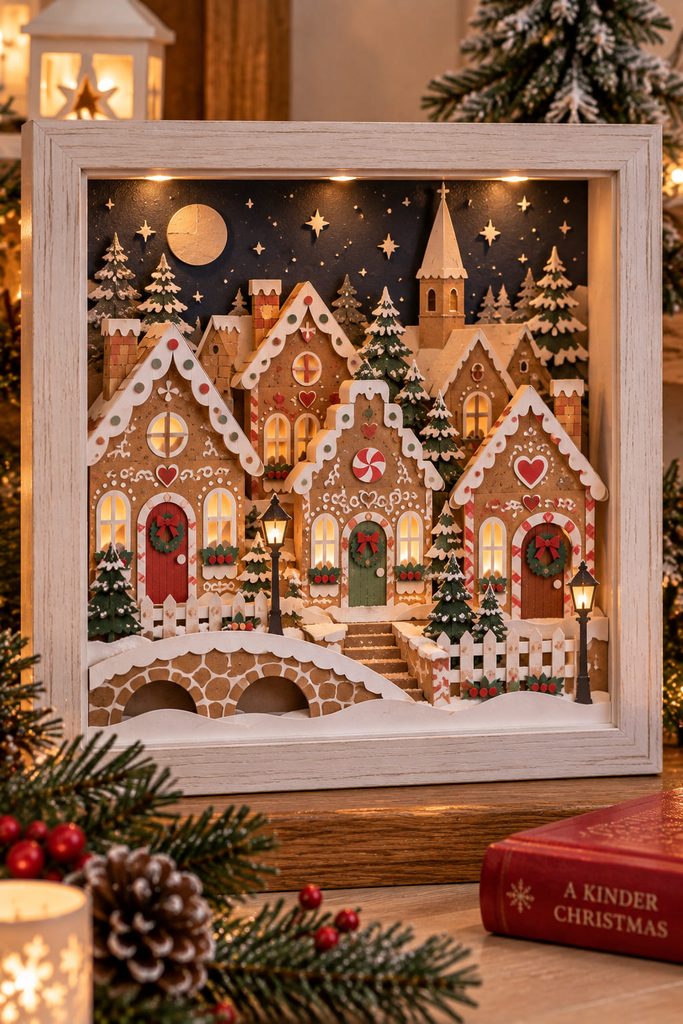
Depth comes from spacing the street into planes instead of stacking every detail on one flat house. Put the largest roof and skyline shapes toward the back, bring doorways and front facades forward on paper spacers, and reserve the nearest layer for snowbanks, fences, candy canes, or a foreground path. The viewer should be able to read the street from several feet away before noticing the tiny frosting details.
Negative space matters as much as the cut paper. Leave visible gaps between rooflines and around windows so the background can separate one layer from another. A crowded composition can turn into a brown-and-white mass once it is behind glass, especially if every layer uses the same value. Test the unframed stack upright before fixing the final spacers; if one house disappears, change its silhouette or move it to a different depth rather than adding more decoration.
9. Gatefold Gingerbread House Card
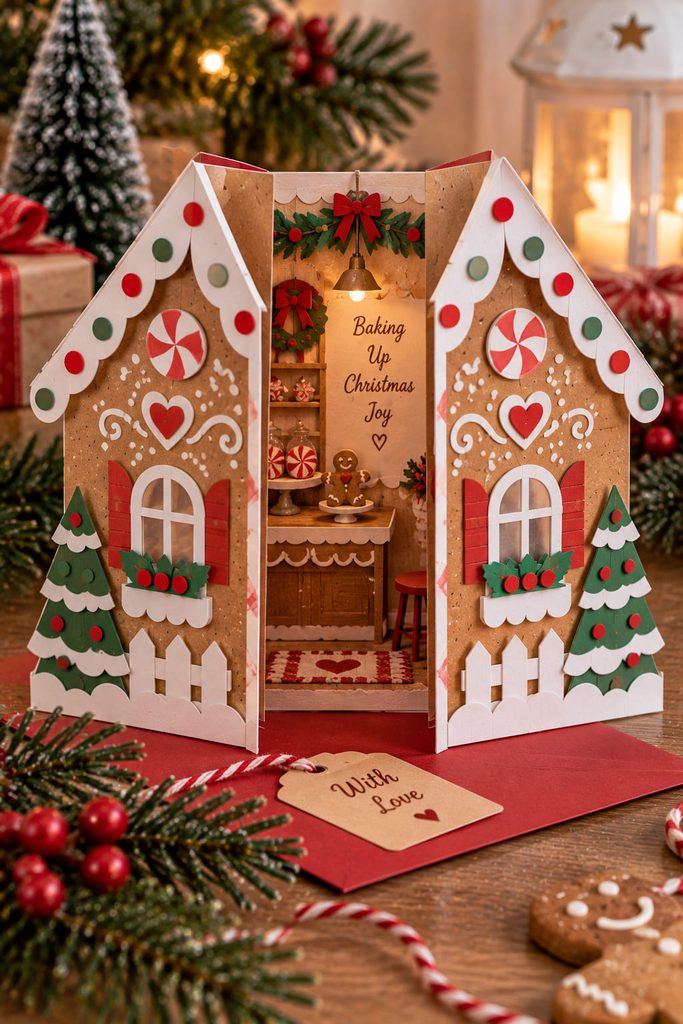
Let the front of the house behave like two doors. A gatefold card can place half of the gingerbread facade on each outer panel, then reveal a short message, tiny paper room, or candy-shop counter when the panels swing open. The interaction feels different from a pop-up because the surprise comes from opening the facade itself rather than lifting a structure from the center fold. Keep the central seam visually quiet: avoid a thick candy button or roof layer that bridges both doors, because that can prevent the card from closing flat. A small paper belly band can hold the gates shut if you want a tidy presentation without turning the facade into a box.
10. Gingerbread House Gift Sleeve
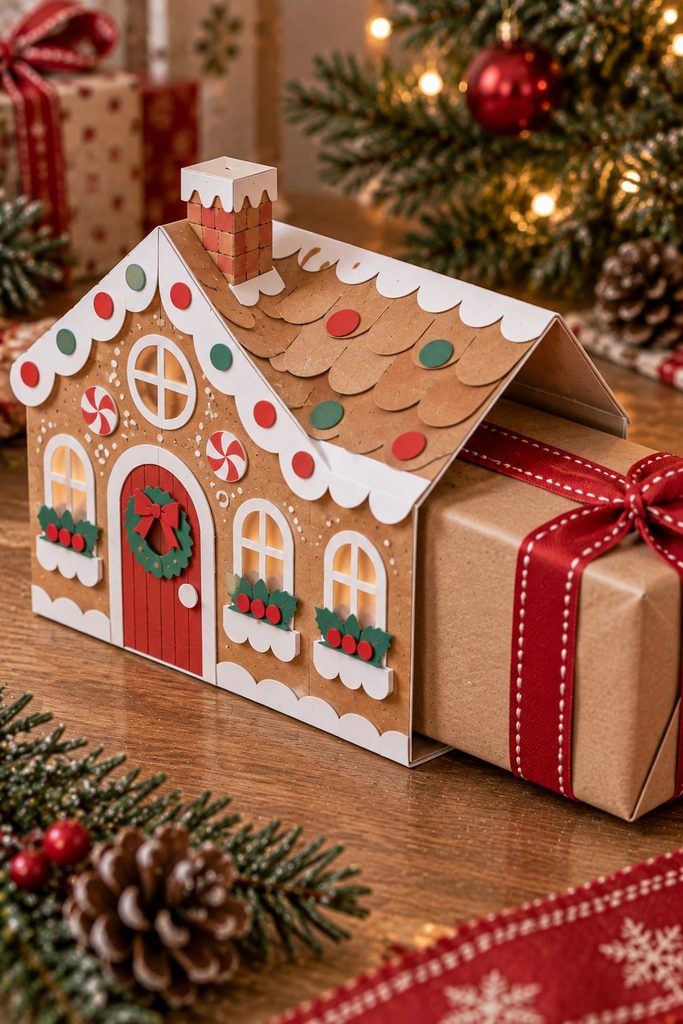
When the present already comes in a small rectangular box, building another container around it wastes paper and adds bulk. A scored gingerbread-house sleeve can wrap around the existing package, using a gabled facade and roof-shaped top flap to create the cottage silhouette while the original box supplies the strength. Measure the wrapped gift first, then add only enough ease for the sleeve to slide on and off without scraping the decorative layers. The best storybook details are the ones that stay out of that sliding path: flat windows, printed or layered icing, and shallow paper shingles. A large chimney or projecting candy cluster belongs on the front face, not along the edge the recipient will grip to remove the sleeve.
11. Gingerbread House Advent Drawer
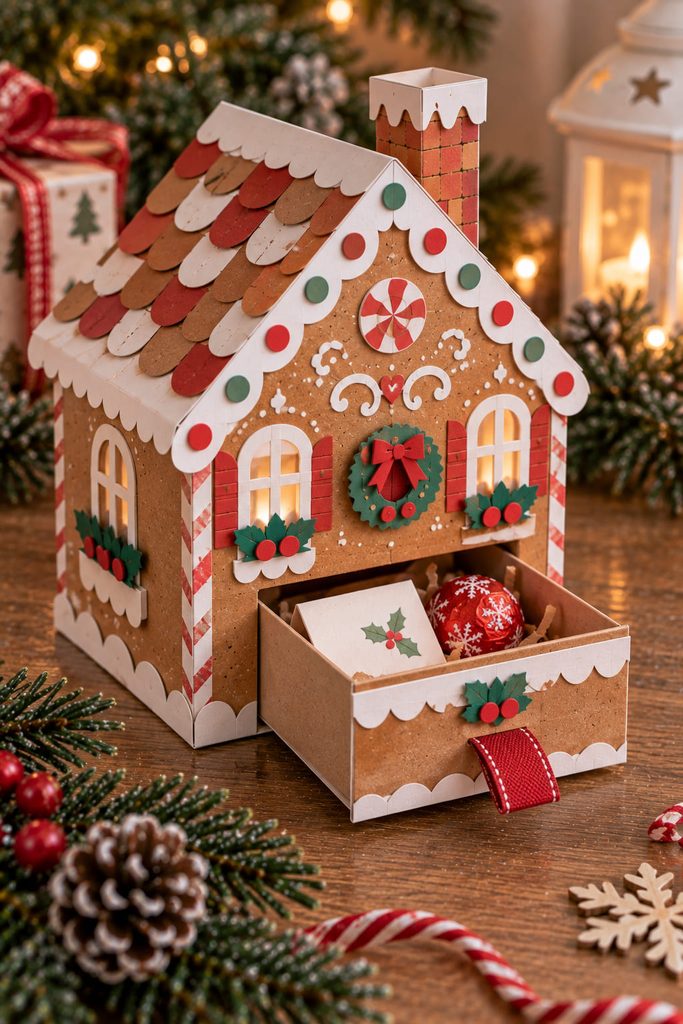
If a tiny drawer catches every time it opens, the problem is usually clearance rather than decoration. Build the outer house as a rigid sleeve with a flat internal floor, then make a separate shallow drawer that slides through the front like a miniature bakery counter. The roof can be fixed because the user reaches the contents from the drawer, which makes the house feel more architectural than a lift-off treat box.
The sliding fit needs to be tested before the facade is layered. If the drawer bows outward, reduce the contents or strengthen its base; if it scrapes at the top, the sleeve is too short or the drawer walls are too tall; if it rattles from side to side, add a narrow paper guide strip inside the sleeve rather than thickening the decorative exterior. A small folded paper pull is lighter than a bulky bead and keeps the front easy to operate.
Drawer Clearance Test: Load the drawer with the actual lightweight treat or note you plan to use, slide it fully closed, then reopen it using one hand. The house should stay in place while the drawer moves; if the whole structure follows, increase the footprint or reduce friction inside the sleeve.
This format works especially well when the “storybook house” needs a repeated interaction—one note, candy, or tiny surprise each day—rather than functioning as a one-time package.
12. Storybook Gingerbread House Wreath
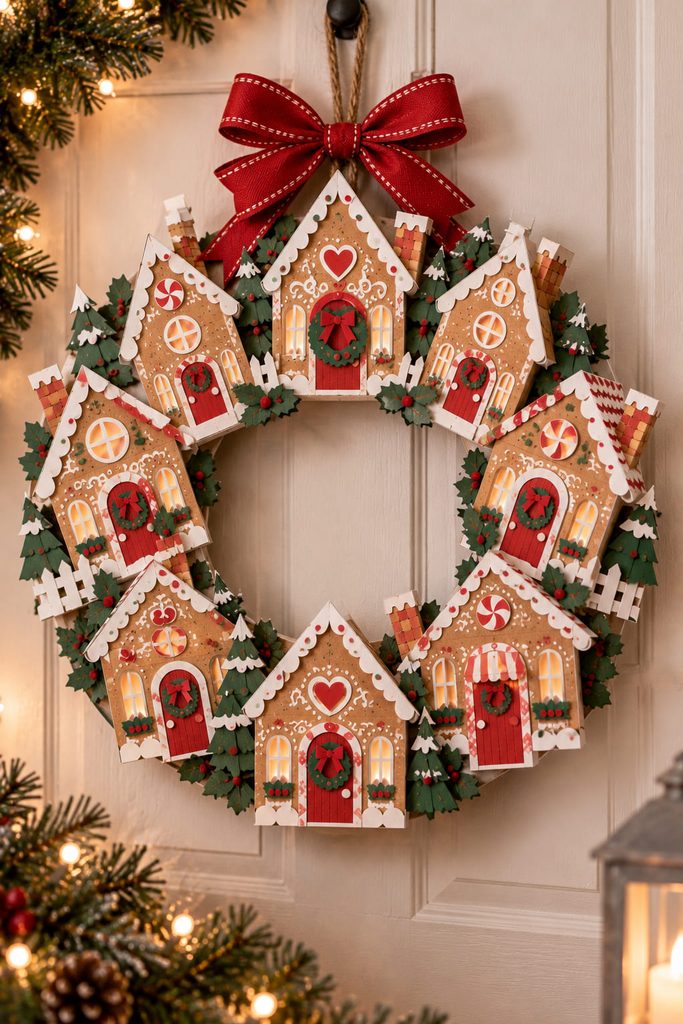
A wreath built from paper houses needs a carrier strong enough to hold the repetition without showing through the design. Use a wide cardstock or lightweight chipboard ring as the frame, then attach shallow house fronts or very low-profile folded cottages around it so their roof peaks create the outer rhythm. Full-depth boxes are usually too heavy and bulky for this job; the wreath reads more clearly when the houses behave like relief elements.
| Material | Best Job |
|---|---|
| Heavy cardstock or light chipboard | Hidden supporting ring |
| Kraft cardstock | Gingerbread walls and house fronts |
| White cardstock | Icing borders, snow, roof scallops |
| Lightweight patterned paper | Candy accents and tiny shutters |
Rotate roof shapes and doorway positions rather than relying on many unrelated colors. Before hanging, support the wreath from its intended loop and make sure the lowest houses do not peel away from the ring under their own weight.
13. Hinged Gingerbread Dollhouse Facade
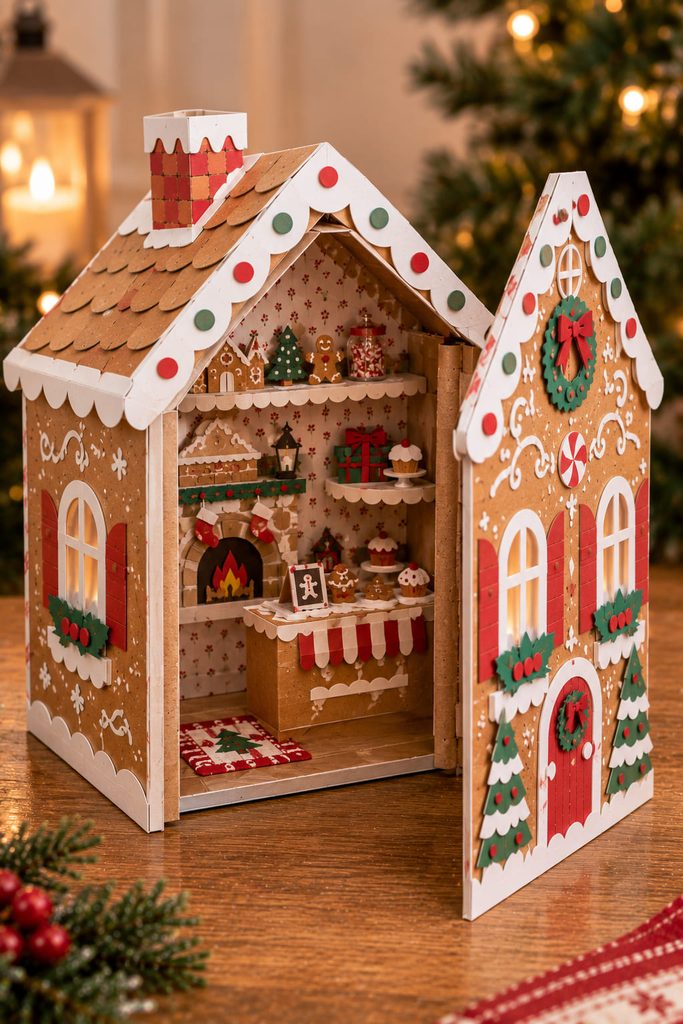
Give the facade a hinge and the paper house becomes a tiny stage instead of a closed shell. Build a firm back wall and floor first, then attach the decorated front panel along one vertical edge with a scored paper hinge so it can swing open. Inside, shallow paper shelves, a fireplace layer, a bakery counter, or a printed wallpaper panel can suggest rooms without requiring a deep dollhouse structure.
The hinge needs room to move. Keep thick roof trim and candy pieces away from the pivot edge, and stop interior shelves short of the closing path so the front can sit flush when shut. A narrow magnetic-style closure would add hardware you may not want; for an all-paper version, use a tab-and-slit catch on the opposite edge or a small removable belly band.
This idea is worth the extra construction when interaction is part of the charm. A child can open the house to reveal a miniature scene, or an adult can use it as a shelf display that changes from a tidy gingerbread facade to a detailed interior. Keep every interior piece lightweight so the open front does not drag the body out of square.
14. Flat-Pack Slot-Together Gingerbread House
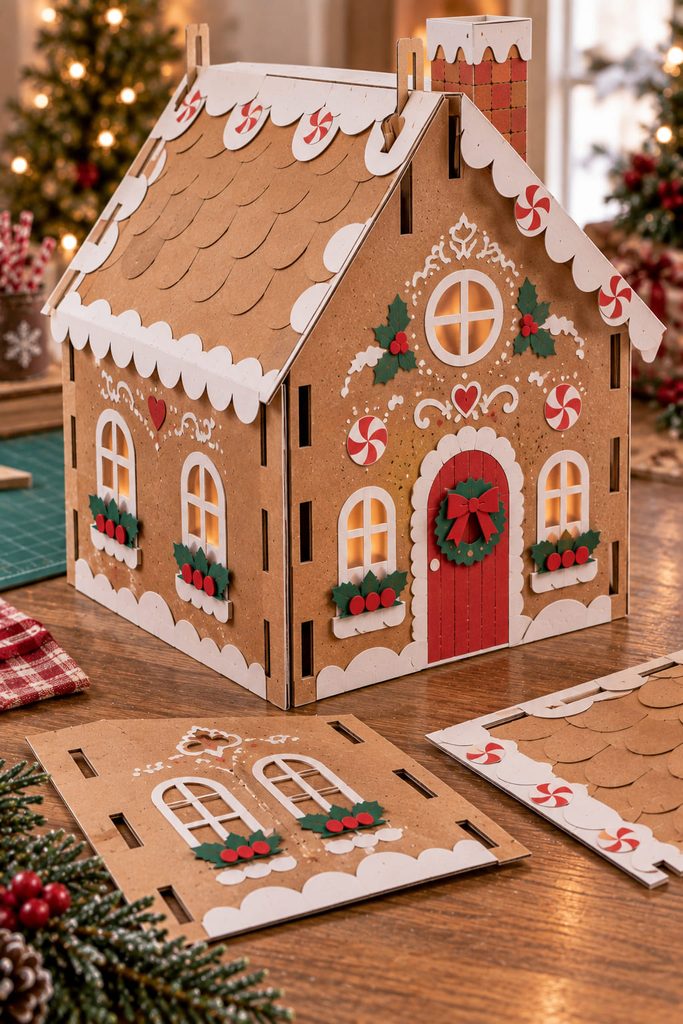
If you want a gingerbread house to survive beyond one season, design the joints so the model can come apart. Cut wall panels with vertical slots that interlock at the corners, then give the roof its own slots or hooked tabs so it locks across the wall tops without permanent glue. The finished house should stand because the panels brace one another, not because icing trim is hiding weak seams.
Dry-fit the undecorated structure first. The slots should be wide enough to accept the actual cardstock thickness without crushing the edges, but not so loose that the corners wobble. Once the shell stands square, mark which surfaces remain exposed and keep raised decorations away from joints that need to slide apart later.
| Fit Test | Pass | Correction |
|---|---|---|
| Corner joint | Panels meet at a clean angle without buckling | Widen an overly tight slot or shorten a bottomed-out slot |
| Roof lock | Roof stays seated when the house is lifted gently from the base | Deepen the roof engagement or add a paper hook |
| Flat-pack check | Panels separate without tearing decorative layers | Move bulky trim away from slots and tab paths |
Slot Fit Before Decoration: A painted, layered, or glittered edge becomes thicker than bare cardstock. Size the structural slots from the material you will actually assemble, or protect the joint areas from extra layers.
The trade-off is visible: slot joints look more architectural than seamless glued corners, but the house can be stored flat and rebuilt next Christmas. That makes it a useful choice for larger statement pieces that would otherwise take up a box of storage space all year.
Choosing Between Paper Gingerbread House Ideas
Choose by what the finished piece needs to do, not by which frosting pattern looks cutest. For a quick shelf decoration, the A-frame cottage or tower keeps the construction straightforward. Choose the ornament for a tree, the shadow box or wreath for wall display, the pop-up or gatefold version for a greeting, and the treat box, gift sleeve, or advent drawer when the house needs to hold or reveal something. The luminary and flat-pack house deserve more careful fitting because light access and reusable joints add real structural constraints.
Cardstock is the common thread, but stiffness should follow scale. Small cards and ornaments can tolerate lighter stock, while tall towers, containers, and reusable houses benefit from firmer panels. Vellum belongs only where translucency helps, thread belongs only where the load has a reinforced hanging point, and a luminary should use a cool LED rather than an open flame.
Start With The Function, Then Add The Fairytale
A storybook gingerbread house looks convincing when the whimsical details sit on top of a construction that actually works. Pick one functional challenge you want to solve first—standing, glowing, opening, hanging, holding, folding flat, or packing away—then let crooked windows, frosting scallops, candy roofs, and curled chimneys push the personality.
If you would rather start from prepared cut-file projects with more detailed templates and machine-ready construction, continue with 31 Enchanting Gingerbread Paper House SVG Designs for Christmas Crafts.








