
This post contains affiliate links. As an Amazon Associate I earn from qualifying purchases, at no extra cost to you. Thank you for supporting Diynify!
Handmade Christmas cards do not need intricate die cuts, perfect lettering, or complicated pop-up engineering to feel special. These 15 simple handmade Christmas cards lean on easy actions—tearing, folding, punching, stamping, layering, and gluing—so the finished design looks intentional without turning card night into a precision project.
Most ideas use folded cardstock, paper scraps, scissors, a glue stick or liquid paper glue, and a pen or marker. A few call for extras such as washi tape, a circle punch, washable ink or paint, vellum, twine, a cork or small sponge, or a printed photo. If you are making a batch, choose the construction first: flat collage and stamped designs are quickest to repeat, while pockets and accordion folds add a little more structure.

1. Torn-Paper Snowy Tree Card
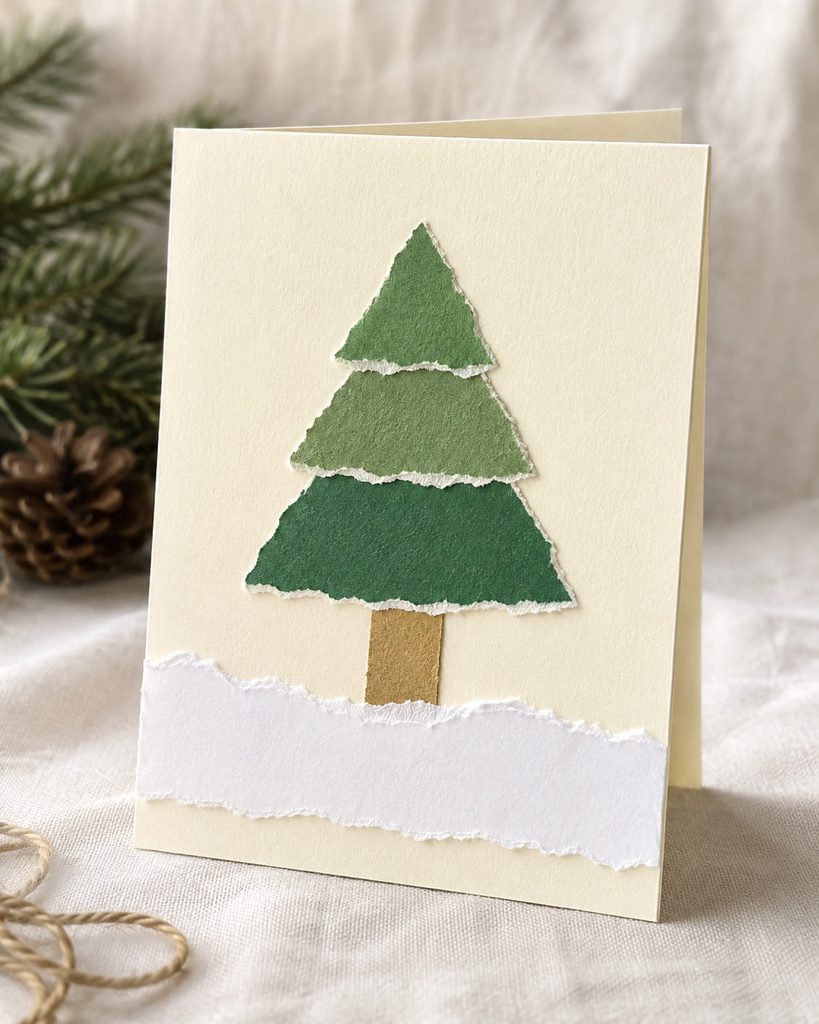
Skip the ruler and let torn edges create the texture. Tear three or four green paper triangles in gradually smaller sizes, stack them into a loose tree, and tuck a white torn strip across the bottom as snow. A tiny kraft-paper trunk is enough. Keep visible cardstock around the silhouette; that open border makes irregular edges look deliberate rather than crowded, even when the scraps are slightly different shades of green.
2. Washi-Tape Christmas Tree Card
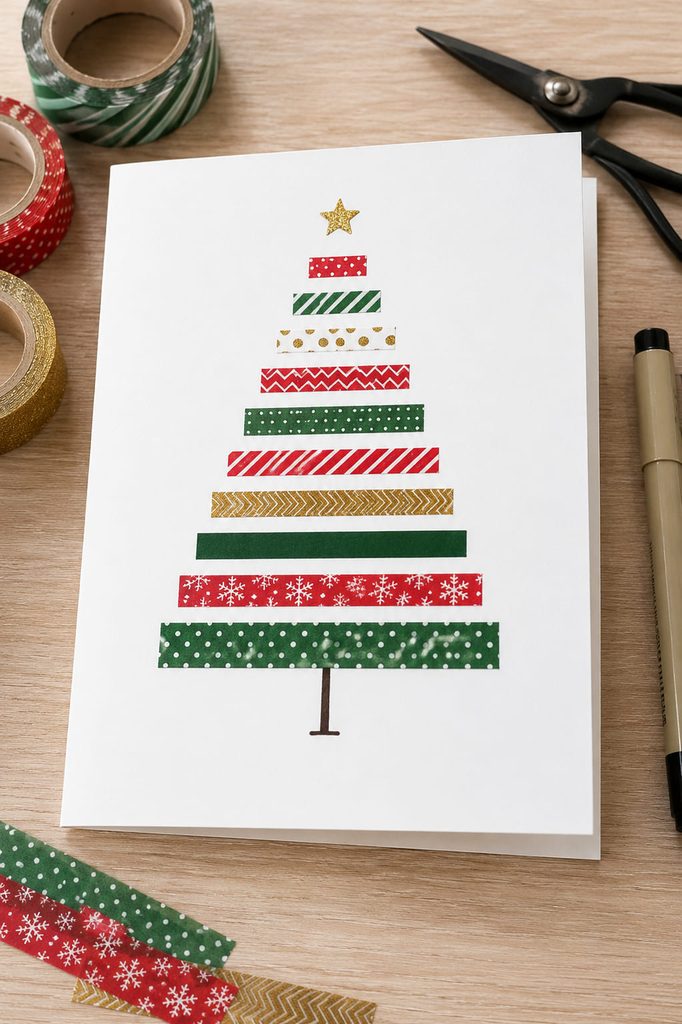
For a card you can repeat quickly, build the tree from horizontal strips of washi tape. Start with the longest strip near the bottom and shorten each row as you move upward; add a drawn trunk and small star. Leave slim gaps when the tape patterns are busy, or let solid-color strips nearly touch. The same triangular layout can be repeated across a batch while the tape combinations change.
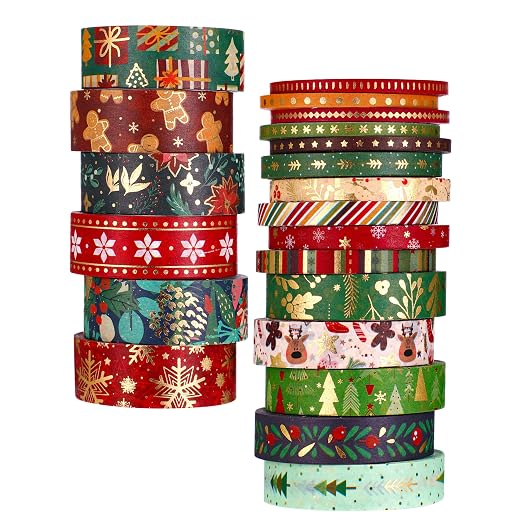
3. Dot-and-Line Christmas Lights Card
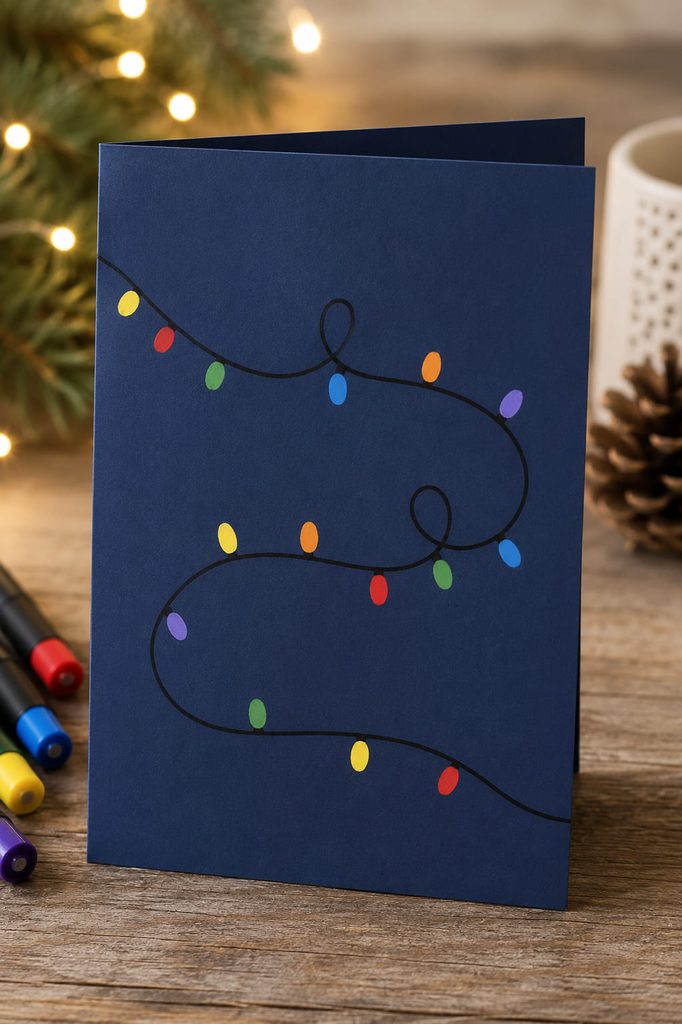
A black or dark green marker can carry most of this design. Draw one loose looping cord, then add small oval bulbs with markers, paint pens, or fingertip dots of washable craft paint. The line organizes the scattered color, so the strand still reads when the bulbs are not perfectly even.
Keep The Cord Readable: Leave blank cardstock between bulbs. If the dots bury the line, the string-light idea turns into a row of color.

4. Wrapping-Paper Gift Stack Card
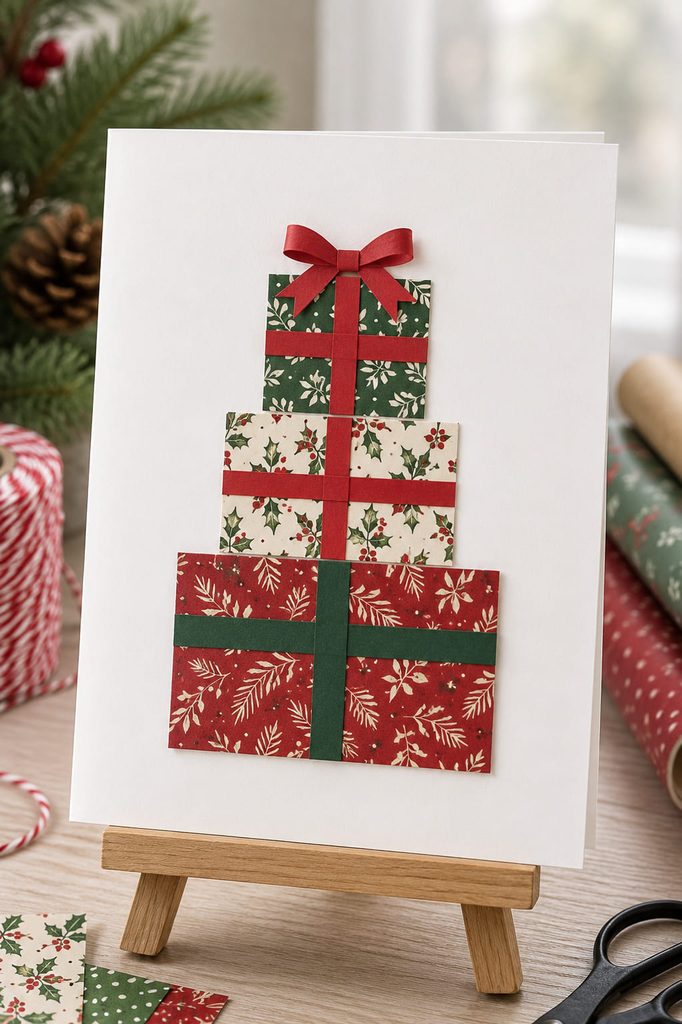
Clean wrapping-paper offcuts work well as three simple gift rectangles. Cut them in graduated sizes, stack the rectangles with small gaps, then glue narrow contrasting paper strips across each one to suggest ribbon. The rectangles do not need to match in pattern; in fact, a restrained mix of two or three prints makes the stack feel more like real wrapped presents.
Before gluing, arrange the largest parcel at the bottom and check that the stack stays comfortably inside the card edges. That one dry layout prevents the top gift or bow from drifting too close to the fold or outer edge.
5. Circle-Punch Ornament Wreath Card
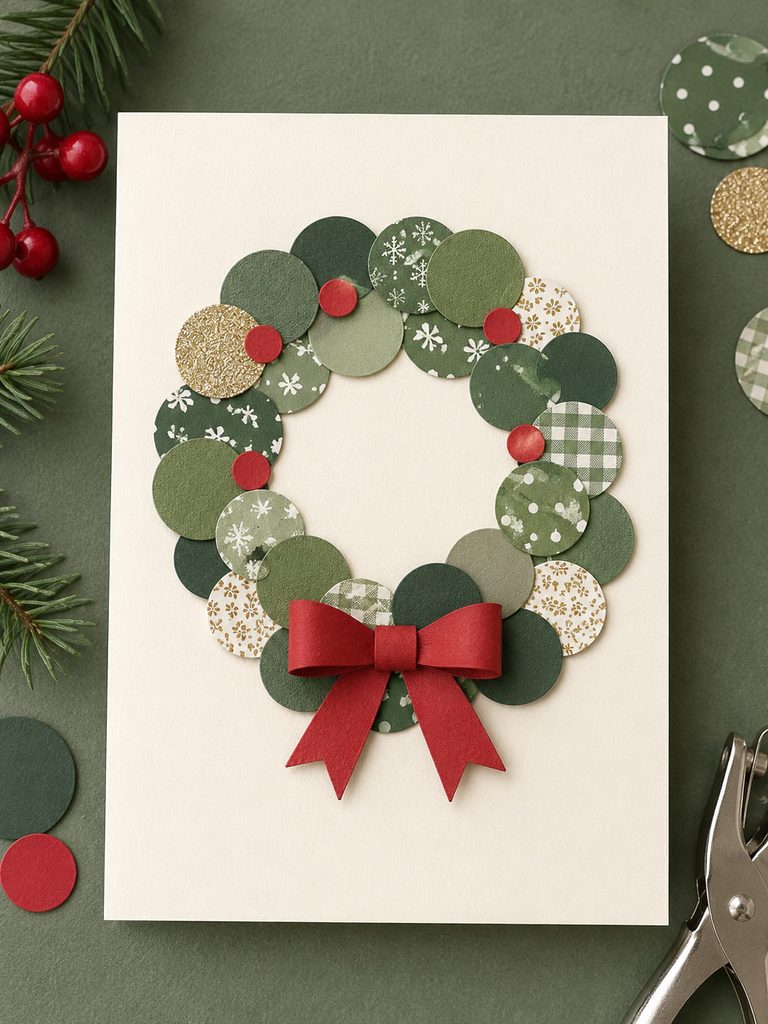
A basic circle punch turns leftover paper into a wreath without asking you to cut a perfect ring. Punch circles from green cardstock and patterned scraps, then arrange them around a penciled circle so their edges overlap slightly. A few red or metallic circles can interrupt the green, and a small paper bow or hand-drawn bow closes the composition.

Use this quick checklist before the glue dries:
- Keep the center opening clearly visible.
- Vary the circles enough to avoid a dotted polka-dot look.
- Let a few pieces overlap the penciled guide rather than following it rigidly.
- Erase any exposed pencil only after the adhesive has set.
6. Paper-Strip Candle Trio Card
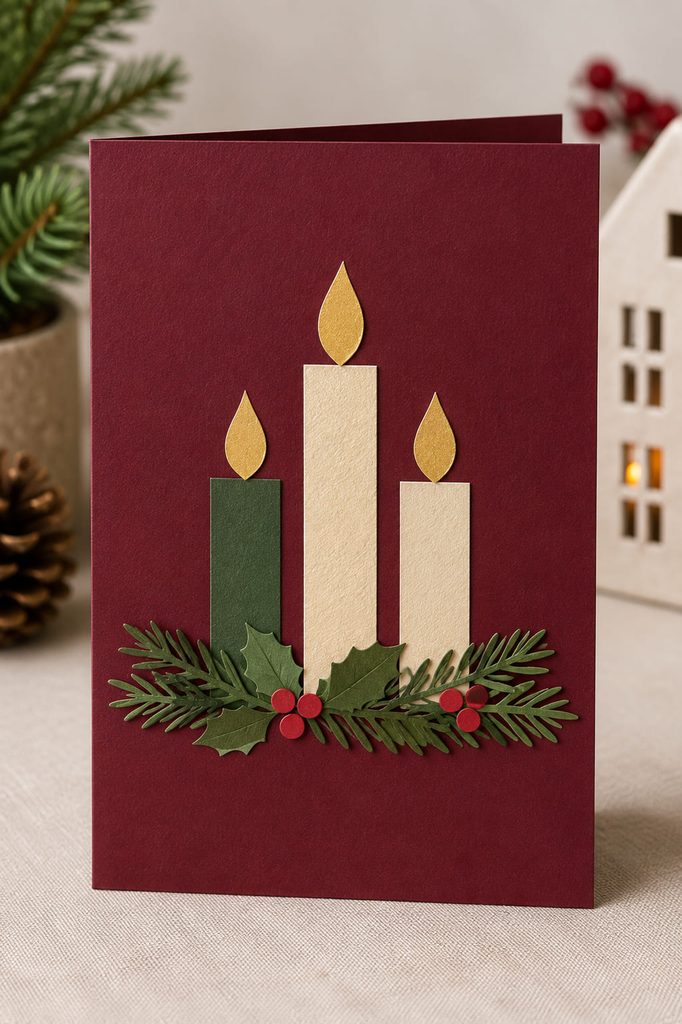
Three vertical paper strips can become a calm Christmas candle card with almost no decorative cutting. Make the center candle slightly taller, trim two side candles shorter, and top each one with a simple teardrop flame cut from yellow or gold paper. A narrow green paper strip or a few marker-drawn sprigs can ground the candles at the base.
The strength of this design is its straight geometry, so align the candle bottoms before worrying about the flames. If the paper patterns are already bold, keep the background plain; if the candles are solid colors, a tiny amount of metallic paper in the flames adds enough contrast without making the card busy.
7. Vellum Snowfall Overlay Card
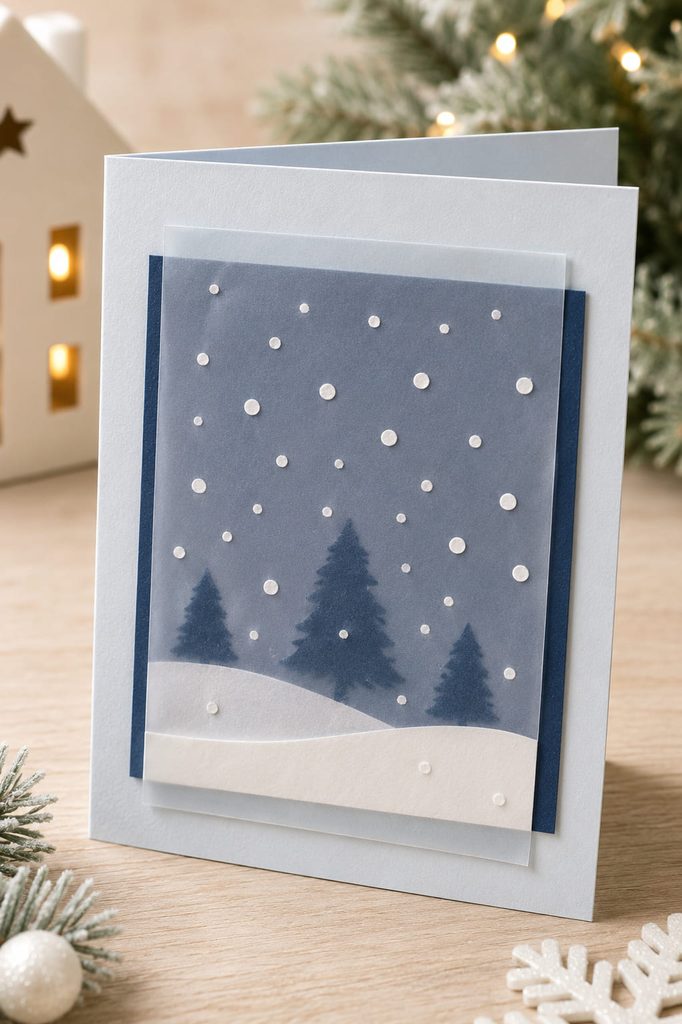
Vellum adds a soft winter layer without requiring a window cut. Place a narrow sheet of translucent vellum over a simple dark-blue paper rectangle, then add white punched dots or tiny torn bits beneath the vellum so they look slightly diffused. The effect is quieter than gluing every “snowflake” on top and works well for a card that needs to stay mostly flat.
There are two easy ways to hide adhesive:
- Edge-wrap route: cut the vellum slightly wider than the blue panel, fold the excess to the back, and glue only those hidden flaps.
- Corner route: use four tiny adhesive dots where a border, star, or paper corner can cover them.
The first route gives the cleanest face; the second is faster when you are making only one or two cards.
8. Cork-Stamped Berry Wreath Card
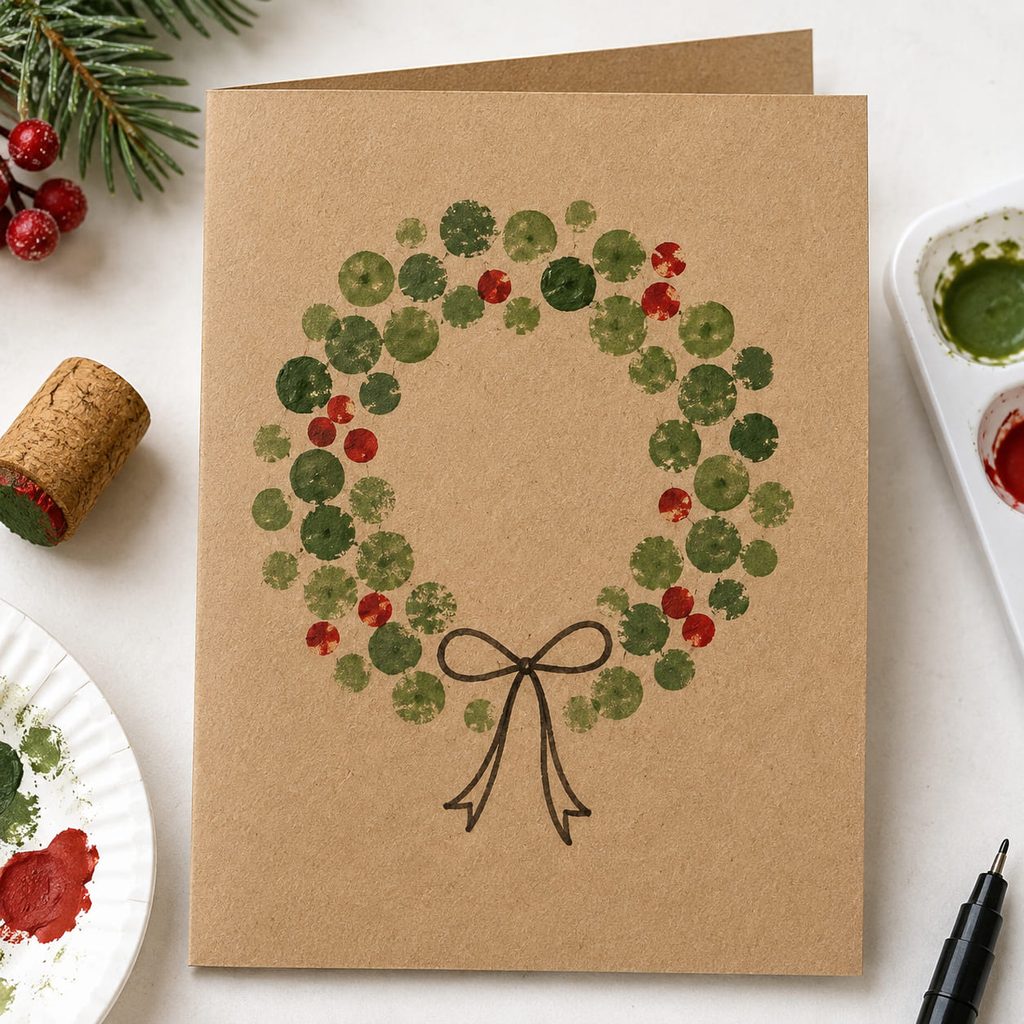
A clean wine cork or small round sponge can stamp a wreath faster than you can cut dozens of berries. Lightly pencil a circle, stamp green dots around it with craft paint, then add a smaller number of red dots once the green is dry. Uneven impressions are fine because repeated circles create the wreath shape from a normal viewing distance.
- Test the stamp on scrap paper to learn how much paint it needs.
- Work around the circle in separated green marks rather than filling every gap at once.
- Add red berries selectively, keeping some green visible.
- Finish with a drawn or paper bow after the paint has dried.
The useful test is simple: hold the card at arm’s length. If the center opening still reads as a clear circle, the wreath has enough negative space.

9. Creased-Paper Holly Card

Creasing each holly leaf before gluing gives a flat shape enough structure to catch the light. Cut three broad green leaves, fold each gently along its length, and glue mainly along the center crease so the edges can lift. Add three red punched or hand-cut berries. Broad leaves are easier to cut than narrow, spiky ones; if the cluster feels crowded, remove a berry rather than shrinking every leaf.
10. Simple Gift Card Pocket Christmas Card
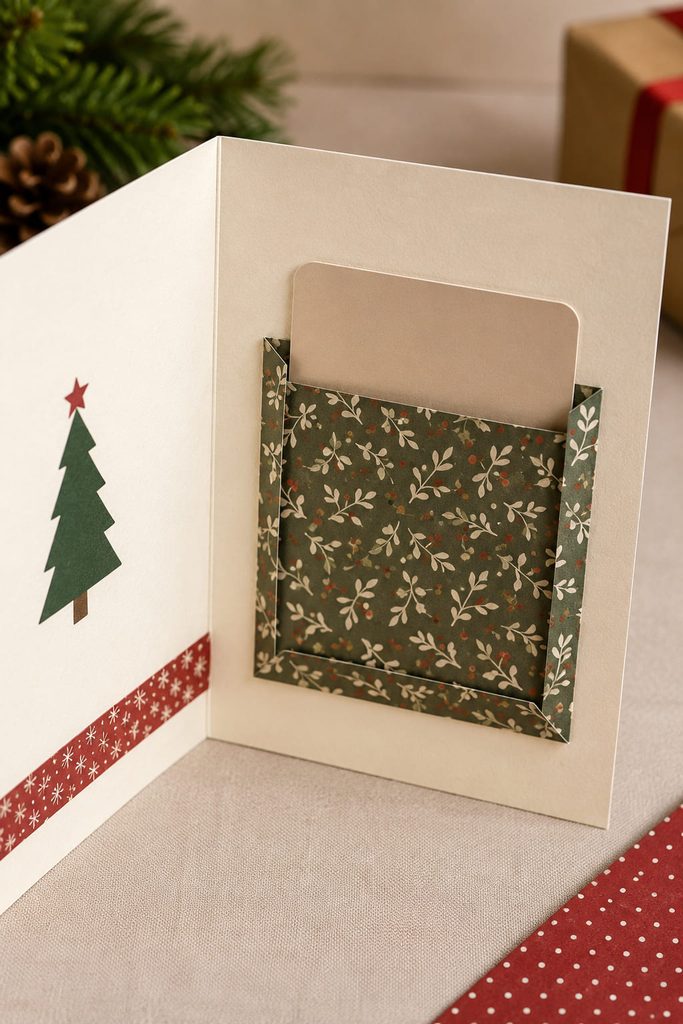
When the greeting also needs to carry a gift card, let the pocket be the main construction instead of adding bulky decoration. Start with a standard folded card base and make a separate paper rectangle slightly wider than the gift card. Fold narrow side tabs and a bottom tab to the back, glue those tabs to the inside panel, and leave the top edge open for loading.
A pocket works only if the gift card can slide in and out without tearing the paper, so test the fit before final gluing. The card should still close with the pocket filled; if it bows outward, reduce extra decoration on the opposite panel rather than tightening the pocket around the card.
Pocket Fit Check: Insert the gift card, close the greeting, reopen it, and remove the card once. If all four actions happen without catching the edges, the pocket has enough clearance.
11. Minimal Metallic Star Card

One strong focal shape can carry the whole card front. Cut a large star from metallic, pearlescent, or contrasting paper, mount it slightly above center, and add a short greeting underneath. Give the star generous blank space: reflective or textured paper looks stronger against a matte base, while a patterned base usually needs a solid star. Skip tiny corner decorations—the empty area is part of the composition.
12. Scrap-Paper Ornament Trio Card
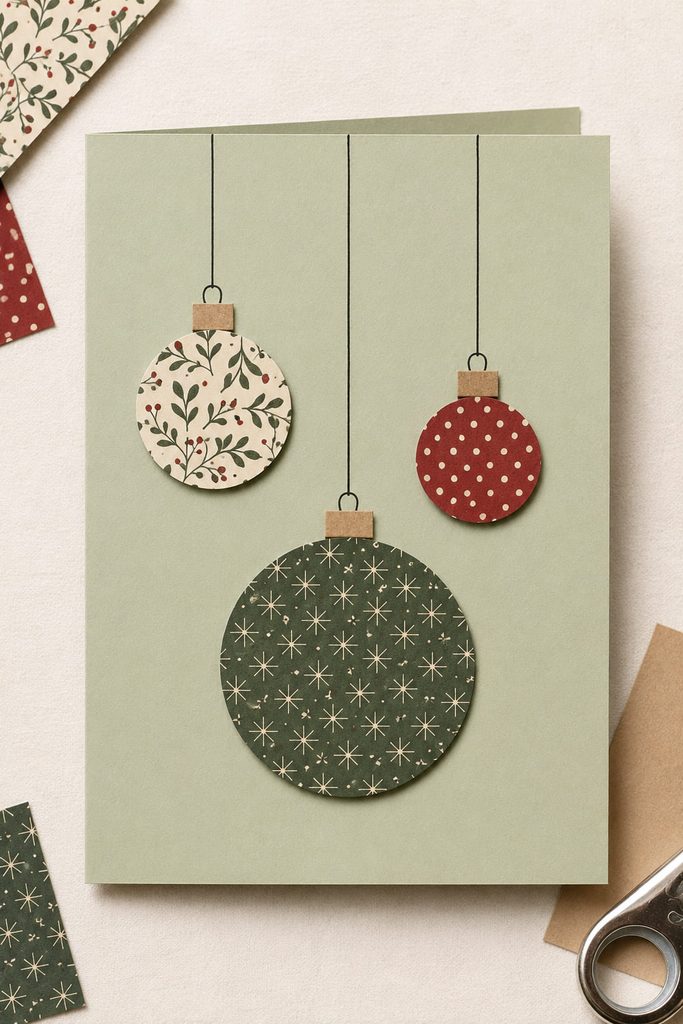
Three paper circles can turn tiny leftover scraps into a balanced ornament card. Cut or punch one large circle and two smaller ones from different papers, arrange them at staggered heights, and draw thin hanging lines from the top edge of the card to each ornament. Small paper rectangles at the top of the circles can suggest metal caps if you want one extra detail.
Useful supplies are intentionally limited:
- three coordinated paper scraps;
- a circle punch or scissors and a round object to trace;
- a fine marker or pen;
- glue;
- folded cardstock.
Keep the hanging lines thin and the ornament shapes bolder. That contrast separates the “string” from the decoration without needing actual thread.
13. Twine Garland Christmas Card
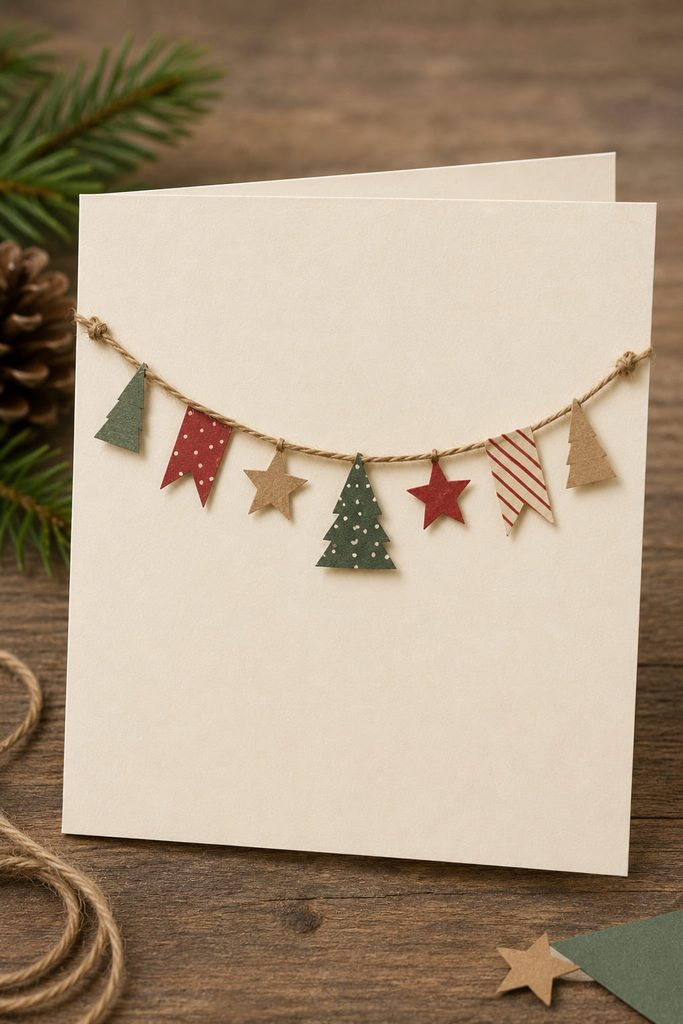
Real twine gives a garland card tactile detail, but the line should stay relaxed. Cut it only a little longer than the card width, attach the ends near the side edges, and glue small paper flags, stars, or tree triangles along it. Let some pieces rest partly on the cardstock so the string remains decorative rather than load-bearing.
Use the tension as your diagnostic:
- If the garland sags deeply: shorten the drop so pieces do not bunch when the card closes.
- If the twine pulls straight: add a little slack so it does not tug at the glued ends.
- If the front feels bulky: switch to thinner twine and flatter paper pieces before making the rest of the batch.
14. Accordion-Fold Christmas Tree Card
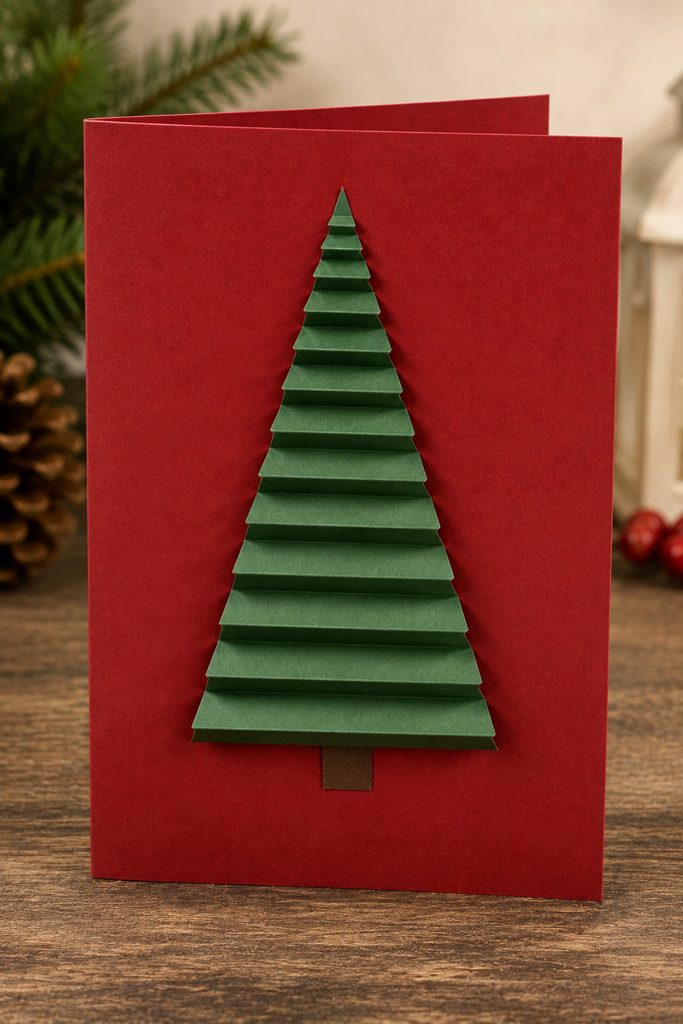
Accordion folds supply the depth, but the easiest way to keep the tree shape is to cut the triangle first. Use a tall green paper triangle, then fold it from the wide base toward the tip in even back-and-forth bands. Because the paper narrows as it rises, each visible pleat naturally becomes shorter. Mount the folded triangle on the card with small glue points under the valleys so the ridges can keep their shallow dimension.
The order matters: cutting the triangle before folding avoids having to trim through a thick stack of pleats. Press the mounted tree gently flat, close the card, and reopen it. The ridges should return without any side edge crossing the card boundary.
If The Tree Leans: Unfold the paper and check whether each crease stays roughly perpendicular to the center line of the triangle. Re-crease the drifting band before adding more glue. The result has more texture than a flat collage, but it still relies on ordinary accordion folds rather than a pop-up mechanism.
15. Photo-Corner Christmas Keepsake Card
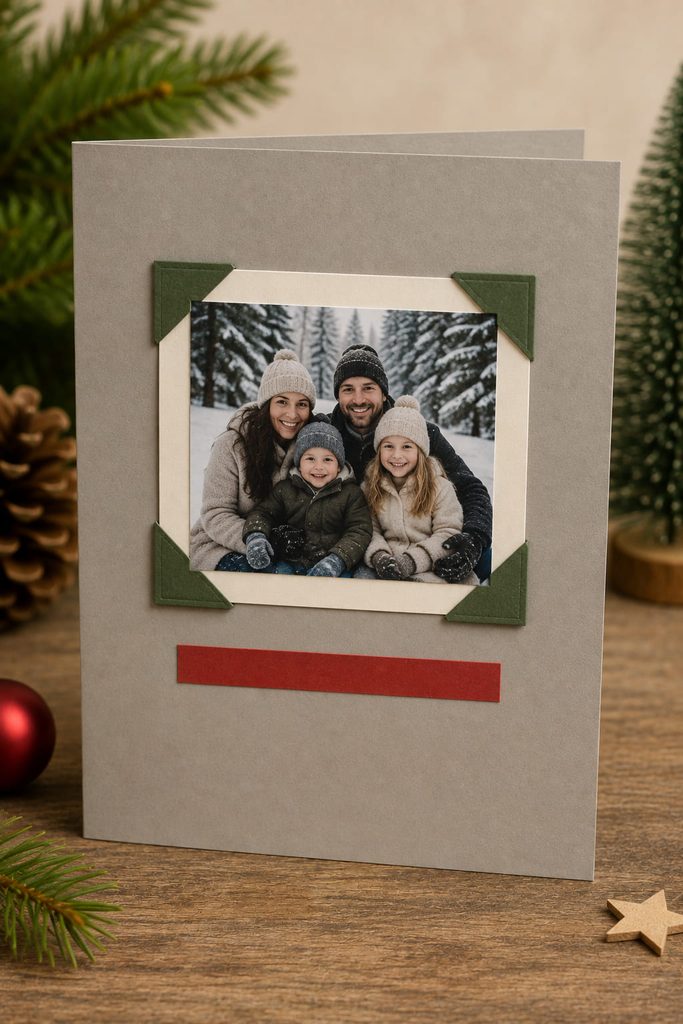
For a keepsake card, let a small printed photo become the focal point instead of covering it in embellishments. Mount the photo on a slightly larger piece of cardstock, then hold it with four simple folded paper corners or ready-made photo corners instead of gluing across the back. Add one narrow paper strip or handwritten greeting below the image so the card still feels finished when it is opened or displayed.
The removable-corner approach is useful if the recipient may want to keep the photo separately. Make sure each corner overlaps enough of the print to hold it, but not so far that it covers faces or important details. A plain card base also keeps the photograph from competing with busy Christmas patterns.
How To Keep Handmade Christmas Cards Simple
A simple card usually looks more finished when one decision is allowed to dominate. That might be the torn edge of a paper tree, the translucent haze of vellum, the shine of one star, or the repeated circles of a wreath. Add detail only when it helps the main shape read more clearly.
For a batch, separate the work by operation: prepare all folded bases, cut or punch repeated pieces, dry-layout one sample, then glue. Designs that rely on stamping, washi tape, rectangles, circles, or one focal cut are easier to repeat than cards that need precise alignment of many tiny parts. If you plan to mail the cards, press each finished front closed before making the whole batch so you can catch bulky folds, loose twine, or thick stacked layers early.
Pick The Card That Matches Your Christmas List
Start with the easiest construction that suits the way the card will be used. Torn paper, washi tape, stamped wreaths, and simple star cards are good choices for a larger list; the gift card pocket, accordion tree, and photo keepsake make more sense when you want the card itself to do something extra.
For more seasonal paper-project directions beyond cards, browse Christmas Paper Crafts, Ideas & SVG Projects.








