
This post contains affiliate links. As an Amazon Associate I earn from qualifying purchases, at no extra cost to you. Thank you for supporting Diynify!
Tissue paper texture art works especially well for modern wall decor because the material can stay nearly flat, build into soft relief, or become surprisingly structural depending on how it is folded, layered, gathered, or compressed. The most effective pieces use that behavior deliberately: translucent overlaps create color depth, raised folds catch side light, and torn edges keep large compositions from feeling mechanically perfect.
Most of these projects start with tissue paper, a rigid panel or framed backing, scissors, and matte decoupage or acrylic medium; PVA is useful for some paper-to-paper joins. A few need clear acetate, frame spacers, batting, thread, a needle or sewing machine, a stable sewing carrier, optional gesso or paint, or additional tissue for paper pulp. For the easiest entry point, start with a torn-edge color field. If you want stronger shadows and a more sculptural result, try pleated ridges, honeycomb modules, or a spaced shadow frame.

1. Folded Tissue Ridge Panel With Directional Shadows
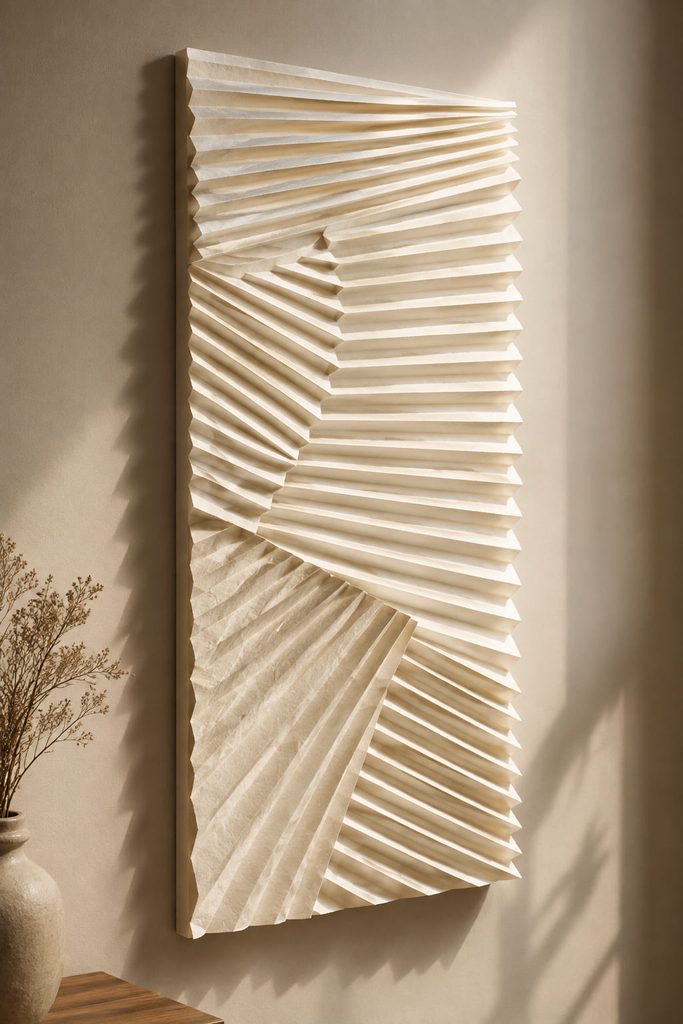
Let side light do part of the design work. Fold long tissue strips in one color family into broad accordion pleats, then mount only the valleys to a rigid panel so the peaks remain lifted. Wider folds make calmer, architectural shadows; tighter folds create a busier surface that reads almost like fabric from across the room.
- Fold two or more tissue layers together so each ridge has a little more body.
- Arrange the pleated strips dry first, changing their direction where you want the light pattern to shift.
- Adhere the valley lines to the panel without brushing medium over the raised peaks.
- Stand the panel upright and view it from the side before adding more strips; the relief should still show clear high and low points.
Shadow Direction Check: Rotate the dry composition near a window or lamp before final mounting. If every ridge catches light the same way, turning one section ninety degrees can create a stronger focal break without adding another color.
2. Torn-Edge Tissue Color Field
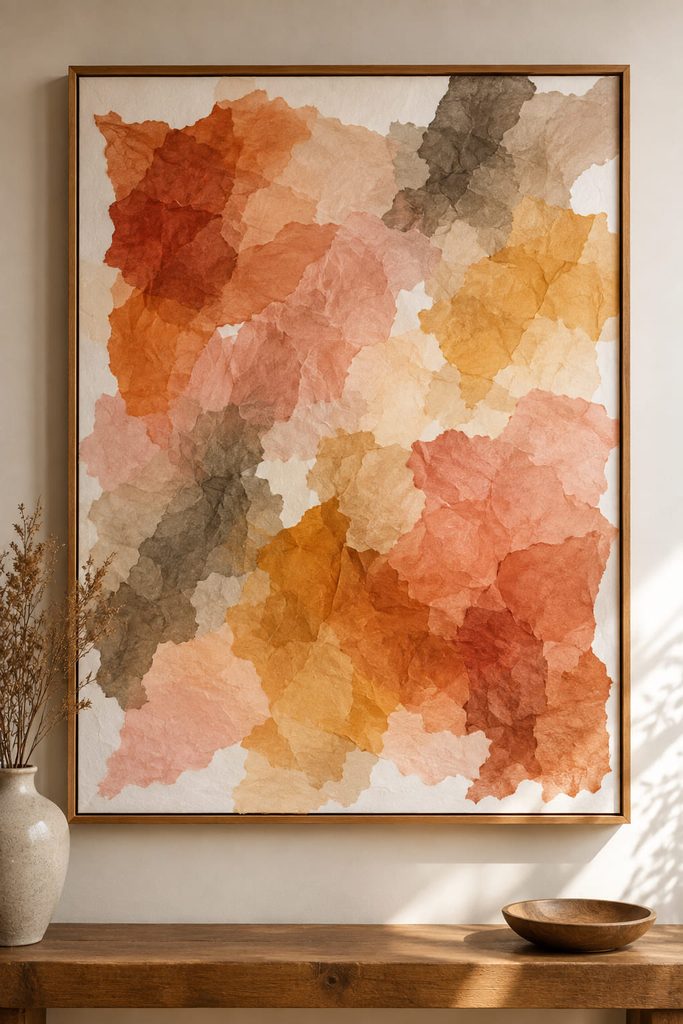
If you want a large piece that stays visually quiet, build color through overlap instead of raised volume. Tear irregular tissue fragments and place them on a sealed or primed rigid backing with matte medium, letting some pieces overlap and others stop short so the base remains visible. The torn fibers soften boundaries, while two or three translucent layers create new intermediate colors without requiring a painted gradient.
Work from the largest shapes to the smallest corrections. Brush medium onto the backing first, lay the tissue into it, and use a soft brush only as much as needed to settle air pockets; saturated tissue tears easily when repeatedly worked. A narrow band of concentrated overlap can act as the focal area, while more open edges keep the panel from becoming a uniform patchwork.
3. Crumpled Tissue Paper Texture Art in Plaster White
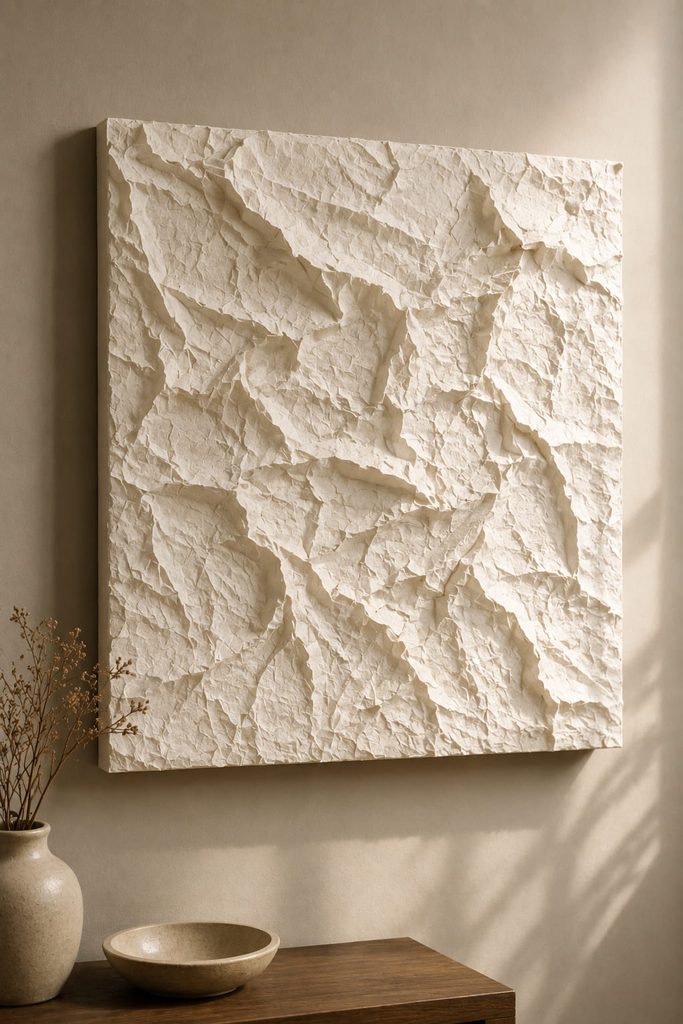
What looks like an accidental wrinkle on a flat collage can become the entire surface when tissue is crumpled, reopened, and adhered without smoothing away its peaks. For a plaster-like look, build the relief with neutral tissue first, let the adhesive dry completely, then add an opaque white or warm off-white finish. The color unifies the paper while side lighting reveals every crease.

If the surface is not behaving as intended, diagnose the construction before adding another coat:
- The wrinkles flatten: too much brushing is pressing the wet tissue into the panel; place new sections with lighter contact.
- High points lift away: the adhesive did not reach enough of the underside; tuck a small amount beneath the loose ridge rather than flooding the top.
- The whole panel bows: the backing is too flexible for the amount of wet medium; switch to a more rigid board for the next layer.
This technique benefits from restraint. Leave several broad ridges intact instead of crushing the entire sheet into tiny wrinkles, or the texture can lose the calm, mineral quality that makes it suitable for a modern interior.
4. Geometric Tissue Window Collage in a Float Frame
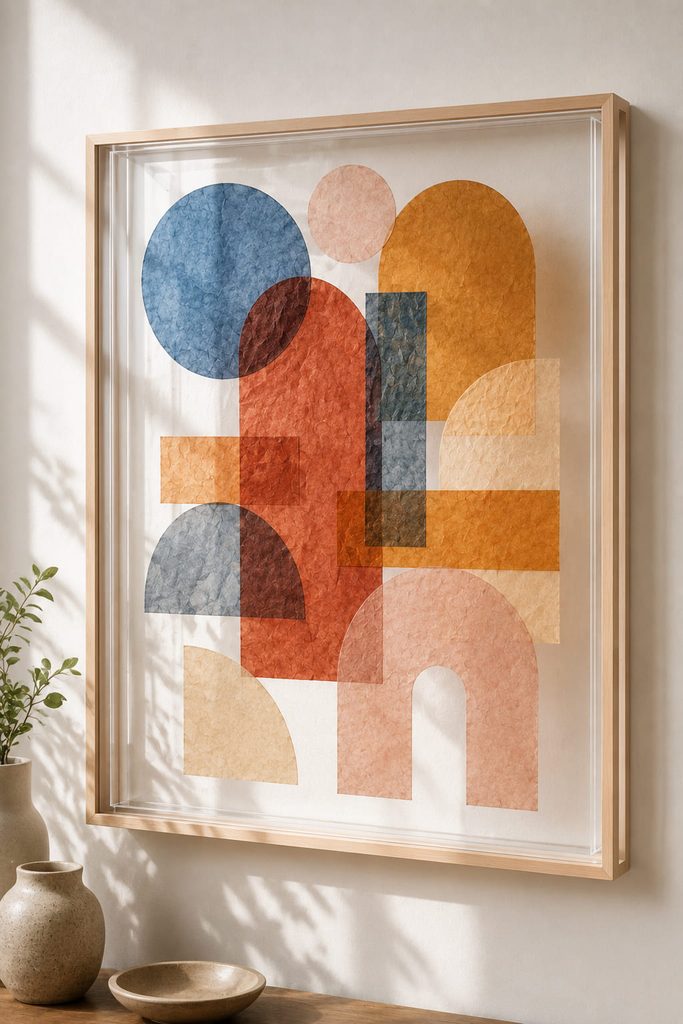
For a cleaner graphic direction, place translucent tissue shapes on clear acetate or another transparent sheet and display the composition in a float frame. Circles, offset arches, narrow bars, and cropped rectangles can overlap to create darker intersections while the clear margin around them becomes part of the design. Keep the adhesive layer thin and confined behind the tissue so glossy smears do not become the dominant texture; a generous transparent border makes the art look intentionally suspended rather than simply unfinished and separates this approach from a conventional decoupage panel.
5. Molded Tissue Pulp Pebble Relief
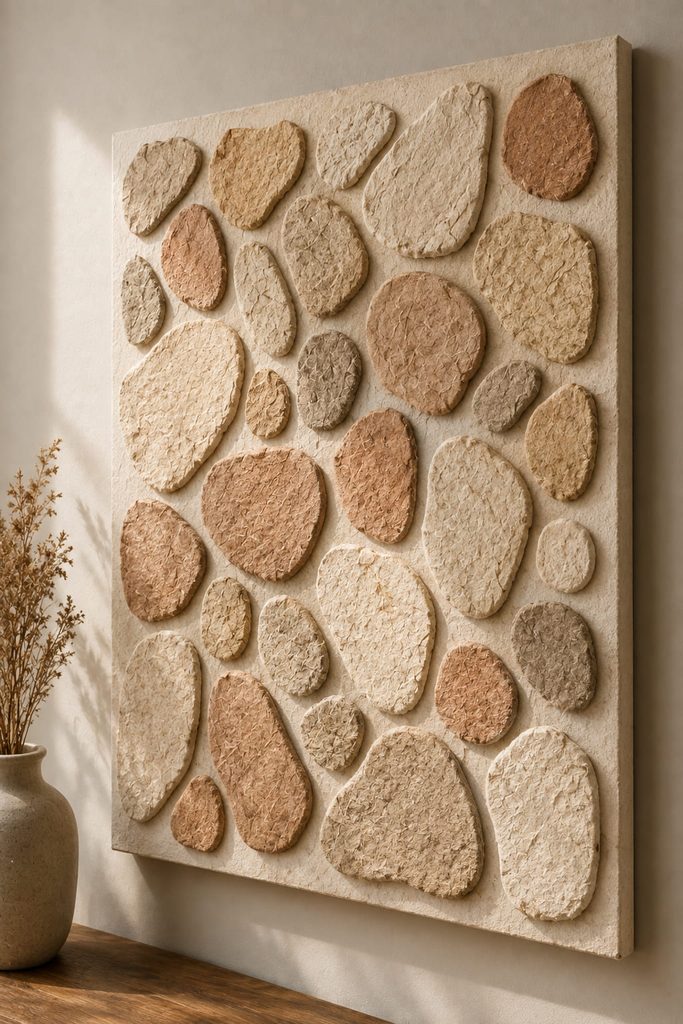
Pulping tissue paper changes the material from a sheet into a moldable mass, which opens up a completely different kind of wall texture. Tear plain tissue into small pieces, soften it in water, break it down, remove excess water, and bind the fibers with enough PVA or matte medium to hold a shape. Form flattened pebbles, arcs, or low organic lumps on a nonstick surface rather than building thick masses directly on the wall panel.
The important decision is depth. Thin, wide forms dry more evenly and keep the finished art lighter; thick pieces create stronger relief but need more drying time and can shrink or distort as moisture leaves. Once the pieces are thoroughly dry, arrange them on a rigid wood or canvas board and secure each one across a broad contact area.
Before mounting, check that:
- each form feels dry through the center, not just on the surface;
- the back sits flat enough to make reliable contact with the panel;
- no piece crumbles when handled gently;
- the backing is stiff enough to carry the combined relief without flexing.
A monochrome finish emphasizes shape, while leaving small differences in tissue color makes the fiber texture more obvious at close range.
6. Ruched Tissue Wave Bands
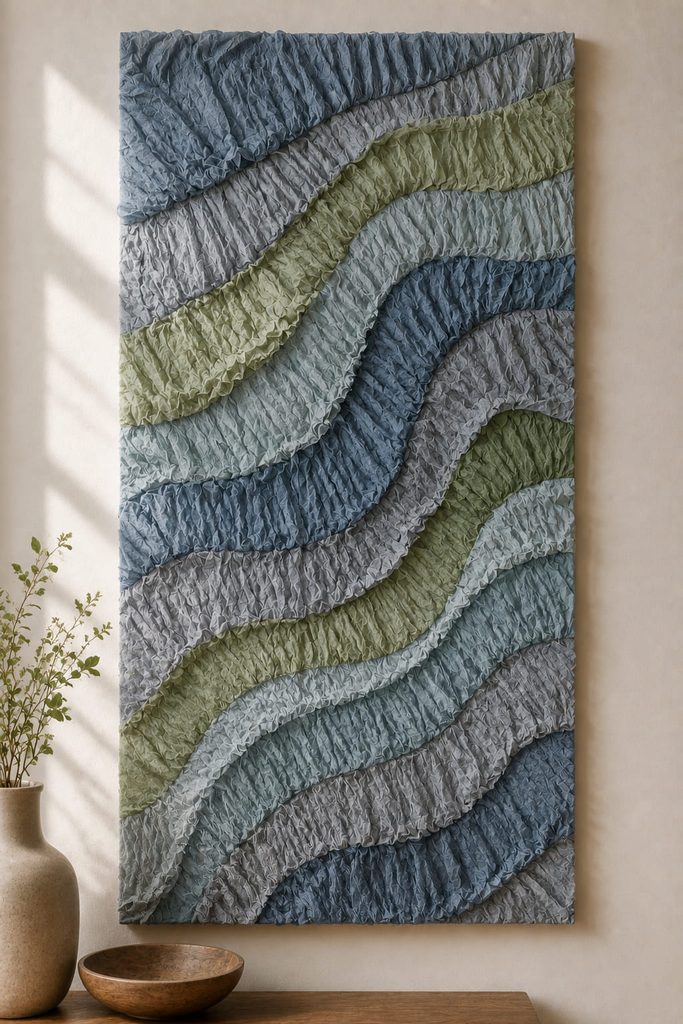
Instead of flattening the paper into a collage, gather narrow tissue strips along curved adhesive paths so they bunch into soft, irregular waves. The ruching produces a textile-like surface without requiring sewing, and the curves can travel diagonally across a panel to make a long vertical piece feel more fluid.
Apply medium only along one short section of the path at a time, then push the tissue gently toward the previous fold with a rounded tool or dry brush handle. Let some bands stay shallow and others rise higher; equal gathers from edge to edge can make the surface look manufactured rather than handmade. This method works particularly well in a limited palette because the shadows supply most of the visual variation.
7. Negative-Space Tissue Botanical Panel
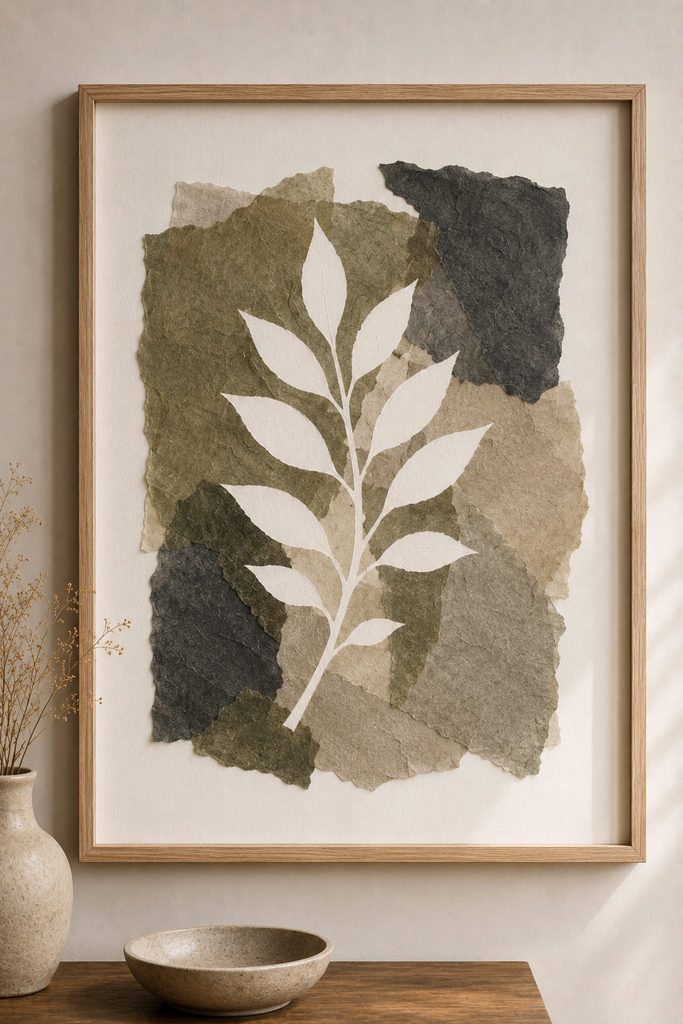
Leave part of the panel untouched and make the empty shape do the drawing. Place a simple leaf or branch stencil on the backing, apply matte medium outside the stencil, and press torn tissue fragments up to its edge. Lift the stencil before it becomes bonded by stray adhesive, then repeat with a second silhouette only if the composition still has enough breathing room.
- Choose a silhouette with broad stems and leaves rather than hairline details.
- Build tissue color outward from the stencil edge, keeping the center of the masked shape clean.
- Remove the stencil while the surrounding layer is still manageable.
- After drying, patch fuzzy boundary areas with tiny tissue pieces instead of outlining the silhouette with paint.
The result reads as modern wall art because the botanical subject is carried by negative space rather than by a detailed illustration.
8. True Woven Tissue Lattice Wall Art
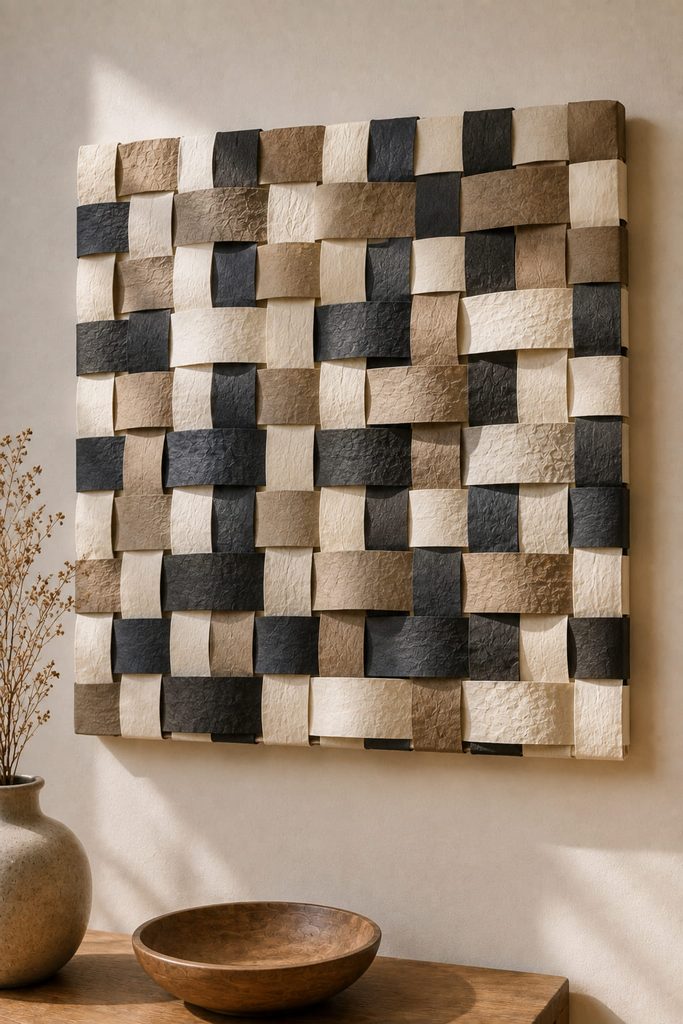
Before trying an over-under pattern, reinforce the tissue because a single wet strip tears too easily under tension. Fold each long strip lengthwise into a narrow ribbon, then anchor a set of vertical warp strips to a backing only at the top edge. Weave horizontal ribbons over and under them, alternating the path on every new row so the lattice actually interlocks.

Keep the weave relaxed rather than pulling it taut. Tissue gains visual depth from slight bows and uneven crossings, and that looseness also reduces stress at the edges. Once the over-under pattern is complete, square the lattice gently, secure all four edges to the backing, and add tiny spots of medium at selected crossings only if they need help staying in place.
Keep The Weave From Tearing: Do the weaving dry. Adding wet medium before the over-under path is finished weakens the ribbons and makes corrections much harder.
A good final test is simple: lift the panel upright before framing. The rows should remain interlaced without sagging into one pile at the bottom, and the open spaces should still read as deliberate negative space.
9. Layered Tissue Fringe Gradient Panel
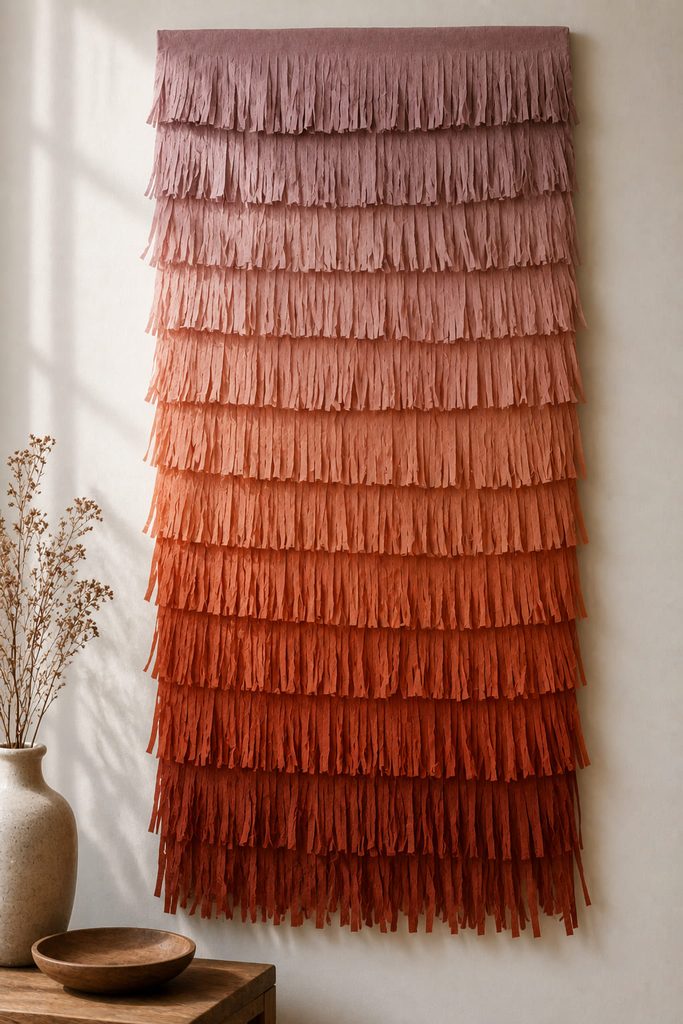
Fringe earns its place in modern wall decor when it is treated as a controlled surface rather than party decoration. Cut long tissue bands with an uncut strip along the top, then attach the bands to a rigid backing from the bottom upward so each new row hides the attachment line beneath it. Vary the fringe length gradually as the color shifts, but keep the top edges level enough that the overall silhouette stays clean. Because the lower ends remain free, the panel changes subtly with air movement and side light, giving it a softer presence than glued relief.
10. Half-Honeycomb Tissue Relief Modules
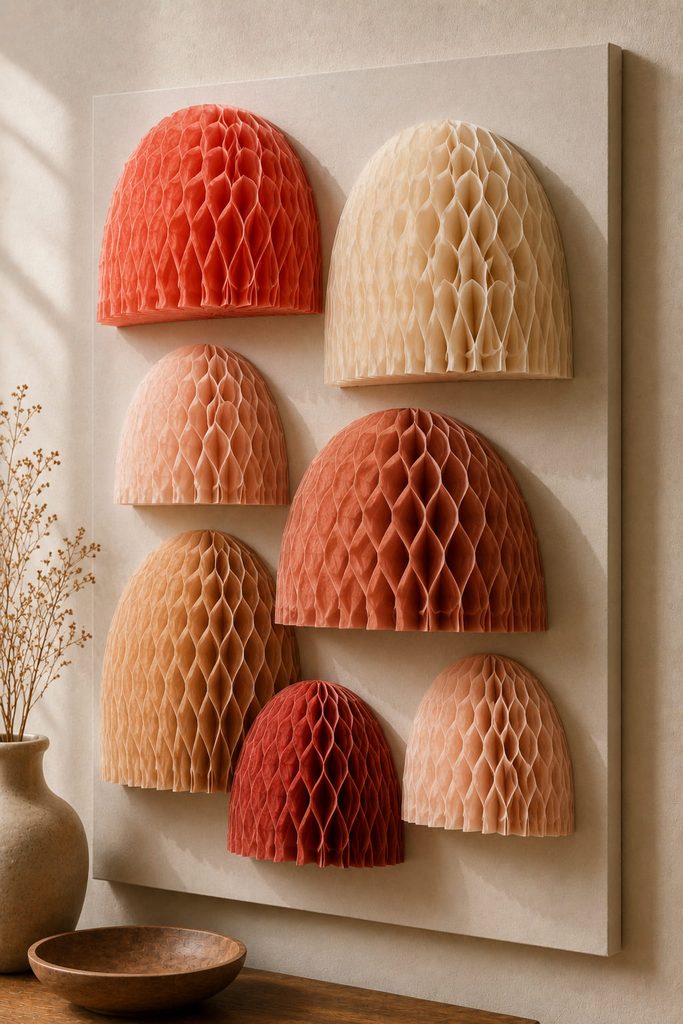
Alternating glue positions create the cellular structure in a stack of tissue sheets. Mark two repeating sets of glue lines, apply the first pattern to one layer and the second pattern to the next, and continue alternating as the stack grows. After the adhesive is dry, cut the stacked tissue into a half-oval or arch and open it like a fan; the alternating bonds force the sheets into connected cells.
For a denser, more graphic module, keep the glue lines closer together. For larger, airier cells, increase the spacing and use a simpler outer shape so the expanded paper does not look fussy. Either route works best as a group of a few modules rather than a wall covered edge to edge.
Mount the flat edge or back half of each expanded module to a rigid panel and leave enough clearance between neighboring forms for the cells to open fully. If a module collapses when the panel is vertical, the expansion is too loose or the mounting area is too small; reduce the opening slightly or give the back a broader support point.
11. Topographic Torn-Tissue Contour Stack
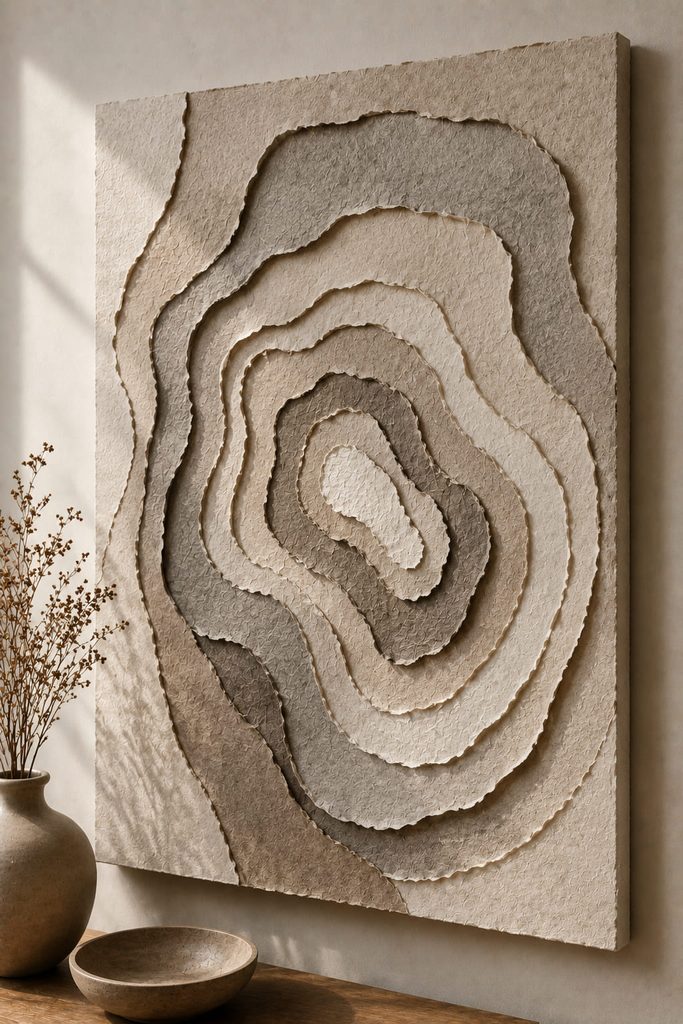
Think of a contour map built from edges rather than printed lines. Tear a large organic shape, then make progressively smaller versions and stack them toward one side of the panel. Instead of using a single tissue sheet per contour, group several sheets of the same size so each level has enough thickness to cast a small shadow.
The layer order matters. Fix the broadest bundle first, align the next contour while the previous edge is still visible, and continue inward without sealing every torn fiber flat. Slightly offsetting the bundles keeps the deckled boundaries readable and prevents the center from becoming a featureless mound.
Depth should increase where the composition needs emphasis, not automatically at every level. If the outer contours disappear from normal viewing distance, add thickness only to selected bands or increase the offset between them. If the center becomes too bulky, remove a bundle rather than compressing the whole stack.
Distance Test: Set the panel where it will actually hang and step across the room. You should still see a hierarchy of contour edges; if the effect exists only from a few inches away, the relief needs stronger spacing or a simpler outline.
12. Spaced Tissue Shadow Frame
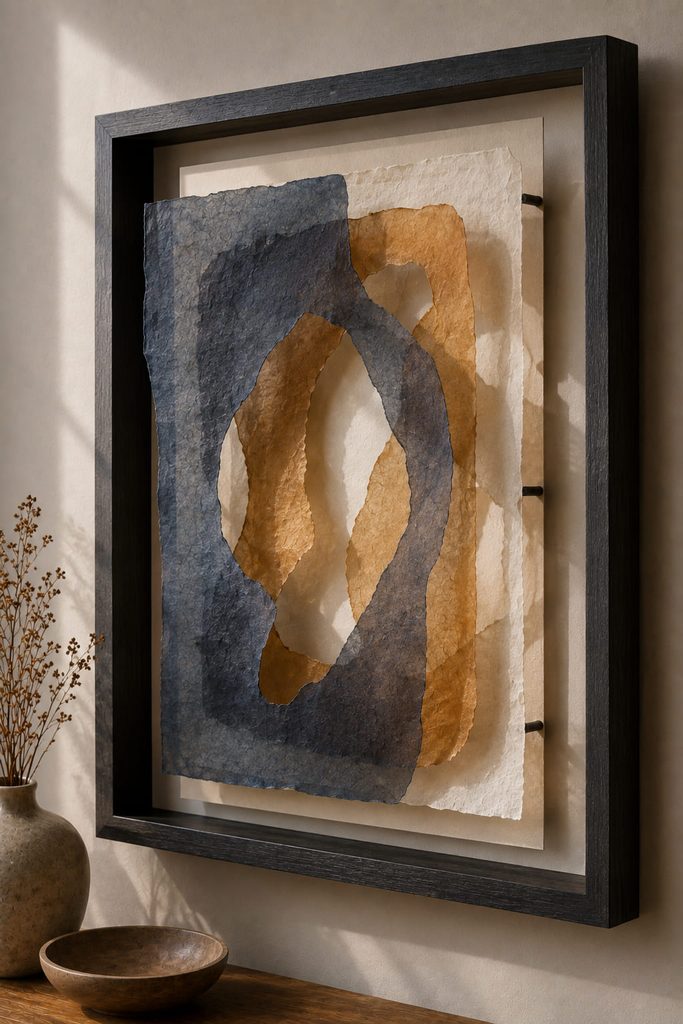
A deep frame gives translucent tissue a second surface to work with: the wall of air between layers. Mount separate tissue compositions on thin cardstock mats, then stack those mats inside a shadow-box-style frame with narrow spacers between them. Open areas in one layer reveal tissue on the layer behind, while ordinary room light creates soft shadows on the deeper sheets.
Plan the stack from back to front. Put the broadest, quietest tissue shapes at the rear, reserve the middle for overlap, and keep the front layer more open so it does not block everything behind it. The spacers must support the mats around their perimeter without touching the central tissue, and the finished stack needs enough frame depth that none of the layers bow into each other.
Before sealing the frame, hold it upright and inspect three things: whether the openings still expose the intended layers, whether any mat edge has slipped into view, and whether the shadows are visible under the room lighting where the piece will hang. If the layers merge into one dark mass, remove a front shape or increase separation rather than simply adding a lighter color.
Where The Shadow Comes From: This piece does not need an internal lamp. The depth is created by physical spacing between translucent layers, so it can respond to changing daylight and room light without becoming a luminary project.
13. Rolled Tissue Coil Relief
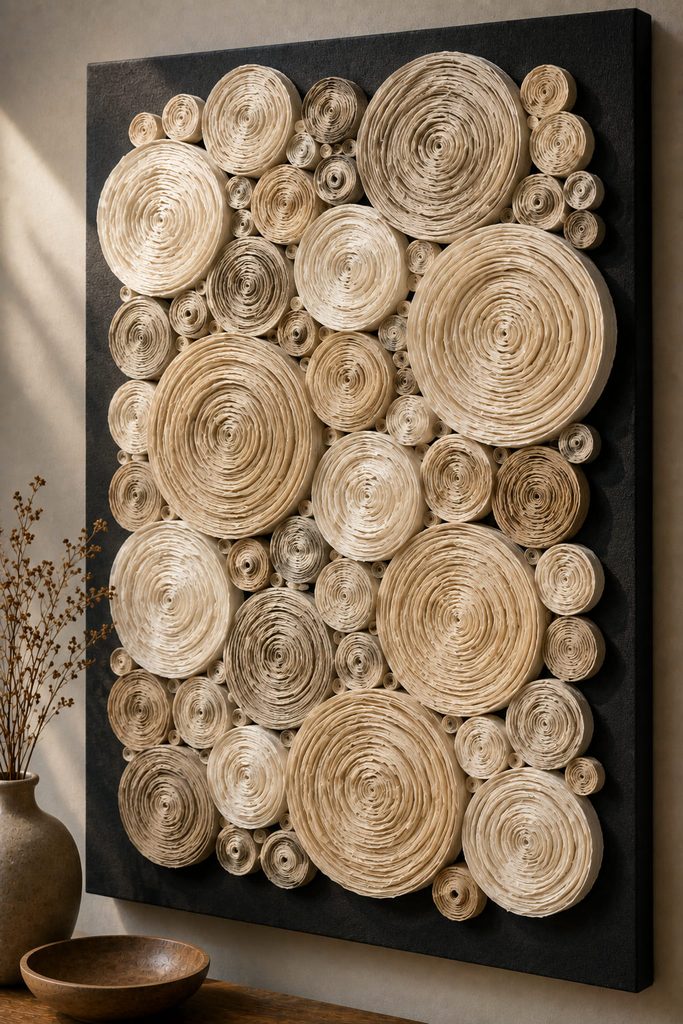
Here, compression matters more than pleating. Roll long tissue strips into slim paper cords, then spiral those cords into flat coils and secure the outer ends so they do not unwind. Small coils can cluster tightly like pebbles, while a few oversized spirals create larger pauses in the composition.
Mount the finished coils flat against the backing, overlapping only a few selected spirals when you want extra depth. Keeping one dominant coil size or orientation prevents the panel from becoming visually noisy. A shallow monochrome cluster is especially effective when the rolled edges, rather than color changes, are the main source of texture.
14. Padded Tissue Tile Wall Panel
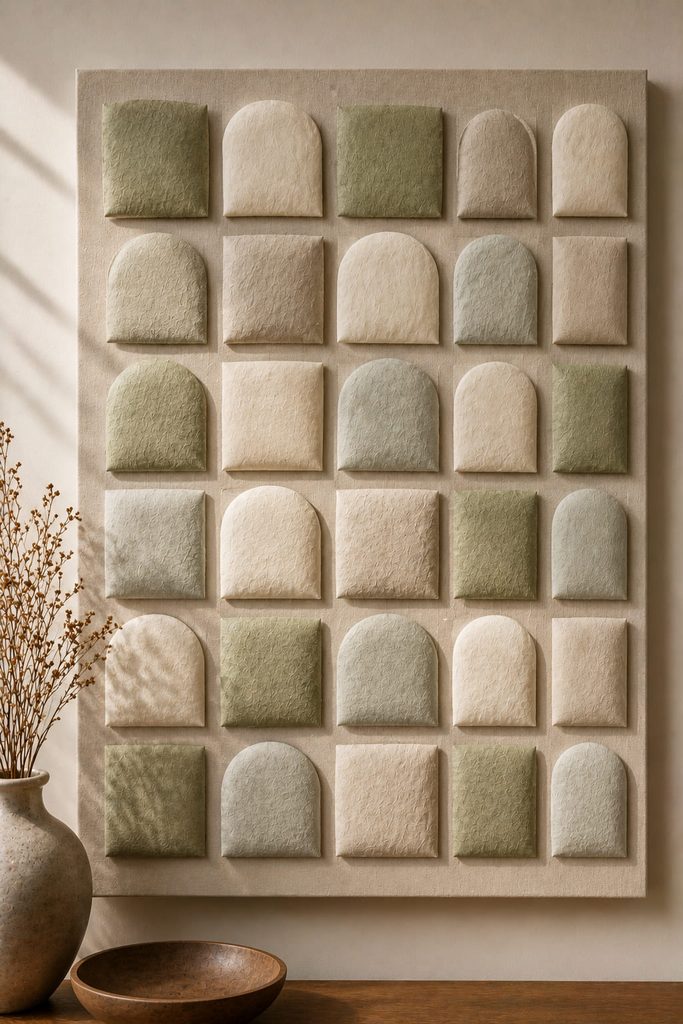
To build soft volume without heavy paper forms, cut small geometric pads from thin batting, attach them to individual card tiles, and drape tissue paper over each pad so the edges wrap to the back. A light layer of matte medium over the tissue can firm the skin once the shape is established, leaving the center gently domed.
Assemble the finished tiles on a larger backing with consistent gaps between them. The repeated spacing supplies the modern grid, while the padded centers keep the surface from reading as flat color blocks. If crisp corners matter, use simpler square or arch pads; very sharp points are difficult to cover cleanly with delicate tissue without bunching.
15. Stitched Tissue Grid Texture Panel
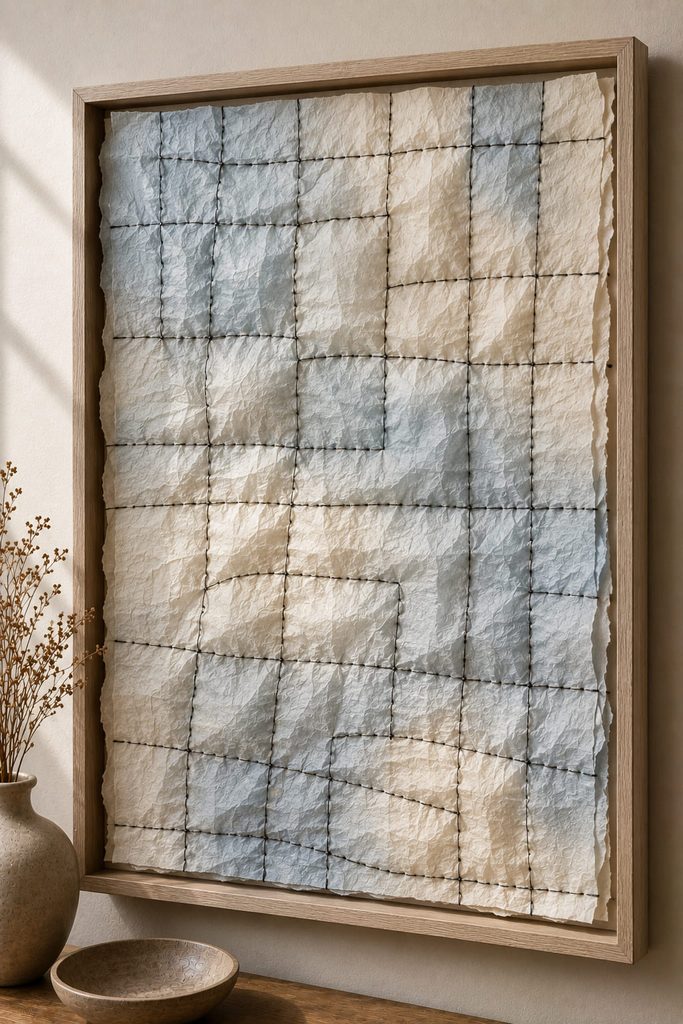
Stitching turns tissue into a compressed surface: thread lines pin the paper down while the areas between them can pucker slightly. Layer several tissue sheets over a stable carrier such as lightweight interfacing or sturdy paper, then sew a loose geometric grid, nested arcs, or long parallel lines through the full stack. The carrier matters because tissue alone is too fragile to support repeated needle holes.
- Build the tissue stack on the carrier before marking any stitch path.
- Use widely spaced lines first; dense perforation can weaken narrow bands of tissue.
- Stitch from the center outward so small puckers can migrate toward the edges instead of being trapped in one spot.
- Mount or frame the supported panel only after the thread tension and edge shape look even.
For hand stitching, pre-pierce the carrier so the needle does not drag the tissue. For machine stitching, test a scrap stack first because stitch length, needle condition, and tissue thickness all affect whether the paper compresses cleanly or perforates into a tear line. The finished piece is especially strong in a restrained palette where thread shadows and puckered planes provide the detail.
Choosing Your First Tissue Paper Texture Art Project
Choose by the kind of surface you want to see from normal room distance. Torn color fields and negative-space panels stay calm and graphic; ridges, ruching, coils, and padded tiles create tactile relief; honeycomb, weaving, pulp, and spaced frames make the construction itself part of the visual statement. If you are new to wet tissue techniques, a flat color field is the most forgiving place to learn how your paper reacts to adhesive before moving into more structural work.
For a next step into larger dimensional wall pieces, see 30 Stunning Giant Paper Flower SVG Designs for Decor.