This post contains affiliate links. As an Amazon Associate I earn from qualifying purchases, at no extra cost to you. Thank you for supporting Diynify!
Paper towel roll art works especially well on a wall because the longer cardboard tube can become a rib, slat, spacer, pocket, light screen, or hanging rod instead of being cut immediately into small rings. That extra length gives these projects a larger scale and a different structure from shorter-roll crafts.
Most ideas below start with clean, completely dry paper towel tubes, a cutting mat, scissors or a craft knife, a ruler, tacky craft glue or PVA, and clips while joints dry. Some projects also need a rigid backing board, dowel or cord, vellum, a cool battery-powered LED, dried stems, or wall-safe hanging hardware. Choose the effect first: open structures emphasize shadows and negative space, folded pieces create sharper facets, and functional pieces need stronger attachment points than purely decorative reliefs.

1. Long-Rib Sunburst Wall Sculpture
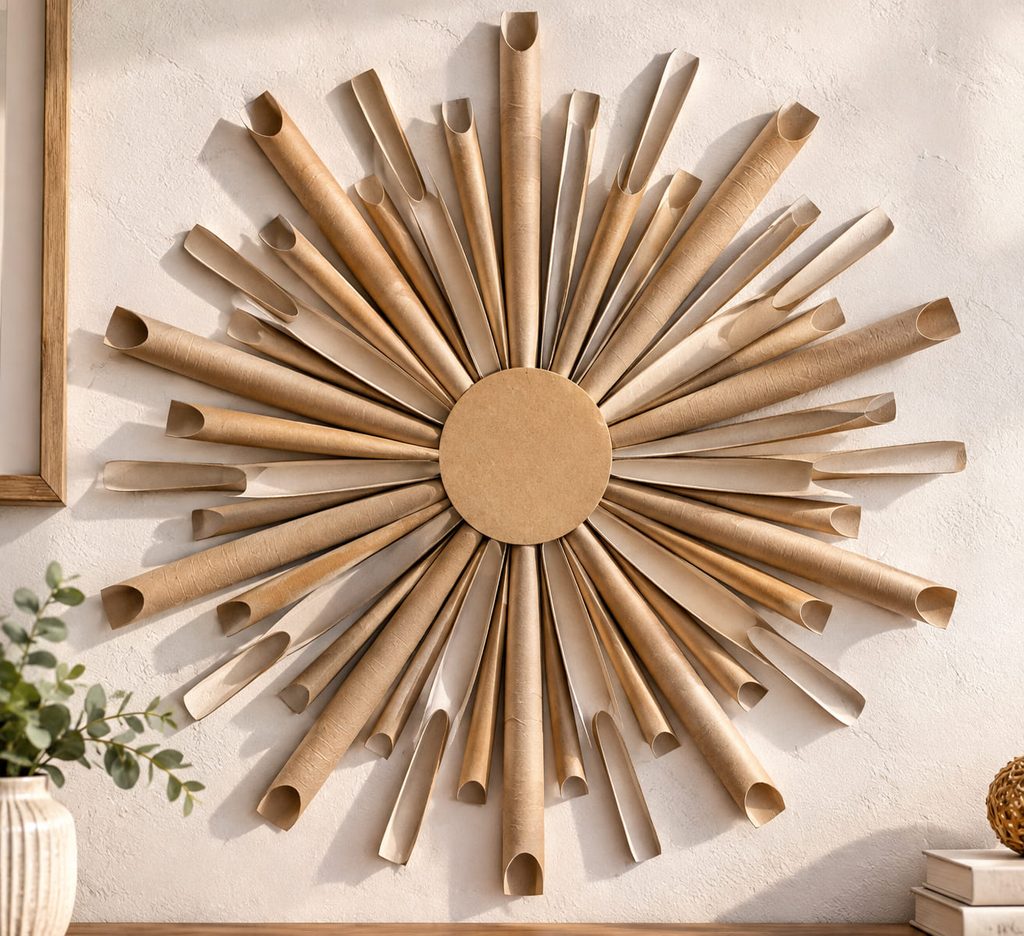
Split clean paper towel tubes lengthwise and the curved walls become ready-made ribs. For a large sunburst, keep those half-cylinders long and aim their narrow ends toward a small central disk on a rigid backing. The rounded faces catch side light while the cut edges draw thin lines between rays, so one material produces both broad highlights and crisp shadows.
Use a few longer rays to establish the main axes, then fill between them with shorter pieces. Dry-fit the circle before gluing so the gaps stay open and the center remains balanced. Mount through the backing board, not through a decorative rib; the backing should carry the wall load.
2. True Over-Under Tube-Strip Weaving
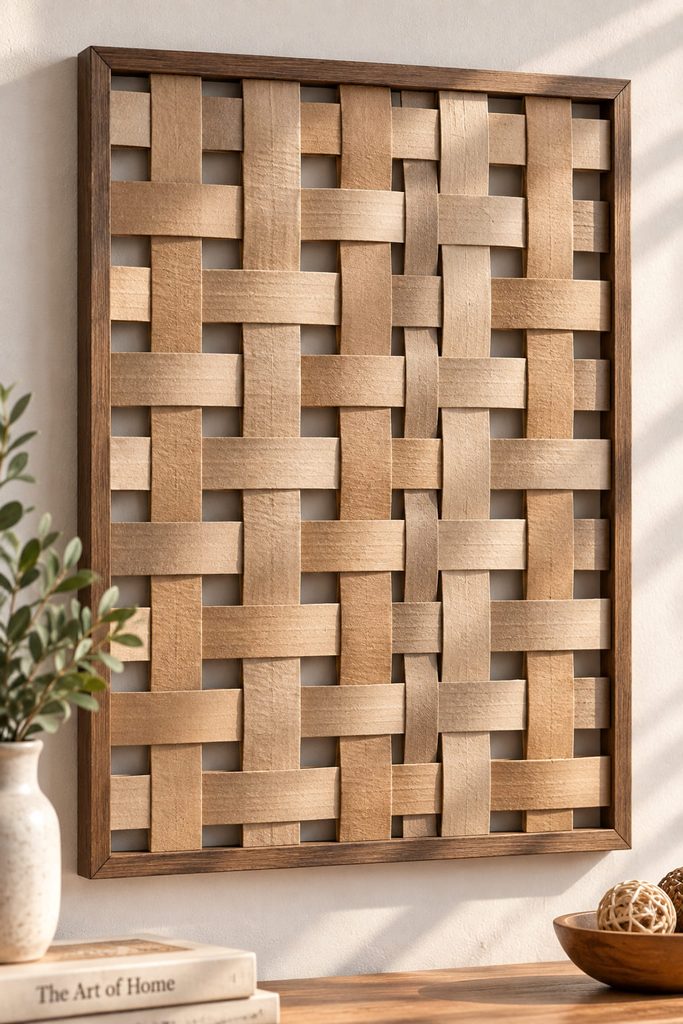
Once a tube is opened flat, its long wall can be cut into flexible strips that are much better suited to weaving than short crosswise slices. Use a shallow rectangular frame or stiff mat-board border as the carrier, then weave the strips in a real over-under path so each new row alternates the previous one. Leaving a few deliberate openings makes the cardboard lattice lighter and lets the wall color become part of the design.
- Cut the opened tubes into strips of consistent width.
- Anchor the vertical strips to the top and bottom of the frame without pulling them drum-tight.
- Weave each horizontal strip over and under, reversing the sequence on the next row.
- Square the intersections before fixing the strip ends to the frame.
- If the center bows forward, reduce tension at the edges rather than adding glue to every crossing.
The frame should carry the hanging points. That keeps the woven field free to flex slightly without asking its outermost strips to support the entire panel.
3. Faceted Prism Relief Panel
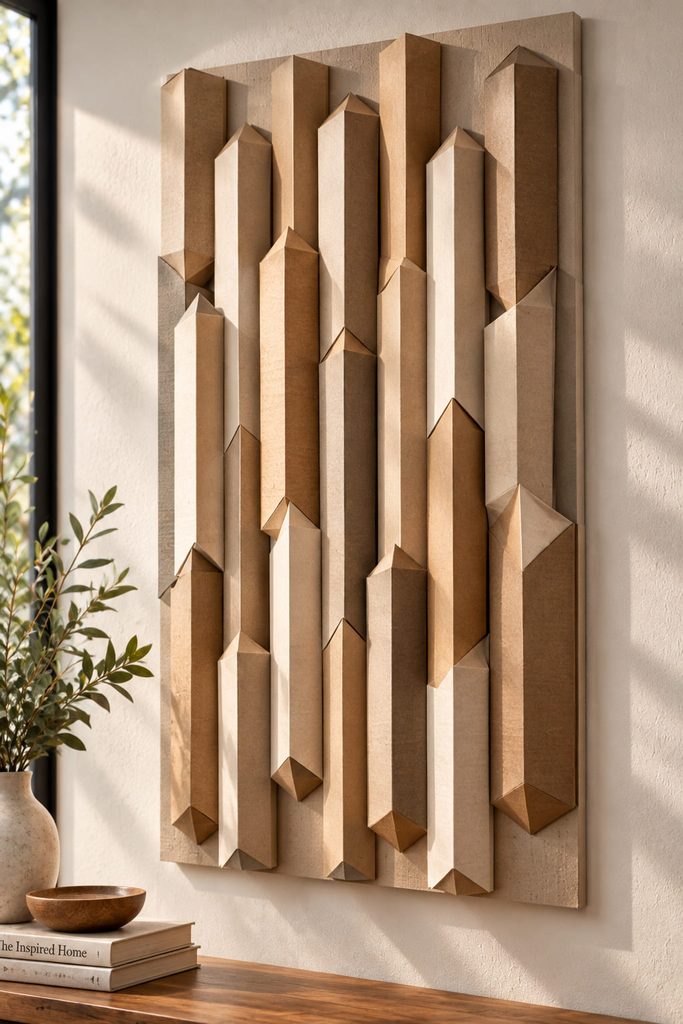
A long cardboard cylinder can become a surprisingly architectural module when you score it from end to end and fold the wall into flat faces. Three evenly spaced fold lines can produce a triangular prism; four can produce a boxier profile. Both routes keep the full tube length visible, but they behave differently on a wall.
| Route | Visual Effect | Best Use |
|---|---|---|
| Triangular prism | sharper light-dark transitions | angular zigzags and radiating layouts |
| Four-sided prism | broader front faces | stepped grids and calm vertical fields |
Score lightly first so the outer paper skin bends without tearing. After folding, glue the long seam and let the prism dry before mounting it. Arrange several prisms with alternating orientations so some faces catch light while others fall into shadow. Because the geometry already creates strong contrast, a single paint color or natural kraft finish can be more effective than a busy multicolor pattern.

4. Dry-Stem Tube Wall Pockets
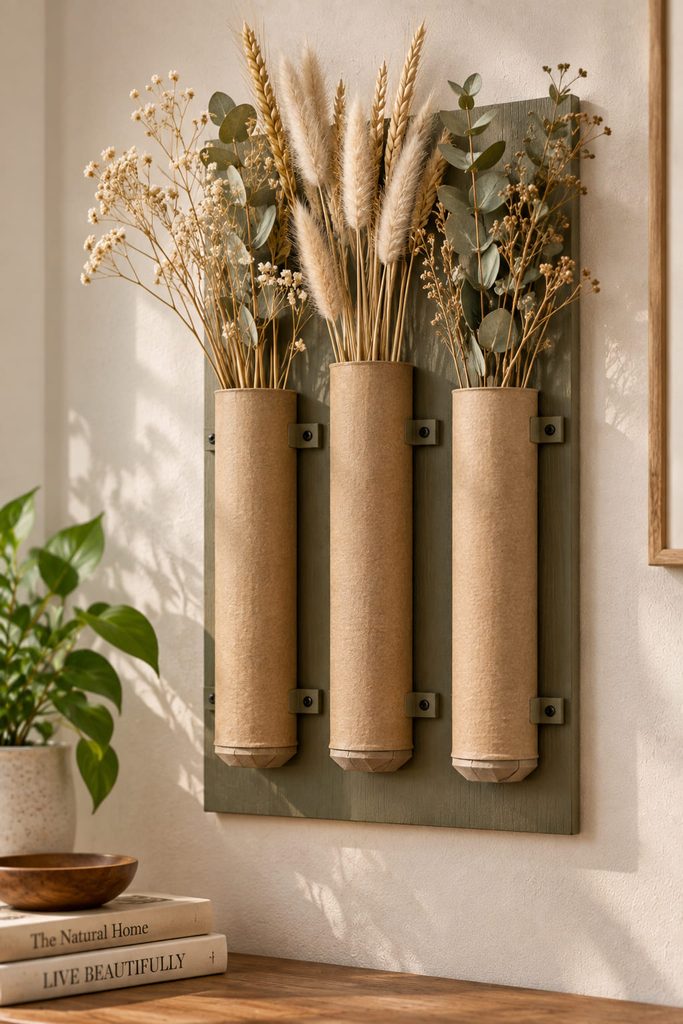
For lightweight dried stems, keep the tubes cylindrical and make the bottom closure do the real work. Cap each tube with a snug cardstock disk or folded end piece, then mount several upright cylinders to a rigid board with enough space above them to insert and remove stems. A narrow front rail can help keep the tubes aligned without covering their rounded shape.
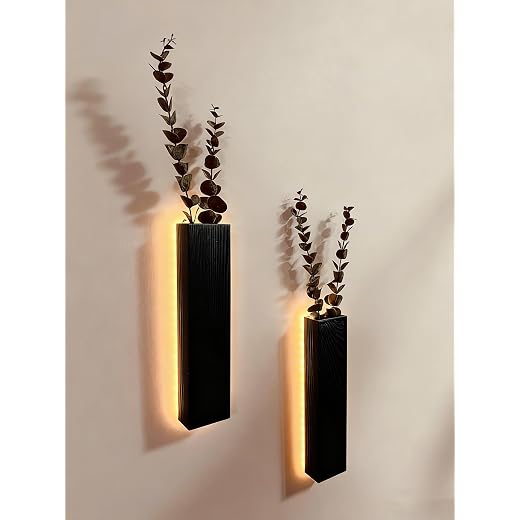
Before hanging, check the functional parts:
- every bottom is fully closed;
- each cylinder has a broad bond to the backing;
- the opening stays clear for loading and removal;
- wall hardware passes through the backing, not a tube rim.
Pocket Load Limit: use only lightweight dried stems. Untreated cardboard should not hold water, so fresh flowers need a separate watertight container.
5. Perforated LED Wall Light Column
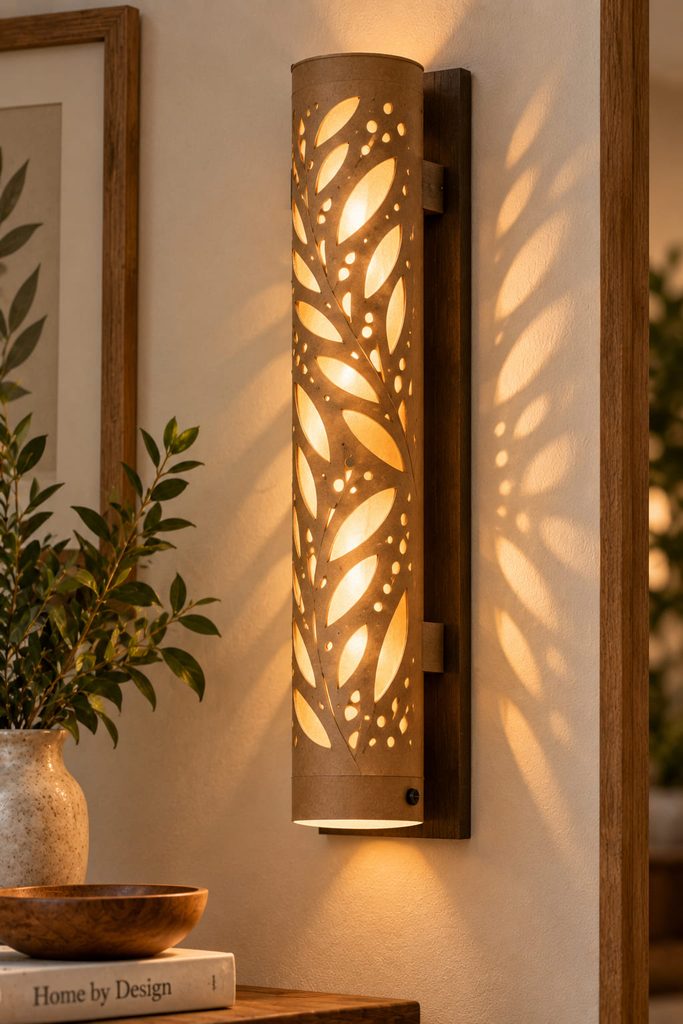
Before any light goes inside the cardboard, prove that the design has a clear light path and safe access. Keep a long tube mostly intact, cut a controlled field of small windows or slots through the front half, and line the inside with vellum so the openings glow instead of revealing a bright point source. Mount the tube on shallow spacers over a rigid vertical backing and use only a cool battery-powered LED source that can be removed without tearing the artwork.
Build the light function before decorating the surface:

- Cut the openings while the tube is empty and supported on a work surface.
- Fit the vellum behind the perforated area without sealing the full tube shut.
- Add a removable lower cap or accessible rear opening for the LED.
- Fix the tube to the backing with the light source clear of the cardboard walls.
- Test the piece upright in a dim room before adding paint or extra trim.
Light Path Check: if one section is bright while another stays muddy, the LED is probably too close to one area or the cut pattern is too dense. Increase the spacing, move the source farther back, or open a few more windows before finishing the piece.
The backing should carry both the spacers and the wall hardware. Never use a flame, candle, or heat-producing bulb inside cardboard decor.
6. Suspended Tube-Rod Mobile
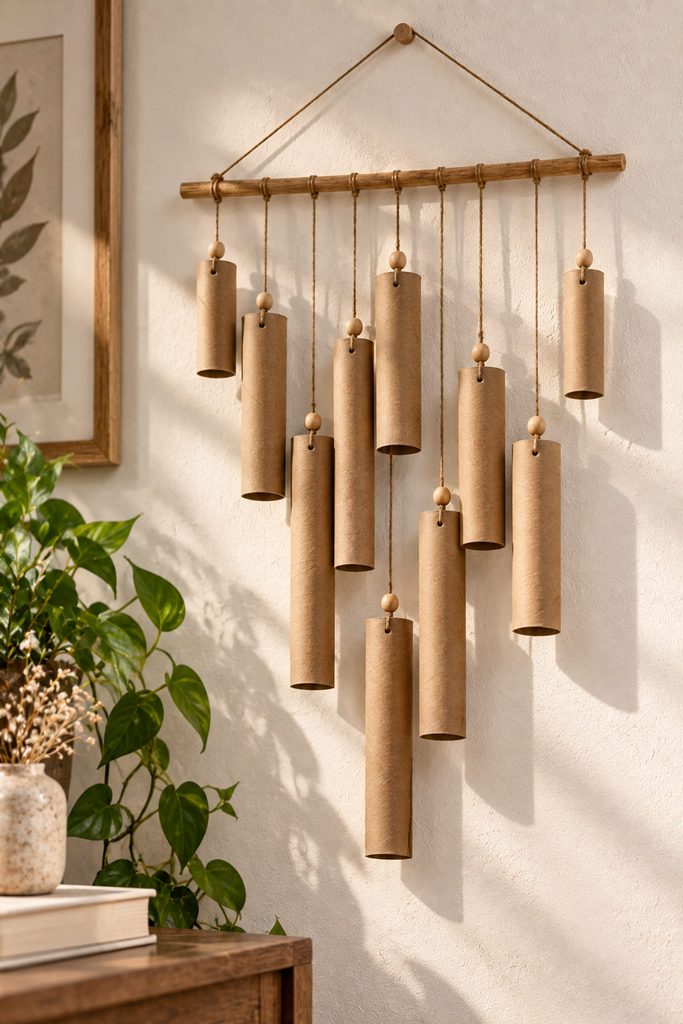
Hung in front of a blank wall, different lengths of paper towel tube can behave like light hollow rods rather than a solid panel. Cut several segments, pierce each one near the top, and suspend them from cord below a slim dowel so the pieces can turn slightly when air moves through the room. The strongest arrangement usually has one clear weight pattern—such as longer rods near the center or a deliberate diagonal—rather than equal lengths scattered at random.
Keep the cords separated enough that neighboring tubes do not collide during normal movement. Two level hanging points on the dowel spread the load better than a single center loop, and a little open wall around the mobile gives its moving shadows room to register.
7. Scored Arch Triptych
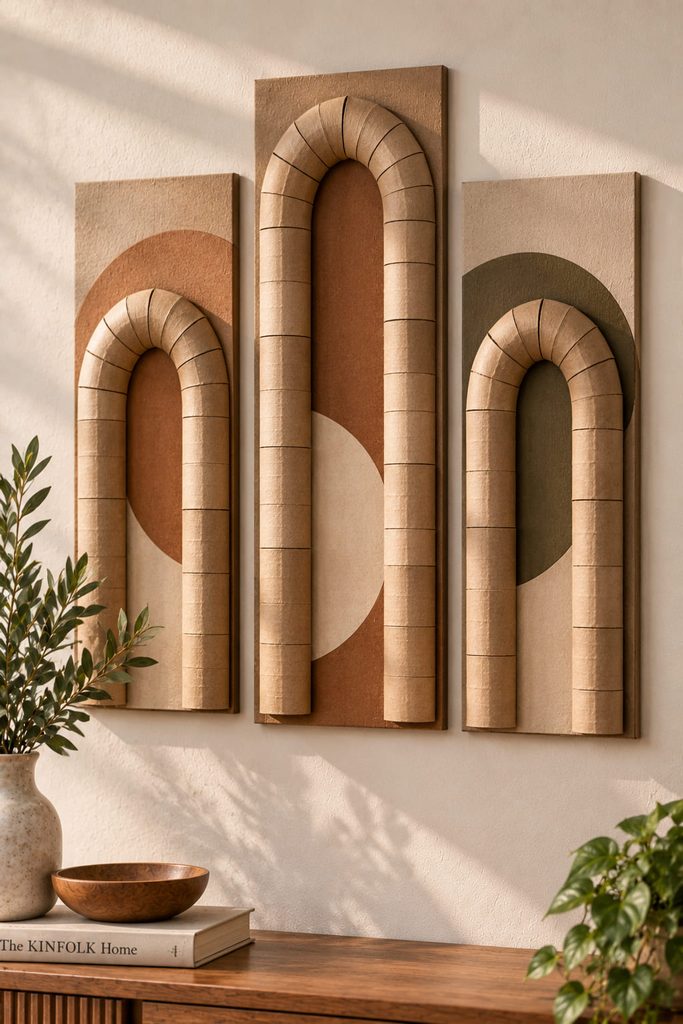
What makes a cardboard arch possible is not force but a sequence of small bends. Split a tube lengthwise, then score the inner face crosswise at regular intervals without cutting through the outer paper layer. Those hinge-like scores let the long half-tube curve into a segmented arch while keeping a continuous front surface.
Build three related arches on separate narrow backing panels rather than trying to make one oversized span. The center panel can carry the tallest arch, with the side panels stepping down or shifting outward. Tape or clip the scored strip temporarily while you judge the curve; if one section kinks sharply, widen the spacing between nearby scores instead of crushing the cardboard flatter.

Align the bottoms of all three panels before mounting them on the wall. The triptych reads as one architectural composition only when the arches share a baseline, even if their heights and openings differ.
8. Cutaway Shadow-Window Columns

Cutting openings instead of adding layers lets the tube itself become a shadow screen. Keep the cylinder intact and remove a repeating series of windows from the front and side faces—tall slots, offset rectangles, or alternating curved cutouts all work as long as enough cardboard remains between them to preserve a continuous spine.
If the result looks weak, diagnose the structure before adding more detail:

- Tube twists: too much material was removed from one side; leave wider bridges on the next column.
- Windows disappear on the wall: mount the tube on spacers so light can pass behind the cutouts.
- Pattern looks flat: rotate the tube slightly so some openings face the light and others turn away.
- Edges buckle: cut fewer, larger windows instead of many narrow openings.
Shadow Test: hold the finished column a short distance from the wall under side light. The openings should produce readable bands of light and shadow without the tube collapsing out of round.
9. Layered Horizon Half-Tube Relief
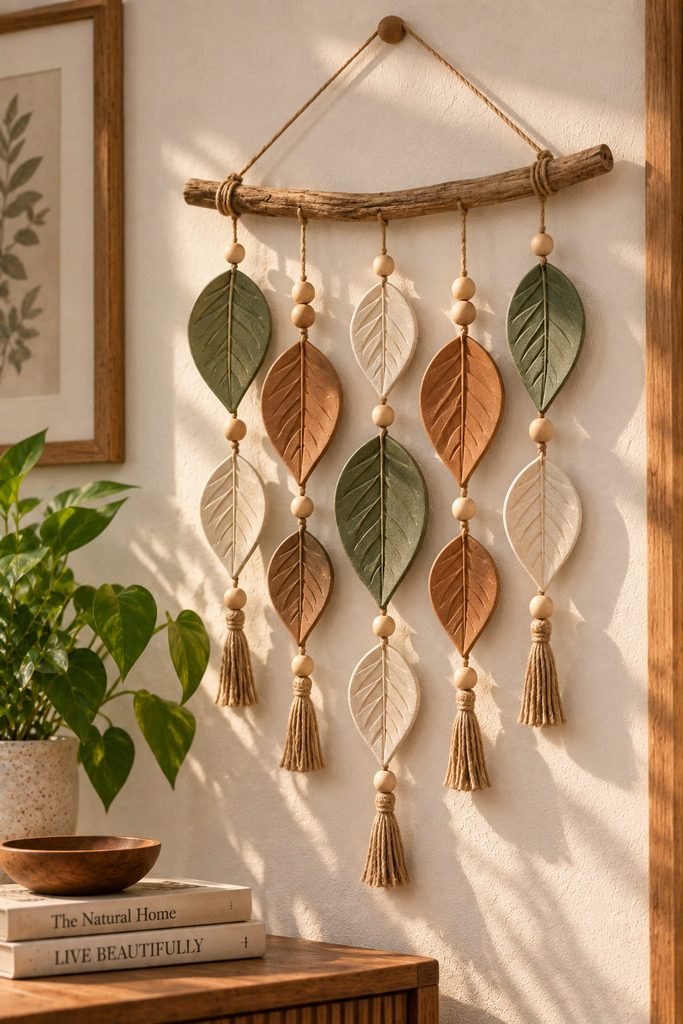
Viewed from the side, shallow half-tubes can read like long landscape ridges. Split several rolls lengthwise, trim them to different lengths, and mount the pieces horizontally in overlapping bands on a wide backing. Keep the rounded faces forward and vary the projection with thin cardboard spacers so one ridge sits slightly above the next.
The composition works best when the layers share a direction but not identical endpoints. Let a few bands extend farther to establish the visual horizon, while shorter pieces interrupt the rhythm. Side lighting will separate the levels more effectively than front lighting, so the piece can stay monochrome and still show substantial depth.
10. Laced Tube Ladder Wall Hanging
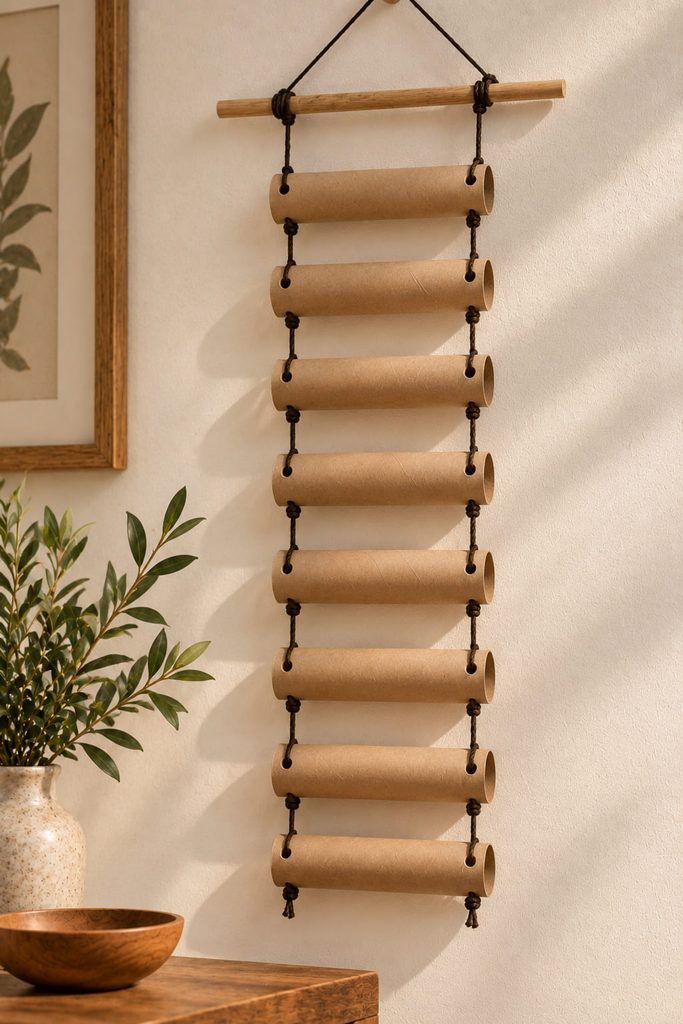
To keep a hanging airy rather than bulky, use short tube sections as horizontal spacers between two or three vertical cords. Punch paired holes through each segment, thread the cords through, and knot below the tube so every bar has a defined resting point. The result resembles a loose ladder or geometric textile, but the hollow cylinders make the shadows deeper than flat paper strips would.
Spacing controls both stability and mood. Close-set bars create a dense central field; larger gaps make the cords more visible and give the piece a lighter silhouette. Keep the top attachment on a rigid dowel, and make the outer cords equal in length so the tubes sit level unless a deliberate stepped arrangement is part of the design.
For storage, lift the hanging by the dowel and lay it flat rather than rolling it tightly. Sharp bends in the cords can pull the punched holes sideways when the piece is rehung.
11. Helical Ribbon Wall Relief
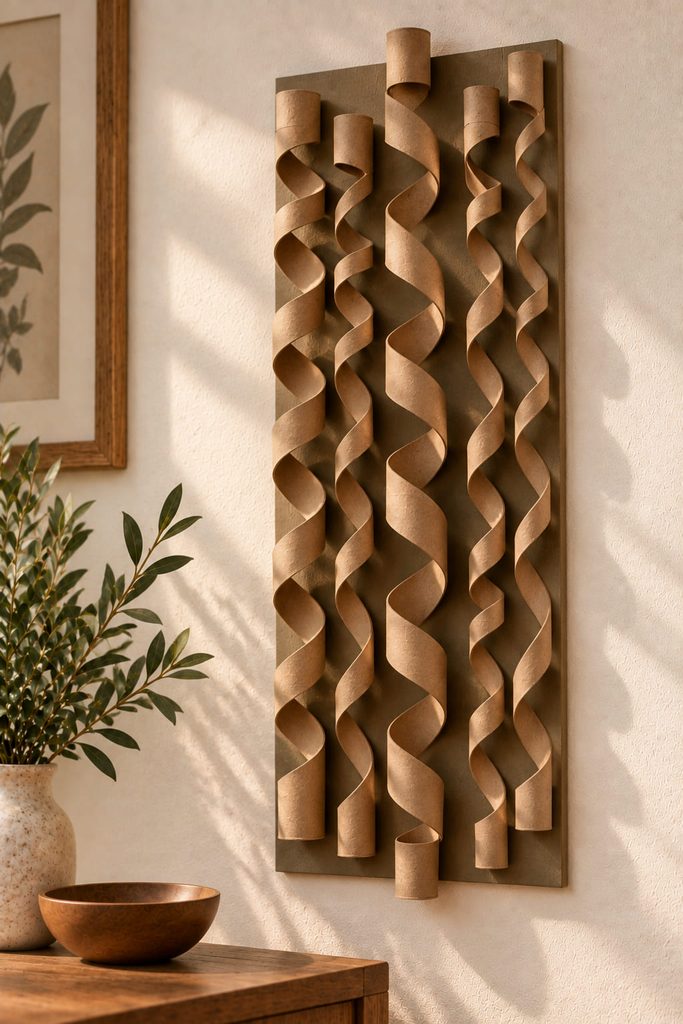
Cut one continuous spiral around a paper towel tube instead of opening it along a straight seam. As the cut progresses, the cylinder releases into a long corkscrew-like ribbon with a natural twist that flat cardstock does not have. Mounted against a backing, that twist creates alternating edges and shadow pockets along the full length.
- Draw a gentle spiral guideline around the tube before cutting.
- Keep the strip width consistent so the ribbon twists evenly.
- Let the cut ribbon relax before deciding how much stretch the composition needs.
- Fix the top end to a rigid backing, rotate the lower end until the helix opens cleanly, then secure it without pulling the cardboard flat.
- Repeat with a few ribbons of different lengths rather than filling the entire panel.
The important variable is tension. Too much stretch turns the helix into a nearly straight strip; too little makes the coils crowd together. Leave enough depth for the ribbon to cast its own shadow without projecting so far that it becomes easy to snag.
12. Interlocking Slot-Rib Sculpture
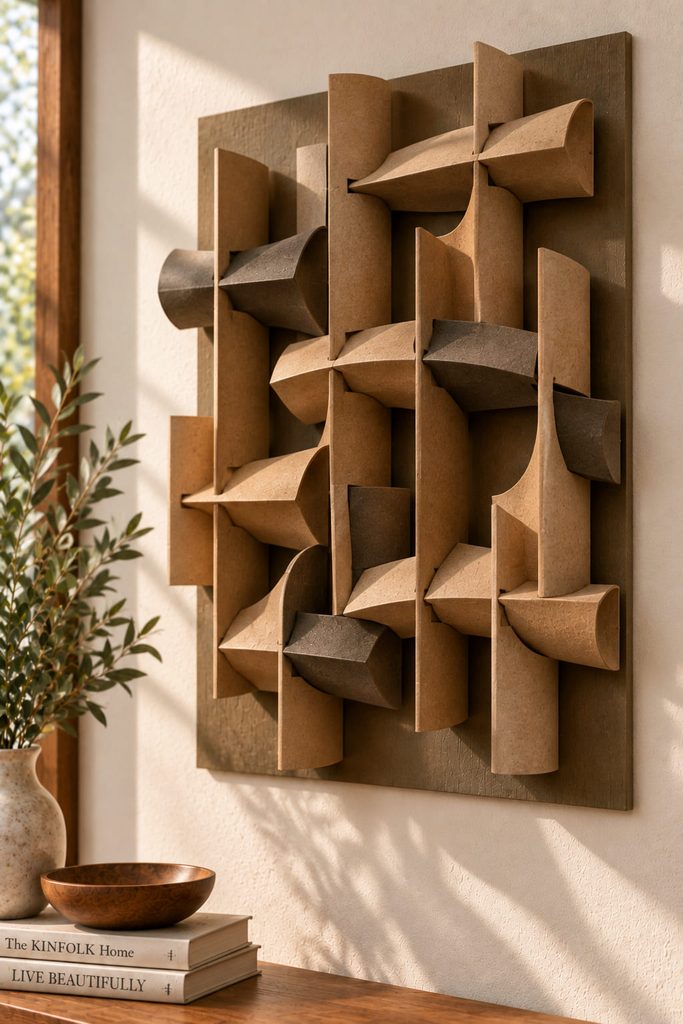
Why does this piece stay dimensional without a thick stack of glued layers? The depth comes from ribs that cross through one another. Split several long tubes lengthwise to make curved half-shells, then cut matching half-depth slots so one rib can slide down into another at a right angle. A group of those intersections forms a shallow egg-crate structure with open cells and strong shadow lines.
Work from a test pair before cutting the full batch. The slot width should match the cardboard thickness closely enough to hold the joint without crushing it, and the slot depth should stop near the midpoint of each rib. Once the fit is reliable, build small two- or three-rib modules, then connect those modules across a rigid backing. Staggering the intersections prevents the whole surface from turning into one repetitive square grid.
Slot Fit Check: if a joint falls apart when lifted, the slot is too wide; laminate a thin paper shim inside the cut or remake that rib. If the cardboard buckles during assembly, widen the slot slightly rather than forcing the pieces together.
Leave access to the backing around the perimeter so the wall hardware does not depend on a projecting rib. This is one of the deeper designs in the group, so it needs more clearance from nearby frames or shelves than a flat woven panel.
13. Layered Ellipse Orbit Relief
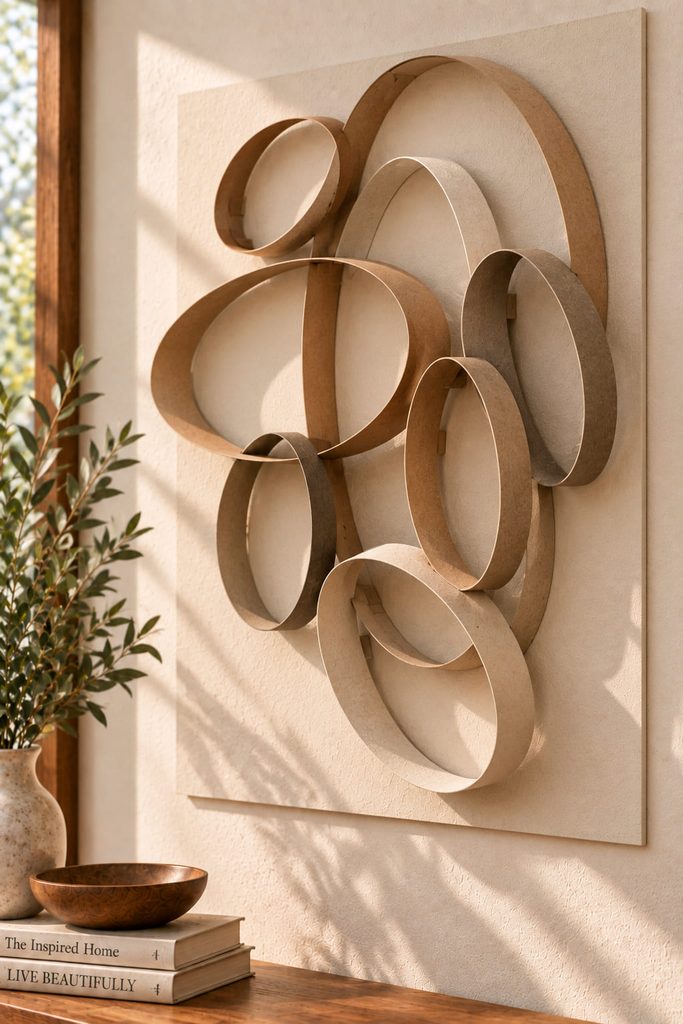
Instead of cutting the tube into small rings, bend long flattened strips into large elliptical loops and let the loops overlap like drawn orbits. Secure each strip end to itself, then use small hidden spacers where selected ellipses cross the backing. Different spacer depths make some loops appear to pass in front of others even though the structure remains lightweight.
Keep one or two large ellipses as the visual framework and add only enough smaller loops to create direction. The empty wall inside each shape is part of the design; filling every opening with another loop will erase the contrast between line and space. A slightly off-center cluster can feel more dynamic than a perfectly concentric target.
14. Stepped Chevron Tube-Slat Panel
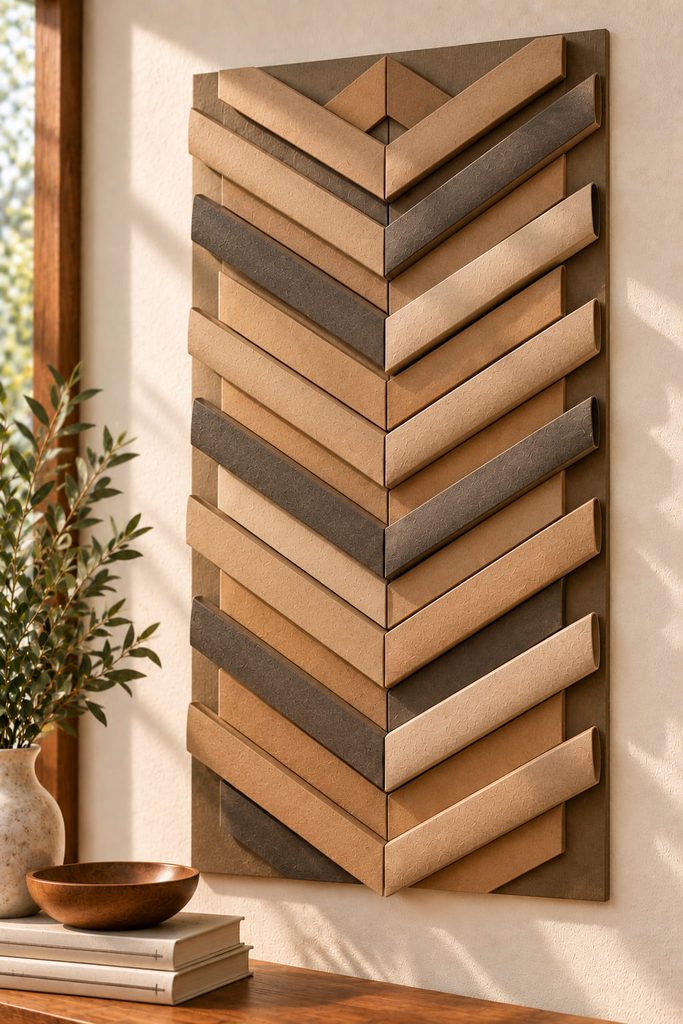
If you want a broad panel with a clean architectural rhythm, flatten whole paper towel tubes into long double-wall slats instead of opening them into single sheets. Trim the ends at matching angles, then build paired diagonals that meet in repeated chevrons across a rigid backing. The doubled cardboard gives each slat a thicker edge, so the pattern holds more shadow than a flat cardstock herringbone.
Set the first centerline carefully because every later row depends on it. Alternate shallow spacers under selected slats to create a stepped surface, but keep neighboring points aligned so the chevrons do not drift sideways. At the outer edges, trim the overhanging slats only after the full pattern is dry; cutting the border too early makes small alignment errors harder to absorb.
A narrow frame or clean painted margin can contain the pattern without covering the relief. Put the hanging hardware through the backing, where it can support the full panel evenly rather than concentrating the load on one flattened tube.
How to Prepare Tubes for Paper Towel Roll Art
Use tubes that are clean, dry, and free of loose paper. For projects that depend on straight ribs, prisms, or slats, mark long cuts with a ruler before using a craft knife on a cutting mat. For curved forms, make one test piece before processing the whole batch; cardboard from different brands can spring back differently after flattening or scoring.
Decide when to paint based on access. Prepainting is useful when the inside of a tube, prism, or perforated light column will remain visible. Painting after assembly can unify joints on relief panels, but excess moisture can soften thin cardboard, so let each coat dry fully before hanging. Large projects are easier to control when you dry-fit the complete layout on a table or floor and transfer it to the backing in sections.
Choose the Structure Before the Finish
Start with the behavior you want from the cardboard. Choose half-tubes for broad ribs and layered shadows, opened strips for weaving or large loops, scored cylinders for facets and arches, and intact tubes when the hollow form needs to hold, screen, or suspend something. That choice gives the wall piece a reason to be made from paper towel rolls rather than from generic flat cardstock.
For a wider set of recycled-cardboard construction ideas, continue with 17 Cardboard Wall Decor Ideas for Creative DIY Interiors.