
This post contains affiliate links. As an Amazon Associate I earn from qualifying purchases, at no extra cost to you. Thank you for supporting Diynify!
Cardboard Christmas decorations work best when they stop pretending to be made from something more expensive. Corrugated flutes, kraft-brown surfaces, layered cut edges, and crisp scored folds can all become part of the design, giving recycled shipping boxes and lightweight packaging board a warm, graphic look that suits Christmas surprisingly well.
Most of these projects use clean, dry cardboard, a cutting mat, a metal ruler, a sharp craft knife or sturdy scissors, and paper-safe glue. A few ideas also need twine or thread, vellum, a paint pen or craft paint, or a cool battery-powered LED. Choose thinner cereal-box board for tight folds and curved pieces; save double-wall corrugated board for large decorations that need stiffness.
1. Layered Corrugated Star Tree Topper
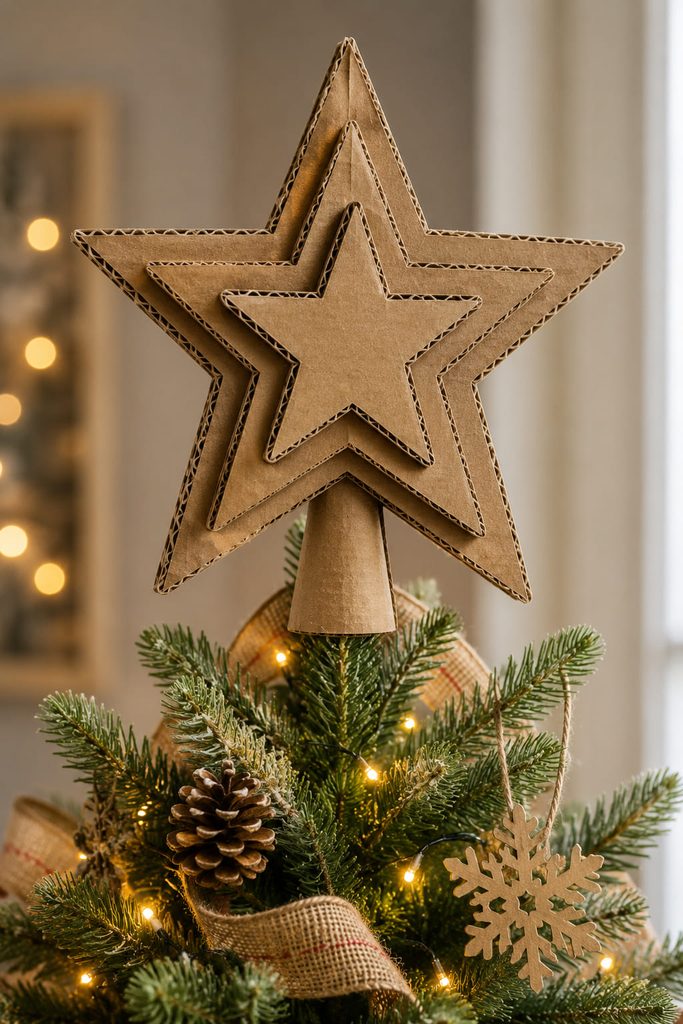
Instead of covering the raw cardboard, make the cut edges the feature. Stack three or five star silhouettes in slightly decreasing sizes, rotating the corrugation direction between layers so the exposed flutes create a striped shadow around the points. A narrow spacer between the front layers adds more depth without making the topper visually heavy.
The star still needs a real attachment, not just a decorative back. Roll a strip of thinner cardboard into a tapered sleeve that slips over the top branch, then glue that sleeve behind the center of the star. Keep most of the cardboard mass close to the sleeve so the topper does not act like a long lever.
Tree-Topper Fit Check: Test the sleeve on the tree before attaching the decorative layers. It should slide on without crushing the top branch and hold the star upright before any extra embellishment is added.
2. Interlocking Cardboard Reindeer Table Sculpture
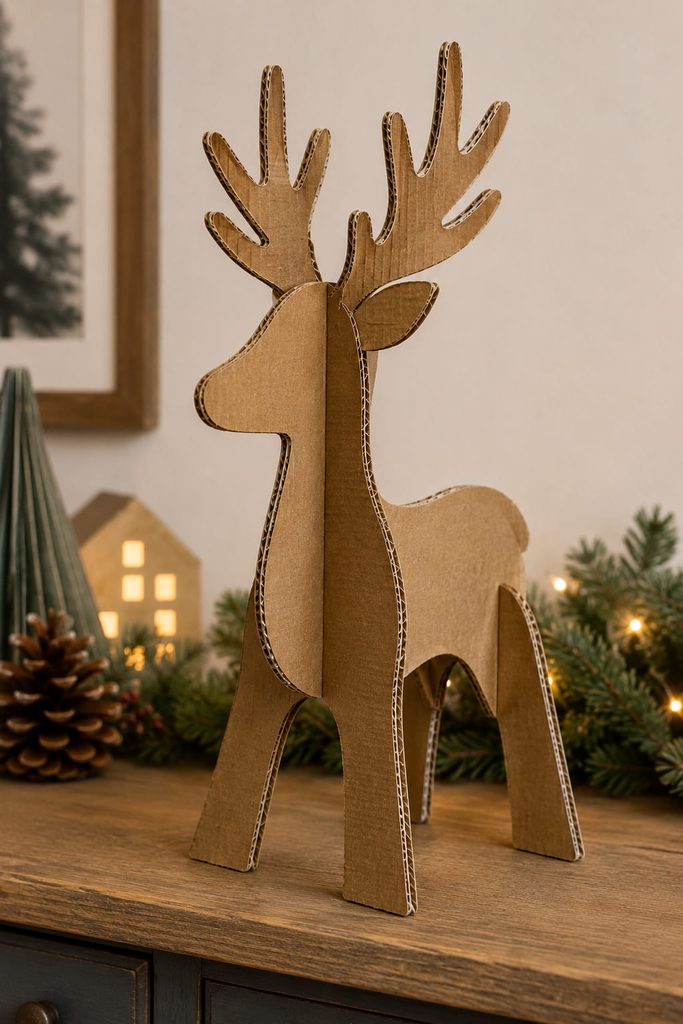
A reindeer becomes far more sculptural when it is built from crossing profiles rather than a flat cutout. Cut one side silhouette and one front-facing chest-and-leg profile from sturdy corrugated board, then add centered slots so the two pieces slide together at 90 degrees. The intersecting planes create a four-sided footprint, which is what lets the figure stand.
Assembly is easiest in this order:

- Cut both main profiles and test the slots before adding antlers.
- Deepen or widen the slots a little at a time until the pieces meet without bowing.
- Add separate antlers only after the body stands squarely.
- If the feet rock, trim the lowest contact points rather than forcing the center joint tighter.
Leave the kraft surface plain for a minimal look, or use a small amount of white paint on the antlers and back to suggest snow while keeping the cardboard construction visible.
3. Faceted Cardboard Bauble Ornaments
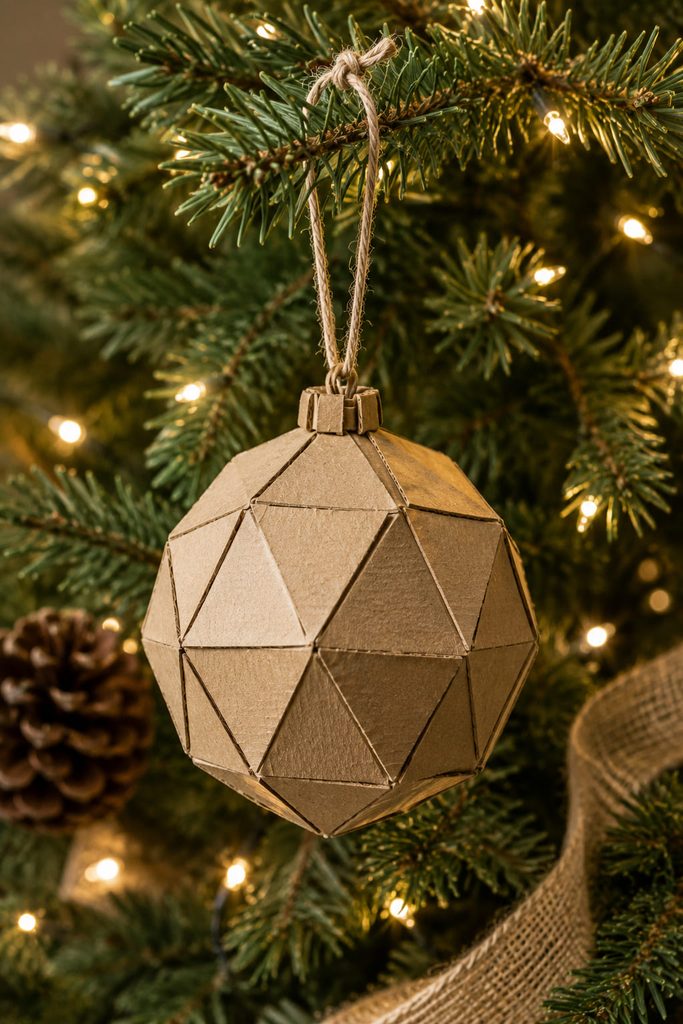
Thin packaging board can be scored into geometric ornament shells that look closer to small paper sculptures than flat cardboard cutouts. Start with a repeated polygon panel—diamonds work especially well—and join the panels edge to edge so the ornament closes into a faceted volume. The visual payoff comes from the planes catching tree lights at different angles, so a restrained finish often looks better than covering every face.
The hanging loop needs to be trapped inside the structure. Sandwich a knotted cord between two small reinforcement tabs near the top opening before the final seam is closed; relying on a hole punched through one thin panel can tear the board over time.
For a clean build, treat the closing sequence as part of the design:
- Score every fold before assembly.
- Pre-curve the form by gently flexing along the scores.
- Glue the side seam first.
- Close the lower facets.
- Insert and secure the hanging loop.
- Finish the top last.
If the ornament twists instead of forming an even volume, the usual cause is one panel being glued past its score line. Reopen that seam before the adhesive fully sets and realign the fold rather than trying to squeeze the finished bauble into shape.
4. Torn-Edge Winter Forest Wall Panel
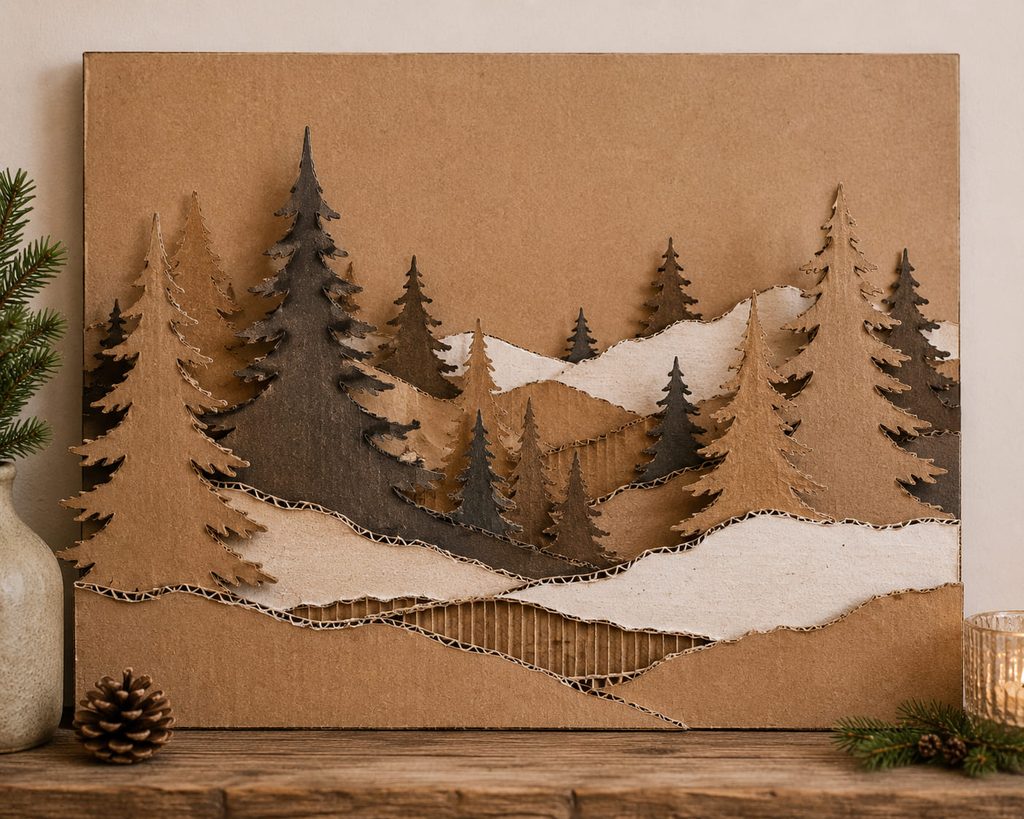
Cardboard is especially good at making a winter landscape feel tactile because torn corrugated edges resemble rough bark and layered ground. Cut several tree and hill silhouettes from different box panels, deliberately tearing a few lower edges to reveal the flutes, then overlap the pieces on a flat backing board.
Depth comes from spacing, not from adding lots of tiny details. Keep the front trees darker or more textured, make the middle layer quieter, and leave generous open board around the top of the composition. The result reads from across a room because the forest is built from a few large silhouettes rather than a field of miniature cutouts.
5. Woven Cardboard Strip Wreath
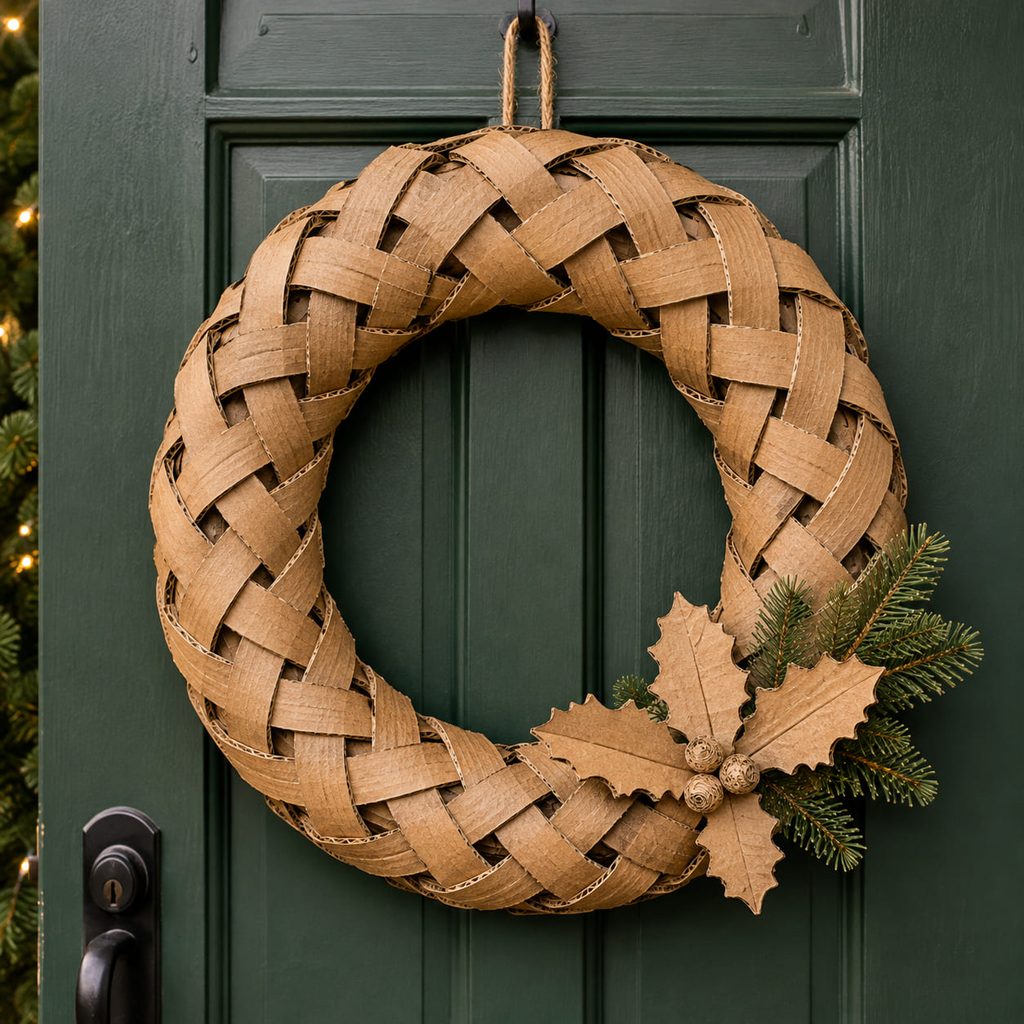
A woven wreath uses cardboard in a way that a painted ring cannot: alternating strips create a real over-under surface and a thicker rim where the weave turns. Cut long strips from thin corrugated board with the flutes running lengthwise, then weave them across a broad cardboard ring rather than simply wrapping them around it.
Use a short repeat that is easy to keep consistent:
- Anchor the first strip on the back of the ring.
- Pass the next strip over one crossing and under the next.
- Add strips around the ring while preserving the same alternation.
- Hide strip ends on the back and reinforce only those joins.
- Flatten any crossing that bulges far enough to distort the circle.
A small asymmetrical cluster of cardboard holly leaves or a narrow fabric ribbon is enough to break the ring without hiding the woven texture.
6. Accordion-Fold Christmas Village Mantel Backdrop
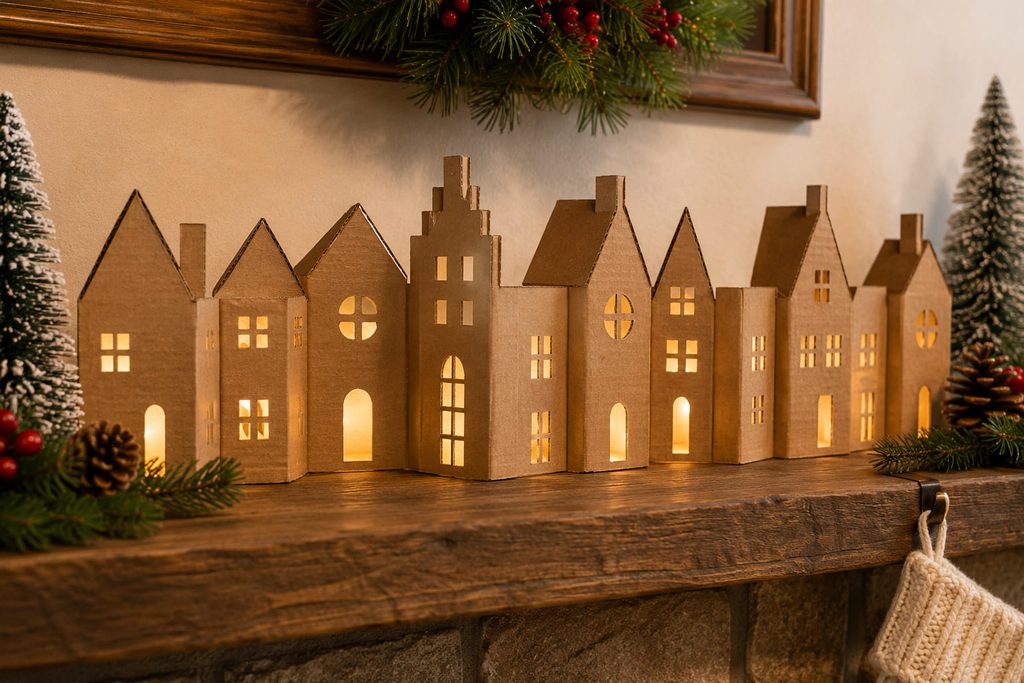
For a mantel or shelf, a village does not have to be a row of separate boxes. A long strip of thin cardboard can become a continuous skyline when it is cut into roof peaks, scored at regular intervals, and folded into a shallow accordion. The folds create their own feet, so the backdrop stands without individual house bases.

Before cutting windows, decide where the fold lines will land. Large door or window openings that cross a fold weaken the exact place that gives the village its stability. Keep openings centered on the flatter house faces, and vary the roof heights instead of filling each facade with detail.
Use a true batch sequence rather than finishing one house face at a time:
- Mark every fold line across the full strip.
- Cut the roof peaks and outer skyline while the board is still flat.
- Score and form the accordion folds.
- Stand the strip up and check which faces are fully supported.
- Add windows and doors only to those flat, stable faces.
This order keeps the repeated buildings aligned and prevents a decorative opening from accidentally removing material needed at a fold. If one section wants to collapse inward, widen its neighboring face or reduce the opening instead of adding a visible prop behind the village.
7. Scalloped Cardboard Christmas Tree Collar
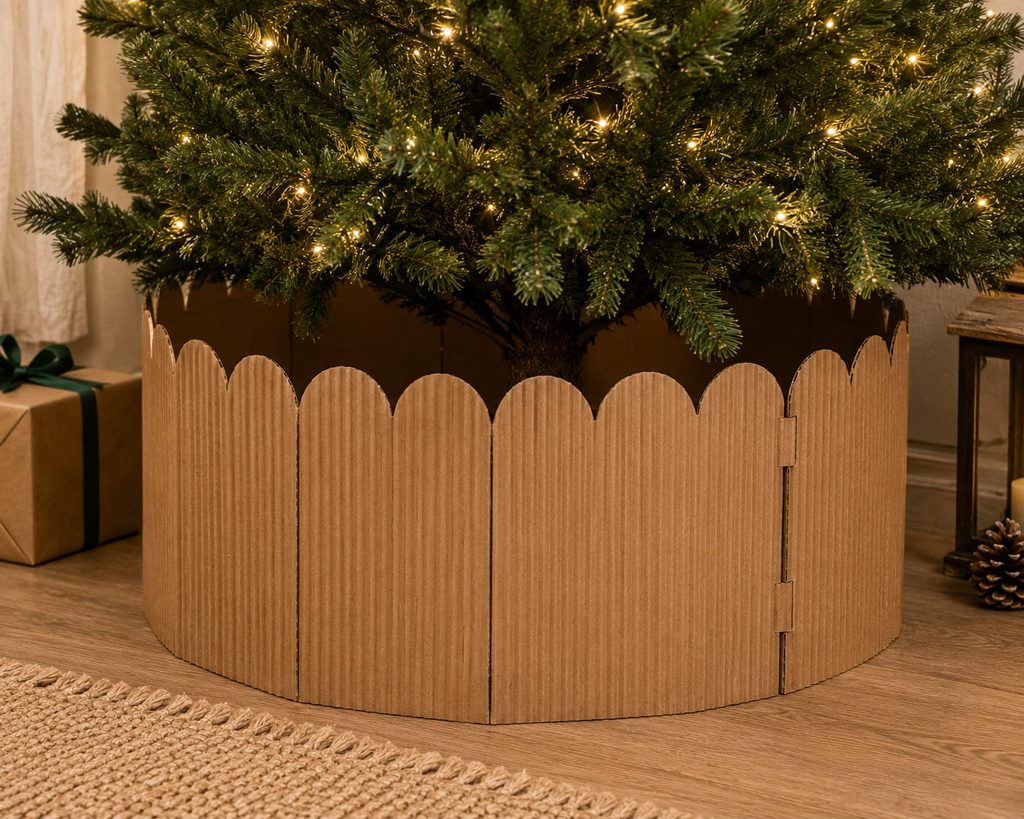
A tree collar asks more of cardboard than a small ornament because it has to hold a wide shape around the stand without collapsing into it. Build the collar from several tall corrugated panels joined edge to edge into a loose polygon. Scalloping the upper edge softens the industrial look while the vertical flutes reinforce the height.

The important decision is how the panels connect. Permanent glued seams make a rigid collar that is awkward to store; paired slots or small interior tabs let the panels fold or separate after Christmas. Whichever route you choose, keep the inside diameter larger than the widest part of the tree stand so the cardboard never has to carry the tree’s weight. With a live tree, leave easy watering access and keep the cardboard clear of spills because untreated board is not moisture-resistant.
Use this checklist before decorating the outer surface:
- The collar sits flat on the floor.
- No panel touches a moving stand part or water reservoir.
- The seam nearest the wall can open for access.
- The top edge stays clear of low branches.
- The collar can be removed without lifting the tree.
Once the geometry works, a narrow painted border, cut scallops, or a repeating punched pattern is enough. Too much surface decoration can hide the crisp panel rhythm that makes the collar look intentional.
8. Oversized Cardboard Gift Bow Door Accent
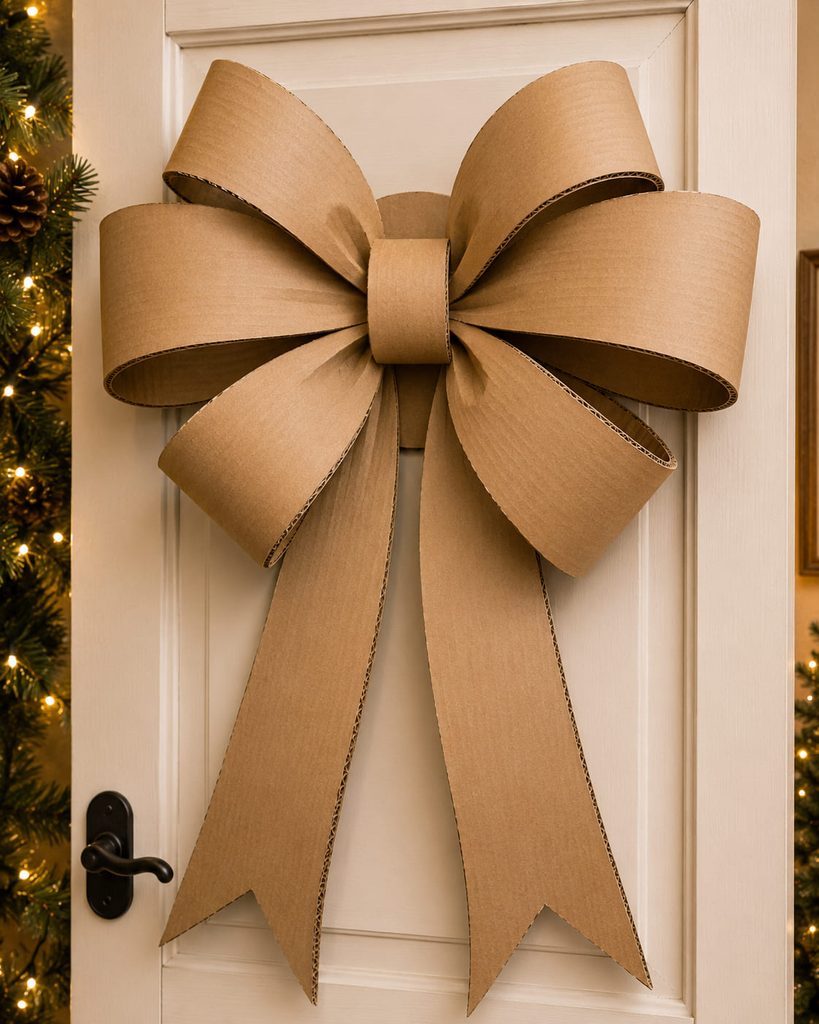
Fill a door or blank wall with curved cardboard strips rather than a solid cutout, and the bow gains volume without becoming bulky. Cut wide bands from flexible cereal-box board or single-wall cardboard, score lightly where each loop turns, and bring the ends into the center over a flat backing disk.
Keep the loops unequal: two broad side loops, two slightly smaller upper loops, and a pair of long tails create a readable bow shape without the dense rosette effect of many identical pieces. Mount the entire bow from the backing disk so the curved strips are decorative only; they should not carry the hanging load.

9. Pierced Cardboard LED Lantern
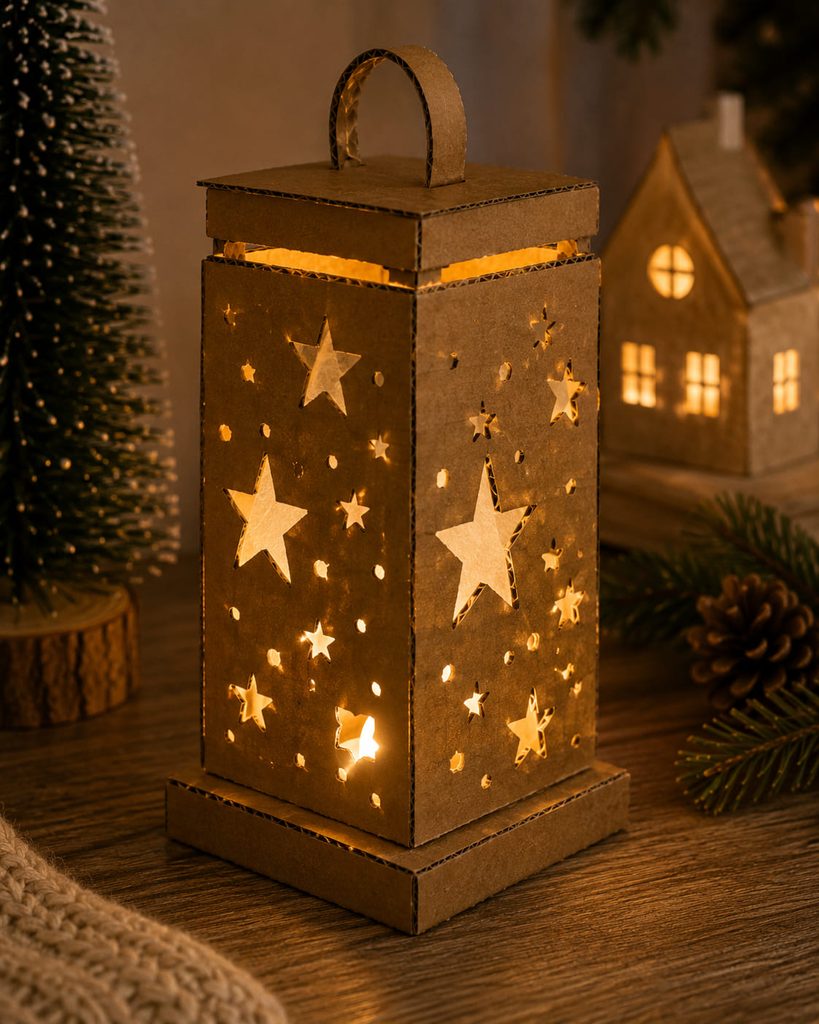
Let the light define the pattern instead of covering the lantern with surface decoration. Build a four-sided sleeve with a closed base and a separate top opening, then pierce or cut simple stars, dots, or geometric windows into the side panels. Vellum can sit behind larger openings to soften the glow, but the light path must remain open enough for the pattern to register.
Only use a cool battery-powered LED light inside cardboard. Size the base so the light sits flat with clearance around it, and leave one panel, the top, or the bottom removable so the LED can be switched on and taken out without tearing the lantern.
Keep the Light Path Open: Before final assembly, place the flat pierced panel over the LED in a dim room. If most of the pattern disappears, enlarge a few openings rather than adding more tiny holes.
If the completed lantern leans, check the base and side-panel folds first. A decorative cutout rarely causes the problem by itself; uneven panel widths or a base glued out of square usually do.
10. Balanced Snowflake Cardboard Mobile
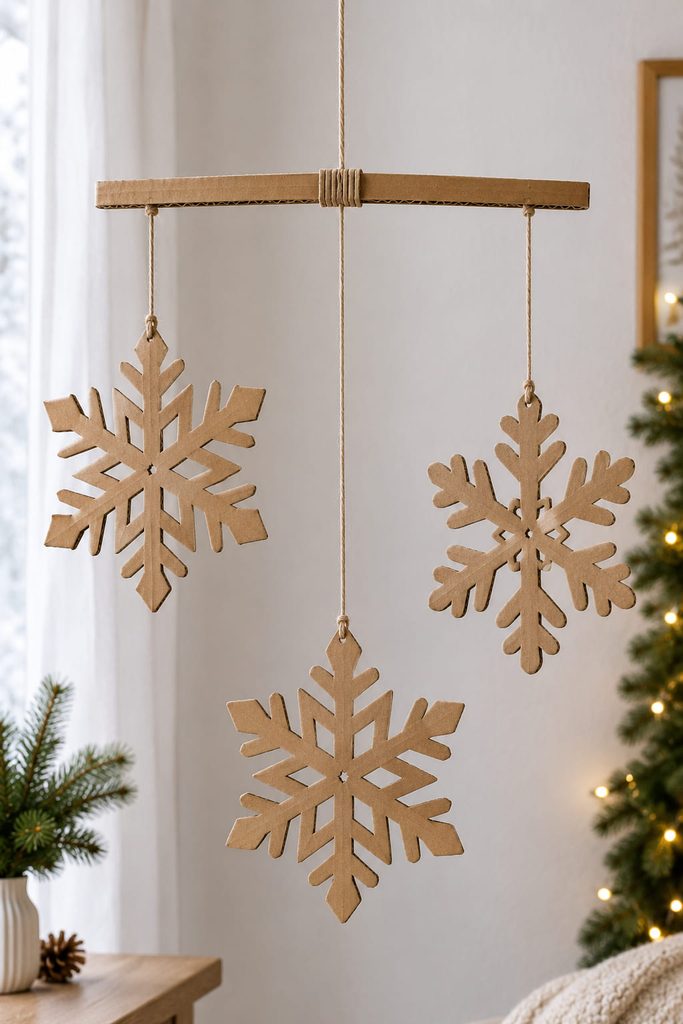
Once cardboard snowflakes are suspended, hanging points matter more than the cut pattern. Use thin card for the snowflakes and a straight cardboard arm reinforced around its center, then suspend different shapes at varied heights with thread.

Balance the structure before decorating it further. Tie the center suspension thread loosely enough to slide, hang the mobile, and move that knot until the arm sits level. After that, adjust the lower threads so the snowflakes clear one another as they rotate.
Balance Before You Hang: Test the mobile in open space and gently turn each snowflake through a full rotation. If two pieces collide, change thread length or attachment position; extra weight is a poor fix because it changes the whole balance.
11. Gingerbread-Style Cardboard Cookie Garland
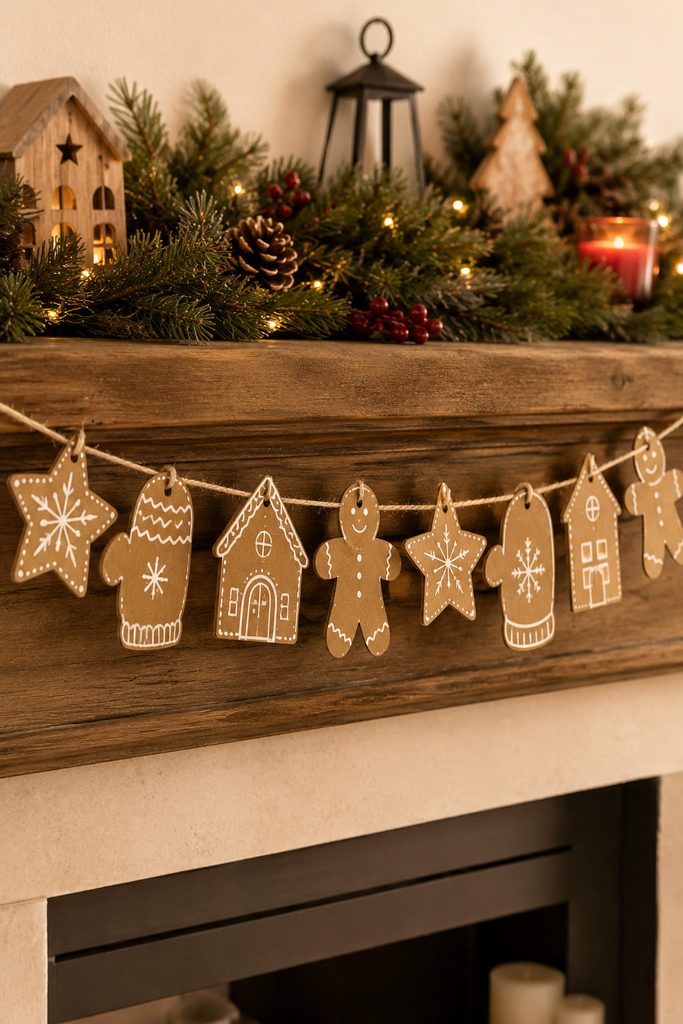
Flat cardboard “cookies” work well as a garland because the kraft surface already resembles baked gingerbread without needing a full coat of paint. Cut a mixed set of stars, mittens, houses, and simple people from thin corrugated board or chipboard, then add restrained white lines with paint pen or opaque craft paint.
Punching the hanging holes before decorating prevents finished details from cracking around the hole. For a calmer garland, keep the spacing generous and repeat only two or three silhouette sizes. The cord should remain visible between pieces; crowding every cookie edge to edge makes the cardboard shapes merge into one heavy band.
12. Layered Cardboard Snow Globe Shelf Scene
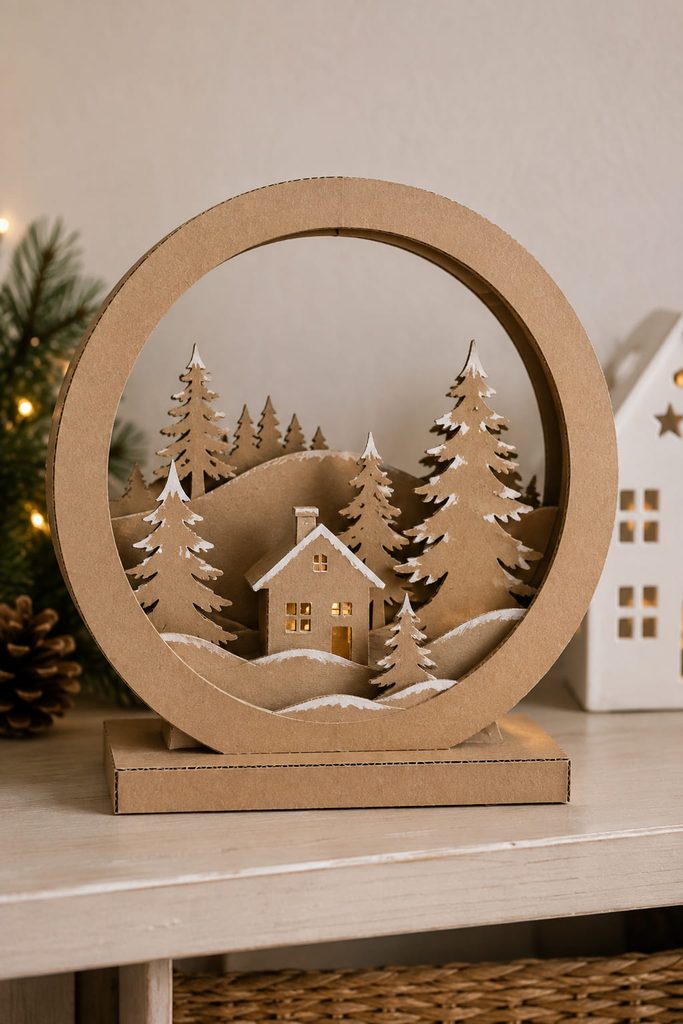
The snow-globe effect works here as a shallow framed scene rather than a sealed shaker. Cut a large circular opening in a sturdy front ring, then build a winter scene behind it with stepped cardboard layers: foreground snowbank, trees, a small house silhouette, and a quiet background. A flat base under the circle turns the piece into shelf decor.
Choose the depth route by the shelf and viewing distance rather than combining every possible layer.
| Depth Route | Best Effect | Main Trade-Off |
|---|---|---|
| Thin spacers between layers | Stronger cast shadows and clearer separation | A thicker overall profile |
| Extra cardboard laminated behind selected foreground shapes | Subtle relief with a shallower profile | Less dramatic shadow depth |
Keep the outer ring visually simple. The circular negative space is what makes the scene read as a globe, so heavy trim around the edge can compete with the interior composition.
13. Cardboard Sleigh Treat Caddy Centerpiece
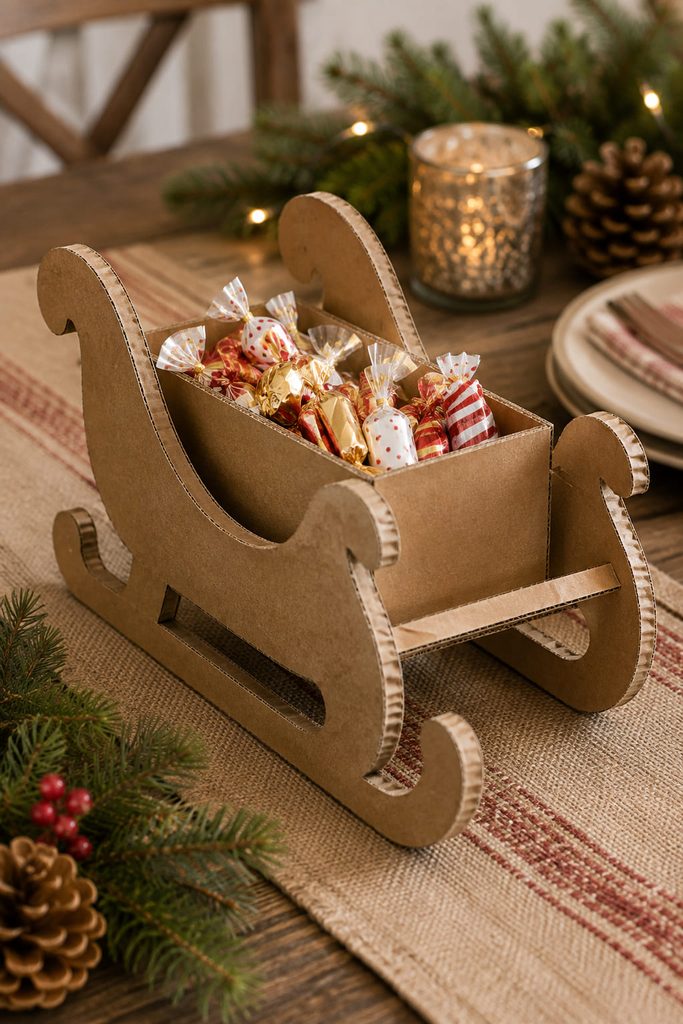
Separate the tray from the decorative runners and a cardboard sleigh can function as a small table caddy without asking the curved sides to carry the load. Build a rectangular inner tray first, with a fully closed bottom and enough wall height to keep wrapped treats from spilling. Add two matching sleigh side profiles outside the tray so their curved runners extend below it without becoming the only support.
The build works best in this order:
- Assemble the tray and let its corners set square.
- Glue one sleigh profile to each long side, matching their runner height.
- Add a narrow cross brace between the profiles near the front.
- Place the empty sleigh on the table and correct any rocking.
- Load it gradually with lightweight wrapped treats and confirm the tray, not the decorative runners, is carrying the contents.
Load Test the Base: If the side profiles begin to splay, add an interior brace across the tray before increasing the load. Decorative runner shapes should frame the container, not replace its floor.
14. Fold-Flat Cardboard Angel Place Cards
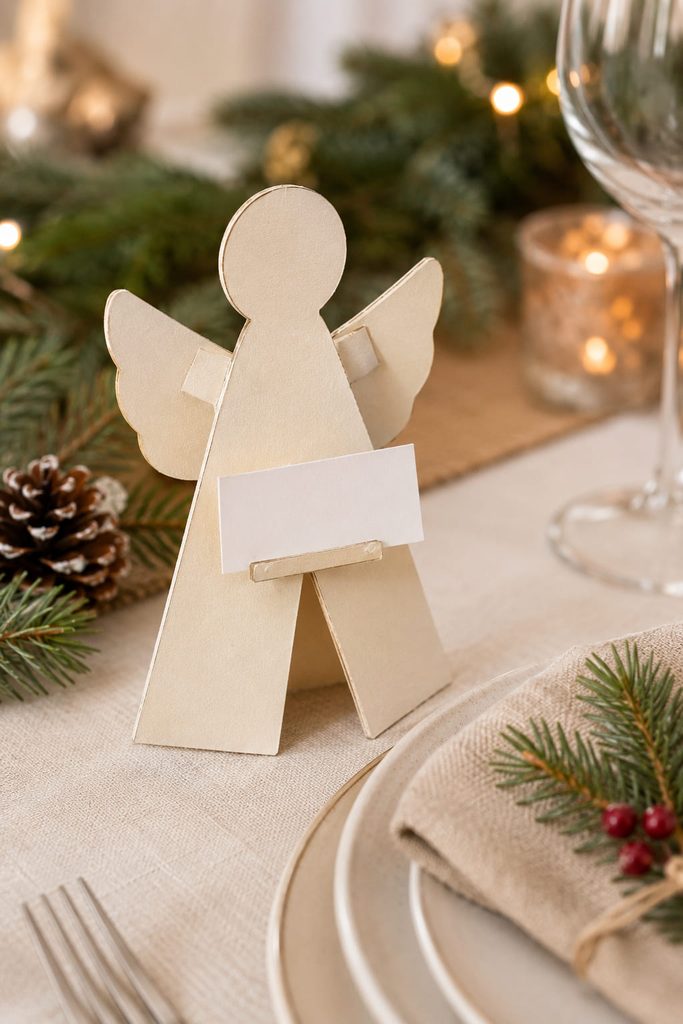
For a table decoration that can be stored almost flat, cut a simple angel silhouette from cereal-box board and give it a scored center fold so the lower robe opens into a narrow V-shaped stand. A second small fold at the wings can push them slightly forward without creating a bulky base.
Cutting and folding in the right order keeps the silhouette clean:
- Cut the outside angel shape while the board is flat.
- Score the center line without cutting through the surface.
- Add a short name-card slot across the front of the robe.
- Fold the stand only after all cuts are finished.
- Test with a blank card and widen the slot only if needed.
Because the name is carried on a removable paper slip, the cardboard angel can be reused with different place cards instead of being permanently lettered.
15. Sculpted Corrugated Cardboard Poinsettia
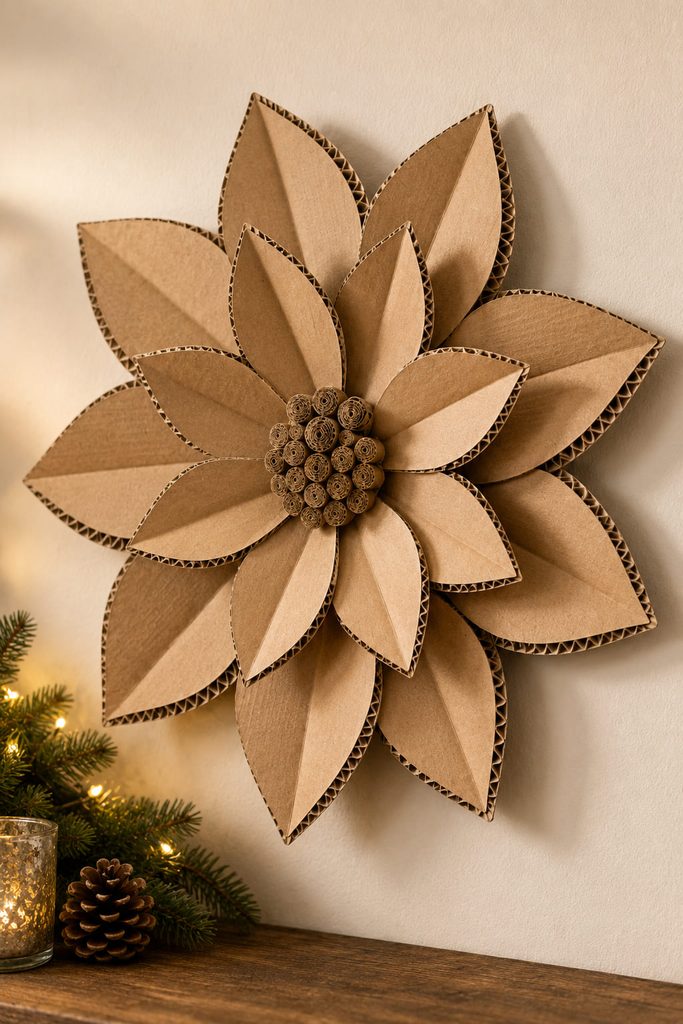
Corrugated board can hold a surprisingly crisp petal curve when each petal is cut as a separate piece and gently scored near its center line. Arrange the first petal ring on a round backing disk, overlap a smaller second ring, then add a tight cluster of rolled or punched cardboard dots in the middle.
The key is restraint at the edges. Exposed flutes around every petal give the flower its distinctive cardboard character, but too many stacked layers make the center bulky and flatten the outer petals. Use thicker board for the lower ring and thinner board toward the center so the flower gains relief without turning into a heavy puck.
This works especially well as a single large shelf or wall accent where the petal shadows are visible. For a smaller version, reduce the number of petals before shrinking every piece; tiny corrugated points are harder to cut cleanly.
16. Modular Cardboard Christmas Card Display Stand
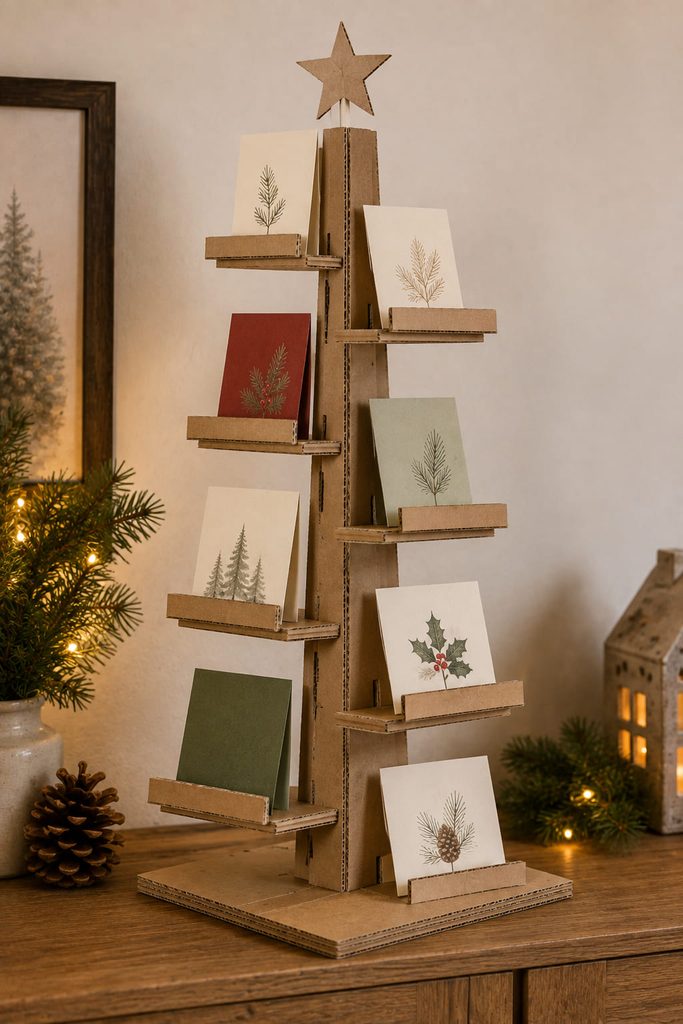
Incoming Christmas cards become part of the decor when a freestanding structure holds them in view instead of letting them collect in a stack. Build a central vertical spine from two laminated cardboard strips, then slot short horizontal ledges through it at alternating heights. Each ledge needs a shallow retaining lip so cards lean back rather than sliding off.
Before adding paint or trim, check the stand by function:
- The base is wider than the loaded upper section.
- The lowest cards do not touch the floor.
- Card edges can be inserted and removed without catching.
- Upper ledges are short enough that the stand does not become top-heavy.
- The whole display can be lifted from the spine without the slots pulling apart.
If the stand feels unstable, widen or laminate the cardboard base before adding more ledges. A tree-like outline can make it more festive, but the structure should still work when viewed simply as a spine, shelf, and footprint.
Which Cardboard Christmas Decorations Should You Make First?
Start with the project that matches the cardboard already on hand. Thin packaging board is easiest for the faceted baubles, bow loops, angels, and garland pieces; sturdy corrugated boxes are better for the reindeer, tree collar, wall panel, sleigh, and card stand. If you want the material itself to be the main visual feature, the woven wreath, layered star topper, and poinsettia make particularly good use of exposed flutes and cut edges.
For a broader mix of folded paper, cardstock, recycled packaging, ornaments, villages, and seasonal SVG projects, continue with Christmas Paper Crafts, Ideas & SVG Projects.








