This post contains affiliate links. As an Amazon Associate I earn from qualifying purchases, at no extra cost to you. Thank you for supporting Diynify!
Christmas decoupage ideas can go far beyond round ornaments. The technique works especially well when the paper layer is matched to the object underneath: tissue and napkins follow curves, rice paper sits neatly on flat decor, and layered paper decoupage can give cards real depth. This collection mixes hanging pieces, greetings, tabletop decor, storage, and display projects so you can choose by finished use instead of repeating one motif on sixteen blanks.
Most projects use decoupage medium, a soft brush, scissors, and thin decorative paper such as napkins, tissue, rice paper, sheet music, or printed ephemera. Individual ideas also call for wood or papier-mâché blanks, cardstock, a clear disc, foam pads, a glass jar with a cool battery-powered LED, a tray, a box, a drawer unit, or a frame. Test unfamiliar printed paper before wetting it, and keep adhesive away from hinges, drawer slides, hanging holes, and other working edges.

1. Napkin-Decoupage Wood Slice Ornament
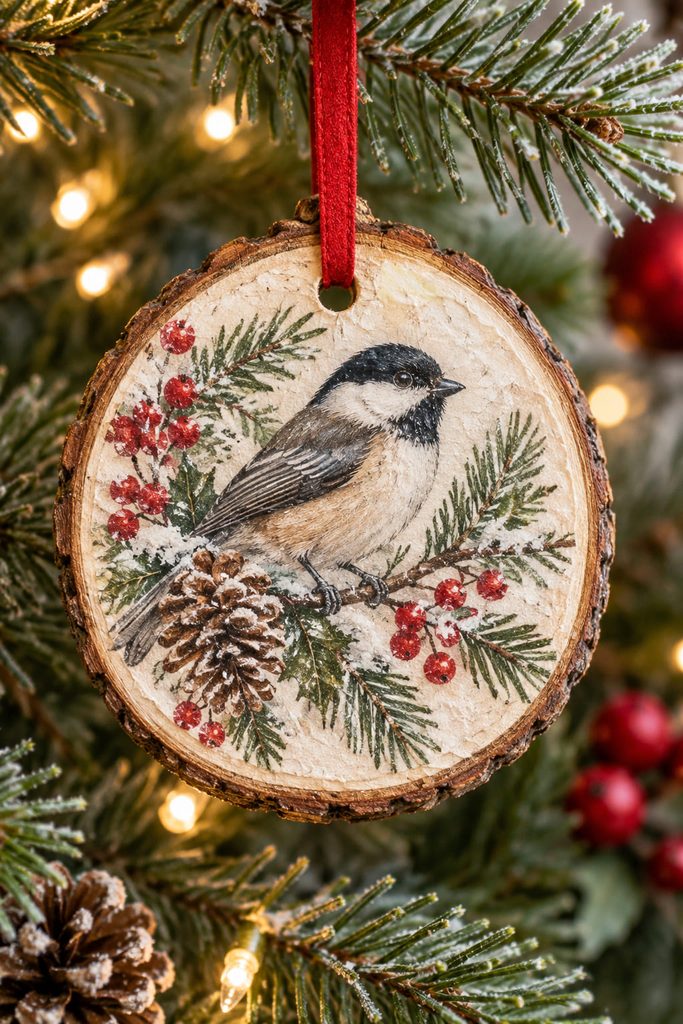
A plain wood slice is useful when you want the picture to feel integrated into the ornament rather than pasted onto a glossy blank. Leave a narrow border of exposed wood around the napkin image, and the grain becomes a natural frame. Use only the printed top layer of a paper napkin, smooth it onto a sealed or clean dry face with a thin coat of decoupage medium, and work from the center outward so the tissue has somewhere to release its wrinkles.

Keep the drilled hanging hole and bark edge free of wet paper. That small boundary makes the piece easier to finish cleanly, prevents the ribbon from rubbing through a softened paper layer, and keeps the ornament recognizable as a wood slice. A matte finish suits rustic botanicals, birds, or simple winter scenes especially well because the surface texture remains visible.
2. Patchwork Papier-Mâché Bauble Ornament

If a round ornament blank makes large motifs buckle, stop trying to wrap one picture around the whole sphere. Small torn pieces conform to the curve much more easily, and their overlapping edges can become part of a patchwork look. Use a lightweight papier-mâché bauble so the finished ornament stays easy to hang.

- Tear thin tissue, napkin, or lightweight decorative paper into small pieces with soft edges.
- Work around the bauble in sections, overlapping each piece just enough to hide the base.
- Brush medium over the paper gently rather than repeatedly dragging the same wet edge.
- Leave the cap, neck, or hanging hardware clear until the surface is dry.
The useful check is the silhouette: the bauble should still look round rather than lumpy. If one area builds up too heavily, let it dry and feather the next patches around it instead of adding more wet layers on top.
3. Sheet-Music Star Ornament

Printed music gives a star ornament detail without requiring tiny cut shapes. Cover a firm papier-mâché, chipboard, or thin wood star with narrow strips of sheet-music paper, changing the direction of the notation from point to point so the surface does not read like one large pasted page. Keep the paper thin around the tips; bulky overlaps can soften the points that make the star readable from across the tree. Reinforce the hanging hole or loop at the blank itself rather than relying on the decoupaged paper to carry the load. For a quieter result, use one page with plenty of open margin instead of dense notation across every point.
4. Reverse-Decoupage Clear Disc Ornament

Want a glossy ornament without burying the picture under visible brush texture? Reverse decoupage works well on a clear flat disc because the image is glued face-down to the back and viewed through the smooth front surface. That makes the clear material itself the protective visual layer, while the paper never has to wrap over the front edge.

There are two useful routes. A transparent background keeps the ornament airy and lets tree lights show around the motif; it suits a single botanical sprig, bird, snowflake, or small scene with a clean outline. An opaque paper backing makes pale illustrations easier to read, hides the adhesive side, and gives the disc more of a medallion look. Dry-position the image before coating it, keep the hanging hole clear, and press out trapped air while the medium is still workable. Hold the finished disc against both a dark and a bright background before choosing the backing. Weak contrast is much easier to solve before the final layer goes on, and the comparison tells you whether transparency is actually helping the design.
5. Layered 3D Decoupage Christmas Card

Building depth with repeated cut motifs turns traditional paper decoupage into a card front that reads almost like a shallow relief. Start with several copies of the same illustration, keep one complete image as the base, then cut progressively smaller foreground elements from the duplicates. Foam pads or tiny cardstock spacers lift only the pieces that should sit closer to the viewer, while the printed alignment keeps the scene coherent.
If the layers start looking wrong, diagnose the symptom rather than adding more pieces:

- The image feels swollen everywhere: too many areas have been raised; keep the background flat.
- Edges cast heavy blocky shadows: the foam is too thick for the scale of the motif.
- Small details curl: mount delicate cutouts to thin cardstock before lifting them.
- The card will not close cleanly: reduce the number of raised layers near the fold and outer edges.
Mailing Thickness Check: Make one finished sample before batching cards. A low-relief front is easier to protect in an envelope than a stack of deep foam layers.
6. Napkin-Decoupage Card Panel
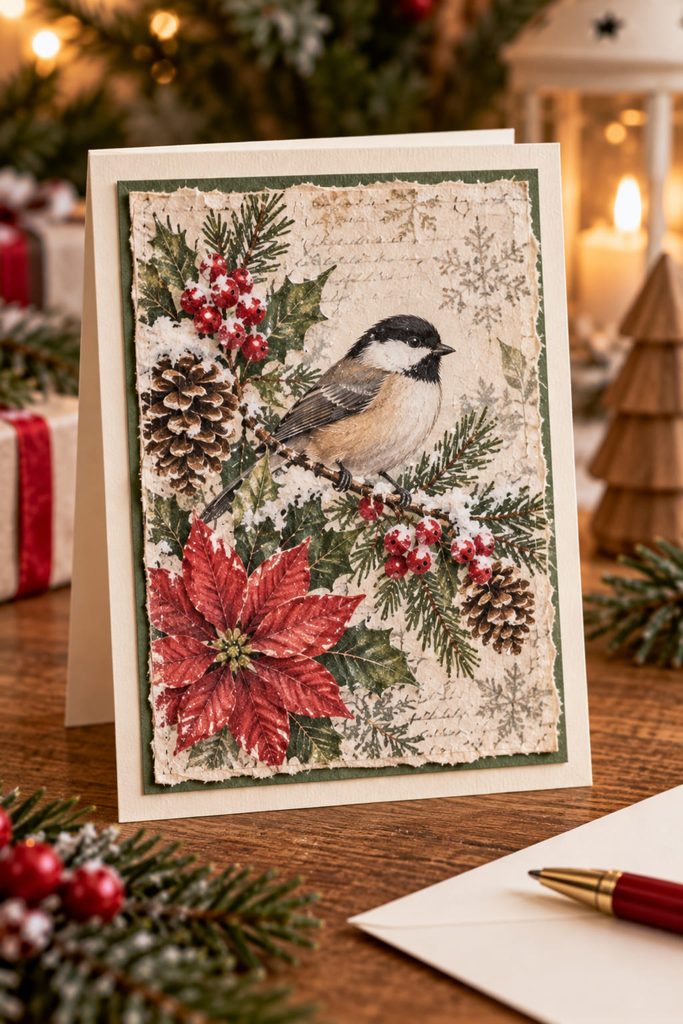
Thin napkin tissue can make a delicate card front, but applying wet medium directly to a folded card invites warping. A better sequence is to decoupage the printed napkin layer onto a separate lightweight cardstock panel, let that panel dry completely under gentle flattening if needed, and only then mount it to the card base.
That separation also gives you a clean design decision: trim the panel with a narrow border for a framed look, or tear the tissue edge before gluing so the image fades irregularly into the background. Because the fold itself never gets wet, the card opens more predictably and the inside remains clean for a written message. Use a restrained amount of medium—the tissue is so thin that excess adhesive adds wrinkles faster than it adds strength.

7. Vintage Ephemera Collage Christmas Card
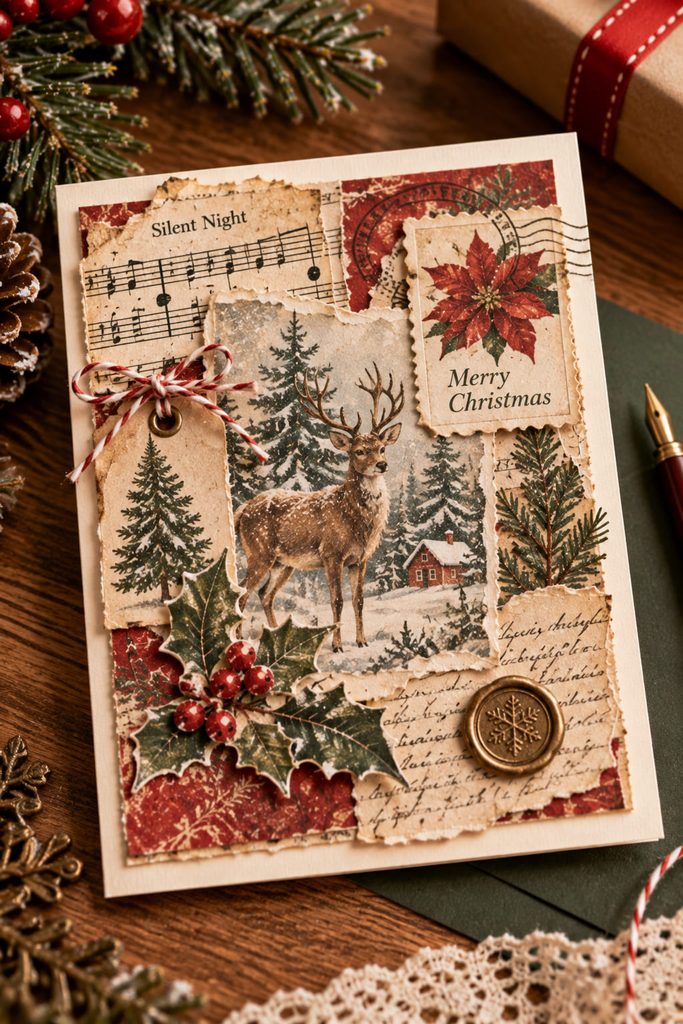
Choose one focal image before you tear a single scrap. A vintage-style Christmas card collage becomes muddy when every stamp, label, music fragment, and botanical print is treated as equally important. Place the largest image first, use smaller ephemera to lead the eye toward it, and leave a little uncovered cardstock so the composition has breathing room.
Before wetting printed material, test a spare scrap with the same matte medium you plan to use. Some home-printed inks can smear when brushed with a water-based product, so a small test can save the whole panel. Build the collage on a separate front piece rather than the folded card itself; that gives you room to press, trim, and dry it without distorting the fold.

For a flatter mailed card, keep twine, wax seals, and dimensional embellishments off the front and let torn edges create the texture. For a hand-delivered version, one small tied thread or raised label can work as the final accent.
Composition Check: Squint at the finished panel from arm’s length. One image should still read first; if every scrap competes equally, remove or cover the weakest detail before mounting the panel.
8. Rice-Paper Christmas Village Plaque
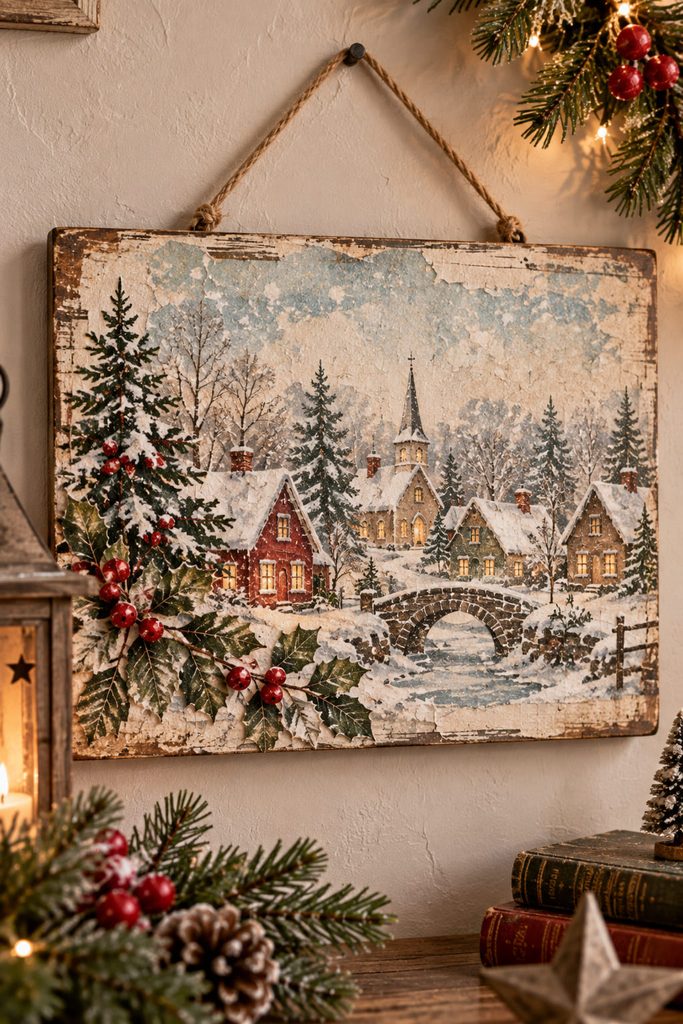
A rice-paper village scene earns wall space only if the main silhouettes remain readable beyond craft-table distance. Instead of filling the plaque edge to edge, let one cluster of houses occupy the lower half or lower third, with quieter sky or snowfall above it. The open area makes rooflines, windows, and church spires easier to distinguish.
Before sealing the whole plaque, check:
- the village has one clear focal building or cluster;
- paper edges are fully bonded along roof peaks and corners;
- the outer margin is intentional rather than an accidental strip of bare board;
- the hanging hardware is centered behind the visual weight, not merely behind the geometric center;
- the image still reads when you step several feet away.
A rectangular wood or MDF plaque gives the scene enough stiffness to hang flat, while thin rice paper follows the surface without adding bulky ridges.
9. Translucent Decoupage LED Luminary Jar
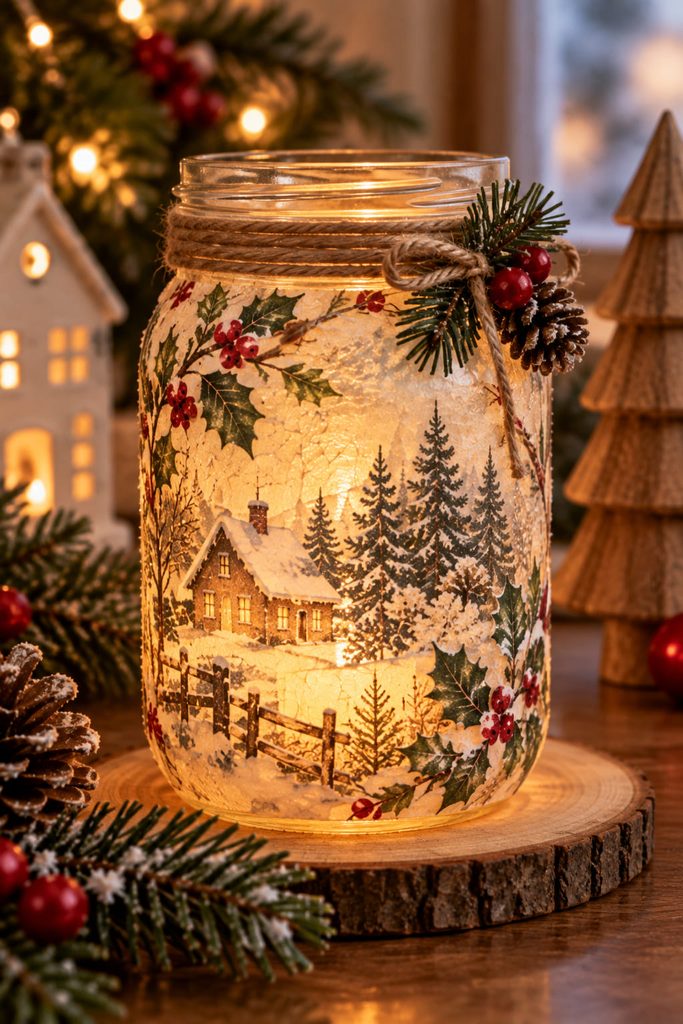
Because light has to pass through the decorated surface, a luminary jar works best with translucent tissue or rice paper rather than opaque cardstock. Keep the paper layer thin, avoid stacking dark patches over the entire glass, and leave some lighter zones where the glow can travel through. A cool battery-powered LED is the appropriate light source here; do not use an open flame inside a paper-covered jar. The jar also needs a clear rim so the light can be inserted and removed without scraping the decoupage. A simple winter branch, snowflake, or house silhouette usually shows better after dark than a dense all-over print.

10. Decoupage Advent Drawer Chest
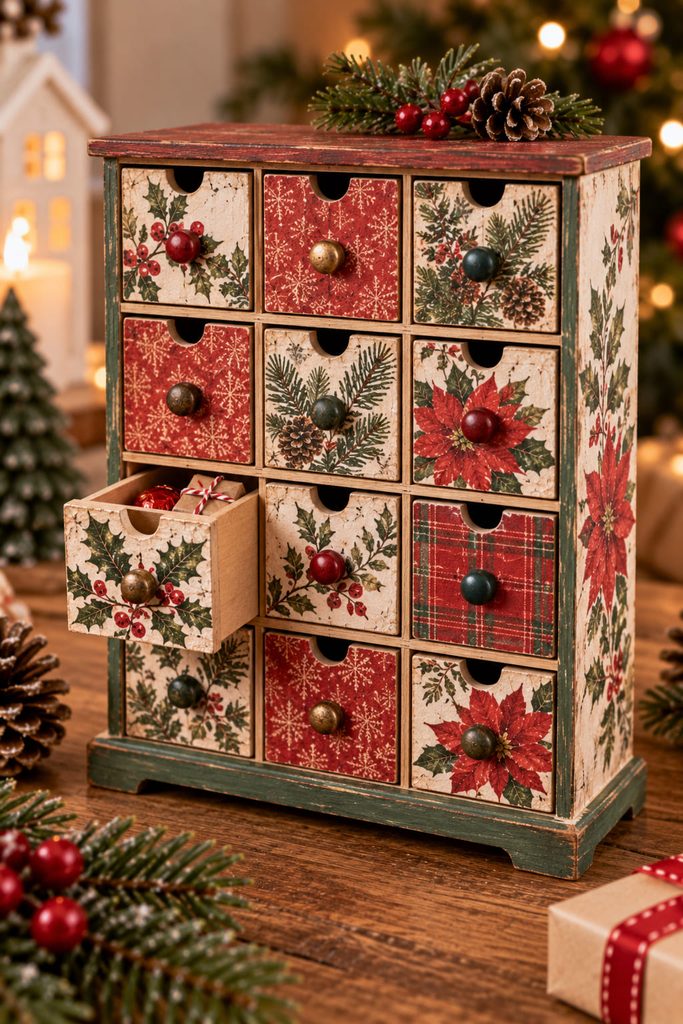
Do not decoupage an Advent drawer unit as if it were one solid box. The fronts need to move independently, so wet paper and medium must stay away from drawer seams, finger pulls, and sliding edges. Treat each drawer face as a small panel and preserve the gaps that let the unit function. If the chest has very shallow clearances, paper only the face rather than wrapping around any edge.
- Remove the drawers and mark their order before decorating.
- Cut paper slightly inside each front edge instead of wrapping around the sides.
- Decoupage all fronts in batches, keeping pulls and openings clear.
- Let them dry fully outside the cabinet.
- Reinsert every drawer and correct any tight spot before adding numbers or extra trim.
Drawer Clearance Check: Each drawer should open with one hand and return flush without scraping a paper edge. If it catches, trim or sand the interfering edge rather than forcing the drawer through softened paper. This is one of the projects where decoration has to yield to access, because one swollen edge can affect the whole countdown once the drawers are used every day.
11. Decorative Decoupage Christmas Tray
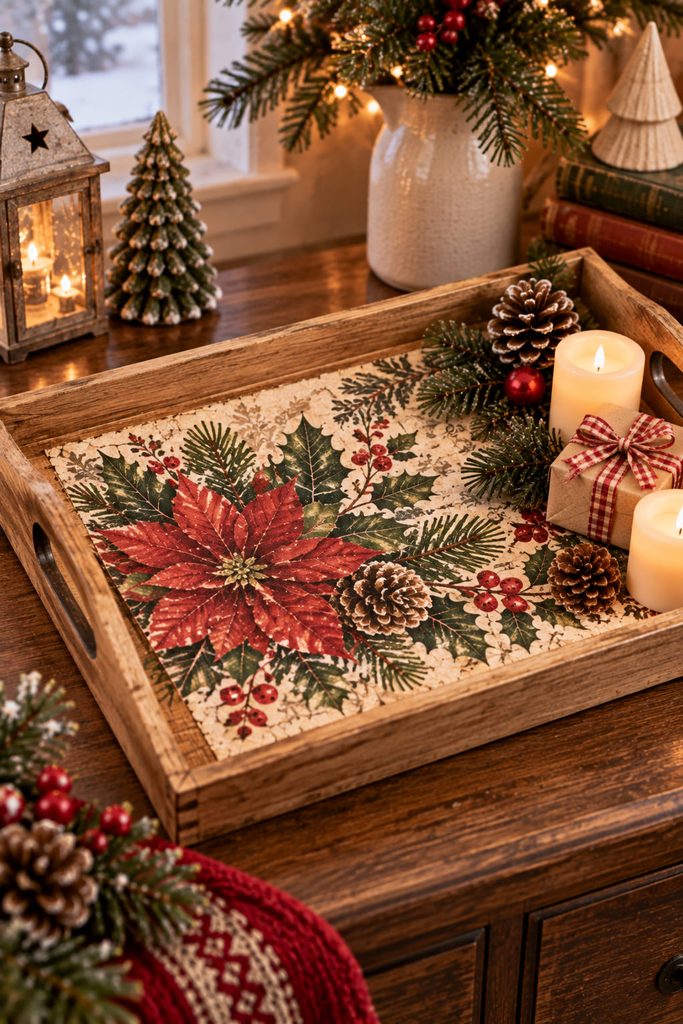
When a Christmas tray is meant to anchor candles, ornaments, greenery, or a table vignette, the center can carry a much larger decoupage image than an ornament or card. Measure the usable flat area first, then keep the busiest part of the print away from objects that will sit on top of it. A border of visible wood or paint helps the surface look intentional even when half the image is covered.
Use this as a dry decorative tray unless every coating in your specific system is rated for the contact, heat, moisture, and cleaning it will receive. Standard craft decoupage finishes should not be assumed to make a surface food-safe or dishwasher-safe. For seasonal styling, that limitation is easy to work around: use the tray as a base for wrapped items, a vase, battery candles, pinecones, or ornaments rather than direct food service.
12. Decoupage Keepsake Gift Box
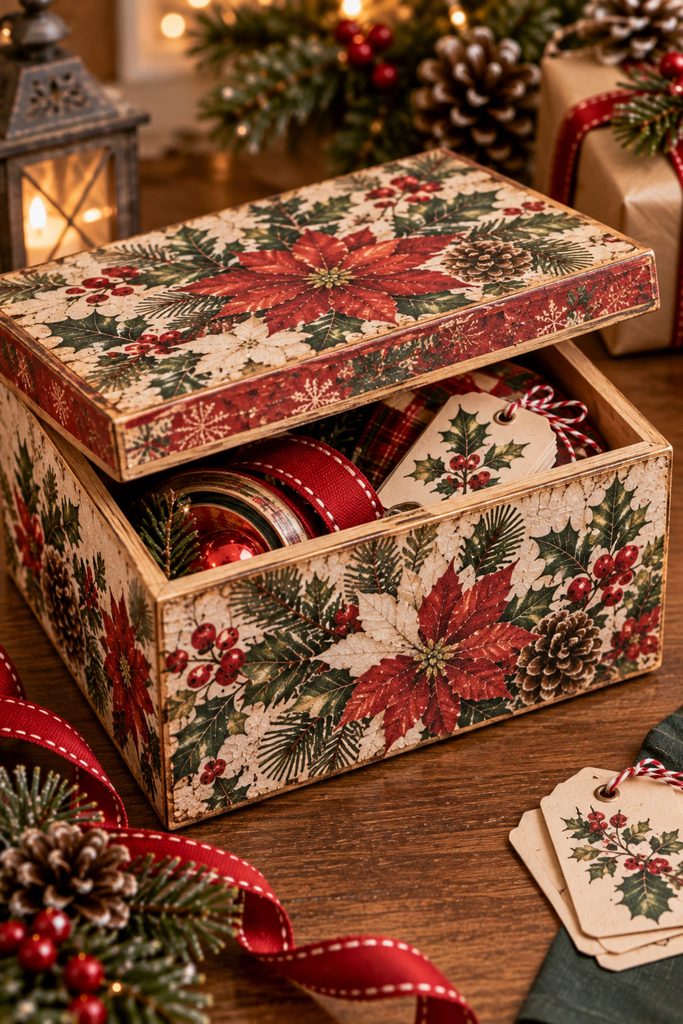
A keepsake box only works if the lid still opens and closes after the decorative layers are added. The safest place for paper is on the broad outside faces; keep the lid lip, hinge area, and friction-fit edges mostly bare.
Useful materials for this project:
- a papier-mâché or wood box with a lid that already fits well;
- thin napkin, tissue, rice paper, or lightweight printed paper;
- decoupage medium and a soft flat brush;
- optional narrow ribbon or paper trim for the top surface, not the closing edge.
Decorate the lid and base separately, then let both dry before testing the fit. If the lid becomes tight, do not add another sealing layer around the rim. The goal is a box that still functions as storage for small ornaments, letters, gift tags, or holiday keepsakes after the surface treatment is finished.
13. Decoupage Mini Christmas Village Houses
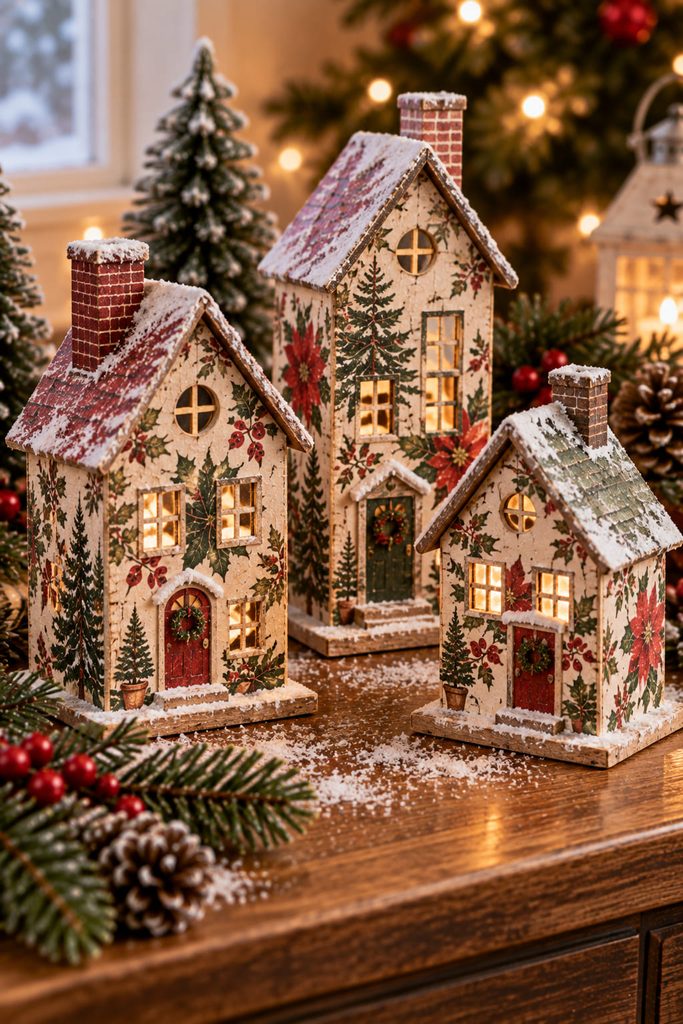
Covering miniature houses is easiest before every roof, porch, and trim piece is permanently joined. Flat wall panels give thin rice paper somewhere to lie; assembled corners force you to chase wet paper around edges while glue tabs and roof joints become harder to reach. If you are building from chipboard, cardstock, or small unfinished wood blanks, plan the decoupage as part of the construction sequence rather than as a final skin.
A practical order is: prepare the wall surfaces, apply and dry the main papers, reopen any window or door cutouts, then assemble or finish the structural joins. Keep tabs, slot edges, and roof-contact strips free of thick medium. Vellum can sit behind open windows if you want a pale lit-window effect with a battery LED placed nearby rather than inside a tightly enclosed paper structure.
The houses also need a shared scale. Repeat one roof color, paper family, or window treatment across the set, but vary the facades enough that the row does not look printed from one pattern.
Repair Path: If a paper edge lifts beside a corner, slide a tiny amount of medium underneath and press it flat after the structure is stable. Do not flood the joint; excess moisture can soften paperboard exactly where the house needs stiffness.
14. Patchwork Decoupage Christmas Wreath
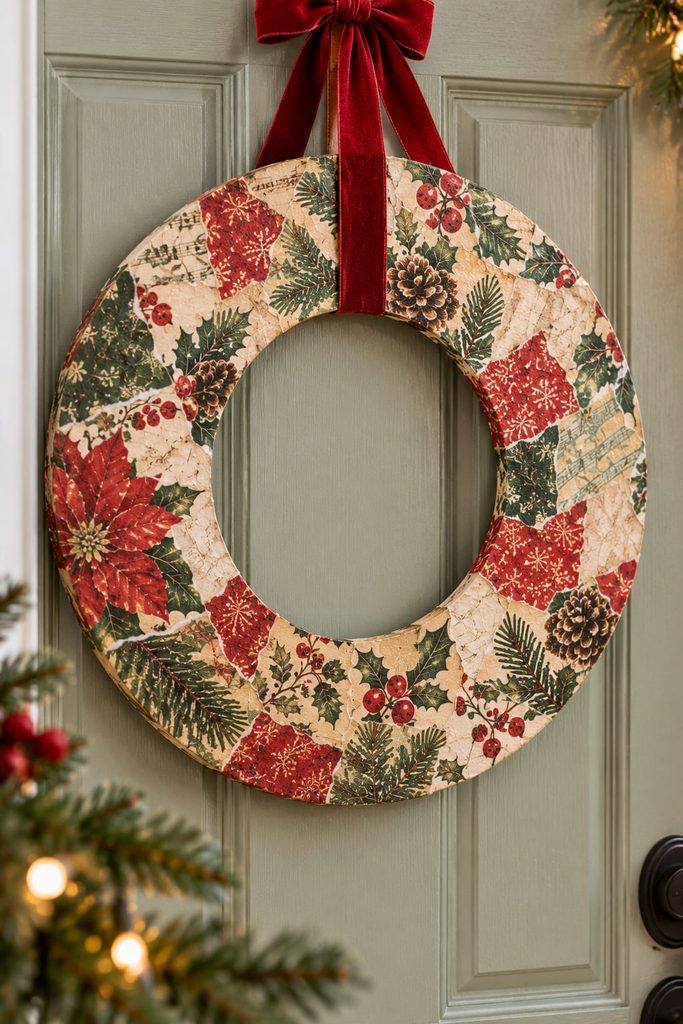
Instead of filling the center, let the empty circle do the visual work. A flat wreath base covered with overlapping scraps of Christmas paper, botanical tissue, or old gift-wrap fragments gains rhythm from repeated patches around the ring, while the open middle keeps the silhouette unmistakable on a door or wall. Change patch size gradually rather than switching randomly between tiny and oversized pieces, and keep the outer edge clean enough that the ring reads from a distance. Attach the hanging ribbon or loop to the rigid wreath base, not to a decoupaged paper layer; the surface is decoration, while the base carries the weight.
15. Decoupage Standing Christmas Tree Trio
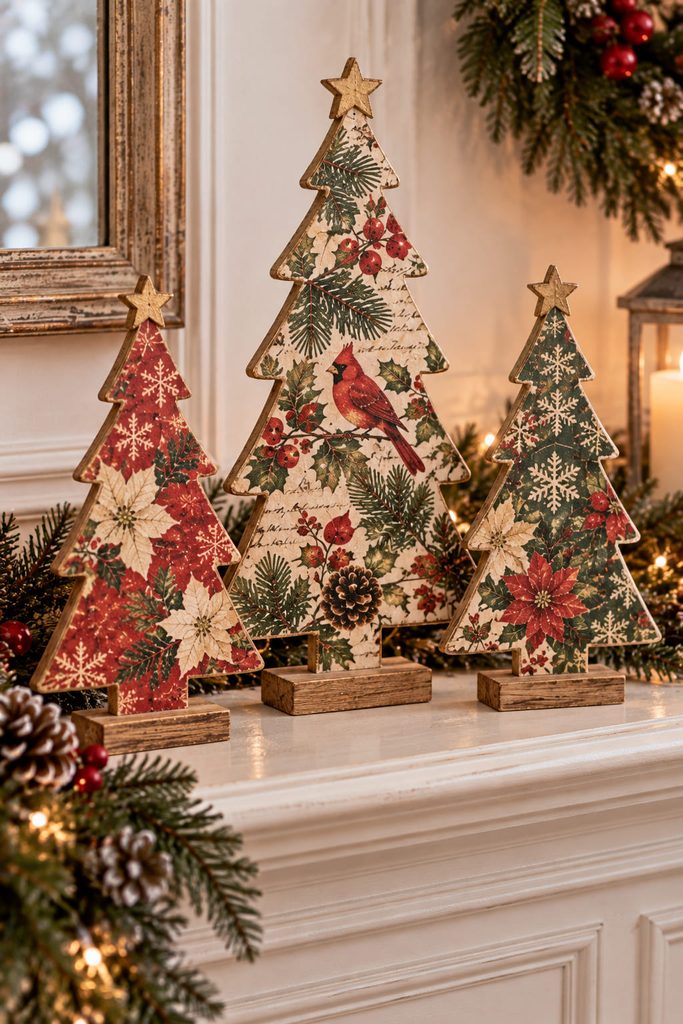
Larger standing tree blanks and small tabletop trees need different support strategies, even when the decoupage surface treatment is identical. A small solid wood tree can often stand on its own foot, while a taller flat tree benefits from a slot-fit cross base or a separate weighted stand. Keep all feet, slots, and contact surfaces free of paper buildup so the trees sit squarely.
For a compact mantel trio, use three solid silhouettes in staggered heights and let different papers distinguish them. For taller shelf or floor-level pieces, choose a mechanically wider base before adding pattern; extra decoupage layers cannot correct a narrow footprint. Group the finished trees with enough space between them that each outline remains visible. If one leans after decorating, correct the base or contact point rather than hiding the imbalance with heavier embellishments.
16. Decoupage Christmas Card Display Frame
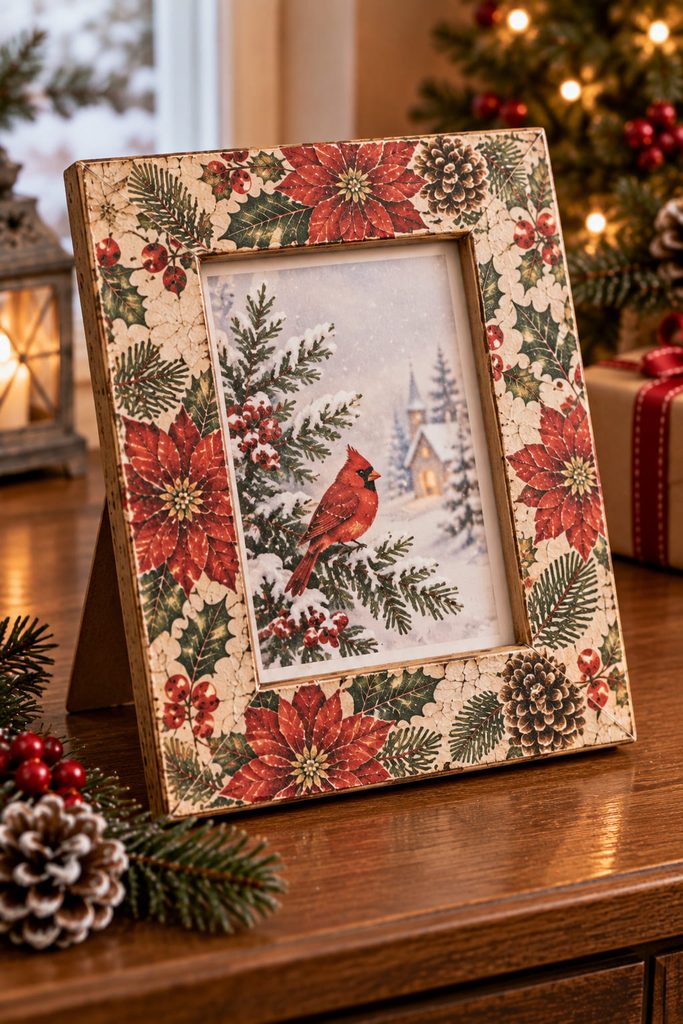
How do you cover a frame without making it harder to use? Keep the decoupage on the visible face and outer sides, while leaving the rabbet, clips, tabs, or removable backing free. The frame should still accept a Christmas card, family photo, or small seasonal print without the paper treatment narrowing the opening.
If the finished frame fights you, match the fix to the problem:
- Card will not sit flat: trim paper that has wrapped into the inner recess.
- Backing will not lock: remove buildup around clips or rotating tabs.
- Corners lift: patch only the loose edge instead of recoating the whole frame.
- Pattern looks broken at the joints: add one narrow coordinating strip across the face, not inside the working hardware.
A frame is a good final project because the decoupage can stay on display after the card itself is stored away. The function remains simple: the decoration belongs on the frame, while the opening stays usable.
How to Match Christmas Decoupage Ideas to the Right Surface
The paper should become thinner as the surface becomes more curved or mechanically demanding. Napkin tissue and lightweight rice paper conform well to rounded blanks and irregular edges; thicker decorative paper is easier to control on plaques, box lids, and broad flat panels. Card fronts benefit from a separate working panel because wet medium can distort the fold.
Also separate decorative surfaces from functional ones. Keep paper away from drawer runners, box lips, frame clips, base slots, and hanging holes. For translucent projects, preserve a clear light path and use only a cool battery-powered LED. For trays and other objects that may sit near food or moisture, treat ordinary craft decoupage as decorative unless the specific products you use are rated for the intended contact and cleaning.
Choose the Surface Before the Motif
Start with the object you actually need: a hanging piece, a mailed card, a storage box, a lighted accent, or a larger display. That decision immediately narrows the best substrate, paper weight, and amount of surface coverage. If you are new to the technique, the wood slice, card panel, or plaque keeps the working surface flat; the drawer chest, layered card, and miniature village are better next steps when you want to manage clearance, depth, or construction order.
For more holiday projects built around different paper mechanisms, continue with Christmas Paper Crafts, Ideas & SVG Projects.