This post contains affiliate links. As an Amazon Associate I earn from qualifying purchases, at no extra cost to you. Thank you for supporting Diynify!
Paper can cover a surprising amount of wall space without making a room feel heavy. These wall decoration ideas with paper range from flat graphic pieces to folded reliefs, garlands, layered scenes, and one useful wall organizer, so you can choose a project by the effect you want rather than by a single craft style. Most use cardstock, copy paper, tissue paper, scissors, a ruler, and glue; a few also need thread, removable mounting products, a shallow frame, or a lightweight backing board.
1. Build a Folded Fan Rosette Cluster
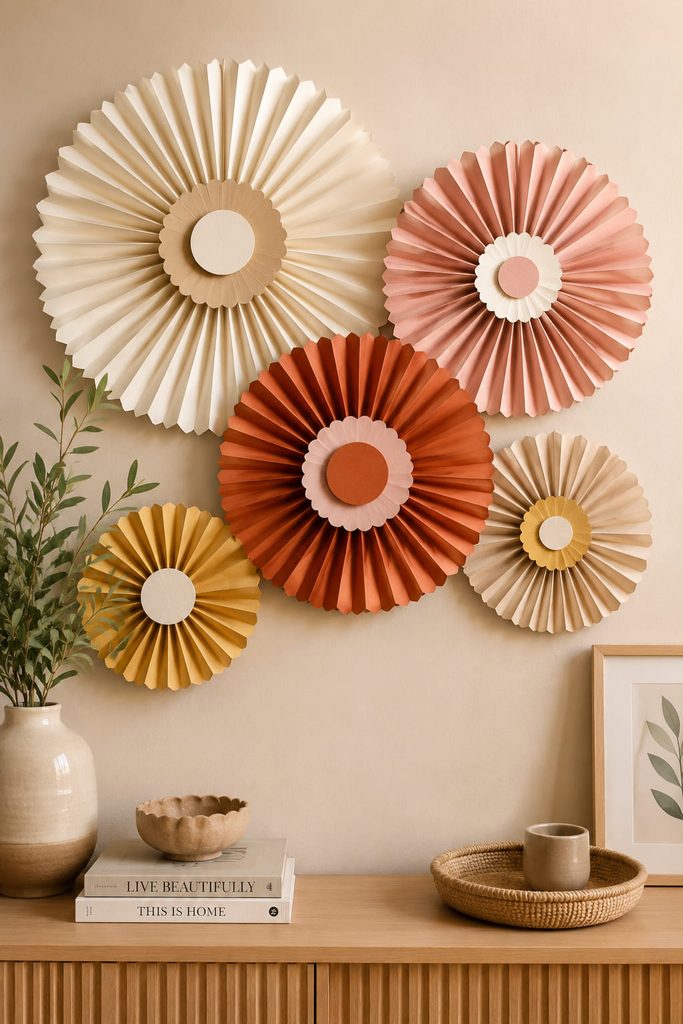
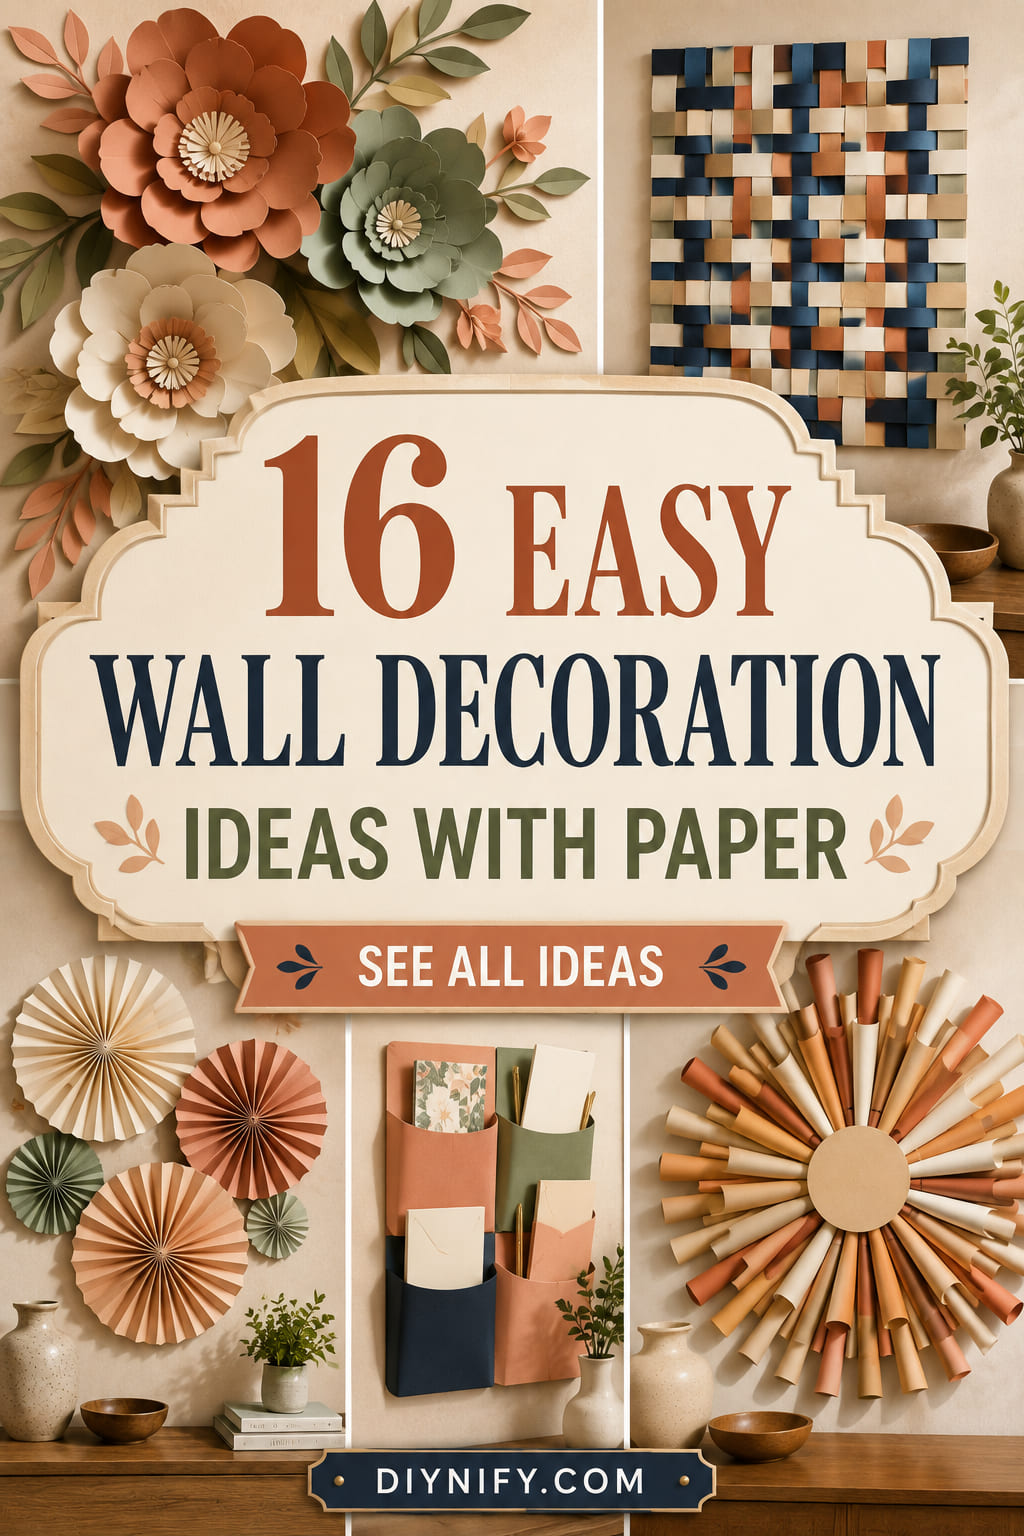
Accordion-fold long paper strips, join the short ends, then bring each loop inward until it flattens into a circle. A small cardstock disk glued across the back keeps the center from springing open, which is the part that makes a rosette reliable enough for wall display. Make three or five in noticeably different diameters instead of filling the wall with equal circles; the size changes create a focal point while the repeated pleats keep the group cohesive. A bedroom, craft room, or party wall can take brighter colors, while two or three quiet tones give the same construction a calmer living-room look.

2. Stretch a Torn-Paper Botanical Branch Across a Narrow Wall
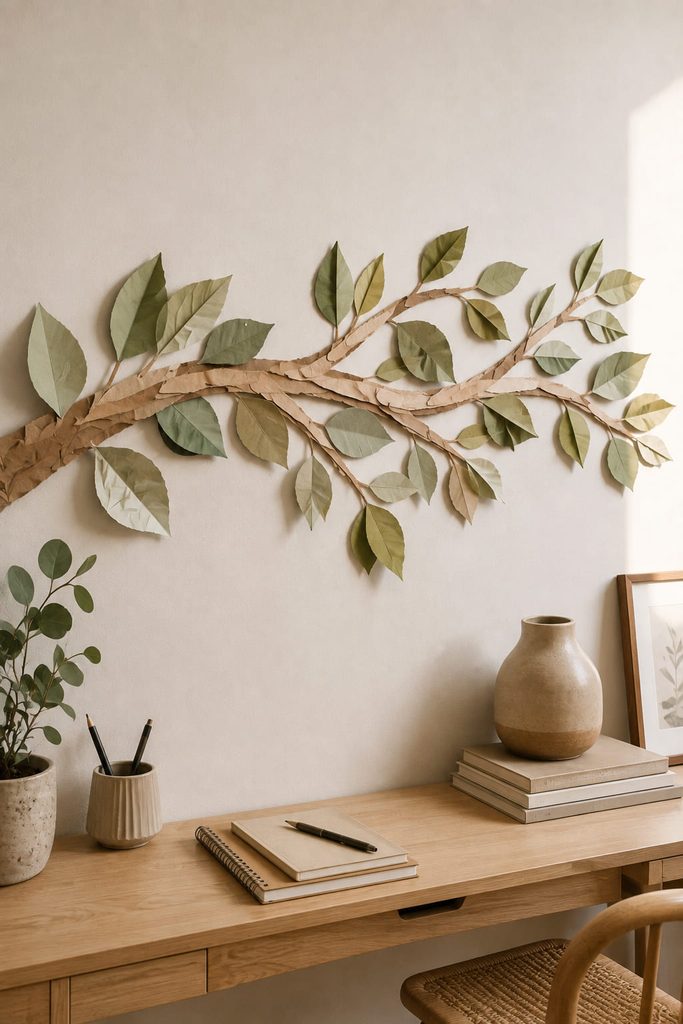
Torn edges make leaves feel softer than perfectly cut shapes, so this idea works well when a hallway needs a long, low composition. Build the branch first from overlapping kraft-paper strips on a narrow hidden backing, then crease each leaf once before attaching only its base. The lifted tips cast small shadows without needing foam spacers.

Keep the branch asymmetrical: one heavier leaf cluster near a third of the length and a few smaller offshoots toward the ends read more naturally than even pairs. Because the whole arrangement is assembled on one lightweight backing, it is also easier to reposition than dozens of individual leaves attached directly to the wall.
3. Weave a Paper Strip Panel for Quiet Texture
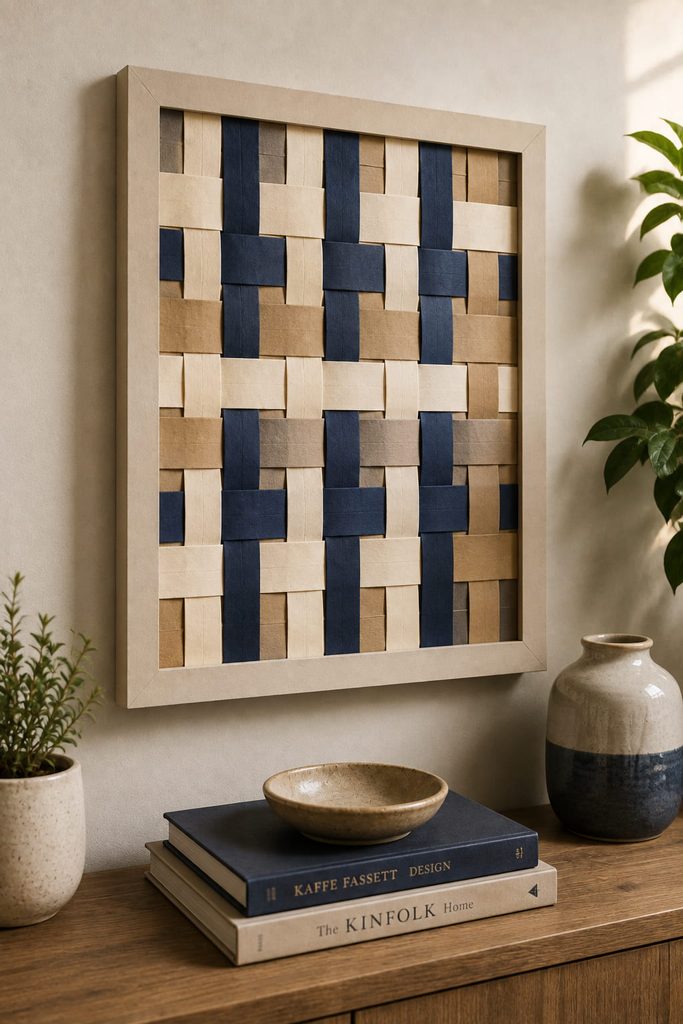
A true woven panel needs an over-under path, not strips simply glued in a checkerboard pattern. Anchor vertical paper strips along the top and bottom edges of a cardstock frame, then feed the horizontal strips alternately over and under them. This creates a flexible surface with real interlocking structure and enough shadow to show the weave from across the room.
- Cut the warp strips to equal width and secure them parallel to each other.
- Weave the first horizontal strip over-under; reverse the pattern on the next row.
- Nudge each row upward before adding the next so gaps stay controlled.
- Glue the outermost intersections only after the panel is square.
Keep the Weave Square: measure both diagonals of the finished rectangle before final gluing. If one diagonal is longer, ease the rows sideways until the corners return to square; otherwise the panel can look skewed once framed.
4. Make a Tissue-Paper Fringe Gradient
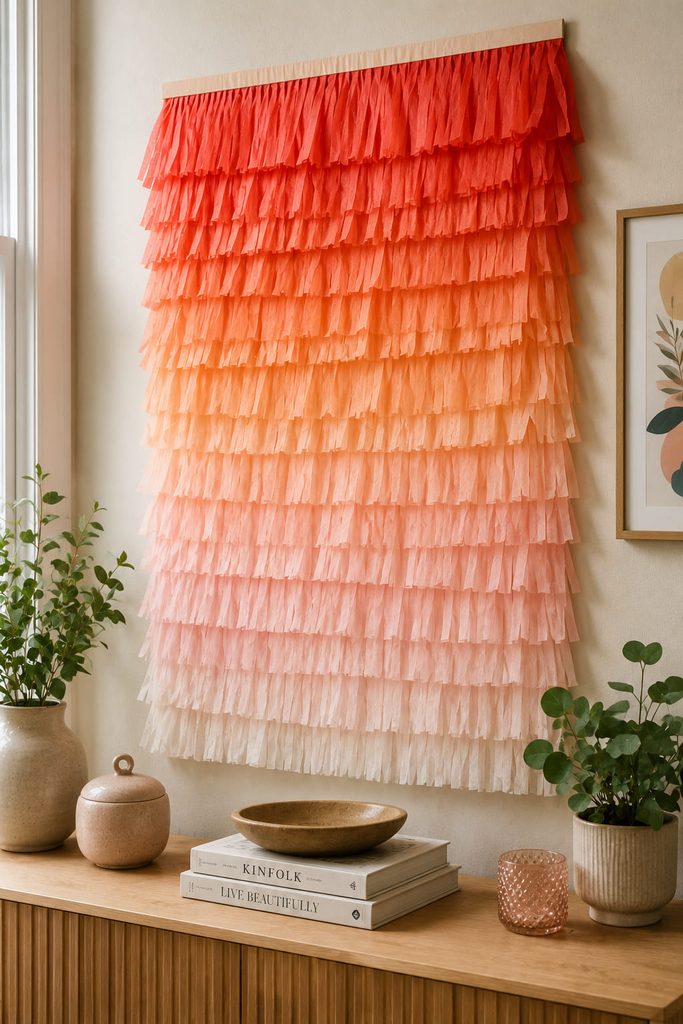
Tissue fringe gives a large wall area movement without adding much visual weight. Cut stacked tissue into long bands, leave an uncut margin along the top of each band, and attach the layers to a paper backing from bottom to top so every new row hides the solid edge of the one below. A gradual shift from dark to light can make the piece feel taller, while a side-to-side gradient visually widens a narrow wall.
If the fringe looks uneven, diagnose it before adding more layers.

| Symptom | Fix |
|---|---|
| Rows separate into obvious stripes | Overlap them more so only the cut fringe remains visible. |
| The lower edge looks bulky | Reduce the number of tissue layers in each band. |
| The surface feels flat | Lightly lift and separate the fringe after the adhesive has set instead of curling every strip in the same direction. |
5. Arrange Layered Geometric Tiles as a Modular Relief
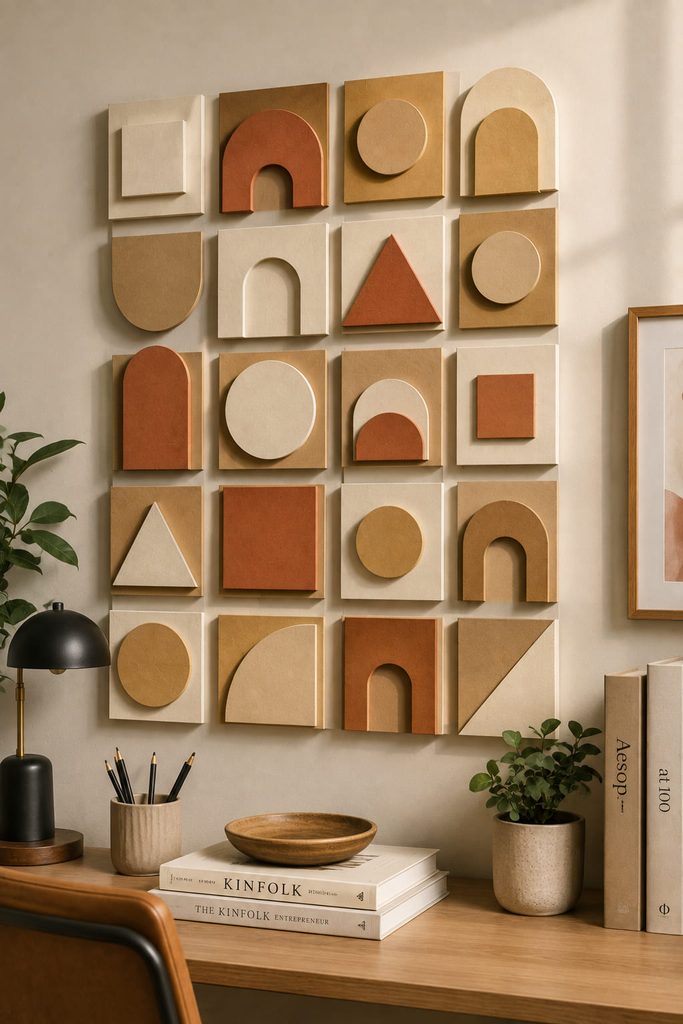
Shallow relief starts with squares, circles, arches, or triangles cut in two or three sizes, with selected pieces stacked on small paper spacers before they are arranged into a larger grid. The spacer creates shallow relief, so even a restrained palette develops visible light and shadow. This is especially useful above a desk or sofa where a busy illustration would compete with the rest of the room.
Build the full layout on the floor first and photograph it before mounting. Mounting Test: view the arrangement from the same distance you will normally see it on the wall. If all the shapes merge into one block, open more negative space between modules; if the design feels scattered, repeat one dominant size or shape to restore rhythm.
6. Grow an Oversized Paper Flower Corner Spray
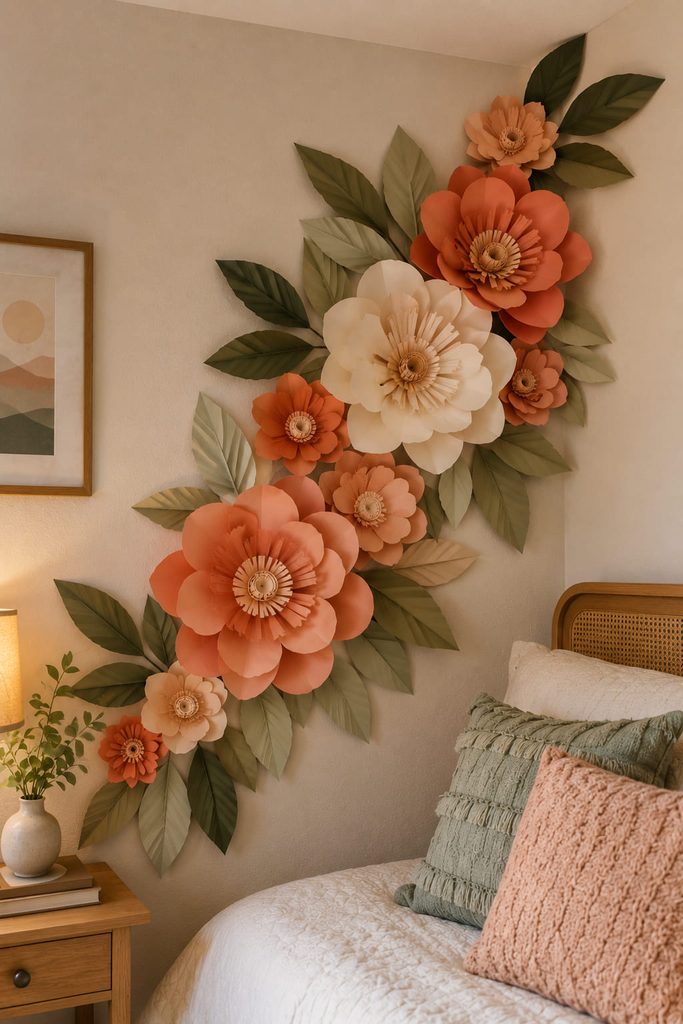
A corner spray uses the architecture of the room instead of fighting it. Make several paper flowers with cupped petals, add long folded leaves, and let the arrangement climb diagonally from one corner rather than forming a centered bouquet. Petals only need a slight curl around a pencil or dowel; a shallow cup is enough to catch light and keep the flowers from reading as flat cutouts.

Before mounting, check four things at once: keep the largest bloom near the visual base, use medium flowers to bridge the direction of the spray, extend leaves beyond the round flower shapes, and preserve visible wall gaps between clusters. That combination gives the eye a clear route through the arrangement instead of one dense floral mass.
For a small room, stop the spray early rather than shrinking every flower. Fewer readable shapes usually look cleaner than many tiny petals.
7. Frame a Layered Cut-Paper Window Scene
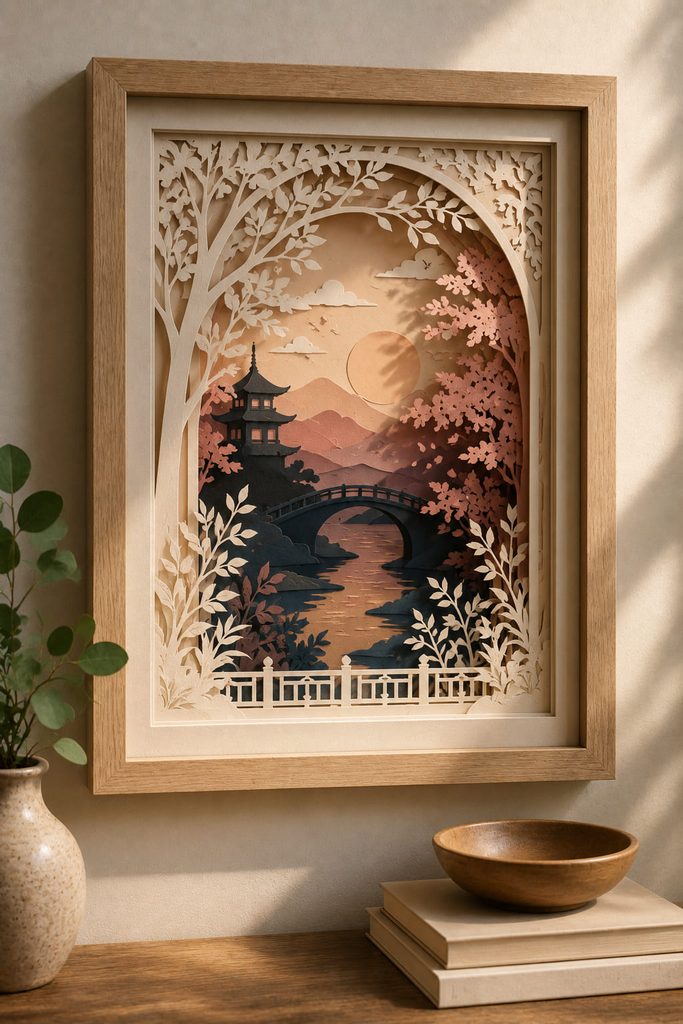
Depth comes from separating a few cut layers inside a shallow frame, not from complicated paper sculpture. Start with three or four sheets cut with progressively smaller openings: a foreground arch or foliage layer, a middle silhouette, and a simple background. Thin folded paper spacer strips between the sheets keep the layers separated, making the openings cast real shadows instead of blending into one flat image.

Layer order matters because later sheets can block access to the glue zones. Dry-stack everything first, mark the top edge of each layer, and confirm that the focal silhouette stays visible through every opening. Then attach spacers around the perimeter where they will not intrude into the view.
A scene that looks muddy usually needs less detail, not more. Remove or enlarge the closest cut shapes if they cover the middle layer, and increase contrast between neighboring papers before adding deeper spacing. The project is successful when the foreground, subject, and background remain distinct from normal viewing distance.
8. Curve Paper Strips Into a Looped Rainbow Relief
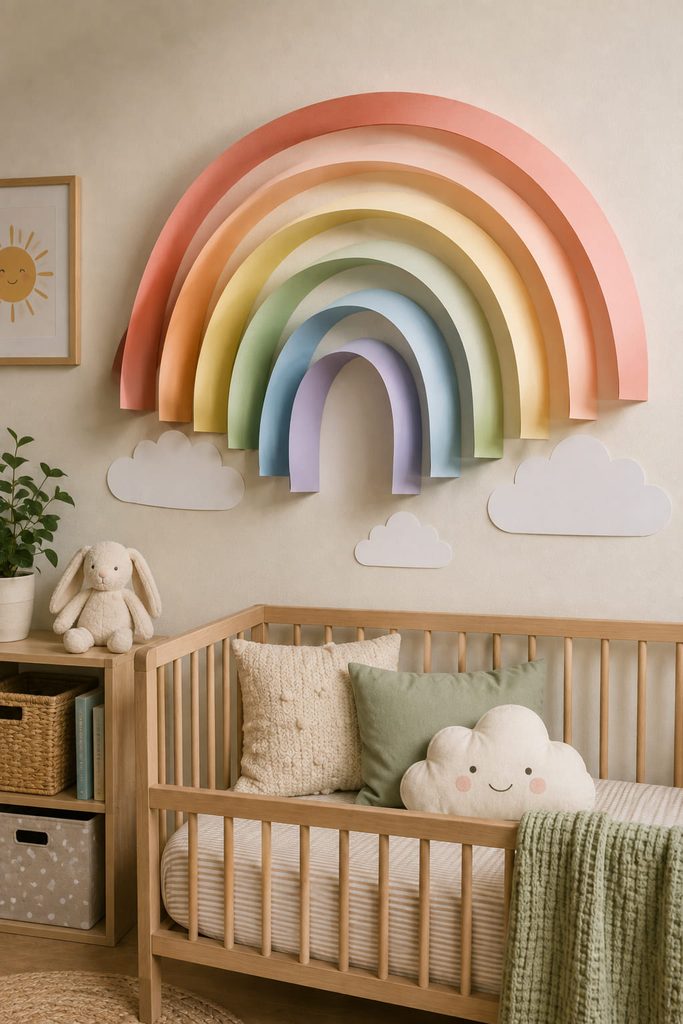
Instead of drawing a rainbow, make each band from a wide cardstock strip arched away from the backing and attached only at its two ends. The resulting loops create real depth with almost no cutting detail, making this a forgiving project for a nursery, playroom, or cheerful office corner. Keep the strip lengths progressively shorter toward the inside of the rainbow so the arches nest without crushing one another, and leave a narrow gap between colors; that sliver of wall or backing helps each curve stay readable.

9. Drape a Paper Chain Wall Swag
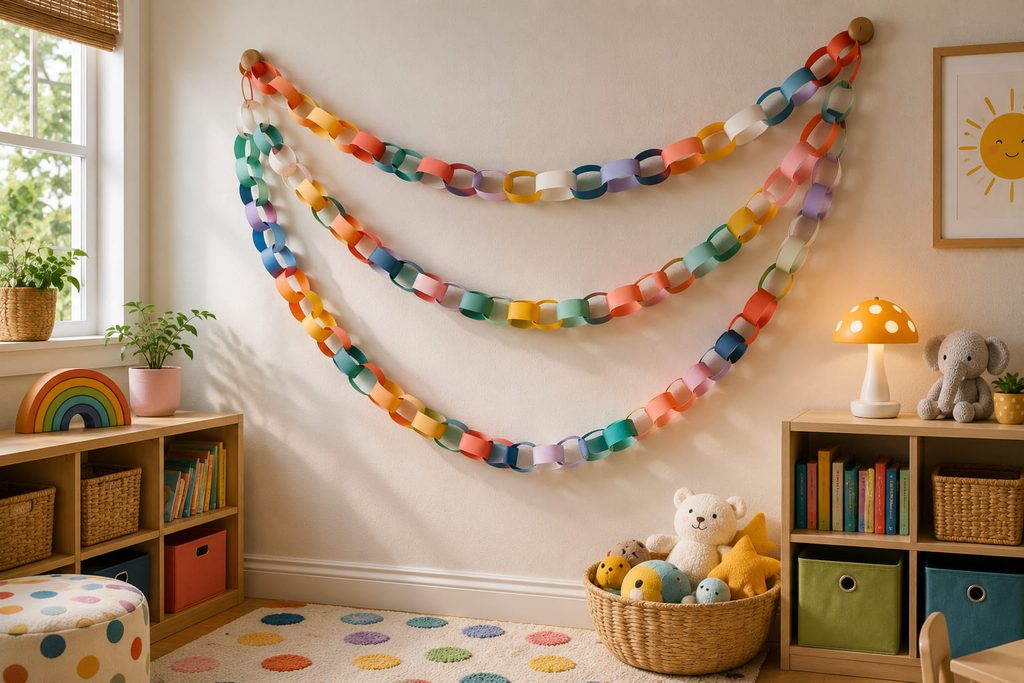
Paper chains are easy to batch-make, but the way you hang them changes the result more than the color choice does. One long chain creates a casual swoop, while several shorter chains form layered scallops with a fuller, more architectural look.
For a relaxed room, use one chain and let the center hang lower. For a cleaner backdrop, make three chains in measured lengths so the curves step down evenly. In either version, close each loop completely before feeding the next strip through it; partially glued loops are the weak point once the chain carries its own length across the wall.
10. Build a Quilled Paper Coil Medallion
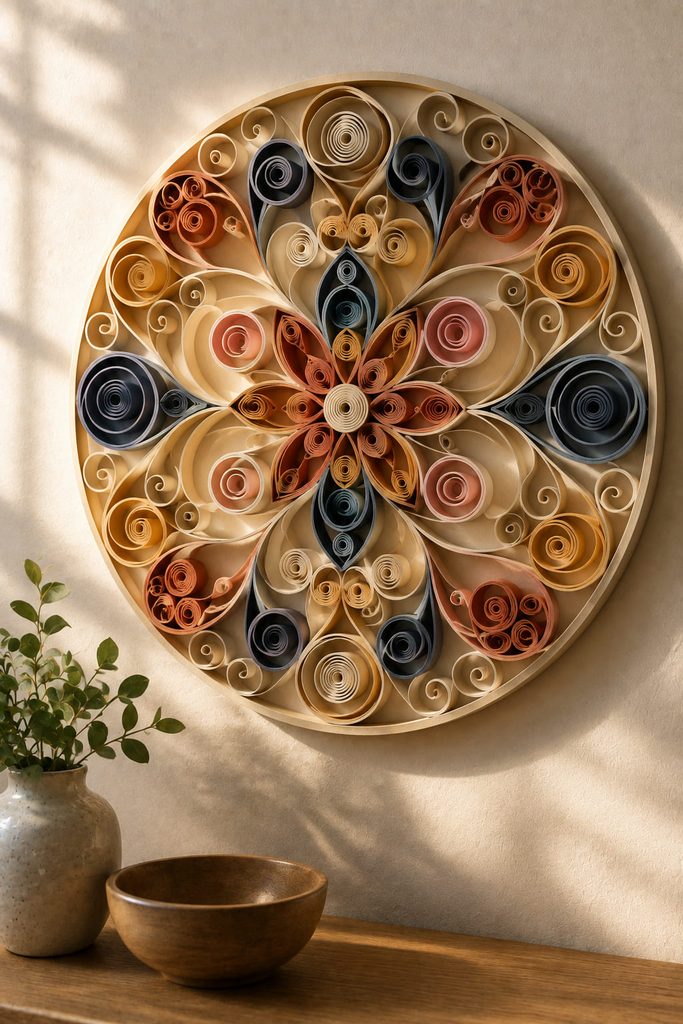
Quilling works best here as structure, not filler. Draw a plain circle on cardstock as a boundary, then build the interior from coils, teardrops, and loose scrolls made with narrow paper strips. Glue each shape on its thin edge so the paper stands upright; this creates a crisp relief that changes as side light moves across it.

Useful supplies for this project are a firm backing, narrow paper strips, a quilling tool or toothpick, and a fine-tip paper adhesive. Start with a few larger coils near the center and use smaller teardrops or scrolls to carry the rhythm outward. Leave intentional gaps between groups so the medallion keeps a readable radial structure instead of becoming a packed field of curls.
Edge Stability Check: gently tilt the finished backing before framing or mounting it. Any coil that lifts away from the surface needs another tiny glue point at its paper edge. If one section feels crowded, remove a coil rather than forcing it smaller; repeated open spaces make the circular design easier to read.
11. String a Folded Paper Leaf Garland
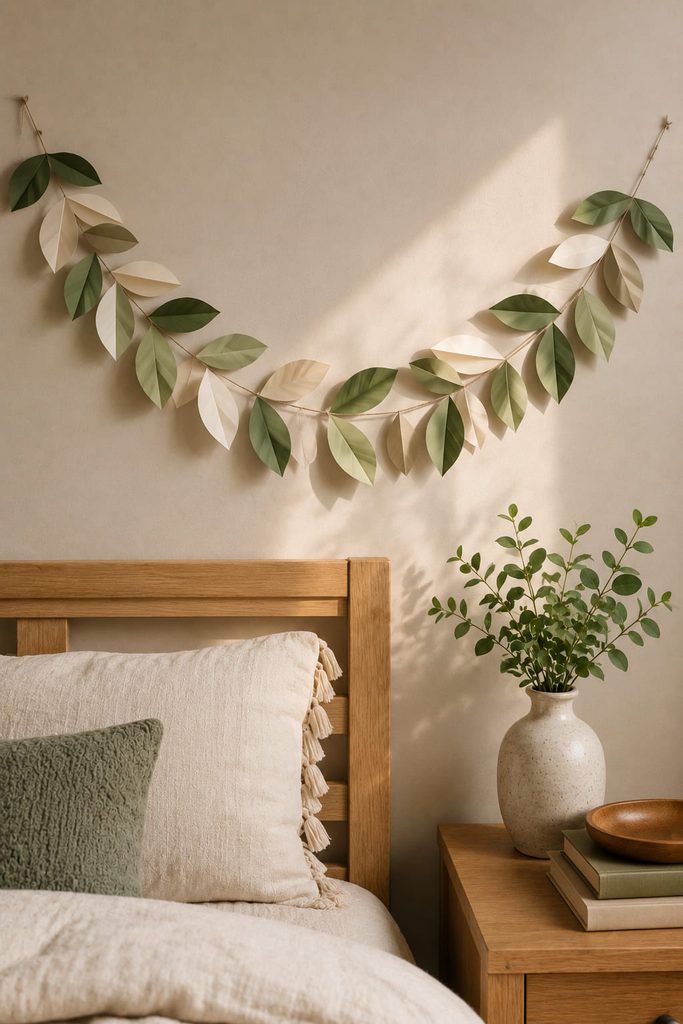
Folded leaves catch light along the center crease, giving a garland a softer line than a chain or geometric banner. Cut simple leaf silhouettes, crease each one from tip to stem, then attach pairs along thread or thin string so the leaves angle in alternating directions. The center crease gives every leaf a ridge, which helps the garland hold a leafy silhouette even when the paper is a single color.
Fold and crease all the leaves before starting the string. Next, lay the string across the back of one leaf and glue a second leaf over it to trap the thread; repeat while varying the spacing slightly, keeping the densest cluster near the middle or one intentional end. Hang the finished garland with enough slack for a shallow curve rather than pulling it tight like a clothesline.
12. Fold Cardstock Pockets Into a Useful Wall Organizer
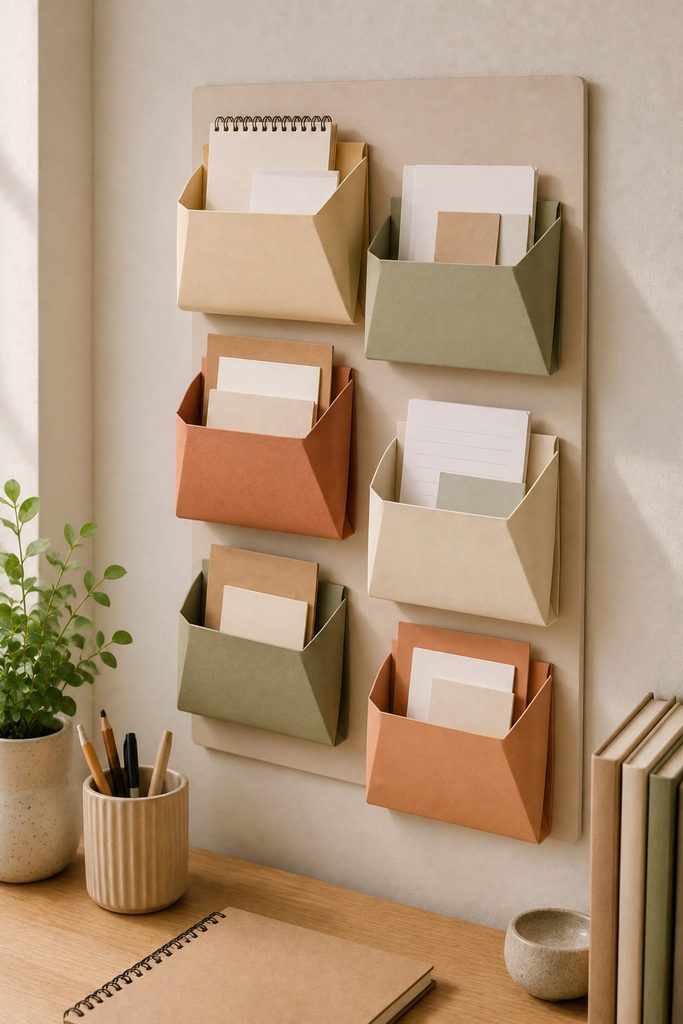
Fold shallow cardstock pockets onto a rigid lightweight backboard for wall decoration that also stores paper. Each pocket needs a front panel, side gussets, and a bottom flap; those folds create actual volume and keep flat notes or lightweight paper items from sliding out. Staggering the pockets vertically also lets the upper edges remain accessible.
Pocket Load Check: treat the organizer as paper storage, not a shelf. After mounting the empty backboard securely, add contents gradually. If a pocket bows forward, reduce the load or remake that pocket from heavier cardstock. Keep the opening wide enough for fingers to reach in without pulling against the glued side gussets.
13. Build an Overlapping Circle Color-Block Artwork
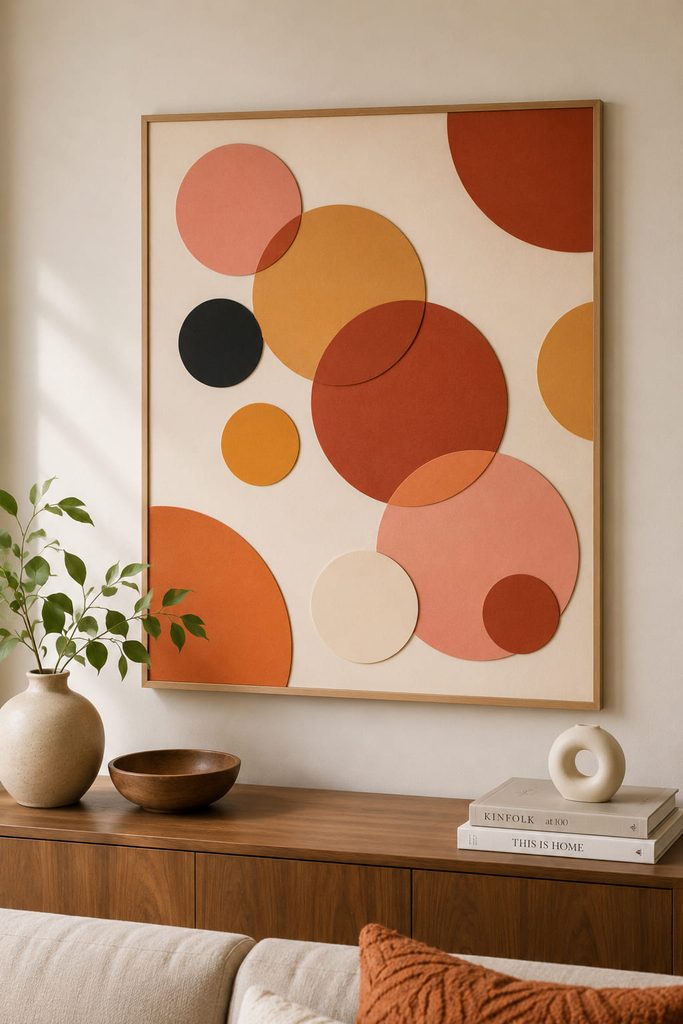
Overlapping circles create new shapes at their intersections, so several sizes can build a color-block composition without any drawing. Because this project stays flat, its strength comes from composition: one dominant cluster, a few cropped circles running off the backing edge, and deliberate patches of untouched background. It suits a home office or living room where you want color without raised pieces that collect dust. Test the arrangement in grayscale with a phone photo before gluing; if every circle has the same visual weight, enlarge one focal group or simplify the smallest pieces.
14. Send 3D Paper Butterflies Up the Wall
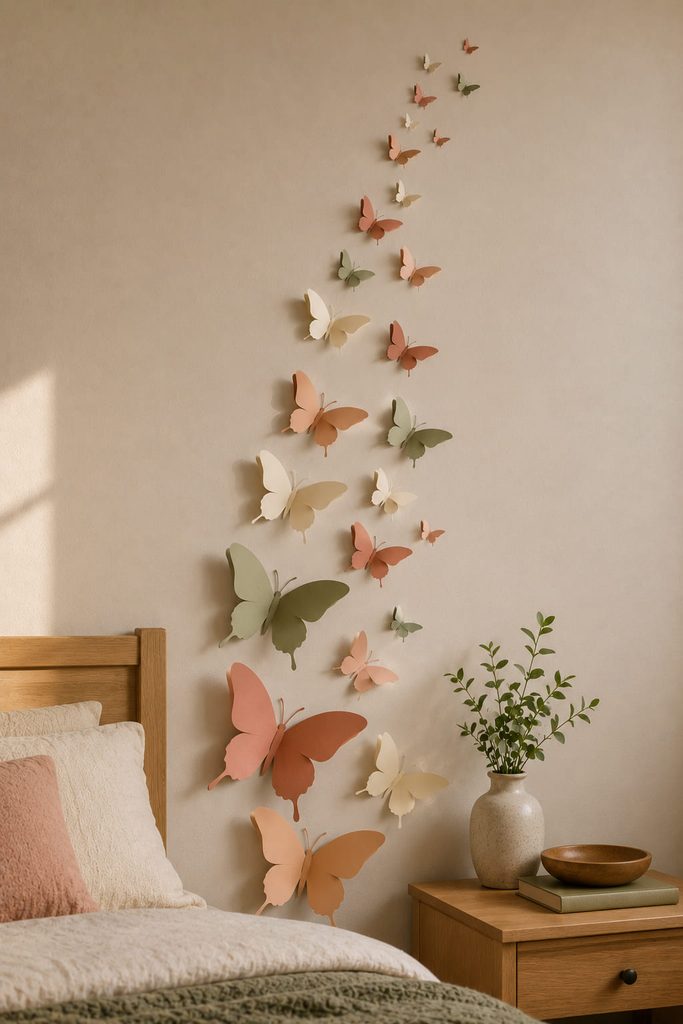
Treat the butterflies as a moving group rather than evenly spaced stickers. Fold each butterfly along the body so the wings lift away from the wall, then vary the size and angle as the trail rises. Keep the bodies aligned roughly along a loose curve while letting individual wings turn differently; the shared path provides direction, and the small rotations keep the group from looking stamped.
If the flight path feels wrong, use the spacing as the diagnostic.
| Problem | Correction |
|---|---|
| Too rigid | Break the equal gaps and rotate a few butterflies across the curve. |
| Too scattered | Pull outliers closer to the main path and reduce the number of angles. |
| Too heavy at the top | Move the largest shapes lower and let smaller butterflies taper the trail upward. |
15. Layer Scalloped Paper Tiles Like Wall Shingles
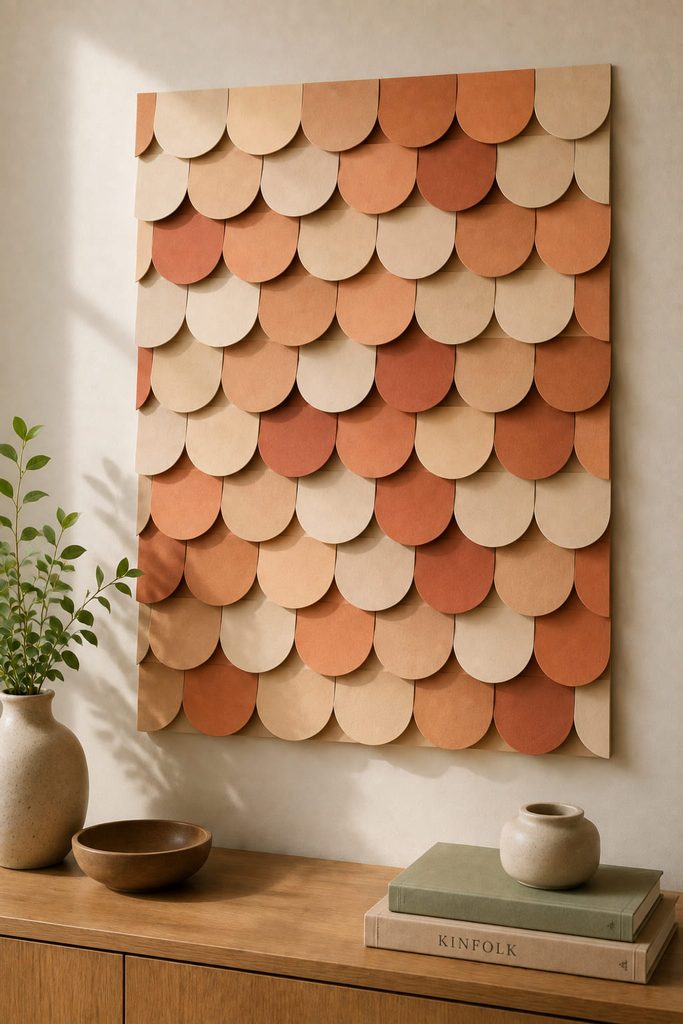
Rows of half-circles or wide scallops can turn plain paper into a surprisingly architectural panel. Start at the bottom of a backing sheet and overlap each new row over the straight top edge of the row below. The overlap hides attachment points while the curved lower edges remain free, producing a repeating shadow line.
Shift every other row by half a scallop so the seams do not stack vertically. That small offset makes the pattern feel continuous and prevents the eye from reading it as columns. For more depth, gently curve the free edge of each scallop outward before mounting, but leave the upper attachment area flat.
Distance Check: step back before filling the entire board. If the rows blur together, increase the contrast between neighboring papers or enlarge the scallops. If the panel looks striped, reduce the color changes and let the staggered geometry do more of the work.
16. Roll Paper Cones Into a Sunburst
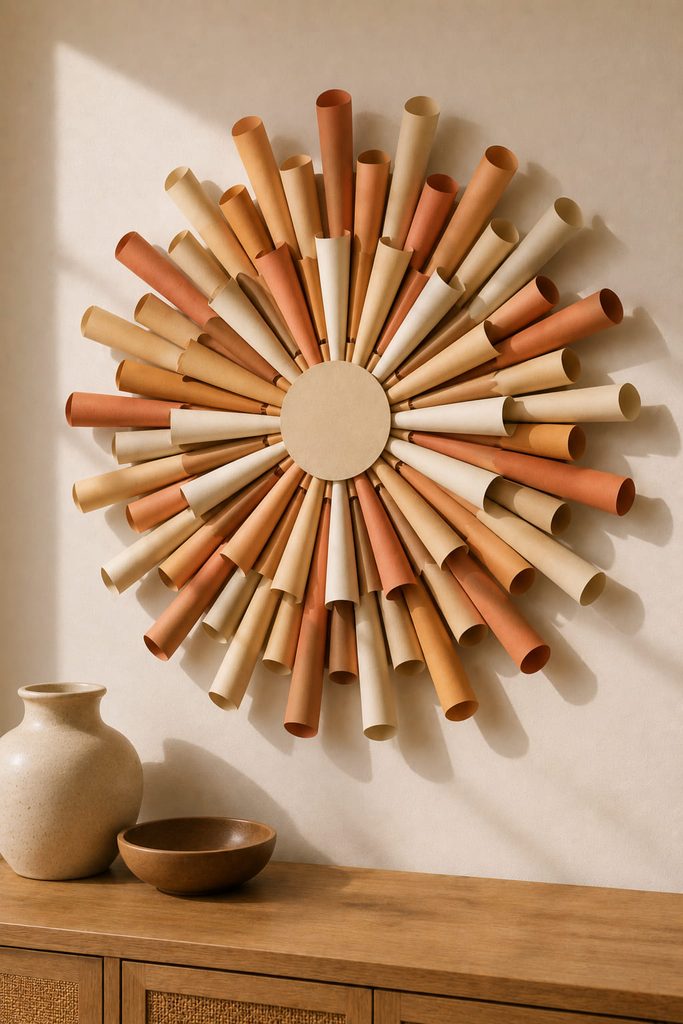
Rolled paper cones make a strong radial focal point from simple rectangles or squares. Shape each piece into a taper, glue the overlap, then arrange the cones around a sturdy circular paper base with the points aimed inward. The base carries the assembly; relying on cone-to-cone glue alone makes the center difficult to align and gives the outer edge less support.
For a softer look, use fewer wide cones and leave narrow gaps between them. For a denser graphic burst, use more slender cones and alternate two lengths. Dry-arrange a full ring before gluing so you can adjust spacing before the final gap becomes obvious.
Keep the center clean with a second paper disk that covers the cone tips and reinforces the hub. Mount the completed sunburst by the backing disk rather than by a cone, and choose a wall position where the projecting edges will not be brushed repeatedly.
Choosing Wall Decoration Ideas With Paper by Room
When choosing wall decoration ideas with paper, start with the amount of depth and handling the location can tolerate. Flat circle art, botanical branches, and framed cut-paper scenes suit narrow passages where projecting pieces could be bumped. Rosettes, quilling, scalloped tiles, and geometric reliefs benefit from side light, so they work particularly well on walls beside windows or lamps rather than directly beneath a strong overhead light.
Bedrooms and living rooms usually benefit from a limited palette and one clear focal group, while playrooms and craft spaces can handle stronger color repetition. Garlands and chains make more sense where a long horizontal line needs filling; corner sprays and butterfly trails are better when the empty wall space is diagonal or vertical. For anything mounted above a bed or seating area, keep the construction lightweight and choose hardware or adhesive appropriate to the wall surface and finished weight.
Start With the Wall Shape, Not the Craft
The simplest first project is the one that already fits the empty space you have. Choose rosettes or a sunburst for a compact focal area, a branch or garland for a long wall, and modular tiles or fringe when you need broader coverage. Once the placement is decided, paper weight, color, and detail become much easier choices.
If the oversized flower corner spray is the direction you want to develop further, Diynify also has a dedicated collection of 30 Stunning Giant Paper Flower SVG Designs for Decor.