This post contains affiliate links. As an Amazon Associate I earn from qualifying purchases, at no extra cost to you. Thank you for supporting Diynify!
Papercut art ideas can look delicate and refined without relying on stacked layers or complicated sculpture. The key is to treat every opening as part of the design: a cut changes the silhouette, controls light, creates shadow, or reveals the backing behind it. That makes negative space just as important as the paper left in place.
Most of these projects use cardstock or sturdy art paper, a sharp craft knife or fine scissors, a cutting mat, a ruler, and paper-safe adhesive. Individual ideas also call for vellum, tissue paper, frames or spacers, thread and a hanging arm, lightweight backing board, removable window hardware, a cool battery-powered LED, or a basic clock movement. Start with flat framed cutwork if you want the simplest route, then move into light, suspension, or freestanding pieces when you want the paper to do more than hang on a wall.

1. Frame a Botanical Negative-Space Panel
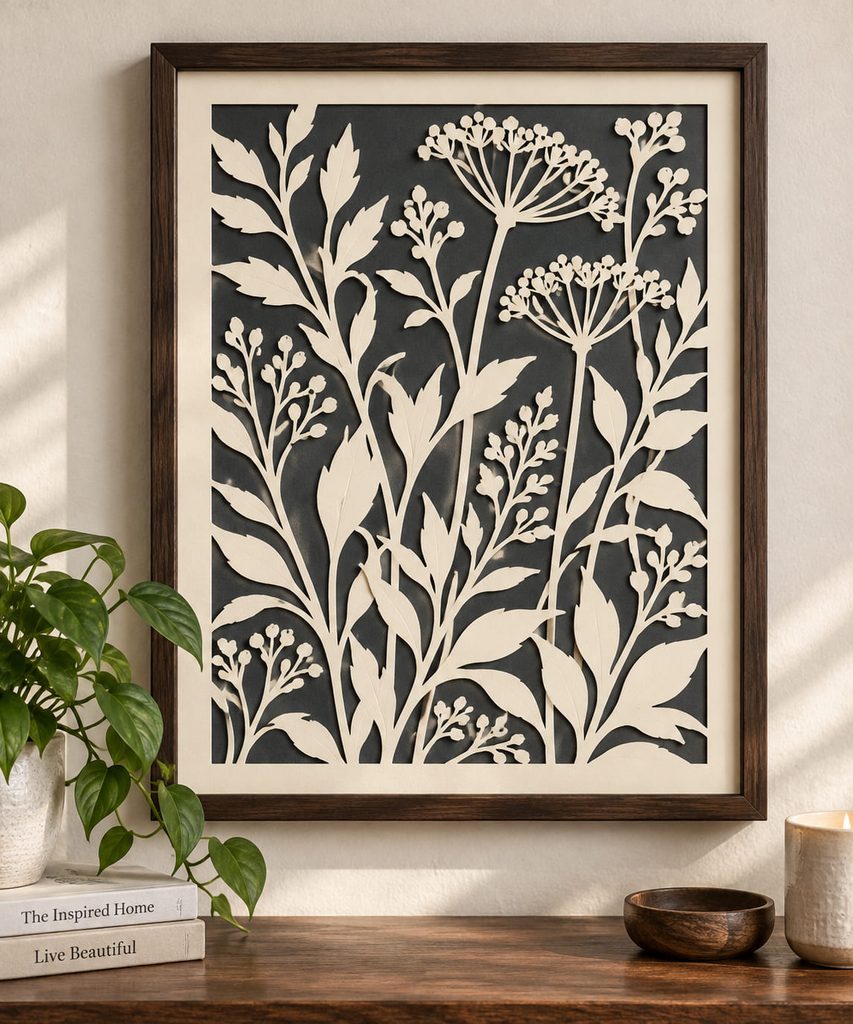
Let the empty areas carry as much of the design as the paper that remains. Start with a single sheet of medium-weight cardstock and draw leaves, stems, or seed heads as connected shapes, leaving narrow paper bridges wherever a floating section would otherwise fall away. The cleanest result comes from varying the size of the openings instead of filling every inch with detail. Mount the finished cut over a contrasting mat with a small margin around the edges; that border gives the fine cuts visual breathing room and makes a simple botanical silhouette read clearly from across a room.

2. Open a Fold-Cut Folk Medallion
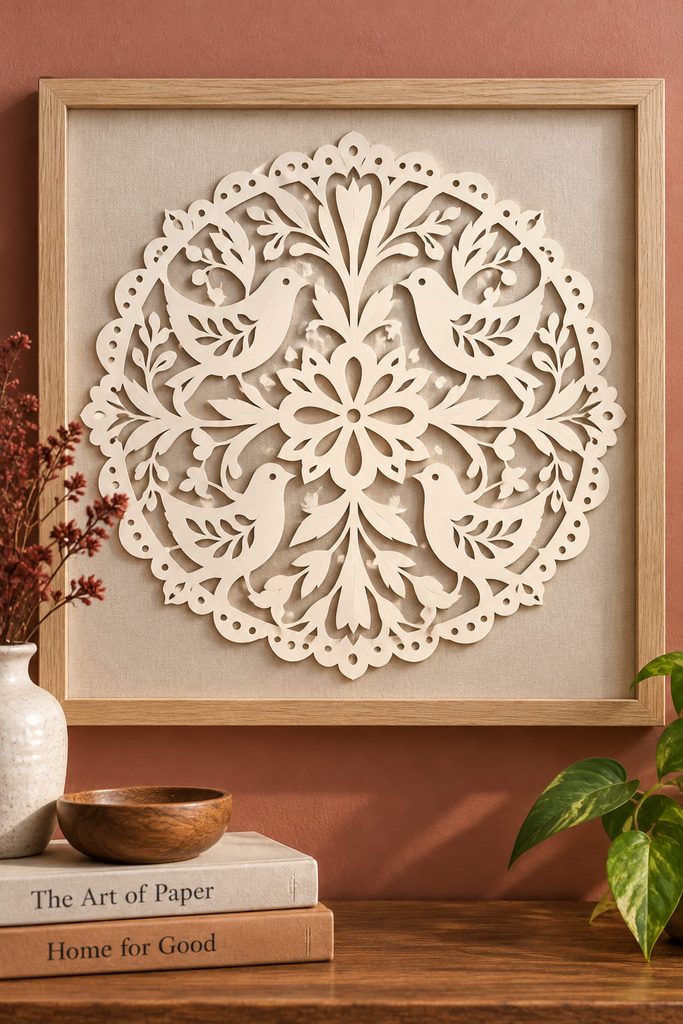
Fold the sheet before drawing the final pattern, because the crease is the mechanism that creates exact bilateral or radial repetition. A half-heart, leaf, bird, or scallop cut near the fold opens into a complete mirrored form, while small interior notches multiply into lace-like details. Keep at least one continuous band of paper around the center so the medallion does not separate into loose pieces.
For a more refined look, stop cutting before every available space is filled. Open the paper after each major round of cuts and check the balance; if one zone feels heavy, add one small repeated opening rather than another large motif. Press the finished piece flat under a clean book before framing it so the fold lines settle without erasing the crisp symmetry.
3. Cut a Cameo-Style Profile Portrait
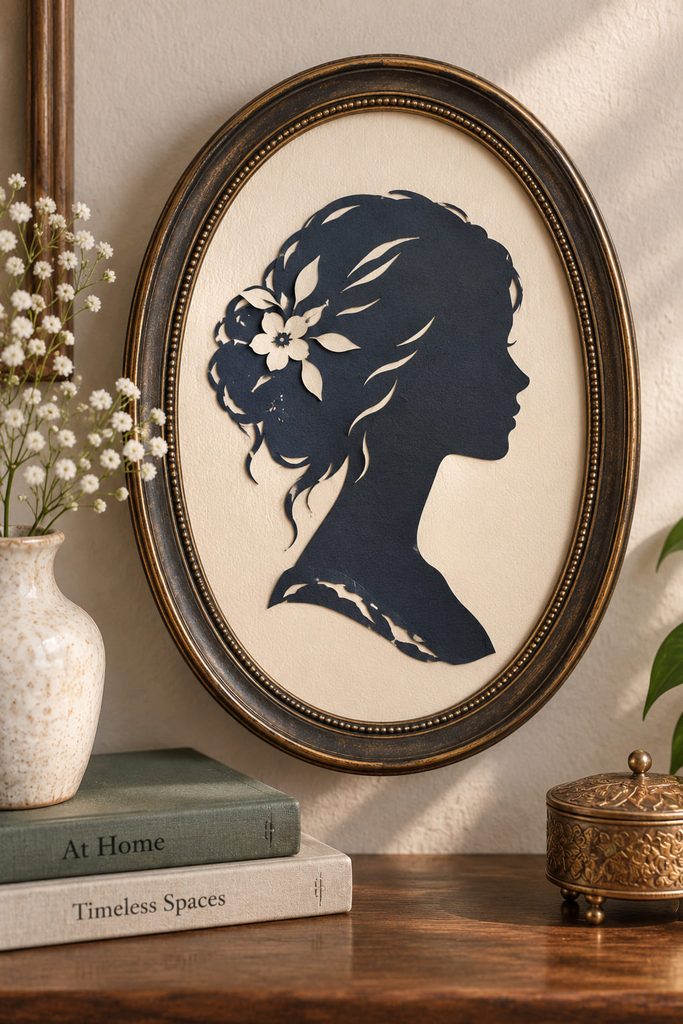
For a portrait that still feels unmistakably handmade, reduce the subject to one strong side profile instead of trying to reproduce facial shading. Hair, chin, nose, and neckline become the identifying information, so the outer contour matters more than interior detail. Use dark paper over a pale backing for the classic cameo effect, or reverse the values for a lighter contemporary piece.
- Trace or draw a clean side-profile contour.
- Cut the outer silhouette first, then add only a few internal openings for hair or clothing detail.
- Place the cutout on the intended backing before gluing; if the face is not recognizable at arm’s length, simplify the contour rather than adding tiny cuts.
4. Float a City Skyline Cutout
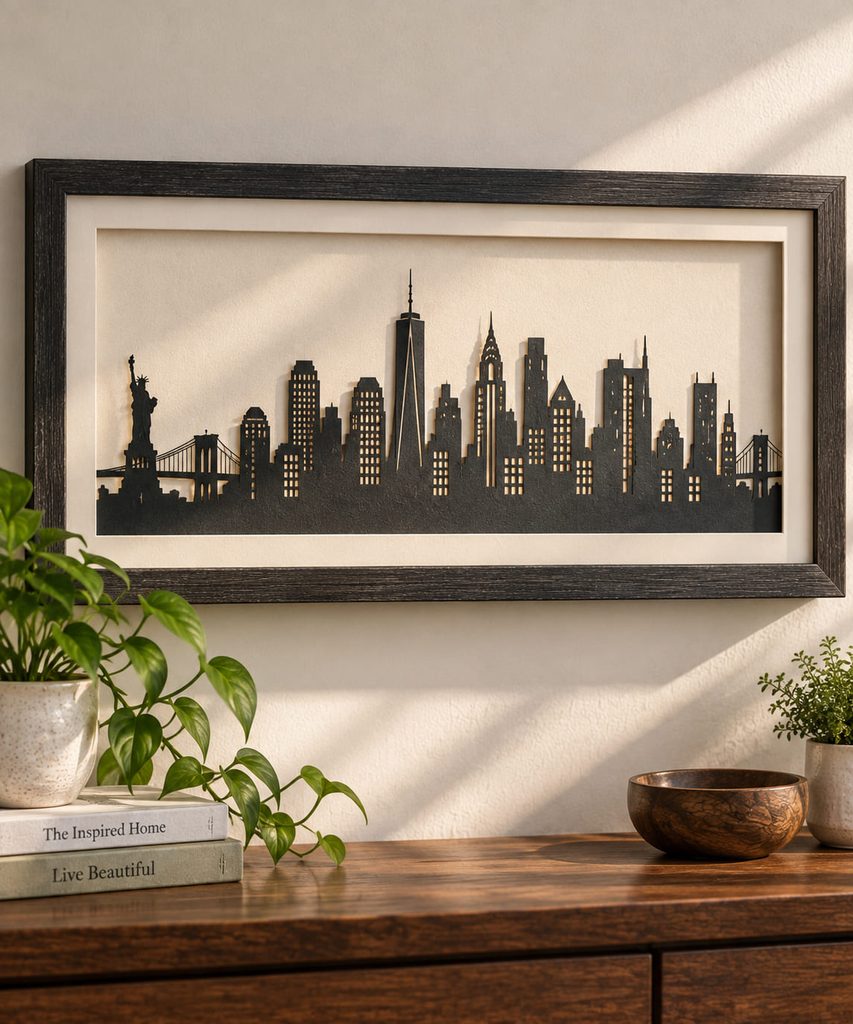
A skyline cutout looks elegant only when the roofs, towers, and window openings stay visually separate without becoming fragile. Treat antennas, narrow spires, and tiny window bars as the weak points: one interrupted connection can detach an entire section. Leave slightly wider bridges at rooflines and use fewer, larger windows near the thinnest buildings. A float mount lets cast shadows emphasize the silhouette without extra paper layers.
If the skyline curls: the sheet is probably too thin or the cut pattern removes too much material near one edge. Move the smallest openings inward, widen two or three structural bridges, or switch to a firmer cardstock before recutting.
5. Build a Repeating Geometric Lattice
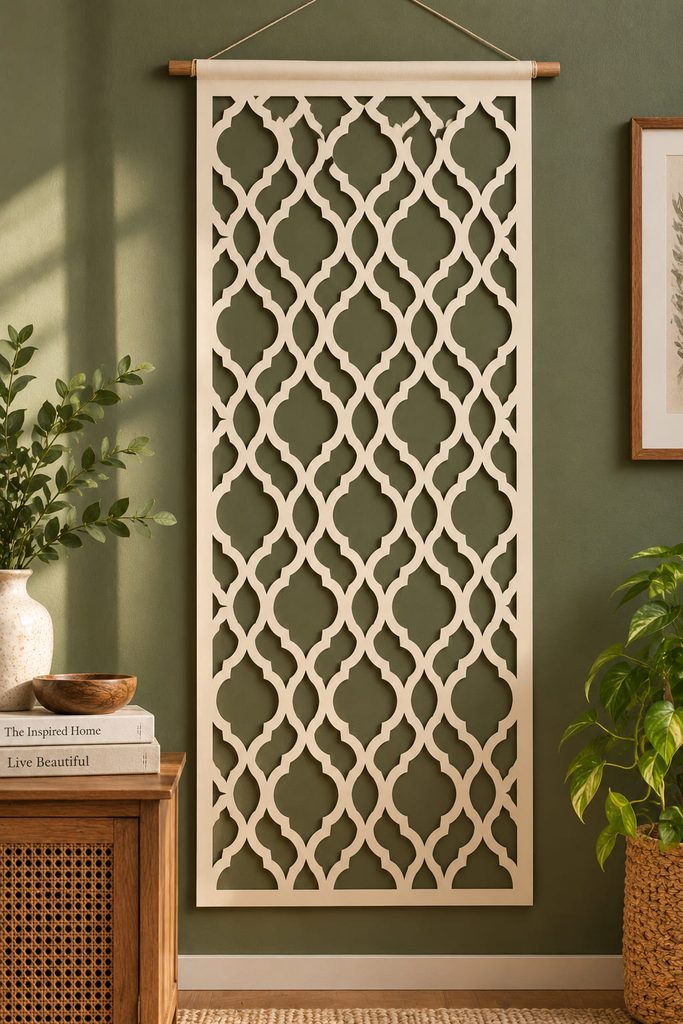
When the pattern repeats across a large sheet, spacing becomes more important than motif complexity. Diamonds, arches, hexagons, or elongated quatrefoils can all work, but the paper web between openings must remain continuous in both directions. Test one full repeat near the center before extending it across the sheet; if the lattice twists when lifted, either widen the connecting ribs or reduce the opening size.
Choose the route by scale: a small framed panel can use tighter cuts and narrower ribs because the frame supports the perimeter. A larger hanging panel needs broader bridges, a stronger outer border, and often a hidden backing strip along the top edge. The second route sacrifices some delicacy, but it keeps the lattice from sagging under its own weight. Cut from the center outward so the uncut perimeter continues to brace the sheet while the interior becomes more open. If one repeat begins to drift, correct the drawn grid before cutting farther; a small spacing error compounds visibly across a geometric field.
6. Wrap a Vellum-Backed Papercut Lantern

Light changes cutwork by turning every opening into part of the composition. Form a cardstock sleeve with a deliberate pattern of cut leaves, stars, or abstract arches, then add a separate vellum liner so the openings glow as soft shapes instead of exposing a bright point source. The cardstock should carry the structure; the vellum is only a diffuser and should not be asked to hold the sleeve upright.
Close the sleeve with a tab or overlap that remains accessible, and set it over a stable holder sized for a cool battery-powered LED. Keep the top open enough for easy insertion and removal, and do not use a flame. Before display, check that the light path is clear, the sleeve stands without leaning, and no decorative flap can fall inward onto the light source. Keep the bottom edge broad and level so the sleeve has a real footprint rather than balancing on narrow cut points. If the seam pulls the cylinder out of round, increase the overlap instead of forcing the edges together.
7. Cut a Continuous Botanical Wreath
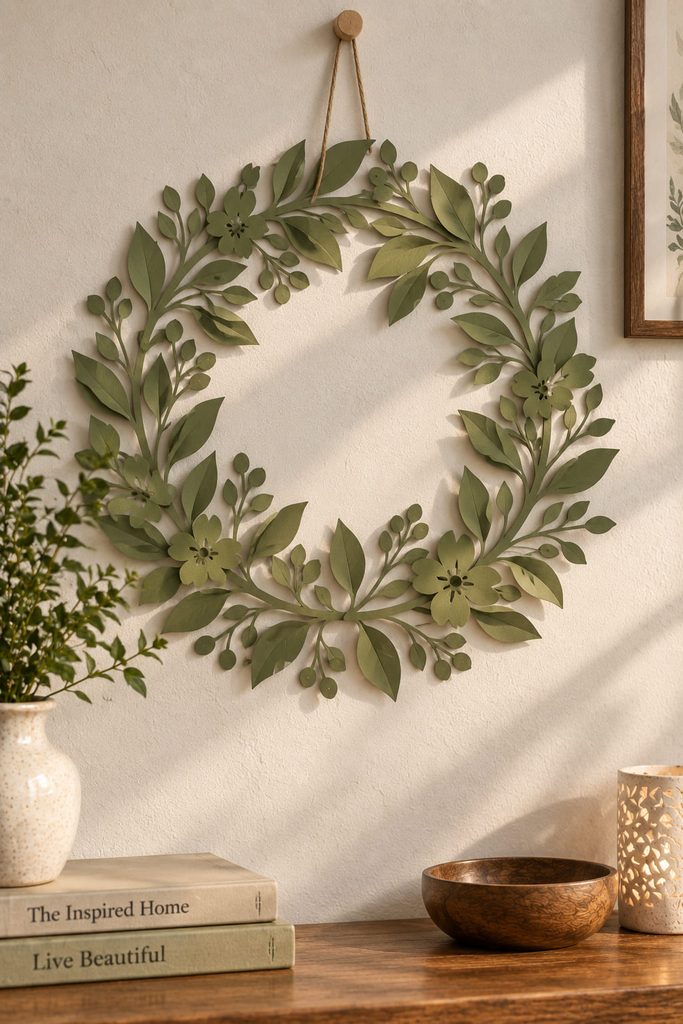
Instead of assembling separate leaves around a base, cut the foliage and the supporting ring from one sheet so the finished wreath keeps a cleaner silhouette. Every leaf cluster should connect back to the ring in at least one substantial place, and delicate tips should point inward or sideways rather than becoming exposed hooks. Use heavyweight cardstock for a larger wreath, then add the hanging loop through the solid ring rather than through a leaf stem.
Before hanging, check:

- the ring stays flat when held at one point;
- no leaf cluster twists away from the plane;
- the top attachment carries the load through solid paper;
- the outer tips have enough clearance from the wall to avoid catching.
8. Create a Shadow-Spaced Forest Frame
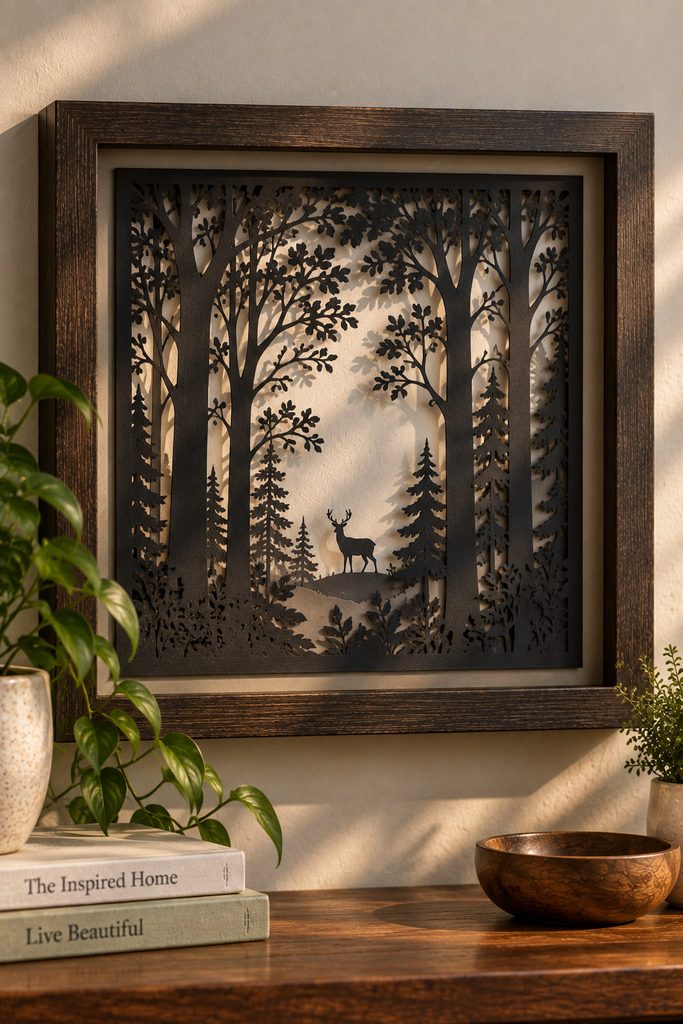
The most convincing forest scene is not the one with the most trees; it is the one that protects readable negative space between trunks and branches. Cut one detailed woodland screen from dark cardstock, then hold it slightly forward from a pale backing with narrow foam spacers hidden behind the solid border. That small gap creates a real shadow line without turning the project into a stack of many decorative layers.
Use the depth deliberately:
- Keep the most intricate branches away from the frame edge, where spacers need solid contact.
- Place spacers behind broad trunks, corners, and the outer border rather than behind fragile cut areas.
- Test the piece under side light before sealing the frame.
Shadow check: if the backing becomes visually busy, reduce the gap or use softer frontal light. If the cutwork still looks flat, add a slightly deeper spacer only along the perimeter so the screen stays evenly supported.
9. Make an Arched Papercut Shelf Backdrop

Cutting an arch into a freestanding display panel gives a shelf arrangement a focal shape without adding another framed picture. Start with a tall sheet of sturdy cardstock or thin paperboard, keep the lower third mostly solid, and concentrate fine cutwork around the upper arch where it will be seen against the wall. A small folded return along each side can act as a foot so the panel stands behind a vase, candleholder, or stack of books. Keep the foreground objects below the most detailed openings; otherwise the cut pattern disappears exactly where the composition should feel lightest.
10. Fill a Cutwork Window Panel With Tissue
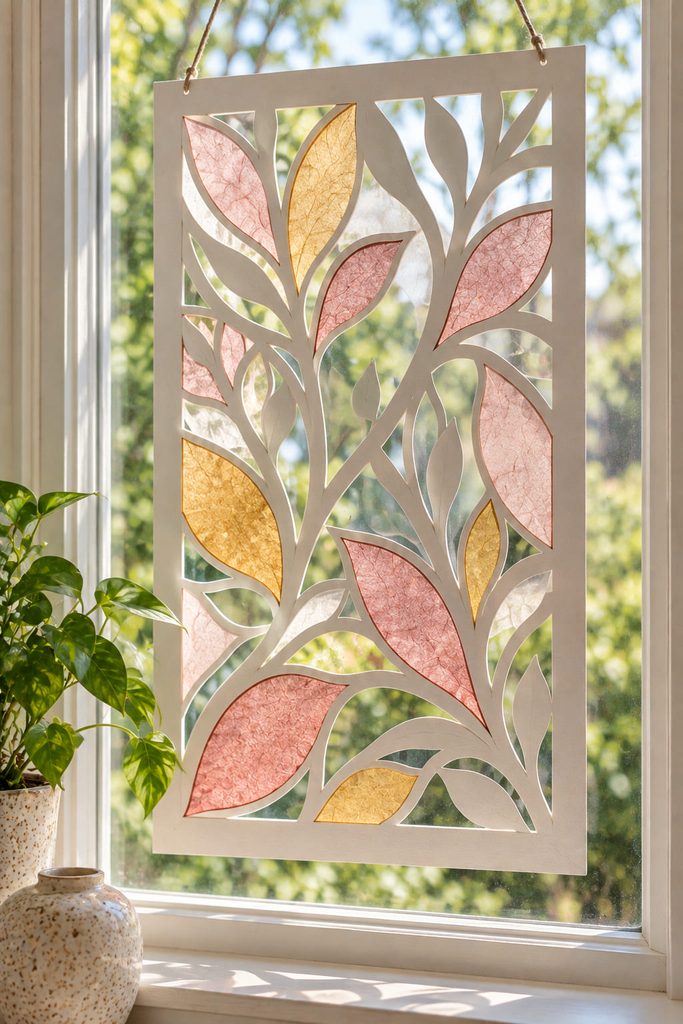
If you want color without building a thick layered piece, use tissue paper as translucent infill behind selected openings. Cut a strong outer frame and a few large enclosed shapes from cardstock, then attach tissue from the back so the joins remain hidden from the viewing side. Leave some openings empty; alternating transparent color with clear negative space keeps the panel from becoming a flat mosaic.
Useful materials: firm cardstock for the cut frame, lightweight tissue or glassine for the color fields, a glue stick or very thin line of paper-safe adhesive, and removable window-safe hanging tabs. Choose pale tissue where daylight is weak and deeper tones only in the largest openings, where enough light can still pass through.
11. Project Shadows With a Cut-Paper Light Screen

Two versions of a light screen produce very different decor. A flat cut-paper panel placed close to a wall creates a crisp halo of shadow around the openings, while a curved screen placed farther from the wall throws a broader, softer pattern. Both depend on the same mechanism: a cool point-like LED sits behind the cutwork, the openings define the light path, and the wall becomes part of the finished effect.
For a framed wall piece, keep the panel flat and use shallow standoffs so the object still reads as art when the light is off. For a tabletop projection, curve the cardstock into a stable arc with solid feet at both ends, then move the LED forward or backward until the projected pattern is legible without becoming oversized and blurry. Keep the LED accessible, avoid heat-producing bulbs, and make sure the paper cannot slump into the light source.

12. Balance a Papercut Mobile

Balance matters more than perfect symmetry when cut-paper pieces are meant to move. Use several lightweight silhouettes with visibly different shapes, then connect them to a dowel, wire arm, or rigid paper beam at adjustable hanging points. A larger shape may need to hang closer to the pivot than a smaller one; visual size is not the same as weight.
- Cut and finish every hanging piece before deciding the final pivot positions.
- Tie the lowest elements first, then slide the upper suspension points until each beam settles near level.
- Lift the complete mobile in its intended location and check clearance from the wall, ceiling, and neighboring pieces.
Balance check: if one arm keeps dropping, move its suspension point toward the heavier side before trimming or remaking any artwork.
13. Fold a Freestanding Village Silhouette
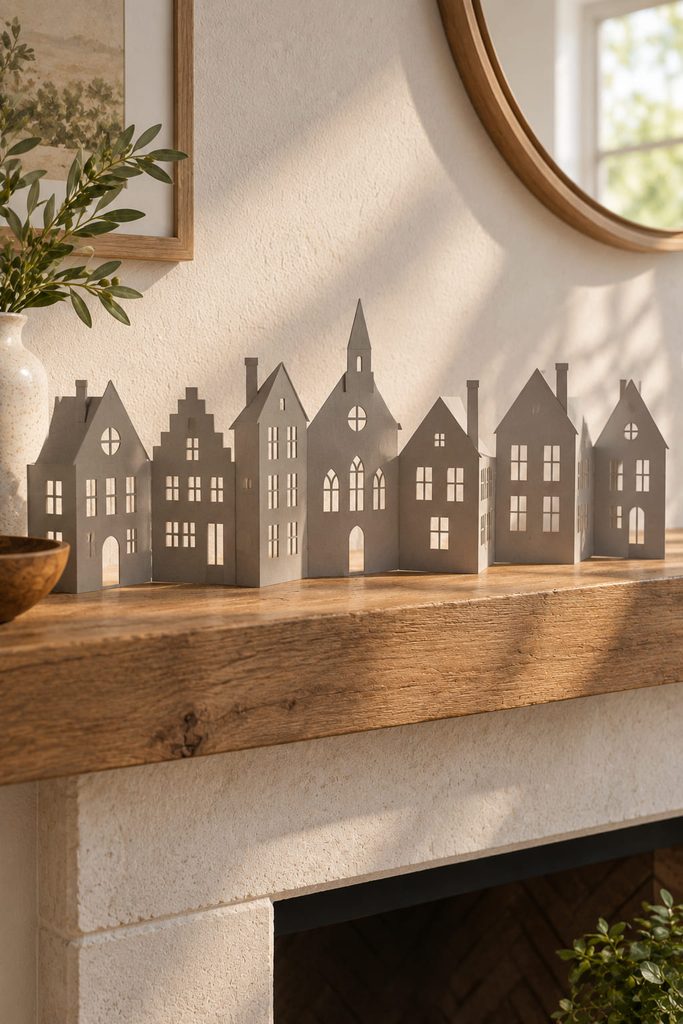
A freestanding village silhouette needs more than a pretty roofline: the folds must create a footprint wide enough to keep the long cut strip upright. Cut the houses as one connected band, leaving solid vertical zones where the paper can fold into shallow zigzags. Windows and doors can be opened within each building, but keep the base edge mostly continuous so it does not collapse into narrow tabs.
If the village tips forward: the folds are too shallow or too much paper has been removed from the lower half. Deepen one or two accordion folds, shift the heaviest building closer to a fold, or glue a narrow strip of heavier paper behind the bottom edge. The goal is a stable base, not a thicker decorative front.
14. Cut a Paper-Lace Mantel Runner
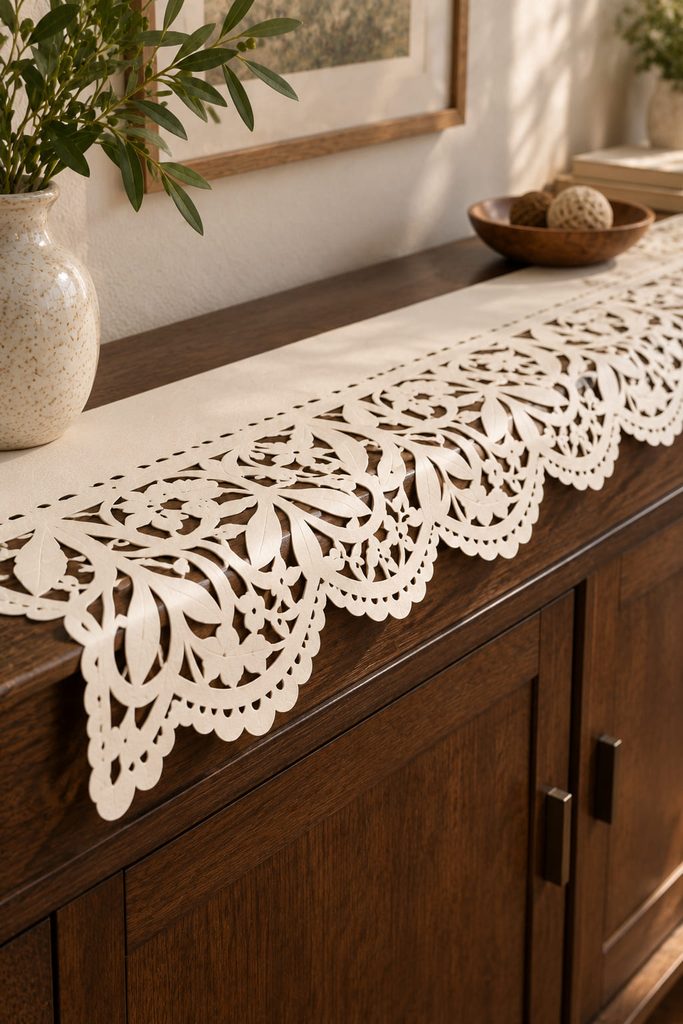
On a mantel, sideboard, or long shelf, cutwork can behave more like textile lace than framed art. Use a long strip of paper with a solid band along the back edge and a deeper pattern toward the front: scallops, vines, arches, or repeated leaf openings show best where they can cast small shadows onto the furniture surface. The uncut band is important because it keeps the runner from stretching and gives you a place to handle it without crushing the decorative edge.
Make one short repeat first and tile that spacing across the full length rather than improvising motif size as you go. If the runner needs to wrap a corner, stop the dense cutwork a little before the bend so the paper can turn without tearing through a fragile opening.
15. Assemble a Modular Papercut Window Valance

Large cutwork is easier to control when it is divided into repeating modules rather than cut as one very long fragile sheet. Design each module with a solid top rail, decorative openings below, and a small overlap zone at both sides. Join the modules behind the pattern so the seams disappear into the rhythm, then support the full valance from the continuous top rail with removable clips or a lightweight rod sleeve.
Before installation, confirm:
- every module overlaps in the same direction;
- the top rail carries the load without relying on cut motifs;
- the finished width matches the window without forcing the paper into a bow;
- the lower edge hangs clear of handles, blinds, and moving window parts.
A removable modular build also makes storage practical: separate the sections and keep them flat between clean boards. Dry-fit the complete run before attaching any permanent join. If a seam produces a doubled dark stripe in the window light, trim only the hidden overlap, not the visible lattice; that keeps the repeat width unchanged while reducing the visual bulk.
16. Lift Butterfly Wings Into Low Relief
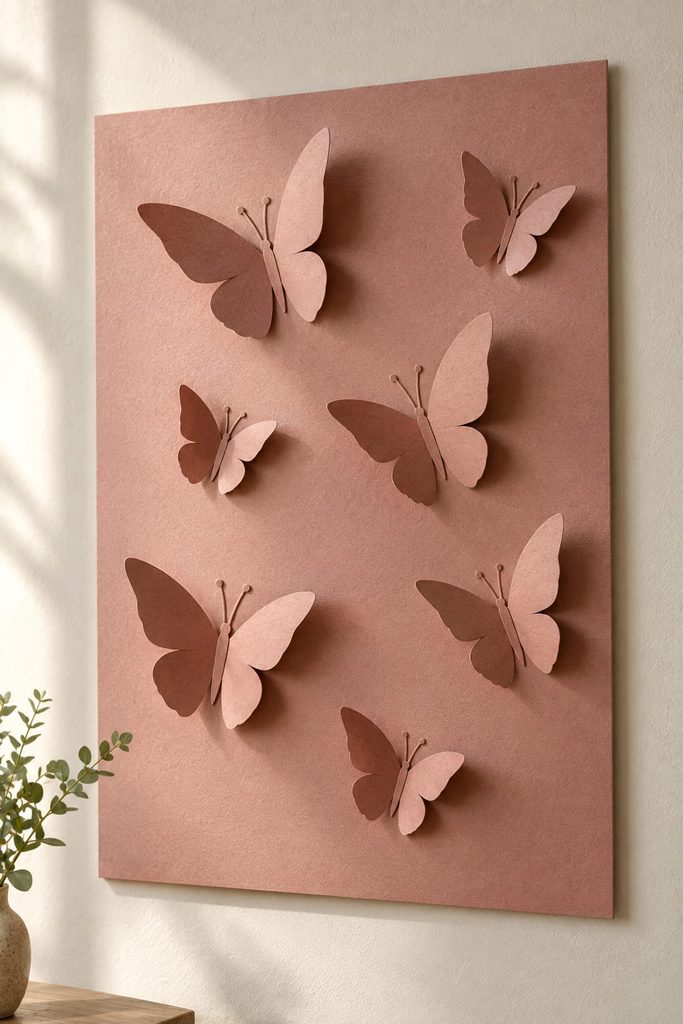
Partial cuts turn a flat silhouette into shallow relief without adding separate paper pieces. Cut around the upper and outer edges of each butterfly wing but leave a narrow uncut hinge along the body. A gentle score beside that hinge helps the wing lift cleanly instead of creasing at a random point.
Arrange the butterflies so their lifted edges catch side light, then vary the wing angle rather than the motif size alone. A few wings can sit almost flat while others rise farther from the backing; the changing shadow is what creates depth.
Handling limit: keep the hinge broad enough to survive dusting and framing. If a wing feels loose after one lift, do not bend it repeatedly—flatten it, reinforce the hinge from the back with a narrow paper patch, and reset the angle once.
17. Make a Reinforced Papercut Wall Clock
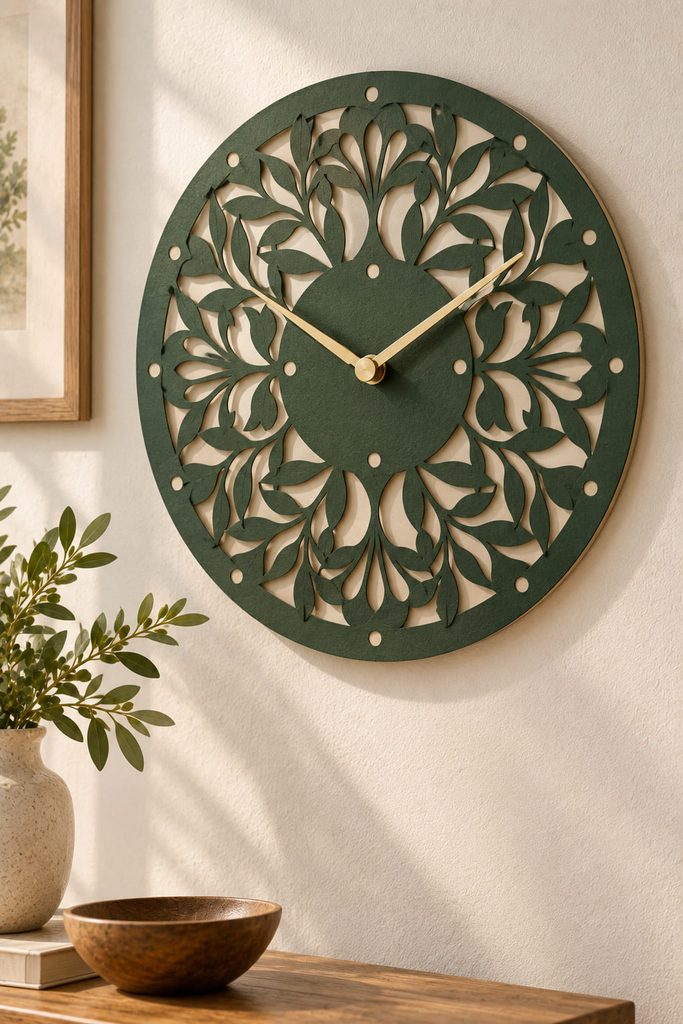
A paper clock face can stay visually delicate if the working load is carried by a hidden rigid center rather than by the cutwork itself. Create a circular or square papercut face with broad solid paper around the spindle opening, then mount that sheet to a thin backing board with a matching center hole. The clock movement sits behind the board, while simple dot markers or the cut pattern itself indicate the hours without requiring printed numbers. Before hanging, rotate both hands through a full circle to confirm they clear every raised edge, check that the center does not flex when the mechanism is tightened, and mount the finished clock from the backing board rather than from the paper face. A small washer or reinforcement disk on the back can spread pressure around the spindle opening. Keep adhesive away from the moving shaft, and leave enough space between the face and hands that the cut edges cannot catch during normal rotation.
Choosing Your First Papercut Art Project
The easiest place to begin is a botanical panel, medallion, or shelf backdrop, because each gives you room to learn clean cutting and bridge placement without solving a moving or illuminated structure. Choose the lantern or light screen when you want cut openings to control light, the mobile when movement is the focus, or the clock when the paper has to work around a real mechanism.
Once these papercut art ideas feel comfortable, layered construction is a useful next direction because it adds depth through spacing and overlap rather than subtraction alone. The closest follow-up on Diynify is 22 Beautiful Layered Paper Art Ideas for 3D Decor.