This post contains affiliate links. As an Amazon Associate I earn from qualifying purchases, at no extra cost to you. Thank you for supporting Diynify!
Cardboard wall decor ideas can do much more than imitate pricier materials. Corrugated flutes, scored folds, torn edges, tube walls, and laminated layers all create texture that only makes sense because the material is cardboard. Most projects below can start with clean shipping boxes, cereal-box board, a cutting mat, a metal ruler, and suitable adhesive. A few need extras such as cardboard tubes, string, a small mirror, wall-safe hanging hardware, or a clock movement.
If you want a quick project, begin with torn contour art or a tube-slice relief. For stronger sculptural depth, try interlocking ribs, folded facets, or the curved arch panel. Functional pieces such as the wall pocket, postcard ledge, and clock need more careful reinforcement because they are handled after hanging.
1. Corrugated Edge Mosaic Wall Panel
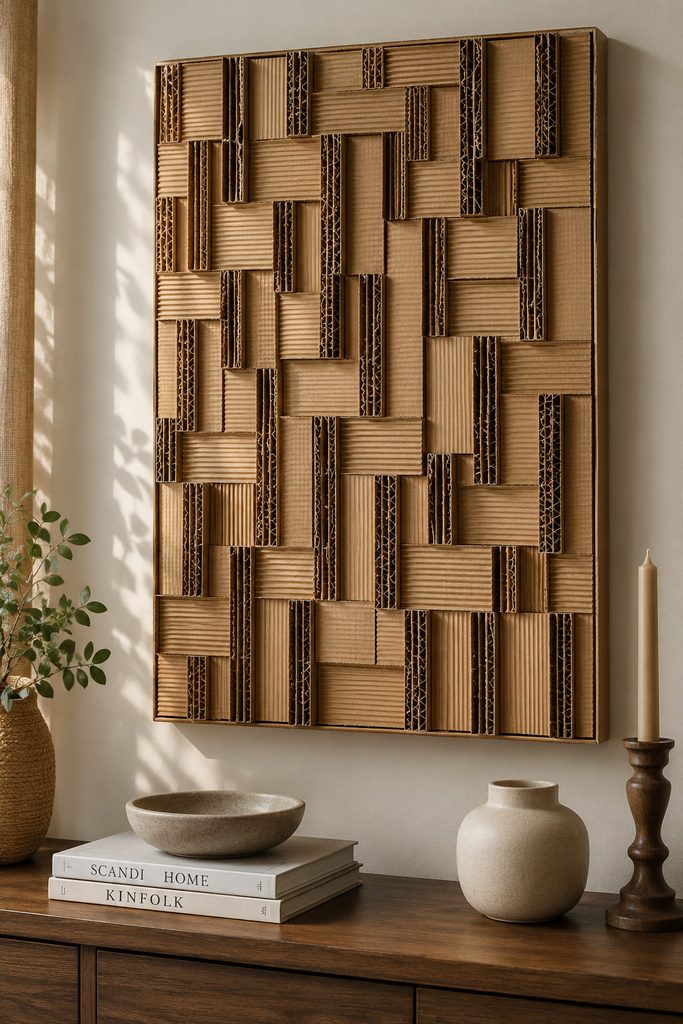
Cut corrugated cardboard into narrow blocks and turn them so the fluted edges face forward instead of hiding inside the sheet. Those exposed channels create a dense, architectural surface that changes with side light. Arrange the blocks in a staggered brick, herringbone, or offset-grid pattern on a flat backing, but keep the block depth consistent so the finished panel reads as intentional texture rather than scraps glued at random. This idea works especially well in a single natural kraft tone because the relief, not added color, does the visual work.

2. Layered Botanical Relief on Recycled Cardboard
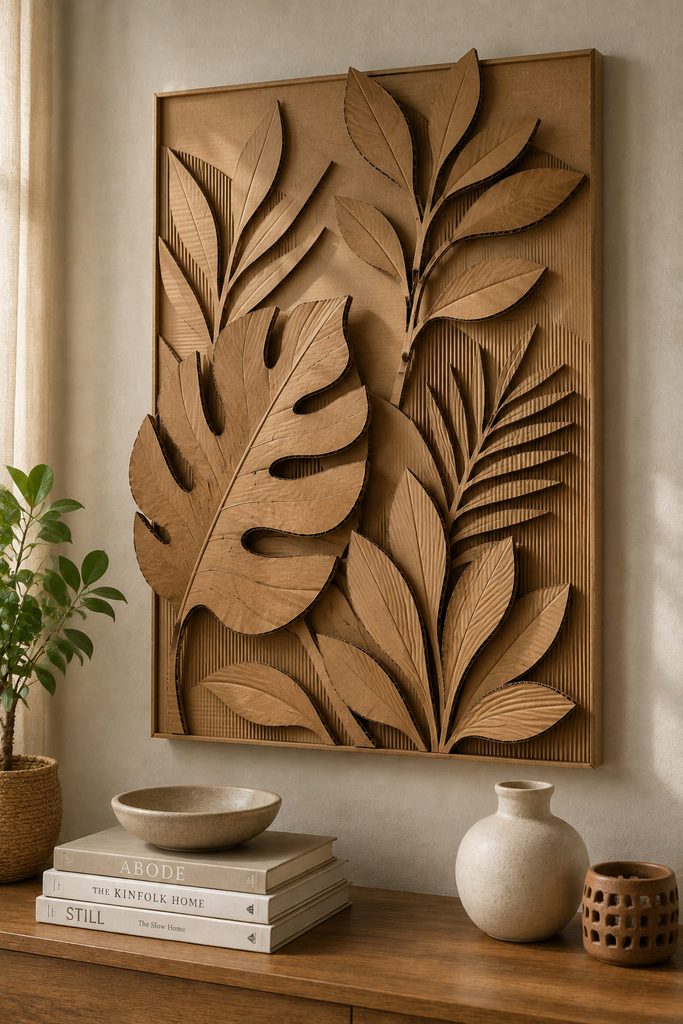
Build the vein structure of a large leaf or branch as separate cardboard levels rather than drawing those details on the surface. Start with a broad backing shape, add smaller cardboard pieces toward the center, and leave narrow gaps between some layers so their shadows separate the forms. Thin cereal-box board is useful for delicate top pieces, while corrugated board can provide the deeper base layers.
Scale matters more than detail here. A few oversized leaves with clear negative space will usually read better across a room than many tiny cutouts. Keep the outer silhouette simple, then spend the extra depth on one or two focal areas such as a central stem or overlapping leaf tips.
3. Bent-Strip Cardboard Line Art
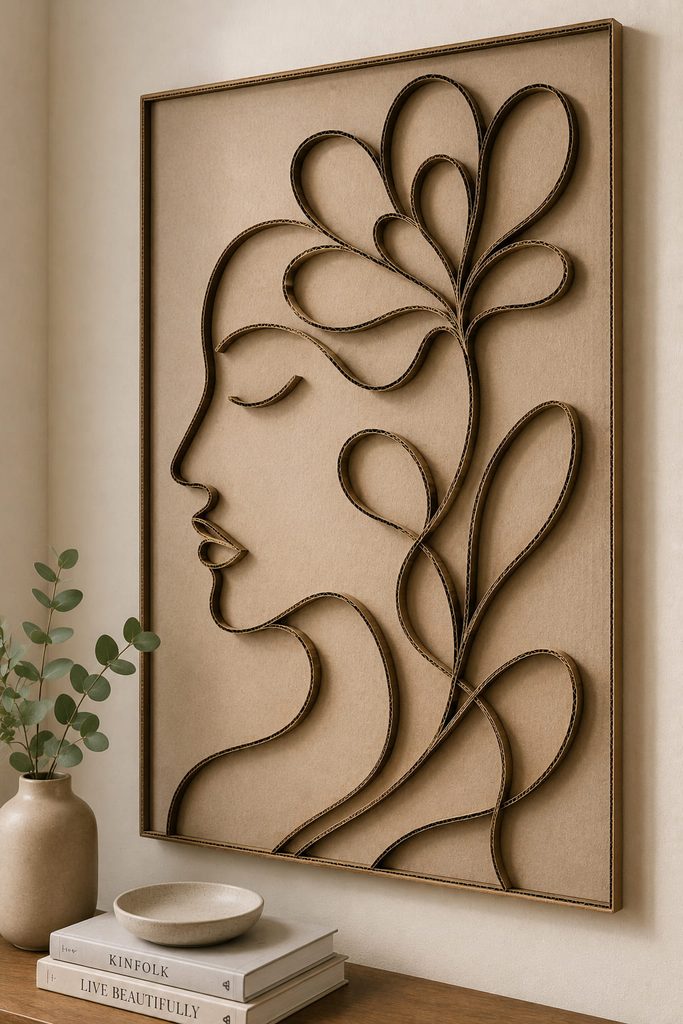
Long strips of thin cardboard can act like drawn lines when they are glued on edge to a backing. Instead of filling an entire shape, let the strips curve around a face profile, abstract landscape, flower outline, or looping geometric form. The edge-on construction produces a narrow shadow on each side, so the image stays legible even when the cardboard and backing are nearly the same color. Build the design in this order:
- Sketch only the major continuous lines on the backing.
- Pre-curve each strip around a jar or dowel before applying adhesive.
- Tack the ends first, then secure the middle while preserving the curve.
- Add short connector pieces only where they help the image read.
The useful test is distance: step several feet away before adding more lines. If the subject is already clear, extra strips may make the composition busier without improving it.
4. Sunburst Mirror Frame With Folded Cardboard Fins
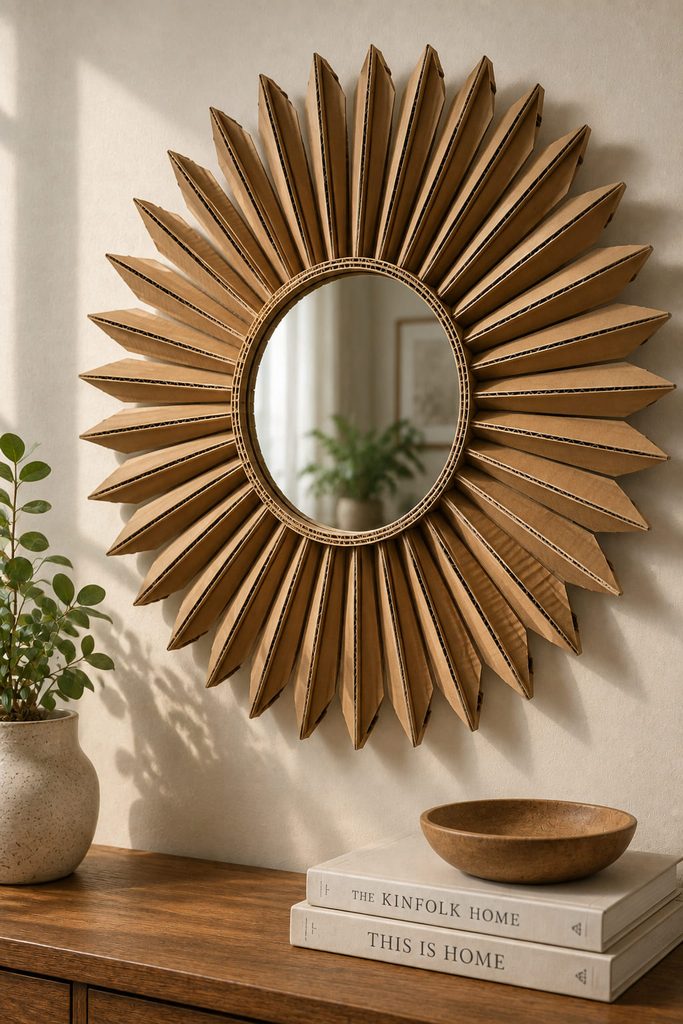
The common failure in a cardboard sunburst is a weak center: long rays amplify every uneven gap around the mirror. Cut a rigid ring first, center the mirror on that ring, and mark equal divisions before attaching any fins. Each fin can be a narrow rectangle scored lengthwise into a shallow V, which gives a slim piece enough stiffness to project from the wall.
Center Ring Check: the mirror opening should look centered before the rays go on. If something still looks wrong, diagnose it before trimming every tip:
- uneven outer circle → recheck the spacing between fins;
- rays leaning sideways → strengthen the fin bases with a second backing ring;
- center feeling visually off → recenter the mirror or ring before the adhesive sets.
Use a mirror insert intended for crafts or a lightweight acrylic mirror rather than relying on cardboard to support a heavy glass mirror.
5. Woven Cardboard Wall Pocket for Dried Stems
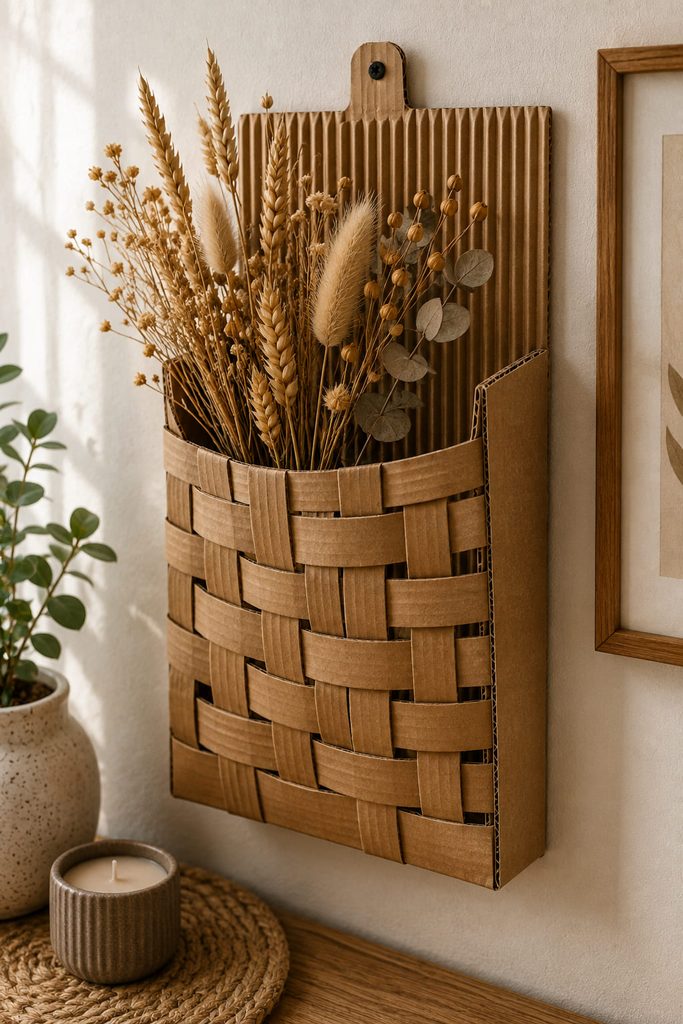
For a wall pocket, the weave has to do more than look decorative: the lower edge must close, the front needs usable depth, and the opening cannot bow away from the backing. Make the back from a solid rectangle of corrugated board. Across the lower half, weave flexible cardboard strips in a true over-under pattern, alternating each row, then wrap or glue the strip ends around the side edges. A narrow gusset on each side creates the pocket depth without turning the whole piece into a box. Before hanging it, check four things:
- the bottom edge is fully closed;
- the weave is attached to the backing at several load points;
- the pocket opening is wide enough to insert and remove contents;
- the hanging points are on the rigid back, not only on woven strips.
Use it for lightweight dried stems, notes, or paper mail. Fresh flowers need a separate watertight container, and the cardboard should not be treated as a vase.
6. Accordion-Fold Cardboard Medallion Cluster
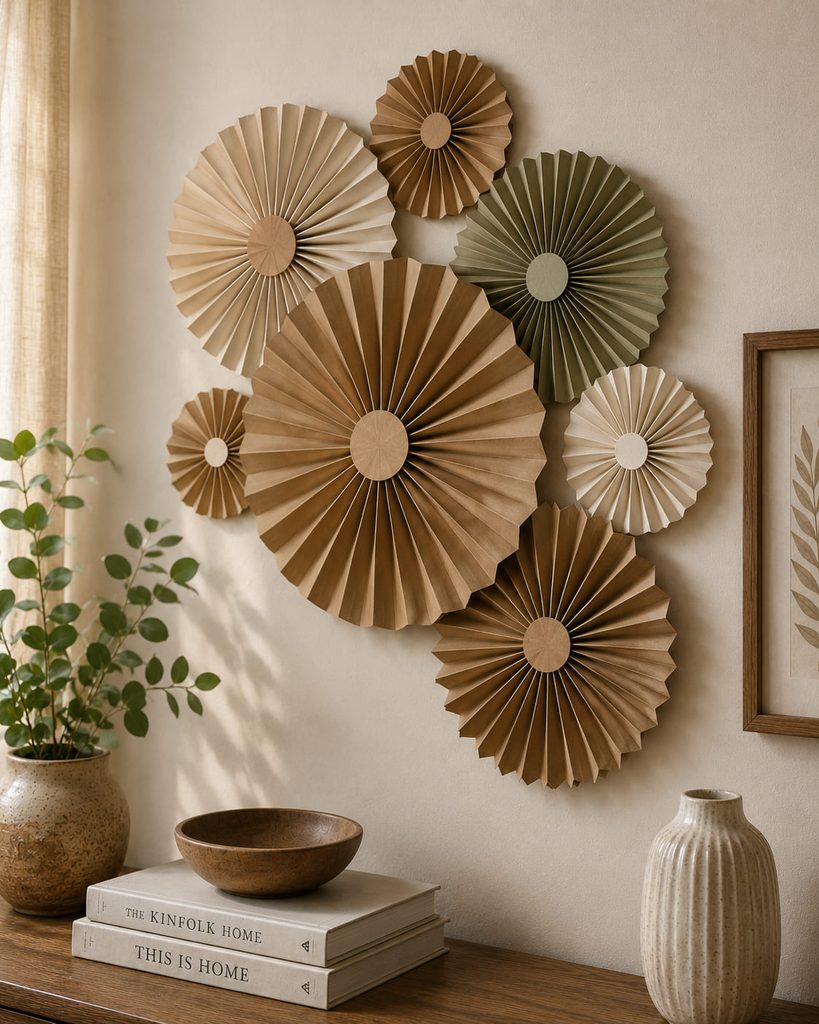
Thin boxboard folds more cleanly than thick corrugated sheet, which makes it the better choice for shallow accordion medallions. Score parallel lines, fold a strip back and forth, join the ends into a ring, then press the inner edge inward until the pleats radiate from the center. A small cardboard disk glued behind the center locks the shape. Vary diameter and pleat width rather than making every medallion identical. A cluster with one large focal disk and several smaller satellites creates a stronger wall composition than a row of equally sized rosettes.
7. Cardboard Tube Slice Cellular Relief
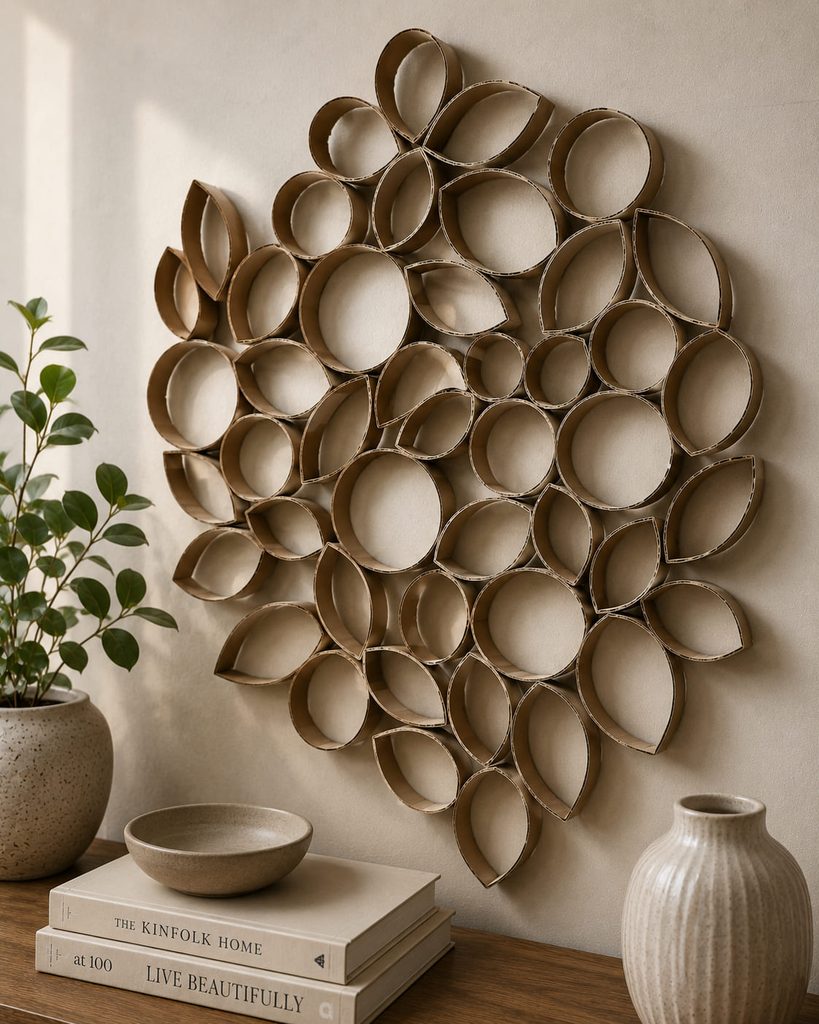
Cardboard tubes already contain a curved wall, so slicing them into short rings gives you ready-made cells without having to bend every piece by hand. Leave some slices circular and pinch others into leaf, eye, or diamond shapes. When the cells touch at just a few points, the wall color remains visible between them and becomes part of the pattern.
The depth of each slice changes the shadow more than the outline does. Shallow slices create a graphic honeycomb effect; deeper sections look more sculptural but also project farther from the wall. Choose one depth family for most of the piece, then reserve a few deeper cells for the focal area.
8. Interlocking Cardboard Wave Wall Sculpture
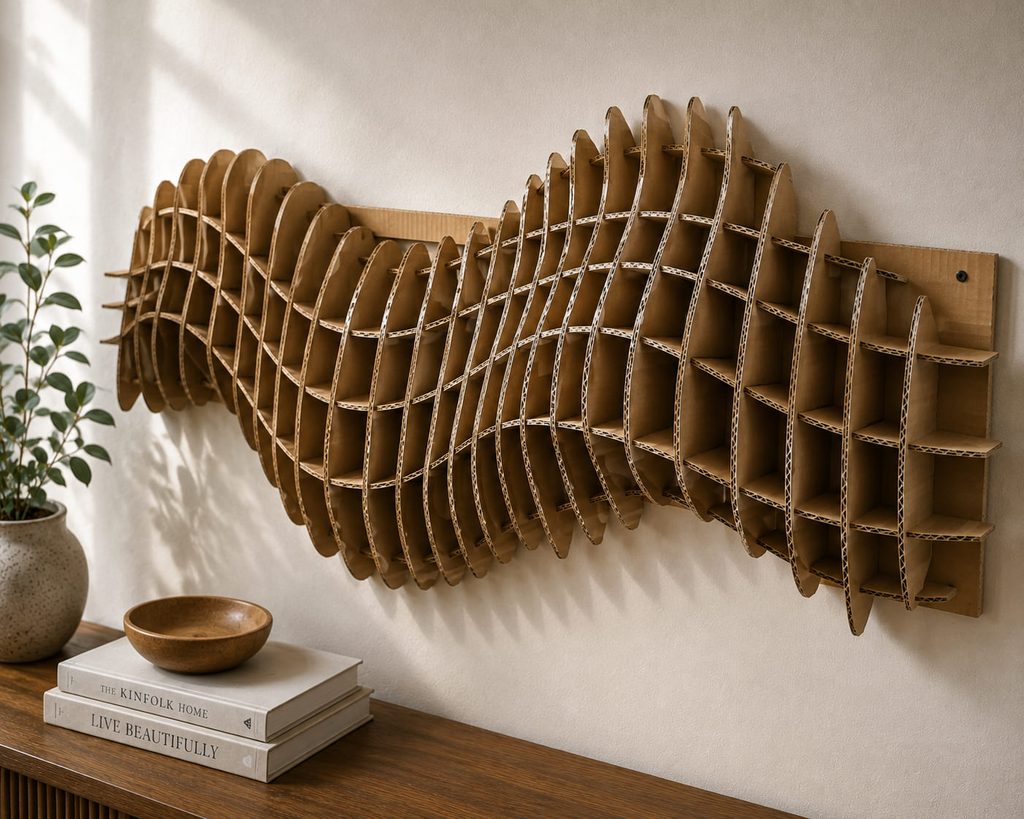
Slotted ribs can turn flat sheets into a self-supporting relief without stacking dozens of layers. Cut several vertical ribs with different curved front profiles, then cut cross ribs with matching half-depth slots. The two sets slide together at right angles to form a lightweight lattice whose front edges create the visible wave. A reliable assembly sequence is:

- Dry-fit the center vertical rib with the center cross rib.
- Add ribs outward in alternating directions so the grid stays square.
- Correct any slot that forces the cardboard to twist; a slot that is too tight can buckle the whole relief.
- Add a narrow rear mounting rail only after the lattice sits flat on a table.
- Hang it with enough clearance that the deepest wave does not scrape the wall.
Slot Fit Check: the joint should grip without crushing the corrugation. If the rib edges flare or bow, widen the slot slightly instead of forcing the connection.
9. Torn Cardboard Contour Relief
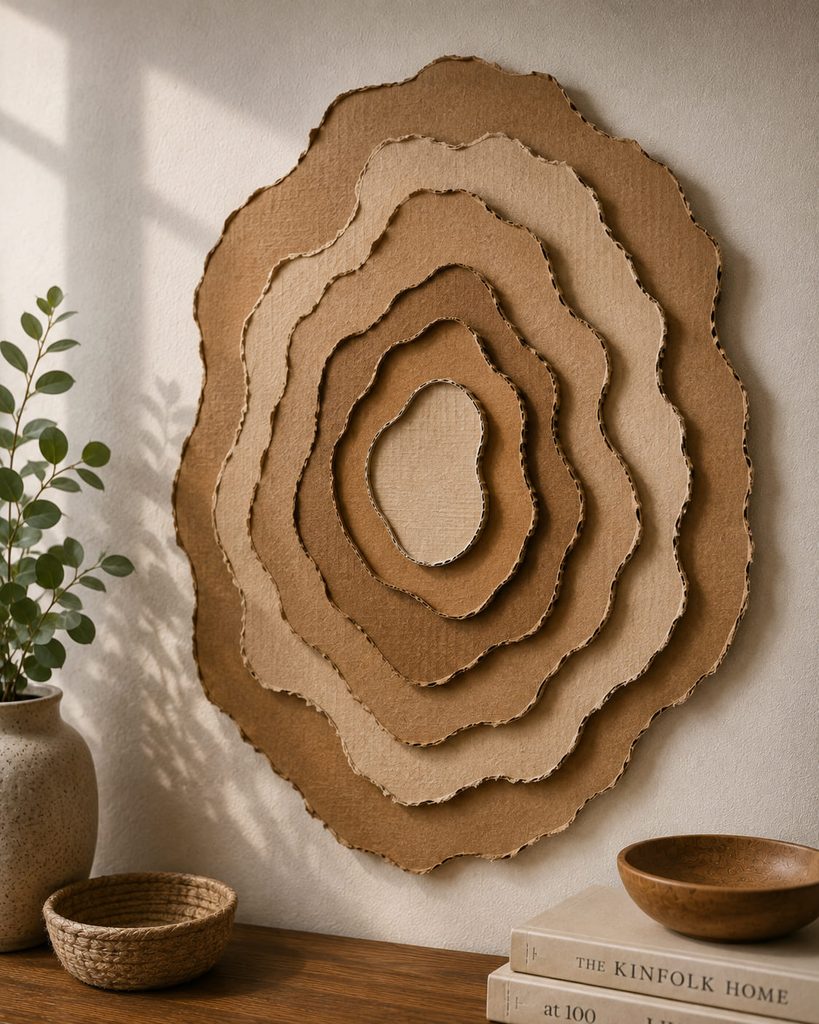
Torn edges are useful when a knife-cut outline would look too mechanical. Peel or tear nested shapes from thin cardboard, keeping each layer slightly smaller than the one below, then stack them like contour lines on a map. Exposed fibers soften the transitions and make irregularity part of the finish. This is a good place to stop early. Five or six purposeful levels can create more readable depth than fifteen nearly identical rings, especially on a medium-size panel viewed from across a room.
10. Woven Cardboard Checkerboard Art Panel
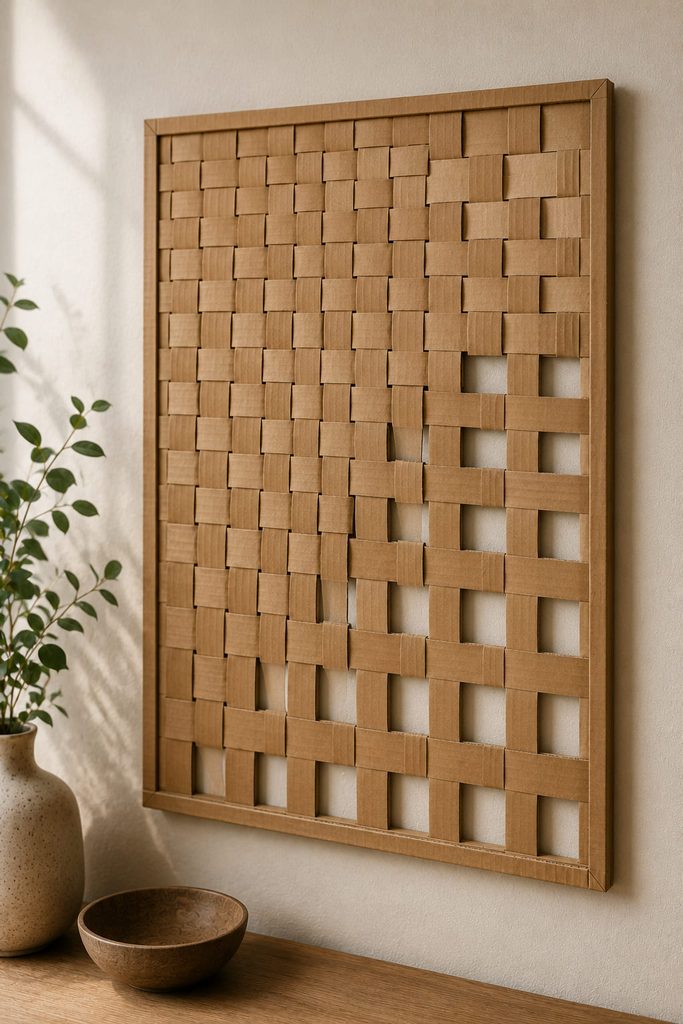
There are two useful ways to treat a cardboard weave. Both use the same true over-under path, but they create different visual weight.

- Tight weave: cut strips to equal width and keep the edges nearly touching for a solid checkerboard with strong surface rhythm.
- Open weave: space the warp strips on a rigid perimeter frame, then thread the weft strips with consistent gaps so the wall color becomes part of the pattern.
The open version is lighter and more graphic, but its frame has to resist racking. The tight version emphasizes material and color instead. Choose between them according to whether you want surface texture or negative space to dominate.
11. Curved Cardboard Arch Niche Panel
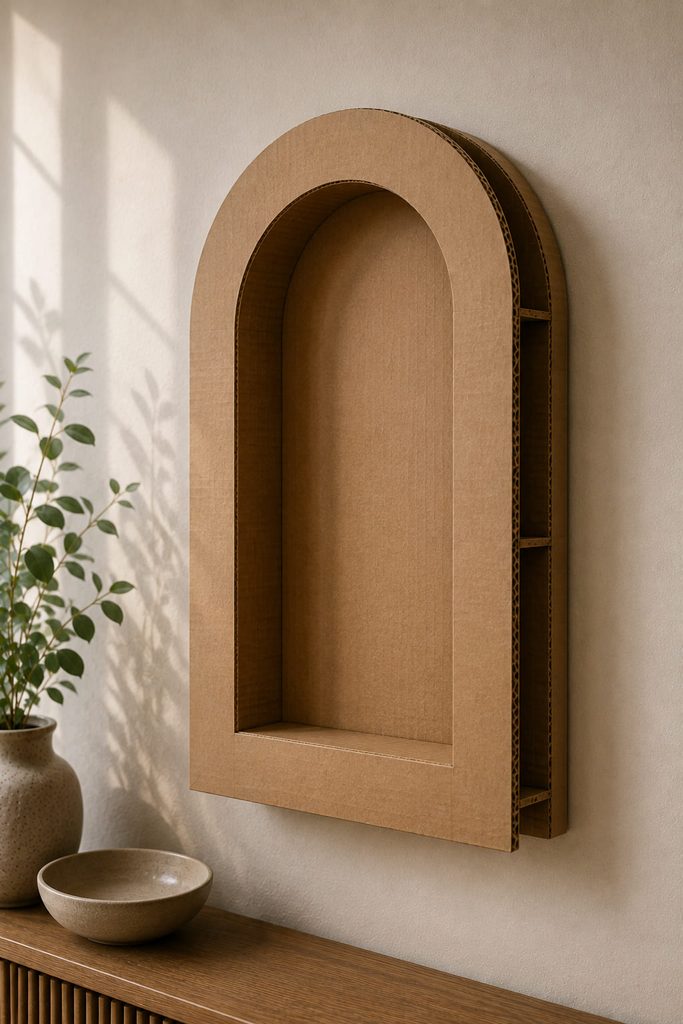
To get a shallow architectural arch without a heavy block, build it from a front frame, curved return, back panel, and internal ribs. Score a long strip across the corrugation so it can bend into a smooth curve, then attach that strip to the inside edge of an arch-shaped face. Short internal ribs bridge the front and back layers and keep the curve from collapsing. Build the panel from the curve outward:
- Cut matching front and back arch silhouettes.
- Form the curved inner return and glue it to the front face.
- Add ribs at the crown, shoulders, and lower sides.
- Attach the back panel only after the arch is symmetrical.
- Mount through the reinforced back, not the thin curved return.
If one shoulder sits forward, check the rib lengths before trimming the face. Unequal internal spacers are usually the real cause of a twisted niche.
12. Balanced Cardboard Mobile Wall Hanging
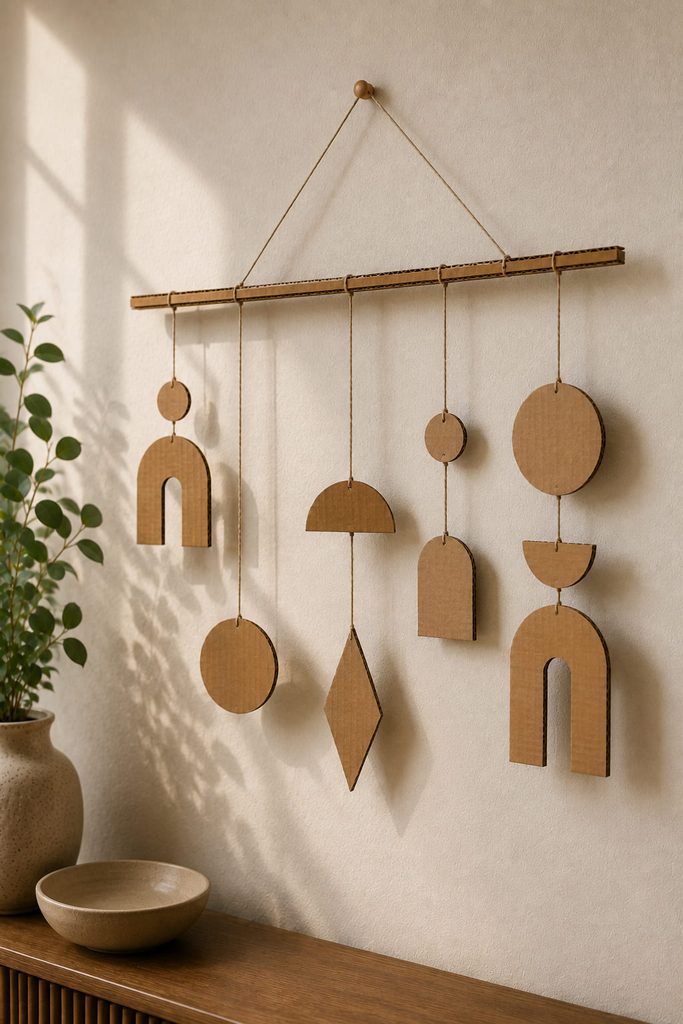
Because a wall mobile has to move freely, balance and clearance matter more than the individual cut shapes. Use a rigid cardboard bar or laminated strip as the upper arm, suspend lighter shapes from thread, and place the hanging point near the bar’s center of mass. Move that point in small increments until the bar settles close to level before adding another tier.
The finished mobile should hang from a hook or attachment point that carries the load directly. Keep the moving pieces far enough from the wall that normal air movement does not make them scrape the surface.
Balance Test: lift the mobile by its final hanging loop for several seconds. If one side consistently drops, shorten that side’s arm, move its attachment inward, or reduce its weight. Decorative symmetry is optional; physical balance is not.
13. Pierced Cardboard Lattice Shadow Panel
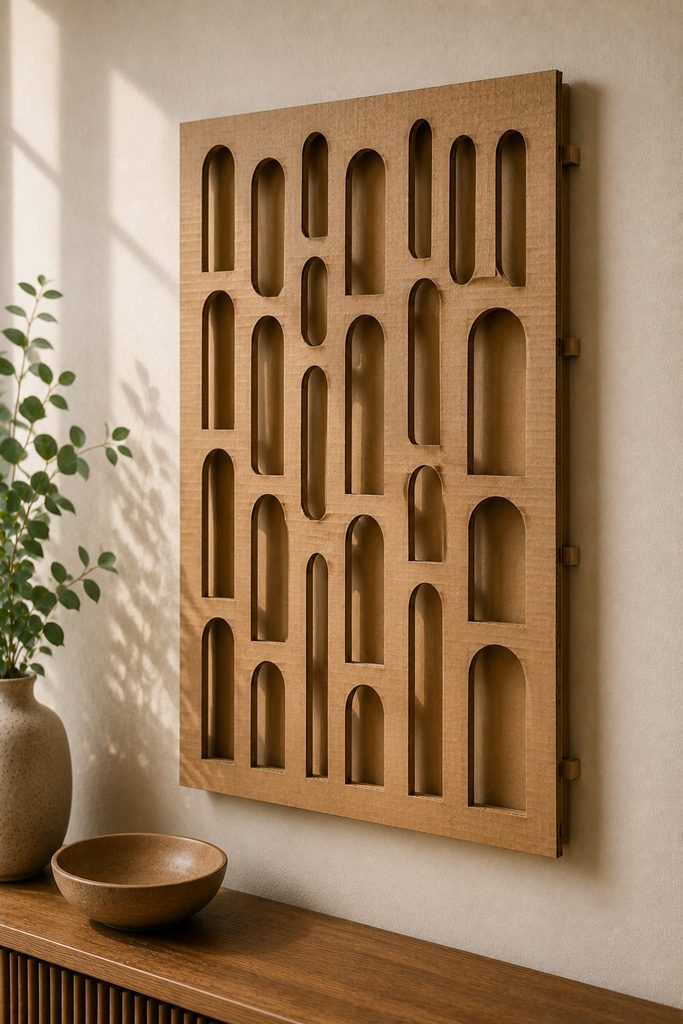
Instead of adding material for depth, remove it. A repeated field of arches, circles, leaf-shaped openings, or irregular slots can turn a simple sheet into a shadow-casting panel. Keep enough uncut cardboard between openings to preserve continuous bridges from top to bottom and side to side; isolated narrow necks are where the panel is most likely to bend or tear. Mount the pierced face on small cardboard spacers over a solid backing. That gap gives the cutouts a visible shadow and prevents the pattern from disappearing against the wall.
14. Faceted Cardboard Pyramid Wall Sculpture
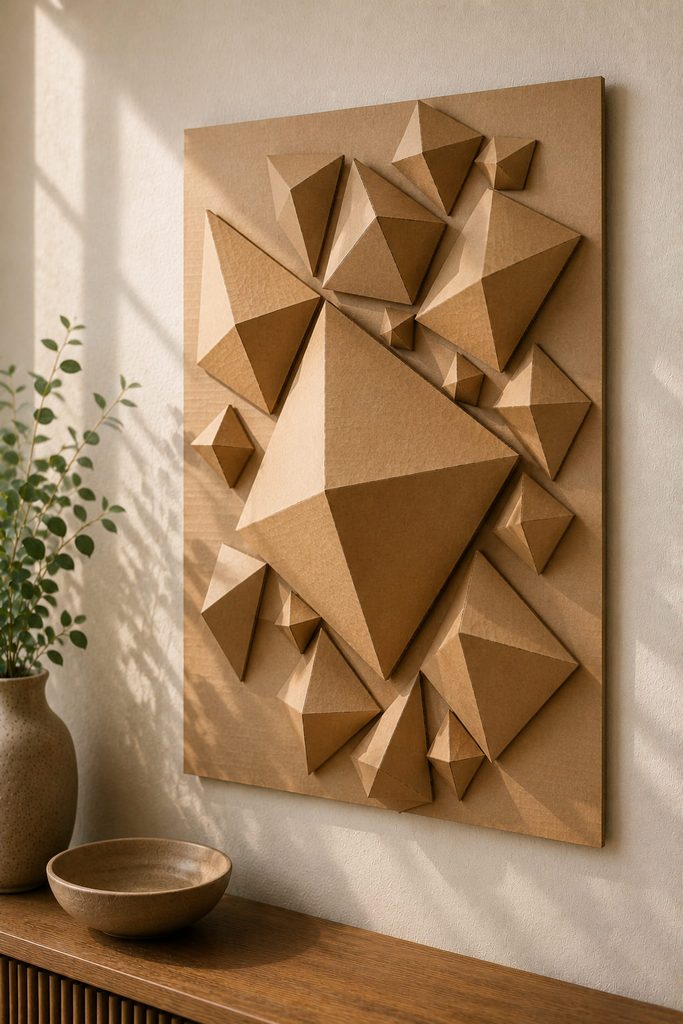
Light changes sharply across folded planes, which makes a group of shallow pyramids or diamonds more dramatic than a flat painted pattern. Cut each unit from thin cardboard with scored fold lines and glue tabs, then close the form so every facet holds its angle. Mount the finished units to a firm panel with their points facing outward.
One oversized facet should lead the composition. Smaller shapes can step away from it in an asymmetric cluster, leaving quiet space around the group. Positioning the piece near side light will emphasize the folds; direct front light tends to flatten the geometry.
15. Folded Cardboard Postcard Display Ledge
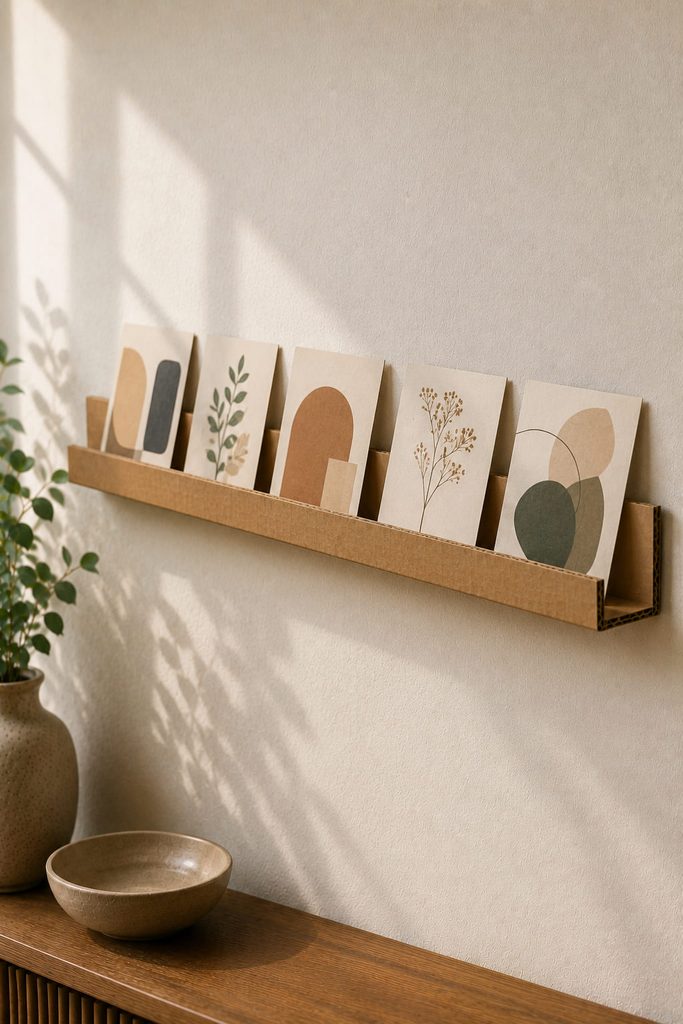
A narrow display ledge turns lightweight postcards, small prints, or paper swatches into changeable wall decor. The structure is a folded channel: a flat back, a horizontal shelf, and a short front lip that keeps the paper from sliding forward. Laminate the back with a second strip of cardboard so the mounting points do not tear through a single layer. Before hanging, confirm the functional details:
- the shelf fold is square enough that cards lean back toward the wall;
- the front lip is lower than the artwork you want to show;
- the channel is deep enough for the paper stack but not intended for heavy objects;
- fasteners or wall-safe hardware pass through the reinforced back.
This is better for rotating flat paper pieces than for framed photos, ceramics, or other concentrated loads.
16. Linked Cardboard Leaf Garland
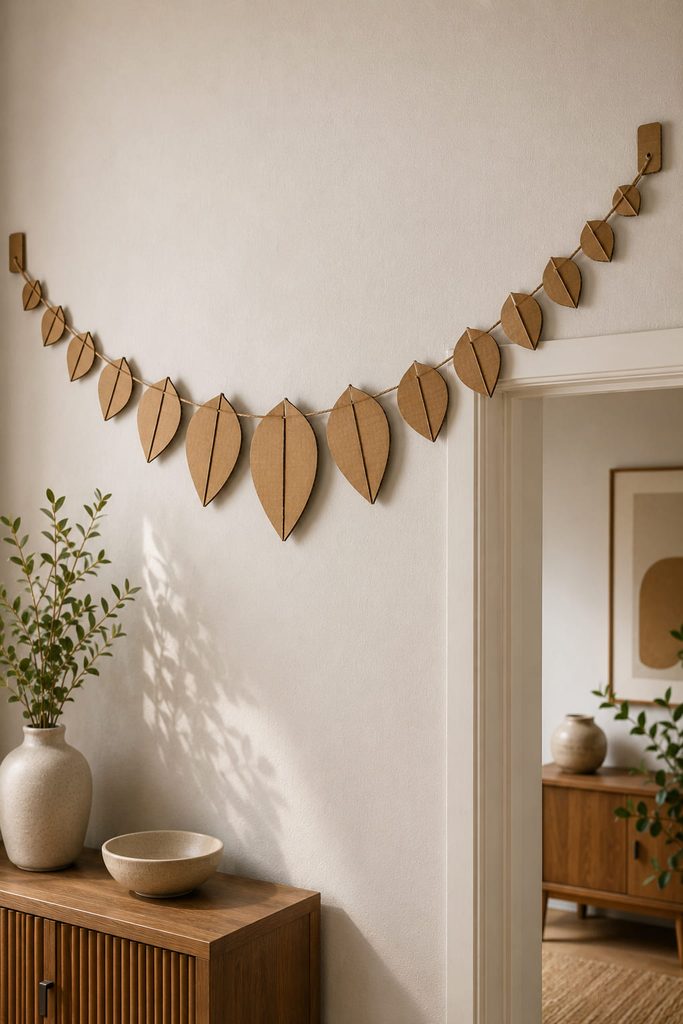
Along a headboard, doorway, or blank corner, linked leaves can follow the wall without needing one large rigid backing. Cut leaf shapes in pairs and sandwich thread or thin cord between each pair, leaving short flexible gaps so the strand can drape instead of behaving like a stiff strip.
- Start at the center with the largest leaf pair.
- Add progressively smaller leaves toward both ends.
- Test the drape after every few additions and adjust the flexible gaps.
- Reinforce the two end tabs with extra cardboard because they carry the strand’s tension.
For storage, coil the garland loosely around a wide piece of scrap board rather than folding it sharply across the leaves.
17. Cardboard Wall Clock With Raised Markers
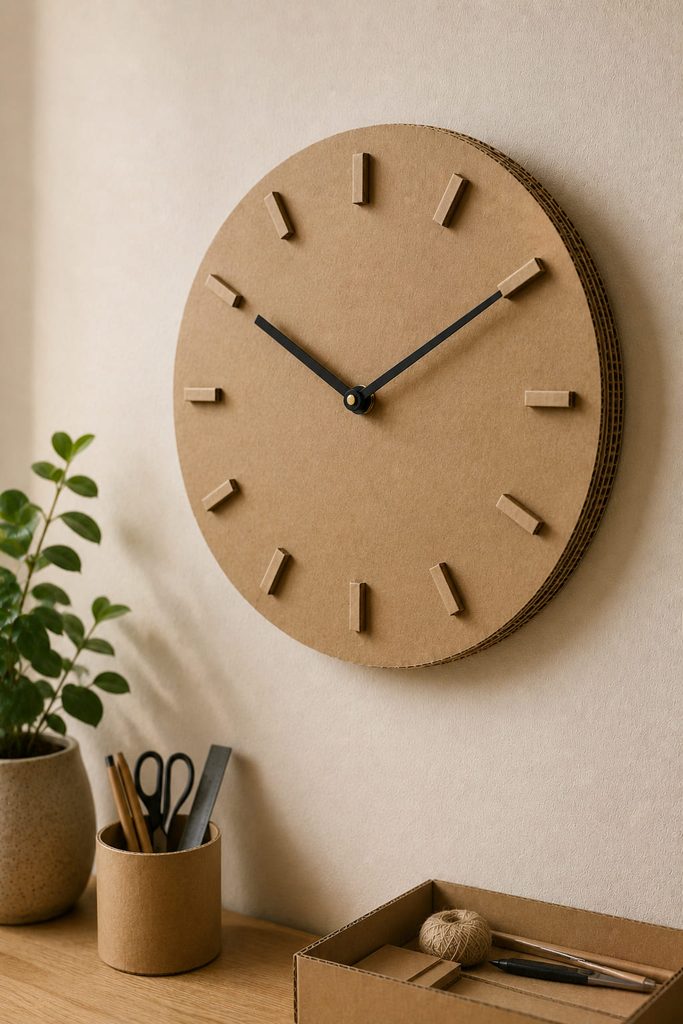
A clock is a useful final step if you want cardboard wall decor to become functional rather than purely sculptural. Laminate two or more flat cardboard circles with the corrugation running in different directions, then cut the center hole to fit a purchased clock movement. Raised cardboard bars or dots can mark the hours without relying on printed numbers.
The clock hands need a completely clear sweep. Keep thick decorative layers outside their path, and make sure the movement’s shaft is long enough to pass through the laminated face before gluing anything permanently. Hang the finished piece from the movement’s intended hanger or a separate reinforced point, depending on the hardware supplied with the mechanism; do not place the load on a thin decorative layer.
Choosing Cardboard Wall Decor Ideas by Weight and Depth
Think about the wall before choosing the project. Flat pieces such as woven panels, torn contours, and pierced lattices are easier to keep close to the surface. Deep projects such as slotted waves, arch niches, and mobiles need more projection and more deliberate mounting. Functional pieces also deserve a different standard because they are touched, loaded, or moved after installation.
For large work, reinforce hanging points with laminated cardboard and spread the load over a broad backing area. Avoid damp locations because untreated cardboard can soften or warp with moisture. If you are cutting thick corrugated board by hand, use a stable cutting mat, a metal ruler where appropriate, and controlled repeated passes rather than trying to force a blade through the full thickness at once.
Start With the Structure You Want to See
Choose the material behavior first: flutes for visible texture, folds for facets, slots for self-supporting depth, weaving for rhythm, or cutouts for negative space. That approach keeps the finished piece from looking like cardboard disguised as something else; the construction itself becomes the design.
If you want to continue into more polished layered paper projects after working with recycled board, the broader Home Decor SVG collection is a useful next direction for comparing framed, hanging, flat, and functional formats.