This post contains affiliate links. As an Amazon Associate I earn from qualifying purchases, at no extra cost to you. Thank you for supporting Diynify!
Paper chain decorations can look far more intentional than the classroom-style garland most people remember. By changing link scale, direction, support, and function, the same basic paper-strip idea can become wall art, a window feature, a tabletop accent, a mobile, or even a small functional container.
Most projects here use colored paper or cardstock, scissors or a craft knife, and glue or double-sided tape. A few designs also need cardboard rings, thin chipboard, thread, a lightweight hoop, a dowel or tension rod, vellum, photo clips, or a cool battery-powered LED. Start with a simple wall or tabletop idea if you want the chain itself to provide the visual impact; choose the mobile, lantern, basket, or woven panel when you want the structure to do more work.

1. Oversized Ombre Paper Chain Wall Swag
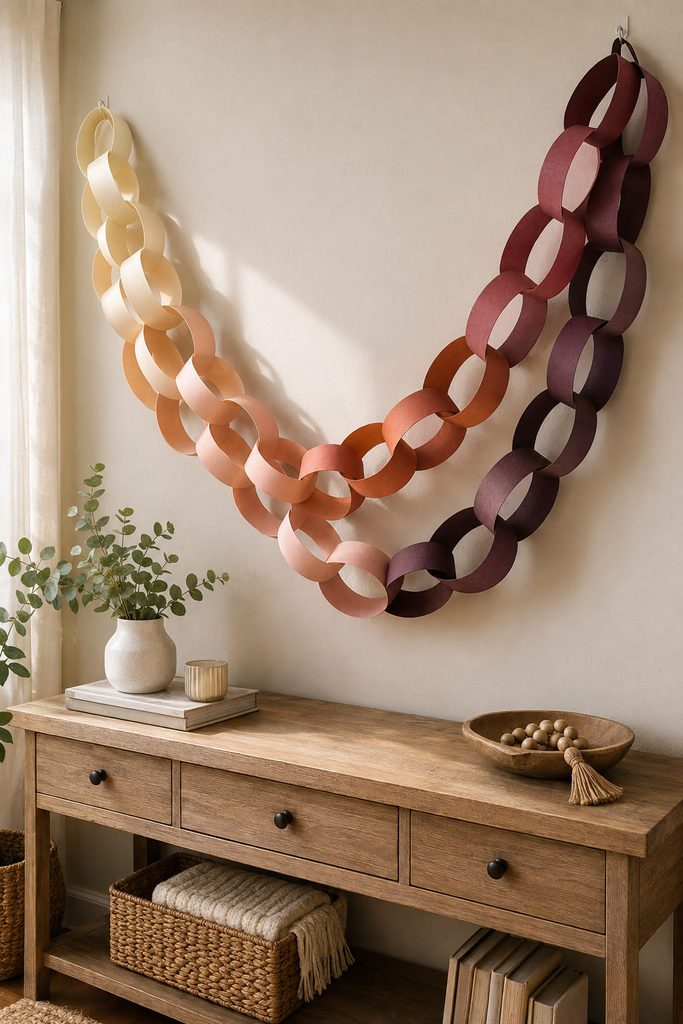
Make the links bigger than expected if you want a paper chain to read as home decor rather than filler. Wide strips formed into oval links create enough shadow to show from across a room, while a gradual shift from pale to dark paper gives the strand a deliberate visual rhythm. Keep the darkest section near one end for an asymmetrical sweep, or place it at the center for a more formal composition. Hang the chain from two or three removable hooks instead of pinning every link; the natural sag between supports becomes part of the design, and stepping back lets you check whether the color transition is still readable at room distance.

2. Floor-Length Paper Chain Doorway Curtain

Start at the header, not the floor, when planning a chain curtain. The top support has to carry many light strands at once, and the finished length needs enough clearance that the lowest links do not drag or catch underfoot.
- Cut and assemble several narrow chains to the same approximate length, leaving the final link on each strand open.
- Wrap a sturdy cardboard strip around a lightweight dowel or tension rod, then close each top link around that header at even intervals.
- Hang the header first, trim strands by removing links from the bottom, and test the opening by walking through the center before adding more density.
A staggered bottom edge is more forgiving than a perfectly straight one because tiny differences in link size disappear into the overall rhythm. Keep the center slightly more open if the doorway is used often.
3. Radial Paper Chain Wreath
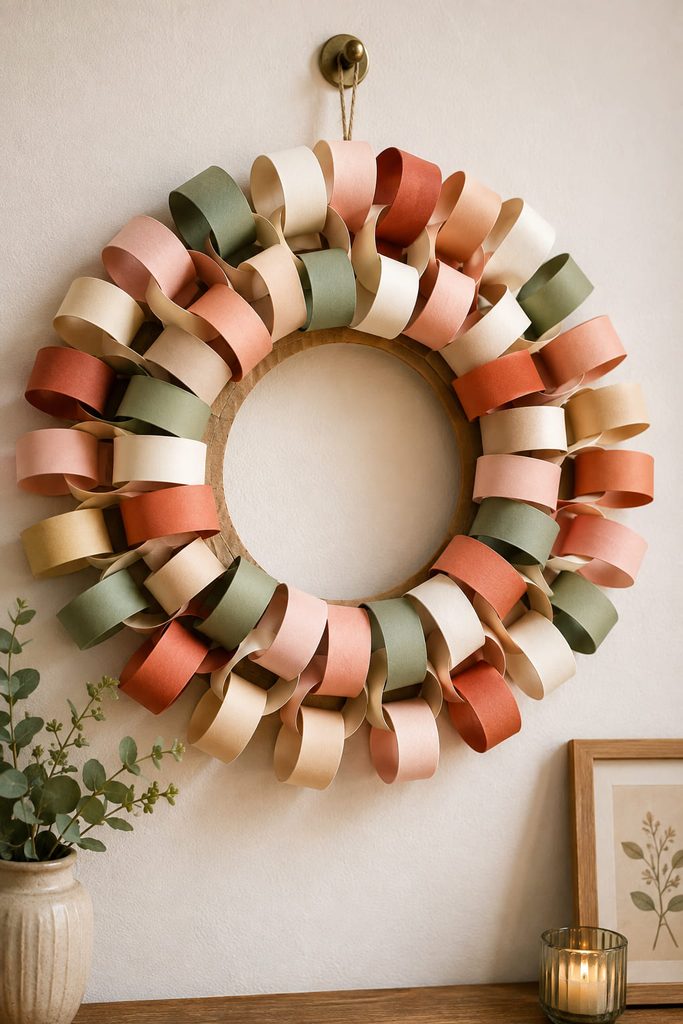
For a wreath, the chain should behave like a textured surface rather than one long strand. Make short runs of three to five links, then attach their first links around a flat cardboard ring so the loose ends point outward. Alternating the direction of neighboring runs keeps the ring from looking striped and helps the links overlap into a fuller edge.
Density matters more than perfect repetition. If the cardboard base shows between clusters, add a short two-link filler instead of forcing every section to match. A wider outer ring gives a plush, sculptural silhouette; a narrow ring leaves a cleaner center opening. For a hanging wreath, tie the hanging loop through the cardboard base rather than a paper link so the load stays on the rigid support.
4. Cascading Hoop Paper Chain Chandelier

Suspending paper loops overhead changes the job of every connection: the top link becomes a load point, the hoop controls the footprint, and each strand needs room to hang without tangling into the next one. Use a lightweight embroidery hoop or cardboard ring as the main support, then attach chains in alternating lengths around its perimeter so the lower edge forms a soft cascade.

Build from the support downward:
- Tie three or four equal lengths of thread to the hoop and join them above the center so the hoop hangs level.
- Add the longest paper chains first at evenly spaced points, then fill the gaps with shorter strands.
- Rotate the suspended hoop slowly and move any heavy cluster until the ring returns to level.
Ceiling Clearance Check: Keep the piece well away from ceiling fans, vents, open flames, hot bulbs, and paths where people will brush against it. This is a decorative hanging piece, not a lampshade or load-bearing fixture.
5. Low-Profile Paper Chain Table Runner
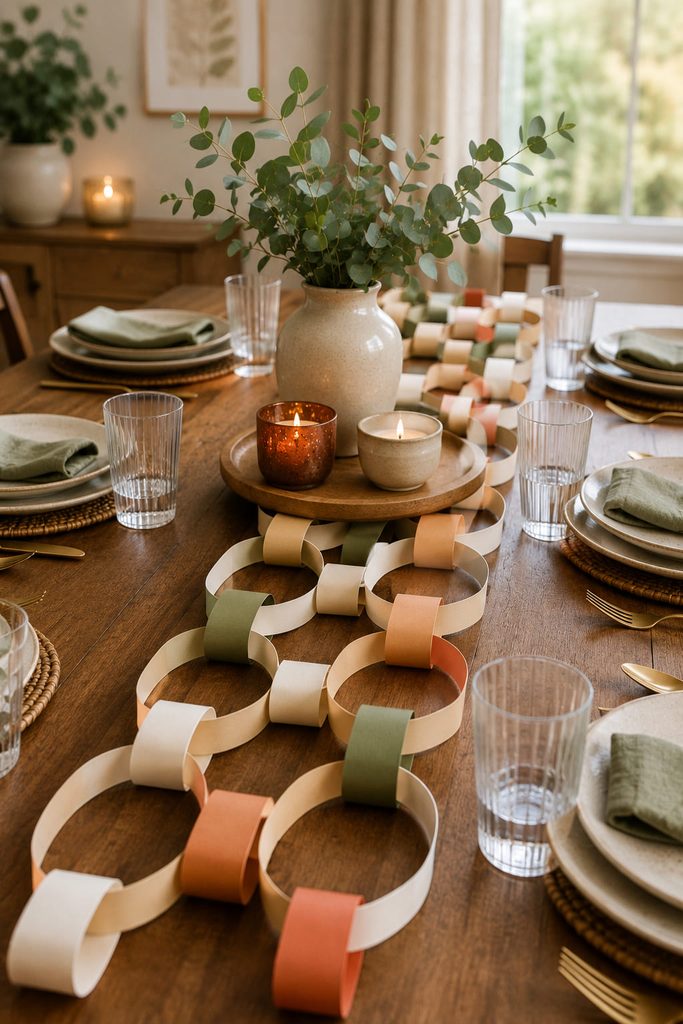
On a dining table, height matters more than length. A standard round-link chain can roll, tip glasses, and block place settings, so flatten each closed link into a long oval before connecting the next one. The result keeps the interlocked look while sitting closer to the tabletop.
Use this quick fit check before finishing the full runner:

- Keep the chain inside the clear strip between opposite place settings.
- Anchor the first and last links to small cardstock tabs hidden under the centerpiece or serving board.
- Leave breaks around serving dishes instead of forcing the chain underneath them.
- Test the runner with an empty glass near the edge; if the chain can push into its footprint, narrow the links or shorten that section.
6. Openwork Paper Chain Planter Collar
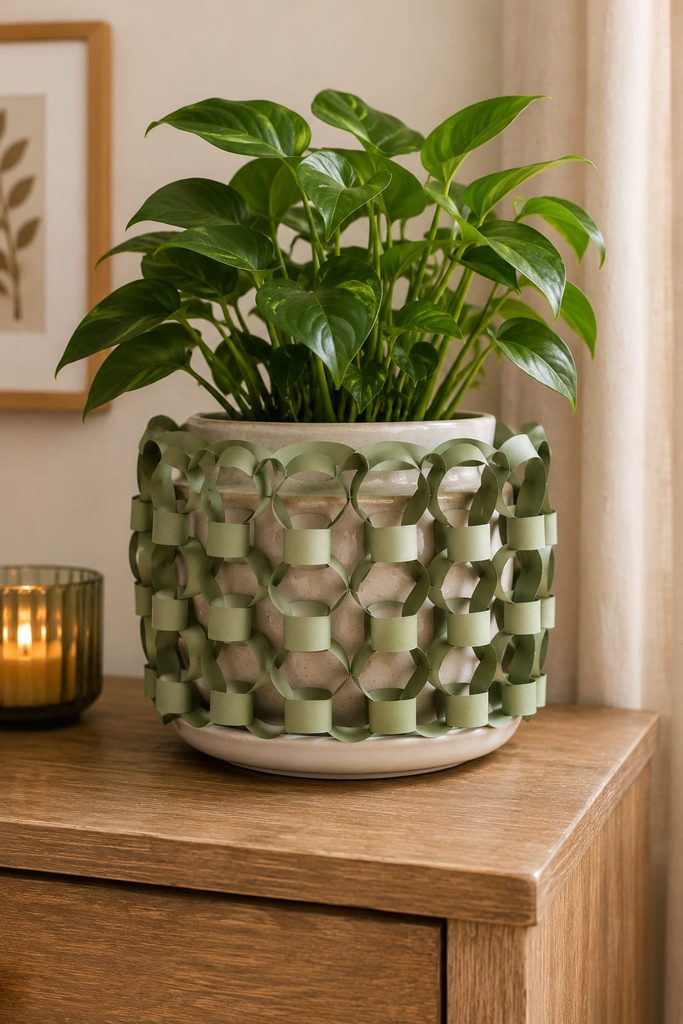
Moisture is the reason a planter collar needs different rules from a wall garland. Paper should never be asked to contain wet soil or catch drainage, so treat the chain as a removable outer sleeve around a separate waterproof pot.
Slip-On Collar vs. Wraparound Collar
- Slip-on: Build several closed chains into a loose cylinder, joining neighboring strands with short connector links. It looks seamless, but the opening must be wide enough to clear the pot rim.
- Wraparound: Build the lattice flat and close it around the pot with one final row of links. This is easier for tapered pots and simpler to remove before watering.
Moisture Boundary: Leave a visible gap above the saucer and remove the paper sleeve if water splashes the exterior pot. A cardstock liner can stiffen the top edge, but it does not make the paper waterproof.
7. Photo Display Paper Chain
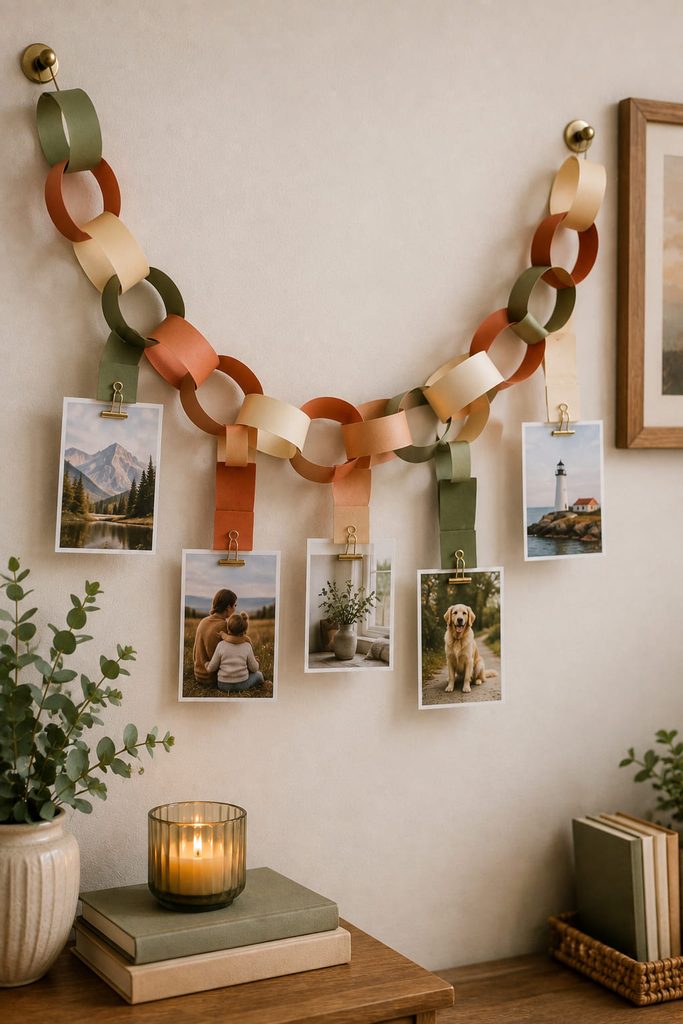
Let the chain do more than hang by turning selected links into photo stations. Use larger cardstock links than you would for a garland, and slide a small folded photo tab over the lower edge of every third or fourth link. A mini clip or photo corner on that tab can hold a print without gluing it directly to the chain. Spacing the photos between plain links keeps the strand flexible and prevents the images from stacking on top of one another; mount the top link to the wall support and leave the photo tabs removable so prints can be swapped without opening the chain itself.
8. Tear-Away Countdown Paper Chain
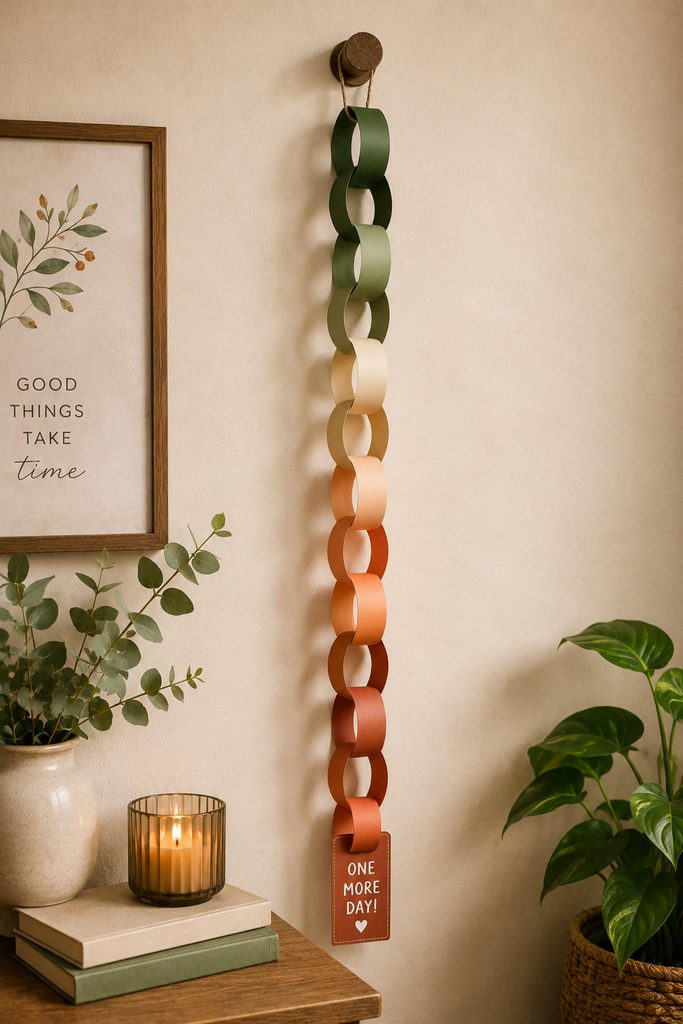
If you want decor that changes day by day, build the interaction into the closure. Make each link from a strip joined with a small piece of removable double-sided tape or a narrow glue area near one end; the joint should hold during display but still let you separate one ring without pulling on the entire strand.

Numbering is optional—the shortening chain already communicates progress. For a cleaner home-decor look, group the colors in blocks that mark weeks or milestones and hang the chain from the end that will remain fixed. Place the lowest removable link where it can be reached without tugging the hook or support above it.
9. Paper Chain Mirror Frame
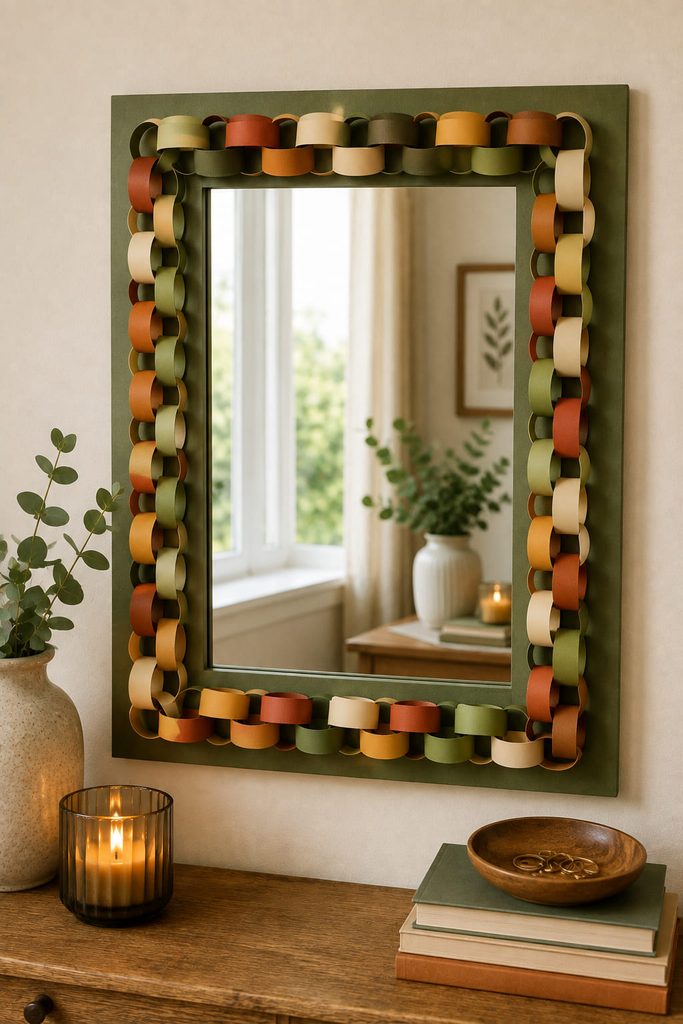
Corners expose the weakness in a paper-chain border. If you glue a continuous strand tightly around a rectangular mirror, the links crowd on the inside corners and spread apart on the outside edge.
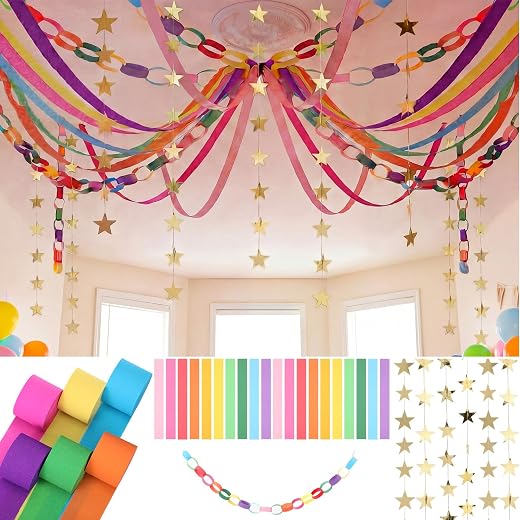
Diagnose the fit before committing the full border:
- Links buckle at a corner: stop the strand before the turn and begin a new short section on the next side.
- The frame looks uneven: mark equal spacing points on a cardstock backing strip and attach one link at each mark.
- Too much mirror is covered: use smaller oval links and keep every attachment on the backing, not on the reflective surface.
- The border pulls away: reduce the length of unsupported chain between glue points rather than adding more adhesive.
A segmented border still reads as one frame once the repeated links surround all four sides.
10. Freestanding Paper Chain Arch Sculpture
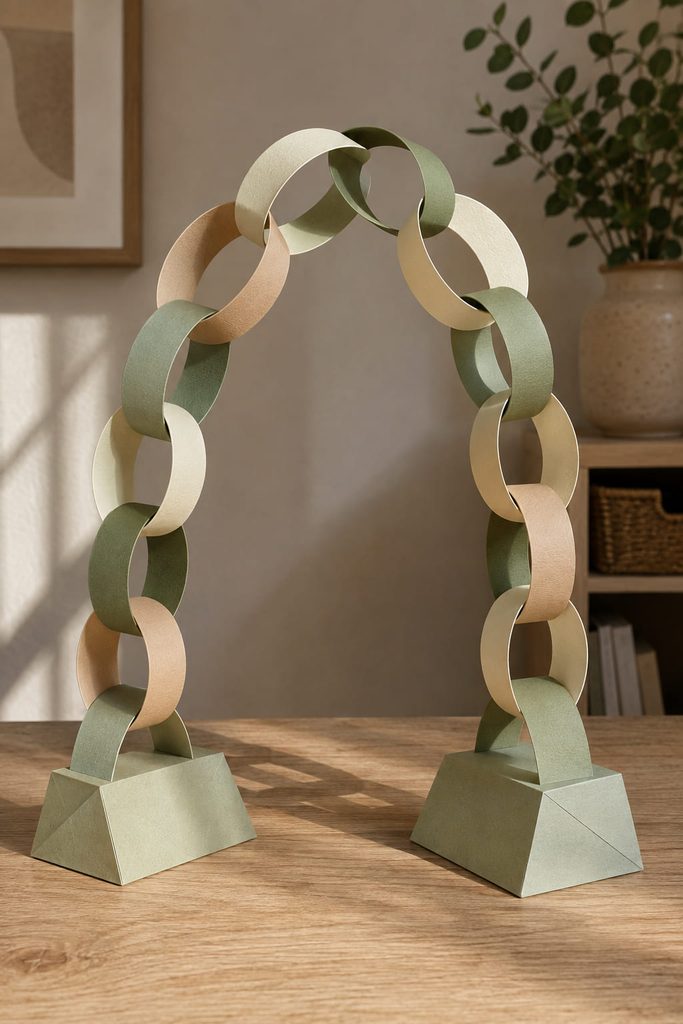
A freestanding arch needs more than interlocked loops; it needs a base that prevents the curve from spreading under its own weight. Use medium-to-heavy cardstock for the links and a doubled cardstock or thin chipboard base wide enough to sit flat. Instead of leaving every link free to rotate, glue the contact points between neighboring links after shaping the arch. Those locked joints turn a floppy chain into a shallow structural rib.
Build the curve gradually from both ends toward the top. The first links should be attached to small folded feet or slots in the base so they cannot slide outward. As the arch rises, alternate the tilt of the links and pause before closing the final top connection; a small change there can shift the entire curve.

Stability Test: Set the arch on a level surface and tap the base lightly from the side. If the top sways while the feet stay planted, add a hidden crosspiece between the two lowest inner links. If the feet move, widen the base before adding decorative weight. This project works best as tabletop sculpture, not as a handle or load-bearing arch.
11. Balanced Paper Chain Mobile
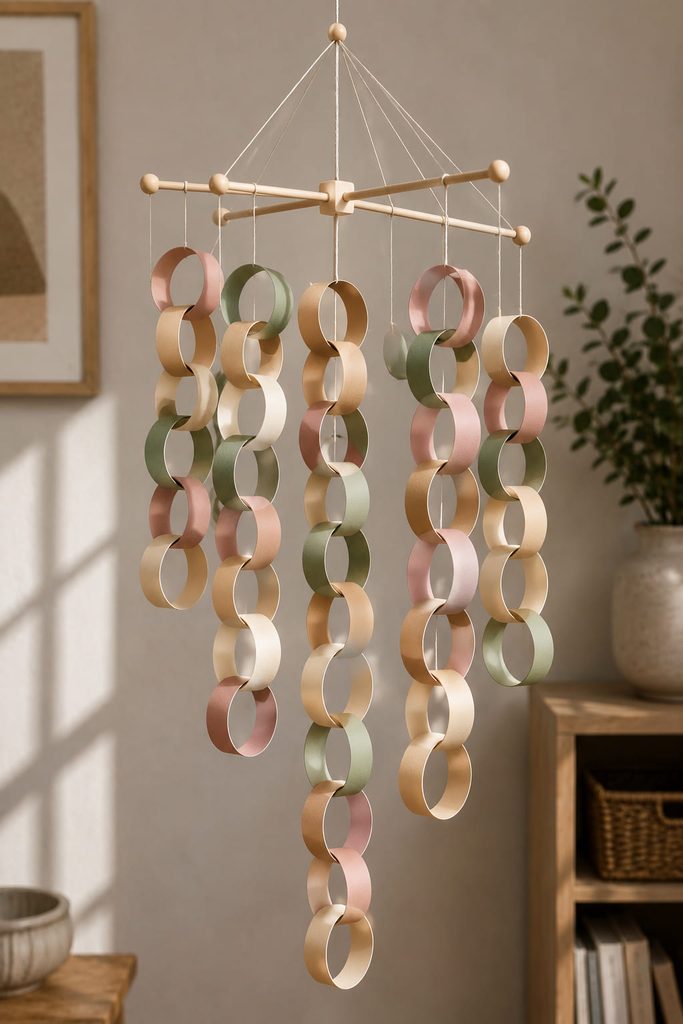
Before a paper chain mobile can move freely, each branch has to balance on its own. A crossbar made from thin wood, stiff rolled paper, or a lightweight dowel can support short chains at different heights, but the pivot point must sit where the weight on both sides is roughly equal.
Work from the bottom upward: finish the lowest pair of chain drops, tie them to their bar, then slide the suspension thread along that bar until it hangs level. Only then attach the completed bar to the level above. Repeat the process instead of guessing all the tie points at once. Unequal link sizes are fine as long as the bars return to a stable resting angle.
Keep clear space around every moving strand so the chains can turn without striking a wall, shade, or neighboring bar. A mobile that keeps twisting into itself usually needs more vertical spacing, not more weight.
12. Shadow Box Paper Chain Relief

Inside a shadow box, the most useful part of a paper chain may be the empty space inside each link. Arrange short chain segments across a backing board so those openings form a repeating pattern, then rotate a few links edge-on to cast deeper shadows.
Attach the backmost segments first and leave deliberate gaps between groups; filling every space reduces the layered effect. Foam spacers under selected links can lift them forward, but keep the total depth inside the frame cavity so the front glazing does not press on the paper. A limited palette makes the link shadows easier to read than a busy mix of colors.
13. Vellum-and-Chain LED Lantern Sleeve
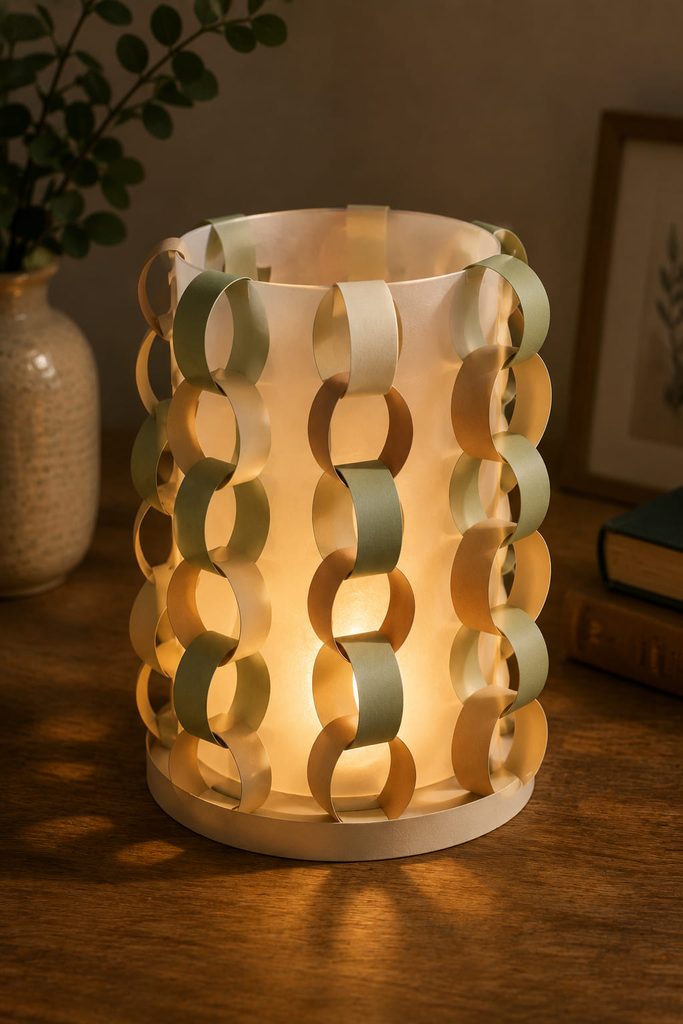
Light should pass through the lantern before the paper chain adds texture. Start with a translucent vellum cylinder that is open at the top, seated in a shallow cardstock base ring, and sized to slip over a cool battery-powered LED light. The vellum provides the continuous glowing surface; the chain becomes an outer lattice rather than the part that has to diffuse the light.
Build the chain shell separately from narrow cardstock links and join several vertical strands with occasional cross-links. Leave enough space between links for the vellum to remain visible, and stop the chain slightly above the bottom so the sleeve can stand on its own base instead of resting on the paper lattice.
Keep the Light Path Open: Use only a cool LED source, keep the top open for access, and make the sleeve easy to lift off for switching or battery changes. If one side glows much darker, remove or widen the densest link cluster instead of adding a brighter light.
14. Mini Paper Chain-Link Catchall Basket
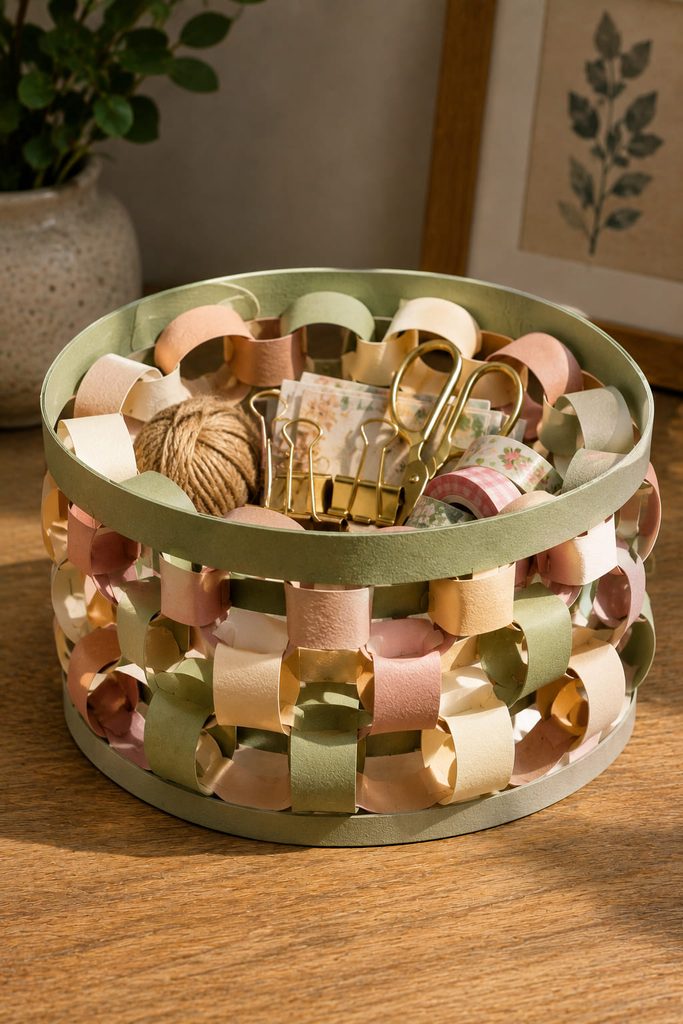
For a small catchall, the chain walls need a real base, a controlled opening, and fixed intersections. Cut a stiff cardstock or thin chipboard circle for the bottom, then attach a first ring of wide vertical paper loops around its perimeter. Thread a second course of links through neighboring vertical loops so the wall begins to lock together.
- Build only one or two courses at a time and glue each intersection after the wall shape looks even.
- Add a flat cardstock rim around the top to stop the loops from spreading.
- Load the finished basket with lightweight items such as wrapped tea bags, yarn clips, or paper craft notions, then check whether the rim stays round.
Load Limit: Paper-chain walls are decorative structure, not a substitute for a rigid box. If the sides bow, remove weight and add an inner cardstock liner rather than stacking more chain courses.
15. Two-Link Paper Chain Napkin Rings
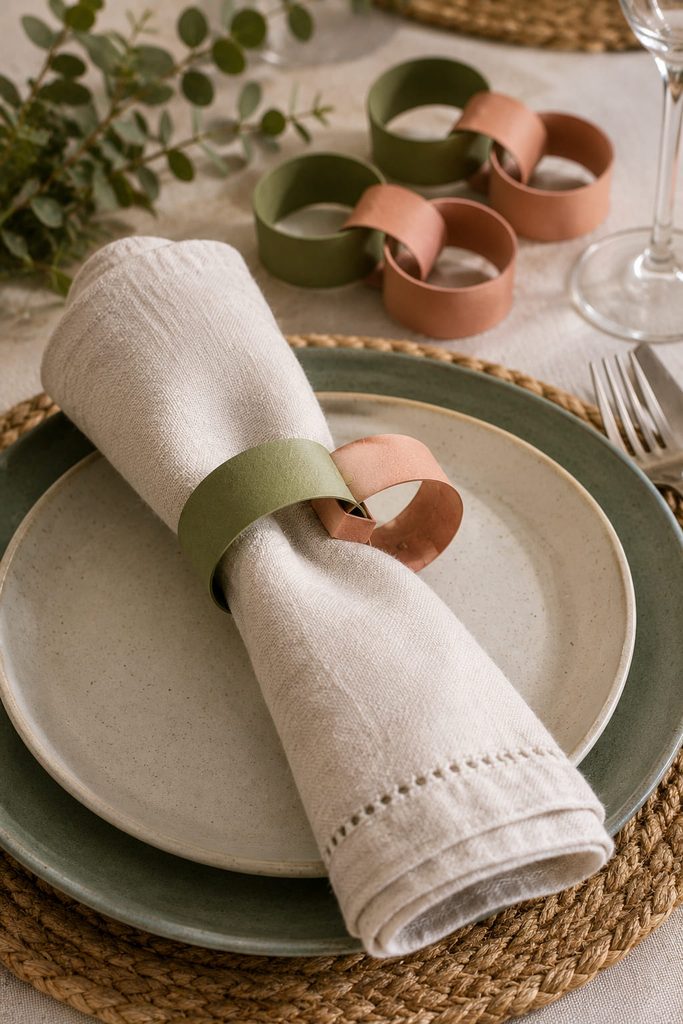
Two links are enough to turn the paper-chain idea into a small functional table detail. Make the first loop just large enough to slide over a rolled or loosely folded napkin, then connect a second, smaller decorative link through it before closing. The second link gives the familiar chain silhouette without squeezing the fabric. Cut all first-loop strips from the same template if you are making a set; consistent circumference matters more than perfectly matching the decorative links, and keeping bulky embellishments away from the underside lets each ring sit flat on the table.
16. Accordion-Cut Paper Leaf Chain Valance

Fold first, cut second when you want a continuous paper chain without separate links. The connection bridges are the structural weak points, so the sequence matters.
- Accordion-fold a long strip of lightweight paper into even panels.
- Draw a simple leaf or arch shape that touches both folded side edges, leaving broad connection bridges.
- Cut the outer contour, unfold gently, and hang several shorter sections across the top of a window or shelf with the folds slightly open so the alternating planes cast shadow.
17. Woven Paper Chain Wall Panel
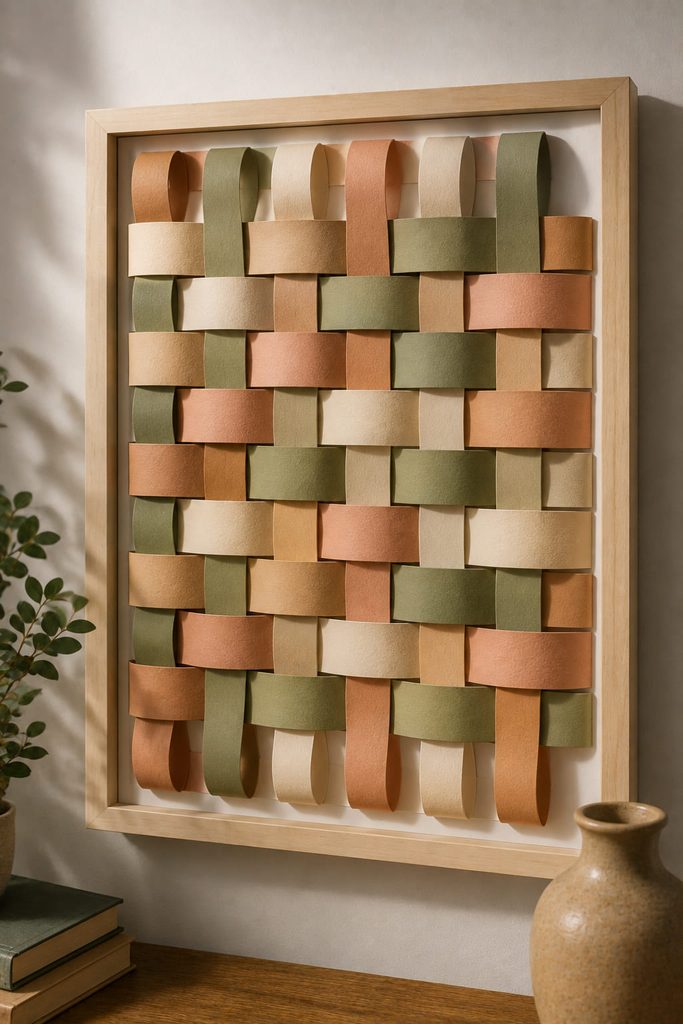
Real weaving requires an over-under path, even when the elements become paper loops. Build a shallow rectangular frame from doubled cardstock or chipboard, then anchor several long, flattened closed loops horizontally between the side rails. Weave an open paper strip vertically over one horizontal loop and under the next; once it reaches the bottom, return the strip behind the frame and close its ends to form one long vertical loop.
Reverse the over-under sequence on every neighboring vertical strip so the front face locks into a true woven grid. Keep the paper flat where it crosses and slightly rounded between intersections; that contrast gives the surface depth without making it bulky. Secure the outermost loops only after the pattern is square. If the center bows forward, ease the vertical strips instead of pulling the frame edges tighter.
Choosing the Right Paper Chain Project for Your Space
Choose by what the decoration needs to do. The ombre swag, wreath, mirror frame, and accordion valance are strong starting points when you mainly want visual impact. The photo chain and countdown chain add interaction, while the mobile, lantern, basket, arch, and woven panel reward more careful construction because balance, support, light, or tension become part of the result.
For more dimensional paper-decor directions beyond chains, browse Home Decor SVG.