

This post contains affiliate links. As an Amazon Associate I earn from qualifying purchases, at no extra cost to you. Thank you for supporting Diynify!
Paper Christmas crafts do not need intricate cutting, specialty machines, or a pile of tiny embellishments to feel finished. The strongest projects here get their holiday character from folds, curves, repetition, translucent paper, and a few clear silhouettes, so the construction stays manageable while the result still reads as intentional.
Most ideas use cardstock, printer paper, wrapping paper, scissors, a ruler, and glue or double-sided tape. A few call for paper bags, vellum or tissue paper, string or thread, a simple hanging support, treats or a gift card, and a battery-powered LED. Choose the project by what the finished piece needs to do—stand, hang, hold, glow, wrap, or mark a place at the table—then let the paper do most of the decorating.

1. Rolled Paper Cone Trees for the Mantel
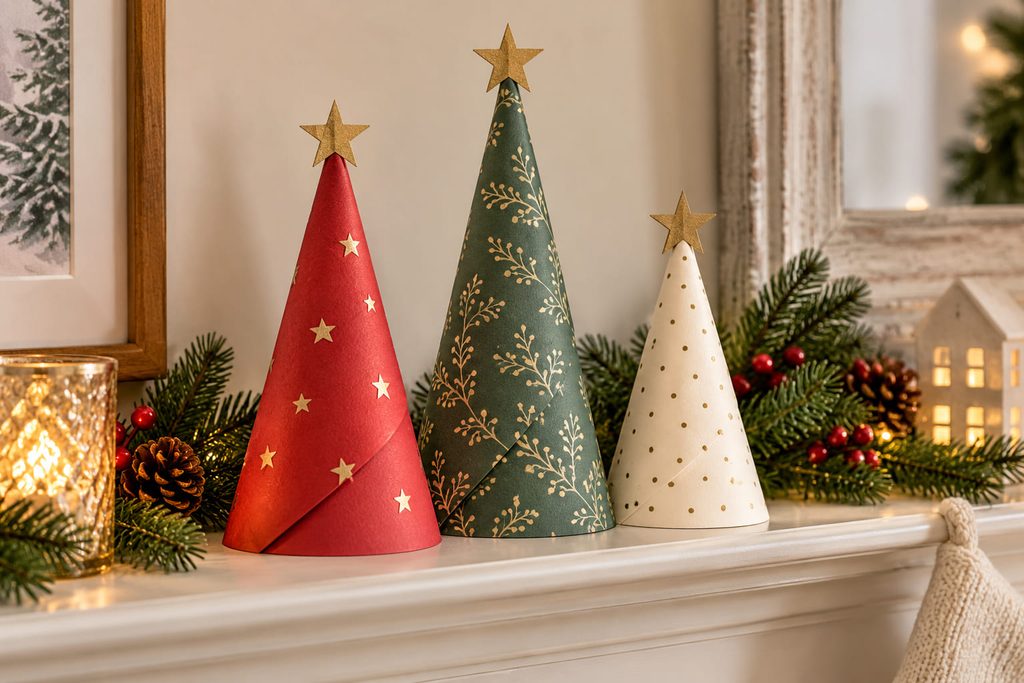
For a mantel, shelf, or entry table, a cluster of paper cone trees gives you height without asking for detailed cutting. Start with cardstock sectors rather than full circles, roll each one until the edges overlap, and glue the seam only after the base sits flat. The wide circular footprint is what keeps the tree standing; if the cone rocks, trim the bottom edge before adding a topper. Varying the height of three or five cones creates the sense of a small forest, while keeping the same paper family stops the group from looking busy.
2. Oversized Paper Bag Starburst for a Blank Wall
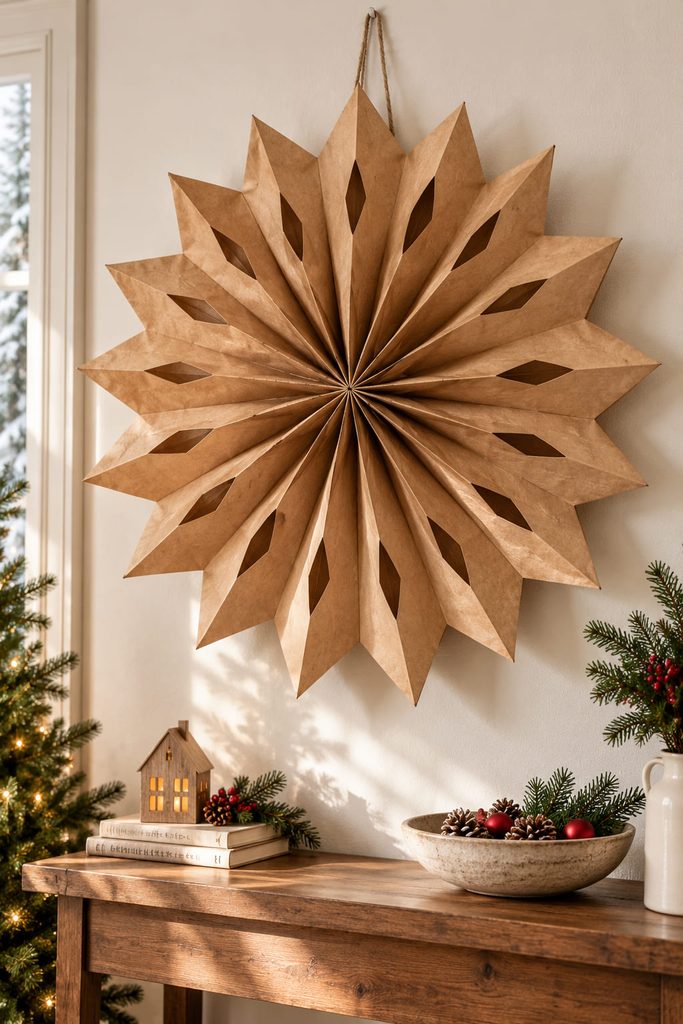
Stacking ordinary paper bags turns a repetitive glue job into a large decoration with very little precision cutting. The bag gussets supply the folding geometry, so the real work is keeping the glue lines consistent and making the final cuts broad enough that the layers can still open cleanly.

- Lay each bag flat with the opening facing the same direction, then add one glue line up the center and another across the closed bottom edge.
- Stack the next bag directly on top and repeat until the bundle feels thick enough to form a full fan.
- Cut one simple point or rounded notch through the open end of the stack; avoid thin lace-like cuts that weaken the layers.
- Fan the first and last bags toward each other, join them, and reinforce the hanging area through two layers rather than relying on a single paper edge.
Hanging-Point Check: The star should open without pulling the top layers out of shape. If the hole or loop starts stretching the paper, move the load closer to a glued seam and add a small cardstock reinforcement patch behind it.
3. Paper Chain Garland With Deliberate Spacing
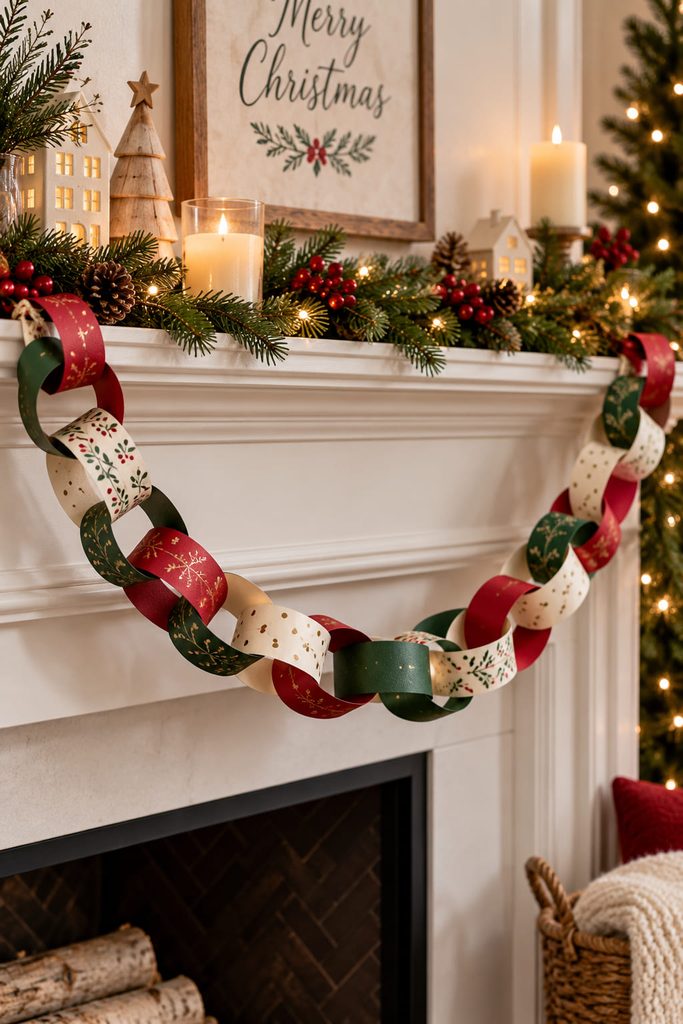
When you need several feet of decoration, repetition matters more than detail. Cut all the strips first, make one sample loop to settle the size, then build the chain in batches so the width stays consistent. Slightly longer strips make softer, larger loops; shorter strips create a tighter chain that reads more densely across a mantel. Leave enough slack between anchor points for a visible drape, because a chain pulled perfectly straight tends to lose the relaxed rhythm that makes it look festive.
4. Folded Circle Bauble Ornaments
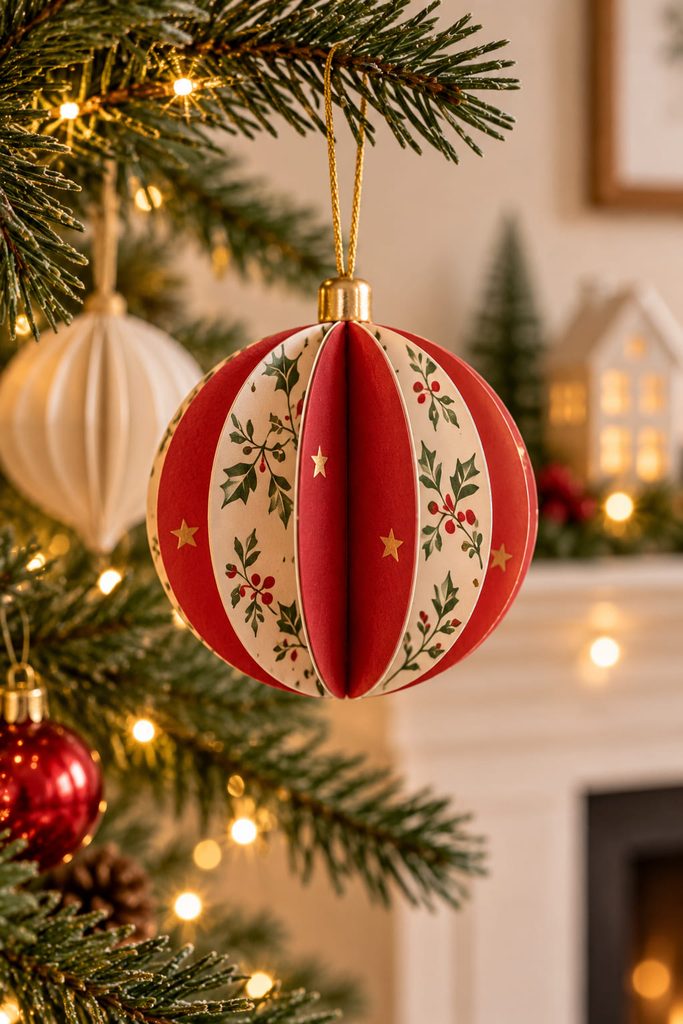
Fold several matching paper circles in half and glue the outer halves together to make a rounded bauble with almost no internal cutting. The repeated folds create ribs that catch light, and the centerline keeps the form balanced. Add the hanging loop before closing the final pair of halves so the thread is trapped inside the top of the ornament instead of depending on a glued-on tab.

Thin paper gives the bauble more pages and a softer fan, while firmer cardstock gives fewer, clearer ribs. If a large ornament starts to sag, reduce the diameter or use fewer panels rather than adding more glue; the hanging point works best when the weight stays close to the folded center.
5. Pleated Paper Rosette Gift Toppers
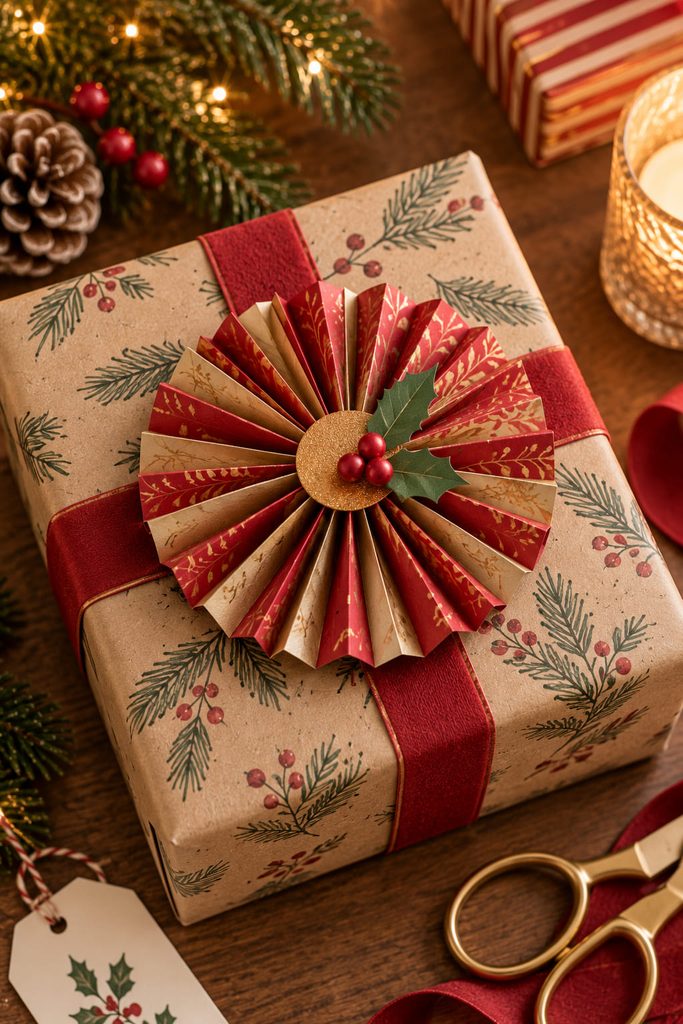
A pleated rosette makes plain wrapping look considered because the structure creates its own shadows. Accordion-fold one long strip, join the short ends into a ring, then press the ring inward until it lies flat like a fan. A small cardstock disk on the back is not just decoration—it keeps the pleats from springing open and gives you a broad surface for attaching the rosette to a gift. Keep the center disk slightly smaller than the pleated circle so it disappears from the front, and use metallic or patterned paper only on the top layer if the wrapping itself is already visually busy.
6. Torn-Paper Snowy Landscape Cards
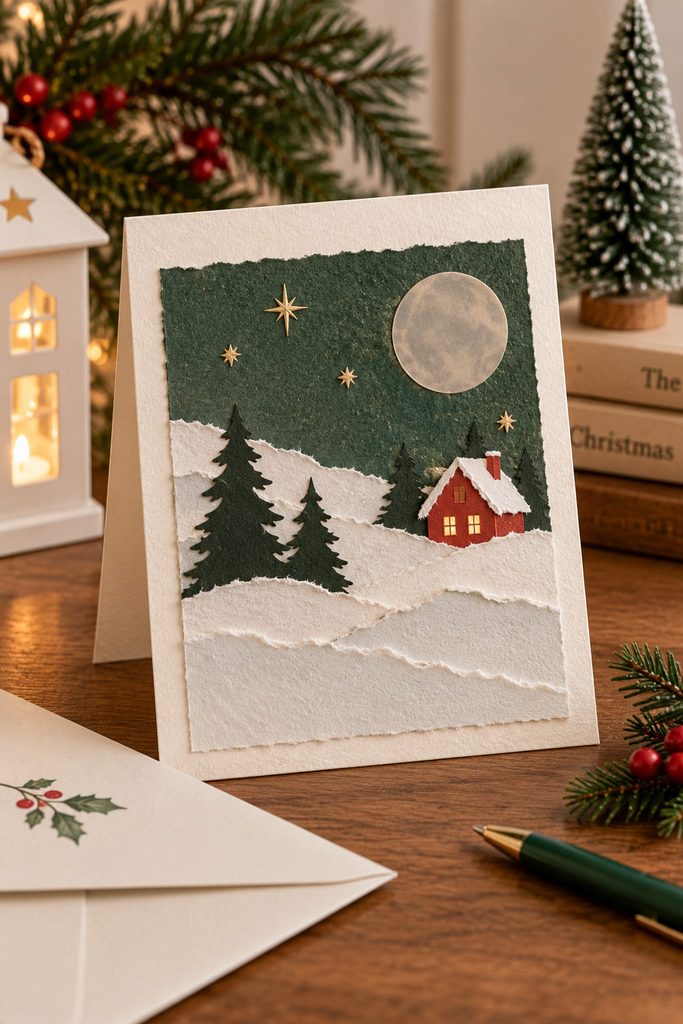
Torn edges are useful when a crisp cut would make the scene feel too graphic. Layer two or three uneven strips of white paper across a folded card base for snowbanks, then add one strong silhouette—a tree line, a small house, or a moon—rather than filling the whole front with tiny pieces. The irregular white edges create depth because each strip casts a slight shadow over the one below it.
Keep the card fairly flat if it needs to go into an envelope. Raised foam, thick buttons, and bulky bows change the mailing profile much more than another paper layer, so this is a good project to leave deliberately spare. A narrow metallic star or one translucent vellum moon can supply the holiday accent without turning the card into a collage.
7. Cone Angel Place Cards That Stand on Their Own
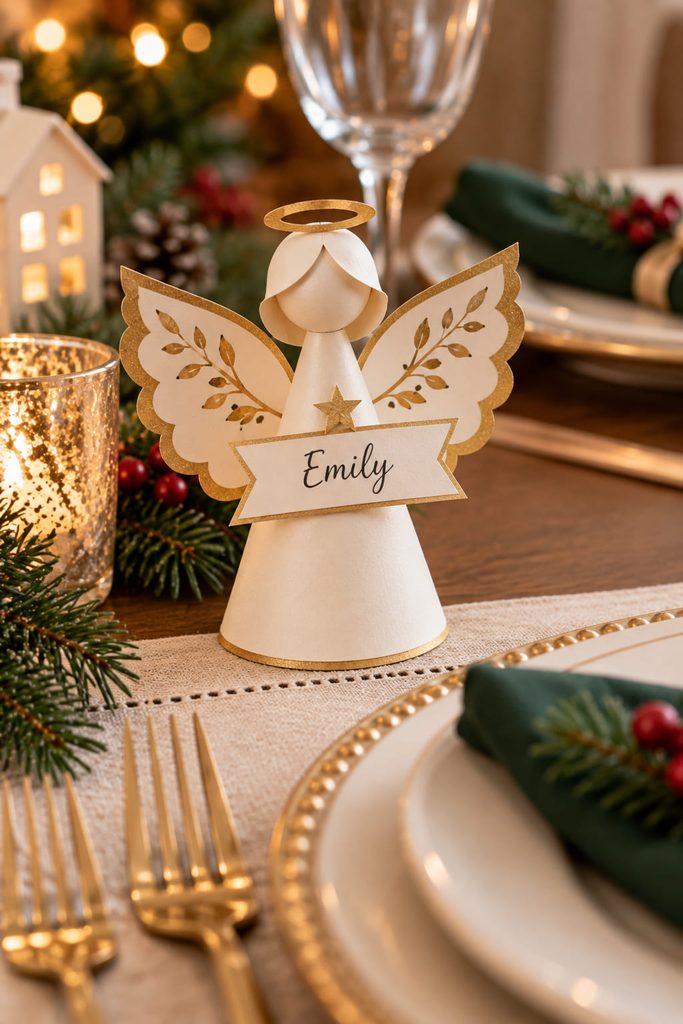
At a holiday table, the most useful angel is one that keeps its footprint small and its name area readable. A shallow paper cone gives the body a stable circular base; wings can be cut as one broad piece and attached across the back so they do not pull the cone sideways. Add a small blank paper flag or collar at the front for the guest name rather than writing across the curved body.
Before making a full set, check three things:

- Base: the cone sits flat without leaning.
- Wings: they stay inside the footprint or rise upward instead of catching neighboring glasses.
- Name area: the writing surface faces the guest and stays large enough to read at table distance.
Make one complete sample before batch cutting. Small changes to cone width affect both stability and how much room you have for the name panel.
8. Woven Paper Heart Treat Pockets
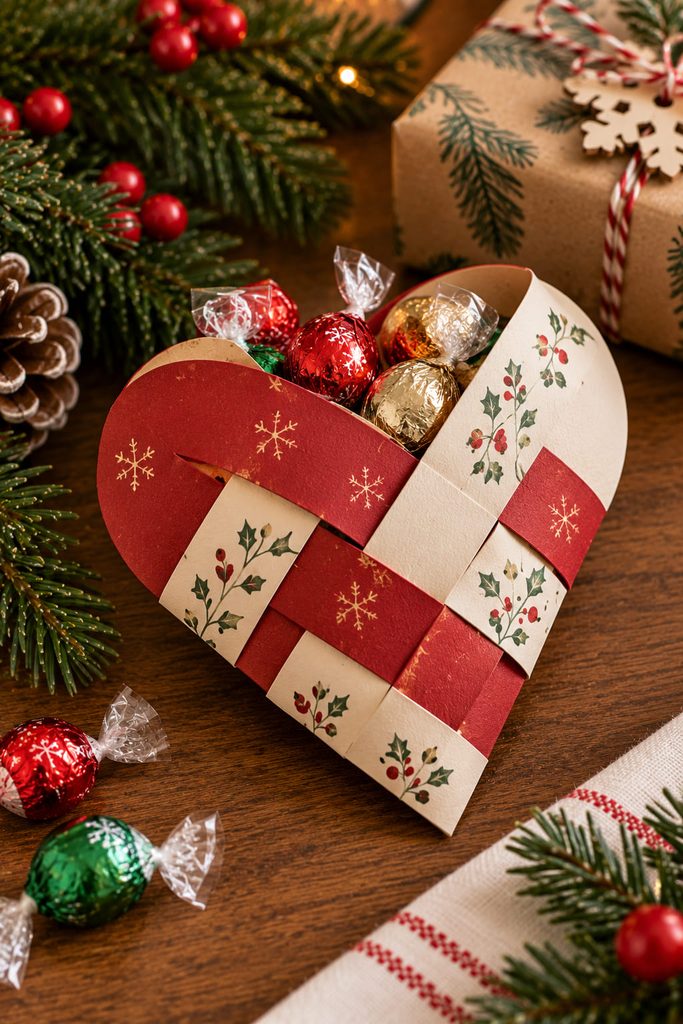
If the heart actually needs to hold a small treat, a printed weave pattern is not enough—the two folded halves have to pass through each other over and under so the interlaced bands form a real pocket. Use flexible paper rather than heavy cardstock, because each loop must bend around the other half without creasing at the wrong point.
- Fold two matching rounded strips in half and cut parallel slits from the folded edge, stopping before the curved end.
- Interweave the loops alternately through and around the loops on the opposite half; the sequence creates enclosed cells rather than a flat checkerboard.
- Work across one row at a time, easing the paper instead of forcing the final loop.
- Open the top gently and check that the woven sides stay connected before adding lightweight wrapped treats.
Fit Choice: Wider loops are easier to weave and give the pocket more usable space. Narrow loops look more intricate but increase friction and make the last pass harder, so they work against the “not fussy” goal.

9. Cut-Paper House LED Luminary Sleeves
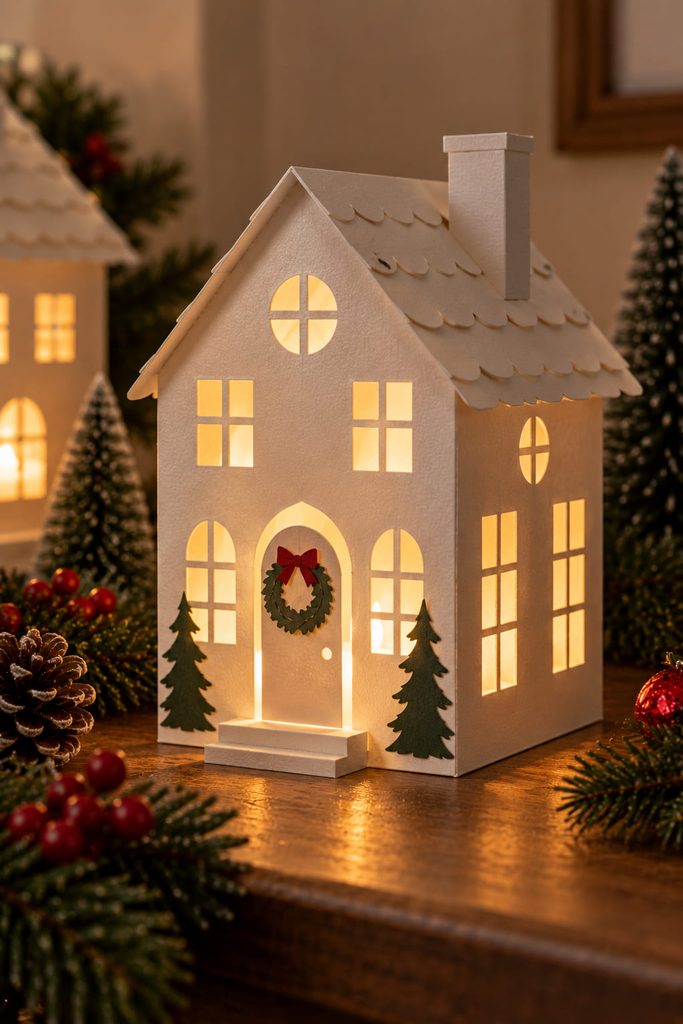
Start with the light path, not the roofline. A paper luminary only works if the openings actually let light through and the finished shell still allows safe access to the light source. Use a simple four-sided cardstock sleeve with an open bottom, cut a few generous window shapes, and back those openings with vellum before closing the final side seam. The vellum diffuses the points of light while the cardstock keeps the house walls upright.

Set the sleeve over a cool, battery-powered LED tea light only—never an open flame. Keep the LED on the surface beneath the sleeve rather than gluing it inside, so the house can lift away whenever the light needs to be switched off or replaced. A slightly wider base than roof keeps the silhouette stable, especially if you add a small chimney or layered door.
Before making several houses, test one in a dim room. If the windows look muddy, remove an unnecessary paper layer or enlarge the openings; if the wall bows inward, use firmer cardstock or shorten the span between the corner folds. The finished piece should stand without the LED and should lift off without catching on the light.
10. Curled Paper Strip Baubles
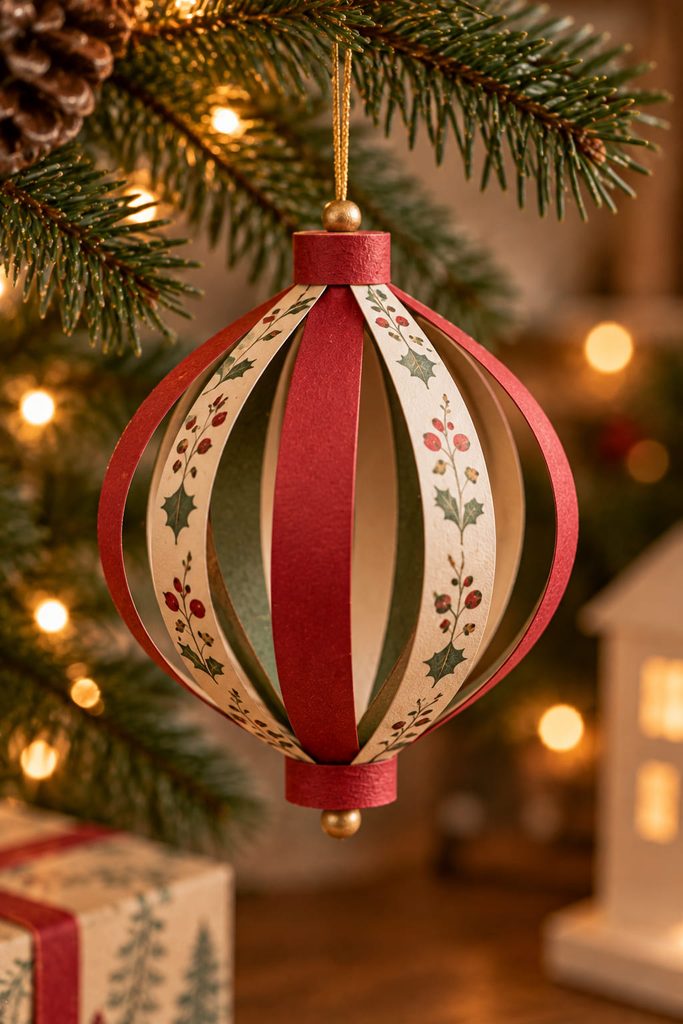
Long paper strips bow outward naturally when their ends are brought closer together, which makes them useful for lightweight ornaments. Cut several strips to the same width, stack and secure them at the bottom, then bring the top ends together around a small paper cap so the middles curve into a bauble shape. A hanging loop trapped under the top cap keeps the load on the shared joint instead of on one decorative strip. For a fuller ornament, add strips; for a cleaner silhouette, use fewer wider bands and let the negative space show between them.
11. Snowflake Napkin Rings Without Crushed Folds
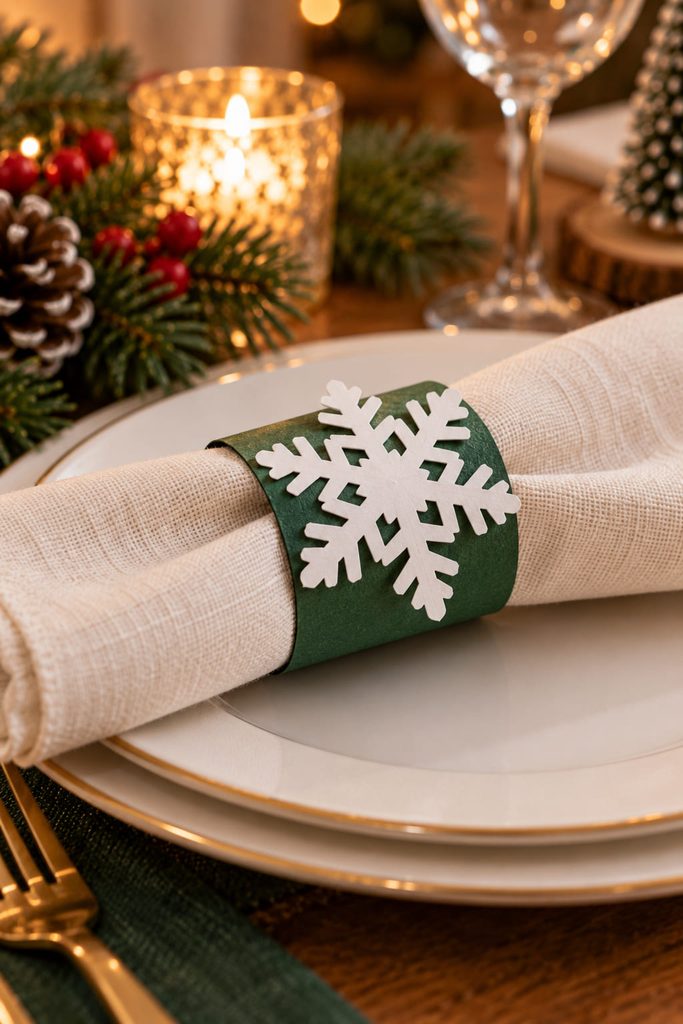
Too-tight rings wrinkle paper napkins and too-loose rings slide off before the place setting reaches the table. Wrap a scrap strip around the folded napkin first, overlap the ends just enough for a secure seam, and use that measurement for the whole batch. Attach one broad snowflake to the seam area so the decoration also hides the join.

If the finished ring misbehaves:
- It slides down: shorten the band slightly rather than enlarging the snowflake.
- It dents the napkin: add a little circumference; stiff cardstock does not need to grip tightly.
- The snowflake tips curl: simplify the outline or switch to a heavier paper for the motif while keeping the band flexible.
The best version looks decorative from the front but still lets the napkin slide out without tearing the ring.
12. Pillow-Box Christmas Treat Holders
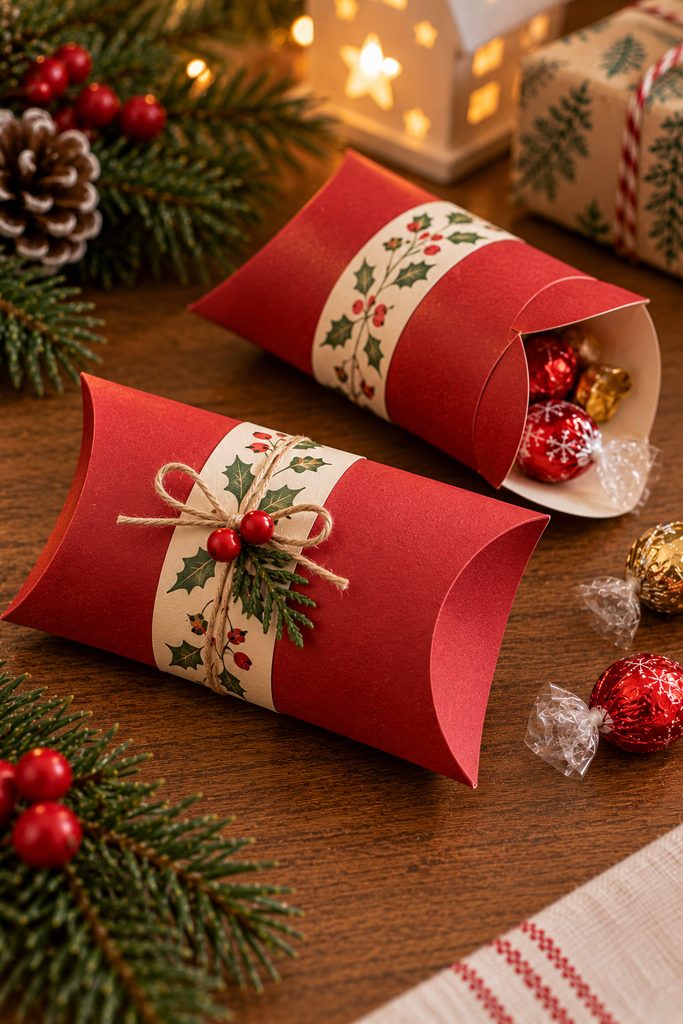
A pillow-box shape earns its place in a simple craft list because two curved end flaps can close a container without a separate lid. The main requirement is that the score lines stay straight and the curved ends are cut as matching pairs, so make one sturdy paper template before repeating the box.
- Cut a rectangle with a narrow side glue tab, then score the two long fold lines that create the front and back panels.
- Trace shallow matching curves at both ends and score the inner arc of each flap.
- Glue the side tab, let the seam set, and gently press the body so it opens into a shallow tube.
- Close one pair of curved flaps, load the wrapped treats through the open end, then overlap the second pair to retain the contents.
Do not overfill the center. If the side seam pulls apart when the flaps are closed, the contents are too bulky or the paper is too stiff for that box size. Reopening one end should give clean access without tearing the glued side seam.

13. Layered Paper Village With Folded Foot Bases
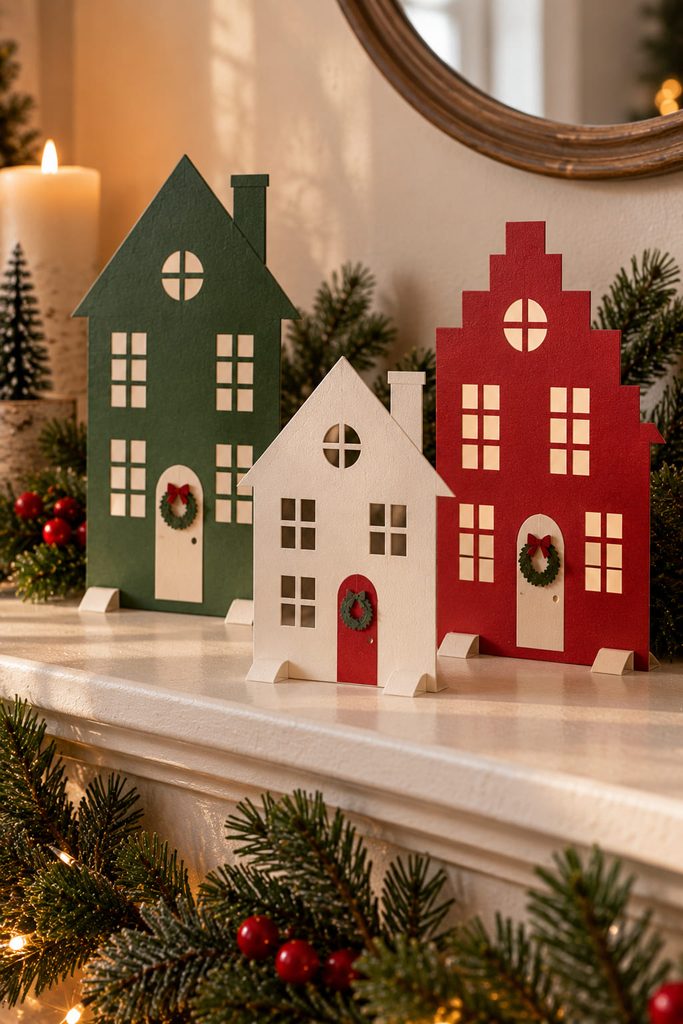
Viewed from across the room, a paper village needs readable rooflines and real depth more than tiny windows. Cut three or four house silhouettes at different heights, then give each one a narrow bottom tab that folds backward at 90 degrees. Those tabs act as feet, so every layer can stand independently instead of leaning on the layer behind it.
Stagger the houses front to back and shift the roof peaks sideways so one silhouette does not disappear behind another. A deeper fold on a tall house increases its footprint; a short cottage can use a narrower foot. If a chimney or tree makes one piece top-heavy, widen the hidden tab before adding decorative layers.
The easiest success test is to step several feet away. You should still read separate buildings and gaps between them. If the village collapses into one dark strip, remove a layer, increase the spacing, or lighten the rear silhouettes rather than cutting more detail into the facades.
14. Simple Paper Leaf Wreath on a Cardstock Ring
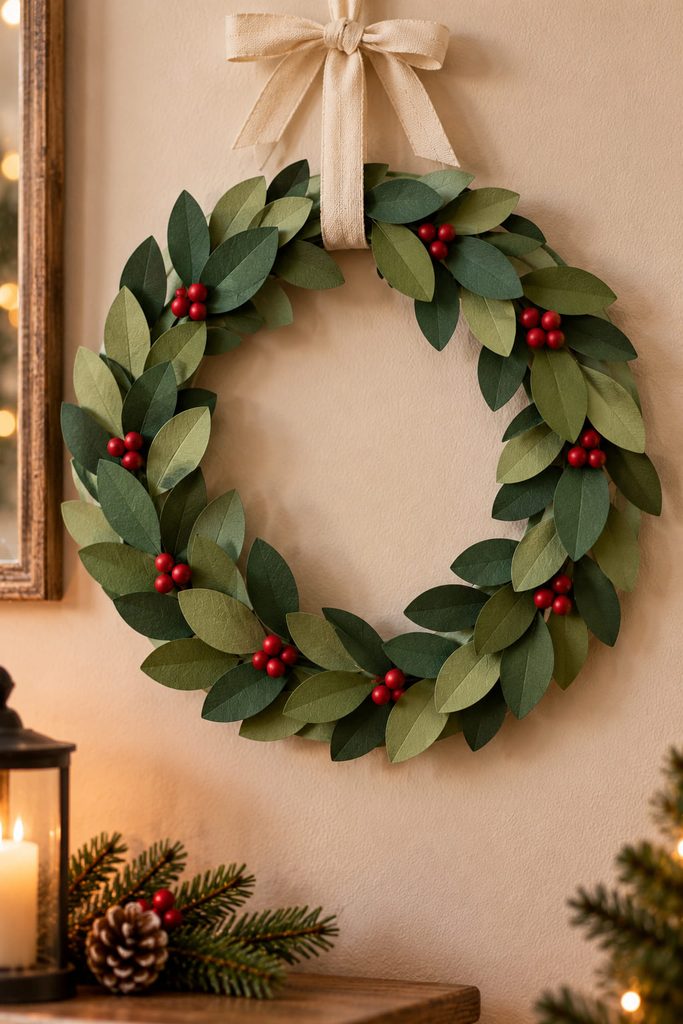
Instead of cutting dozens of pointed holly leaves, use one rounded leaf shape and let overlap create the fullness. A cardstock ring carries the load, so the decorative leaves can stay lightweight and slightly curved. Glue them in loose clusters that all travel in the same direction, leaving a few small gaps where the backing ring can breathe; covering every inch with identical rows makes the wreath look flatter, not richer.
A small materials set is enough:
- firm cardstock or light chipboard for the backing ring;
- lighter paper for the leaves;
- glue with enough grab to hold a curved leaf base;
- ribbon or string for hanging.
Attach the hanger to the backing ring itself, not to a leaf. If the wreath twists forward on the wall, move the hanging point slightly inward or keep the heaviest leaf cluster closer to the top center.
15. Stocking-Shaped Gift Card Pocket
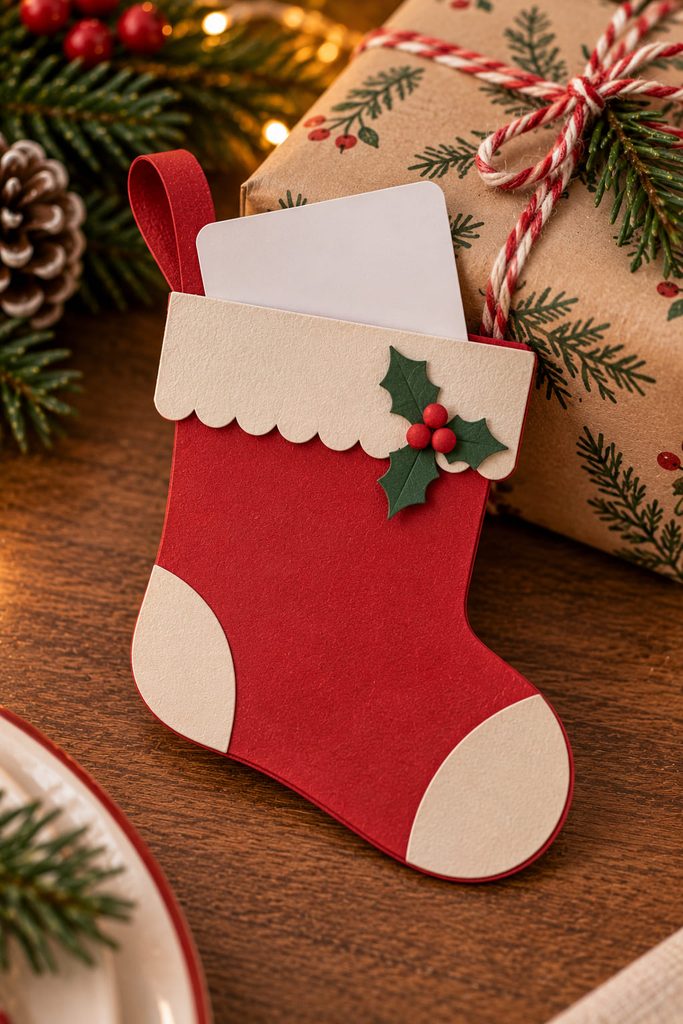
Gift cards need a pocket that holds the card without making the recipient pry it out. Cut two matching stocking silhouettes from cardstock, glue around the sides and toe, and leave the entire top edge open. A narrow unglued margin around the opening keeps adhesive away from the card, while a small thumb notch or slightly lower front layer makes the top edge easy to grasp.
Before decorating, slide a spare card in and out several times. If the corners catch, widen the pocket rather than forcing the card against the seam. The stocking can then become part of the gift itself: tuck it under ribbon, hang it from a branch with a loop attached to the reinforced cuff, or place it at a table setting with the opening still fully accessible.
16. Balanced Paper Snowflake Mobile
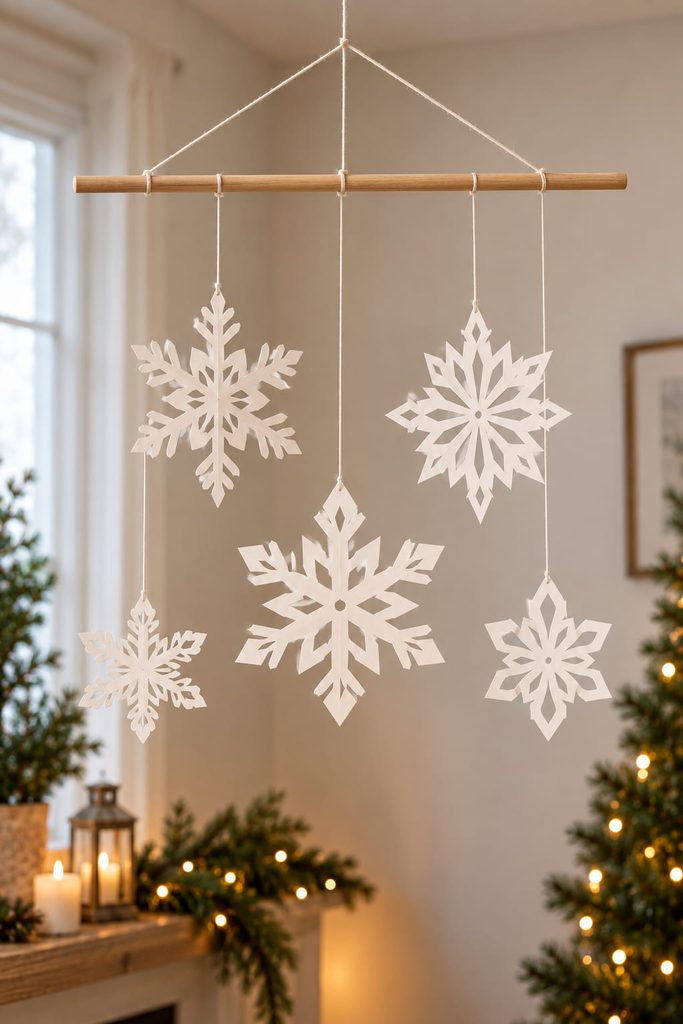
Once several paper shapes share one support, balance matters more than symmetry. Use a lightweight dowel, twig, or firm paper crossbar, then suspend three to five snowflakes on separate threads. Start with the center piece, add the outer pair, and slide each knot along the support until the bar settles close to level before adding another tier.
- Reinforce each snowflake near its center and tie the thread through that area rather than through a narrow tip.
- Hang the support from a temporary point so it can move freely while you adjust it.
- Shorten or lengthen threads for visual spacing, then shift attachment points sideways to correct tilt.
- Check that neighboring snowflakes can rotate without striking each other or the wall.
Clearance Check: A mobile that balances while lying on the table may collide once it moves in air. Give the widest snowflake enough room to turn through its full arc before tightening the final knots.
17. Tissue-Paper Christmas Tree Window Panel
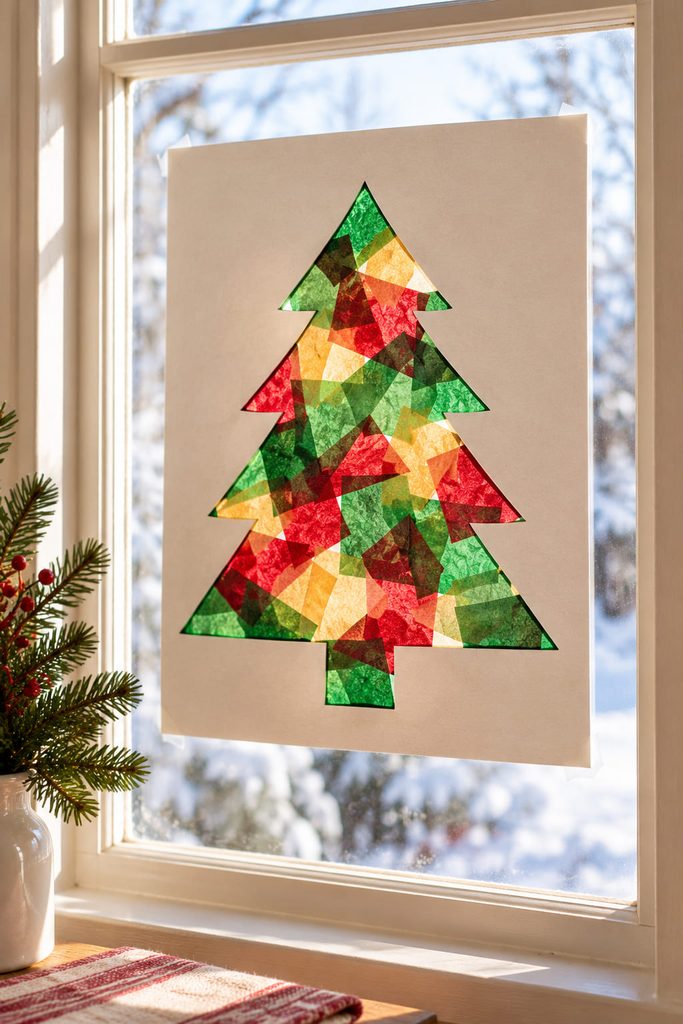
Against daylight, translucent color can do more work than intricate cutting. Make a simple tree-shaped opening in a cardstock frame, then cover the back with overlapping pieces of tissue paper so the joins become part of the design. Larger pieces produce calm color blocks; smaller overlaps create darker patches where two layers meet. Keep the outer cardstock frame wide enough to resist curling and to provide clean mounting points at the corners.
Mount the finished panel to the window by the frame rather than by the tissue, using a removable method suitable for the surface. If glue marks show through the thin paper, confine adhesive to the hidden cardstock edge or use tiny pieces where colors overlap. The project is finished when the tree reads clearly from several feet away and daylight still passes through most of the colored area.
How to Keep Paper Christmas Crafts Looking Clean, Not Complicated
The easiest way to make simple paper Christmas crafts feel intentional is to let one structural idea lead each project. A strong fold, repeated loop, translucent panel, clear silhouette, or controlled layer gap gives the eye something to read before decoration enters the picture. When a piece feels unfinished, check alignment, spacing, support, and scale before adding another embellishment.
Paper choice matters for the same reason. Use thinner sheets where the project must fold, weave, or glow; move to cardstock where it has to stand, hold a card, support a seam, or keep a crisp edge. Batch projects also benefit from one finished sample before you cut the rest, because the sample exposes fit and stability problems while they are still cheap to correct.
Choose the Project by What It Needs to Do
If you want the quickest visual payoff, start with the paper bag starburst, cone trees, or rosette toppers. For something functional, choose the stocking pocket, pillow box, napkin rings, or woven heart. The luminary, layered village, and mobile ask for a little more checking, but their extra structure is visible in the finished result rather than hidden in fussy decoration.
For a broader next read, see Christmas Paper Crafts, Ideas & SVG Projects. The page is the current Christmas craft hub on Diynify.








