

This post contains affiliate links. As an Amazon Associate I earn from qualifying purchases, at no extra cost to you. Thank you for supporting Diynify!
Paper star garland ideas can shift Christmas decorating from glossy and store-bought to layered, tactile, and unmistakably handmade. The useful difference is not just the star shape: folds, weaving, stitching, cutouts, and three-dimensional joins change how each garland hangs, catches light, stores, and fills a room.
Most projects use cardstock, copy paper, wrapping paper, scissors, a ruler, and craft adhesive. Some also need thread or cord, a needle or sewing machine, tissue paper, paper bags, quilling strips, vellum, or a cool battery-powered micro-LED string. If you want the fastest start, choose a flat or fold-over design. For stronger shadows or a more sculptural Christmas display, use the slotted, woven, honeycomb, puffed, or luminary versions.
1. Scored Five-Point Cardstock Star Swag
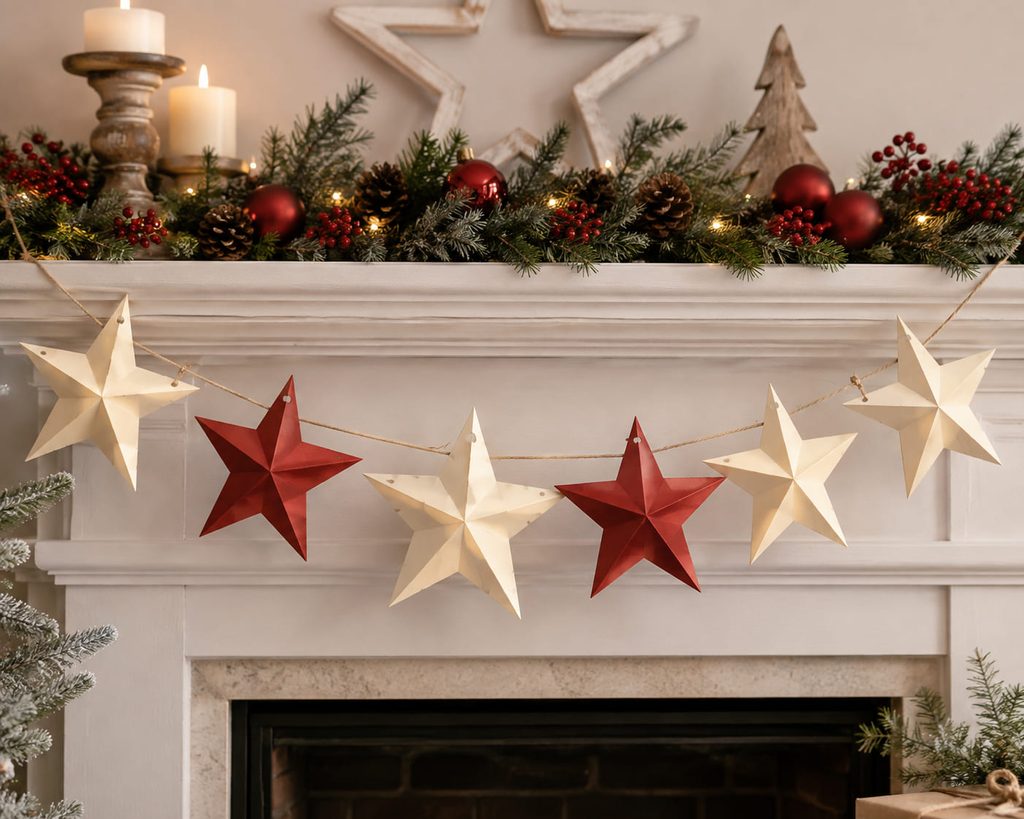
Score each cardstock star from point to inner corner, then reverse selected creases so the cutout rises into low relief. The ridges catch side light without adding much bulk, which suits a mantel or doorway. Punch two small hanging holes near the upper points instead of one in the center; the cord supports the star level and keeps the face readable. For across-the-room viewing, favor a broad silhouette over tiny cut details, since clean points and one strong ridge survive distance better.
2. Tiny Origami Lucky Star Strand

Wrap narrow paper strips into small origami lucky stars when the garland needs fine texture rather than a row of large silhouettes. Each star is formed from a knotted pentagon and successive strip wraps, so patterned wrapping-paper offcuts can become compact beads of color without requiring separate cut templates.

Thread the finished stars with a fine needle through their dense center layers and place a small knot or spacer between them. The spacing matters: tightly packed stars behave like a paper necklace, while wider gaps let each puffed form show its faceted sides. This version suits a small tabletop tree, shelf edge, or narrow window where oversized stars would dominate the space.
3. Accordion-Fold Fan Star Garland
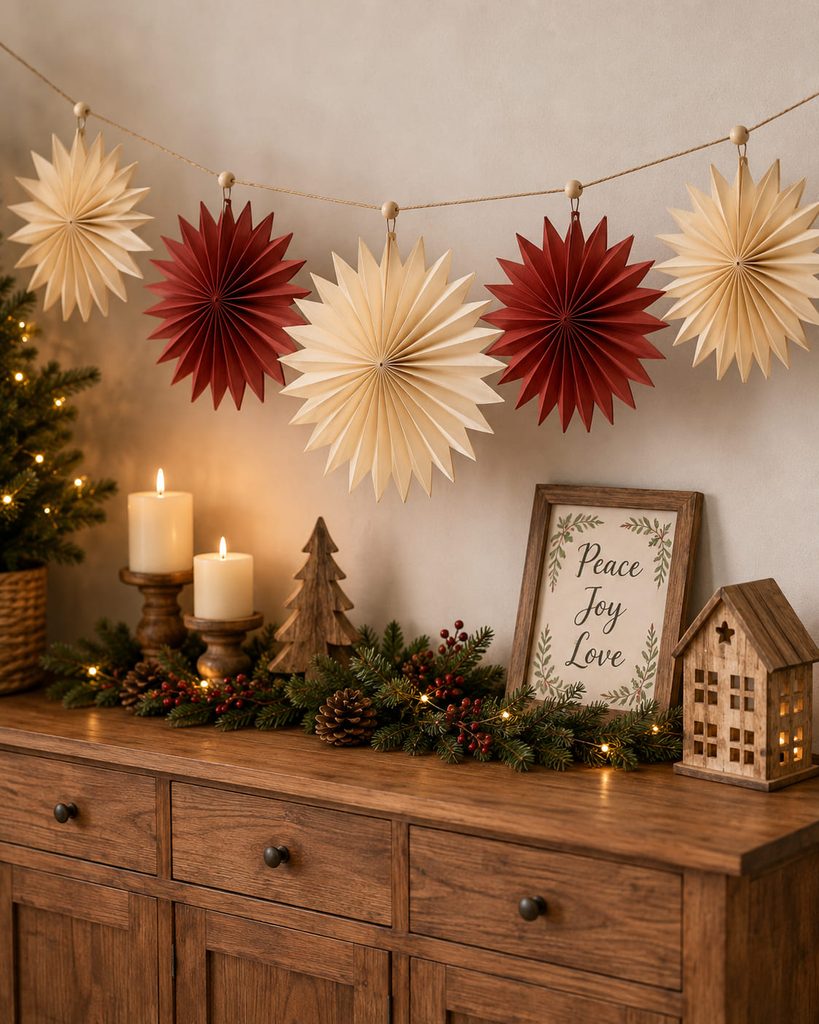
A folded paper strip can open into a surprisingly full star when the pleats are doing the structural work. Use medium-weight paper that creases cleanly but still bends at the center; very heavy cardstock fights the radial fold, while thin tissue will not hold the points.
- Accordion-fold a long strip with even pleats.
- Trim both short ends into matching points before joining the strip into a loop.
- Push one pleated edge inward until the loop flattens into a radial star.
- Glue a small paper disk over the back center to lock the shape.
- Add the hanging cord through the reinforced backing, not through a single pleat.
Center Lock Check: If the star keeps popping into a cone, the inner edge is still under tension. Reduce the diameter slightly or widen the backing disk instead of forcing the center flat with more glue.
4. Mini Paper Bag Star Garland
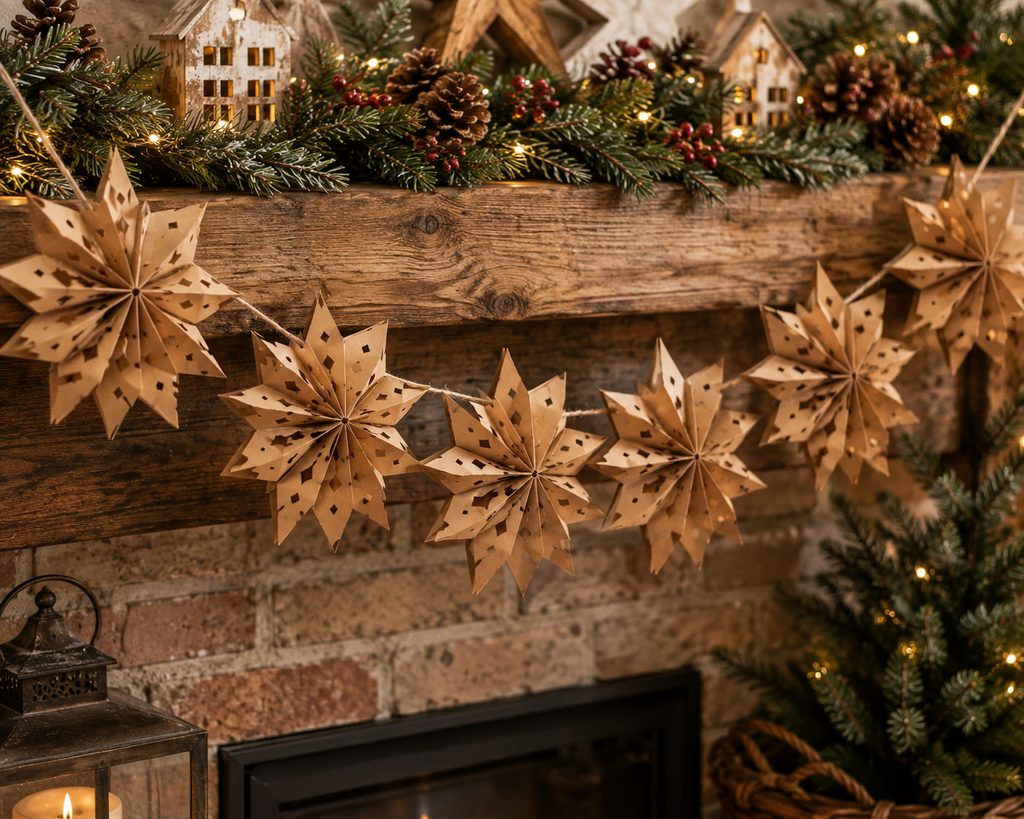
With stacked mini paper bags, repeated layers do most of the dimensional work. Align several small kraft or glassine bags, glue each one with a vertical line through the center and a second line across the closed end, then cut simple side notches before opening the stack. This T-shaped glue pattern allows the unglued sides to fan outward.

- Will not open fully: adhesive probably spread beyond the intended lines; carefully free the locked side layers.
- Points droop: use fewer bags or smaller cutouts so wider paper bridges remain.
- Opened ring twists: realign the first and last bag faces before joining them.
- Opens evenly: tie the garland cord through a reinforced upper section, away from the cut notches.
5. Woven Paper Strip Star Garland
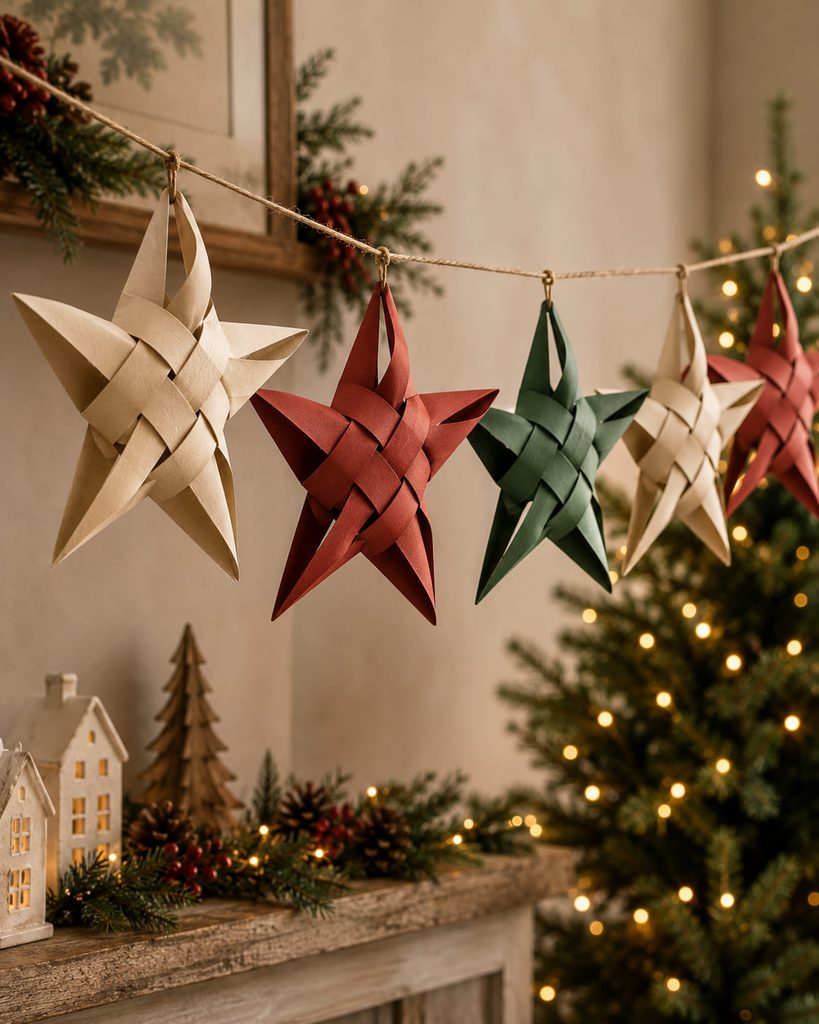
For a star that looks finished from more than one angle, woven strip construction gives the edges real thickness and an interlaced center instead of a printed or glued-on pattern. Traditional four-strip woven stars create dimensional points around a tightly interlaced center and rely on an actual weaving sequence rather than decorative surface layering.
| Route | Best Result | Trade-Off |
|---|---|---|
| Four-strip woven star | Dimensional ornament-like stars that can rotate on the cord | More folding and tighter control at the center |
| Flat over-under star frame | Graphic open stars that sit close to a wall | Less sculptural from side angles |
For either version, keep the over-under path genuine: each strip must alternately pass above and below its neighbors so the center locks by interlacing rather than surface stacking. Hang from a structurally continuous strip near one point, and leave enough clearance from the wall for dimensional sections to turn without crushing.
Weave Tension: The center should feel snug before the decorative points are shaped. If it is loose, tightening the outer points later will not repair the core.
6. Continuous Accordion-Cut Star Chain
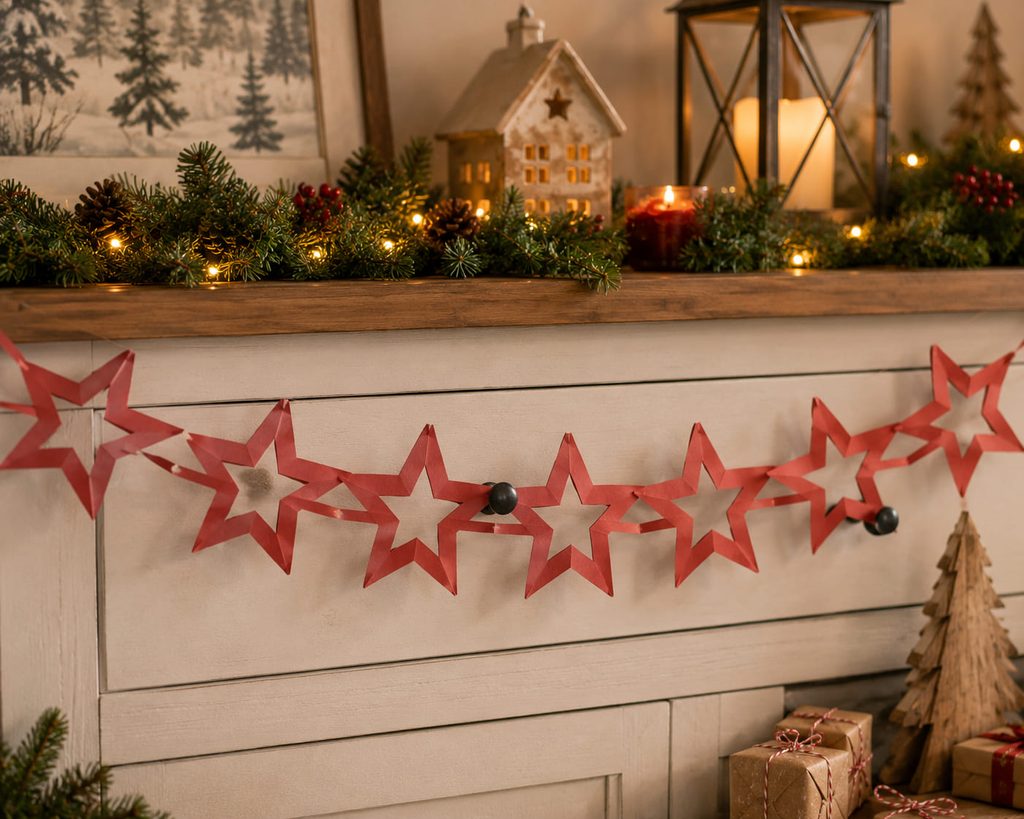
Fold a long strip of lightweight paper back and forth, draw half a star so the shape touches both folded edges, and cut through the stack while preserving those connection points. Opening the strip reveals one continuous chain with no cord between motifs, useful across cabinet fronts or narrow shelves. The weak spot is the hinge: keep each bridge broad enough to flex without tearing, and choose lighter paper so the connected stars drape rather than kink.
7. Interlocking Slotted 3D Star Strand
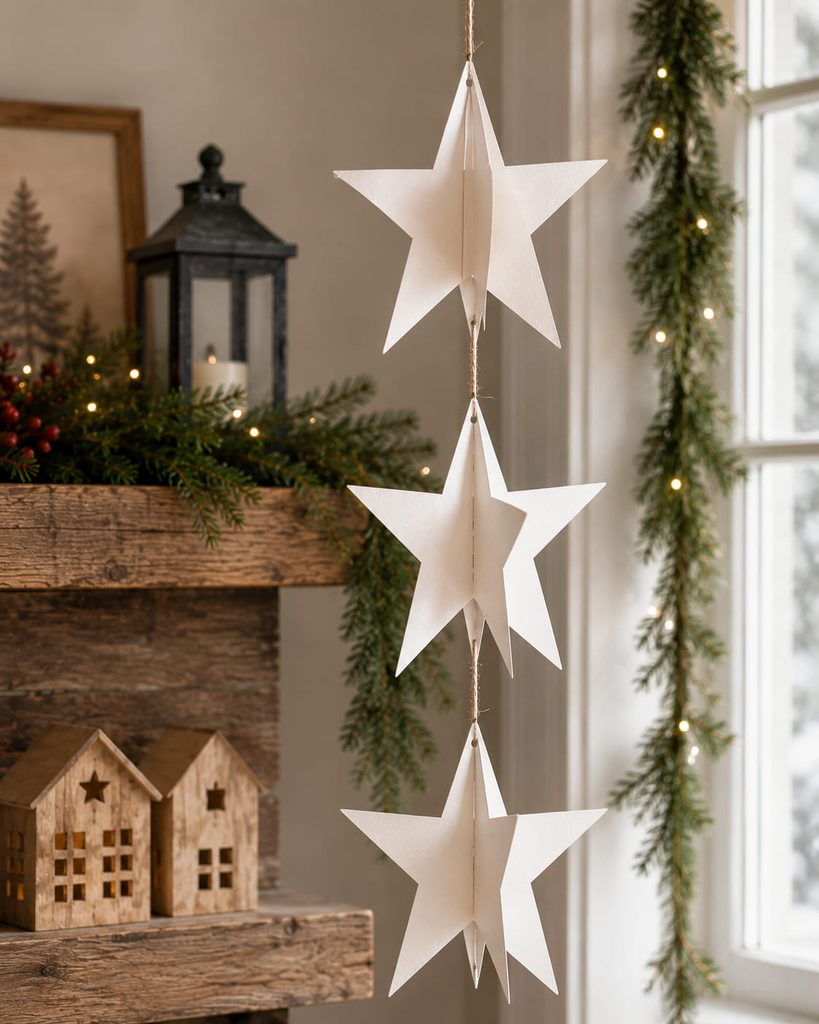
Cut two identical star profiles for each ornament and give one a slot from the top toward the center and the other a slot from the bottom toward the center. Slide the pieces together at right angles; the crossed planes make a three-dimensional star without needing a hollow shell.

Before stringing a whole set, dry-fit one pair. Both slots should stop at the center and be only slightly wider than the paper thickness. A short slot leaves the halves offset, while an oversized one lets them wobble. Punch the hanging hole through the upper point of one plane and keep the cord above the intersection so gravity draws the pieces together rather than pulling them apart.
8. Layered Window Stars With Vellum Centers

Against daylight, an open cardstock star with a vellum center reads differently from an opaque ornament. Cut a wide star-shaped frame, back it with translucent vellum, then add a second matching frame on the reverse so the adhesive edge is hidden and the center panel is protected between layers.
The garland works best close to a window where the vellum can soften natural light; it does not need an internal light source. Keep cut details away from the narrowest points of the frame, because the window opening already removes some of the material providing stiffness. Small hanging holes near the upper corners can carry thread while leaving the translucent center uninterrupted.
9. Machine-Stitched Flat Star Garland
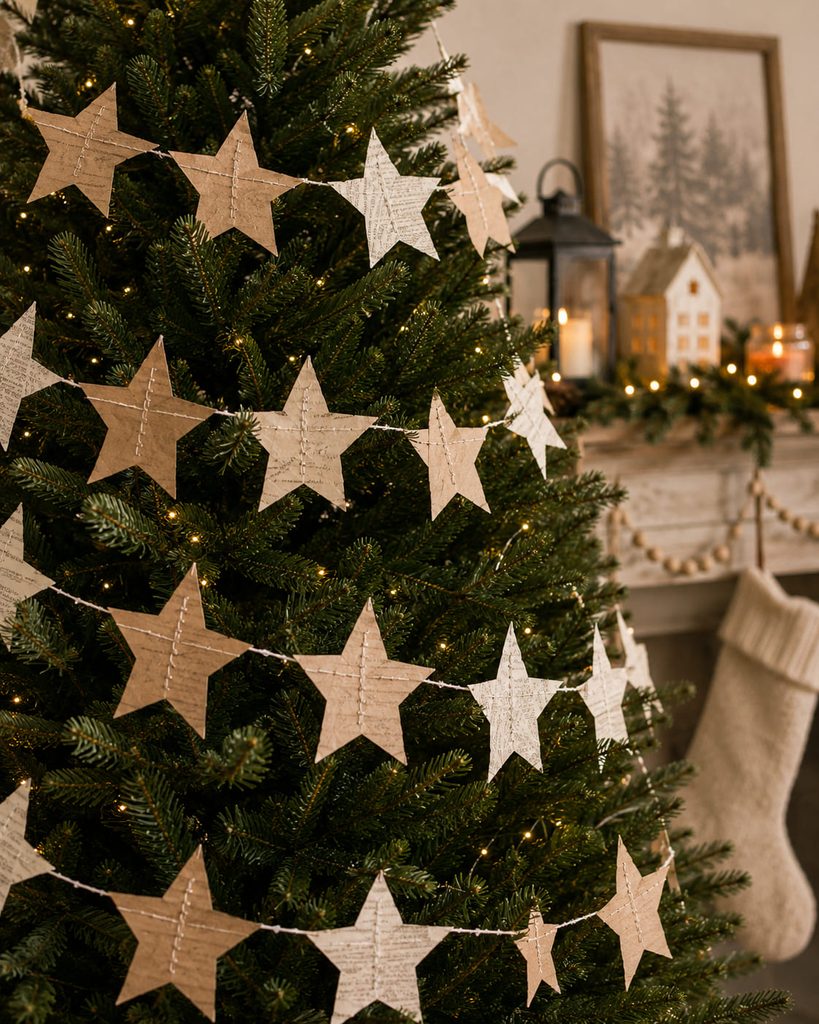
Batch-making becomes faster when the attachment line also joins the decoration. Cut flat paper stars in several sizes, stitch straight through their broad centers, and leave a short empty thread chain between motifs. The result stays flat enough to wrap a tree or cross a mirror without bulky connectors.
Before making the full strand:
- Test one star to confirm the needle holes do not tear outward.
- Keep stitches away from narrow points.
- Support finished stars as they leave the machine so their weight does not pull the thread chain.
- Wind the garland loosely around cardboard for storage rather than folding it.
10. Hollow Folded Star Luminary Garland
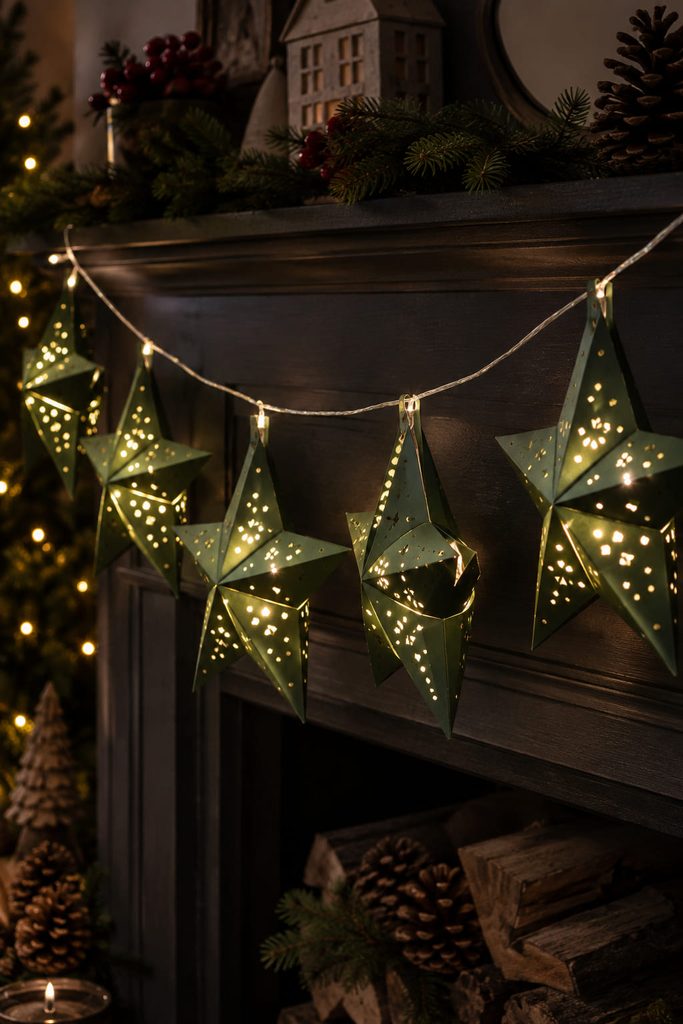
Once light enters the design, the construction contract changes. Each star needs a hollow paper body, a deliberate light path, and a way to position the light without damaging the hanging point. Build each star from two scored cardstock faces with side tabs, but cut small windows or perforations before assembly so illumination can escape.
- Score and pre-fold both star faces.
- Cut the light openings while the paper is still flat.
- Join most side tabs, leaving one lower section accessible.
- Position one cool battery-powered micro-LED inside the cavity without gluing the wire to a fold.
- Close the remaining tab with a removable or lightly secured flap if later access may be needed.
- Suspend the star from a reinforced upper point and leave slack in the wire between stars.
Light Path Check: Turn the LEDs on before closing the final flap. If the brightest point is blocked by a seam, rotate the light or enlarge a nearby opening rather than adding more bulbs.
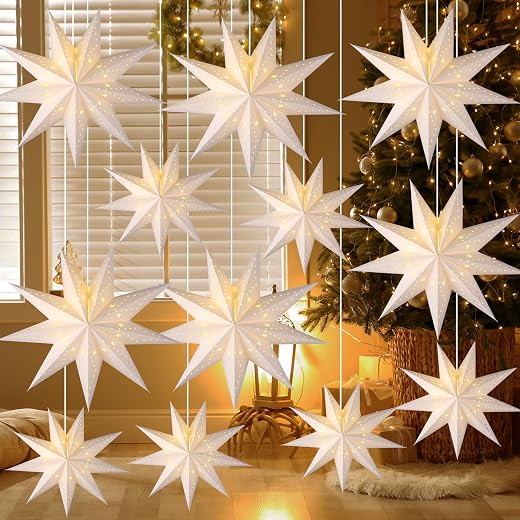
Use only cool battery-powered LEDs around paper; avoid candles, hot bulbs, or any flame source.
11. Quilled Outline Star Garland
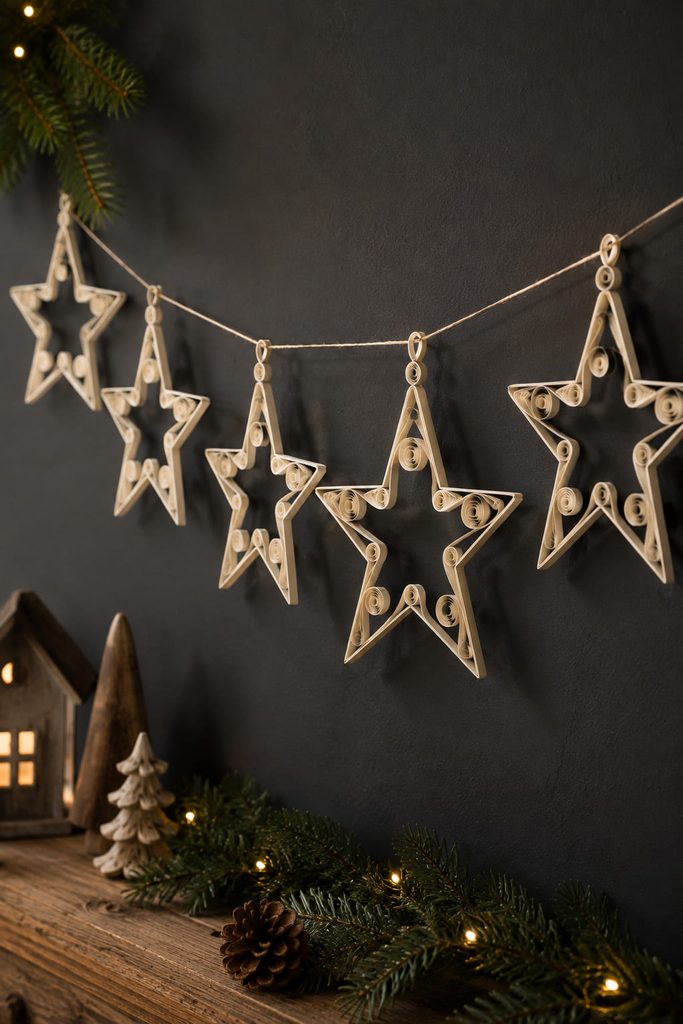
Narrow quilling strips can form airy stars with almost no solid paper surface. Bend one long strip around a five-point guide, glue only where it overlaps itself, and reinforce inner corners with small coils or teardrop quilled shapes. Tie the hanging loop near a reinforced corner rather than punching a single strip. Against a darker wall, the open framework and its shadows stay visible while the garland remains light enough to drape with very little pull on each star.
12. Layered Offset Cardstock Star Garland
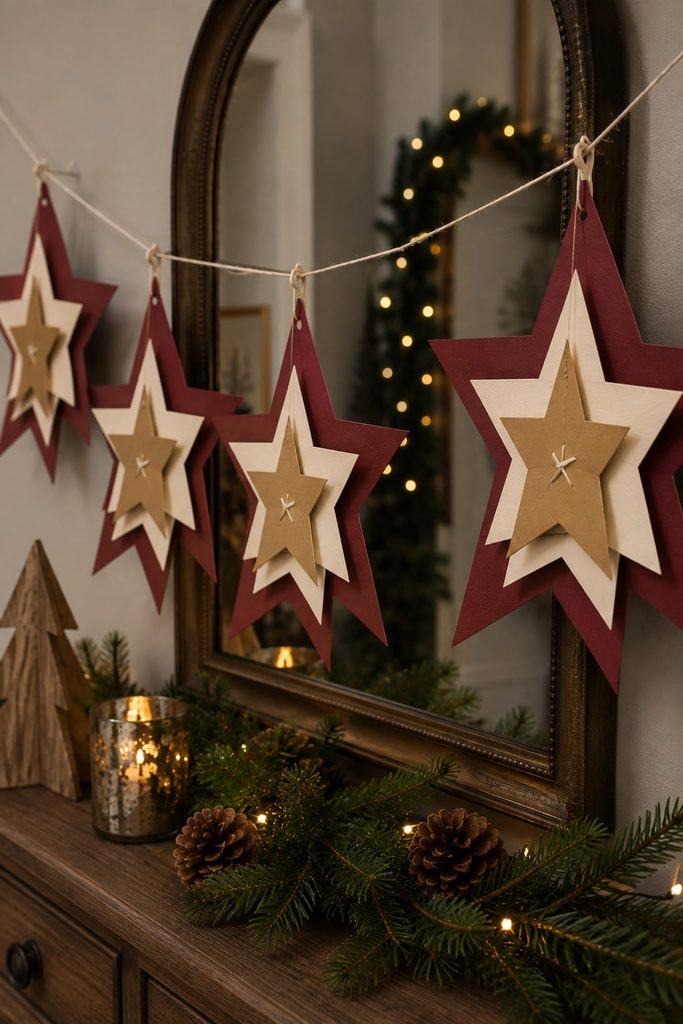
Rotating stacked star cutouts a few degrees creates a denser burst without asking the paper to fold into a hollow form. Cut three cardstock stars in descending sizes, keep their centers aligned, and offset the points so the lower layers appear between the upper ones.
- Dry-stack the three stars and mark a common center.
- Rotate each layer until the exposed points look balanced.
- Join only the center with a small paper fastener, stitched X, or compact glue area.
- Gently lift the outer points of the upper layers for shallow shadow.
- Attach the hanging loop through the reinforced center join or a separate backed top hole.
Keep the center connection small; gluing the whole faces together removes the offset shadow that makes this version different from a single flat cutout.
13. Honeycomb Tissue Star Garland
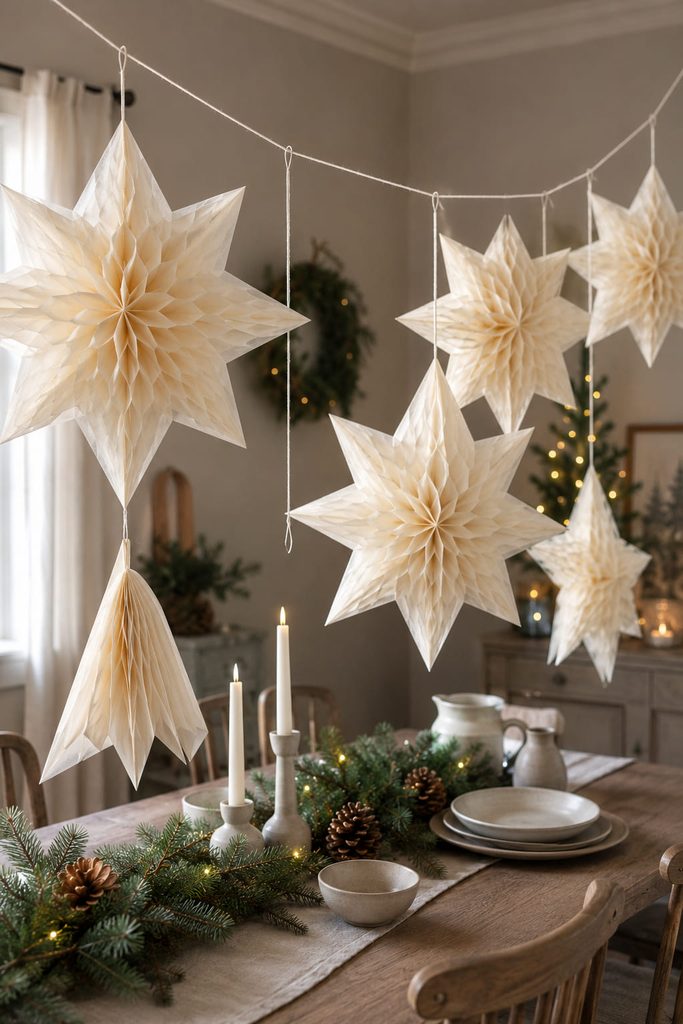
Because tissue weighs so little, honeycomb construction can produce a large star that still folds nearly flat for storage. Cut a stack of identical tissue stars, then apply narrow glue lines in alternating positions from layer to layer. When the stack opens around its center axis, the unglued zones expand into repeating cells. Alternating adhesive positions is the mechanism that creates the honeycomb rather than a solid laminated stack.
The glue pattern controls the result. Mark two sets of guide lines on scrap paper beneath the tissue and alternate between them. After drying, open the star slowly and join the first and last layers around a fine cord running along the center axis so the load is shared through many layers.
Expansion Test: If one wedge stays flat or carries most of the pull, a glue line likely crossed the wrong zone. Separate that area carefully before forcing the star wider. For storage, release the outer join when possible and collapse the cells along their original folds instead of crushing them.
14. Floating Star-Within-Star Frame Garland

Negative space becomes the focal point when a broad outer star frame surrounds a smaller solid star. Cut both pieces from cardstock, then reconnect the center with short thread bridges at the top and bottom so it can move independently inside the opening.
- Inner star hits one side: shorten the upper bridge or widen the gap.
- Center flips edge-on constantly: keep the top and bottom attachment points centered.
- Outer frame twists on the main cord: use two upper hanging holes instead of one.
- Movement stays clear: place the garland against a pale wall or window where the floating center can be read inside the outline.
15. Double-Sided Puffed Pillow Star Garland
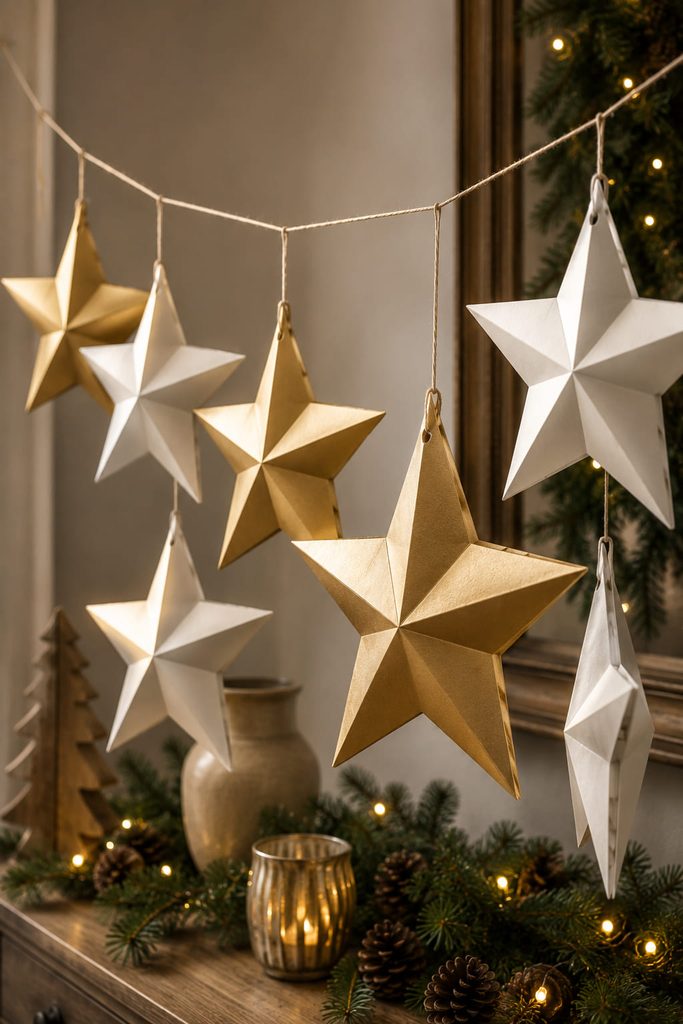
A paper pillow star gets its volume from scored ridges and sealed edges, not from an internal light or a crossed slot. Score matching star faces so each point can bow outward, then glue narrow perimeter tabs between the layers while the center remains hollow.
Close opposite points in stages rather than sealing the perimeter in one pass. Compare the two faces from the side as you work; if one remains flatter, deepen its score before the last tabs are glued. Trap the hanging loop between reinforced layers at the top point so the load cannot peel one face away from the other.
Matte cardstock emphasizes the folded facets, while a restrained metallic face reflects more Christmas light. Either way, the shallow pillow profile should supply the visual effect; extra surface decoration is optional.
16. Fold-Over Star Pennant Garland
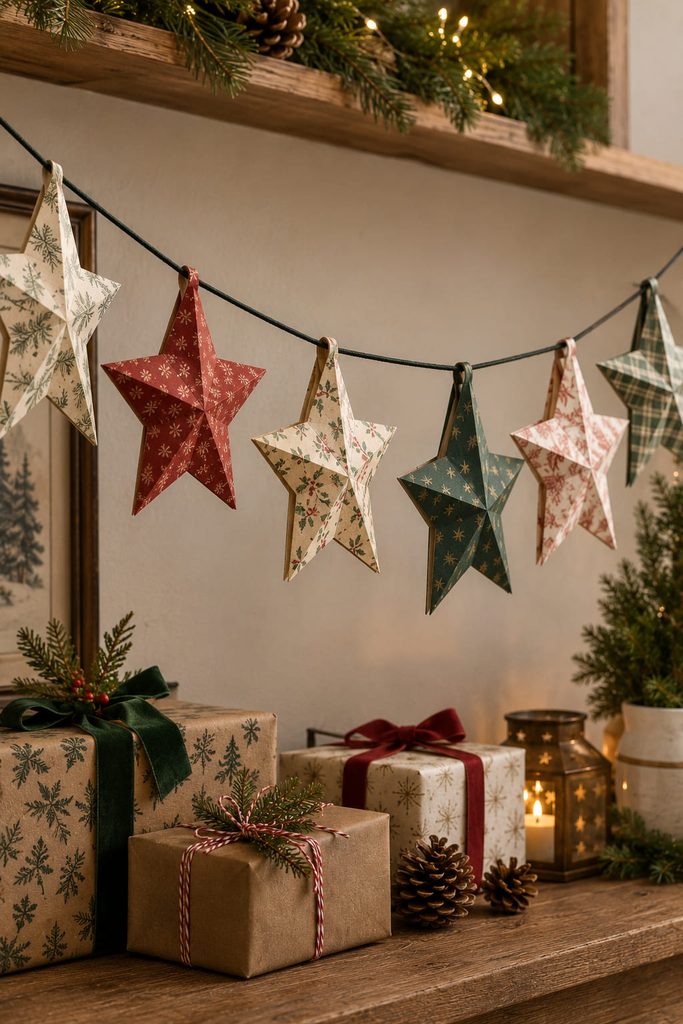
Using a top hinge instead of punched holes keeps thin decorative paper intact. Cut each star as a mirrored pair joined at the top, fold the pair over the garland cord, align the faces, and glue them together around the line. The trapped cord keeps the star upright and prevents it from sliding off. Gift wrap or book pages work well; if the paper feels fragile, hide a small cardstock patch inside the hinge so repeated handling does not tear the fold.
17. Modular Paper Cone Starburst Garland
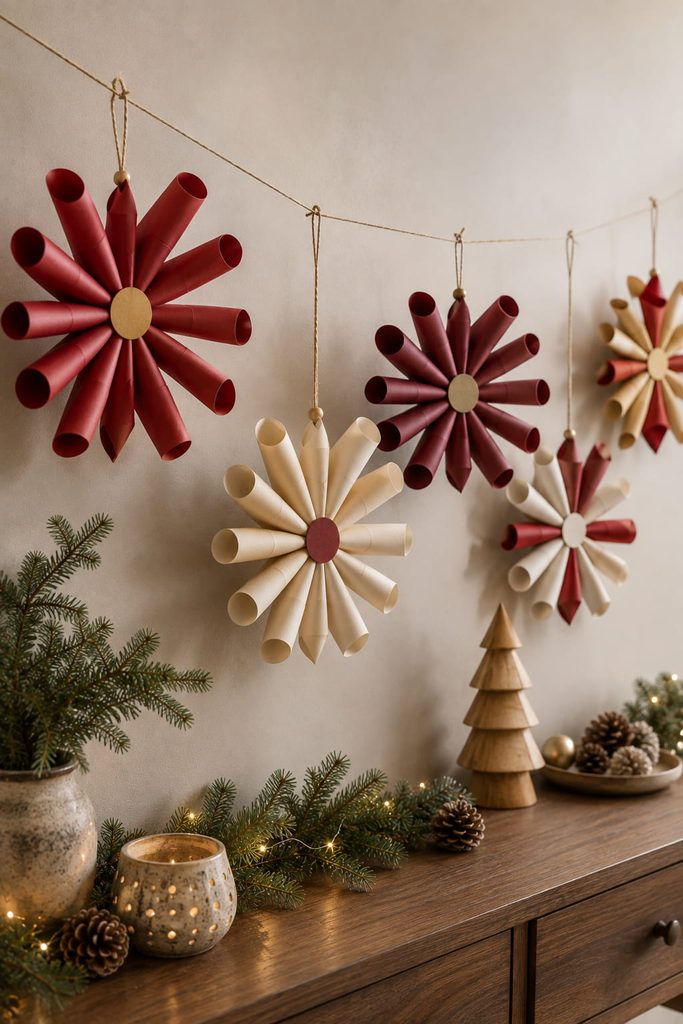
To build a starburst with more projection than a five-point cutout, form matching paper cones and flatten their tips slightly. Glue them radially around a cardstock disk; a second disk on the back sandwiches the tips and gives the hanging loop a broad anchor.
Choose depth by where the garland will live:
- Wall or mantel: use fewer, wider cones for a shallow burst that clears the surface.
- Open suspension: use narrower cones for a fuller profile, leaving enough space for the rays to avoid greenery, walls, and neighboring pieces.
In both routes, let the center disks carry the load. Tying thread to one cone can pull that module open and distort the whole burst.
18. Chain-Linked Open Star Garland
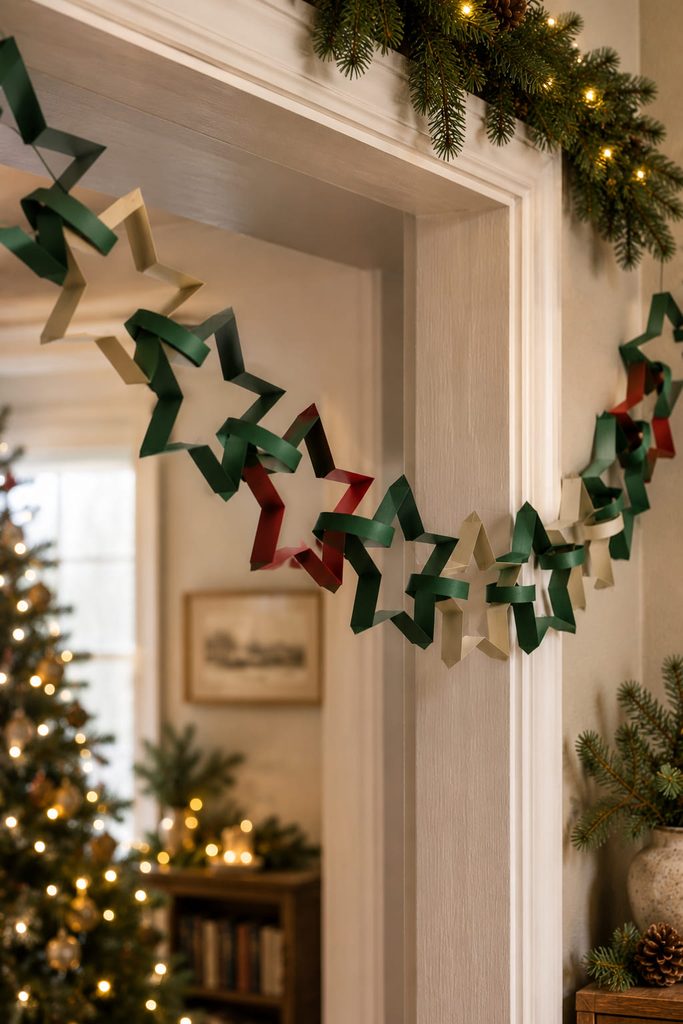
Here the stars are not ornaments attached to a cord; they are the links of the garland itself. Pre-score long paper strips into equal segments, fold each strip into an open five-point outline, and glue the ends. Before closing the next star, pass its strip through the previous frame so the two shapes become physically linked like a paper chain.
Before building the full length:
- Keep the center opening wide enough for the next strip to pass through.
- Make the corner creases sharp enough to hold the five-point geometry.
- Place the glued end on a broad segment, away from a corner that flexes repeatedly.
- Hang the chain with open clearance so linked stars can rotate without striking the wall.
Choosing Among Paper Star Garland Ideas by Placement
Placement should decide the structure before color does. Flat stitched stars, continuous cut chains, and fold-over pennants sit comfortably against mirrors, cabinets, and walls. Scored cardstock, layered stars, bag stars, and floating frames give a mantel more shadow without demanding much clearance. Woven, slotted, honeycomb, pillow, and cone constructions deserve open air so their depth can be seen.
Windows favor vellum, open quilling, and negative space because daylight can pass through or around the paper. A small tree benefits from lightweight lucky stars or stitched cutouts rather than large radial pieces. For any suspended design, test one complete section in the actual location before making the full length; spacing that looks generous on a worktable can feel crowded once the garland curves under its own weight.
Make the Garland Match the Space
Start with the simplest structure that gives you the effect you actually want. Flat stars are easier to batch and store; folded, woven, honeycomb, or hollow stars earn their extra work when you want shadow, movement, or light to become part of the decoration.
For a broader next step, the Diynify Christmas hub organizes projects by finished use, including ornaments, decorations, garlands, cards, boxes, and paper displays. Christmas Paper Crafts, Ideas & SVG Projects








