This post contains affiliate links. As an Amazon Associate I earn from qualifying purchases, at no extra cost to you. Thank you for supporting Diynify!
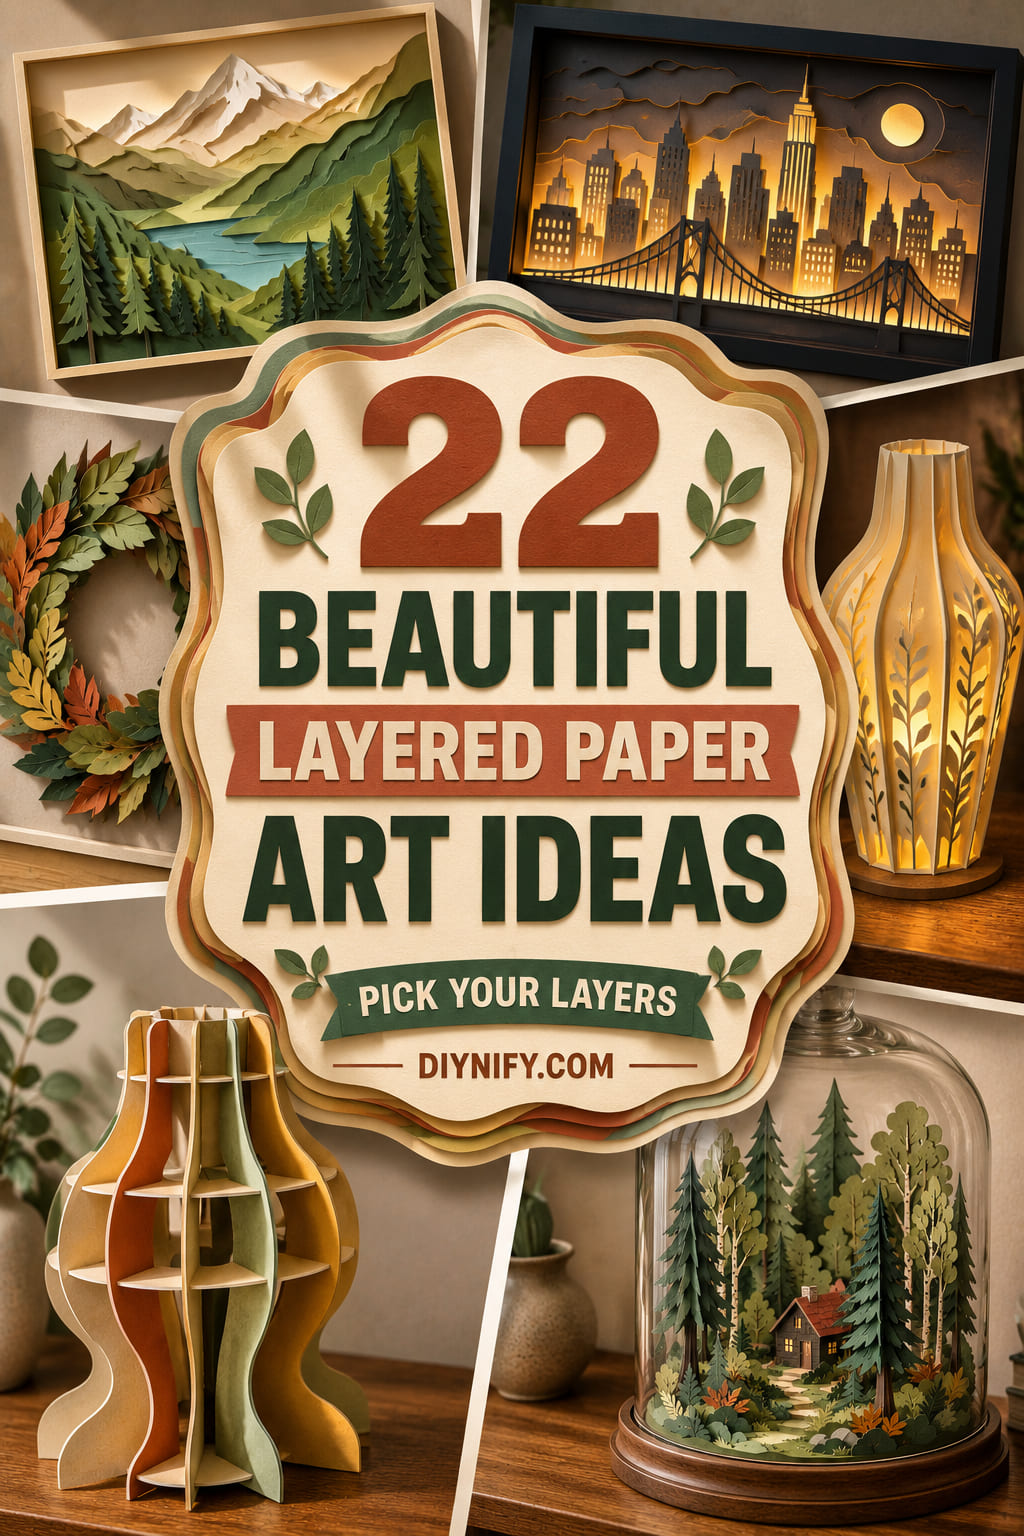
Layered paper art turns flat cardstock into relief, shadow, and structure by controlling overlap, spacing, folds, and cut openings. These 22 ideas use different construction methods, so the finished decor ranges from shallow wall reliefs to framed scenes, glowing lanterns, hanging mobiles, and freestanding sculptures.
Most projects use cardstock, a cutting tool, and paper-safe adhesive. Individual designs may also call for foam tape or spacers, frames and backing boards, vellum, cool-running LED lights, thread, a wreath base, heavier paperboard, or a display cloche. For shallower decor, start with overlap, curling, or pleating; projects with lighting, moving parts, or freestanding structures need more attention to support and clearance.
1. Layered Botanical Shadow Box
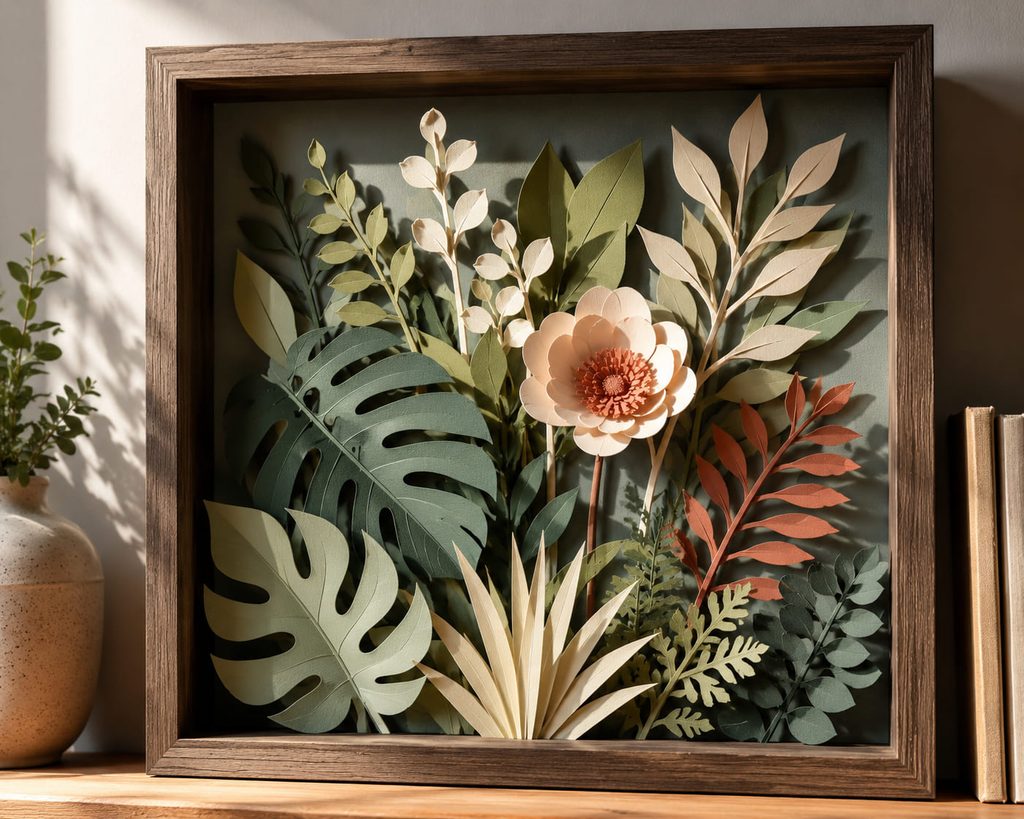
Inside a shadow-box frame, broad leaves can build depth without repeating the same outline. Build the composition as a small field of depth: broad foliage can sit near the front edge, slimmer stems can cross the middle, and one calmer background layer can keep the negative space open around the focal cluster. That spacing lets real shadows separate similar greens, creams, or earth tones instead of asking color alone to create dimension.
Dry-stack the cut layers before adding adhesive, then decide which gaps deserve thin spacers and which can stay flush. Keeping every gap identical often makes the scene look mechanically striped. A deeper opening behind one branch or flower gives the eye somewhere to travel, while tighter contact around the frame keeps the artwork visually anchored.
2. Topographic Paper Landscape Relief
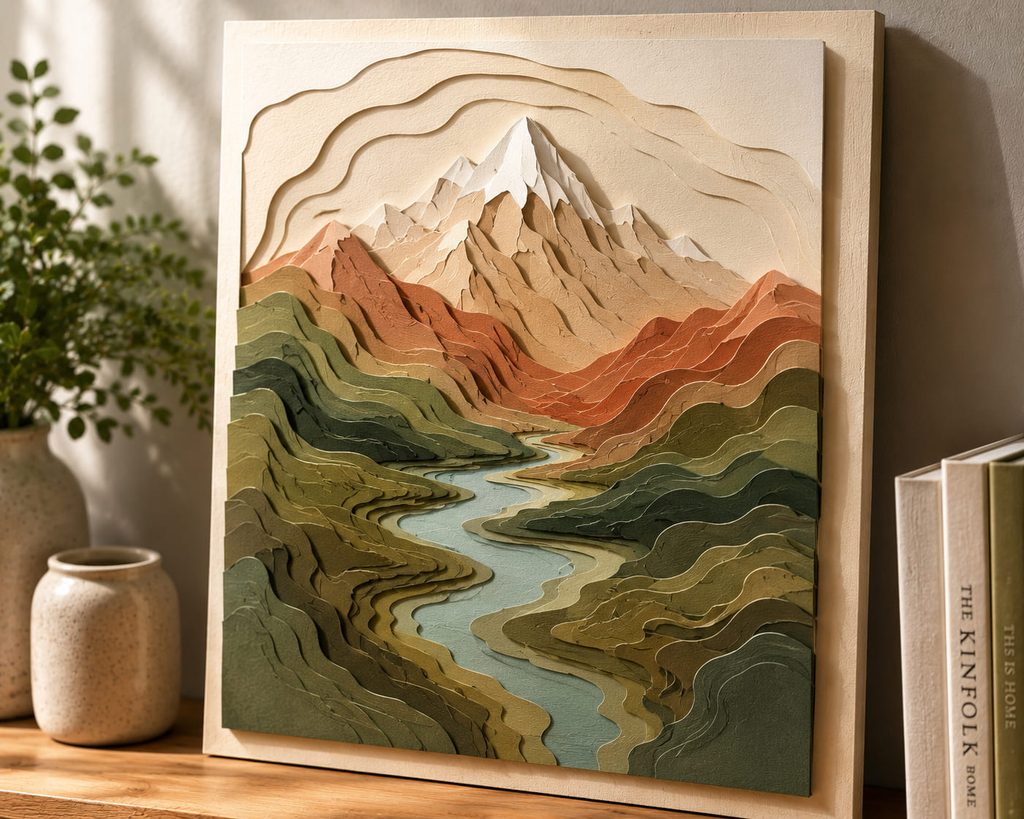
Working from one master outline turns simple paper rings into a convincing landscape because each edge represents a change in height. The cleanest version starts with one master outline and moves inward without losing registration; if one contour drifts sideways, the “terrain” can look warped instead of intentionally stepped.
- Cut the largest base contour first and mark a tiny hidden registration point.
- Stack progressively smaller contour shapes in order, using cardstock shims or foam tape only where you want a stronger rise.
- Press the finished relief flat on a table and view it from a low angle; uneven corners or accidental tilts will show immediately.
- If the relief looks too stair-stepped, glue one or two neighboring contours flush so the elevation changes feel less uniform. A limited palette can make the physical edges more important than the cut shapes, which is ideal for modern shelf or wall decor.
3. Rolled-Edge Sunburst Wall Relief
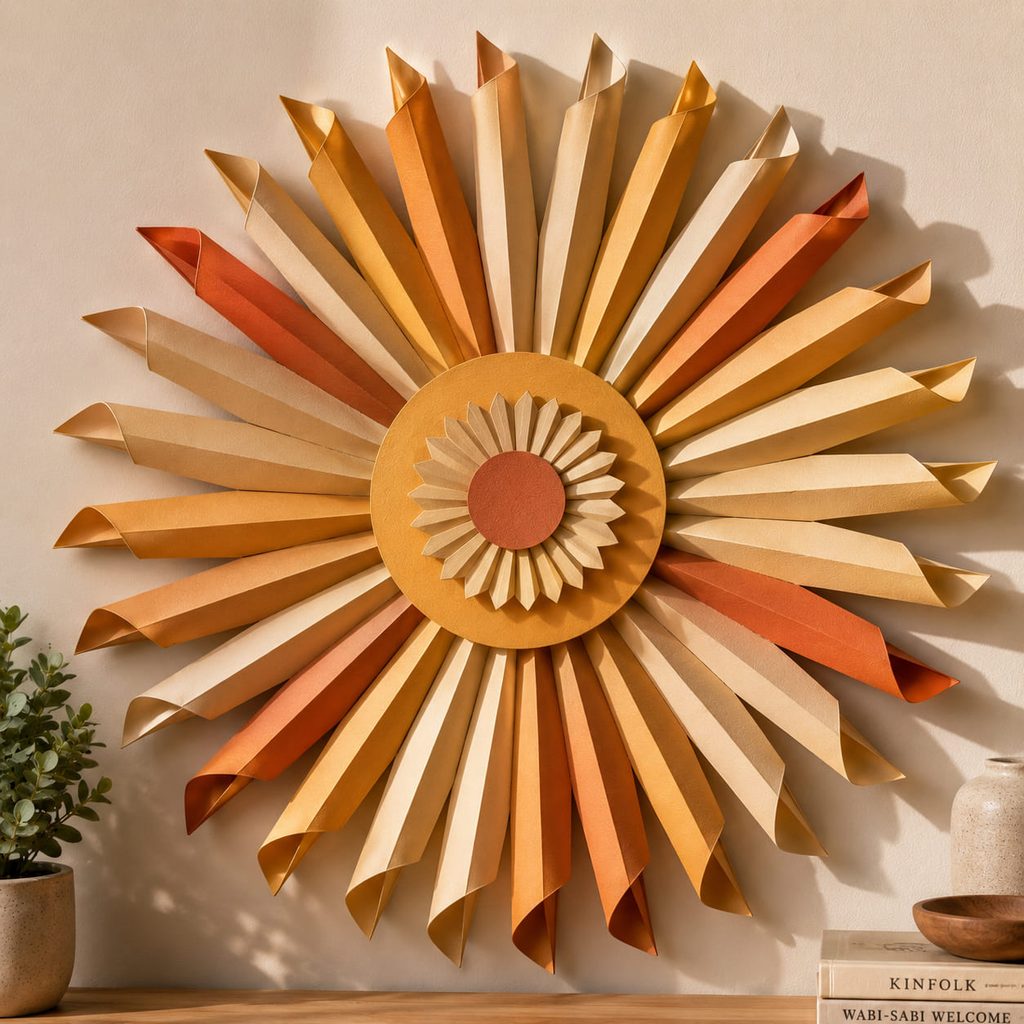
Use long paper wedges or tapered rays and curl only their outer edges before arranging them around a small central disk. The curl changes how each ray catches light, so the sunburst gains depth without needing a thick stack of foam. Keep the inner ends flat and overlap them consistently at the center; that compact hub acts like a visual clamp while the raised tips stay lively. A strong result depends more on even radial spacing than on adding extra layers, making this a good choice when you want dimensional wall art with a shallow profile.
4. Floating Butterfly Specimen Frame
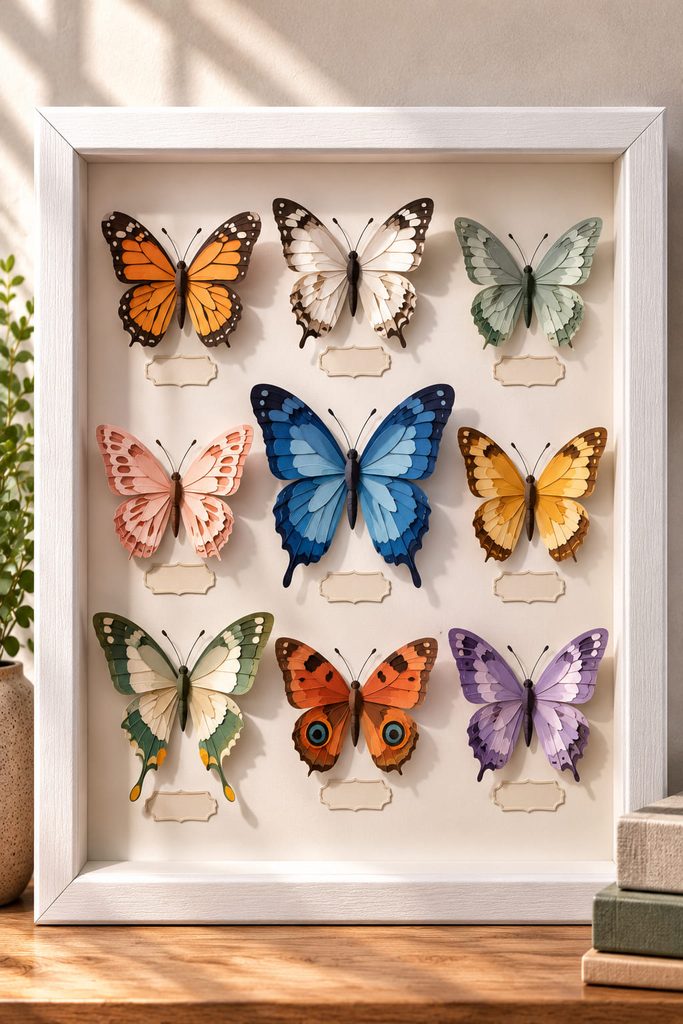
For a specimen-frame effect, the body becomes the anchor while the wings lift away from the backing. Mount each insect over a contrasting cut-paper mat or a small layered label shape, then bend the wings along the body line rather than curling the entire silhouette. That hinge-like crease preserves a crisp profile while creating a soft shadow beneath each wing.

For a calm specimen look, keep the butterflies evenly spaced and use similar wing angles. For a more natural swarm, vary scale and rotation while leaving larger pockets of empty background between groups. The first route emphasizes order; the second emphasizes motion. In either case, avoid gluing the wing edges down, because that removes the separation that makes the frame read as three-dimensional.
5. LED Layered City Skyline Light Box
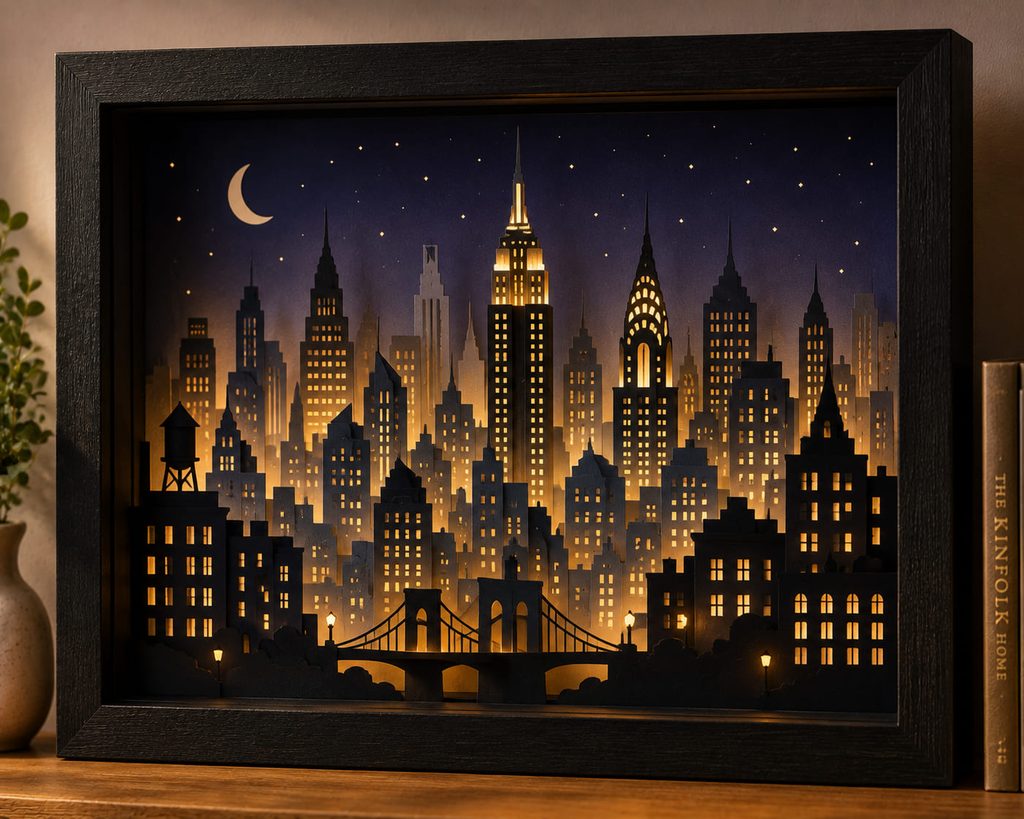
To make a city light box work, manage visible spacing between skyline layers and a continuous path for light behind the windows. Start with the deepest sky panel, then place distant buildings, midground rooftops, and one stronger foreground silhouette so the streetscape reads even when the LEDs are off.

Keep The Light Path Open: Use vellum or another translucent paper behind window cutouts to diffuse a cool LED source, but do not bury the openings under adhesive strips or dense spacer blocks.
Before closing the frame, test it in a dim room. If one building glows much brighter than the rest, the problem is usually uneven distance from the light or a blocked cavity, not the paper color. Reposition the LED or add a simple white reflector behind the darker area. Keep the light source removable and use only a cool-running LED system; the frame should still have enough depth that paper never presses against the lights.
6. Accordion Tunnel-Book Garden
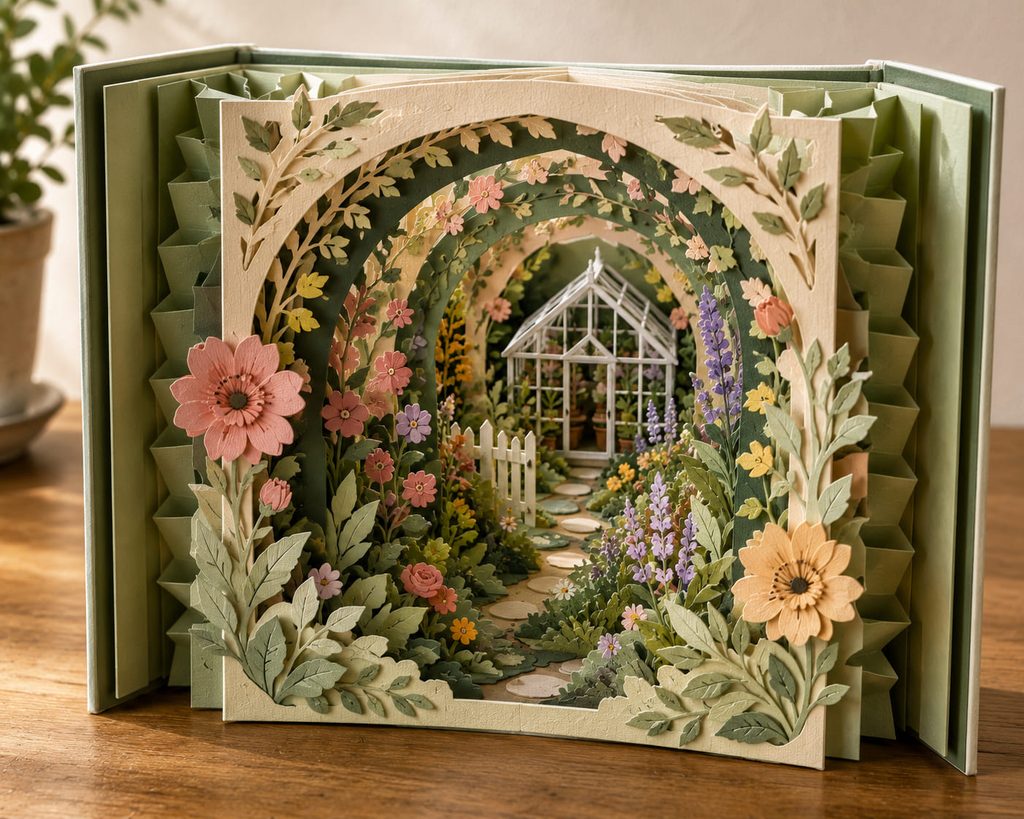
An accordion tunnel book creates real spatial depth without a conventional shadow-box frame. Two folded side rails hold a sequence of cut panels apart, so every opening acts like a window into the next layer. A garden scene suits the mechanism especially well: foreground leaves can frame a path, flowers can occupy the middle, and a small gate or greenhouse can sit at the back.
Build the side accordions first and keep both rails matched fold for fold. Attach the back panel, then work forward one layer at a time so you can still reach the glue tabs. If the panels are attached before the side rails are squared, the book can twist and the apertures will stop lining up.
The useful test is not only how it looks open. Gently compress the accordions and make sure no petal, branch, or decorative tab collides with the neighboring panel. A tunnel book that folds neatly is easier to store and less likely to crease its most delicate cutouts.
7. Stacked Floral Monogram Plaque
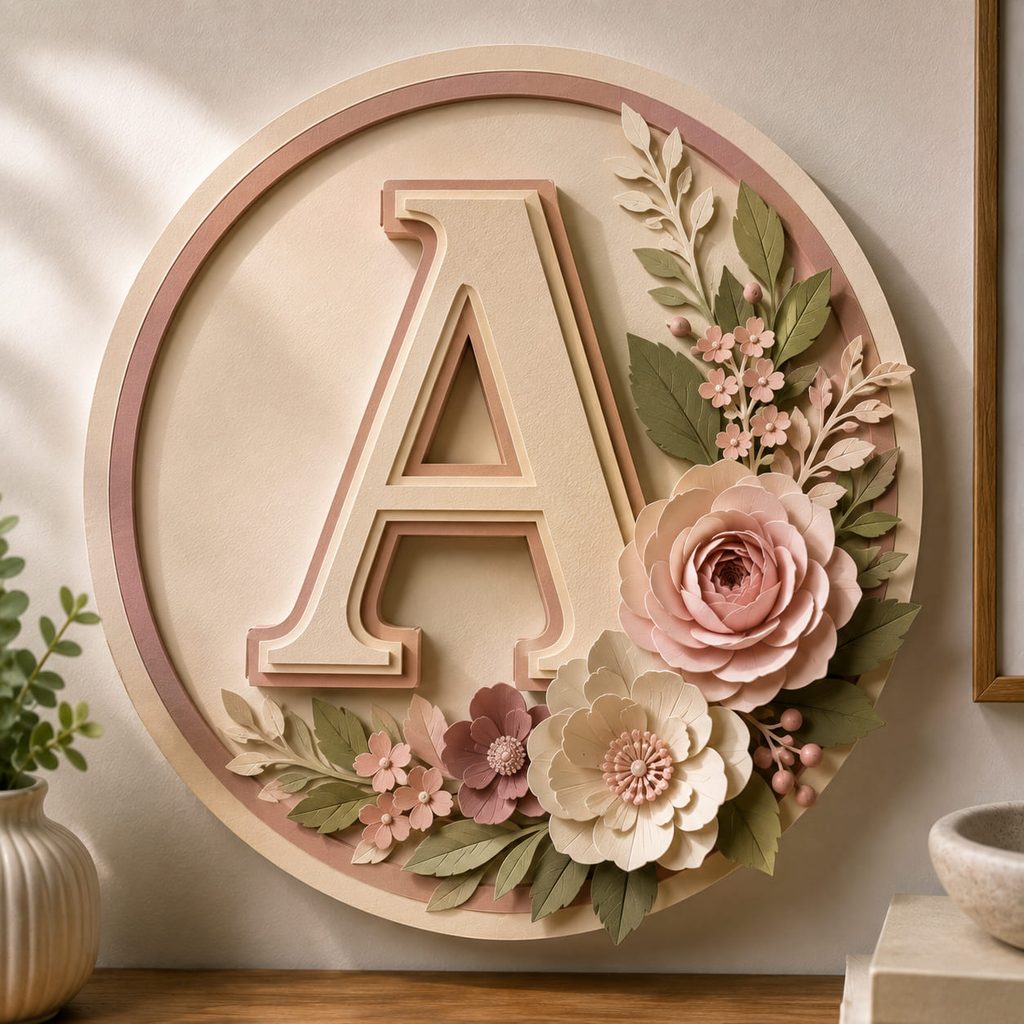
Keep the monogram readable after the flowers arrive. Build the initial from two or three offset paper layers, then add floral shapes as secondary accents instead of covering the strokes. The layered letter supplies the main depth; the flowers can be flatter near narrow areas and fuller where the character has more visual weight.
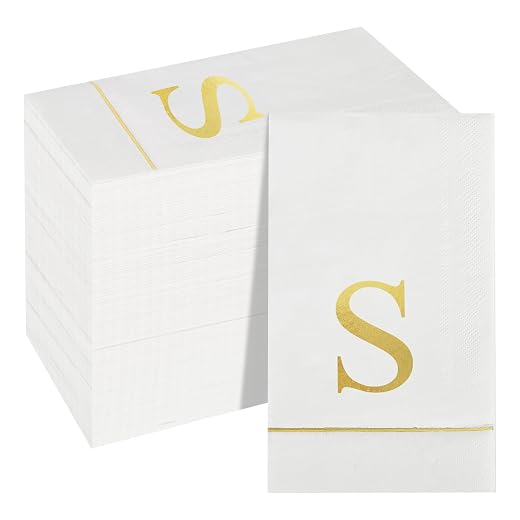
Before gluing, check:
- Can the letter still be recognized from several feet away?
- Do the flowers cross the edge in only a few intentional places?
- Is at least one section of the layered letter completely visible?
- Does the backing extend far enough to protect fragile petals, so the plaque feels personalized rather than like a flower cluster with a hidden initial?
8. Nested Arch Paper Wall Panel
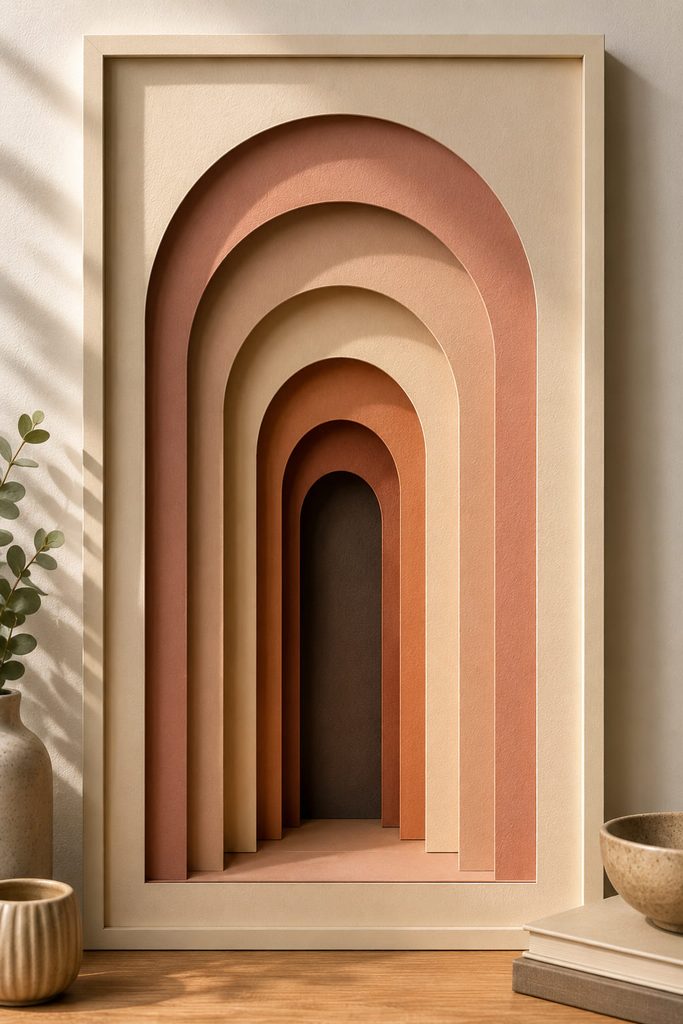
To make nested arches read as architecture, treat each opening as a step into deeper space. Cut a family of related arch shapes, but change both the opening size and the height of the spacers as the forms move inward. The eye then reads a shallow “room” instead of a stack of colored borders. A dark inner opening can suggest distance, while a lighter outer layer keeps the piece from becoming visually heavy.
Scale matters more here than tiny detail. On a larger wall panel, broad arch bands stay readable and cast useful shadows; narrow bands can disappear from across the room. If the center feels cramped, remove a layer rather than shrinking every opening. The empty space inside the smallest arch is part of the design, not an area that must be filled.
9. Overlapping Paper Feather Wreath
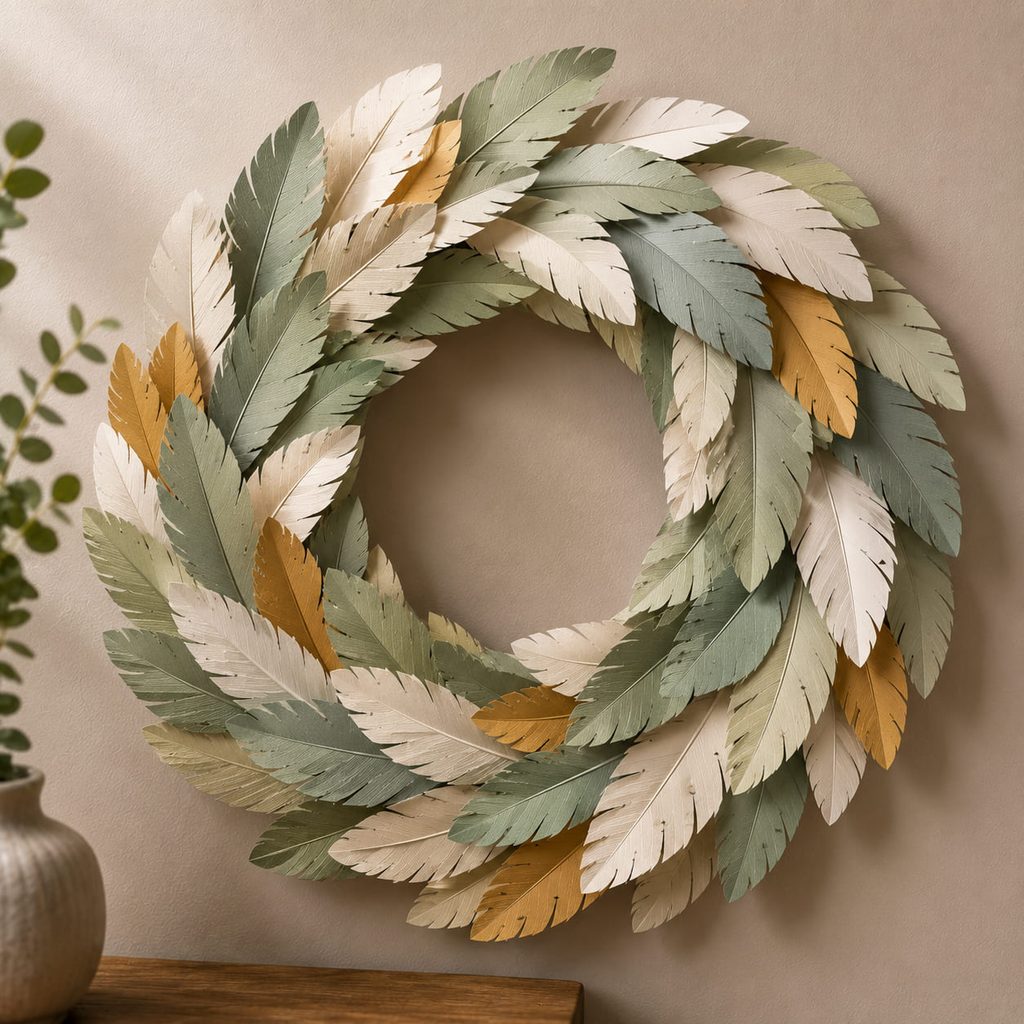
Around a flat wreath base, volume comes from overlap rather than thick individual feathers. Cut a small family of feather shapes, score or gently fold each one along the center vein, and let the tips lift away from the ring.
- Divide the wreath base into four visual quadrants so the density stays balanced.
- Glue the first feathers with their bases on the ring and tips pointing slightly outward.
- Add the next row so every feather base disappears under the one above it.
- Rotate the wreath as you work rather than completing one side first. For faster batch-making, crease all feathers before you begin gluing. The finished ring should lie flat against the wall while the feather tips project forward; if the base buckles, the overlap is too dense or the paper is pulling unevenly.
10. Sculpted Ocean Wave Paper Relief
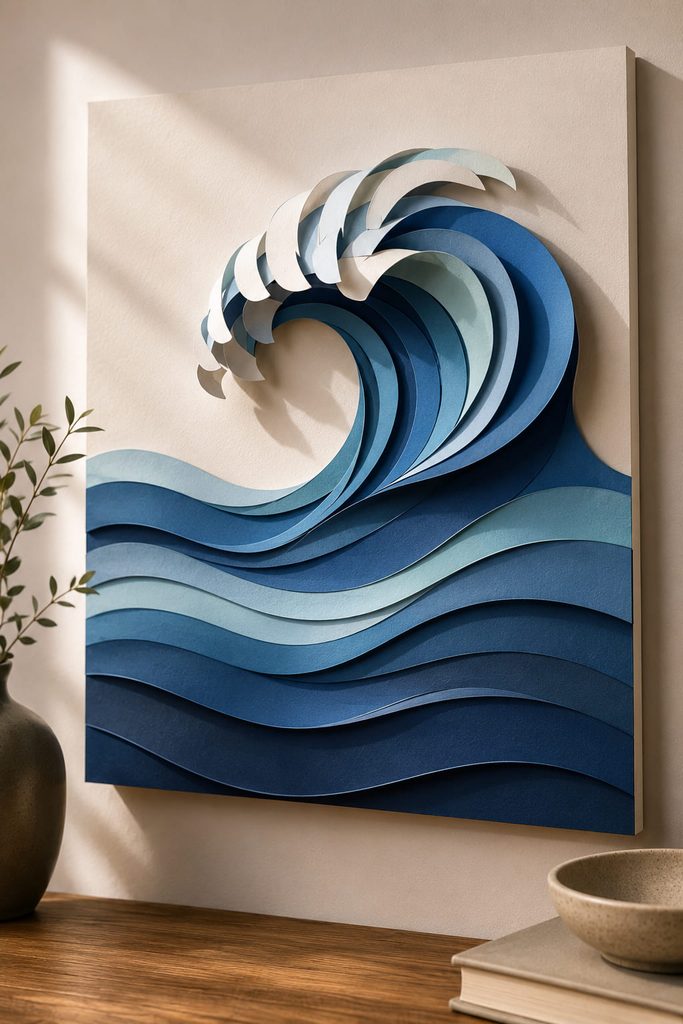
Follow the direction of the water when shaping this relief. Layer broad curved bands for the body of the wave, then bend only selected crest strips forward so the top edge appears to roll over the flatter base. Keep the lowest bands close to the backing; otherwise the whole piece can look like a stack of loose ribbons.
- If the crest collapses: shorten the unsupported curve or add a hidden paper bridge behind it.
- If the wave looks striped: reduce the contrast between neighboring bands or let two colors overlap more deeply.
- If the relief twists off the backing: flatten one side and rebuild the curve with fewer lifted points, because raised sections pulling in different directions can distort the panel.
11. Woven Paper Lattice Wall Art
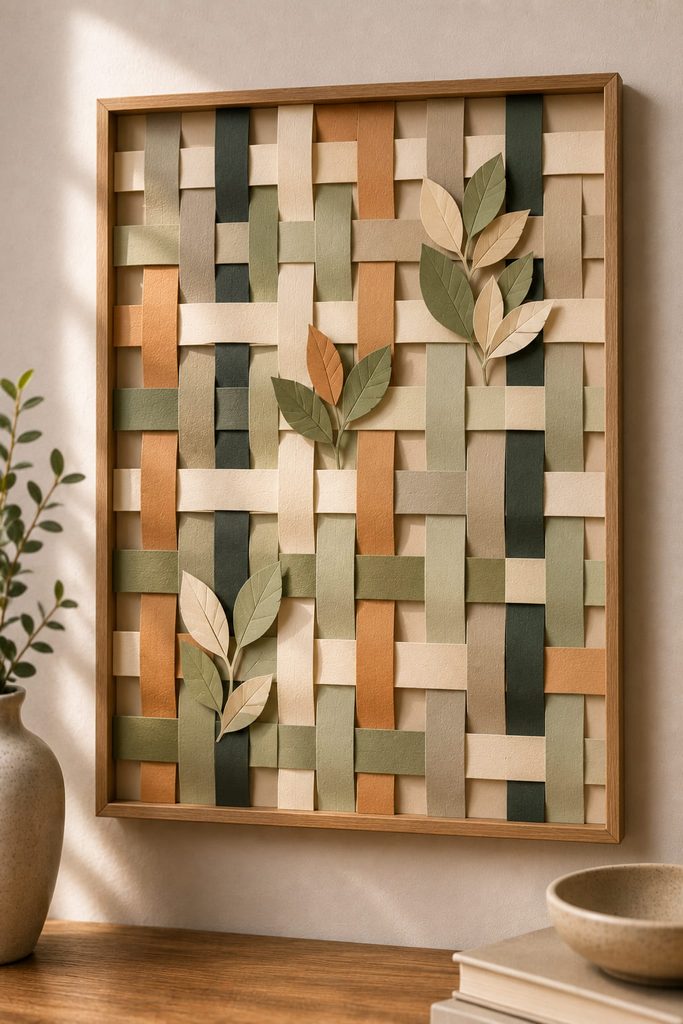
For this piece to count as woven, the strips need a real alternating over-under path rather than decorative bands glued on top. Build a rectangular or diamond lattice first, keeping the tension light enough that the backing does not bow. The crossings create relief naturally, so extra foam is usually unnecessary.
Add a few cut-paper leaves, circles, or abstract tabs at selected intersections instead of covering the weave. They can hide joins and create a focal area while leaving enough crossings exposed to prove the construction. If the grid skews, square it before adding overlays; decoration will not correct a distorted weave.
12. Concentric Mandala Shadow Frame
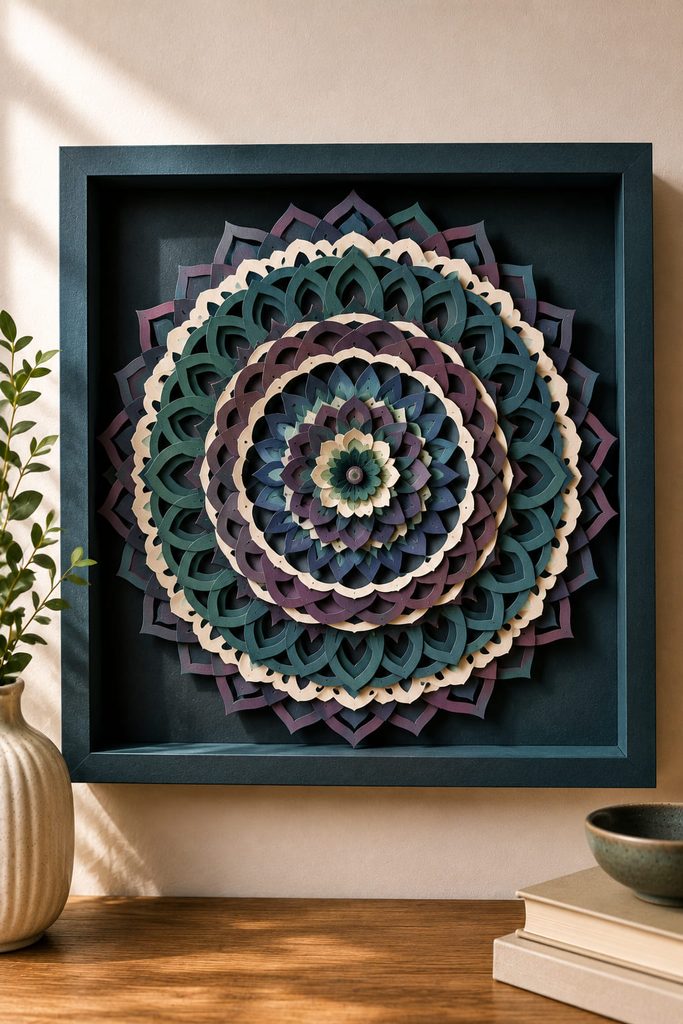
Center alignment matters more than tiny color shifts in a layered mandala. Every ring repeats around the same axis, so even a small offset becomes visible across many petals or spokes. Use a backing with two faint center marks and dry-fit the largest, middle, and smallest layers before committing to glue.
There are two useful spacing routes. Flush stacking gives a crisp graphic mandala with strong color blocking. Thin spacers between selected rings create dramatic cast shadows, but the added depth can exaggerate any alignment error.
Center Registration Check: Look through the smallest central opening before pressing the adhesive down. If the opening appears closer to one side, nudge the layer while the bond is still movable.
Do not automatically space every ring. Alternating flush and raised zones usually creates a clearer depth hierarchy and keeps the finished frame from becoming bulky.
13. Tiered Paper Flower Wall Cluster
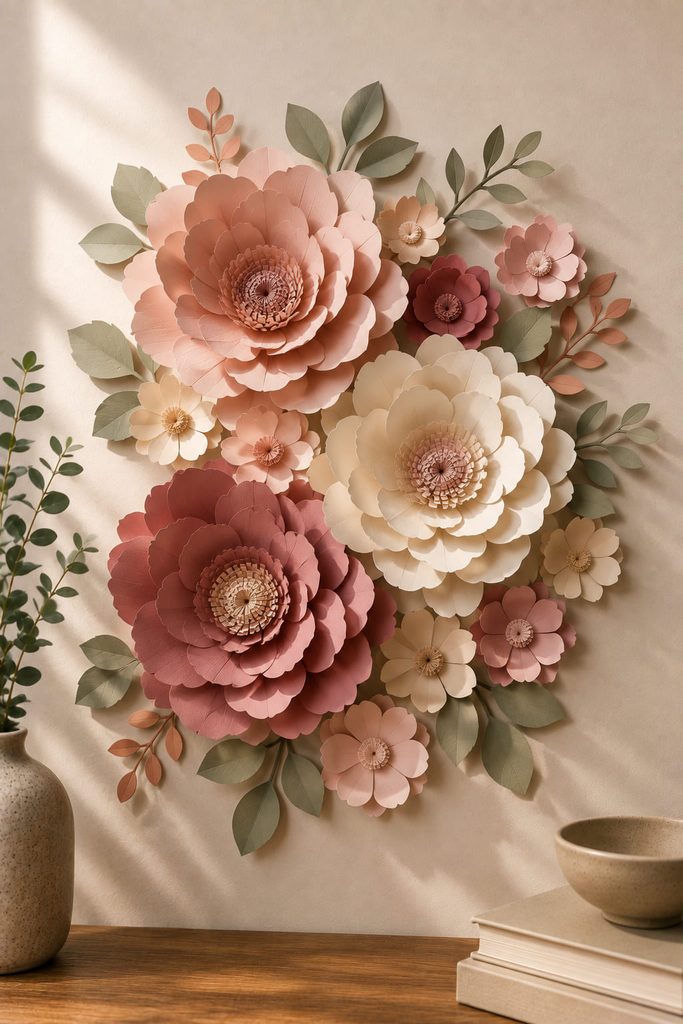
Instead of making every flower equally full, vary the petal depth across the cluster. A few large blooms can use multiple nested petal tiers with cupped centers, while smaller flowers stay flatter and bridge the gaps between them. Mount the flowers on a concealed paper or lightweight board carrier so the composition can be positioned as one unit. The dimensional contrast between deep focal blooms and shallow filler flowers is what makes the cluster read as layered decor rather than a row of identical rosettes.
14. Layered Animal Portrait Plaque
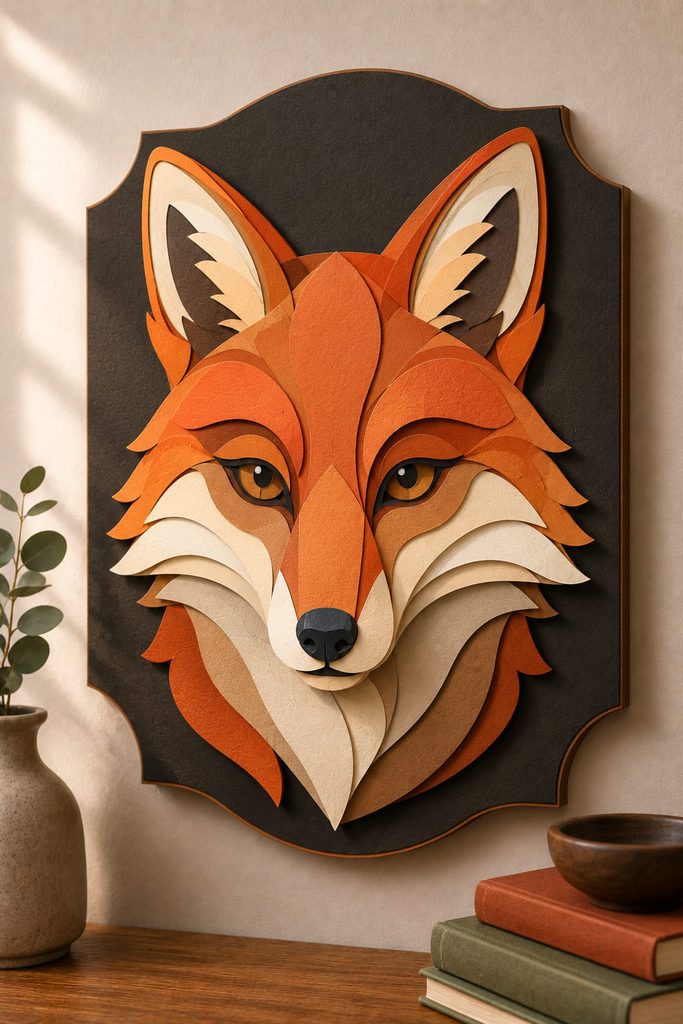
Recognition starts with a clean outer silhouette, while the inner layers explain form rather than simply changing color. Use a broad head silhouette as the base, then add separate muzzle, cheek, ear, and eye-area shapes so the face gains shallow relief. Keep the smallest features flat; stacking tiny eyes or whiskers can make the expression clumsy.
A graphic route uses fewer, larger color blocks and is easier to read from across a room. A realistic route uses more subtle contour pieces around the face and suits a close-view shelf or gallery wall. Choose the route based on viewing distance, not on how many layers you can fit. In both versions, the outer silhouette should remain clean enough that the subject is recognizable before the facial details are noticed.
15. Architectural House-Facade Shelf Art
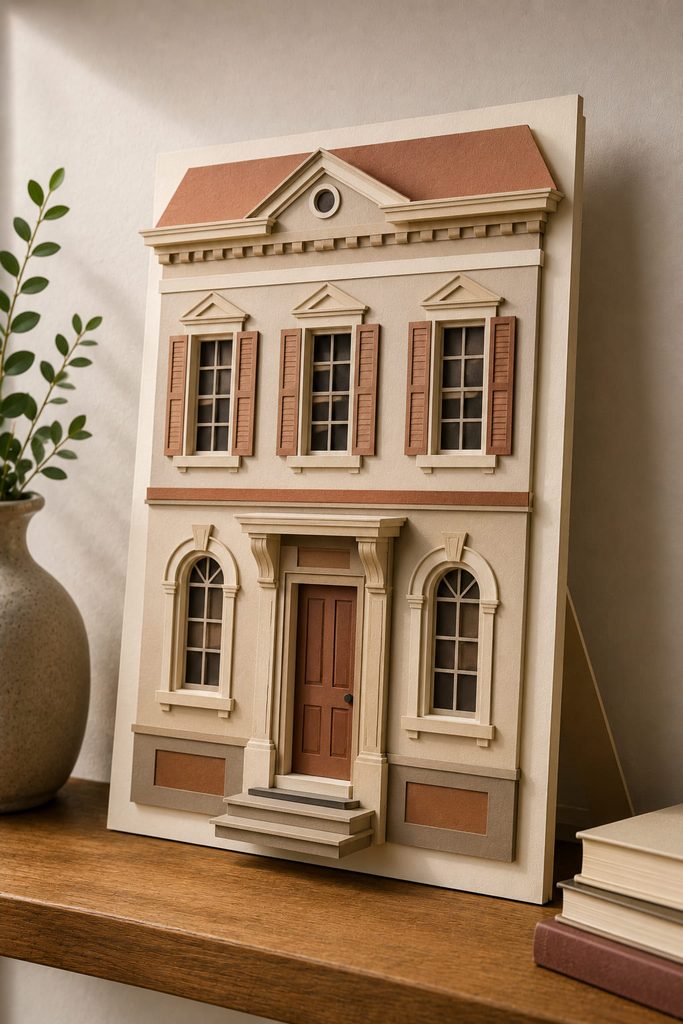
Rather than building a full miniature house, recessed openings create depth in a shelf-ready facade. Start with a sturdy back panel, add the wall face on shallow spacers, then layer window frames, trim, shutters, and a projecting door surround. The recess behind each opening does more visual work than extra surface decoration.
To make the piece shelf-ready, give it a folded rear easel or a wide paperboard foot that keeps the facade from tipping forward. Any roofline, balcony, or awning that projects far from the face should stay lightweight so it does not pull the top away from the support.
Set the finished piece on a level surface and tap the shelf lightly. If the facade rocks or leans, widen the rear foot before adding more decoration. A stable silhouette lets the windows and trim remain delicate without turning the project into a fragile freestanding model.
16. Folded Leaf Layer Garland
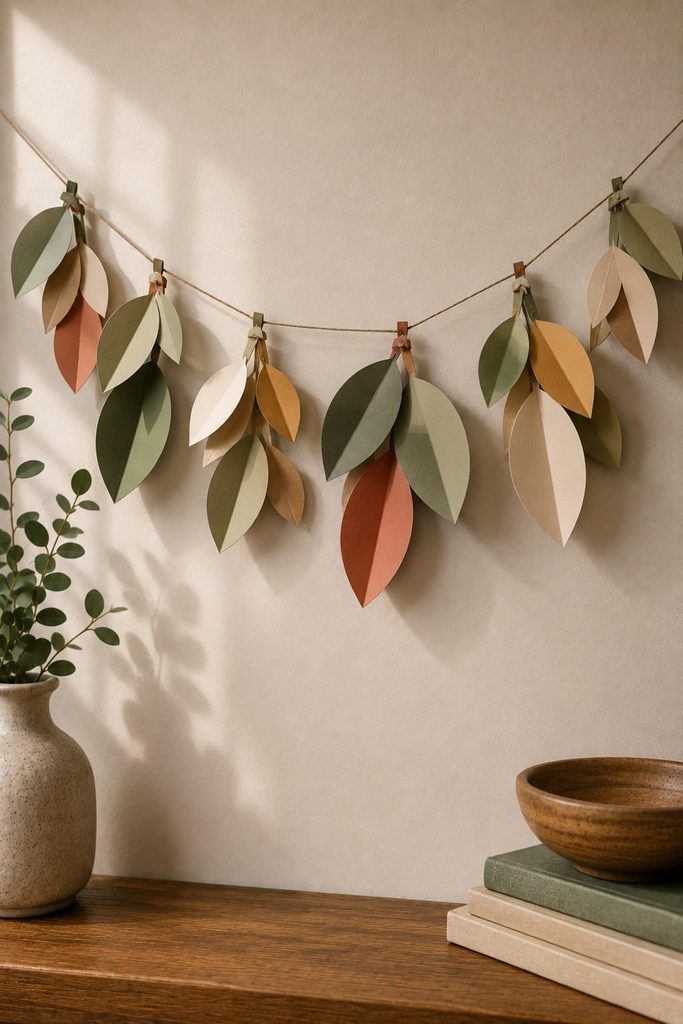
A dimensional leaf garland stays lightweight when the depth is built into each leaf instead of added with thick spacers. Cut leaves in two or three sizes, score a center vein, and fold them slightly so the halves meet at a shallow angle.
- Reinforce the top of each leaf with a small glued paper tab.
- Punch or pierce the tab rather than the leaf blade itself.
- Thread the leaves onto string with small gaps between clusters.
- Hang the garland temporarily and rotate any leaves that sit edge-on to the viewer. Leave enough clearance from the wall for the folded leaves to cast shadows without being crushed; this also lets the garland move slightly in air rather than behaving like a flat banner.
17. Pleated Paper Relief Panel
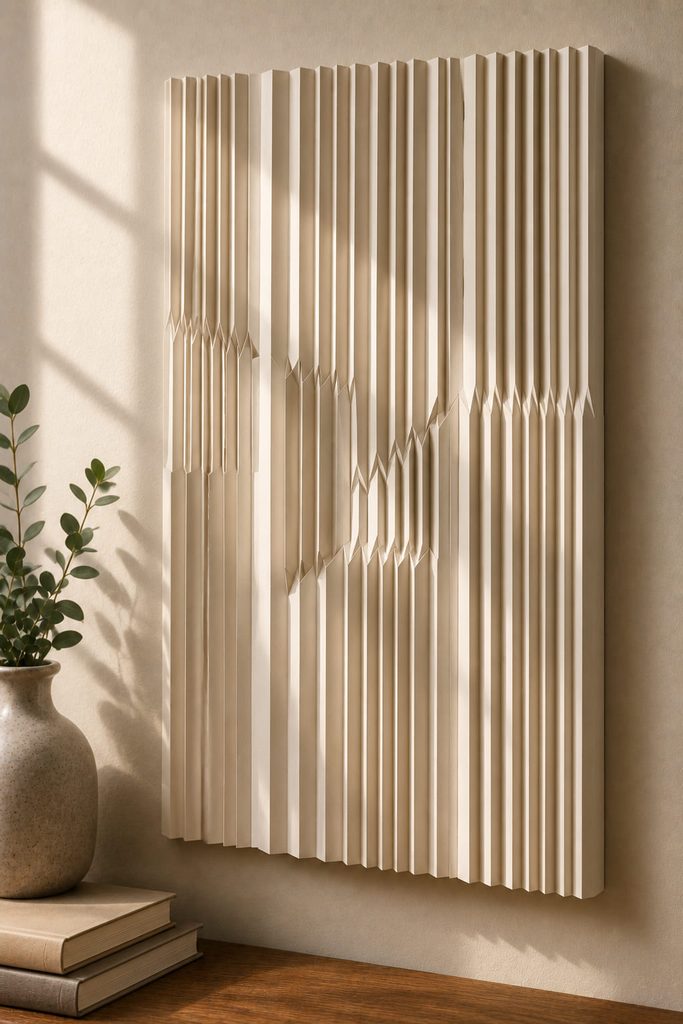
With pleats, depth comes from geometry, so this panel can stay almost monochrome and still look active. Fold long paper strips into consistent mountain-and-valley rhythms, then mount them side by side with selected sections reversed or compressed. The surface changes as light crosses it, giving the wall piece a different appearance through the day.
The key decision is rhythm. Equal pleats feel calm and architectural; occasional wider folds create a focal break. Keep the mounting edge flat and let the folded faces project forward. If the backing bows, reduce the compressed pleats rather than forcing the relief under heavier adhesive.
18. Layered Vellum Window Lantern
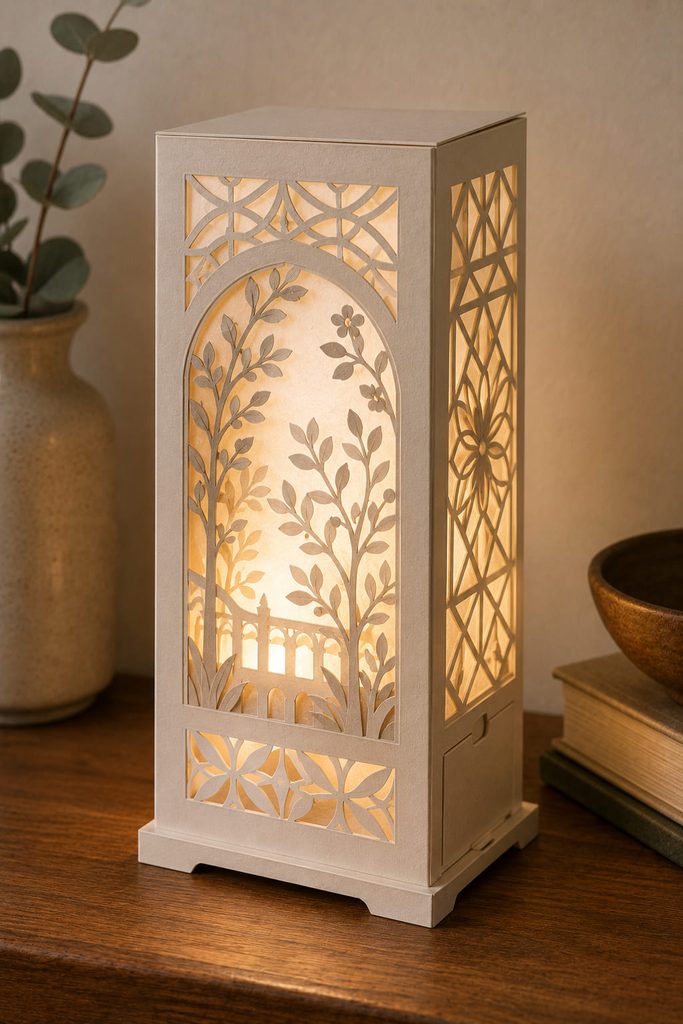
Plan the light path before assembling the decorative lantern panels. Use a firm outer paper shell, a cut-paper scene or pattern as the middle layer, and vellum on the inside to soften a cool LED light. The bottom or one side needs a simple flap or removable panel so the light can be inserted, switched on, and removed without tearing the lantern.
Before closing the shell, check:
- Are the cut openings free of glue and spacer strips?
- Is the vellum secured around its edges without covering the main apertures?
- Does the lantern stand on a flat, wide base?
- Can the LED be reached without bending the decorated panels?
- Is the light cool-running and fully separated from any flame source, while the layered window design remains readable even in daylight? A removable light compartment also makes battery changes easier without disturbing the decorative shell.
19. Slice-Form Paper Sculpture Centerpiece
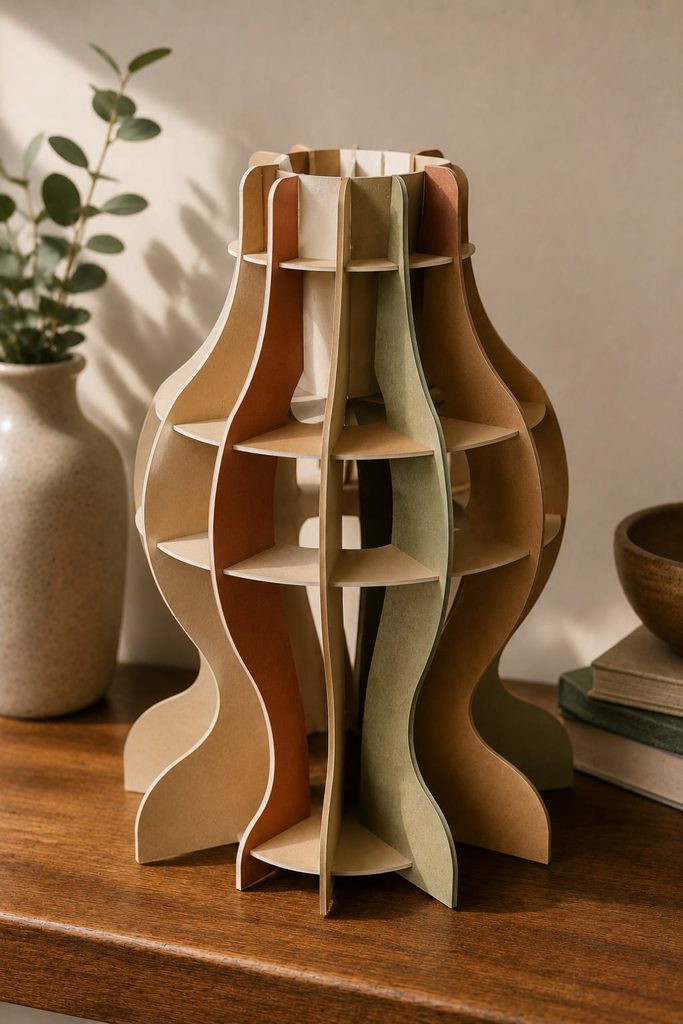
To build volume from flat sheets, interlock paperboard profiles at right angles into a freestanding slice-form sculpture. Cut matching slots into a set of vertical and horizontal paperboard slices, then slide them together so the crossing pieces form a lightweight internal skeleton. Rounded fruit, abstract vases, clouds, or simple organic shapes work especially well because the changing profiles make the volume obvious.
The slots should grip without crushing the paper. If they are too loose, the sculpture racks sideways; if they are too tight, the edges buckle during assembly.
Base Footprint Test: Stand the piece on its intended table and gently rotate it. At least two lower slices should create a broad enough footprint that the sculpture does not depend on a hidden prop. For a taller centerpiece, widen the bottom profiles rather than simply adding heavier paper at the top.
This method is useful when you want large visual volume with relatively little material and a silhouette that can be seen from multiple directions.
20. Suspended Celestial Layered Mobile
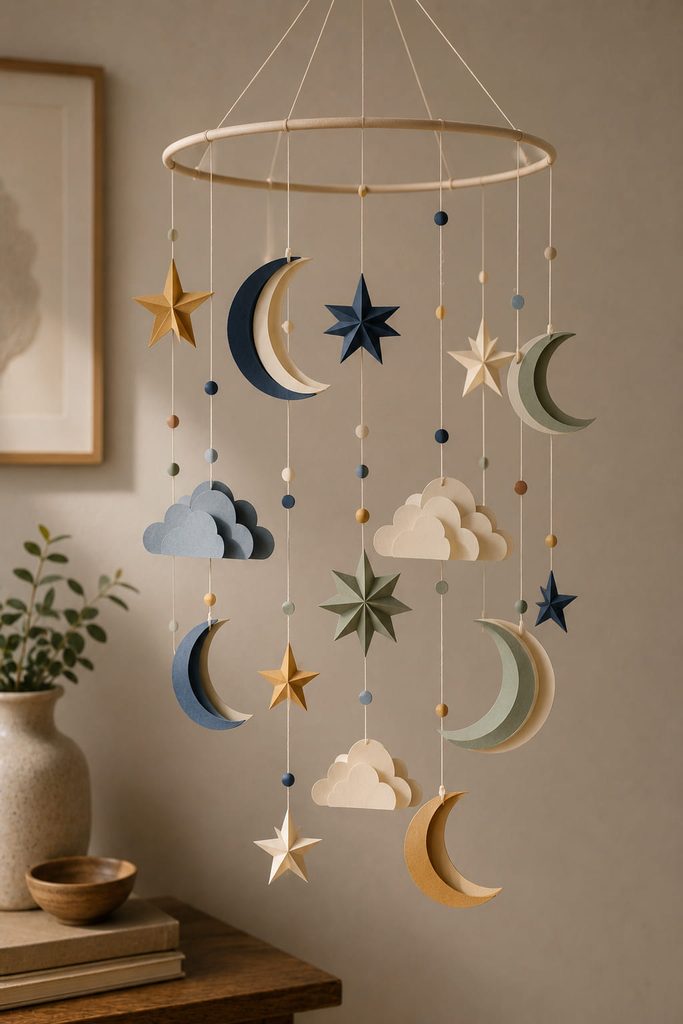
Before decorative detail is added, the layered moons, stars, and clouds must balance as real hanging weights. Laminate or stack each motif so it is stiff enough to hang flat, then suspend the pieces from a lightweight crossbar or ring with thread. Test the balance before trimming thread ends or permanently fixing knots.
- If one side drops: move that hanging point inward toward the center or shift a lighter ornament farther out; changing thread length alters vertical spacing but does not solve horizontal imbalance.
- If pieces collide: stagger their heights and give the mobile more clearance from the wall.
- If a motif twists uncontrollably: reduce asymmetrical embellishment around its suspension point. The finished mobile should move freely without letting one heavy layered element dominate the entire structure.
21. Color-Block Layered Abstract Collage
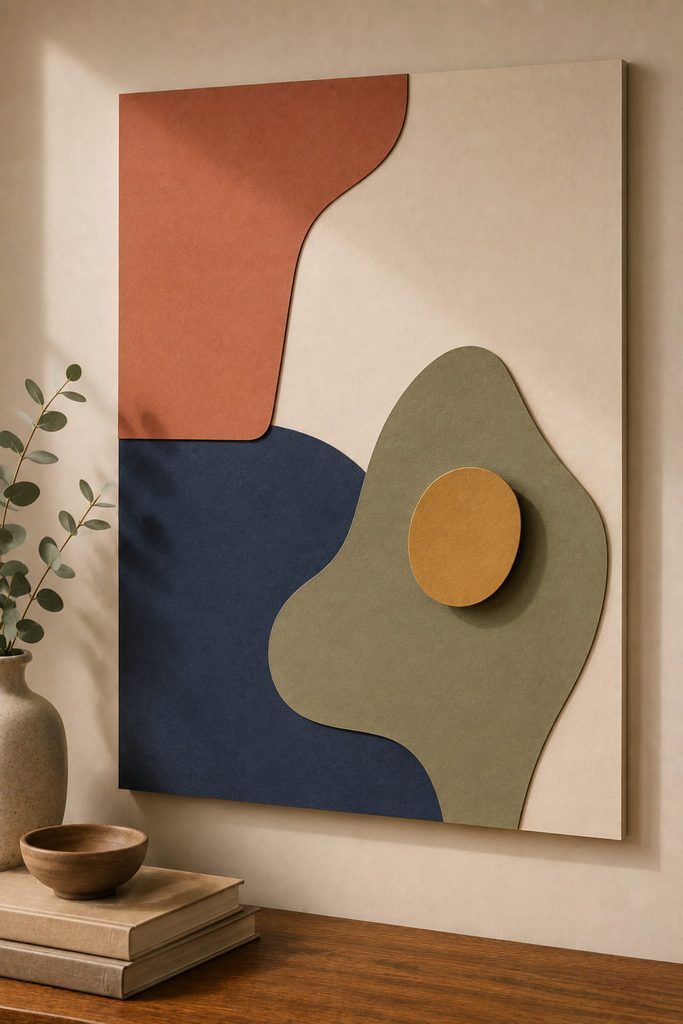
When intricate cutting is not the goal, abstract collage can build depth through overlap, edge shape, and color relationships. Start with two or three broad paper forms, overlap them enough to create a clear junction, then raise only one smaller focal shape on a thin spacer. Let some edges align and others drift apart so the composition feels deliberate rather than randomly scattered. A restrained number of layers keeps the negative space active and makes this style especially suitable for larger wall art where tiny details would disappear.
22. Deep Forest Paper Diorama Under A Cloche
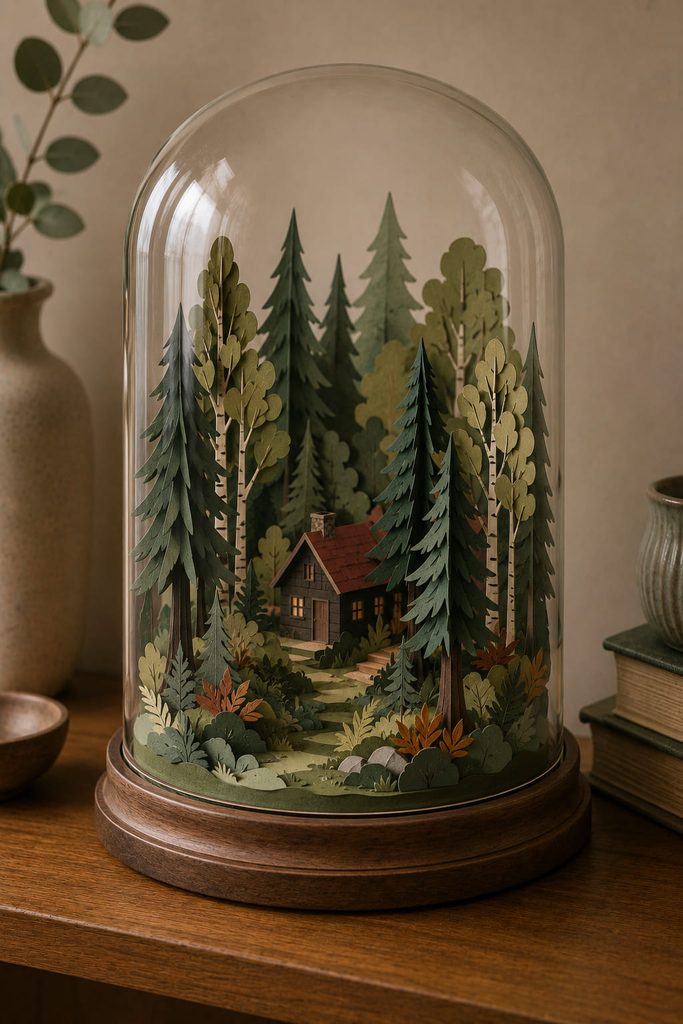
Under a cloche, layered paper becomes a small scene viewed from several angles, so a flat stack is not enough. Build a rigid circular or oval base, then set shallow tabs or slots into it for separate foreground, middle, and background pieces. Trees can cross slightly in front of one another, but the scene should still have open sightlines toward a focal object such as a cabin, deer, or path.
Install the farthest layer first and work toward the front while access is easy. Use folded feet or narrow base tabs to keep upright pieces square; relying on glue along a thin paper edge makes tall elements unstable. Add ground strips or low foliage last to disguise the attachment points.
Before final assembly, place the cloche over the dry-fitted scene. Nothing should touch the glass or acrylic dome, and the tallest element needs enough clearance that the cover can lift straight off. If the scene feels crowded, remove one foreground piece rather than pushing every layer inward. The empty air around the paper is part of what makes the miniature depth believable.
How To Make Layered Paper Art Look More Dimensional
More layers do not automatically create more depth. The stronger approach is to decide where the eye should travel, then vary three things: overlap, spacing, and contrast. Flush-glued pieces create tight graphic transitions, while raised pieces cast shadows and separate important forms. Using both methods in one project usually gives the composition more hierarchy than spacing every layer equally.
Paper behavior matters too. A scored fold creates a crisp ridge, a curled edge catches side light, and a cut opening can reveal a darker or lighter layer behind it. When a project starts to look crowded, removing one layer or widening a negative-space opening can improve depth more effectively than adding another decorative shape.
For framed work, dry-fit the full stack before closing the frame. For freestanding or hanging pieces, test stability, balance, and clearance before adding the most delicate decoration.
Choose The Kind Of Depth You Want
The best starting point depends on how you want the finished piece to behave. Sunbursts, pleated panels, abstract collages, and floral clusters create dimensional wall decor without deep frames. Shadow boxes and mandalas make spacing itself part of the composition, while lanterns and light boxes add another design constraint: light must move through the layers. Mobiles, tunnel books, slice-form sculptures, and cloche scenes go further by making structure, movement, or viewing angle part of the artwork.
If framed scenery is the direction you want to develop next, the narrower collection 25 Stunning Nature Shadow Box SVG Designs is a useful continuation for landscape-based layered decor.