
This post contains affiliate links. As an Amazon Associate I earn from qualifying purchases, at no extra cost to you. Thank you for supporting Diynify!
Paper bag snowflakes turn ordinary lunch and treat bags into large radial winter decorations with little more than careful stacking, glue, and scissors. The core technique is simple, but the finished piece changes dramatically depending on whether it needs to hang flat in a window, move from a ceiling, stand on a table, fold away for storage, or become part of a larger installation.
Most ideas here use paper bags, scissors, and paper-safe adhesive. Some also need cardstock or chipboard for reinforcement, cord or ribbon, removable clips, a craft hoop or wreath base, vellum, a deep frame, or a cool-running battery LED. Start with the basic window version if you want to learn how the bag stack opens; choose the mobile, topper, centerpiece, or backlit display when support, clearance, balance, or light becomes part of the design.
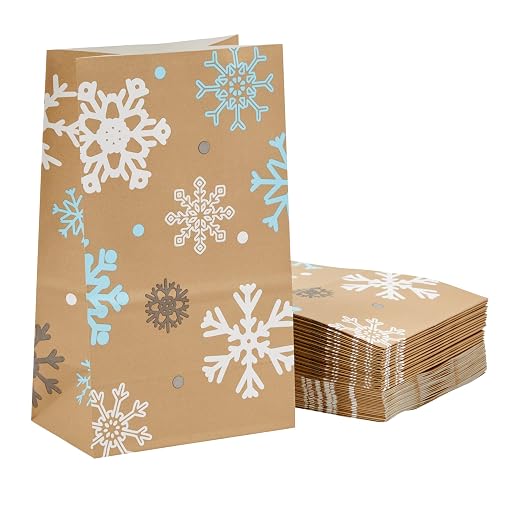
Common tutorials use an inverted-T glue pattern—one line along the center and one across the closed base—so the side edges remain free to fan open. Published versions use different bag counts, which makes a test opening more useful than treating one number as universal.
1. Classic Lunch-Bag Window Snowflake
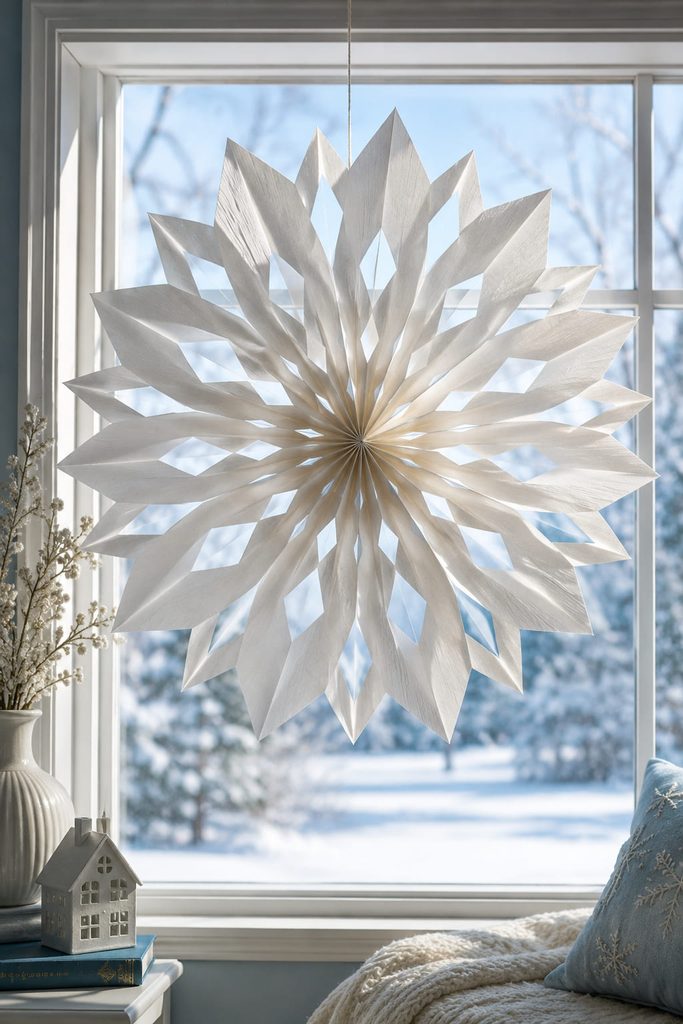
For the clearest introduction to the craft, keep the first snowflake close to the basic structure: identical lunch bags stacked in one direction, glued only along the center spine and across the closed bottom, then cut with a pointed top and a few generous side openings. The large negative spaces matter more than tiny notches because daylight has to pass through the finished rosette. Before joining the first and last bags, open the stack gently against the window; if the circle fights to close, add another bag rather than forcing the paper. A nearly flat snowflake hangs more cleanly on glass than an overstuffed one that buckles toward the room.
2. Giant Grocery-Bag Wall Snowflake
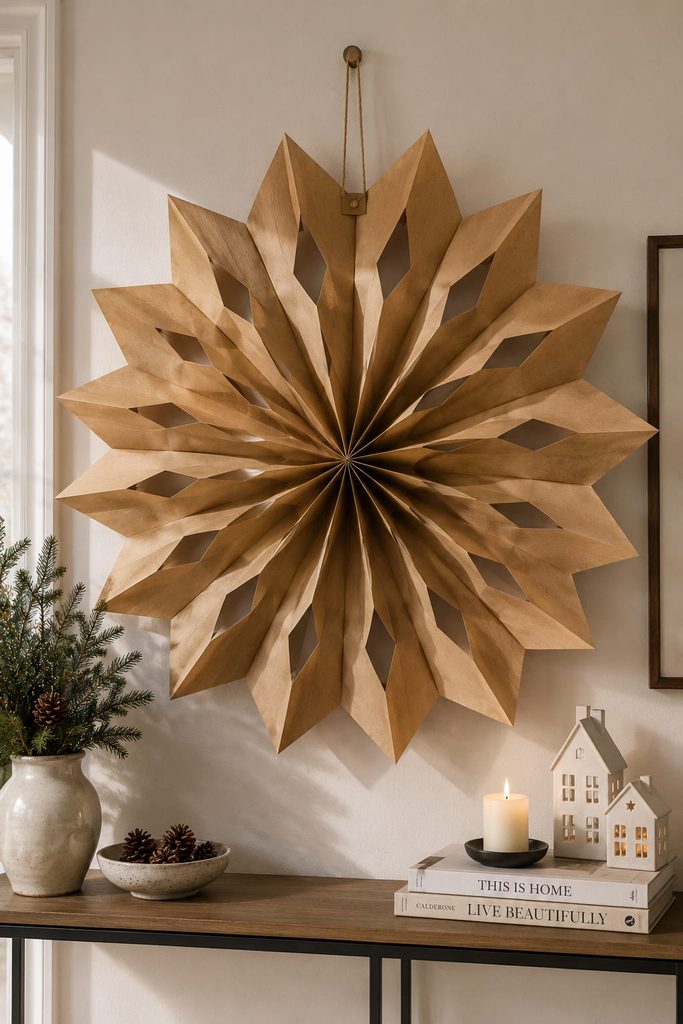
When the snowflake grows to grocery-bag scale, the engineering changes with it. Large grocery-style paper bags create a broad snowflake that can fill an empty wall, but the extra paper also puts more strain on the glued center and hanging point. Keep the cut pattern bold: one deep V at the open ends and two or three wide side cutouts will read better from across the room than a lace of fragile slits.

Build the hanging support before the snowflake goes on the wall. Sandwich a short loop of cord between two small cardstock patches near the glued base of the stack, then open the rosette and close it around that reinforced point. The patch spreads the load across several layers instead of asking one punched hole to carry the whole piece. If the outer points sag, the practical fix is usually less paper at the tips, not more adhesive at the center.
3. Mini Treat-Bag Snowflake Garland
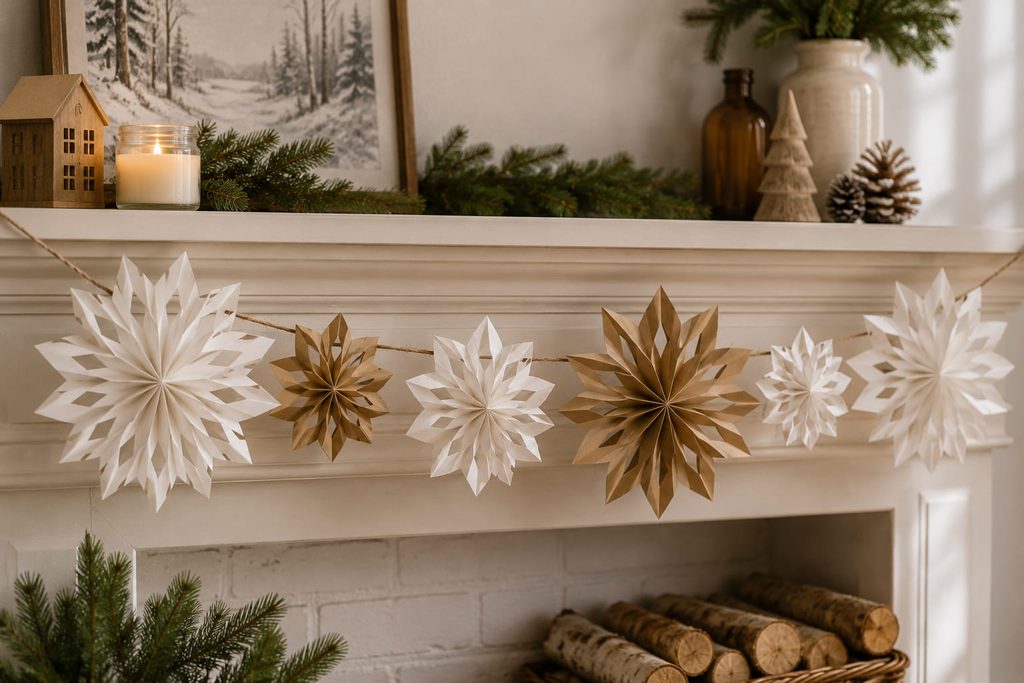
Small treat bags turn the same radial fold into a repeatable garland element, but batch order is what keeps a long strand from becoming tedious. Make one complete mini snowflake first and use it to decide how much cut detail survives at garland distance; then prepare the rest by operation rather than finishing them one at a time.
- Stack and glue all bag sets while the bags are still flat.
- Cut one simple pattern through each stack, keeping enough paper around the center spine to hold the layers together.
- Open every rosette and secure its final seam.
- Add hanging loops last, spacing the snowflakes on cord only after you can see their finished diameters.
Leave visible cord between pieces. If the rosettes touch edge to edge, their points tangle and the garland reads as one heavy strip instead of a rhythm of separate snowflakes.

4. Double-Layer Shadow Snowflake Medallion
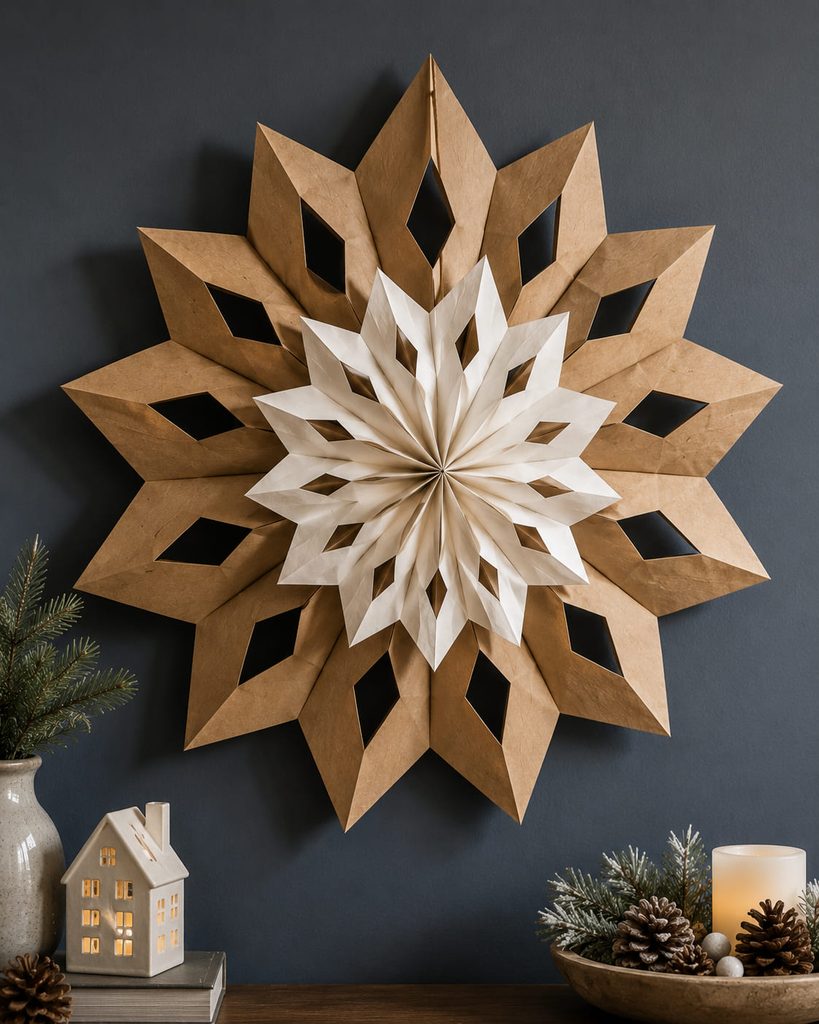
A single paper-bag rosette gives you silhouette; two offset rosettes can create real relief. Make a larger back snowflake with broad openings and a smaller front snowflake with a simpler edge. Rotate the front layer so its points sit between the back layer’s points, then connect the two only at a small reinforced center area. That offset lets the wall color show through both cut patterns and prevents the front layer from visually erasing the back one.
There are two useful ways to join the layers. A flat center bond keeps the medallion shallow, which is better behind a console or in a narrow hallway. A few small cardstock spacers at the center create a shadow gap, making the overlap much more visible under side lighting. Spacers also increase leverage on the joint, so the back rosette needs a firm central patch and a wall hook that carries the rear layer rather than the front one.
Depth check: Look at the piece from several feet away. If the two layers merge into one shape, increase the rotational offset or the shadow gap before adding more decorative cuts.
5. Fold-Flat Reusable Paper Bag Snowflake
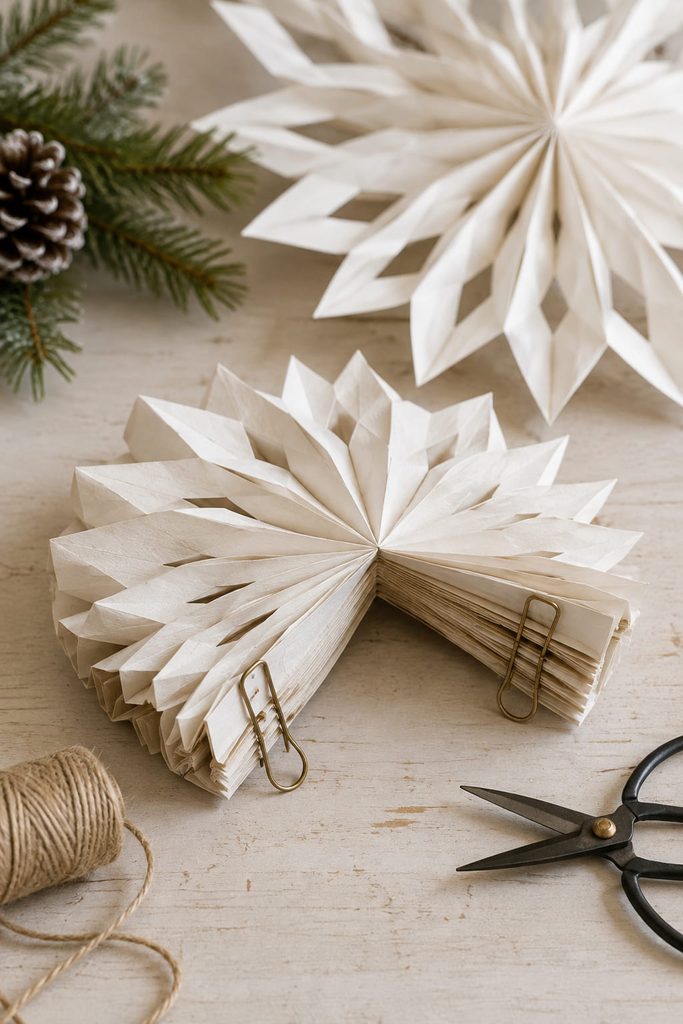
If winter decor has to store flat, make the final seam a removable connection rather than a permanent one. Glue the bag stack and cut the pattern normally, but do not permanently glue the first bag to the last. Open the rosette, align those two faces, and use small removable paper clips or low-profile binder clips near the center and outer edge to hold the circle closed. After the season, remove the clips and let the stack collapse back into its original flat bundle.

If the snowflake refuses to lie flat after opening, check the problem before pressing it into storage:
- Center feels twisted: One or more bags were stacked in the opposite direction.
- Outer edge ripples: The fan is being forced wider than the stack naturally allows.
- Clips slide off: Move them into areas with more intact paper rather than onto a narrow cut point.
- Layers stick together: Excess glue reached the side edges, which need to remain free so the bags can open.
This version earns its keep in homes with limited holiday-storage space because the closure, not the decoration, is designed around reuse.
6. Half-Rosette Mantel Snowflake Fan
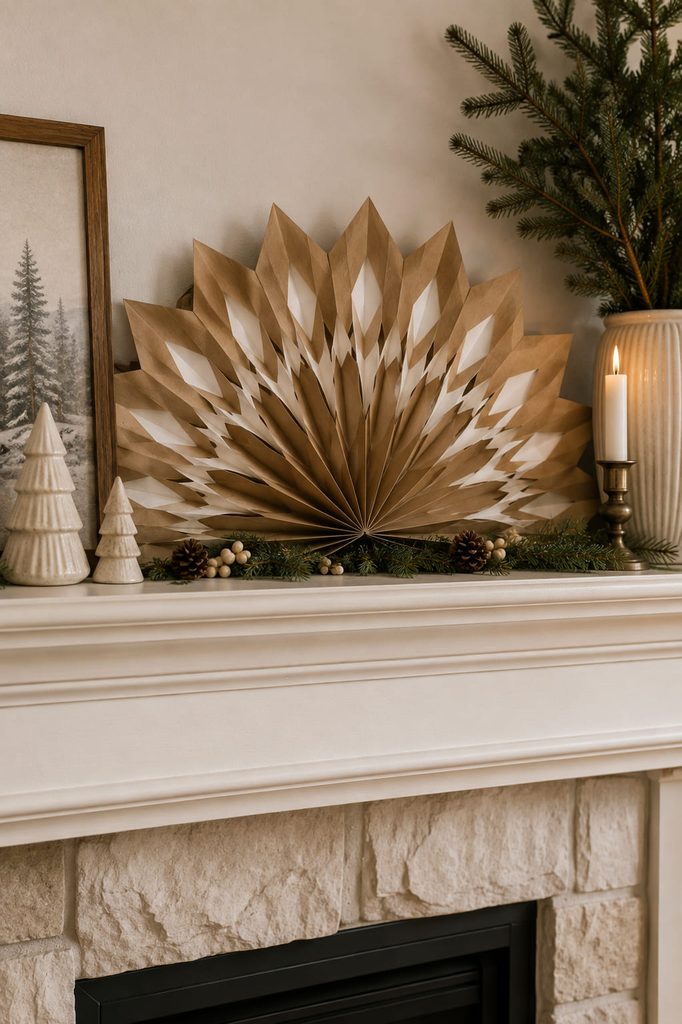
A full 360-degree snowflake is not always the best fit for a shallow mantel. Stop the opening at a semicircle instead and attach the two end faces to a narrow backing strip, creating a fan that sits flush against the wall while the cut edge projects forward.
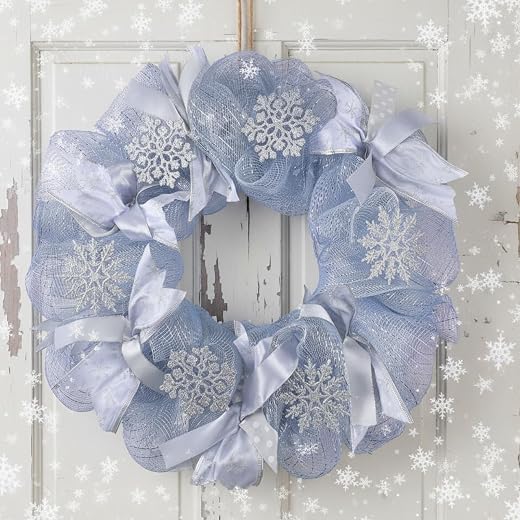
Use this quick placement check before gluing the backing:
- The straight edge should rest behind objects rather than under their weight.
- The cut points need enough clearance that LED candles, frames, or greenery do not crush them.
- The backing strip should be shorter than the visible fan so it disappears from the normal viewing angle.
Because only half the rosette is used, the piece reads more like a snowy architectural flourish than a hanging ornament.
7. Snowflake Wreath Built From Mini Bag Rosettes
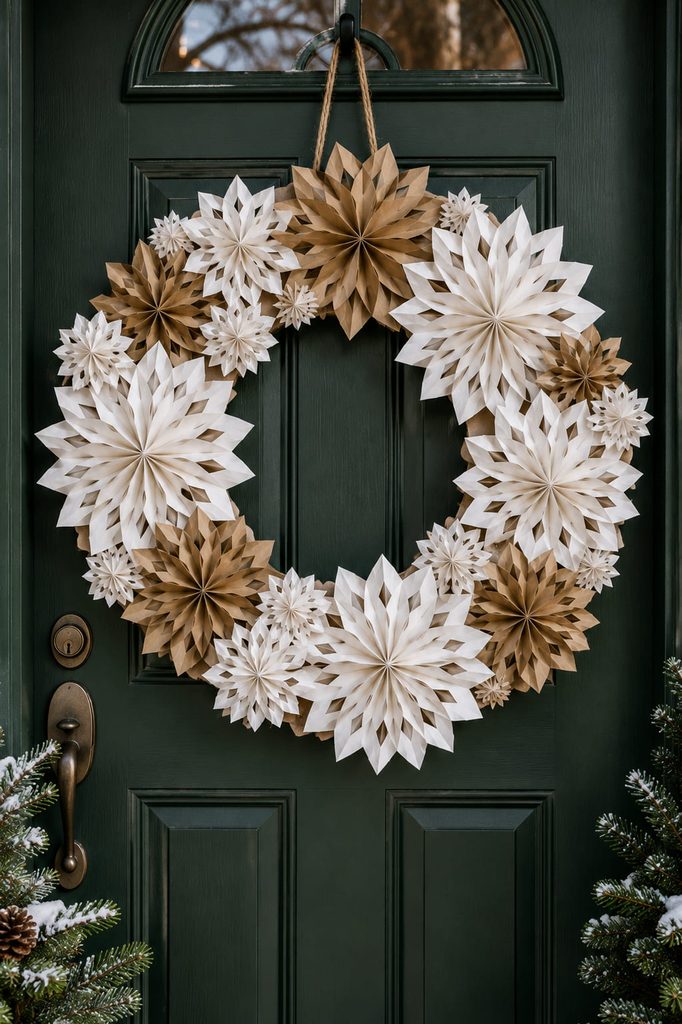
Start with the ring, not the snowflakes, when the finished piece has to function as a wreath: repeated paper forms should decorate a stable circle rather than distort it. Cut a lightweight base from sturdy cardstock, chipboard, or clean corrugated cardboard, and make several mini bag snowflakes small enough that each one can overlap its neighbor without covering the wreath opening. The base carries the load; the rosettes provide volume.
Dry-arrange the snowflakes before attaching anything. Start with four anchor pieces at roughly the top, bottom, left, and right, then fill the gaps. This prevents a dense cluster on one side from forcing tiny filler pieces onto the other. Attach each rosette through a reinforced center zone rather than by its outer points, since those points flex easily when the wreath moves.

For a softer edge, let some snowflakes project beyond the ring; for a cleaner graphic wreath, keep their centers on one consistent circle. The choice affects the finished silhouette more than adding extra cut detail.
Balance test: Hold the wreath by its planned hanging loop before the adhesive is fully committed. If it rotates to one side, shift one or two rosettes or move the loop slightly until the ring settles upright.
8. Cascading Paper Bag Snowflake Mobile
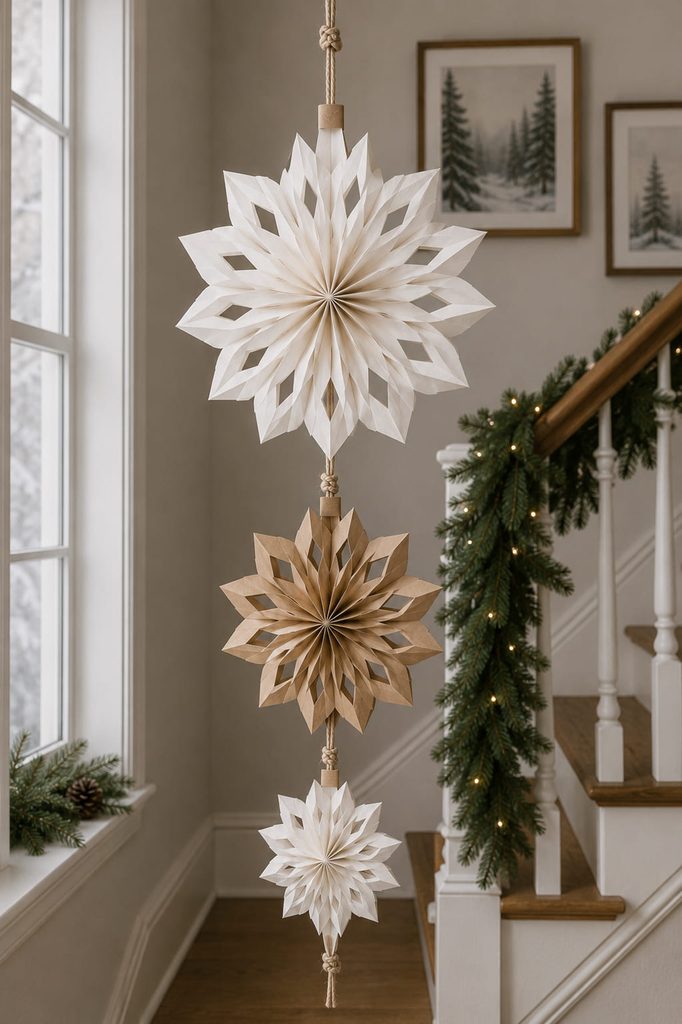
A vertical mobile works when each snowflake has room to turn without colliding with the one below it. Use three or more sizes, but keep the lightest or smallest piece near the bottom so the strand does not become top-heavy and visually cramped.

- Reinforce the hanging area of each bag stack with a small folded paper tab before opening the rosette.
- Thread one continuous cord through the reinforced points, tying a stop knot above and below each snowflake so it cannot slide.
- Open and close the snowflakes only after the spacing is set.
- Hang the strand temporarily and rotate each piece by hand to confirm that its outer points clear the cord and neighboring rosettes.
The best spacing is not equal spacing; larger snowflakes need a wider air gap. If the mobile will hang near a wall, give the largest rosette enough clearance to turn without brushing the surface.
9. Hoop-Suspended Snowflake Chandelier
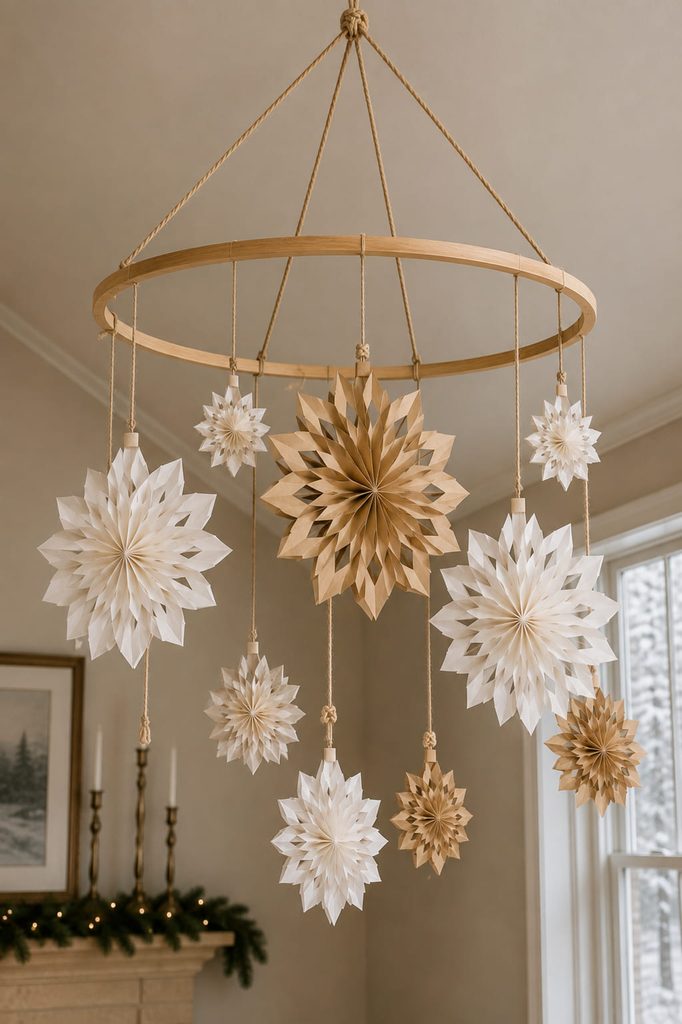
For an overhead cluster, a hoop is more useful than a single vertical cord because it spreads the snowflakes around a footprint. Suspend a lightweight craft hoop from three evenly spaced cords, level it first, then add individual snowflake drops around the ring. Place the largest rosettes higher and nearer the centerline; smaller ones can hang lower without making the whole cluster feel heavy.
The hanging system should be finished before decorative extras are added. Every drop needs its own secure loop, and the hoop needs open space below it so the snowflakes can sway without touching pendant lights, ceiling fans, heat sources, or each other. This is one case where restraint improves the effect: a few clearly separated forms cast better shadows than a packed cloud of paper.
10. Paper Bag Snowflake Window Valance
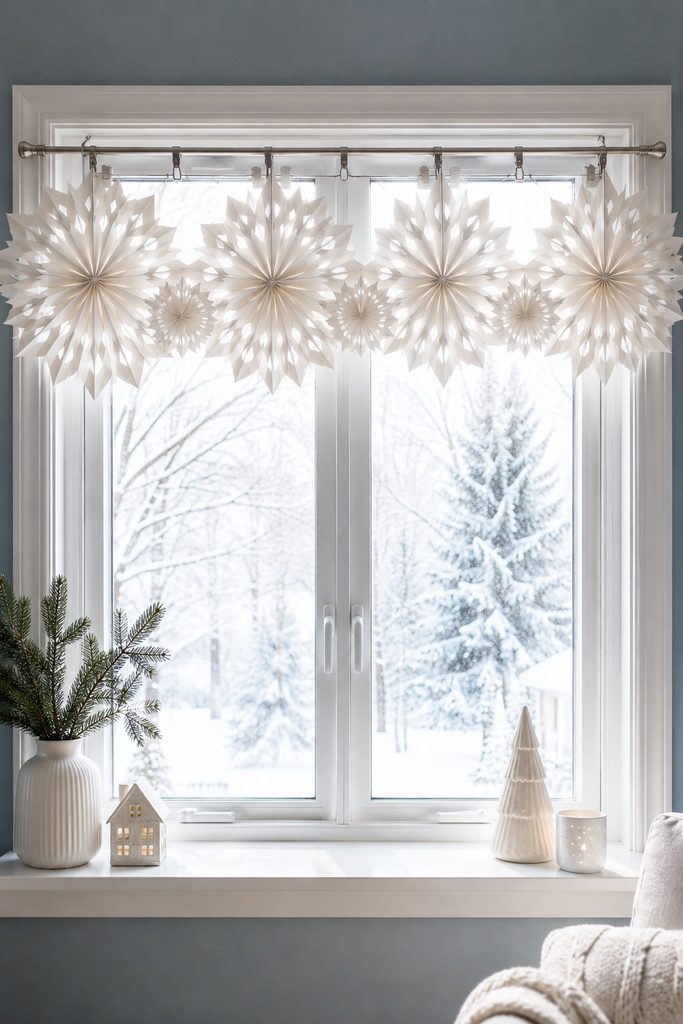
Instead of placing snowflakes directly on the glass, build a removable row that hangs from a tension rod, curtain rod, or ribbon stretched across the top of the window. This keeps the decoration easy to take down and lets each rosette hang in front of the light rather than flattening against it.
Useful extras: Small paper bags, narrow ribbon or cord, reinforced hanging tabs, removable clips, and a rod or existing curtain hardware.
Alternate diameters rather than patterns. A large-small-large rhythm creates a visible scalloped lower edge, while too many different cut motifs become visual noise in strong backlight. Keep the bottom of the valance above handles and opening hardware so the window still functions normally.
11. Reinforced Snowflake Christmas Tree Topper
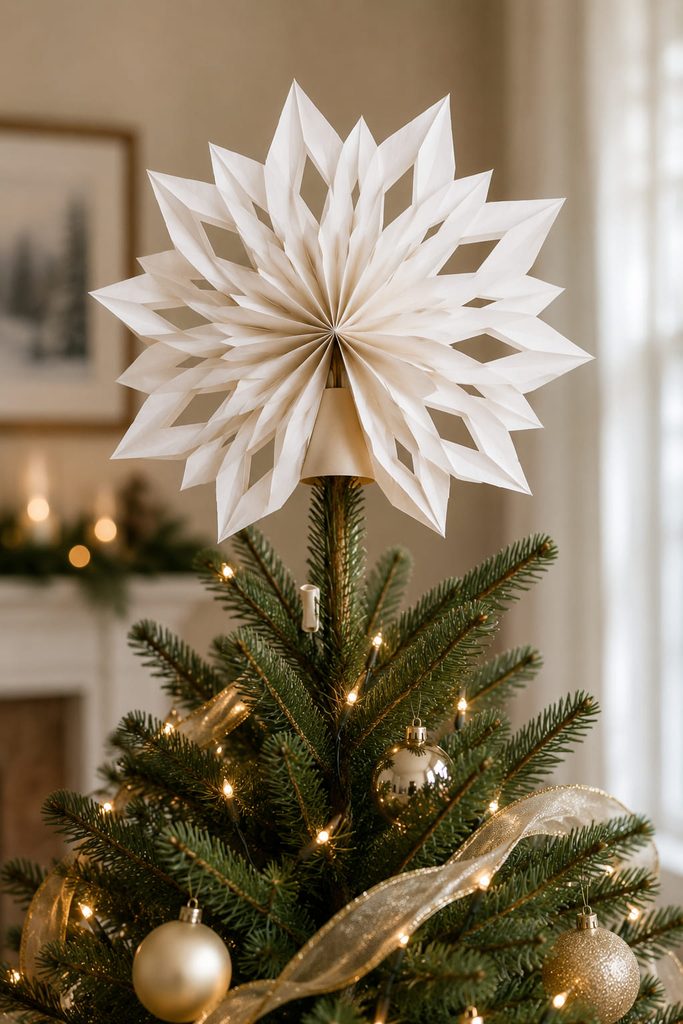
On a tree, the support matters more than it does for an ordinary hanging snowflake. Make one medium paper-bag snowflake, then attach a shallow cardstock cone or folded sleeve to its back so the topper can slide over the tree’s upper stem. The sleeve should carry the weight; do not rely on a single string tied to the snowflake points. Keep the front rosette fairly light and symmetrical so it does not torque the support sideways. If the top branch bends before the topper is fully seated, reduce the snowflake size or use fewer decorative cutouts near the outer edge rather than trying to stiffen the branch with more paper.
12. Mini Paper Bag Snowflake Ornament
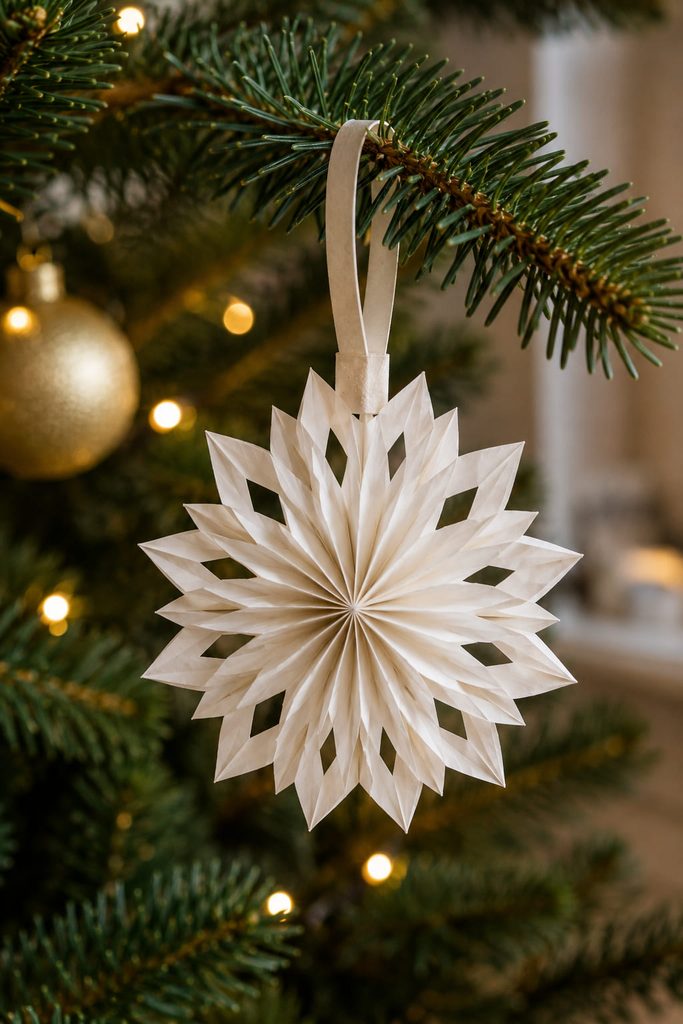
Branch movement makes the hanging point more important than intricate cutting on a tree ornament. Use small treat bags and leave a generous solid zone around the glued center. A reinforced loop at the top of the stack gives the ornament a predictable load path; hanging from a narrow outer point invites tearing.
There are two good closure routes. Glue the first and last faces permanently if the ornament will stay open all season and storage space is not a concern. Use a removable clip closure if you want it to flatten after the holidays. The second option adds a tiny bit of hardware but makes a whole set far easier to store.
Keep the finished diameter modest enough that nearby needles and cool-running tree lights do not push the rosette out of shape. On a dense tree, strong outer points and broad cutouts read better than fine lace.
13. Mini Paper Bag Snowflake Gift Topper

For wrapped gifts, use the snowflake as a removable dimensional topper rather than gluing its full face to the paper. Make a small rosette, add a narrow paper loop or ribbon channel to the back, and slide the gift ribbon through that support. The snowflake then lifts away when the ribbon is untied and can be reused as an ornament.
Check three things before committing to the size:
- It should sit inside the top plane of the box instead of hanging over crush-prone edges.
- The ribbon channel must grip the ribbon without pinching the bag folds.
- The snowflake should open without covering the gift tag or bow knot.
A shallow cut pattern is usually better here because the topper will be handled at close range.
14. Snowflake Napkin Ring Accent
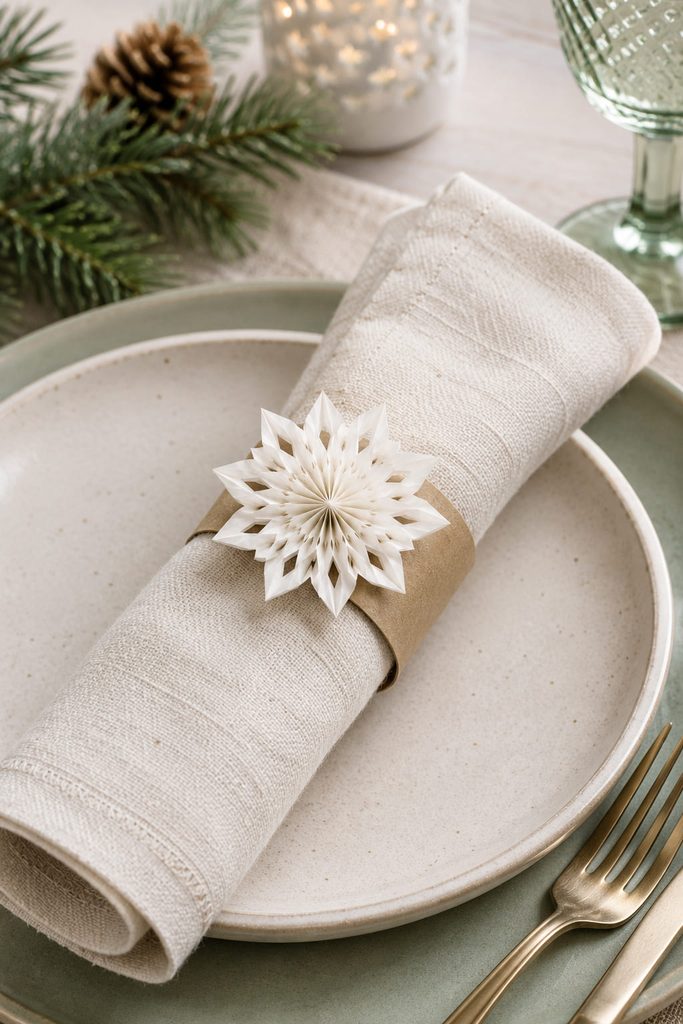
A tiny bag rosette becomes table decor when it is mounted on a separate band instead of being asked to wrap around the napkin itself. Form a cardstock strip into a ring sized to slide over a rolled or loosely folded napkin, then glue the snowflake only at its reinforced center to the outside of that ring. The band takes the flexing; the paper-bag points stay decorative.
A closed ring is simplest for consistent napkin sizes. For thicker winter linens, use an overlapping band with a small slot-and-tab closure so the circumference can change without crushing the snowflake. Keep the rosette narrow enough that it does not dip into plates or glasses when the napkin is set down.
Because this project is handled rather than hung, avoid long needle-like points. Rounded or clipped tips withstand contact better and still cast a crisp snowflake shadow on the table.
15. LED-Backlit Snowflake Display Box
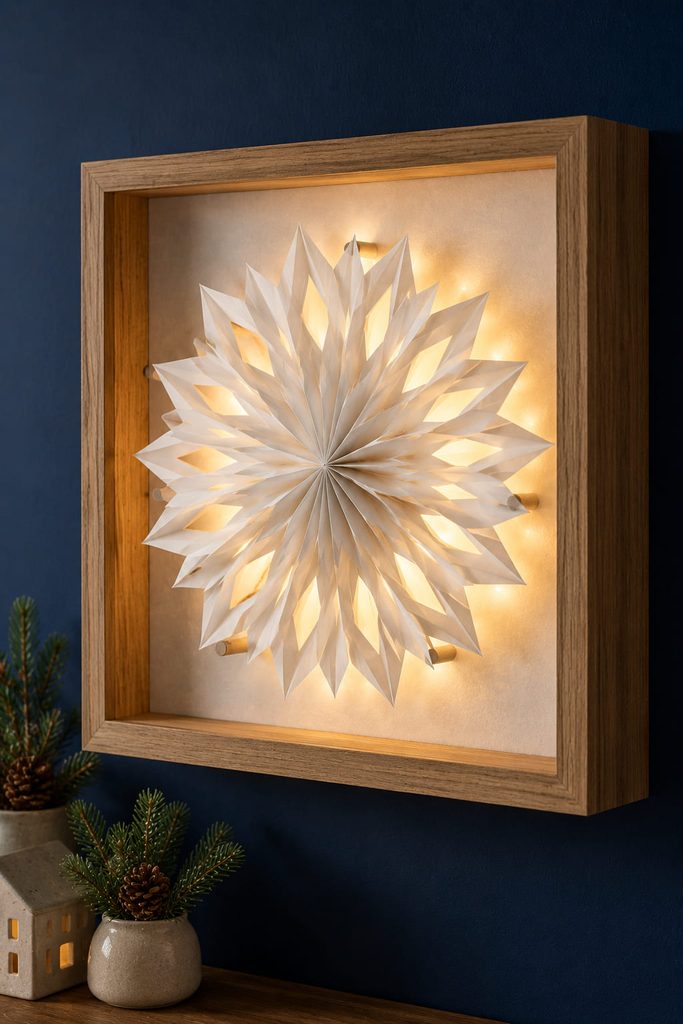
Backlighting makes the cut openings do the visual work, but the snowflake should never be wrapped around a heat-producing light. Build a shallow open-front display box or use a deep frame, place a sheet of vellum or translucent white paper at the back, and mount one opened paper-bag snowflake in front of it with small spacers. A cool-running battery LED strand or puck sits behind the vellum, separated from the paper craft and reachable without dismantling the frame.
The light path needs to stay open. Keep adhesive and spacers near the reinforced center or along hidden outer areas so they do not block the larger cutouts. If the snowflake is kraft brown, a pale vellum layer gives the negative space a warm glow; white bags can take a darker blue-gray backing for more contrast.
Before closing the frame:
- Switch the LED on and check that the brightest point is diffused rather than visible as a hard dot.
- Confirm that the battery pack can be removed from the back or side.
- Make sure the frame stands or hangs securely without the light unit pushing it forward.
- Use only a cool-running LED source; no flame or incandescent bulb belongs inside a paper display.
If the pattern disappears when lit, widen a few openings or move the snowflake farther from the vellum instead of adding brighter light.
16. Snowflake Doorway Curtain With Independent Strands
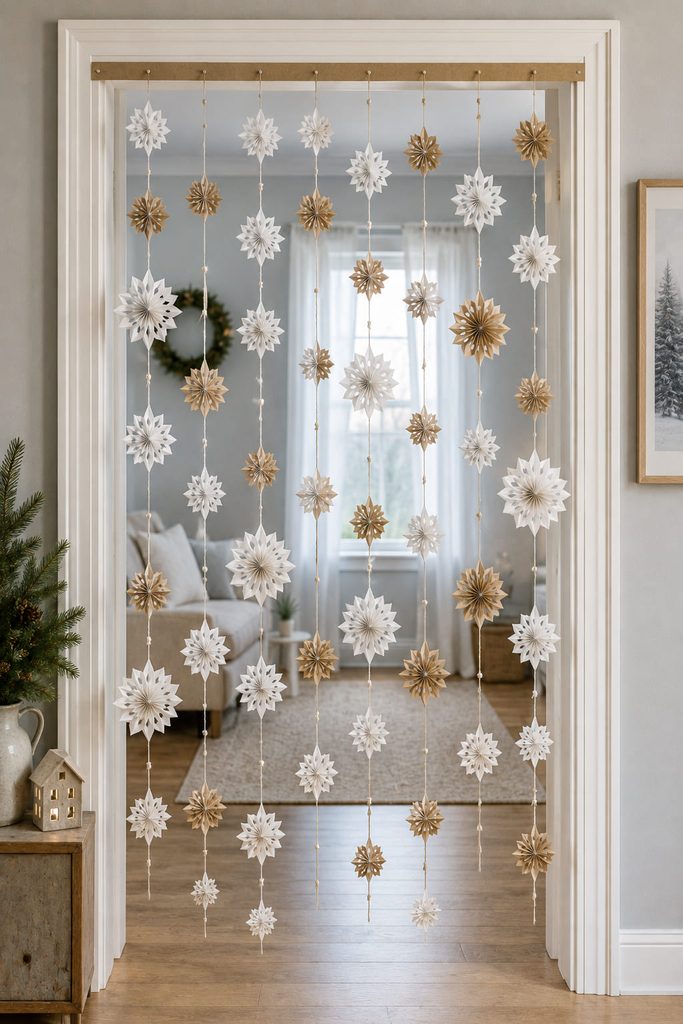
Treat the doorway as a set of independent vertical strands, not one oversized garland. That distinction keeps the opening usable and prevents the paper forms from dragging each other sideways.
- Measure the clear width and decide how many strands can hang without crowding the passage.
- Build each strand with lightweight mini snowflakes and reinforced cord attachments, leaving more space around shoulder height than near the top.
- Fix the strands to a removable header strip or tension rod rather than attaching them directly to the door trim.
- Walk through the opening from both directions and shorten or remove any strand that catches clothing, handles, or the swinging door.
Use this only in a low-traffic opening where paper decor will not be constantly brushed. In a busy hallway, the same strands make more sense against a wall where the snowflakes can move without becoming an obstacle.
17. Snowflake Banister Swag With Clip-On Rosettes
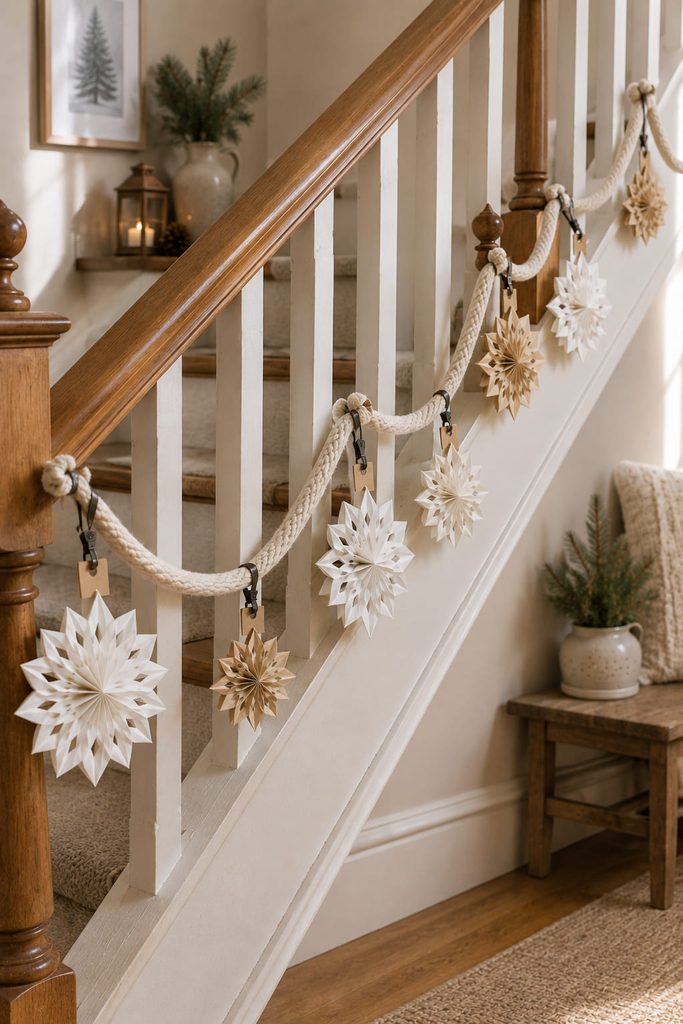
Run the supporting swag first and secure it only at stable points along the banister; tying delicate snowflake points directly to a rail puts the load in the wrong place. Then add paper-bag rosettes with small clips through reinforced center tabs so individual pieces can be moved or replaced without dismantling the whole arrangement.
Let gravity set the curve before spacing the snowflakes. A rosette placed at the bottom of each swag dip becomes a strong visual anchor, while smaller pieces can sit nearer the tie points. Keep the decor on the outside face of the rail so it does not interfere with the handhold or stair path.
18. Freestanding Crossed-Snowflake Centerpiece
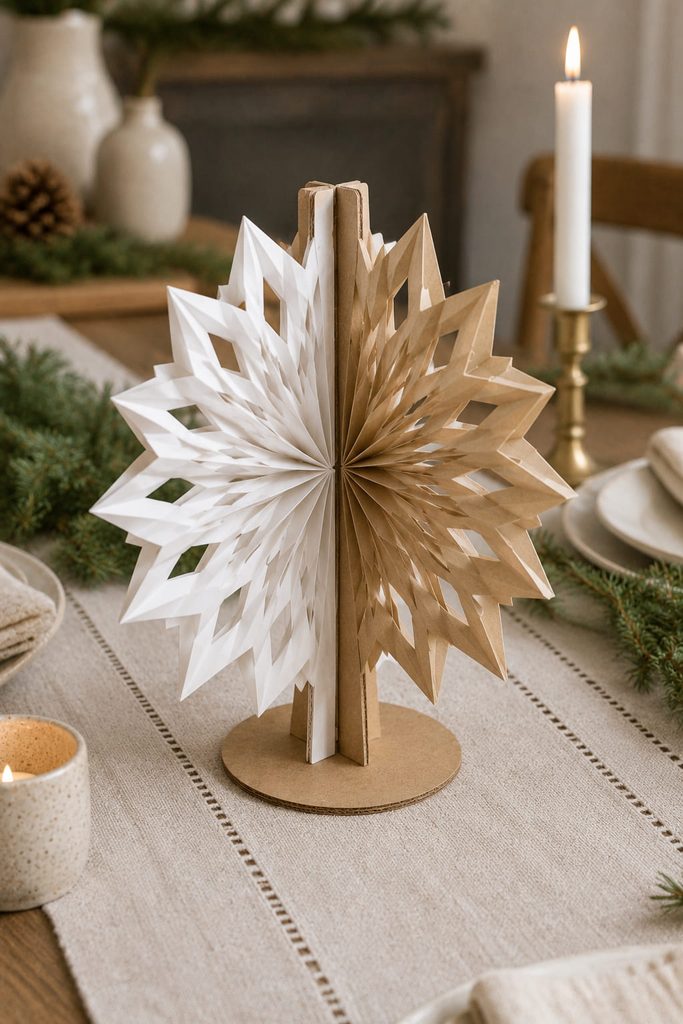
Two shallow snowflake panels can become a tabletop sculpture when they intersect at right angles. This is easier to control with half-rosette fans than with two bulky full circles: mount each fan to a narrow cardstock spine, cut a centered slot halfway down one spine and halfway up the other, then slide the two together.
Useful materials: Small paper bags, sturdy cardstock strips, paper-safe glue, scissors, a ruler, and an optional flat cardstock base disc.
The joint should reach the table before the decorative bag folds do. If the rosette edges touch first, the sculpture will rock. A small base disc glued beneath the crossed spines increases the footprint without showing much from eye level. Turn the finished piece through a quarter rotation; it should still present a snowflake profile instead of collapsing visually into one flat fan.
19. Linked Snowflake Table Runner
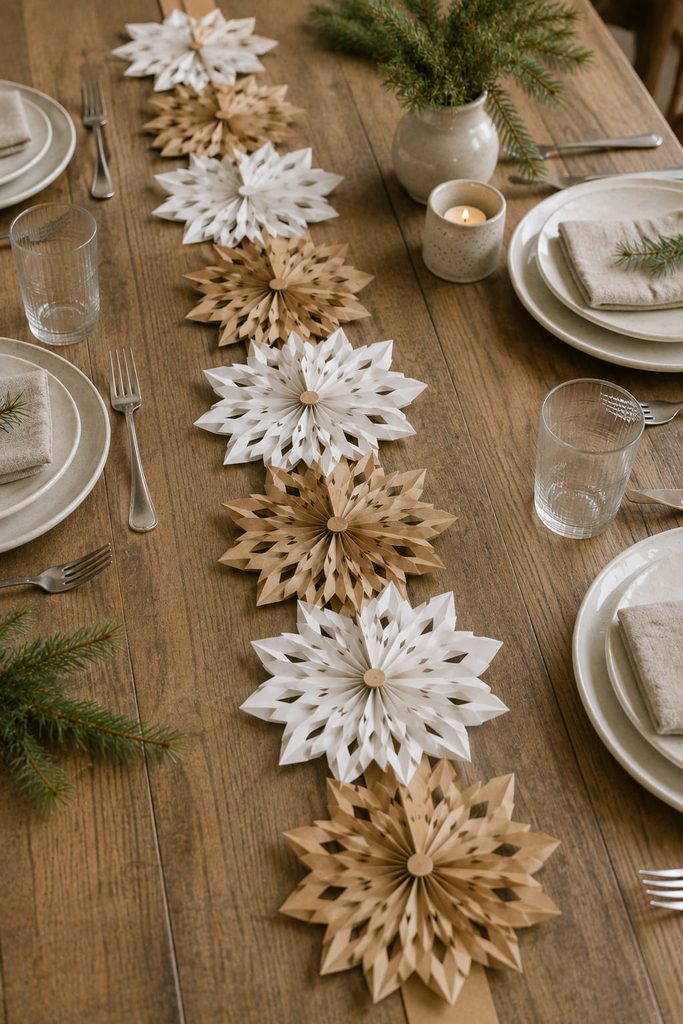
Keep this construction low and anchored because a table runner still has to leave room for dishes. Make a series of flattened mini snowflakes and attach their reinforced centers to a narrow kraft-paper or cardstock strip running down the table. The backing strip does the structural work, so the rosettes can overlap slightly without being glued edge to edge.
Start by setting the plates, serving pieces, or centerpiece that will actually share the table. Then place the snowflakes into the remaining corridor. This reverses the usual decorating order and prevents a beautiful runner from occupying the space needed for food. Alternate large and small forms where the table is open, and switch to smaller pieces near place settings.
For a removable version, use small paper tabs that fold over the backing strip rather than permanent adhesive. The rosettes can then come off and store flat while the strip rolls up.
Clearance check: Slide an empty plate along the table as if serving. If it catches an outer point, reduce the diameter or move that snowflake inward; do not simply bend the point under the plate.
20. Snowflake Place Card Stand
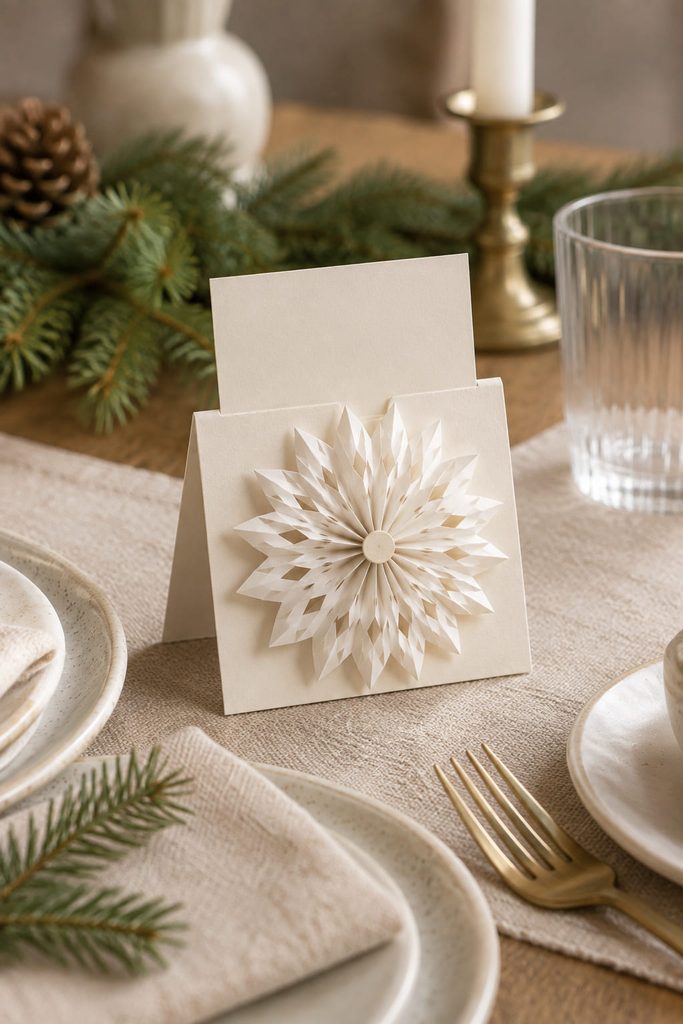
Give the standing job to a separate folded base, then let the mini paper-bag snowflake handle only the visual marker. Make a compact rosette, attach its center to the front face of a wide cardstock tent, and leave a clear area above or beside it for the guest name on a removable card.
Before making a batch, check:
- The tent base is wide enough that the snowflake cannot pull it forward.
- The name remains readable from seated eye level.
- The rosette stays inside the place setting footprint.
- The card can be removed without tugging on the paper-bag layers.
Keeping the name card separate also means the snowflake stands can be reused for another dinner.
21. Modular Snowflake Photo Backdrop
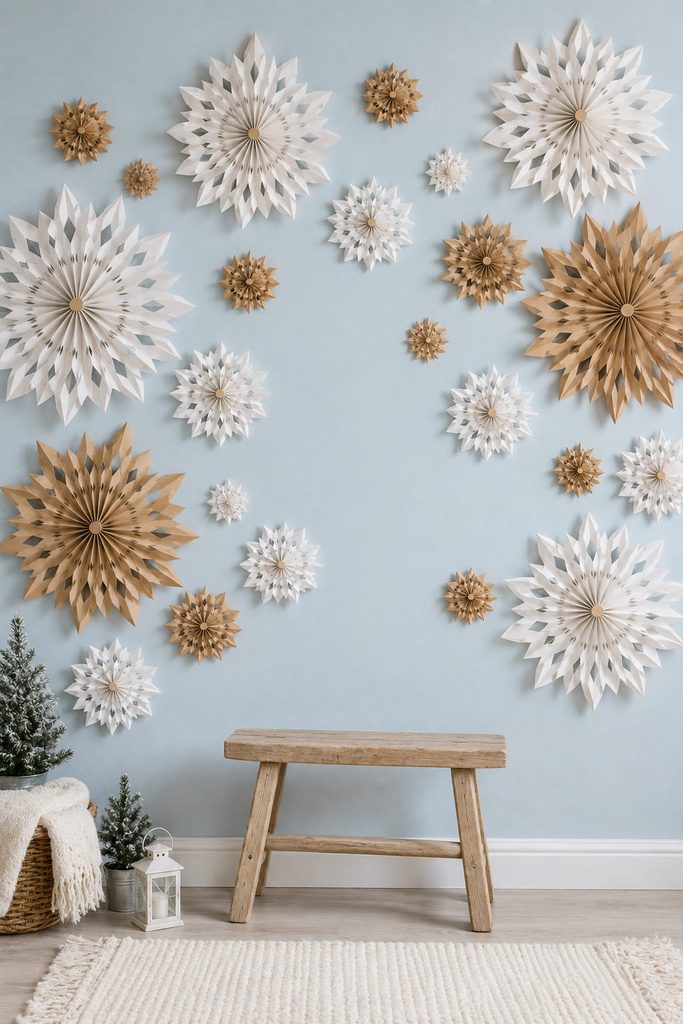
For a party or winter portrait corner, treat each snowflake as a module rather than trying to build one giant connected sheet. Make several diameters, reinforce their centers, and mount them individually to a temporary backing or wall-safe hanging system with deliberate gaps of visible background between shapes. The open wall color becomes part of the composition and keeps faces from competing with a dense field of paper.
Build the cluster from the camera frame outward: place the largest snowflakes near the edges and smaller ones around head height, where they are less likely to disappear behind people. This approach also makes damaged pieces replaceable without taking down the whole backdrop.
22. Kinetic Cross-Snowflake Spinner
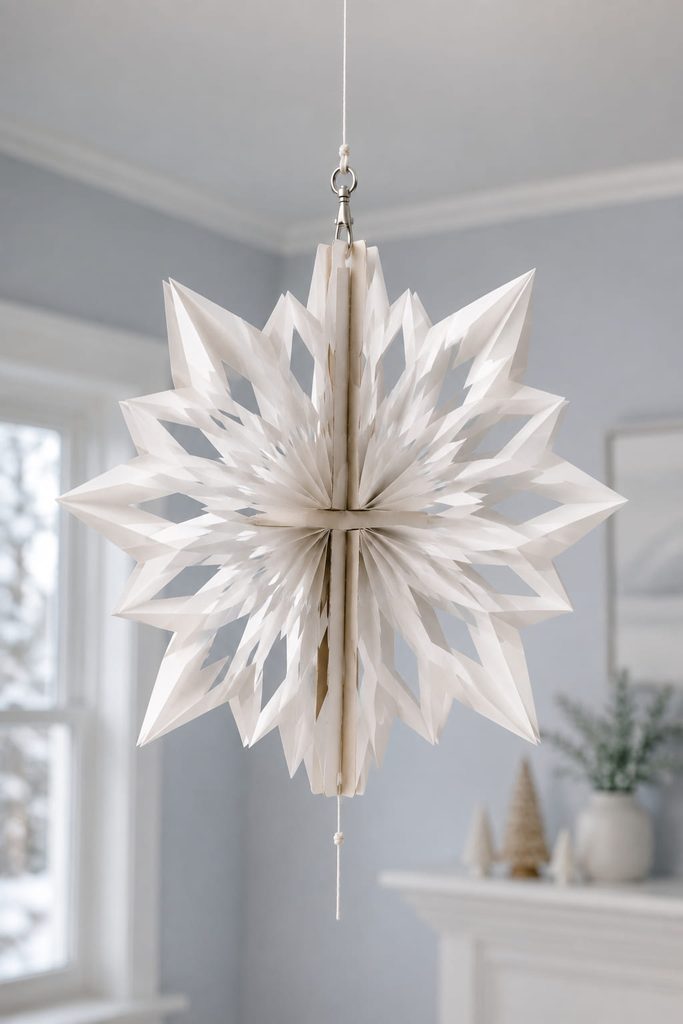
Movement calls for a different construction than a flat hanging rosette. Make two lightweight snowflakes of the same diameter, give each one a reinforced center strip, then slot the strips halfway through so the two rosettes cross at roughly 90 degrees. The result has visible depth from several angles and catches small air currents more readily than one flat disk.
For the simplest version, hang the crossed form from a single swivel or smooth loop above the intersection and add a short thread tail below as a visual plumb line. If the spinner consistently tilts, one half is carrying more paper; trim a little mass from the heavier side or shift the hanging loop by a few millimeters rather than adding weight to the opposite side.
A static crossed snowflake can skip the swivel and hang from ordinary cord. The kinetic version needs extra clearance: keep it away from walls, branches, and other decorations so a full turn does not snag an outer point. That motion is the reason to choose this project over a conventional hanging snowflake.
How To Get Cleaner Paper Bag Snowflakes
The cut pattern should respect the glue spine. Large side openings create the negative space that gives the finished rosette its character, but removing too much paper around the center or closed base weakens the area carrying the fan. Keep the bags aligned in the same direction, leave the side edges free of glue, and test-open the stack before closing it permanently. If the two ends will not meet without strain, change the fullness of the stack rather than squeezing the rosette into a circle.
Bag count is not universal. Published tutorials use different counts for different bag formats and desired fullness while retaining the same fan-and-glue principle. Treat the opening test as the deciding criterion instead of copying a number intended for a different bag size.
Choose The Function Before The Cut Pattern
If you are making your first version, start with the window snowflake because it makes the opening mechanics easy to see. Once that feels predictable, choose the next project by what the finished craft has to do: fold flat, carry a hanging load, stand, move, frame light, or behave as one module in a larger installation. That functional choice should decide the reinforcement and attachment method before you chase a more intricate cut pattern.
For more seasonal paper formats—including ornaments, garlands, window decorations, houses, and layered projects—continue with Christmas Paper Crafts, DIY Ideas & SVG Projects.








