
This post contains affiliate links. As an Amazon Associate I earn from qualifying purchases, at no extra cost to you. Thank you for supporting Diynify!
Old printed pages bring instant patina to handmade holiday decor, but the most interesting book page ornaments do more than show off type. Folds, woven strips, rolled beads, cut spirals, and honeycomb glue patterns all change how the same lightweight paper catches light and hangs on a tree.
Most of these projects can be made with discarded or damaged book pages, scissors, a ruler, paper-safe glue, thread or narrow ribbon, and a little cardstock for reinforcement. A few need a scoring tool, quilling tool, hole punch, or thin chipboard. If you want the look of an old page without cutting a valued book, use a scan or photocopy of suitable text instead.

1. Folded Diamond Drop with Antique Text
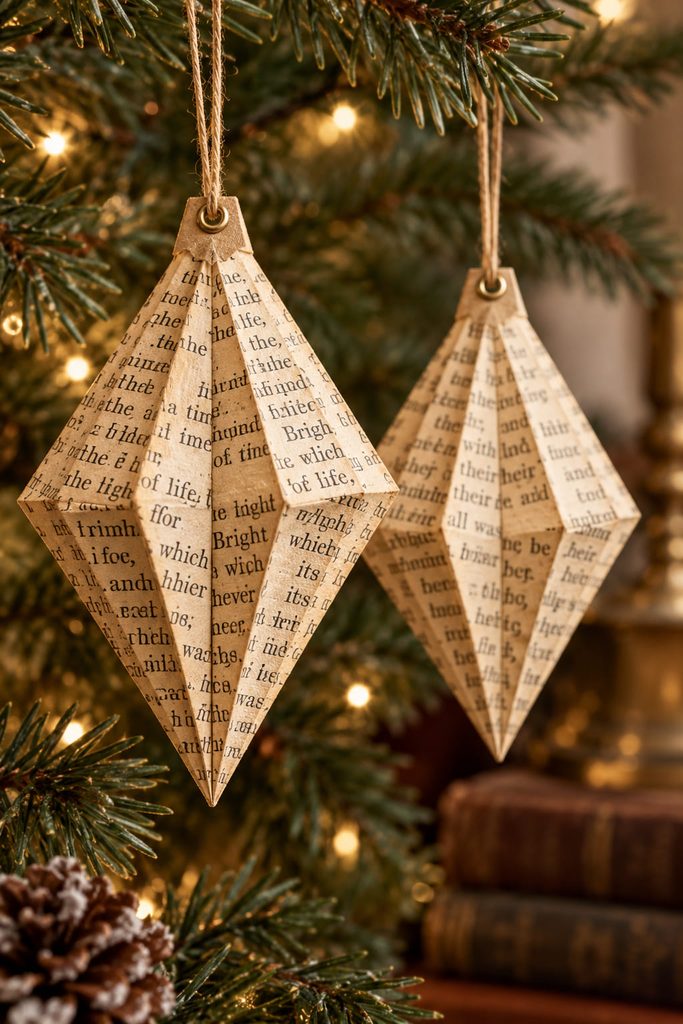
A square of printed paper becomes much more sculptural once crisp diagonal and center creases push it into a faceted diamond. Use lightweight page paper for the folded shell, then hide a small cardstock reinforcement inside the top point before piercing the hanger; the extra layer keeps thread from slowly tearing through the old paper. The best visual effect comes from letting the type run across the facets rather than centering a single word. Hang several at slightly different heights and the changing planes will catch tree lights without glitter, foil, or added surface decoration.
2. Slot-Fit Book-Page Bird with Perpendicular Wings

For a recognizable silhouette that stays almost weightless, build the bird from two crossed planes instead of a stuffed or layered body. A cardstock-backed page gives the body enough stiffness to stay straight, while a second folded piece can form the wings and lock through a narrow slot.
Cut the side-profile body first and reinforce the hanger area; next, fold a wing piece at its center, open a short slot across the body, and slide the folded wing through until both sides project evenly. Add the hanging thread before final gluing so you can see whether the bird rests close to level. If the tail drops sharply, move the hanger a few millimeters toward the head rather than adding weight. That small change corrects balance without making the paper ornament heavier.

3. Woven Heart Pocket for a Tiny Note

The vintage appeal of a woven heart comes from structure, not from a printed heart pasted onto a backing. Cut two long U-shaped pieces, fold each one in half, and slit the rounded ends into equal bands while leaving the fold intact. During weaving, each band must pass alternately through and around the opposing bands; that true over-under path creates a hollow interior instead of a flat checkerboard.
Work from one side to the other, keeping the bands loose enough to slide but snug enough that the curved top stays smooth. Once the last row is woven, open the top gently with a fingertip and add a narrow hanging loop between the back layers. A tiny written note, paper sprig, or very lightweight flat keepsake can slip inside without changing the silhouette.
Weave Check: If you cannot open the heart into a pocket, at least one band was woven only over the surface. Back up to the first locked row and restore the alternating through-and-around path before trimming anything.
4. Cameo Window Ornament with a Script Backdrop

When typography gets visually busy at ornament scale, give the printed page a supporting job. Sandwich a book-page rectangle between two thin chipboard or heavy-cardstock frames with an oval opening, then place one strong silhouette in the center of that window.
There are two useful routes. A dark cut-paper profile creates the clearest Victorian cameo effect from across the room; a pale botanical silhouette feels softer but needs a darker page or backing for separation. Keep the frame edge wider than the hanger hole so the load is carried by the board, not by the book paper itself. The result reads as a tiny framed object rather than another flat page cutout.
5. Quilled Filigree Snowflake from Narrow Page Strips

Quilling works especially well with book pages because the printed marks break into fine irregular lines once the paper is cut into narrow strips. The challenge is consistency: mixed coil tension can make a snowflake look lopsided even when every arm has the same number of pieces.
If one arm looks shorter, compare the diameter of the loose coils before gluing; a tighter coil is usually the cause. If points twist sideways, pinch the marquise or teardrop shapes after the coils have relaxed rather than while they are still under tension. A weak center needs a small closed coil or cardstock disk, while a top point that distorts under the hanger is better supported by tying through two adjacent units or adding a tiny reinforced loop behind the center.
Leave real negative space between the coils. Filling every gap with extra scrolls hides the filigree quality that makes this ornament different from a solid paper snowflake.
6. Victorian Cornucopia Cone for a Dried Sprig

A narrow cone has the right old-fashioned silhouette for a cornucopia-style tree ornament, and the construction is simple enough to let the printed paper stay visible. Roll a book-page sector around a light cardstock liner, overlap the seam, and reinforce the upper rim with a narrow strip so the hanging holes do not split. A small folded tab across the bottom closes the point and prevents a fine stem from slipping through.
Treat the ornament as a holder, not a miniature vase. A single dried grass stem, paper flower, or feather-light faux sprig is enough; bulky greenery will pull the cone forward and can tear the rim. Put the two hanger holes opposite each other and slightly below the reinforced edge so the load is shared. The cone should hang upright before the decorative insert goes in.

7. Spiral-Cut Icicle That Turns in Air

Cutting a long spiral from a tapered book-page shape creates movement with almost no added material. The trick is preserving enough width near the top: a spiral that begins too close to the hanging hole can tear where all the weight is concentrated.
Start with a narrow teardrop or elongated oval backed only at its top inch with thin cardstock. Cut a continuous spiral toward the center, stop before the final loop becomes fragile, and let gravity pull the cut shape open. A tiny paper bead at the bottom can add visual punctuation, but it should not be heavy enough to stretch the spiral.

Clearance Check: Hang the icicle where it can turn without brushing a branch, wall, or neighboring ornament. Its charm comes from the shifting printed curve, so even a little free space matters more than extra embellishment.
8. Rolled Paper-Bead Teardrop Ornament

Roll narrow triangular page strips around a smooth skewer or quilling needle and the text compresses into striped, bead-like bands. For a tapered drop, mix several bead shapes rather than making every roll identical.
Useful pieces: one wide central oval bead, two or three smaller tapered beads, a tiny kraft-paper spacer, strong thread, and a small top reinforcement disk.
Roll each triangle from its wide end toward the point, secure only the final tip, and let the bead dry before sliding it off the tool. Stack the largest bead low in the arrangement so the ornament has a clear visual center instead of reading as a loose string of paper tubes.
9. Fringed Book-Page Tassel Finial

Once the fringe is cut, old paper takes on a soft textile-like edge without pretending it is fabric. Cut parallel lines into a long page strip while leaving an uncut band along one side, then wrap that band around a narrow paper core; the uncut band becomes the structural collar and the loose cuts become the tassel. Before rolling, gently curve the fringe over a ruler edge or round tool so the strips separate instead of clumping into a cylinder. Cap the top with a small cone or scalloped collar cut from muted cardstock, trapping the hanging loop inside the cap rather than gluing it to the fragile fringe. Restrained metallic ink belongs on the collar, not the fringe, because the printed tassel already supplies plenty of visual movement.
10. Fold-Flat Victorian House Ornament

To make the house dimensional on display but flat in storage, build a shallow four-wall sleeve with scored corner folds, a separate roof bridge, and one narrow glue tab. The joints need to let the walls collapse inward after the roof is released.
Cut the wall strip from lightweight cardstock faced with book paper rather than from unreinforced pages. Score all vertical corners first, cut windows only after the wall strip is stable, and keep the roof as a separate folded piece that slips over two small tabs at the gable ends. A hanging loop can pass through a reinforced roof ridge.
For the fold-flat action:
- Open the wall sleeve and square the corners.
- Slide the roof over the gable tabs without gluing it permanently.
- Hang the house and confirm the roof cannot lift off under its own weight.
- For storage, remove the roof, press opposite wall corners inward, and flatten the sleeve along its score lines.
Closed-State Test: Nothing should collide when the walls flatten. If a window frame, door layer, or internal brace crosses a fold line, move that detail before final assembly rather than forcing the paper to crease around it.
11. Honeycomb Book-Page Bauble with Controlled Glue Lines
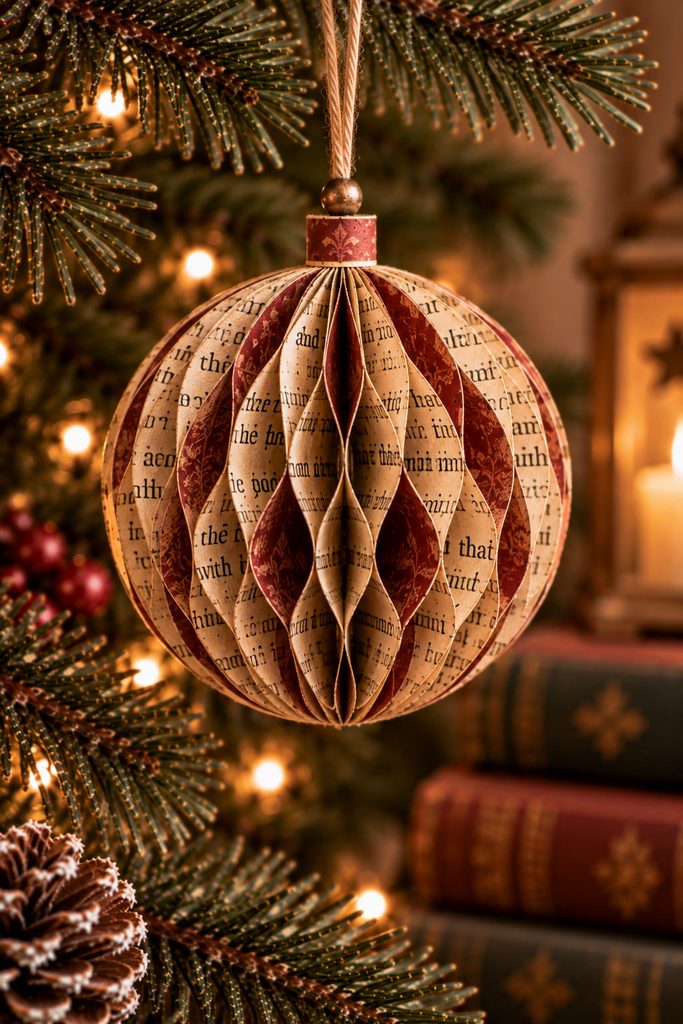
Why do some honeycomb ornaments open into airy spheres while others stay stiff? The difference is the glue map. If every layer is glued in the same places, the ornament becomes a laminated pad; alternating glue lines is what lets the stack open into a cellular sphere.
Cut a set of matching half-circles or full circles from lightweight page paper using a template. Fold each piece along the center line, then stack the halves in registration. On one layer, place tiny glue dots near the outer edge and center; on the next, shift the glue to the spaces between those points. Continue alternating that pattern while keeping adhesive away from the outermost rim. Once the stack is dry, open it slowly into a sphere and join the first and last faces around a reinforced hanging loop.
If the bauble opens unevenly, do not pull harder. Close it, locate the section that refuses to spread, and check for a glue dot that crossed into the wrong zone or squeezed to the edge. Carefully separating that local bond usually restores the cell pattern without rebuilding the whole ornament.
Glue-Line Map: Mark a scrap template with two alternating dot patterns before assembly. That simple guide is more reliable than trying to remember the sequence across many thin layers.
12. Miniature Book Ornament with a Folded Spine

Turn the printed page back into a tiny book by folding a narrow strip into a compact accordion page block. Keep the folds square so the fore edge stays even, then wrap the block with a slightly taller kraft or colored cardstock cover, leaving a narrow hinge gap at the spine so the covers can close without crushing the accordion.
Trap the hanging loop beneath the cover at the top of the spine, where the cardstock can carry the load. A small blank label, a clipped botanical scrap, or a thin border can decorate the cover, but avoid adding readable pseudo-titles unless you are intentionally making a specific named keepsake. Hung from the tree, the tiny volume reads clearly from its cover silhouette while the page edges reveal what it is made from.
Choosing Book Page Ornaments by Construction
Choose the mechanism before the motif. Folded diamonds and spiral icicles are good when you want light shapes with strong shadows; quilling and honeycomb work better when fine structure is the main attraction. The woven heart and cornucopia add a small usable cavity, while the fold-flat house earns its complexity by storing nearly flat.
Old pages also vary more than new craft paper. Brittle sheets are better for flat frames, rolled beads, or reinforced designs than for tight folds. Supple pages handle weaving, spirals, and honeycomb expansion more gracefully. When the paper feels historically or personally valuable, make a scan or photocopy and preserve the original.
Let the Construction Create the Vintage Character
The strongest vintage effect comes from letting age, typography, and paper mechanics work together rather than covering every surface with antique-style embellishments. Start with the folded diamond, tassel, or rolled beads if you want a compact project; choose the woven heart, fold-flat house, or honeycomb bauble when the structure itself is the point.
For a broader tree-decor collection built around other paper techniques, continue with 16 Festive Paper Christmas Ornaments for a Handmade Tree.