This post contains affiliate links. As an Amazon Associate I earn from qualifying purchases, at no extra cost to you. Thank you for supporting Diynify!
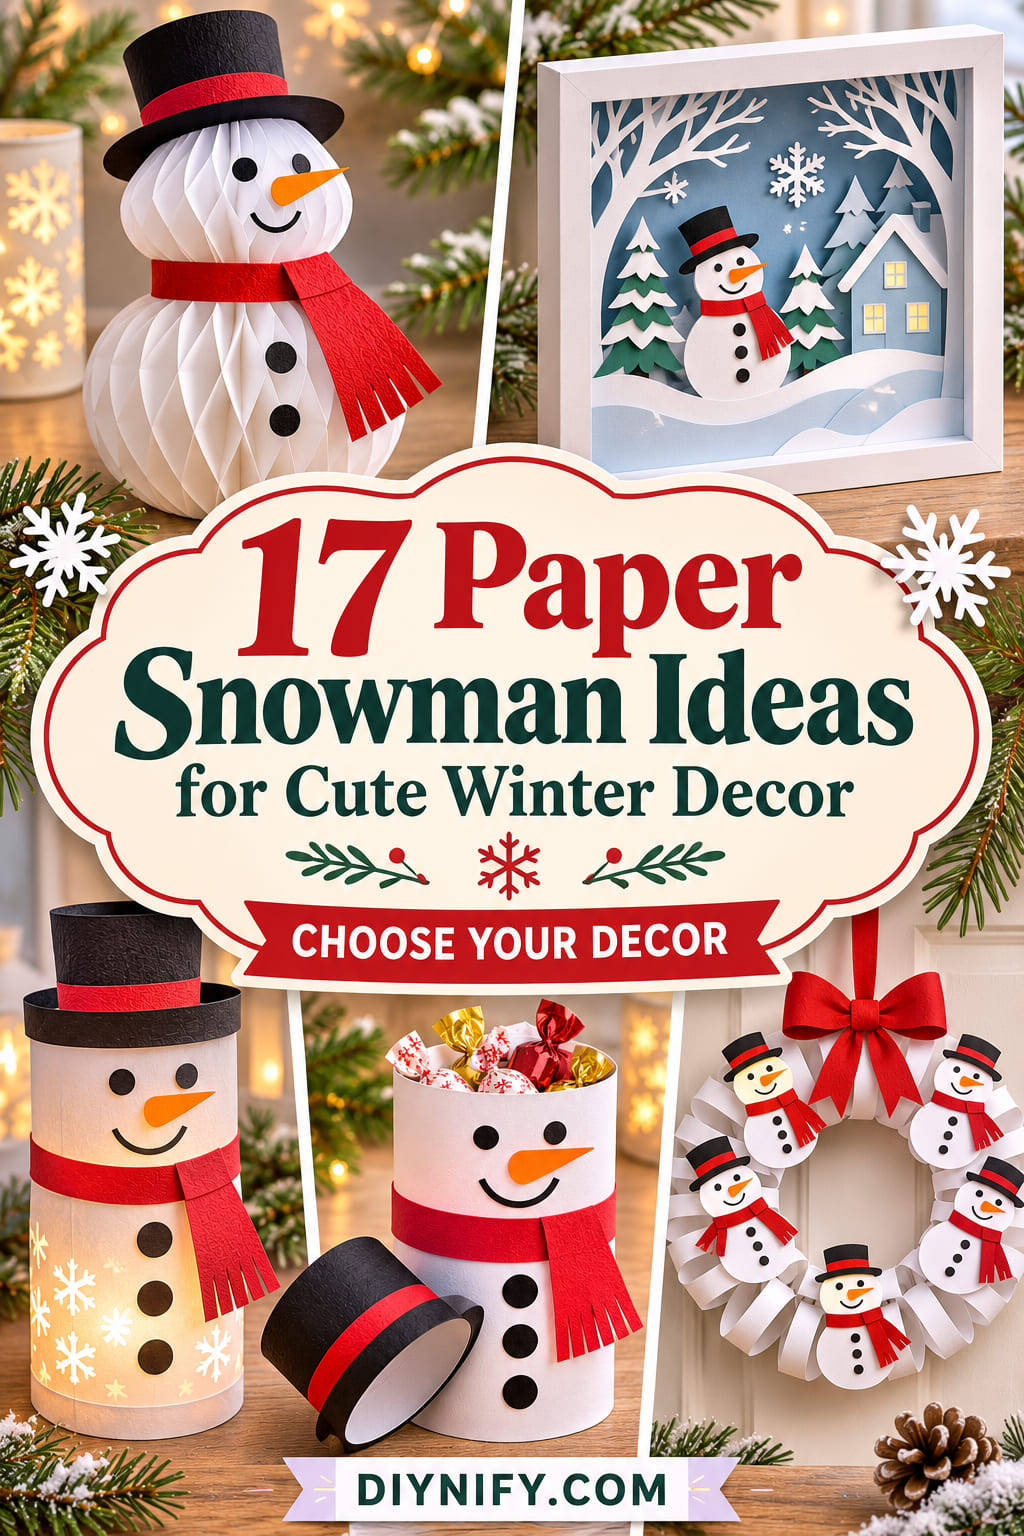
Paper snowman ideas can brighten a room long after the holiday ornaments have been packed away. Here, the focus is on actual paper construction: honeycomb folds, curved strips, quilling, translucent panels, and small decorations that hang or stand without relying on paper plates. The projects range from quick flat displays to more involved lanterns and containers.
Start with paper or cardstock, scissors, a ruler, and paper-safe glue. Thin sheets suit pleats and tight curves; sturdier cardstock is better for bases, tabs, and freestanding pieces. Some projects also call for vellum, tissue paper, a frame, thread, paper fasteners, clear adhesive film, or a battery-powered LED. Choose a spot first, then pick a construction that behaves well there.
1. Honeycomb Paper Snowman For A Winter Shelf
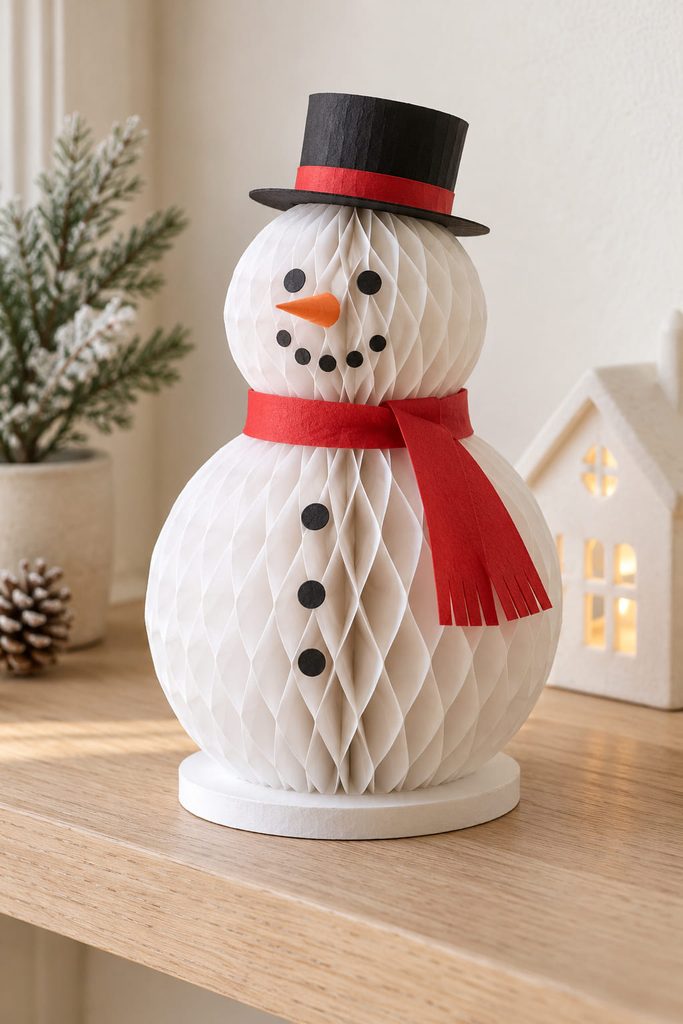
The appealing thing about honeycomb paper is how much volume can come from a stack that starts almost flat. Make two rounded white sections by folding matching paper shapes in half, stacking them, and alternating narrow glue lines between layers. When each stack opens into a honeycomb ball, one becomes the larger body and the other the head. They should be attached through a small cardstock neck collar rather than relying on two tiny contact points.

For shelf display, mount the body on a broad paper-covered disk and keep the hat light. The open cells throw soft shadows across the white surface, so a plain scarf and small face details are enough. If the piece will be stored between winters, leave a discreet removable closure at the back so the sections can fold down again.
2. Pleated Snowman Window Rosettes
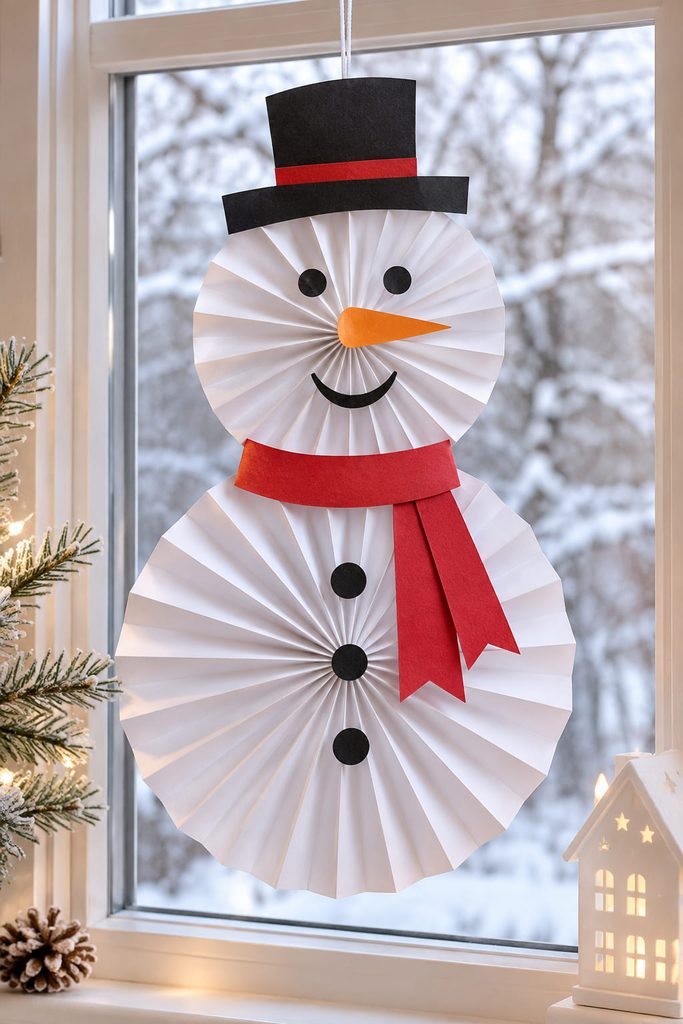
Two white paper fans of different sizes form an unusually graphic snowman when viewed against winter daylight. The pleats provide the texture; a dark hat and orange carrot nose make the silhouette readable from across the room. Use lightweight paper, as thick cardstock resists the tight folds required for neat rosettes.
- Accordion-fold two long strips, one wider than the other.
- Join each strip into a loop and bring its inside edges together to form a flat rosette.
- Secure the centers with small backing circles and connect the rosettes using a narrow rear strip.
- Attach the hanging thread to that rear strip, not to a fragile pleat.
A little space between the rosettes keeps the neck from looking crushed. Hang the piece in front of the glass rather than pinning its folds flat.
3. Quilled Snowman Portrait In A Deep Frame
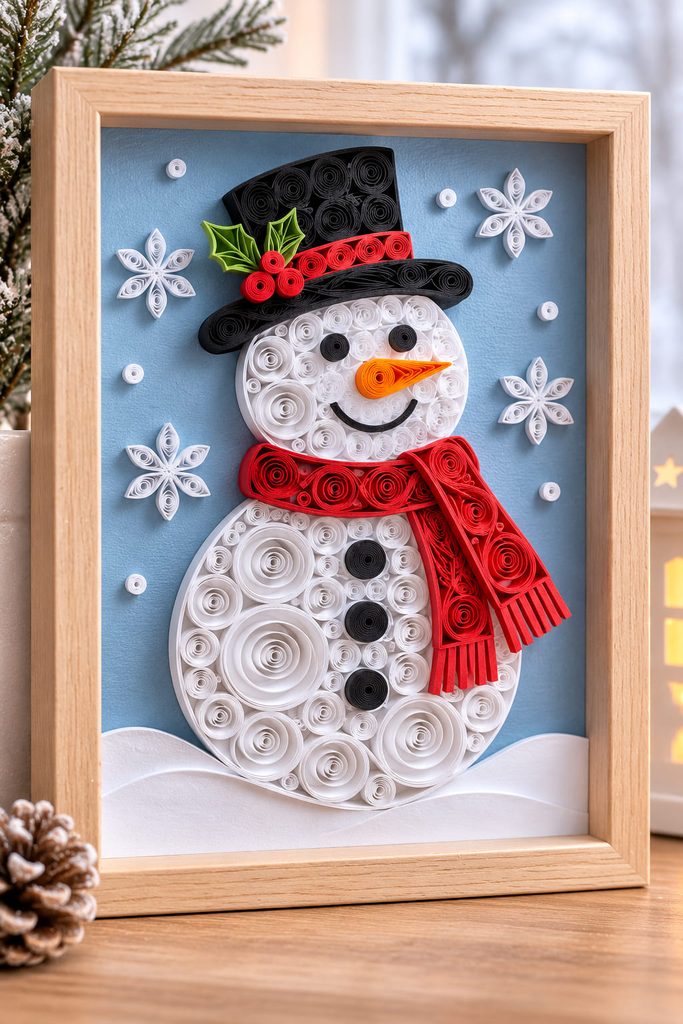
Tiny coils can suggest packed snow without filling an entire picture with white paper. Roll narrow strips into loose spirals, pinch a few into teardrops, and arrange the pieces inside a snowman outline on contrasting blue backing. Dense circles near the center and open coils near the outside give the body a rounded look. Glue only the contact edges of the coils so the strips retain their shapes. A deep frame is worth using here: ordinary glass pressed against the quilling will flatten the raised curls. Leave a little negative space around the scarf and hat, where a cluster of tight coils would obscure the familiar outline. This is a patient, close-view piece for a desk or gallery wall rather than a decoration meant to be seen from the street.
4. Stacked Paper Cone Snowman For The Mantel
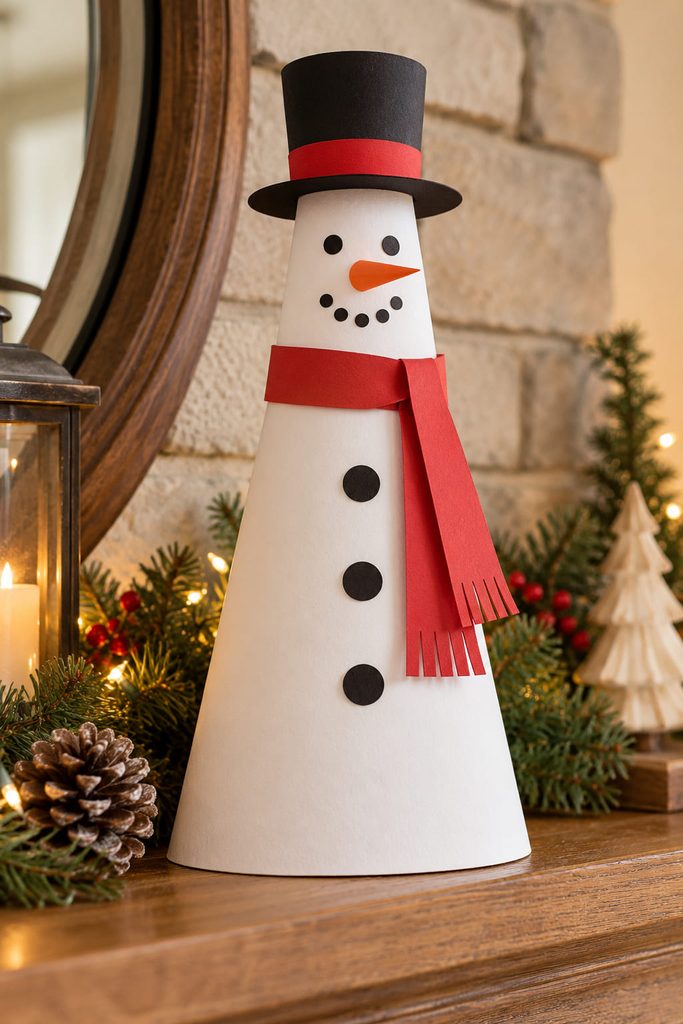
Build a tall figure from two cones of firm white cardstock. Make the lower cone broad and the upper one shorter, trim both bottoms level, and use a circular cardstock collar inside the join. A folded scarf hides the join.
If it leans: Check the footprint before moving the face or hat. A narrow base, uneven lower edge, or heavy top hat shifts the weight outside the supporting circle. Widen the lower cone or add a second cardstock disk beneath it. Keep the cones hollow and free of heavy filler; they need their geometry, not extra weight, to stand neatly.

5. Layered Snowman Shadow Box With A Snowy Path
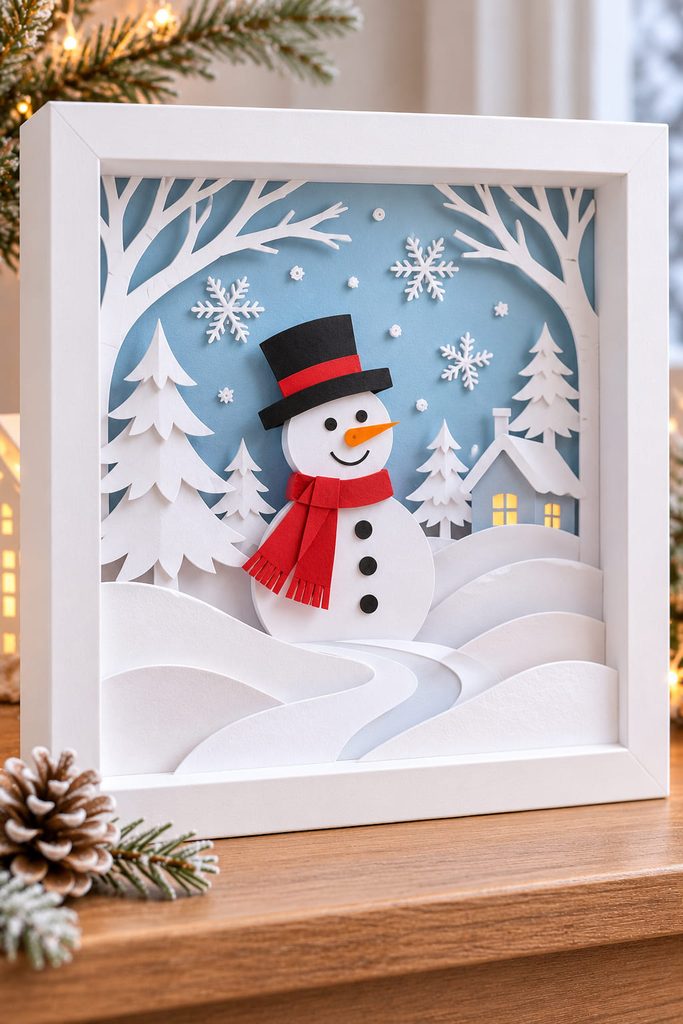
Behind the glass, separated paper layers turn a white figure into a quiet winter landscape. Use a pale background, a snowman silhouette in the middle distance, and separate paper snowbanks in front. Trees or a roofline belong behind the figure. Those positions matter: if every cutout sits on the same plane, the scene loses its sense of depth no matter how detailed the edges are.
Build the layers from back to front with narrow cardstock spacer strips hidden behind solid areas. Cut the front snowbank low enough to leave the snowman’s face visible. In a small frame, fewer large openings are usually clearer than lots of tiny snowflakes that merge into one busy pattern.
Before closing the frame, set it upright and look from the side. Check that no tree bends into the next layer and that the glazing has clearance over the tallest detail. If the foreground casts too strong a shadow on the face, reduce spacer depth there or move the snowman forward. This project is especially useful when you want a winter decoration that can stay in place all season.
6. Vellum Snowman Lantern Sleeve With A Cool LED
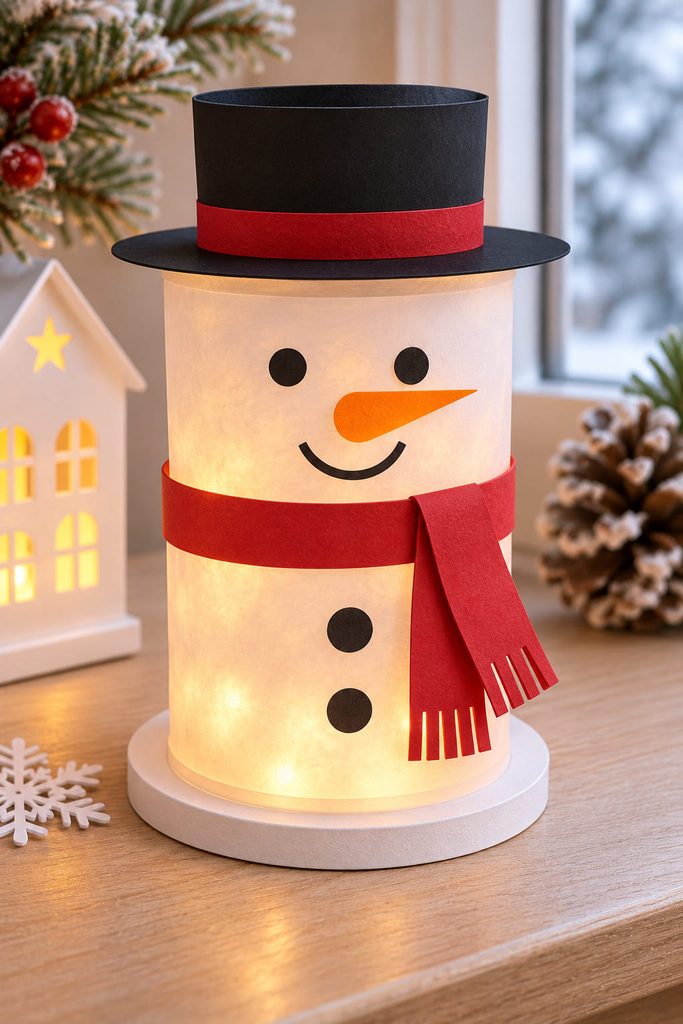
Soft light changes the character of a paper snowman more than extra embellishment does. A cylindrical vellum sleeve can carry a simple snowman face and a dark cardstock hat while letting a battery-powered LED glow through the body. White vellum diffuses the light; opaque paper accents keep the expression visible even when the LED is off.
The sleeve needs an actual support and an opening for access:
- Form a vellum cylinder around two cardstock rings, leaving the top open.
- Glue the lower ring to a flat paper-covered base that sits outside the LED’s footprint.
- Add a removable hat-shaped top ring or cap, with a clear opening for the light.
- Place a cool-running battery LED on the base and lower the sleeve around it.
Light safety: Never use a candle, incandescent bulb, or hot light near paper. Do not seal the light inside a glued container; the switch and battery compartment must remain accessible.
7. Curved-Strip Snowman Tree Ornament
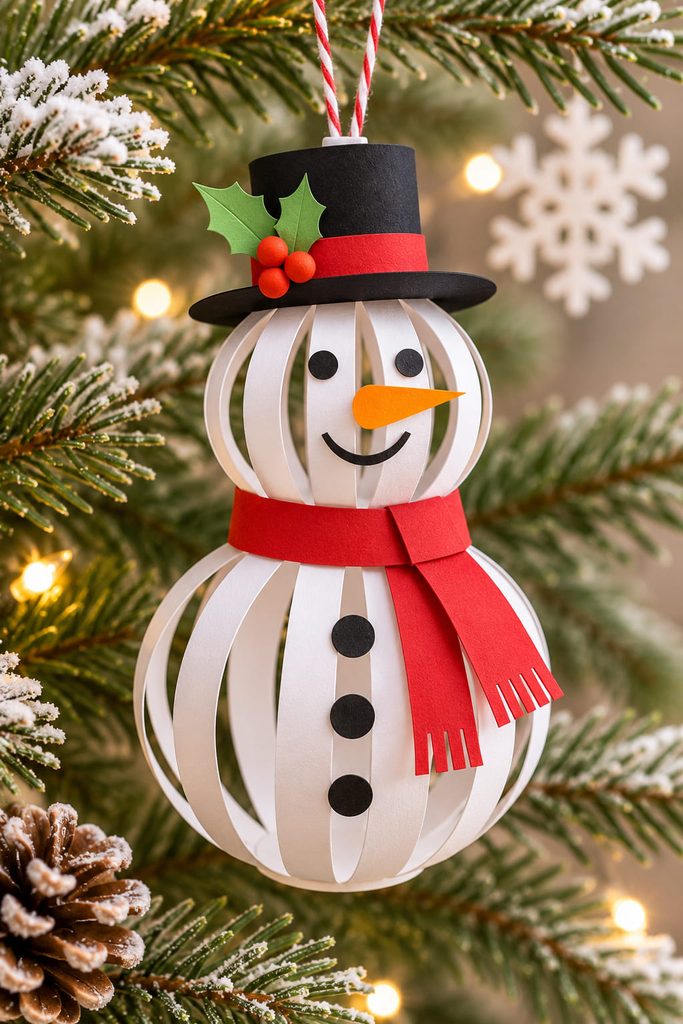
Instead of cutting solid circles, give the snowman two airy globes made from arched paper strips. Each globe needs small cardstock end disks: attach several equal strips around one disk, bend them outward, then secure their opposite ends to a matching disk. Join a small globe above a larger one with a short paper connector. The gaps between strips make the ornament light enough to hang, while the curved profiles still suggest a round body.

Before adding the face, check three things:
- The hanging loop passes through a reinforced upper disk rather than a single strip.
- The globes have enough space between them for a scarf without flattening the top arches.
- Both strip sets are evenly spaced, so the ornament hangs with its head over its body.
Use a few bold paper details; tiny buttons tend to disappear between the open ribs.
8. Woven Paper Snowman Wall Hanging
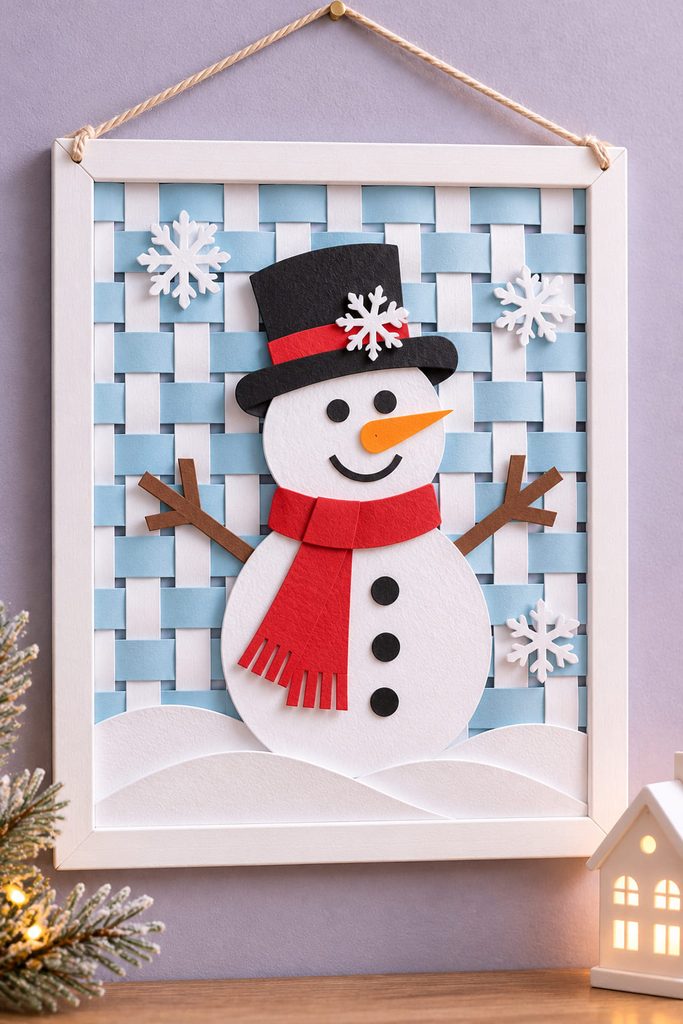
White paper strips crossed with pale blue ones give this winter wall art the rhythm of woven fabric. Start with a cardstock window frame and make a shallow grid of white vertical paper strips across the opening. Weave pale blue strips horizontally over and under the white ones, then alternate the path on each new row. A separate white snowman silhouette mounted slightly above the weaving creates a crisp focal point against the patterned field.
The construction order prevents the panel from sagging:
- Cut the frame with a generous solid border and reinforce the corners.
- Fasten the vertical strips at both ends, keeping them parallel but not taut enough to curl the frame.
- Weave the horizontal strips through, alternating over-under at each crossing.
- Secure the loose ends behind the frame and mount the snowman on a few small paper spacers.
Weaving check: If two consecutive rows follow the same over-under path, the grid makes long floats instead of a stable interlock. Reverse the next row before gluing it down. A hanging cord attached to both upper corners keeps the panel level.
9. Slot-Together Snowman Table Figures
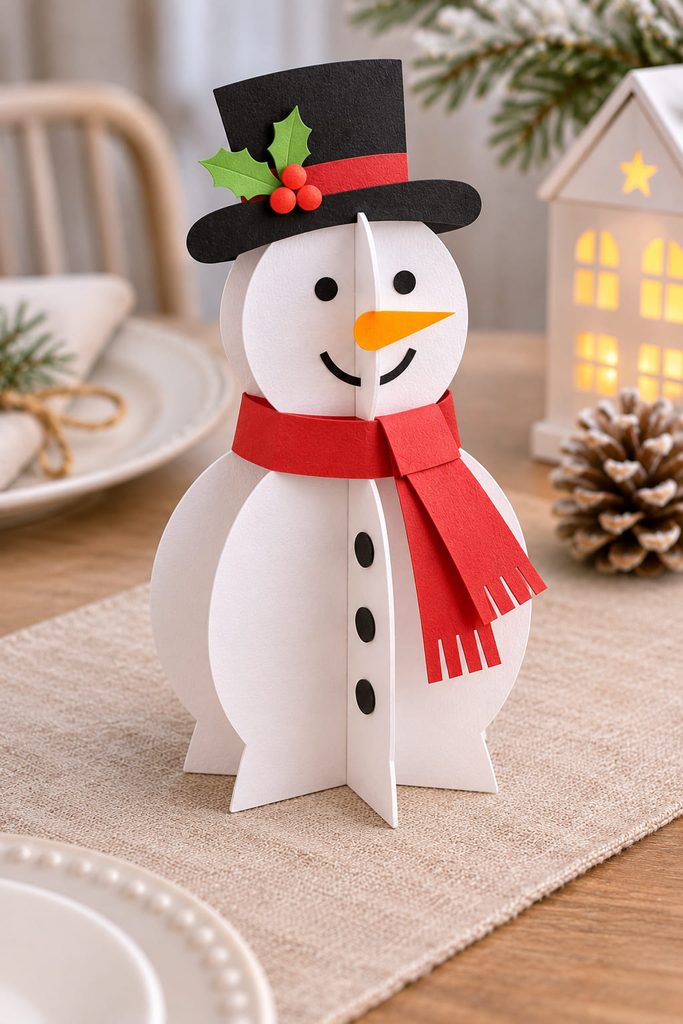
Table decorations have to survive a little movement without demanding a separate stand. Cut two matching snowman profiles from sturdy cardstock, then cut a centered slot halfway down one and halfway up the other. Slide the profiles together at right angles to create four feet around a shared center. That crossed footprint is why the snowman can stand without glue.
Make a test version from scrap cardstock first. Slots that are narrower than the paper thickness buckle the profiles; slots that are much wider leave the joint loose. Keep scarves and hats within the silhouette so they do not block the crossing cuts. The finished figures can sit beside place settings or repeat along a long table, and they pull apart for flat storage when the meal is over.

10. Mini Snowman Cluster Wreath From Paper Loops
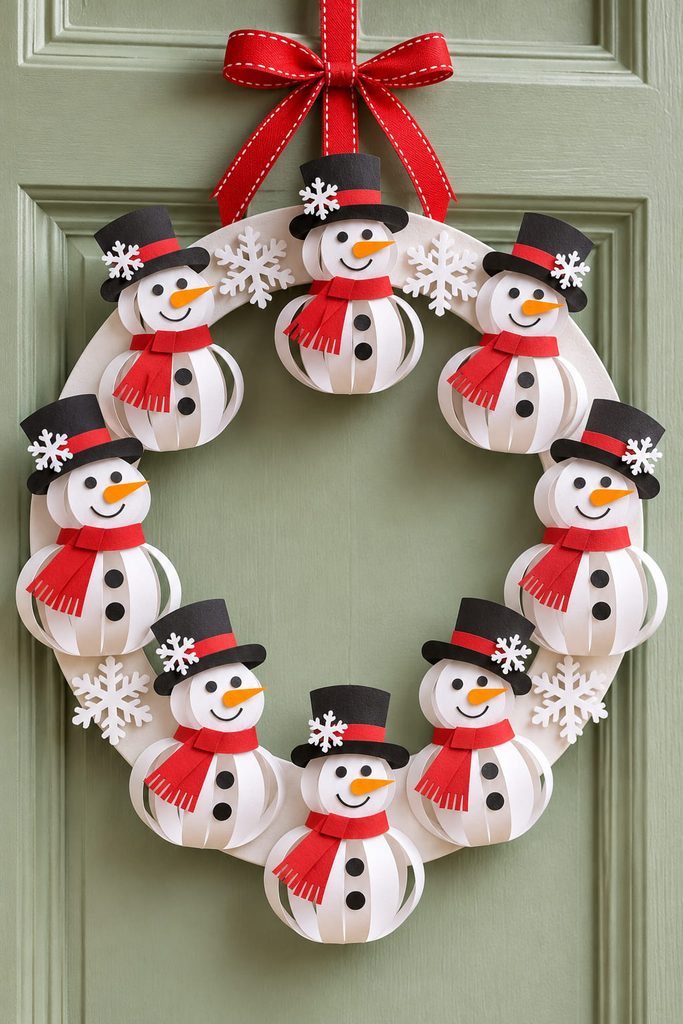
Rather than covering a door ring with one large snowman face, arrange several small three-dimensional snowmen around a flat cardstock hoop. Each miniature figure can be made with two glued paper loops, a small scarf band, and a simple dark hat. Attach the loops at their rear seams to the hoop so their round fronts project into the room.
There are two sensible arrangements. A full-circle wreath reads as a repeating winter pattern and needs evenly spaced figures around the ring. An off-center cluster leaves more of the hoop visible and works better if you want one playful focal point. Either way, reinforce the hanger with a second cardstock layer behind the top. Keep the loops shallow if the wreath will rest close to a door that opens often.

11. Tissue Paper Snowman Window Suncatcher
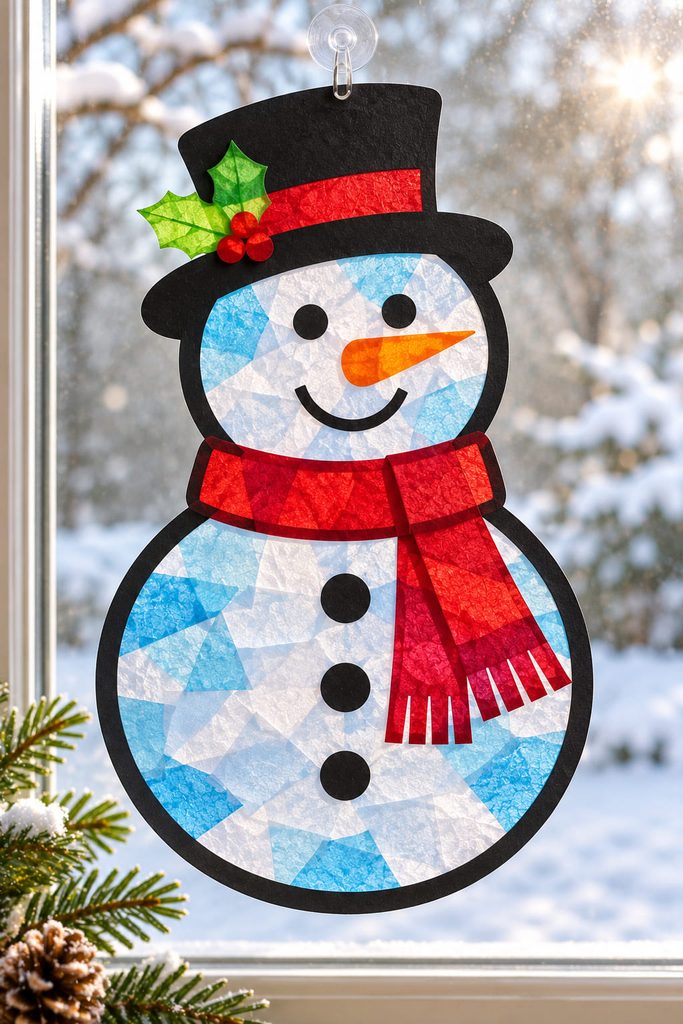
Colored tissue paper gives a snowman a translucent, almost stained-glass body without needing actual glass. Cut a snowman-shaped opening from a sheet of dark cardstock, then cover the opening from behind with small overlapping pieces of white and pale-blue tissue. Clear self-adhesive film can hold those pieces in place while keeping glue away from the delicate edges. Add orange paper for the nose and leave the eyes as bold dark cutouts in the front frame. Keep a wide border at the narrow neck. Put the panel in a bright window. The effect comes from transmitted light.
12. Pull-Tab Snowman With Waving Arms
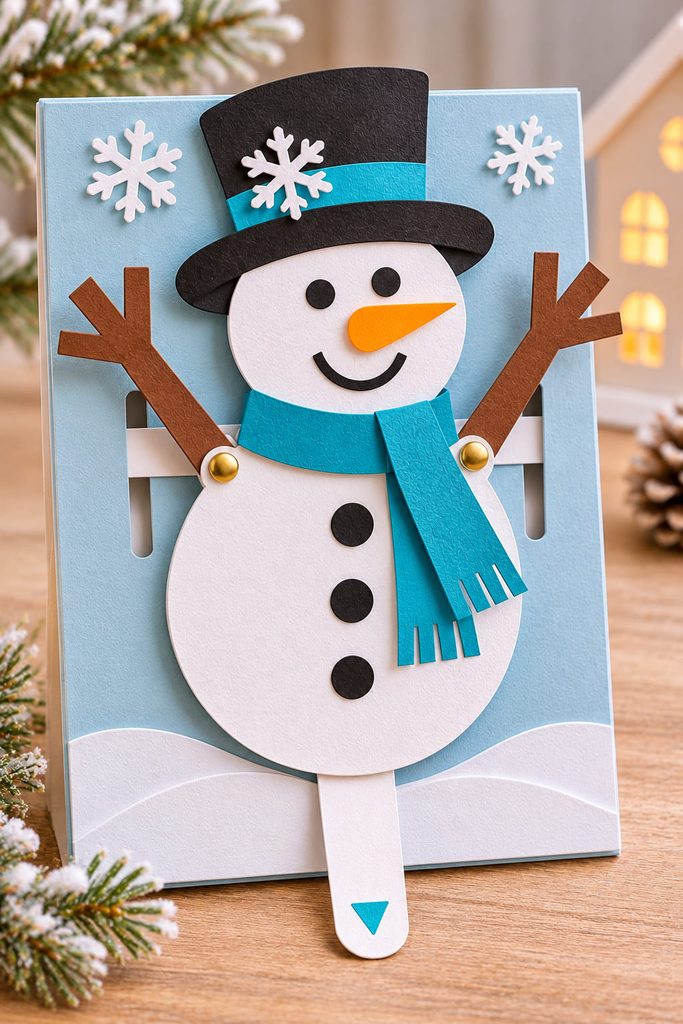
Pull a narrow tab and the snowman waves both arms at once, a playful detail for a winter noticeboard. The front figure stays fixed; the two paper arms sit behind it on pivot points. A narrow sliding strip links both arms so pulling downward tips them upward. This needs space behind the body, so mount it on a shallow raised backing rather than gluing everything flat to the wall.
For the mechanism, work in this order:
- Punch a pivot hole near each shoulder and reinforce the holes with small paper disks.
- Attach the arms with paper fasteners, loose enough to rotate.
- Connect their inner ends to a slotted pull strip with small movable joints.
- Add a lower guide so the strip travels straight and remains reachable beneath the body.
- Test the full travel before covering the mechanism with a decorative front panel.
Movement check: If one arm lifts sooner, compare the distances from its pivot to the connecting joint. Unequal lever lengths cause uneven motion. Metal fasteners and hole punches are best handled by an adult during children’s activities.
13. Connected Snowman Silhouette Paper Chain
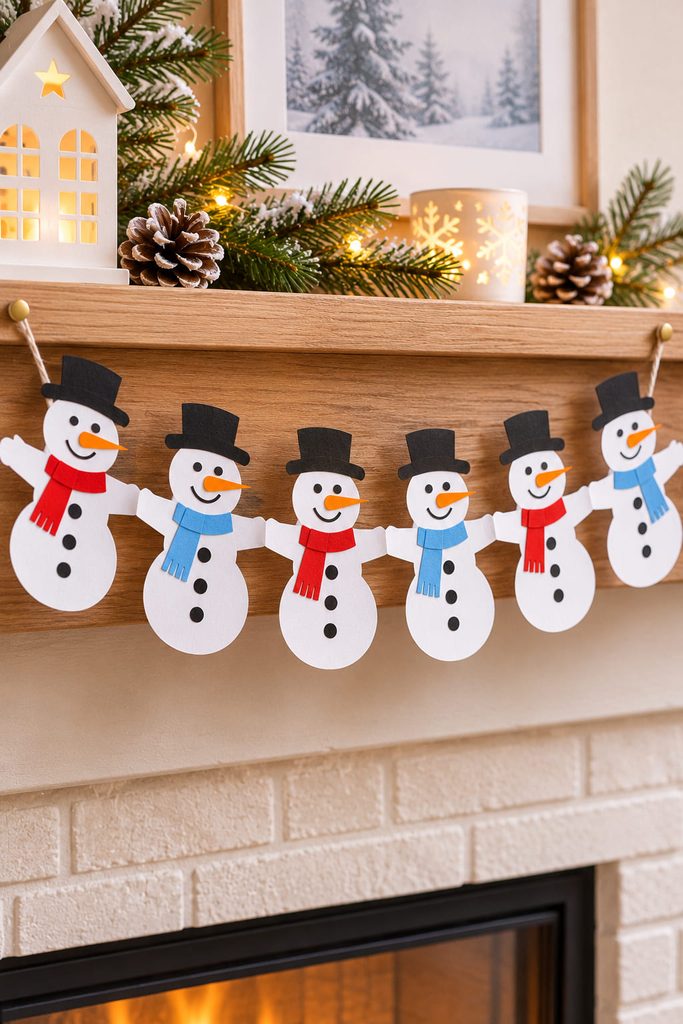
Fold one long strip like an accordion and the snowmen can remain joined without string between the figures. Draw half a snowman on the folded stack, making sure the outstretched arm reaches the folded side. When you cut around the silhouette and unfold the strip, that uncut bridge keeps the whole chain connected. The shared arms are structural rather than merely decorative.
This looks especially good as a short swag above a mantel or along a shelf edge. Use lightweight paper so the bridges do not carry too much weight, and support longer runs at multiple points instead of tugging on the outer figures. If a narrow wrist tears, shorten the chain and give the remaining figures wider connecting arms. A repeating border of scarves or hats adds detail without changing the cutting pattern.
14. Inflated Origami Snowman Gift Accent
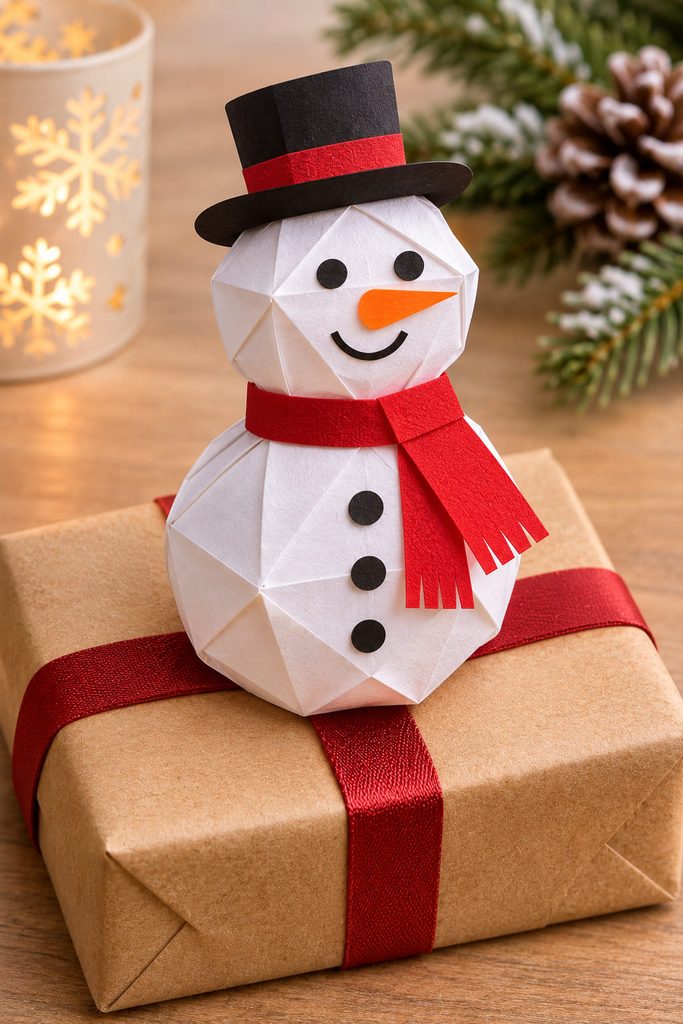
Fold an origami balloon into a tiny snowball for the top of a wrapped gift. Fold two paper waterbomb balloons in different sizes, inflate them gently through their openings, and connect the smaller to the larger with a narrow paper band. The structure works best with lightweight origami paper; thick cardstock is too stiff for the final inflation. Use a ribbon loop under the larger balloon to fasten the decoration to a package without crushing its sides.
Keep the finishing supplies minimal:
- two square sheets of thin white paper in different sizes
- a short strip for the joining band
- a small paper scarf and hat
- ribbon and a tiny amount of paper-safe glue
The inflated shapes are decorative, not containers, and should be handled lightly.
15. Snowman Treat Cylinder With A Removable Hat Lid
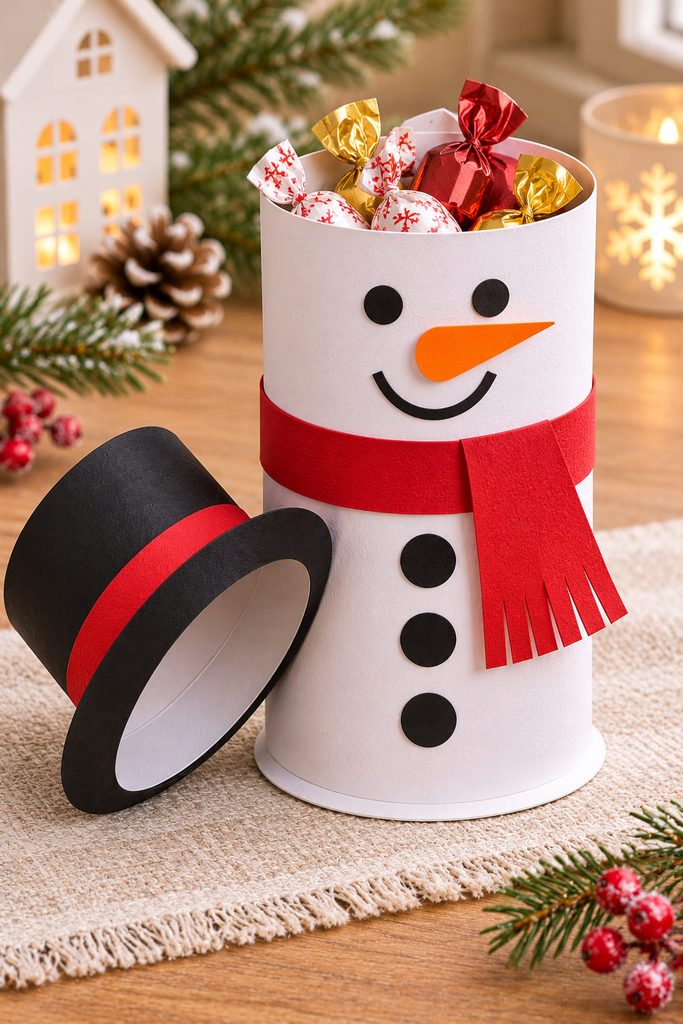
For a winter party favor, a hollow cardstock cylinder can double as a snowman and a small box. The white body holds a few lightweight wrapped treats; a black paper top hat becomes the lid. Unlike a decorative tube glued shut, this version has to let someone load the contents, close the opening, and remove the hat again without tearing the body.
Score narrow tabs along the bottom edge of the cylinder and glue those tabs beneath a solid base disk. Build the hat as a shallow cap with a crown and a reinforced inner rim that slips over the cylinder’s upper edge. A broad brim makes the hat recognizable, but the actual grip comes from the cap wall, not the brim. Cut and test that fit before adding the face or scarf.
Two small decisions make the box more usable. Keep the snowman decorations away from the lid’s sliding path, and choose a cylinder diameter that fits the wrapped item rather than scaling the entire figure by eye. Fit test: Fill the box, place the hat on top, lift it off, and repeat. If it snags, widen the inner rim slightly; if it slips off immediately, add a narrow cardstock liner. This is for dry, individually wrapped favors, not unwrapped food.
16. Snowman Winter Village On A Folded Paper Base
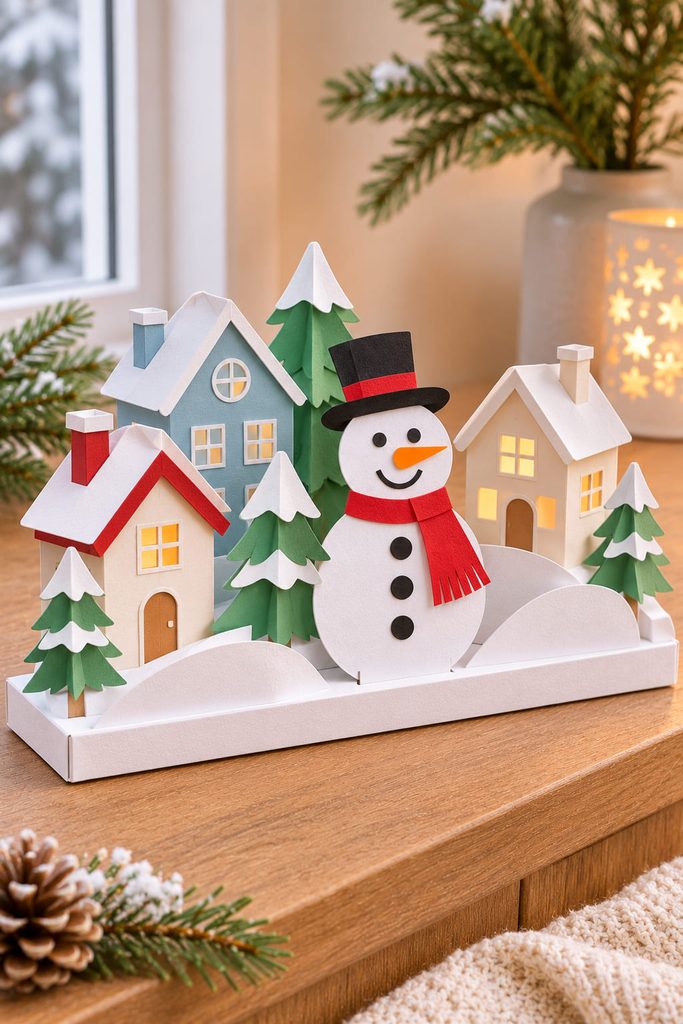
An open winter village gives a snowman a setting without enclosing it in a deep frame. Fold a long rectangle of cardstock into a shallow raised platform, leaving a flat upper surface and tucked-under support flaps. Cut slots in that surface for separate snowman, pine-tree, and house silhouettes with matching bottom tabs. The scene stands on a sideboard and can be rearranged when you want a different snowy street.
For a narrow ledge, keep the buildings low and place the snowman near the center so the scene does not feel top-heavy. A wider console can take several staggered rows, but those rows need enough spacing that one cutout does not obscure the next. Unlike the enclosed shadow box, this open village is designed to be viewed from several angles; reinforce the platform before adding taller silhouettes.
17. Pop-Up Snowman Card For A Winter Mantel
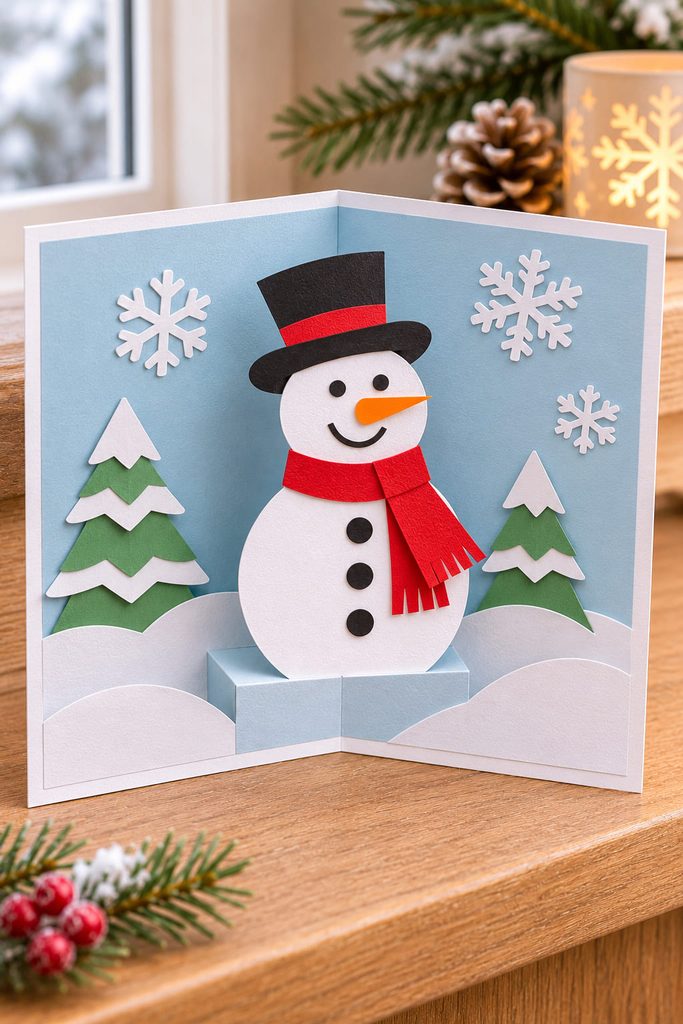
On a winter mantel, an opened greeting card can reveal a snowman that rises from its center fold. Fold a sturdy card base, then cut two short parallel slits across the center fold and push the tab inward to create a small pop-up step. Attach a lightweight snowman silhouette to the front face of that step, keeping the hat within the closed card’s outline. A blue background sets off the figure. Open and close the card several times before writing inside: if the snowman’s head catches the top edge, shorten the support or move the figure lower. It folds flat for mailing and stands open on a mantel.
How To Choose Paper Snowman Ideas For Winter Displays
Let the display location decide how much structure you need. Window decorations need light material and a strong hanging point; mantel pieces need a flat footprint; wall art needs reliable attachment and enough contrast to read at a distance. Translucent tissue and vellum are rewarding near daylight or cool battery light, while quilling and fine paper curls are best where someone can see them up close.
If you are making several projects together, batch-cut the shared white circles, scarves, and hats first, but keep the supports specific to each build. A hanging loop cannot substitute for the base of a shelf figure, and a card’s fold should not be glued into the same fixed shape as a table sculpture.
Keep A Little Winter On Display


For a quick seasonal change, start with the slot-together table figure or the tissue-paper suncatcher. Try the layered shadow box or removable-lid treat cylinder when you want a project that rewards more careful measuring. To pair the snowmen with a different winter silhouette, see 15 Paper Snowflakes DIY Ideas Worth Cutting This Winter.