This post contains affiliate links. As an Amazon Associate I earn from qualifying purchases, at no extra cost to you. Thank you for supporting Diynify!
Handmade Christmas cards for your boyfriend feel more personal when they carry something only the two of you understand. A familiar photograph, a favorite song, an inside joke, or a plan for your next date can turn an ordinary holiday greeting into a keepsake he actually wants to hold onto.
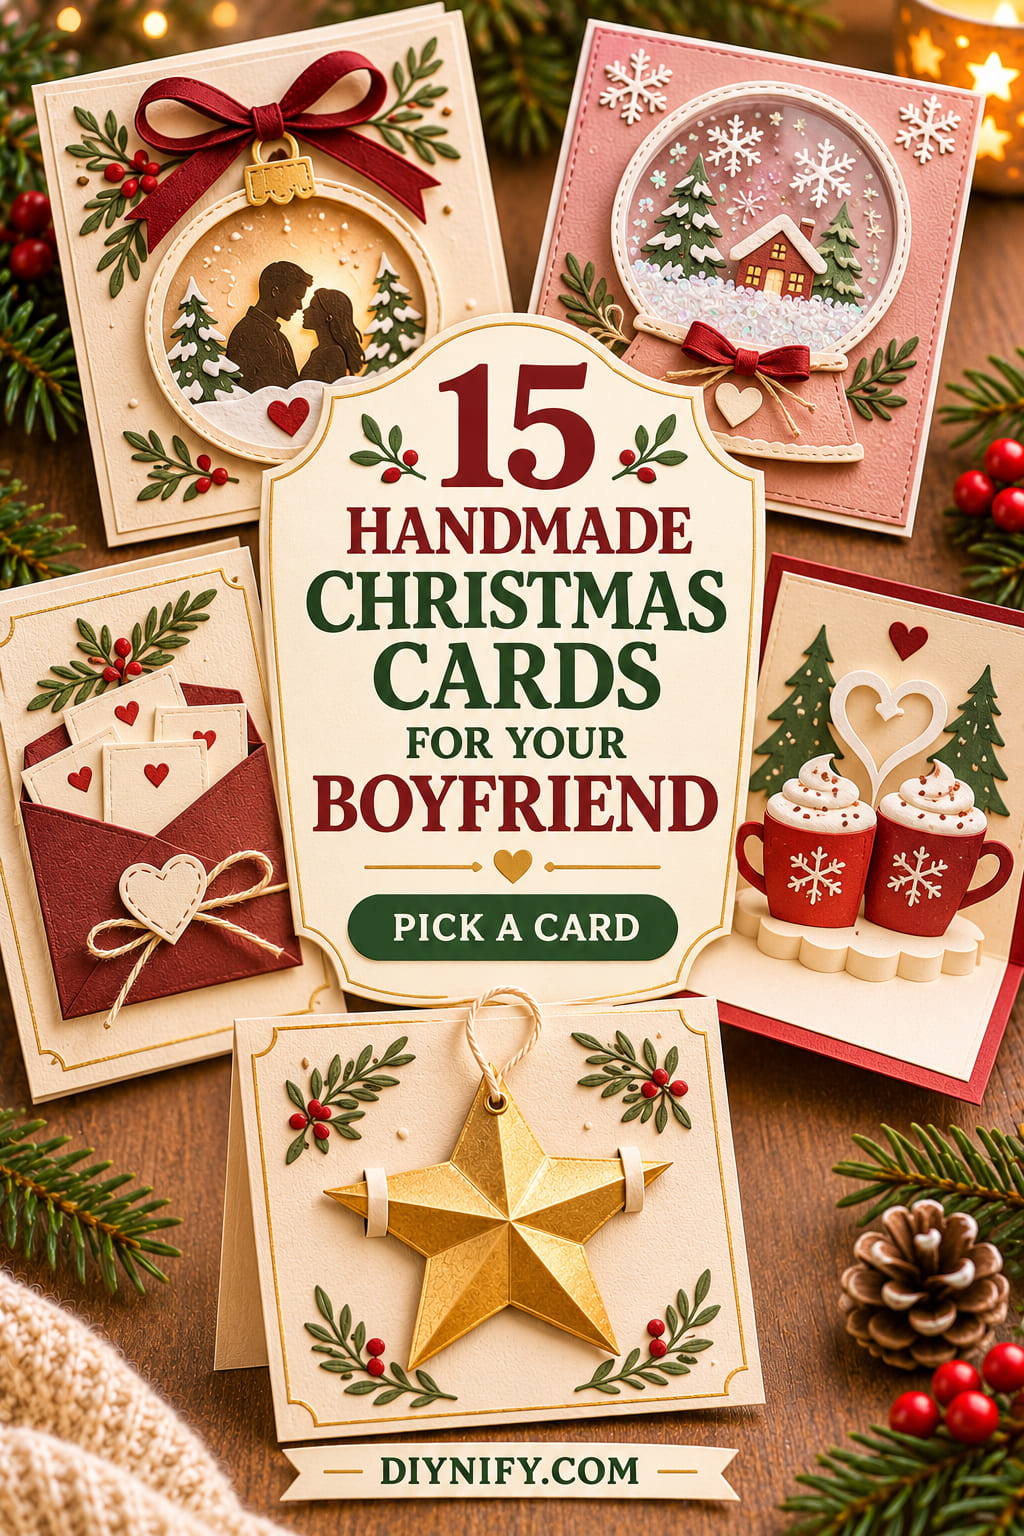
These 15 ideas mix romantic details with practical paper crafts, including hidden messages, interactive folds, photo cards, and small removable gifts. Most start with cardstock, scissors, paper glue, and a pen. A few need photos, embroidery thread, acetate, foam tape, or paper fasteners. Choose a flat design for mailing, or try a moving or dimensional card when you can give it to him in person.
1. Christmas Tree Accordion Love Letter
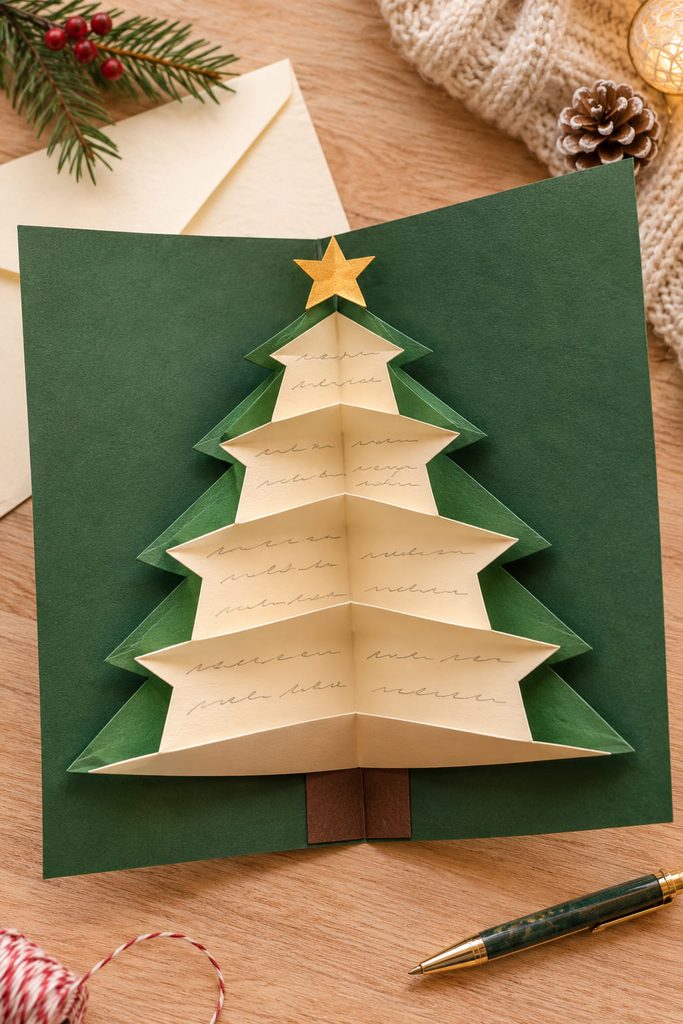
A folded Christmas tree can hold a surprisingly long love letter without looking like an ordinary multi-page note. Build a narrow accordion from green or cream paper, then trim the closed silhouette into a simple tree shape. Each fold becomes a place for a different memory, a little thank-you, or a reason you love spending Christmas together. Attach the final panel to a sturdy folded card so the letter stays connected when he opens it.

Keep the written messages short enough to read panel by panel. A small star on the first fold gives him somewhere to start, while the last panel can carry a private Christmas wish. Before attaching the accordion, fold it completely closed and check that no pointed branches catch against neighboring panels. This version is especially lovely for a first Christmas together or a relationship with plenty of shared memories.
2. Photo Ornament Window Card
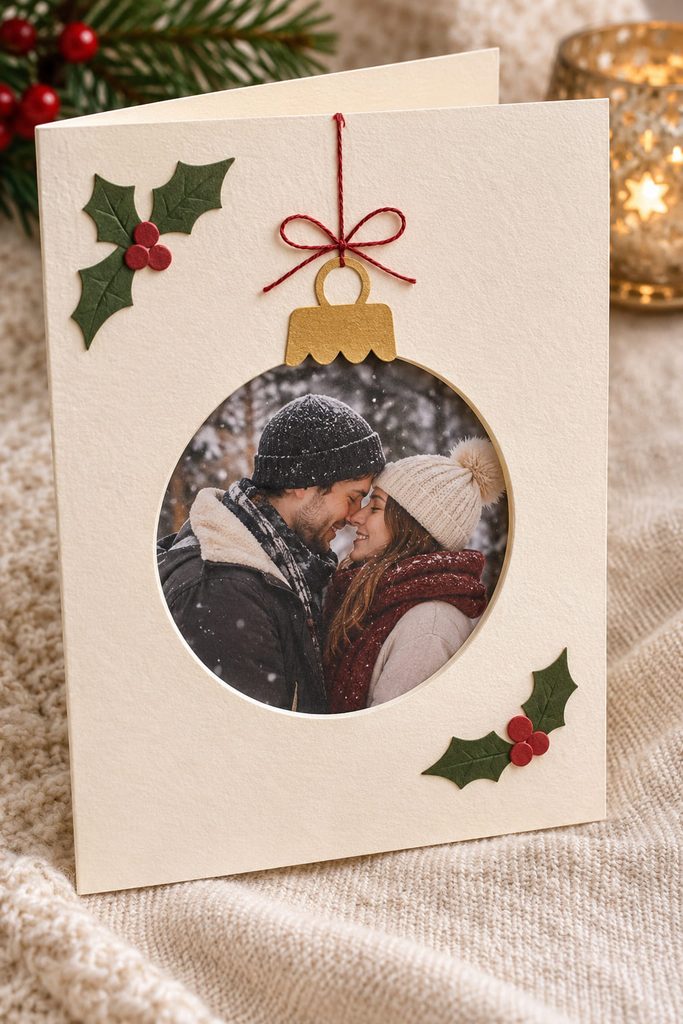
Choose a photograph that means something to both of you, preferably one with a clear subject that will still be recognizable through a small circular opening.
Cut an ornament-shaped window into the front of folded cardstock and mount the photograph behind it, using a slightly larger paper backing to secure the edges. Add a tiny paper ornament cap and a drawn hanging string above the opening. The photograph becomes the ornament itself rather than another decoration glued onto the card.

A matte photo usually works better than a glossy print when the card will be handled frequently. Leave the inside panel open for a handwritten message, and keep the window away from the fold so the front remains sturdy.
3. Pull-Tab Mistletoe Kiss Reveal
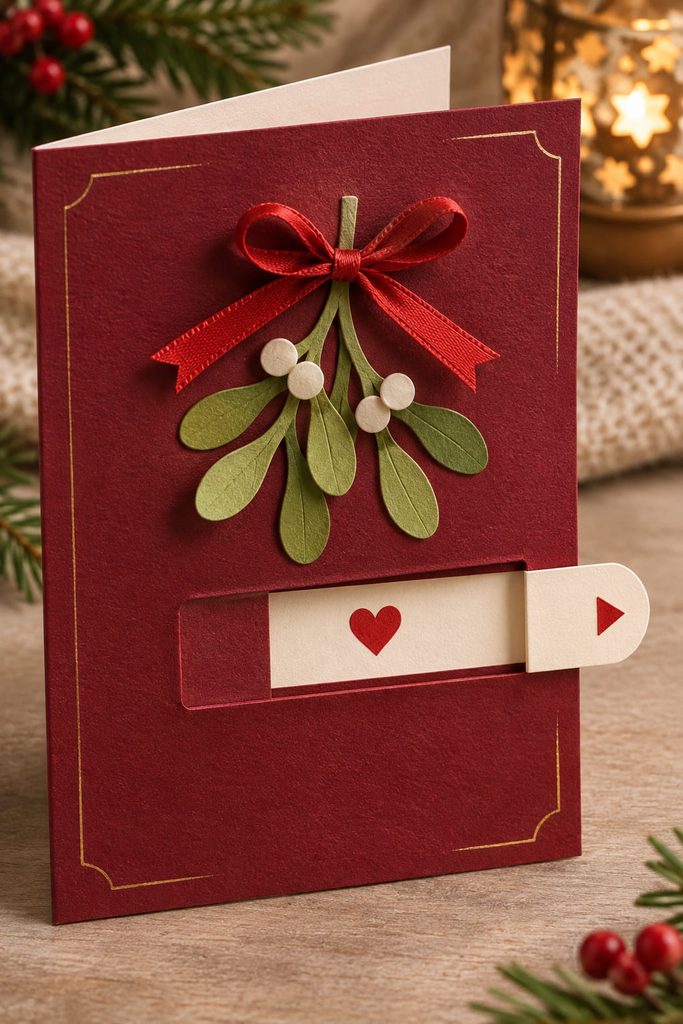
The fun of a mistletoe card is letting the message change. Start with a small illustrated sprig of mistletoe above a rectangular opening. Underneath, hide a sliding paper strip that reveals a second message when your boyfriend pulls a little tab.
Use a simple track construction:

- Cut a narrow window into a decorative front panel.
- Glue two thin paper rails behind that panel, leaving a channel between them.
- Slide a longer message strip through the channel.
- Attach the panel to the card without gluing over the moving strip.
- Add a small cardstock stop to the hidden end so the slider cannot pull out accidentally.
The first message might say “Christmas Wish,” with “One Kiss From You” appearing when the tab moves. A small arrow can indicate where to pull.
Slider Check: If the strip catches, inspect the glued rails first. A slightly wider channel usually helps more than pulling harder.
4. Christmas Date-Night Ticket Card
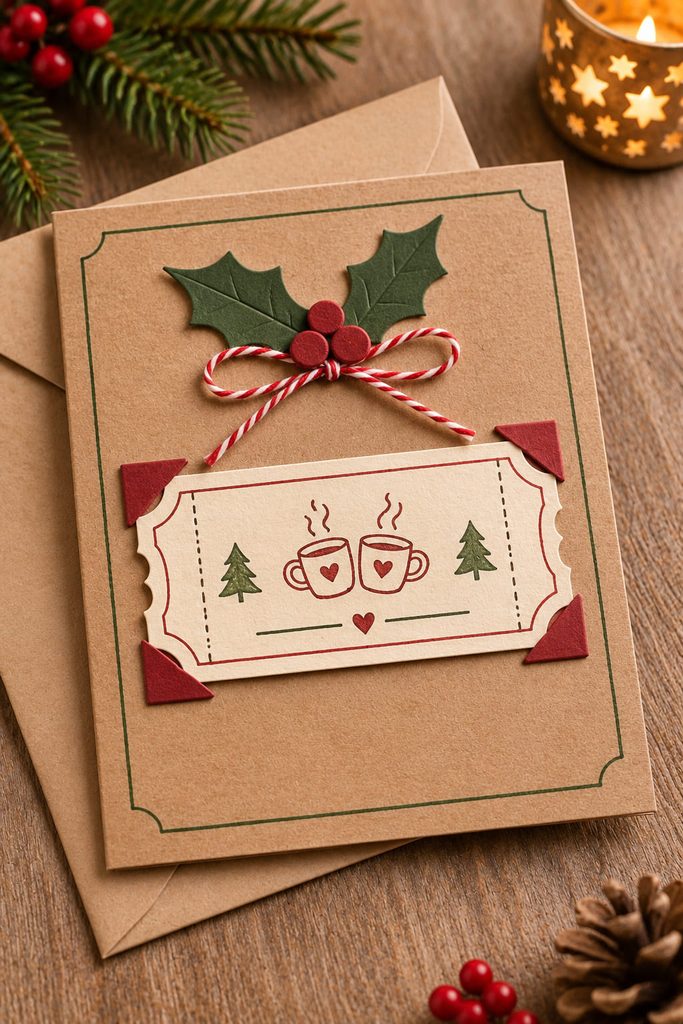
Sometimes the sweetest Christmas card is a promise to spend time together. Turn the front into a miniature ticket holder, with a removable admission pass for a holiday date.

Make the ticket from contrasting cardstock and write the activity directly on it: Christmas movie night, a winter market visit, homemade dinner, or a cozy evening with hot chocolate. Four shallow corner slits in the card front can hold the ticket without permanent glue, so he can take it out and keep it in his wallet.
A vintage ticket layout with a printed-style border looks playful, while a simple cream-and-burgundy design suits a more understated gift. Leave the date flexible if you have not chosen one yet. The physical ticket gives him something to redeem, which makes this different from a card that merely mentions future plans.
5. Long-Distance Christmas Map With Thread
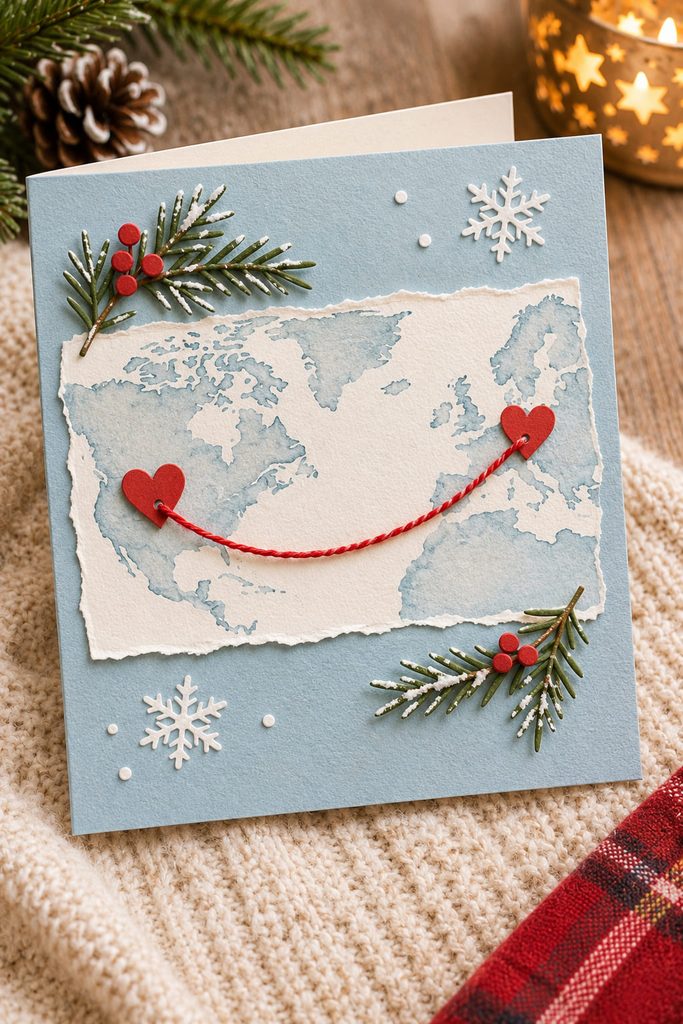
When Christmas means counting the days until you see each other again, a map can express the distance more personally than another heart illustration. Use a simplified map showing your two cities, drawn or printed on lightweight paper. Mark each location with a tiny paper heart, then connect the points with a length of red embroidery thread.
Make small holes at both locations, pass the thread ends through, and secure them on the back of the map before mounting it onto cardstock. Let the thread follow a gentle curve rather than pulling it completely taut.

The message can be as simple as “Different Places, Same Christmas Wish.” This works particularly well when the distance is part of your relationship’s story.
- If the thread pulls the paper inward: loosen it and reinforce the holes with small backing circles.
- If the route looks cluttered: remove decorative map labels and keep only the two meaningful locations.
6. Twelve Little Reasons Love Note Pocket
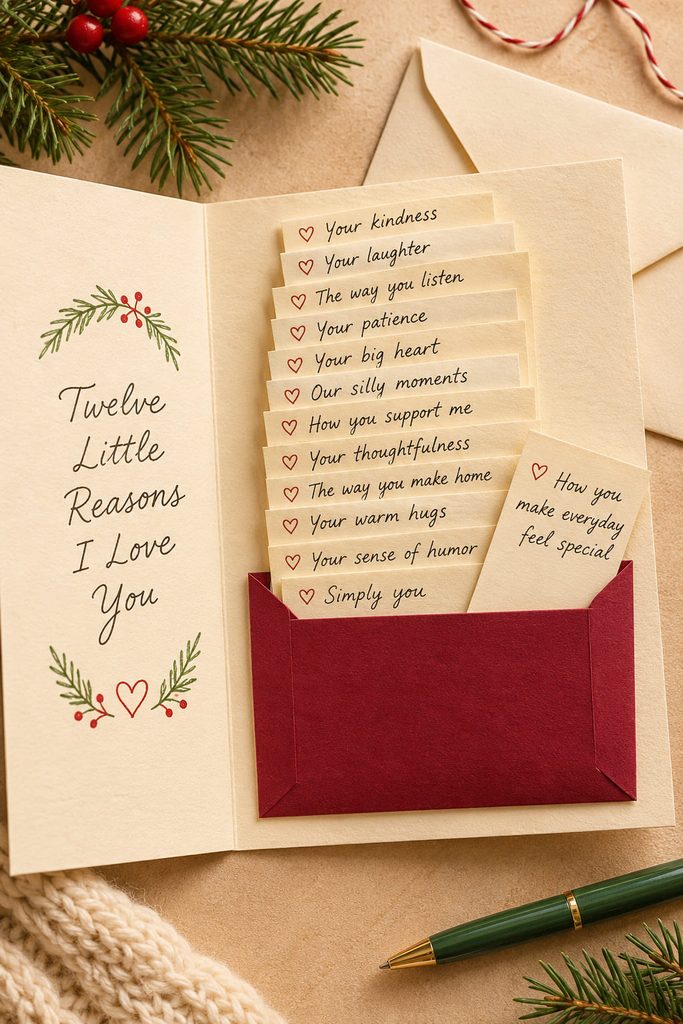
Twelve tiny notes can make one Christmas greeting last longer than a single reading. Instead of writing a long letter, prepare twelve small paper slips, each with a specific reason your boyfriend matters to you. Number them lightly, or use tiny stars to distinguish them.

A shallow pocket attached to the inside of a folded card keeps the notes together. Fold narrow tabs along the sides and bottom of a separate paper rectangle, glue only those tabs to the base, and leave the top accessible. The slips should extend just above the pocket edge so he can remove them individually.
For a neat result, gather:
- Lightweight paper for the twelve notes, which keeps the pocket from becoming too thick.
- Medium-weight cardstock for the pocket and outer greeting.
- A small heart-shaped tab on the first note to make removal easier.
Write things he will recognize: a comforting habit, a ridiculous joke, or the way he makes an ordinary evening better. Specific memories matter much more than elaborate decorations here.
7. Romantic Snow Globe Shaker Card
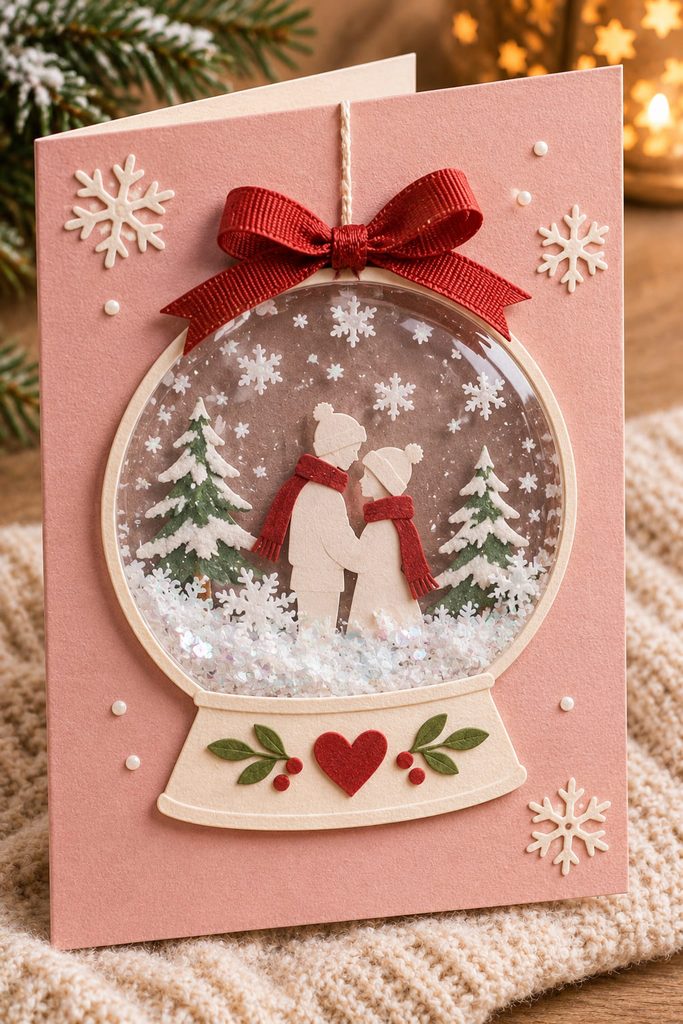
Loose snowflakes moving around a miniature picture can give a Christmas card a playful, almost toy-like quality. For a romantic version, place a simplified paper silhouette of the two of you inside a snow globe. A tiny scarf, matching winter hats, or joined hands can make the figures recognizable without needing detailed portraits.
The moving snow needs a sealed chamber. Cut a circular opening in the front panel, glue transparent acetate behind it, and build a continuous border with foam tape around the window. Add a small amount of lightweight paper confetti, then close the chamber with a separate backing panel carrying the couple illustration. Mount the sealed assembly onto the folded card only after checking that the contents move freely.

Before Sealing the Shaker
- Keep all confetti inside the foam border, away from the adhesive.
- Check for gaps where the foam tape joins, especially around curves.
- Use less confetti than you think you need; a crowded window hides the couple.
- Close the empty chamber temporarily to check the depth before adding the loose pieces.
If snowflakes stick to the edges, they may be catching exposed adhesive. Cover that adhesive or replace the spacer before final assembly. This card is thicker than a flat greeting, so it is better suited to hand delivery or protective packaging.
8. Favorite Songs Christmas Playlist Sleeve
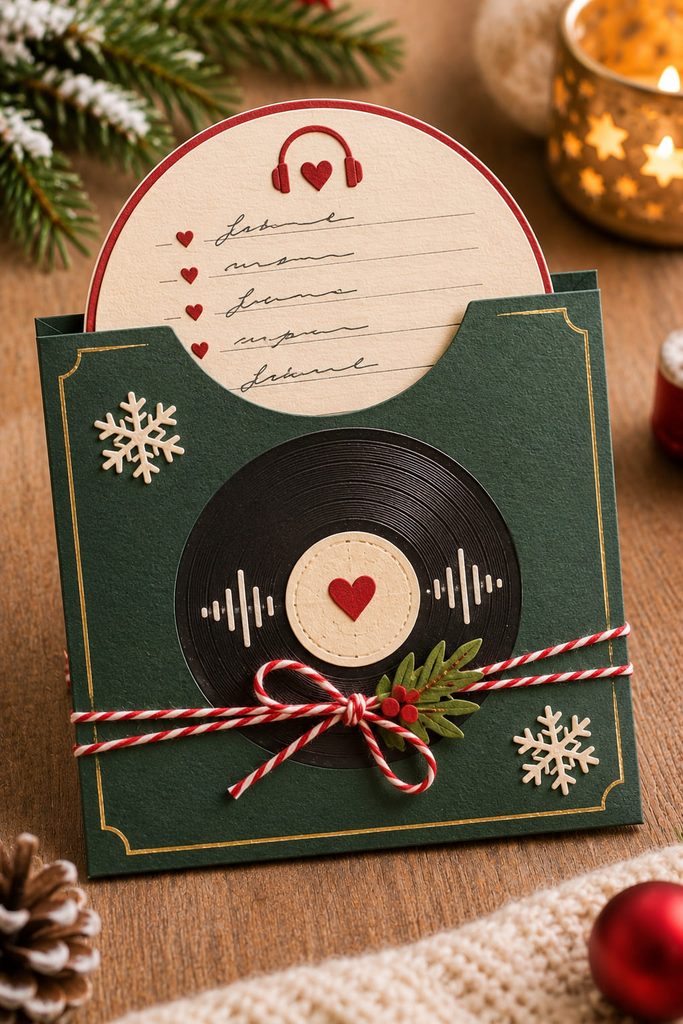
If music is a big part of your relationship, turn the card into a miniature record sleeve. Use dark cardstock for the outer cover and create a shallow pocket on the front with an opening along the top. Inside, place a removable paper insert shaped like a small record or cassette label.
The insert can hold a handwritten holiday playlist: the song from your first date, something you always sing together, or music you want to listen to on Christmas morning. Leave enough of the insert visible to grasp without tearing the sleeve.

A simple handwritten message such as “Our Christmas Soundtrack” gives the card its identity. Unlike an ordinary music-themed illustration, the removable insert becomes a little collection he can keep and revisit.
9. Layered Christmas Cabin Memory Scene
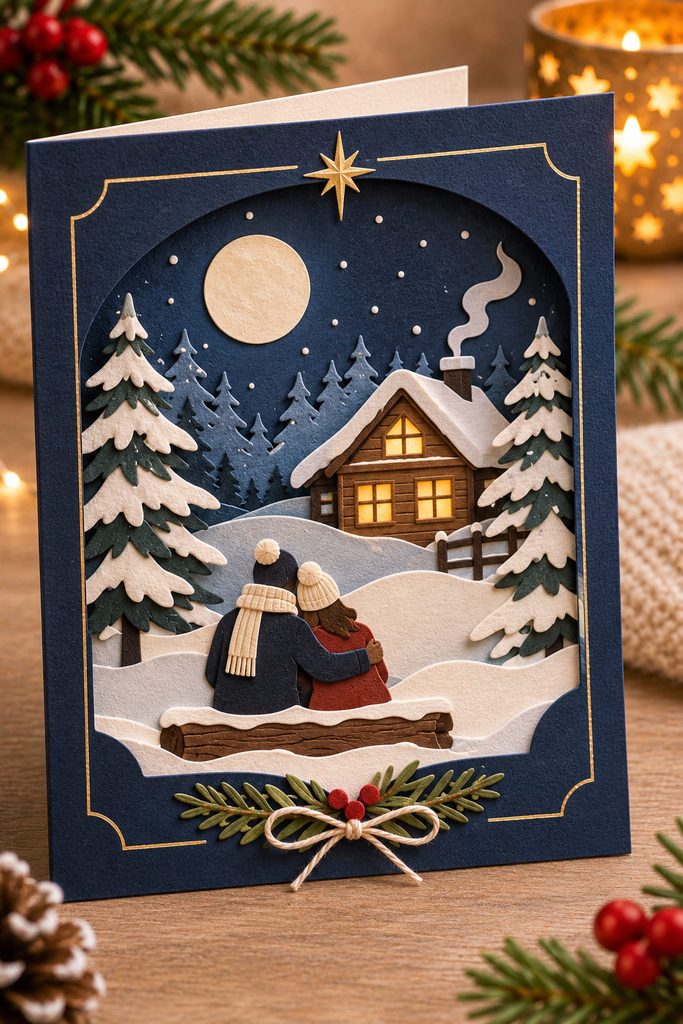
Picture a small snowy cabin at night, with warm light glowing through its paper windows and two tiny figures standing together outside. That scene can become a personalized Christmas card inspired by a favorite trip, the place where you met, or somewhere you would love to visit together.
Cut a background sky, a middle layer with the cabin, and a foreground with snow-covered trees. Mount the layers using narrow cardstock spacers or foam tape, keeping the figures visible between them. The window glow can be suggested with pale yellow paper behind the openings; no real lighting is necessary.
There are two useful ways to build the scene:
| Construction | Finished Effect |
|---|---|
| Flat overlapping paper | Slimmer, easier to mail, with color creating most of the depth |
| Raised separated layers | Stronger shadows and a miniature diorama appearance, better for hand delivery |
Leave room inside for the personal connection. A short note about why that place matters will make the scene recognizable as your story rather than a generic winter landscape.
10. Embroidered Christmas Sweater Heart Card
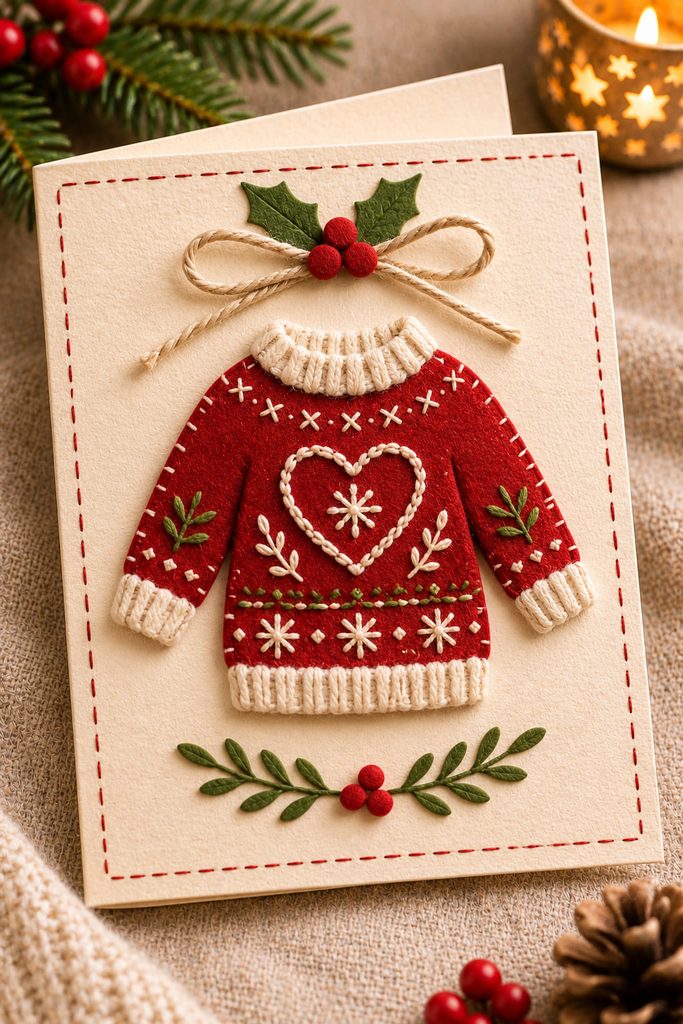
A small sweater-shaped fabric patch gives a romantic greeting the texture of something handmade and familiar. Cut a simplified sweater silhouette from felt, then stitch a tiny heart and your initials onto it using embroidery floss. Two colors are enough: one for the sweater and another for the stitched details.
Finish the embroidery before attaching the felt to cardstock, so the knots stay hidden on the reverse. A thin border of fabric glue can secure the patch without leaving hard stitches through the greeting itself.
This idea works especially well for a boyfriend who loves cozy winter traditions or has a favorite Christmas sweater. Keep the embroidered shapes fairly large and avoid bulky embellishments near the fold. The fabric is already the main decorative feature.
11. Pop-Up Hot Chocolate Date Card
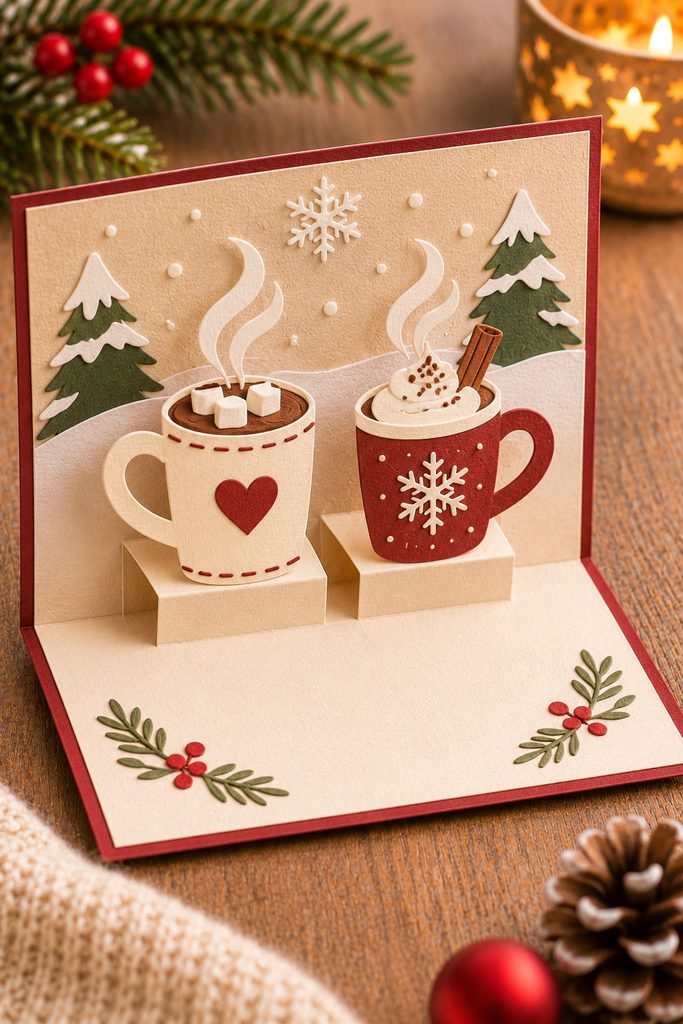
Two little mugs of hot chocolate appearing when the card opens can recreate a familiar winter moment. Make one mug represent you and the other your boyfriend, using different paper patterns, tiny heart details, or contrasting handles. A few curved paper strips above the cups suggest rising steam.
The mugs need actual pop-up supports rather than being glued directly to the inside pages. A pair of reverse-folded step tabs is a manageable way to achieve this:
- Fold a sturdy cardstock base and mark two small tab positions along its center crease.
- Make two parallel cuts across the fold for each tab, then reverse the folds to push the rectangular steps inward.
- Cut two mug silhouettes with flat lower edges and attach each one to the front-facing surface of a step.
- Open and close the card gently before adding steam, handles, or background decoration.
The important measurement is the available space when everything folds down. Oversized handles can collide with the opposite page, and steam strips placed too high may protrude beyond the top edge.
Fold-Flat Test: Close the card without pressing on the mugs. If either silhouette bends, shorten its handle or move the attachment lower on the step. Add a plain outer backing if you want to hide the tab cuts.
This is a sweet choice for couples who enjoy quiet evenings together, particularly when you pair it with an invitation for another hot chocolate date.
12. Four Christmas Wishes Spinning Wheel
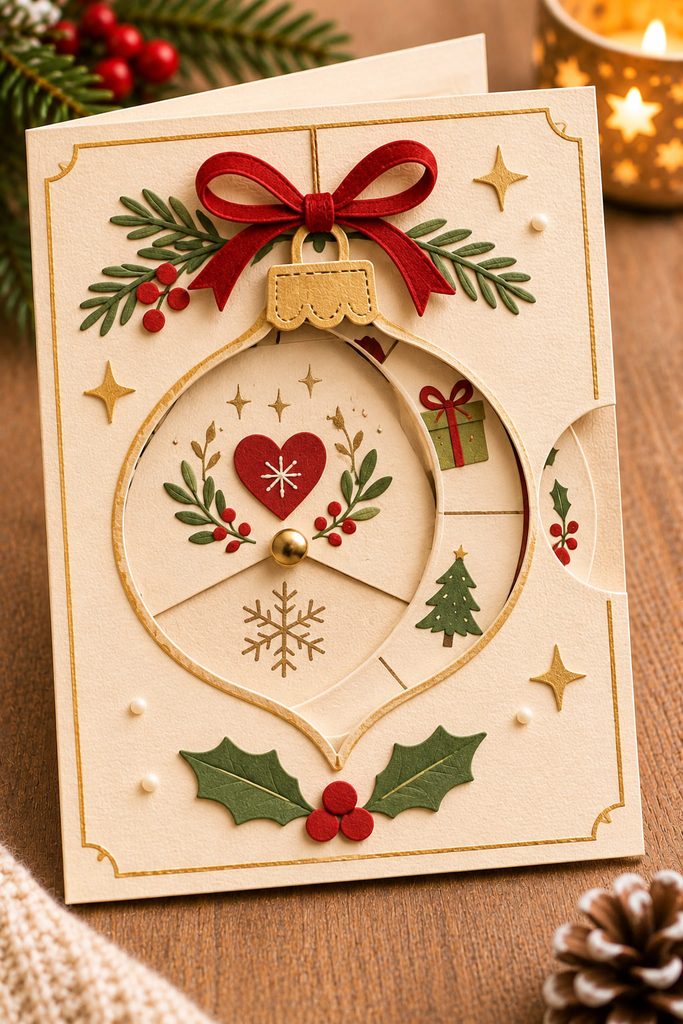
Four small wishes hidden behind a rotating ornament can turn a greeting into something he plays with. The messages might be plans for Christmas Eve, a future trip, a favorite shared tradition, and a private wish for the coming year.
Make a circular cardstock wheel and divide it into four equal sections. Write or illustrate one wish in each section, keeping everything within a consistent distance from the center. On a separate front panel, cut a small window shaped like a Christmas ornament. The opening should reveal only one section at a time.
To make the wheel rotate:
- Place the disk behind the decorative panel and mark its center.
- Join the layers with a small paper fastener, leaving enough clearance for movement.
- Cut a shallow finger notch near the panel edge so part of the wheel can be turned.
- Attach the panel to the folded base using adhesive around its perimeter, away from the disk.
Rotate the wheel through all four positions before the glue sets. If the messages do not align with the window, adjust their positions on the disk rather than enlarging the opening until several wishes show at once.
A finished spinning card works best when the wheel turns with light pressure and every stop reveals a complete message.
13. Matching Christmas Mitten Puzzle Card
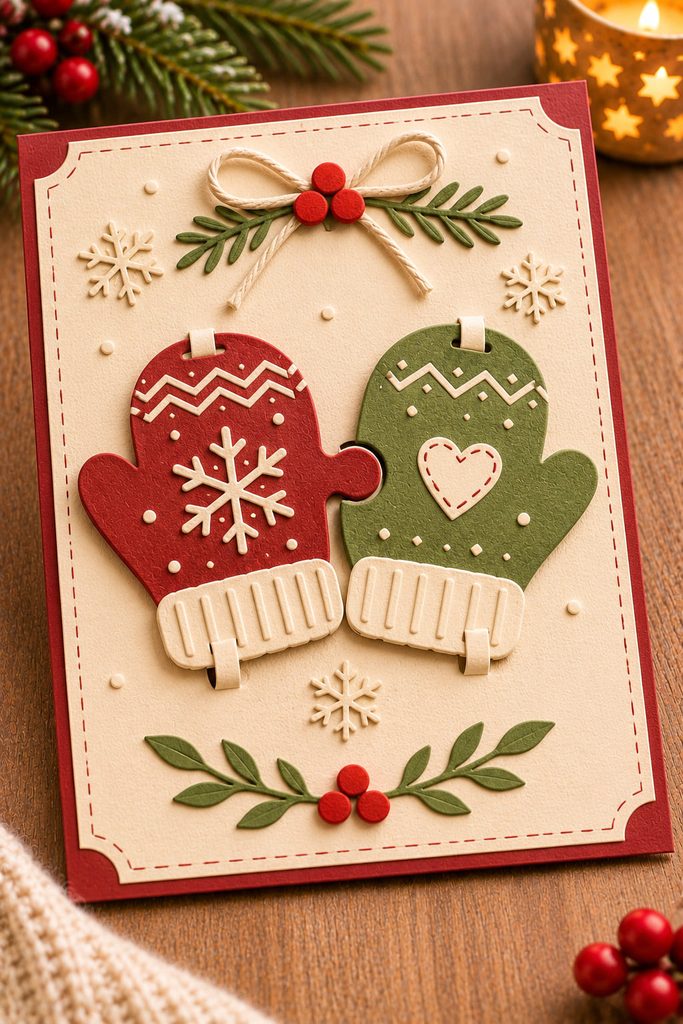
Matching mittens can become two removable paper pieces that fit together into one little keepsake. Cut a pair from firm cardstock, giving one a narrow projecting tab and the other a matching slot. The shapes should connect gently without needing tape or glue.
Decorate them with different sweater-style patterns and place one initial on each mitten. Small paper slits in the card front can hold the pieces temporarily, leaving your boyfriend free to remove and join them.
For the neatest fit, cut the slot slightly wider than the thickness of the tab and avoid sharp internal corners, which can tear during repeated handling. Keep the mittens large enough to handle comfortably. This design is cute without needing detailed illustration, and the finished pair can sit on a desk or slip into a memory box.
14. Wrapped Christmas Present Gatefold Card
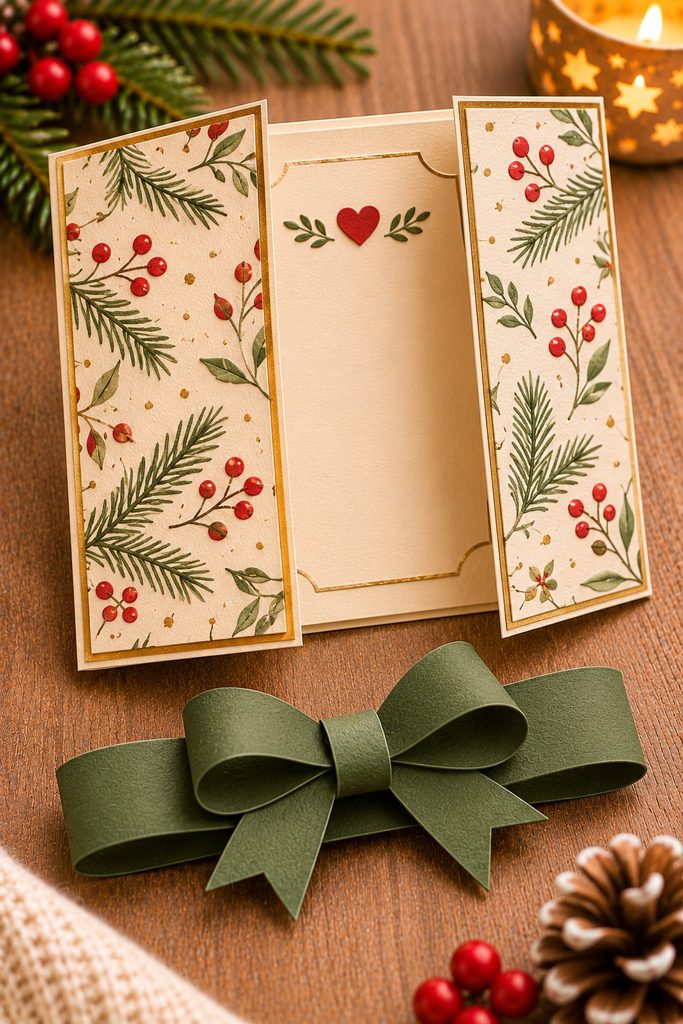
Wrapping-paper details can make an ordinary greeting open like a tiny Christmas gift. Instead of using a standard center fold, create two equal doors that meet in the middle. Cover them with coordinated holiday paper so the closed card looks like a wrapped present.
A separate paper band slides over the closed doors to hold them together. Attach a folded paper bow to the band rather than gluing it across both doors, because the greeting needs to open without tearing the decoration.
Inside, place a small photograph or a short message that only becomes visible when the doors swing apart. The reveal is particularly effective if the outside remains simple, with just one ribbon crossing the center.
This is an approachable choice when you want a romantic surprise without building a complicated pop-up mechanism. A band that slides off smoothly is the detail worth getting right.
15. Detachable Christmas Star Keepsake Card
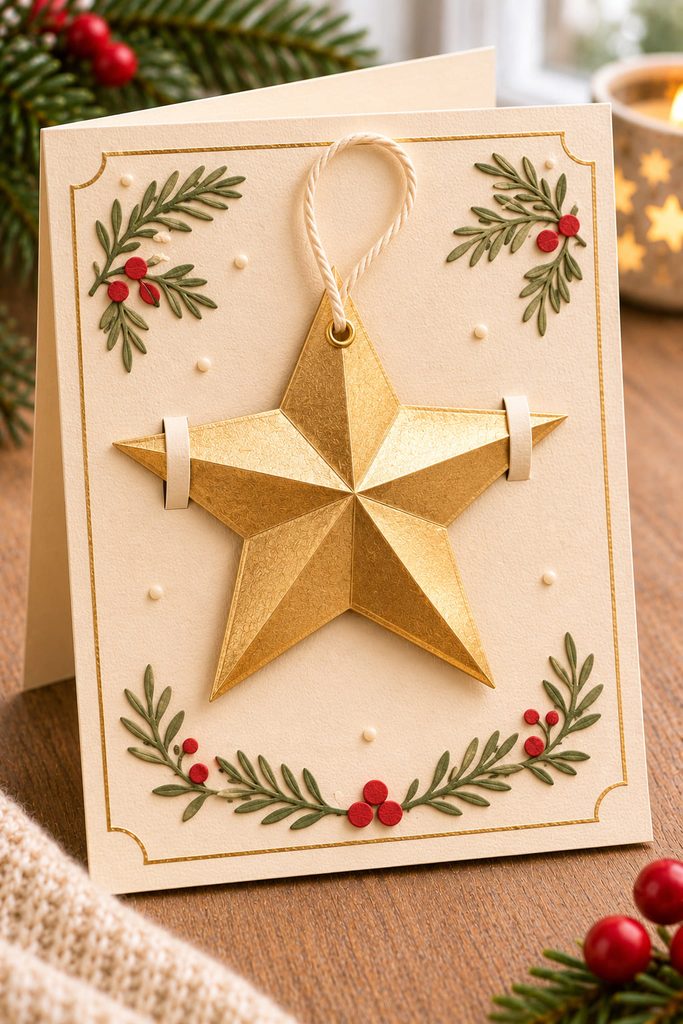
The nicest part of this design is that your boyfriend can remove the central decoration and hang it on his Christmas tree. Make a small star from two layers of sturdy cardstock, place a private handwritten message on the back, and add a thin thread loop through a reinforced hole near the top point.
Hold the star on the front of a folded greeting using two shallow paper slits that catch opposite points. Avoid permanent adhesive on the ornament itself. When removed, the star becomes a separate keepsake, while the card remains intact.
Check that the thread loop is long enough to hang over a branch and that the star is light enough to stay upright. A metallic paper face paired with a plain handwritten reverse gives the ornament two distinct sides: festive when displayed and personal when turned over.
Writing Christmas Cards for Your Boyfriend With Meaning
The strongest message usually connects to something he already remembers. Instead of filling the inside with general romantic phrases, refer to a real conversation, a small kindness, or a moment from the past year that made you feel especially close.
For a boyfriend who prefers humor, write something playful and follow it with one sincere sentence. If he appreciates thoughtful letters, give your message a little more space, particularly in an accordion or pocket card. You could also include a Christmas plan that turns the greeting into an invitation.
Keep the message readable against the chosen paper. Dark ink on cream or lightly colored cardstock is usually easier to read than metallic lettering over a patterned background. When the design has moving parts, write in an area that remains visible and untouched during opening.
Choose a Card He Can Keep
Choose the design around the moment you want to create. A small photo window works when one memory says everything. A removable ticket gives you something to look forward to, while a folded love letter offers more room for the things you want him to know.
If you enjoy building moving paper mechanisms, 15 Pop Up Christmas Cards That Feel Extra Special has more ideas for greetings that change shape when opened.