
This post contains affiliate links. As an Amazon Associate I earn from qualifying purchases, at no extra cost to you. Thank you for supporting Diynify!
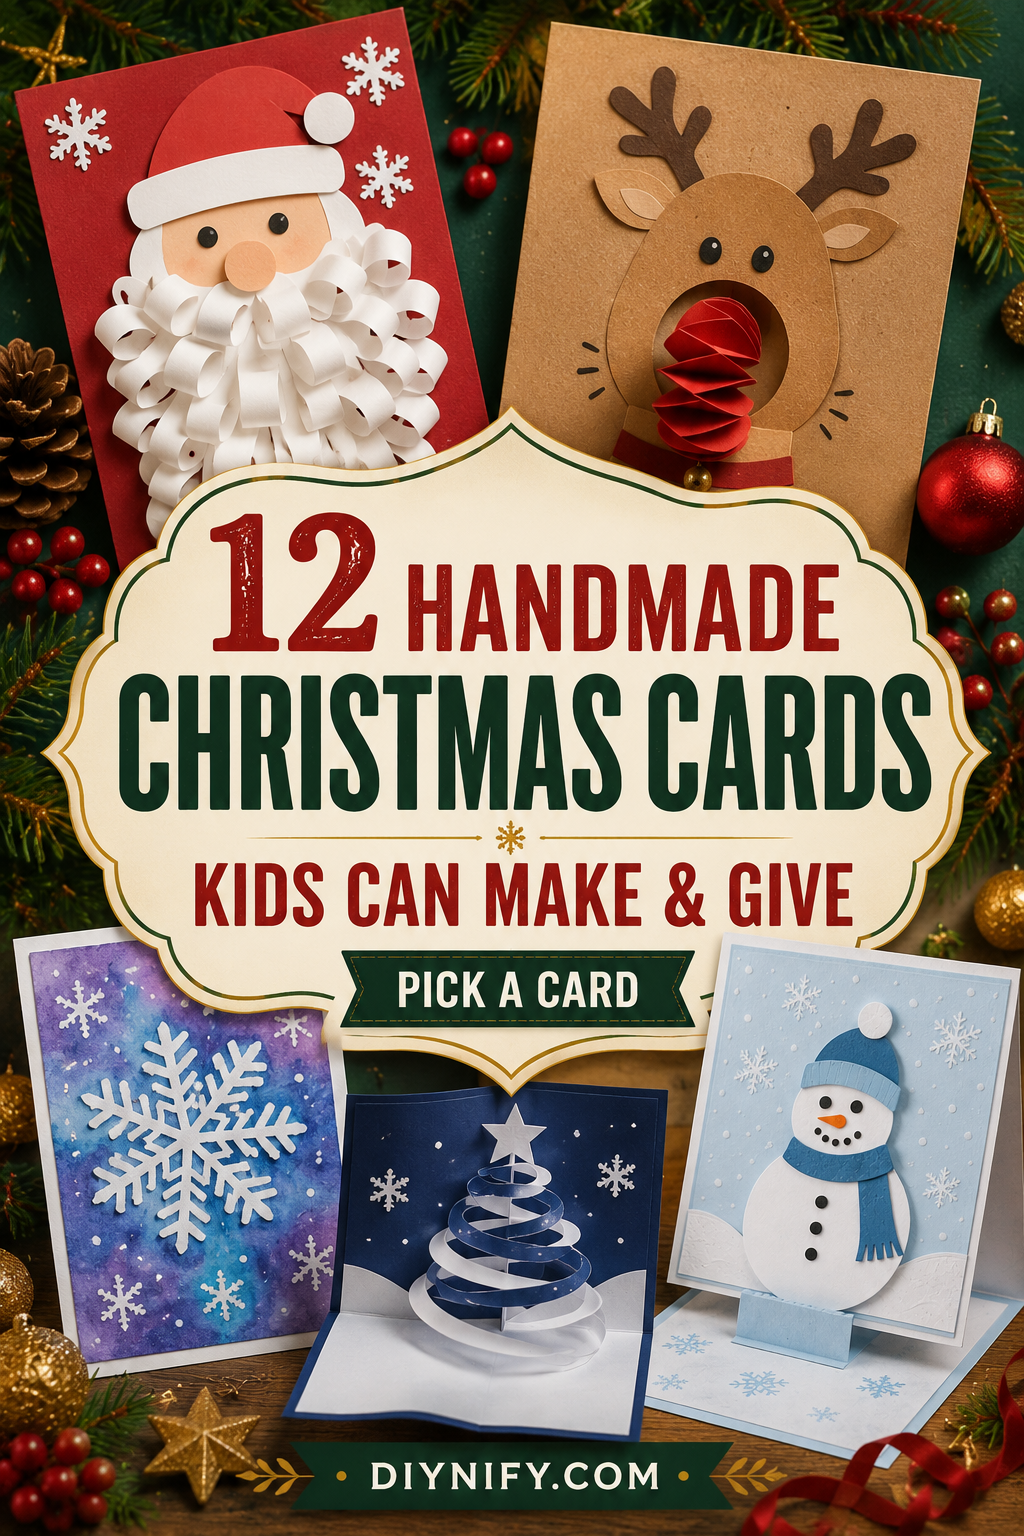
Handmade Christmas cards for kids work best when the making action is easy to see in the finished card: curled strips, paper loops, handprints, paint resist, or a moving fold. These 12 ideas give children something real to make and give without depending on perfect lettering or intricate cutting. Most use folded cardstock or construction paper, scraps, scissors, a glue stick, crayons, and a pencil. A few need tissue paper, watercolor or another thin water-based paint, and lightweight magazine or gift-wrap paper. Choose the project by the kind of making the child already enjoys: gluing, painting, cutting, rolling, or building something that moves.
1. Confetti Mosaic Candy Cane Card
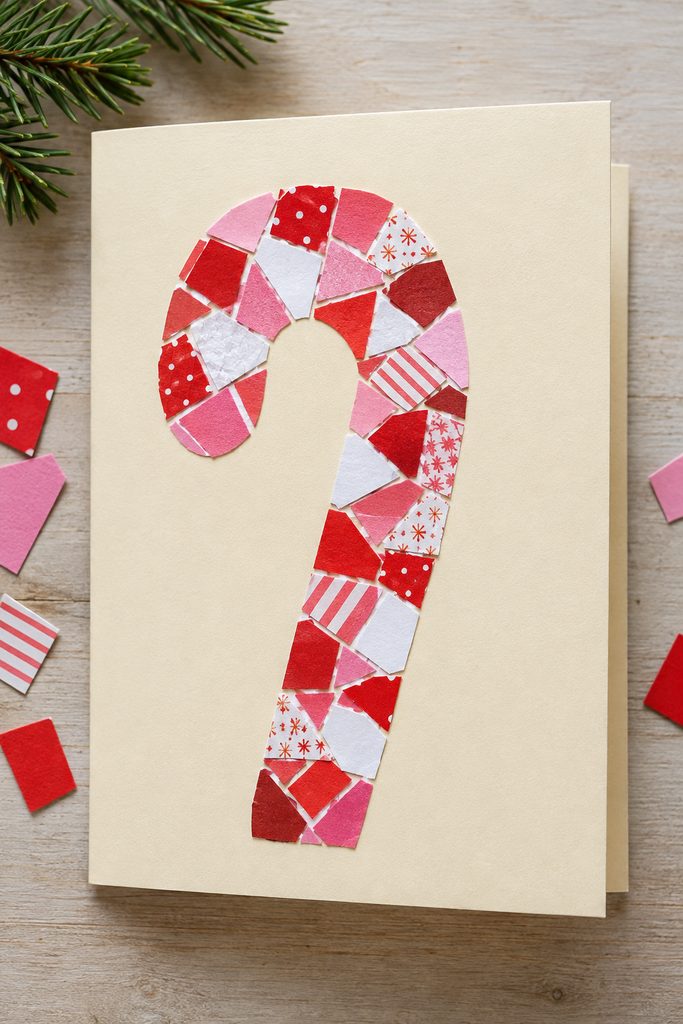
When the scrap pile is full of tiny pieces, a clear outline can do the organizing. Lightly draw a wide candy-cane shape on a folded cardstock base, then let kids fill the path with small red, pink, white, or patterned paper pieces like a loose mosaic. The pieces do not need matching edges; what matters is keeping the outer curve readable and leaving a little background visible between some scraps. That negative space stops the surface from becoming one solid blob. This is a useful choice for a child who enjoys sorting and gluing more than precise cutting, and the finished card stays flat enough to slip into an ordinary envelope.
2. Curled-Paper Santa Beard Card
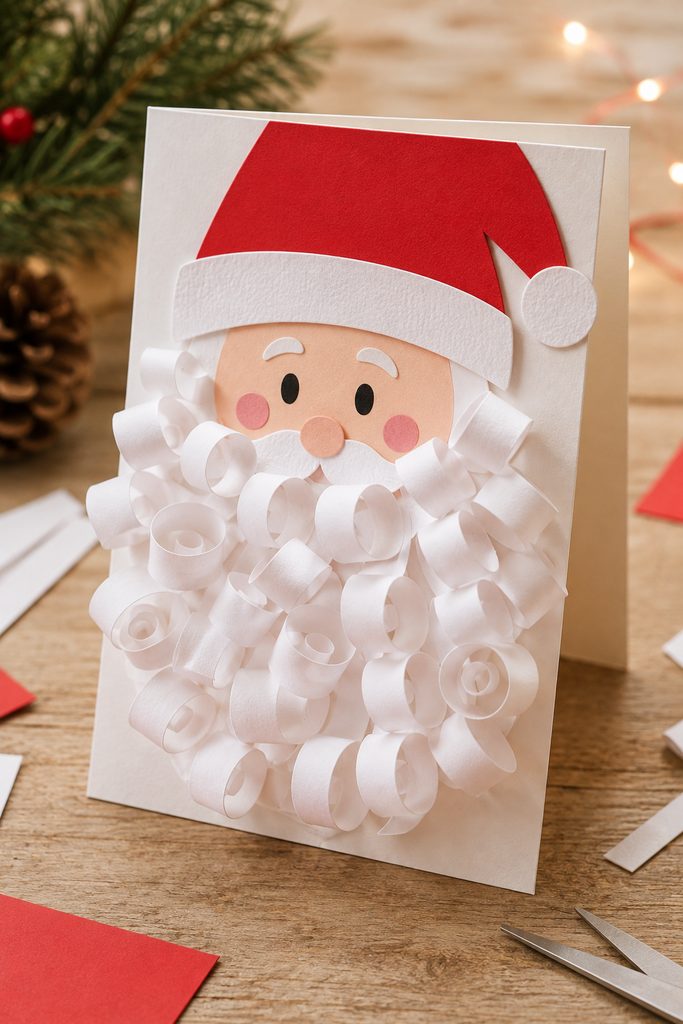
Curling the beard does more for this Santa card than adding tiny facial details. Use a simple paper face and hat near the top of the card, then build the beard from narrow white strips curled around a pencil. Gluing only the top end of each curl keeps the lower part loose, so the beard casts small shadows and still moves a little when the card is handled. For a card that will be mailed, use fewer curls so they can settle inside the envelope; for a hand-delivered card, the beard can stay fuller.

- Cut several white paper strips in mixed lengths.
- Wrap each strip around a pencil, slide it off, and let it relax into a curl.
- Glue the top ends under the paper face, starting with longer curls at the bottom.
- Add a shorter second row where the beard looks sparse, then close the card gently to make sure no curl catches beyond the edges.
3. Paper-Loop Mini Wreath Card
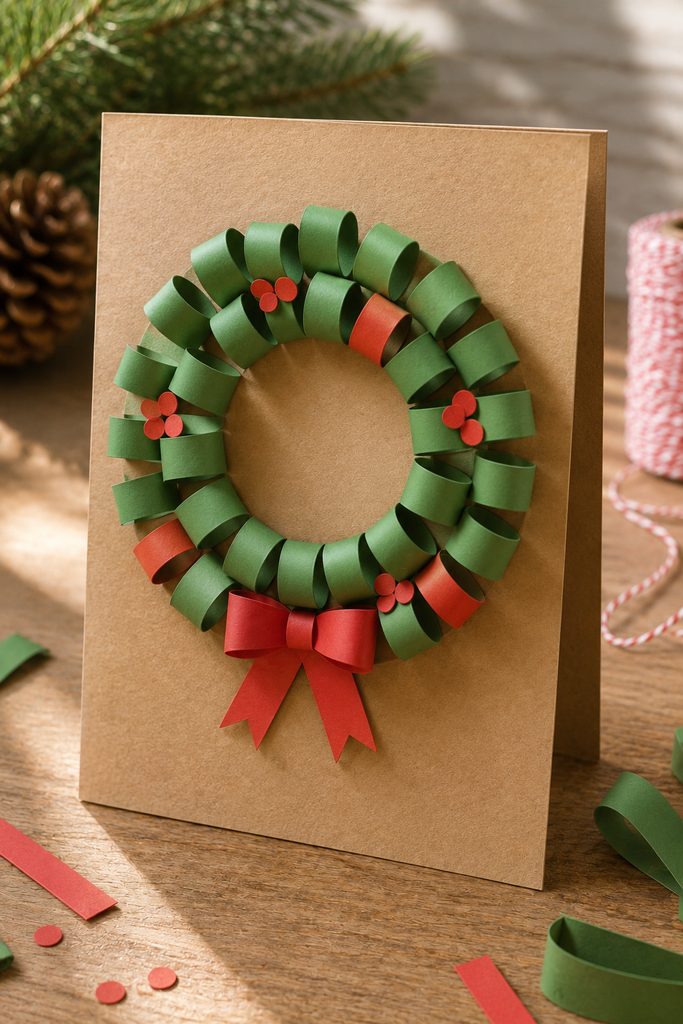
Instead of drawing a wreath, build one from a ring of small paper loops. Form short green strips into loops, glue each end closed, and arrange the loops around a lightly penciled circle on the card front. Point some loops slightly inward and others outward so the wreath feels full without stacking them into a thick mound. A few red loops or tiny paper berries can break up the green, but the center opening should remain obvious from arm’s length.
This works especially well when several cards need to feel related but not identical. Kids can make a bowl of loops first, then choose different combinations for a teacher, grandparent, neighbor, or friend. Batch-making the components first keeps the glue stage calmer and makes it easier to compare wreath size before anything is fixed in place.
4. Paper-Spring Reindeer Nose Card
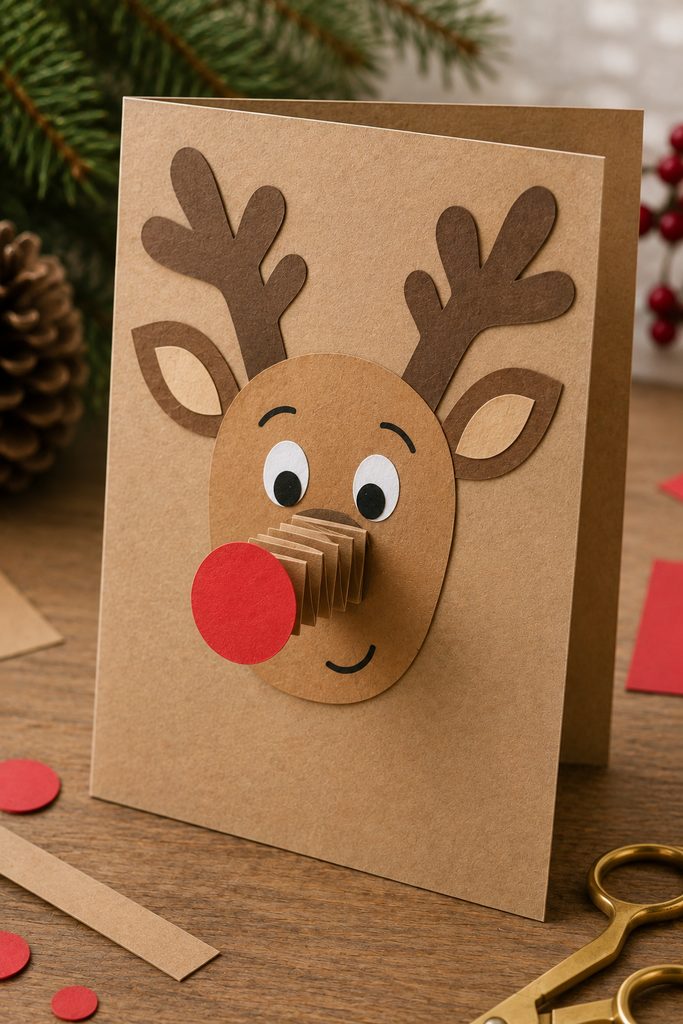
Press the red nose toward the card and the construction explains itself: the nose compresses when the card is closed and pops forward again when released. Make the spring from two long, narrow paper strips crossed at right angles. Fold one strip over the other, then alternate the folds to build a square paper spring. A red paper circle glued to the free end becomes the nose.

Build the moving part before decorating the face:
- Keep the two starting ends square and glue them together.
- Alternate the strips over each other without pulling so tightly that the folds crease into a hard block.
- Glue the finished spring to the card front, then add the red nose to its tip.
- Place antlers, eyes, and ears far enough away that the spring cannot snag them.
Spring Check: Close the card slowly before writing inside. The spring should flatten within the card edges and reopen without twisting sideways. If it buckles, shorten the spring by removing a few folds rather than pressing it flatter with extra glue. That keeps the interaction simple enough for the recipient to enjoy more than once.
5. Handprint Evergreen Keepsake Card
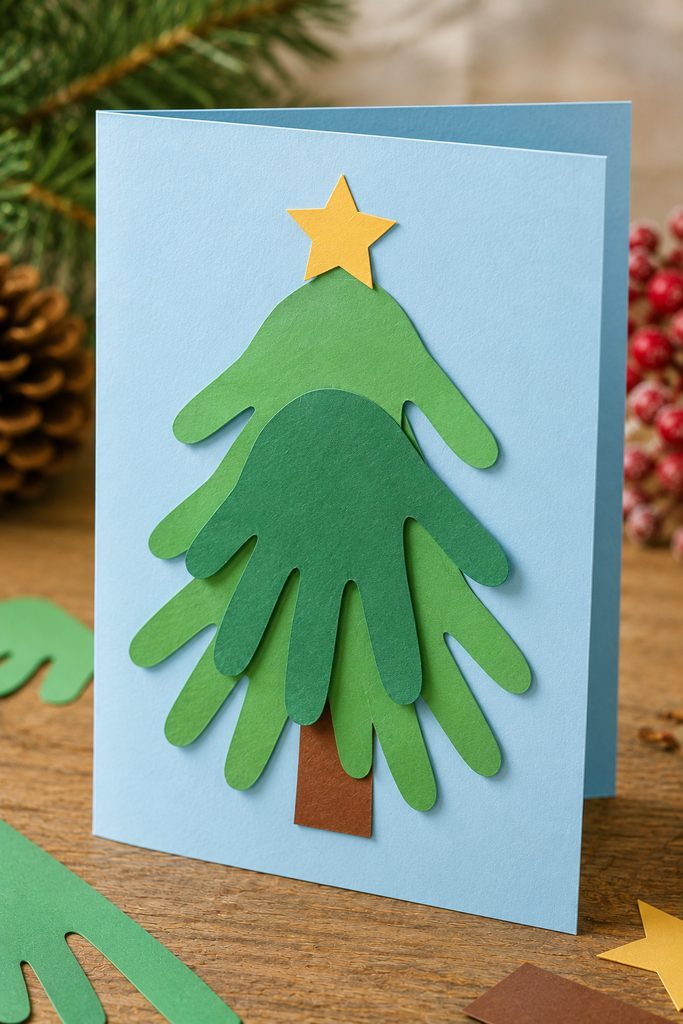
Trace one hand on green construction paper, cut out the silhouette, and turn the fingers downward so they read as a row of evergreen branches. A second, slightly offset handprint can make the tree fuller, while a small paper trunk and star are enough to establish the shape. The value here is personal rather than technically complicated: the hand outline makes the card unmistakably connected to the child who made it. Leave a generous border around the tree and keep extra stickers or gems away from the fingertips, where they can make the silhouette harder to read.
6. Crayon-Resist Snowflake Card
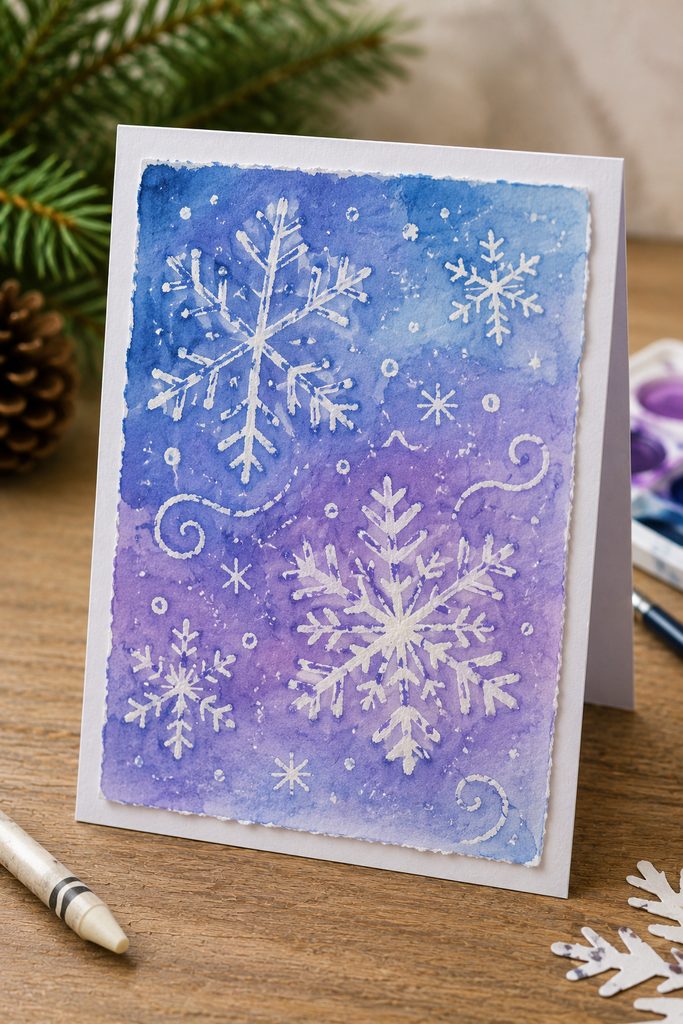
Crayon resist gives a child a way to make a snowy pattern appear through color instead of cutting dozens of tiny openings. Draw large snowflakes, dots, or icy lines with a white wax crayon on a separate sheet of white or pale watercolor-friendly paper, then brush a thin blue or purple water-based wash over the surface. The waxy lines resist much of the wash, so the hidden marks become visible as the surrounding paper darkens. Let the painted panel dry flat before gluing it to the folded card so moisture does not distort the whole base.

Two materials give slightly different results:
- White crayon: finer, lighter lines and a more subtle reveal.
- White oil pastel: broader, heavier marks that tend to stay more visible under the wash.
If the snowflakes disappear, the usual problem is not the color choice but the line weight. Redraw with firmer pressure on the next panel or use the broader pastel route rather than adding more paint.
7. Spiral Snowfall Pop-Up Card
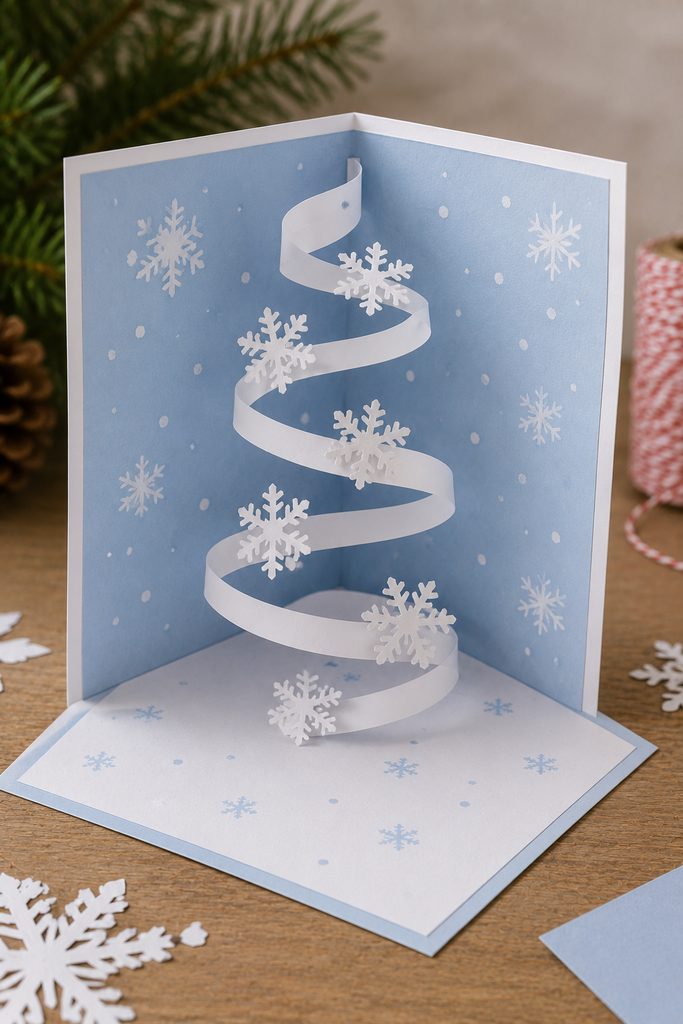
Cut one broad spiral from a paper circle and the inside of the card can open into a small hanging snowfall scene. Start at the outside edge and work toward the center while leaving a solid center disk. Small paper snowflakes or white dots can be glued along the spiral, but keep them light and sparse so the moving strip can still collapse.
The attachment points control the whole mechanism. Glue the outer end of the spiral to one inside panel and the center disk to the opposite inside panel. Before the glue sets, open the card only partway and check that the spiral stretches between the two faces instead of pulling hard toward the spine. Then close the card completely. Every snowflake must land inside the card edges, and no glued decoration should bridge across two neighboring turns of the spiral.

If the pop-up catches: first remove or trim the decoration nearest the snag. If the bare spiral still bunches, widen the tightest curve or shorten the spiral by trimming away its outermost turn. Do not solve a collision by forcing the card shut; a crease in the spiral will keep returning to the same weak point.
Keep the outside quiet so the moving interior remains the surprise. A small flat snowflake or simple color block is enough to signal the theme before the recipient opens the card.
8. Rolled Paper Bead Garland Card
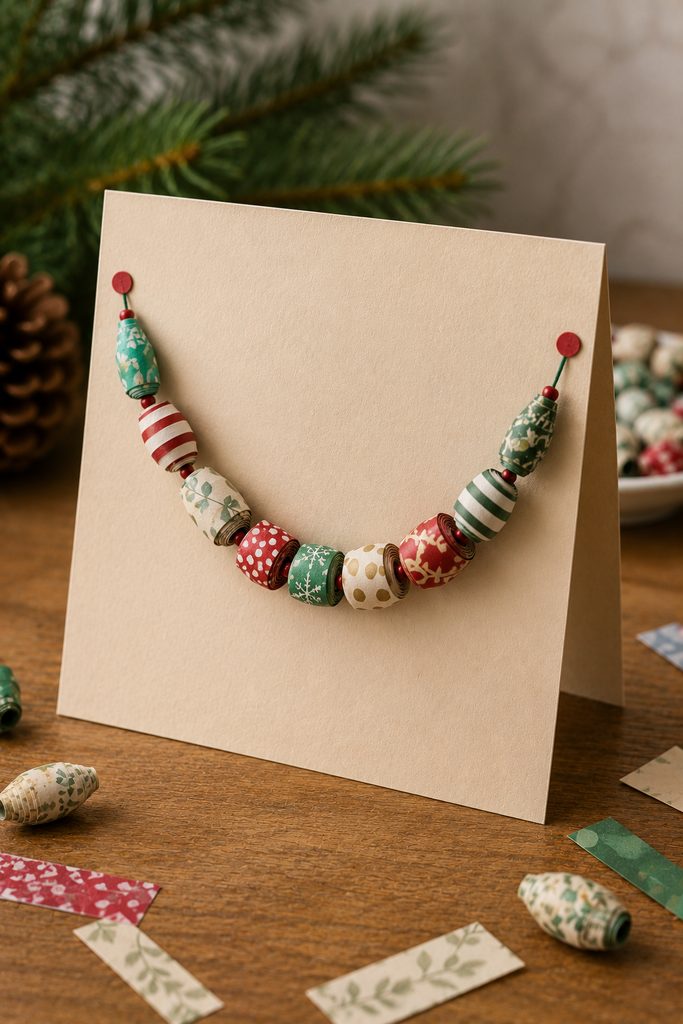
For a garland with real paper volume, roll narrow scraps into small beads instead of cutting flat circles. Thin magazine paper, lightweight patterned paper, or gift-wrap scraps roll more easily than stiff cardstock. The trick is to secure each bead at its seam and then glue one side of the finished bead to the card so it cannot roll. Keep the garland short and airy; too many beads make the front heavy and can cause the folded card to gape open.

- Cut long paper triangles with a wide base and a narrow tip.
- Roll from the wide end around a pencil, keeping the edges centered as the bead thickens.
- Glue the final tip down, slide the bead off, and let it dry.
- Arrange several beads along a shallow drawn curve, then glue them in place with small gaps between each one.
9. Scrunched Tissue-Paper Ornament Card
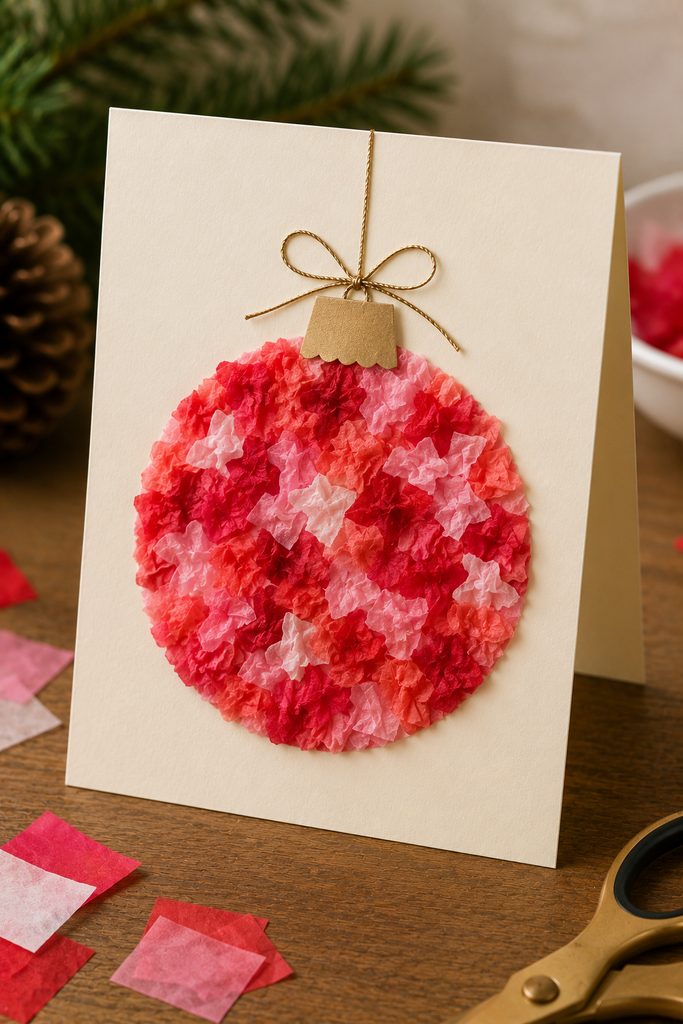
Tissue paper makes a soft, bumpy ornament without asking kids to cut perfect shapes. Draw a large circle on the card front, tear tissue into small pieces, scrunch each piece loosely, and glue the little bundles inside the outline. Mixing two or three shades creates depth because the folds catch light differently. Keep the paper cap and hanging line flat so the textured circle remains the focal point.
If the surface goes wrong, the fix is usually simple:
- Tissue turns soggy: use smaller dots of glue and place the paper onto the adhesive instead of brushing glue over the top.
- Pieces keep lifting: make the bundles looser so more paper touches the card.
- The ornament loses its round shape: stop adding tissue at the penciled edge and fill empty spots toward the center instead.
- The card will not close flat: reserve this design for hand delivery or use fewer tissue bundles.
10. Stand-Up Easel Snowman Card
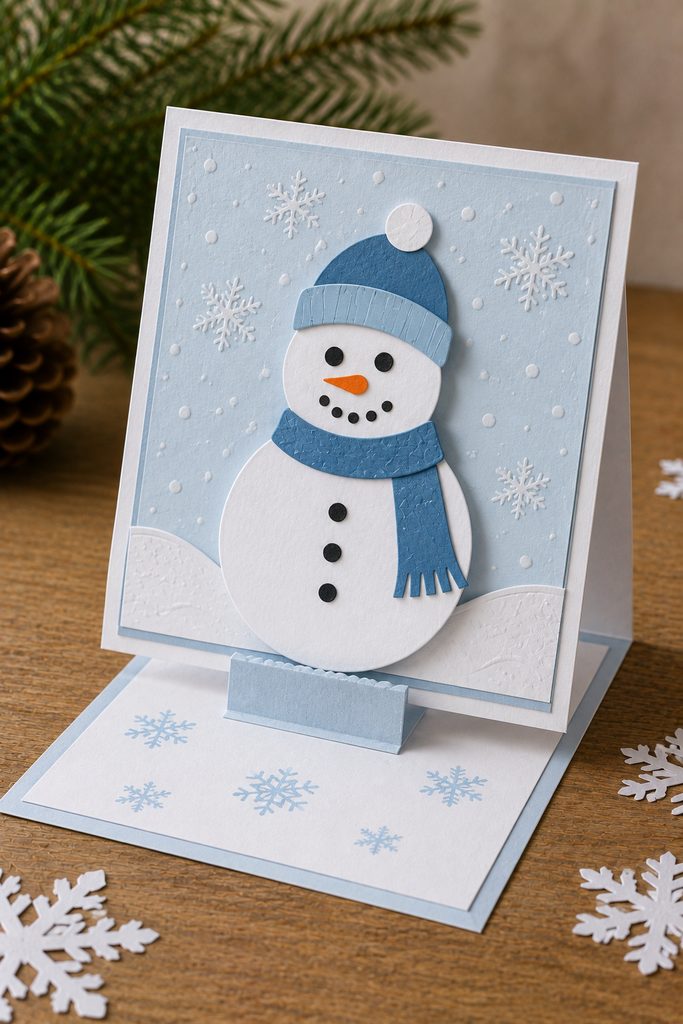
For a card that can live on a desk or shelf after Christmas morning, an easel fold gives the artwork its own support. Start with a folded cardstock base, then fold the front panel in half again to create the easel hinge. Make the snowman on a separate front panel and attach that panel only to the lower half of the folded card front; the unglued upper portion has to remain free so the display can rise. A small raised paper strip or layered shape on the inside base acts as the stopper that the front panel rests against. This is the standard physical logic of an easel card: a hinged front plus an interior stop holds the display angle.
Build and test the support before adding bulky decoration:

- Fold the card base and the extra hinge crease cleanly.
- Attach the snowman panel only where it meets the lower half of the folded front.
- Place the interior stopper low enough that the snowman leans back instead of standing almost vertical.
- Open the easel, press the front edge against the stopper, and tap the table lightly. The base should stay flat while the panel remains propped.
If the front slides forward, raise the stopper with one extra cardstock layer or move it slightly farther from the fold. If the whole card tips backward, the decorated panel is probably too top-heavy; remove thick embellishments near the hat and keep the largest paper shapes lower. For mailing, flatten the easel and avoid a stopper so thick that it creates a hard bump through the envelope.
11. Folded Paper Bow Present Card

The present stays mostly flat; only the paper bow rises from the surface. Glue one rectangle to the card as the gift box, add two narrow paper strips as ribbon, then form the bow from short strips whose ends meet at the center. Pinch or gently crease each loop where it meets the middle so the bow lifts while the outer edges stay rounded. A small center band hides the glued ends. Because the box itself stays flat, kids can make the bow the one raised feature and still leave plenty of room for a handwritten message inside.
12. Fold-and-Cut Snowflake Frame Card
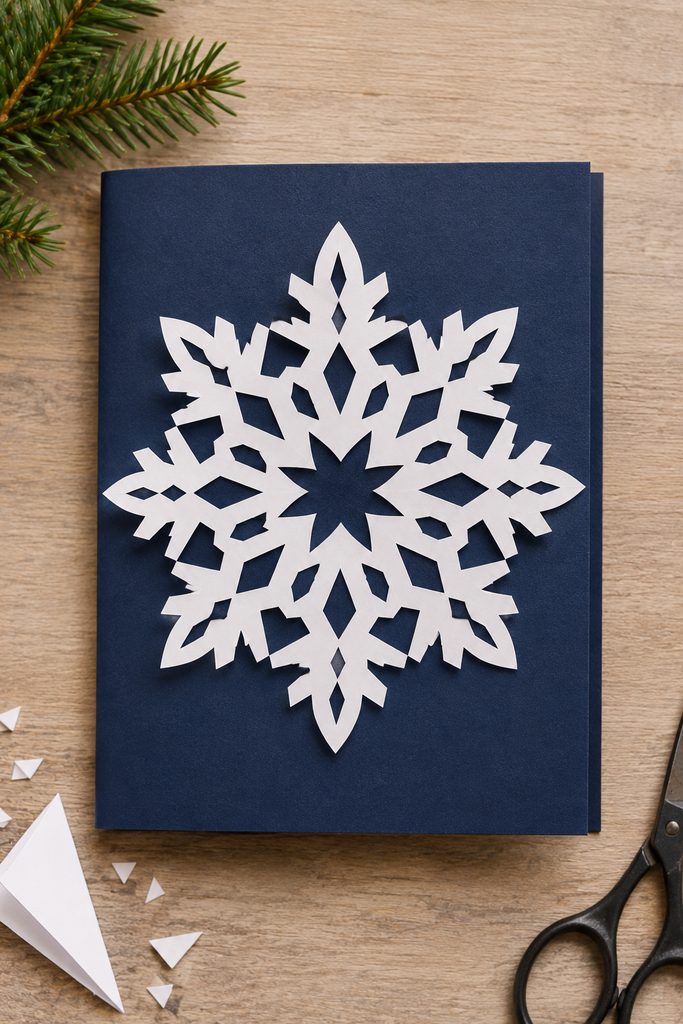
If scissors are the favorite tool, one large folded-paper snowflake can carry the whole card front. Fold a square of thin paper into a smaller wedge, snip simple triangles and notches from the open edges, then unfold slowly. Mount the snowflake over contrasting cardstock so its cut openings show clearly. The center can stay open or hold one small paper shape, but the cut pattern should do most of the work.
Before gluing, check five things:
- The snowflake opens without torn bridges.
- The outer points fit inside the card edges.
- Enough background shows through the cutouts to make the pattern readable.
- The center is not so crowded that the design loses its radial shape.
- If one delicate point tears, trim the matching points slightly shorter so the radial pattern stays balanced instead of hiding the damage under extra decoration.
Choosing Handmade Christmas Cards for Kids by Crafting Style
The fastest way to choose is by process rather than by Christmas character. Kids who like sorting and gluing may enjoy the candy-cane mosaic, loop wreath, or tissue-paper ornament. Curling and rolling are the main action in the Santa beard, paper-bead garland, and folded bow. The crayon-resist card suits a child who wants to paint, while the snowflake frame gives scissors most of the work.
Save the spring nose, spiral pop-up, and easel snowman for a child who enjoys making parts interact. Those projects ask for one extra round of opening, closing, or stability checks before decoration is finished. The handprint evergreen is the simplest choice when the personal connection matters more than construction.
Let the Making Style Choose the First Card
Start with the action a child already enjoys, then choose the recipient. A tactile card may be more fun to hand over in person, while a flatter mosaic, handprint, resist, or snowflake design is easier to place with a wrapped gift or in an envelope. Once one construction feels comfortable, move to a card with a spring, spiral, or stand-up support so the next project adds a new kind of making instead of more decoration.
For another low-fuss set of card ideas, Diynify’s 15 Simple Handmade Christmas Cards Without Fussy Techniques is the closest next read.








