
This post contains affiliate links. As an Amazon Associate I earn from qualifying purchases, at no extra cost to you. Thank you for supporting Diynify!
Paper mache Christmas ideas are especially good for holiday decor that should look collected, softly aged, and visibly handmade rather than crisp and factory-perfect. The material can be molded, layered over an armature, or built into a hollow shell, so the same basic craft method can produce ornaments, containers, wall pieces, tabletop figures, and even a small illuminated house.
Most projects here use torn paper or fine paper pulp, paper-mache paste, acrylic paint, and a simple cardboard or recycled-paper armature. A few need extra supplies such as a flexible mold, ribbon or string, chipboard, vellum, a cool battery-powered LED, a cardboard tube, or a weighted internal block with a nonslip pad. Let each piece dry fully before adding paint or sealing layers, especially where two shells need to fit together.
1. Victorian Cameo Medallion Ornaments
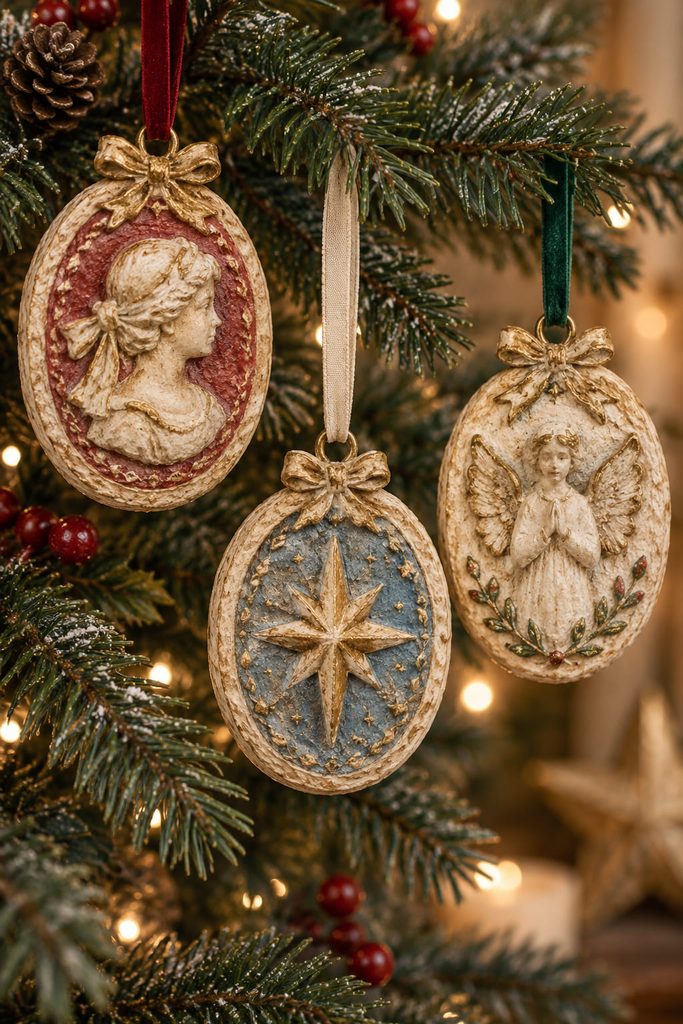
A shallow relief is one of the easiest ways to make paper mache look old-fashioned without adding dozens of tiny decorations. Press fine, damp paper pulp into a flexible oval mold with a raised floral, bow, star, or portrait-style motif, keeping the back fairly flat so the finished medallion does not become unnecessarily heavy. Once dry, add a small hanging hole or glue a paper-reinforced ribbon tab to the back.
The vintage effect comes more from the finish than from the motif. A warm cream base with a muted red, dusty blue, or antique-gold dry brush lets the raised areas catch light while the recesses stay darker. Make a coordinated set rather than twelve identical pieces; repeating the oval silhouette keeps them related while changing only the relief pattern.

2. Old-World Rocking Horse Figurine
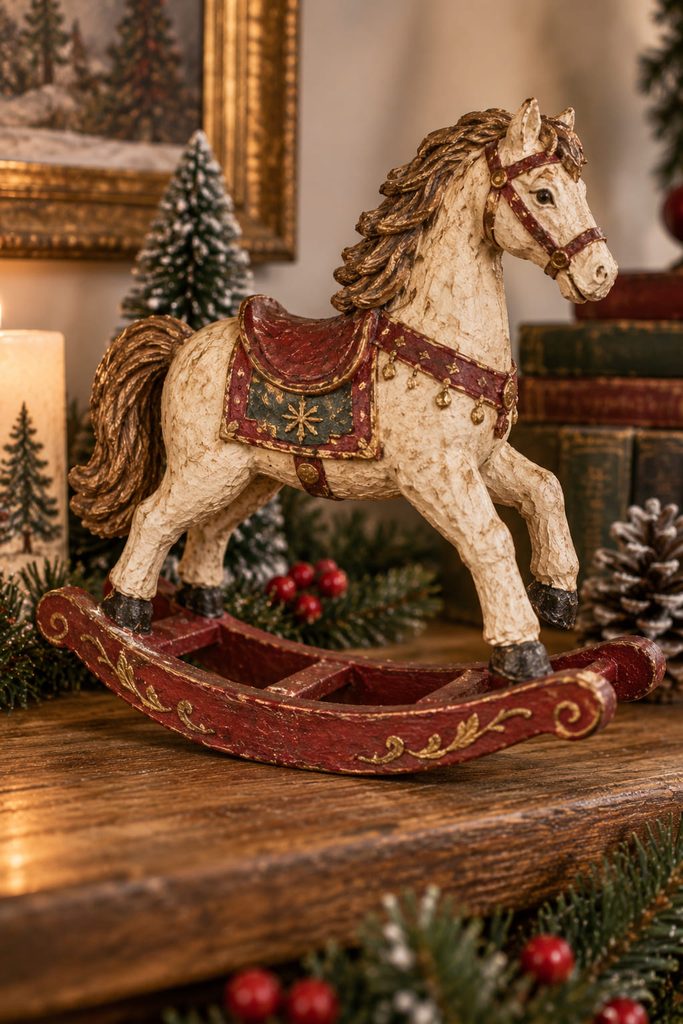
The recognizable part of a rocking horse is not the painted saddle but the curved runner beneath it. Build that feature first so the decoration never has to compensate for a weak silhouette.
- Cut two matching horse profiles from corrugated cardboard and separate them with narrow cardboard spacers to create body thickness.
- Add a curved runner under the feet with two or three cross braces wide enough to keep the figure upright.
- Wrap the armature with short paper strips, smoothing around the belly and neck but leaving the runner edges readable.
- After the shell is completely dry, paint the body in muted toy-shop colors and add a simple paper saddle, bridle, and mane.
Set the finished horse on a flat surface before decorating heavily. If it tips forward, shift decorative weight backward or widen the runner slightly; the base should solve the balance problem, not a hidden prop.
3. Santa Candy Container With a Hidden Lid
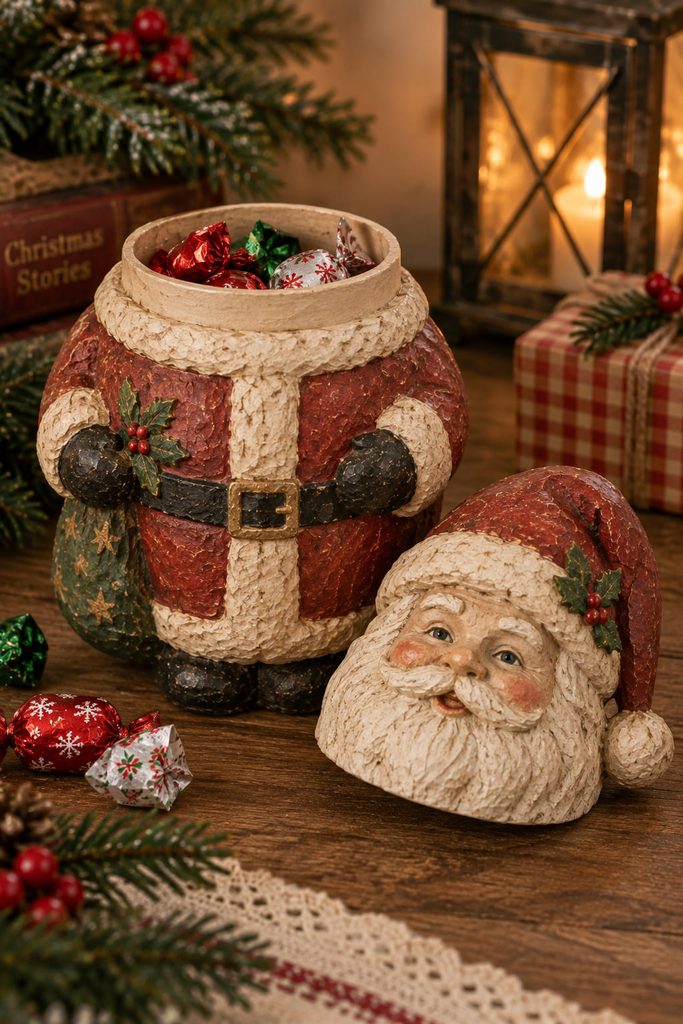
Before adding Santa’s beard, belt, or face, solve the lid. The lower body needs a closed base, the top needs a removable closure, and the joint must leave enough clearance for paint and paper layers. Treat the character details as surface decoration only after the fit is established.

A practical construction is a sturdy lower cylinder covered in paper mache with a second, slightly larger cap shell forming the shoulders and head. Add a narrow inner paperboard collar inside the cap so it slips over the lower wall instead of balancing on the edge. Dry-fit before painting; several coats at the rim can erase a good tolerance. If the finished cap binds, trim or sand the inner collar lightly rather than forcing the painted shell.
Lid Clearance Check
- The cap should slide on without forcing.
- The inner collar should overlap enough to resist accidental knocks.
- The base must sit flat when the container is filled with lightweight wrapped candy.
- The opening should be wide enough for fingers to remove the contents comfortably.
Keep food wrapped and removable rather than placing unwrapped sweets directly against the craft surface.
4. Putz-Inspired Christmas House Luminary
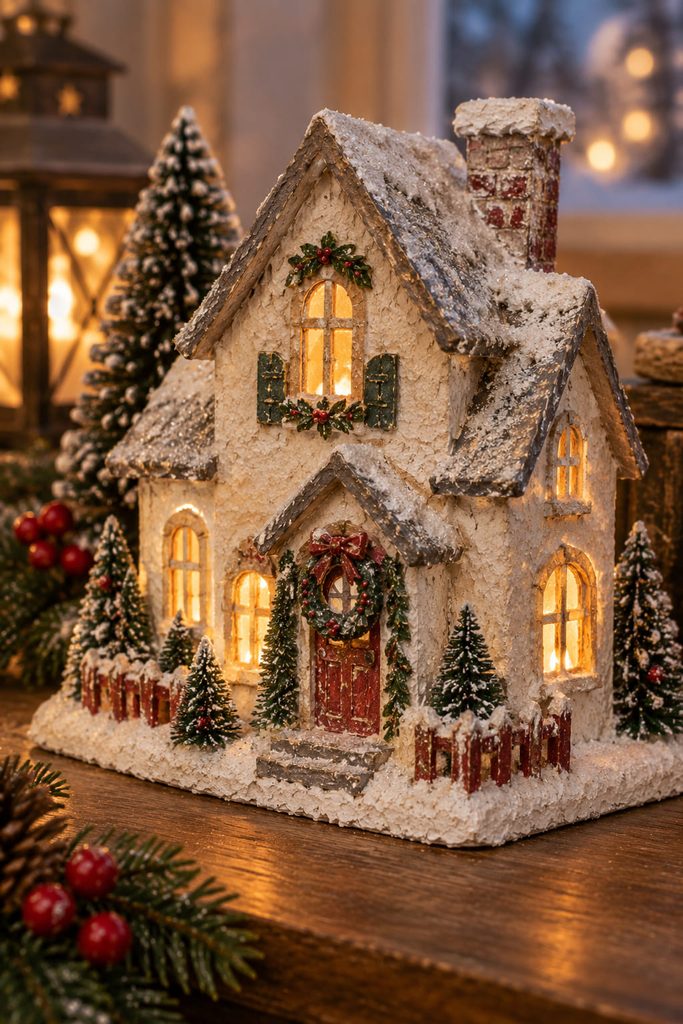
If a miniature paper-mache house looks dull when lit, the problem is usually the light path rather than the paint. Thick window edges, blocked openings, or an LED buried behind opaque interior supports can keep the glow from reaching the facade.
Build the house from chipboard first so the walls, roof, and floor carry the structure. Cover the exterior with a thin paper-mache skin instead of heavy wet layers that may pull the walls out of square. Cut windows before applying the skin, line them with vellum after painting, and leave the back or part of the base open enough to insert and remove a cool battery-powered LED while the house still rests on a flat, stable floor.

If the roof twists while drying, brace the walls internally with temporary scrap-card strips until the shell is firm. If the windows glow unevenly, move the LED farther from the nearest opening or add a small white-paper reflector behind it. Never use a real candle in a paper-mache luminary.
A snowy finish can stay restrained: off-white walls, a dull silver roof edge, and a few mica-like glitter accents around the windows are enough to suggest an old holiday village without hiding the architecture.
5. Gilded Star Tree Topper With a Paper Sleeve
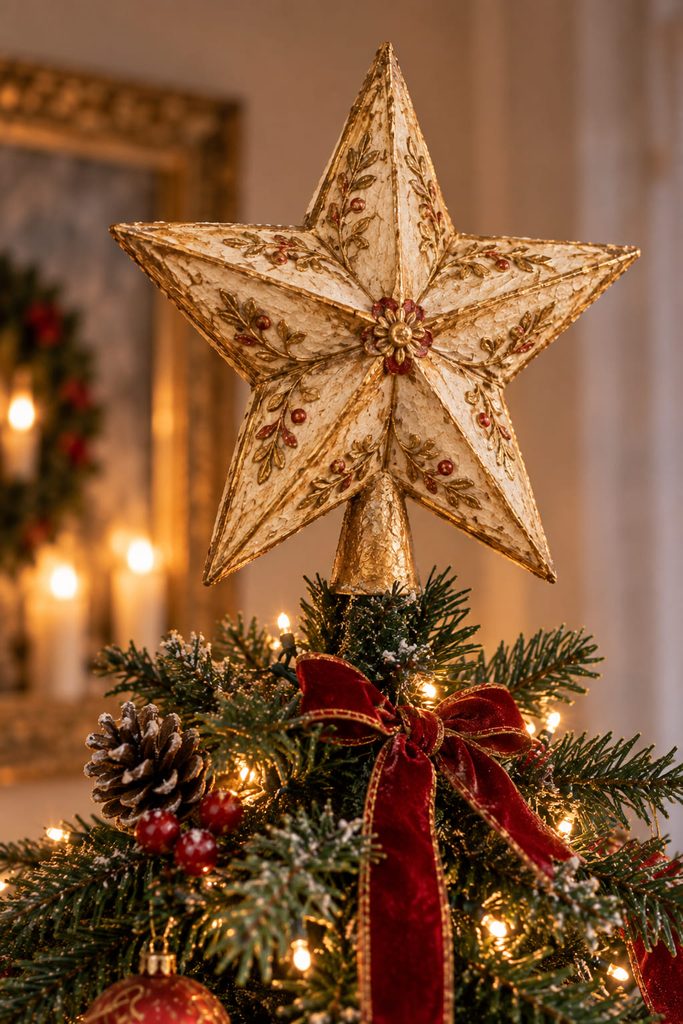
Think of the topper as a mounted object rather than an oversized ornament: it needs a positive attachment that keeps the star upright. Build two shallow paper-mache star faces over a firm cardstock core, join them around the edge, and leave the lower point open for a tapered paper sleeve on the back.

The sleeve should fit over the tree’s top stem or a narrow support without splitting the star itself. Before adding metallic paint, place the unfinished topper on the intended support and view it from several angles. A slight backward lean is much easier to correct by changing the sleeve angle before the final coat.
Topper Fit Test: Hold the tree or support steady and lightly tap the branch below. The star should remain aligned without needing hidden tape around the front.
6. Sugared Fruit Christmas Wreath
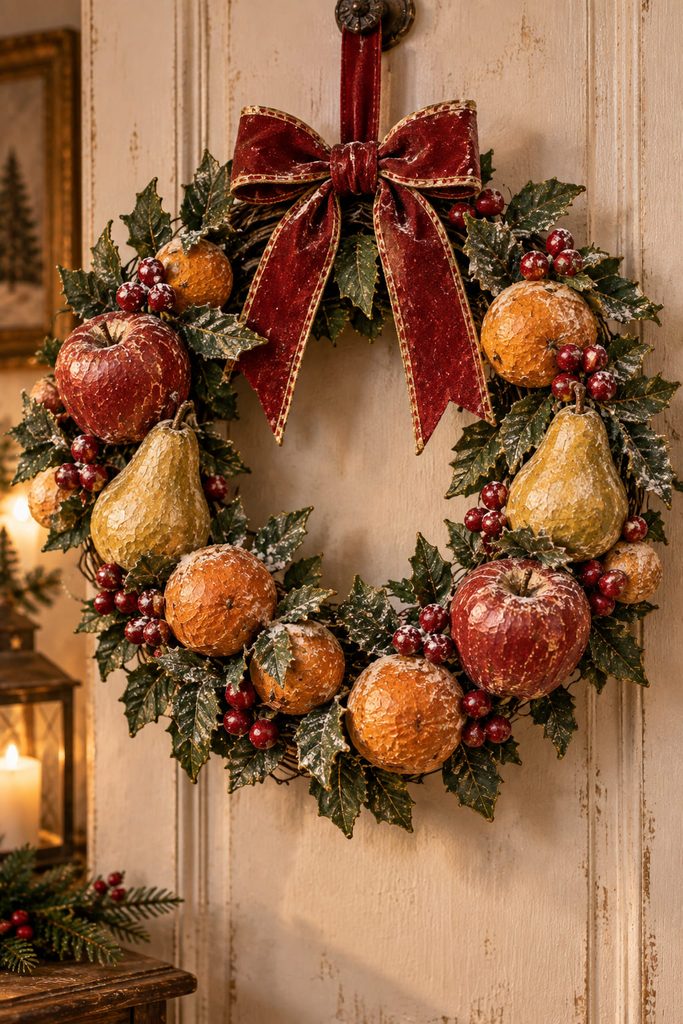
The wreath becomes convincing when the paper-mache fruit is treated as weight that must be distributed, not simply as decoration to glue wherever there is space.

- Shape lightweight apples, pears, and small oranges from crumpled paper cores, then cover them with thin paper-mache layers.
- Build or cover a firm wreath ring and mark the hanging point before attaching any fruit.
- Cluster the larger forms low and slightly off-center, then fill upward with smaller fruit, paper leaves, and narrow ribbon.
- Attach each piece through a broad glued contact area or a concealed paper tab that wraps partly around the ring.
Leave a little background visible between clusters. That negative space keeps the fruit silhouettes readable and prevents the wreath from becoming a single heavy circle.
Where the Hanging Loop Goes: Reinforce the loop at the ring itself, not on a decorative fruit, so the load travels through the structural base.
7. Scalloped Snow Village Display Riser
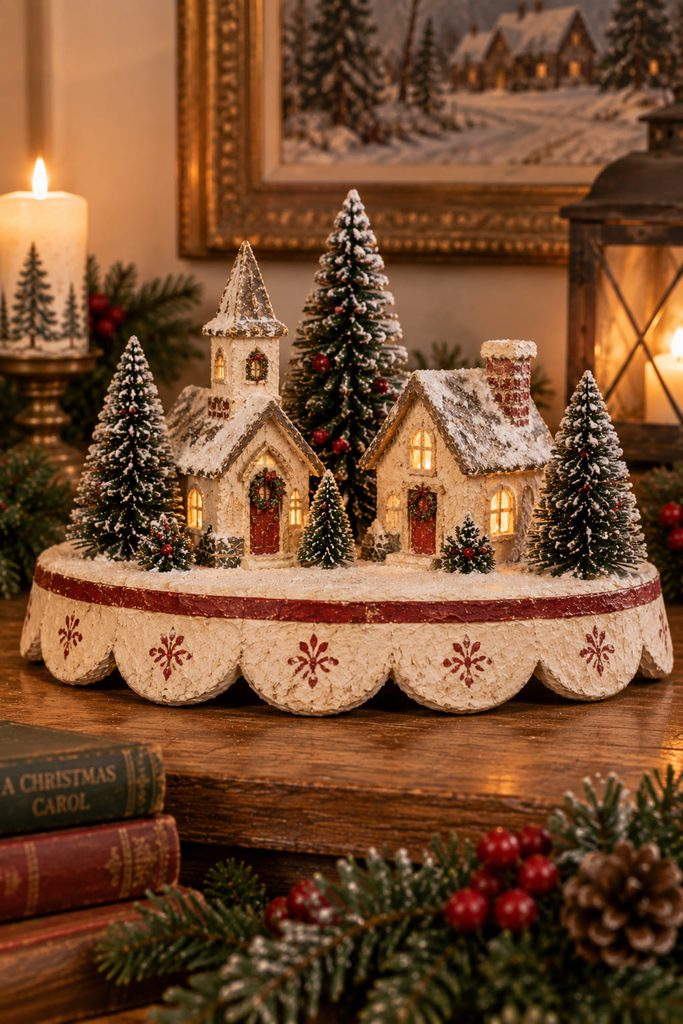
A low paper-mache riser can make a collection of tiny houses or bottlebrush trees feel intentional without becoming another miniature building. Stack corrugated-cardboard layers into a broad, shallow platform, round the front edge with crumpled paper, and cover the form with paper mache until the seam lines disappear.
The important detail is a flat top. Keep wet paper away from the central display surface during the final layer, or press the riser under a flat board while it finishes drying. A scalloped front, faded cream paint, and a narrow red stripe give it the look of an old toy-store display base while leaving the miniature pieces removable and rearrangeable.
8. Vintage Sleigh Centerpiece With a Usable Cargo Well
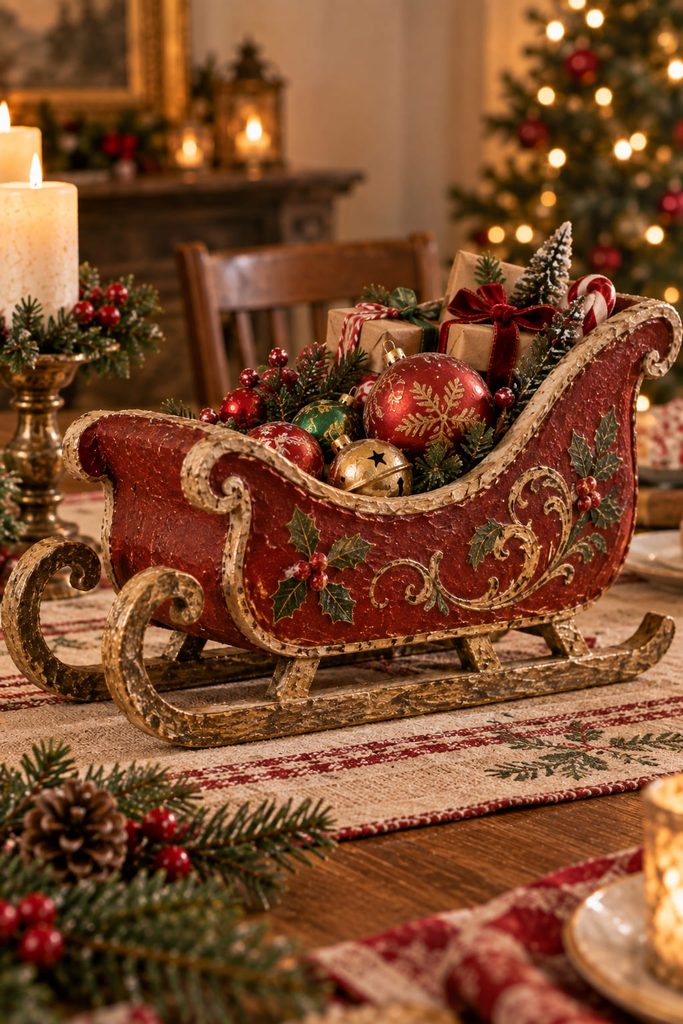
There are two good ways to make a paper-mache sleigh, and the right one depends on what the centerpiece needs to hold.
| Route | Best For | Construction Difference |
|---|---|---|
| Hollow cargo well | Lightweight ornaments, wrapped treats, paper greenery | Build the body around a removable inner form and reinforce the floor before adding runners |
| Fixed display scene | Bottlebrush trees, paper parcels, a small figurine | Use a solid cardboard block inside the sleigh so the decorative scene can be glued permanently |
For a hollow version, the runners should not carry the full load by themselves. Let the sleigh body have a hidden flat underside or cross braces that touch the table, while the curved runners remain visible as the decorative silhouette. Add paper-mache layers over the body and braces, keeping the opening wide enough for a hand to reach inside.
A fixed scene can be shallower because access no longer matters. That trade-off gives more freedom for a high back, painted scrollwork, and stacked parcels without making the sleigh awkward to use.
9. Antique Angel Bas-Relief Wall Plaque

Use paper pulp as low-relief sculpture here rather than as a wrapping layer. Start with a rigid oval backing and build the angel with a raised face and torso, shallow wing forms, and a separate halo that stays slightly above the background. Keeping the depth modest reduces weight and makes the piece easier to hang flat.
The composition reads best when one area remains quiet. Instead of filling every inch with stars and holly, let the wings occupy most of the oval and place a small ribbon banner or pair of bells near the lower edge. The open background becomes part of the vintage look.
For finishing, use a light base coat first so small cracks and rough transitions are easy to see. Sand or fill only the distracting ridges; a perfectly smooth plastic surface would work against the handmade character. A darker glaze in the recesses can strengthen the relief, while a restrained metallic touch on the halo gives the eye one clear focal point.
Mount the hanging hardware through the rigid backing rather than through the dried relief.
10. Snowman Place Card Holders With Stable Bases
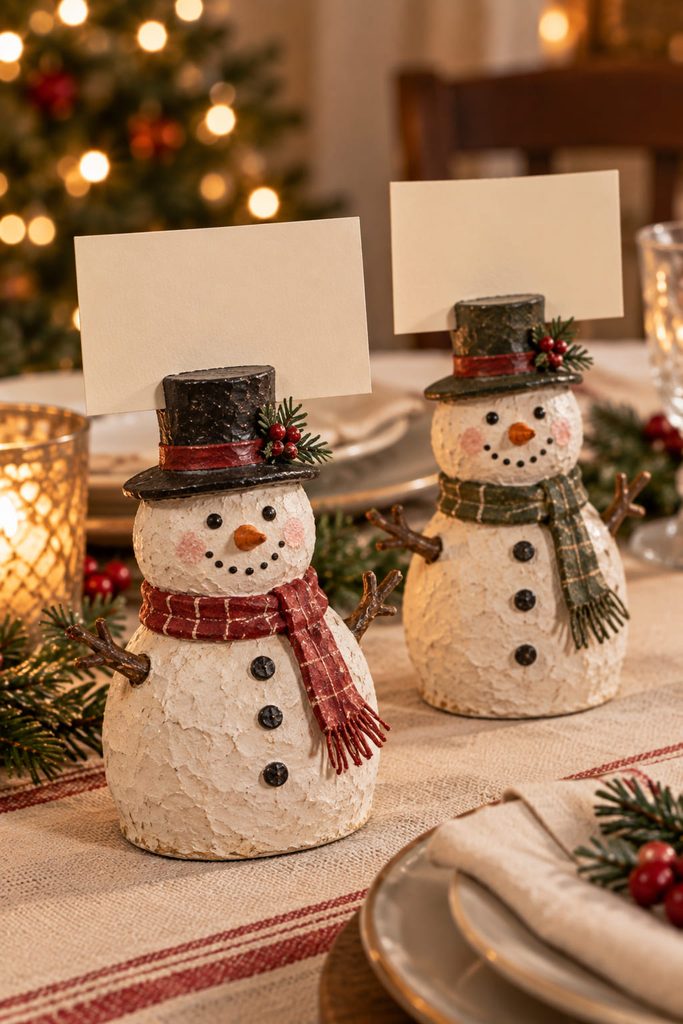
Tiny snowmen can double as place-card holders if the card slot is planned before the head is finished. Form each body around a compact paper core and flatten the underside while damp so it develops a real footprint rather than balancing on a round belly.
Before the last paper-mache layer dries, insert a narrow folded strip of cardstock at the top to create a clean channel for the card. Remove the strip after drying if you want an open slot, or leave a trimmed inner liner in place for a neater edge.
Tabletop Checklist
- Base sits flat without a card.
- Card stays upright without being pinched or bent.
- Slot remains accessible after the hat or scarf is added.
- Decorative arms stay clear of neighboring place settings.
Batch the bodies first, then paint faces and accessories as a second operation; the repeated construction matters more than making every snowman identical.
11. Nutcracker Bookends Built Around Real Weight
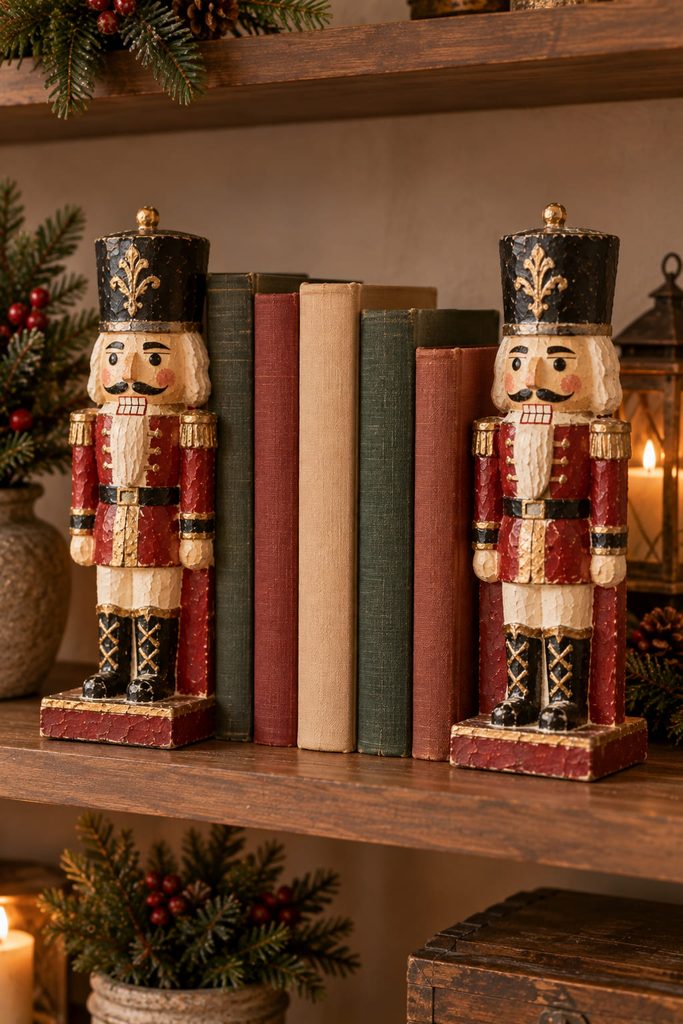
Paper mache alone is too light to make a dependable bookend, so let the decorative shell hide a genuinely stable core. Cover a pair of compact wooden blocks or other solid, flat-bottomed weights with thin paper-mache layers, then build the nutcracker faces, hats, and jacket details onto the outward-facing sides.
Keep the bottom and the book-contact face nearly flat. Test each piece against a short row of books before decorating it; if the block slides, add a thin nonslip pad underneath. Raised buttons and trim belong on the visible front, while the hidden core—not the dried paper shell—handles the load.
12. Vintage Toy Drum Napkin Rings
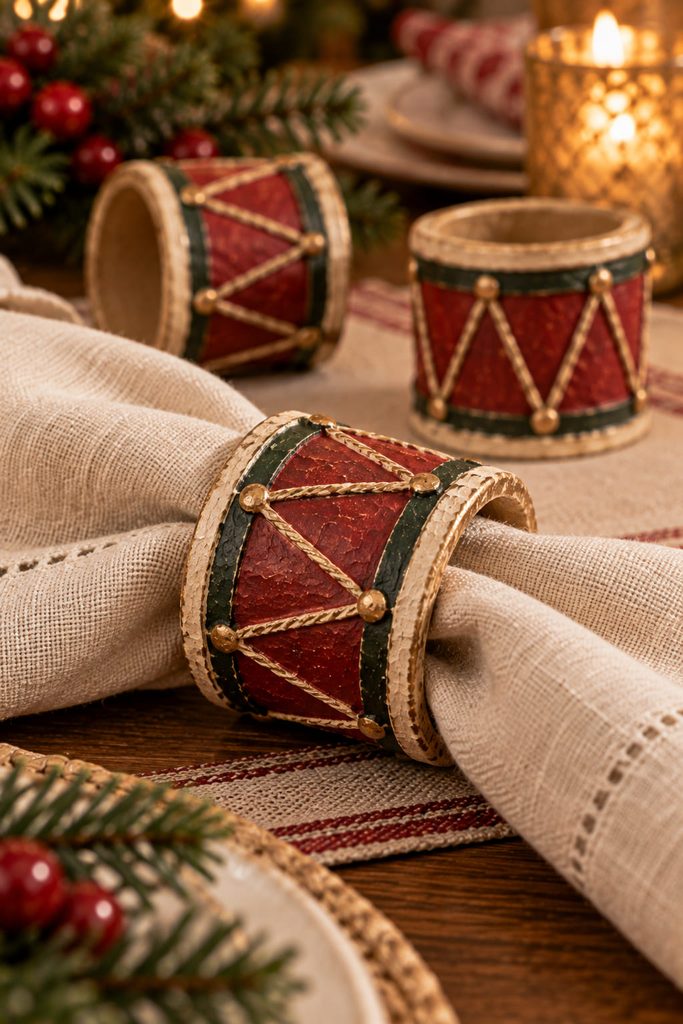
Start with the tube instead of sculpting a ring from scratch. Cut a short cardboard tube into even bands, cover each one with thin paper-mache strips, and keep the inner opening as clean as possible so a folded fabric napkin can slide through without catching.
For an old toy-drum effect, paint the bands in faded red, cream, or forest green, then add narrow paper rims and diagonal cord-like strips outside. Keep bulky trim away from the inner edge.
For a table set, finish all base rings first, add every rim next, then paint the stripes as one batch. They stay coordinated without becoming exact copies.
How To Keep Paper Mache Christmas Decor Looking Vintage
The most useful way to compare paper mache Christmas ideas is by surface and silhouette, not by how many embellishments can be added. Vintage-style pieces usually read more clearly when the form is simple enough to recognize from across the room and the finish has only one or two focal accents.
Start with a warm off-white, muted red, deep green, dusty blue, or soft black base, then reserve metallic paint, glitter, or darker glaze for edges and recesses. If every ridge is gilded, the eye stops seeing the paper shape. If every surface is distressed, the aging effect becomes visual noise.
Paper mache also rewards patience between layers. Thin, fully dried coats are easier to refine than one thick, wet application, especially on lids, flat-backed plaques, and structures with square corners.
Choose One Project By Function First
If you want the fastest introduction to the material, begin with the cameo medallions or napkin rings; both have simple forms and a small surface area. For a more sculptural project, the rocking horse or angel plaque gives the paper itself more of the visual work. The Santa container, luminary, sleigh, and bookends are better choices when you want the finished piece to do something beyond sitting on display.
For a lighter tree-focused follow-up, Diynify’s related ornament collection is a natural next read: 16 Festive Paper Christmas Ornaments for a Handmade Tree.








