
This post contains affiliate links. As an Amazon Associate I earn from qualifying purchases, at no extra cost to you. Thank you for supporting Diynify!
Paper star decorations can do very different jobs depending on where they live. A wall piece can carry depth and a wider backing; a window star has to work with daylight and keep its attachment light; a tree decoration needs to hang, turn, or sit at the top without pulling a branch out of shape.
Most of these ideas use cardstock, lightweight decorative paper, scissors or a craft knife, a ruler, a scoring tool, and paper-safe adhesive. A few call for vellum, tissue paper, paper bags, thread, or a small paperboard backing. Choose the display location first, then pick a construction that suits the load, light, and viewing distance.
1. Build a Modular Point Star Wall Medallion
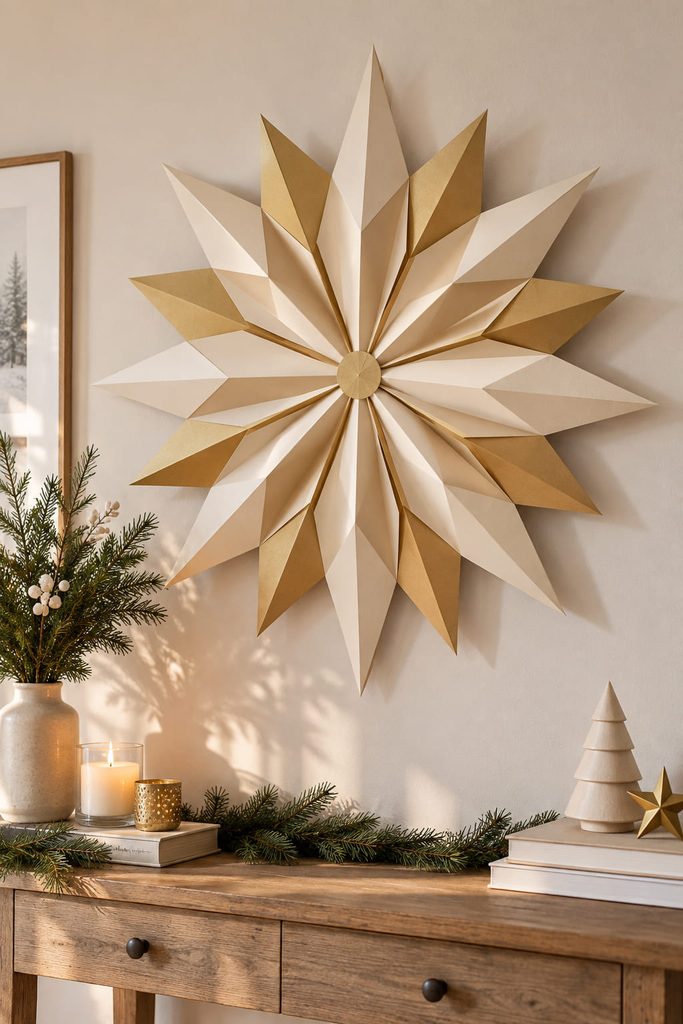
Build the center before you worry about the outer silhouette. This wall star is assembled from separate kite-shaped or diamond-shaped paper modules whose wide ends meet around a reinforced center disk. Light scoring down each module adds a shallow ridge, so the finished points catch side light without requiring a heavy layered stack.
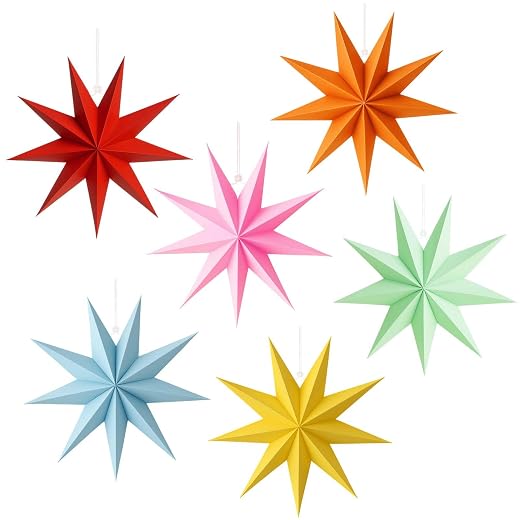
For an oversized version, make one paperboard backing disk just large enough to support the inner ends of the modules, then work around it in opposite pairs. Mounting the points to a shared center spreads the load and keeps one loose piece from twisting away from the wall. From across the room, the center should read as one clean hub rather than a pile of overlapping tabs; if it feels crowded, shorten the hidden inner ends instead of trimming the visible points.
2. Run Offset Star Tiles Along a Wall Ledge
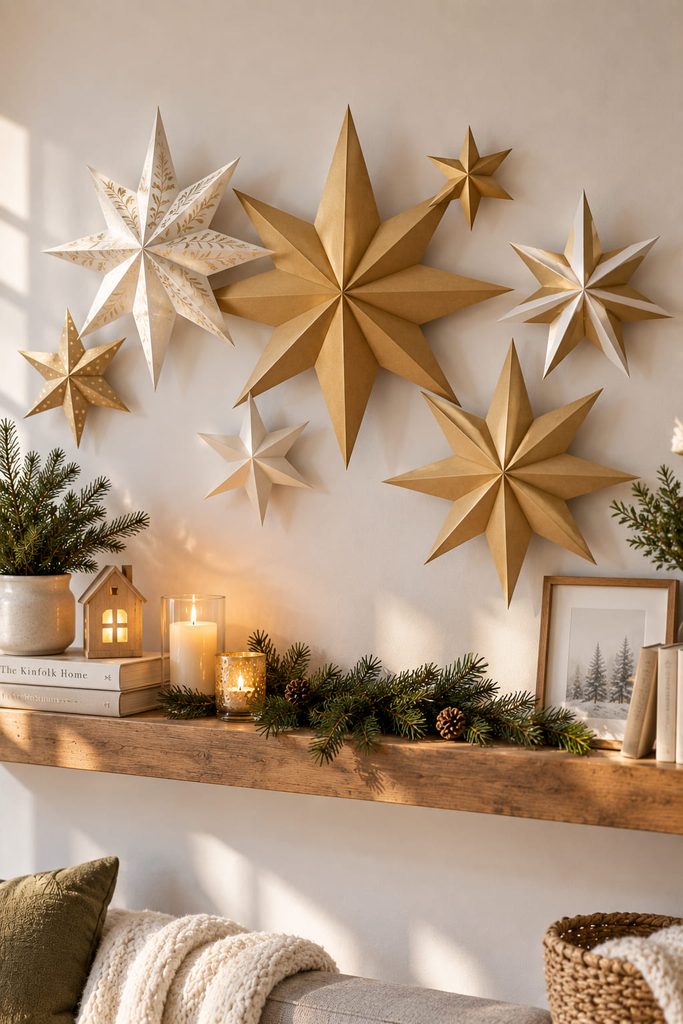
A long wall, picture ledge, or mantel-height strip often needs rhythm more than one giant focal object. Cut flat stars in two or three sizes, then give selected pieces a narrow folded spacer on the back so some sit slightly forward while others remain close to the surface.

Build the arrangement in this order:
- Place the largest star first to establish the visual anchor.
- Add a second large star farther away than feels perfectly symmetrical.
- Bridge the gap with smaller stars, rotating only a few so the points do not form a rigid row.
- Step back before fixing the final pieces and check the empty wall between them.
The useful test is the negative space. If every tip nearly touches another star, the installation becomes one jagged band. A few deliberate gaps make the separate silhouettes readable from normal room distance.
3. Open a Paper Bag Star Flat Against the Wall
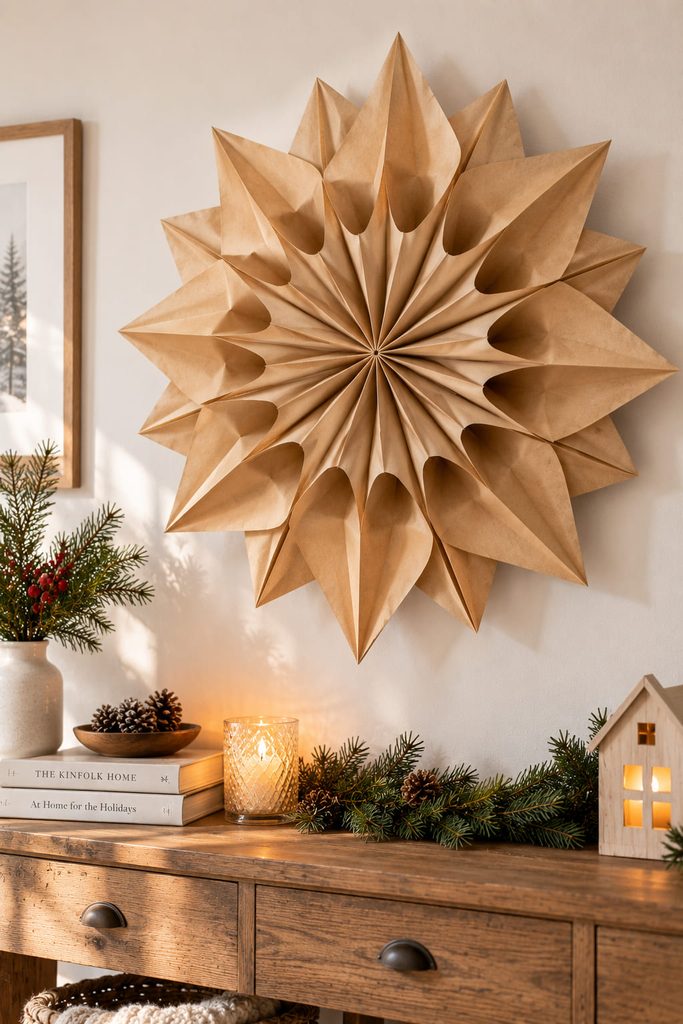
Storage is the main reason to choose a paper bag star. A stack of identical flat paper bags can be glued face to face in a controlled pattern, trimmed at the outer end, then opened around its spine into a radial star. When the season is over, the two outer faces can be separated or unclipped so the whole decoration collapses back into a slim stack.

Expansion Check
- If the star refuses to open fully, the adhesive lines are probably too wide or too close to the outer edge.
- If individual bags flare unevenly, align the closed ends before adding the next layer.
- If the center sags on the wall, place the hanging loop through the reinforced spine area rather than one thin bag edge.
- If you want repeated storage, use a removable closure between the first and last faces instead of sealing them permanently.
This construction is especially useful for a large temporary wall accent because its volume comes from repeated paper cells, not a thick backing board.
4. Shape a Rolled-Cone Starburst Wall Sculpture

Rolled paper cones can create a deep starburst, but the depth only works if the backing controls the load. Use firm cardstock for the cones and a rigid paperboard disk or ring behind them. Each cone contributes a tapered point, while the backing keeps those points aimed around one center instead of letting the whole piece sag downward.
Start with four or five long cones at evenly spaced reference positions. Dry-place the remaining cones between them, alternating lengths if you want a sharper star silhouette. Glue the wide cone ends to the backing, not to neighboring cones; that keeps each piece supported independently and makes a damaged point easier to replace. A second, shorter cone layer can add depth near the center, but leave enough visible backing or open center space that the form does not become a dense paper pom-pom.
Wall Load Check: hold the finished piece vertically before mounting it. If the upper cones stay aligned on the table but dip when upright, the backing is flexing or the cone bases are too far from the support. Strengthen the rear disk or shorten the heaviest projections rather than adding glue between unsupported tips.
For mounting, attach the wall loop or removable hanging hardware to the backing itself. The finished sculpture should cast changing shadows from the side while the star outline still reads straight on.
5. Make a Vellum Patchwork Star Suncatcher
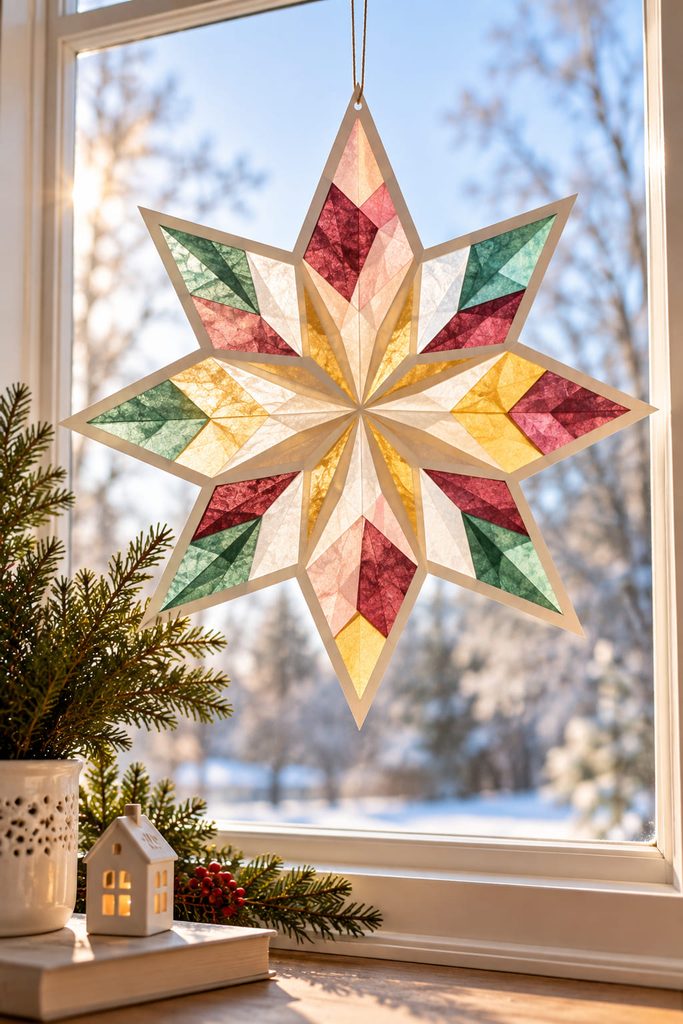
Against daylight, opaque layers quickly turn into dark shapes, so this window star uses a cardstock outline as the structure and translucent paper as the color. Cut a broad star frame with several internal openings, then back those openings with vellum, tissue paper, or other lightweight translucent paper.
Keep adhesive on the cardstock borders where it can stay hidden. Overlapping translucent pieces can create richer color, but two or three layers are usually more useful than a thick stack because the design depends on light passing through. Hang the finished star from a reinforced top tab or mount it near the glass with a suitable removable method, leaving the center of the window mostly open.

The success check happens in daylight, not on the craft table. Hold the star against the window before sealing every patch. If one section reads muddy while the others glow, remove a layer or widen the opening instead of adding a brighter color.
6. Cut a Lace Star Silhouette for Clear Glass
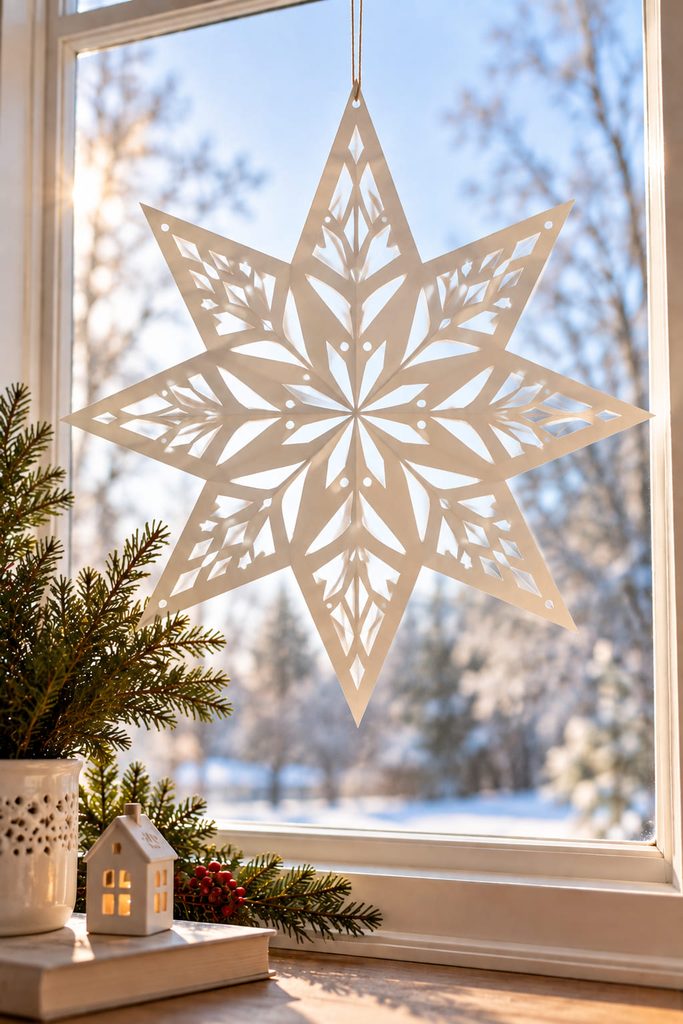
The cleanest window star can be almost completely flat. Start with a sturdy outer star and remove repeated geometric openings from the interior so the glass becomes part of the pattern. Large cutouts usually read better than dozens of tiny ones because daylight creates the contrast.
Keep narrow bridges consistent around the points and leave extra paper around the hanging area. A single-color sheet is enough; the interest comes from the relationship between paper and open space. Place it where sky or a bright exterior surface can show through the cutouts, rather than against a curtain that fills every opening with the same tone.

7. Hang a Single Paper Star Spinner in the Window
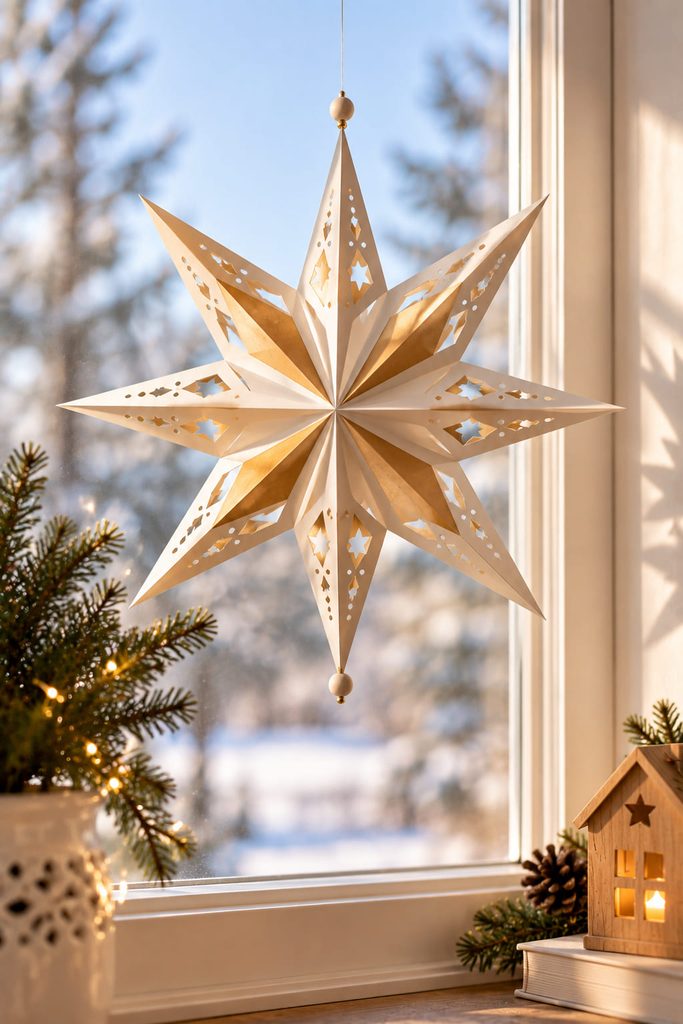
Want movement without building a full mobile? Make one lightweight star with two balanced faces and suspend it from a central thread so it can turn in gentle air movement. A shallow folded ridge or two back-to-back cut stars gives the piece enough presence to look finished from both sides of the glass.
Before hanging it, check four things:
- Attachment: the thread should pass through a reinforced center tab or spine, not a fragile outer point.
- Balance: the star should settle close to vertical when the air is still.
- Clearance: leave enough distance from glass, blinds, and curtains for the points to rotate.
- Weight: keep beads, thick embellishments, and heavy center layers off the lower half unless the opposite side is balanced.
If the spinner repeatedly turns edge-on and stays there, the two faces may not be centered on the suspension line. Reposition the hanging point before adding more weight.
8. Assemble a Faceted Pyramid-Point Window Star
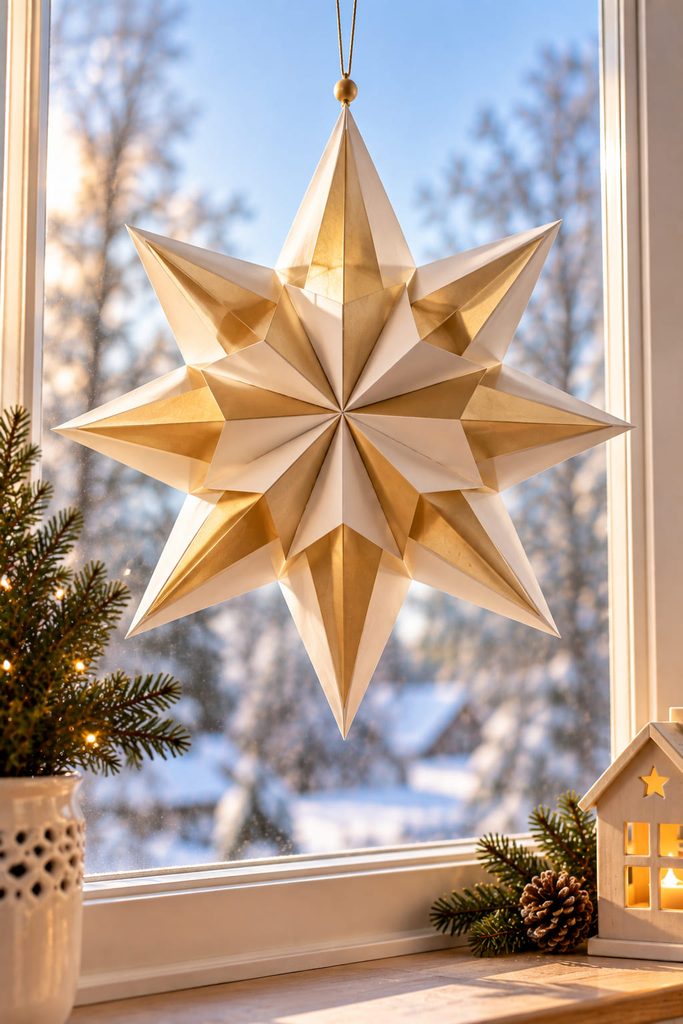
Start by thinking of this star as a small paper structure rather than a flat ornament. Its depth comes from hollow pyramidal points arranged around a central body, so each point needs matching edges, glue tabs, and enough internal room to close without crushing the previous seam.

Score and fold several identical point modules first. Join them around a small polygonal center or a pair of reinforced center plates, keeping the bases of the points on the same plane. Work in opposite positions rather than completing one side at a time; this makes it easier to see when the star is drifting out of symmetry. Before closing the final joint, add a hanging loop through the center support so the load travels into the core instead of one pyramid tip.
Closure Test: turn the unsealed star in your hands. Every point should project cleanly without forcing its neighbor sideways, and the center should not buckle when the hanging loop is lifted. If two points collide, reopen the nearest base seam and adjust the angle there; trimming the outer tips hides the symptom without correcting the geometry.
Use lightweight cardstock rather than very heavy board. The finished star should have enough stiffness to hold its facets but remain light enough for a window hook or suspended line.
9. Make a Soft-Volume Puffy Star Tree Ornament

Tree branches punish bulky ornaments, so this star gets its volume from two lightweight paper faces rather than a heavy internal core. Cut matching stars, lightly curve or score them, then join the edges while leaving a small opening. A little crumpled tissue paper or clean paper offcuts inside can hold a gentle puff before the last section is closed.
Add the hanging loop at the top between the two faces, with a small reinforcing patch inside the seam. The ornament should feel hollow and light, not stuffed firm. Too much filling rounds away the points and adds load the branch does not need.
10. Curl Paper Loops Into an Open Star Ornament
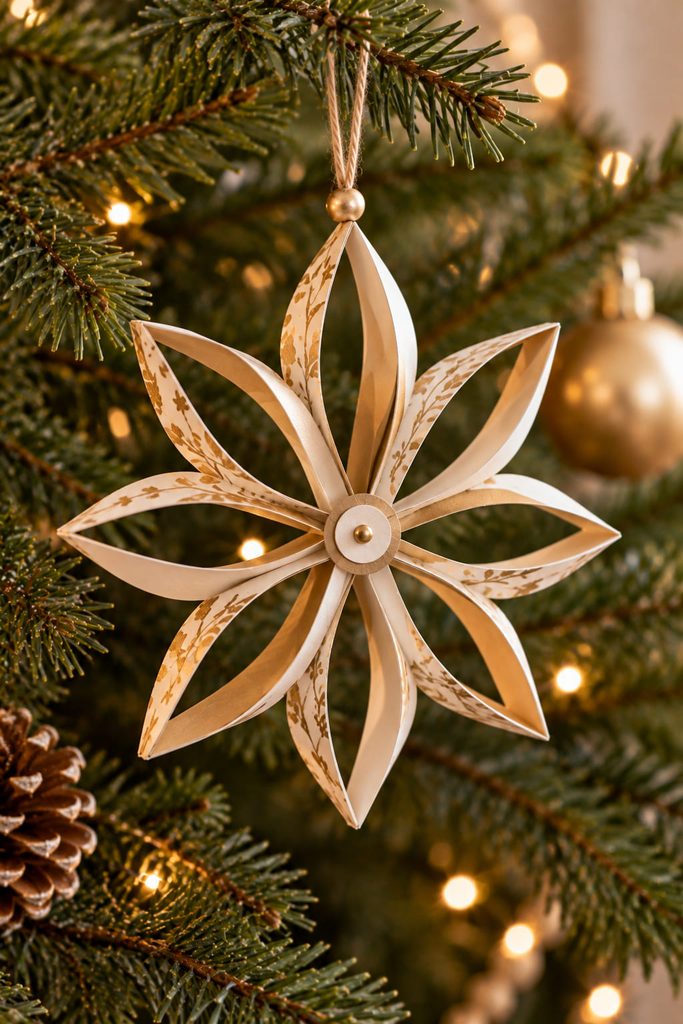
Instead of cutting a solid star, build the outline from repeated paper loops. Narrow strips can be curved into teardrops or pointed loops, then arranged around a small layered center so the open spaces between them become part of the ornament.
- Curl all loop units first and match them by size before gluing.
- Attach opposite loops to the center so the ornament stays balanced as it grows.
- Add the remaining points between them, checking that each loop opens in the same direction.
- Trap a lightweight hanging loop between two center disks rather than piercing one curled strip.
This version works well on a tree because branch needles remain visible through the open center and between the points. If the loops collapse inward, switch to slightly firmer paper or shorten the unsupported curve instead of doubling every strip.
11. Support a Paper Star Tree Topper With a Three-Tab Collar
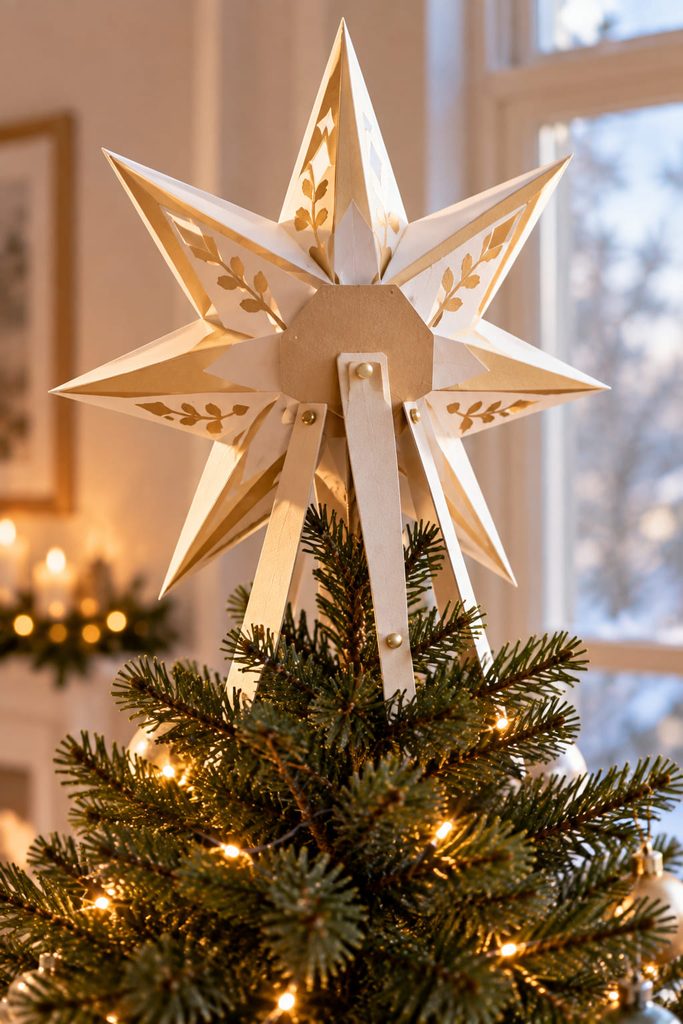
At the top of the tree, the support geometry matters more than the front decoration. A wide paper star can be very light and still lean if all of its weight pulls through one small connection, so this version spreads the load through a folded three-tab collar fixed to the back.
Build the star face separately and keep the center reinforced with a second cardstock layer. For the collar, fold three long tapered tabs from firm cardstock and join their upper ends behind the center. The lower ends stay slightly open so they can sit around the upper tree leader and neighboring small branches instead of squeezing one tip inside a narrow cone. Dry-fit the collar before decorating the front; the tabs should share the contact rather than letting one tab carry the whole topper.
Topper Diagnosis
- Leans forward: the decorative face is too front-heavy or the collar sits too low. Raise the rear connection or remove unnecessary front layers.
- Rotates sideways: the three tabs are not sharing contact. Adjust their spacing before tightening the fit.
- Slides down: lengthen the contact area on the tabs rather than pinching the tree leader.
- Star twists on its support: reinforce the connection between the collar and the star center, keeping the vertical centerlines aligned.
A good fit holds the topper upright without crushing the branch tip. Once the support works, add metallic paper or a lighter contrasting layer where it will not change the balance.
12. Drape a Linked Star Garland Through the Tree

Thread or paper links? The connector changes both the movement of the garland and the way it sits among branches. Use flat or shallow-folded stars in either version, but reinforce the connection near each star’s center so an outer point never carries the pull from the next section.
| Connector | Best Result | Trade-Off |
|---|---|---|
| Thread | Softer drape and more independent star movement | Knots can disappear into dense branches |
| Narrow paper loops | Strong handmade rhythm with visible joins | The strand becomes stiffer between stars |
Dense trees usually benefit from wider spacing and thread because needles already create visual texture. An open tree can carry larger stars and visible paper links without looking crowded. Whichever route you choose, drape the garland in broad curves rather than pulling it taut, support long runs at several branches, and leave enough slack that removing one section does not tug the next star out of shape. For storage, coil a thread-linked garland loosely around a piece of cardstock; lay a paper-linked version flat so the connector loops are not crushed. Before making the full length, hang a three-star sample on the actual tree and check whether the branch tips can support the curve without bowing noticeably.
How to Choose Paper Star Decorations by Display Location
The display surface should decide the construction before color or pattern does.
| Location | Best Construction Traits | Main Check |
|---|---|---|
| Walls | Wider backing, shallow-to-deep relief, strong silhouette | Mount from the backing and view from room distance |
| Windows | Low weight, translucent or open areas, reinforced hanging point | Check daylight, clearance, and both-sided appearance |
| Trees | Lightweight forms, balanced hanging, branch-friendly attachment | Test branch deflection before adding decoration |
| Tree top | Very light face with a separate support system | Fit the support before finishing the front |
| Seasonal storage | Collapsible, detachable, or low-profile construction | Confirm the piece can close or lie flat without crushing details |
If you are making several stars for one room, repeat one variable and change another. Keeping the same paper family while varying scale can make a wall, window, and tree feel connected without turning every project into the same star in a different place.
Choose the Display First, Then the Fold
For a quick start, choose the surface that needs the most visual change. A lace window star uses very little material, the modular wall medallion gives you scale, and the puffy ornament adds dimension without asking much from a tree branch. If you want a more structural project, the faceted window star or supported tree topper makes the attachment and geometry part of the design.
If dimensional construction is the part you want to explore next, continue with 20 Stunning 3D Paper Art Ideas for Handmade Decor for more relief, folded, suspended, and structure-driven projects.








