This post contains affiliate links. As an Amazon Associate I earn from qualifying purchases, at no extra cost to you. Thank you for supporting Diynify!
Paper bag gingerbread house ideas are useful when you want the warm kraft-paper look without building every wall from scratch. A lunch bag already brings a flat base, side gussets, an open top, and the ability to collapse for storage, so the construction can focus on what that bag needs to become: a treat holder, luminary, hanging pocket, ornament, puppet, mini album, or tabletop display.
Most of these projects start with plain kraft lunch bags, white cardstock or a white paint marker for “icing,” scissors, and paper glue. A few need extras such as vellum, twine, tissue paper, a battery LED, binder rings, a rigid backing strip, or a jar used inside a decorative sleeve. Pick a project by function first; the gingerbread details are easiest to add after the bag already stands, opens, hangs, or closes the way you need.

1. Fold-Top Gingerbread Treat Bag House
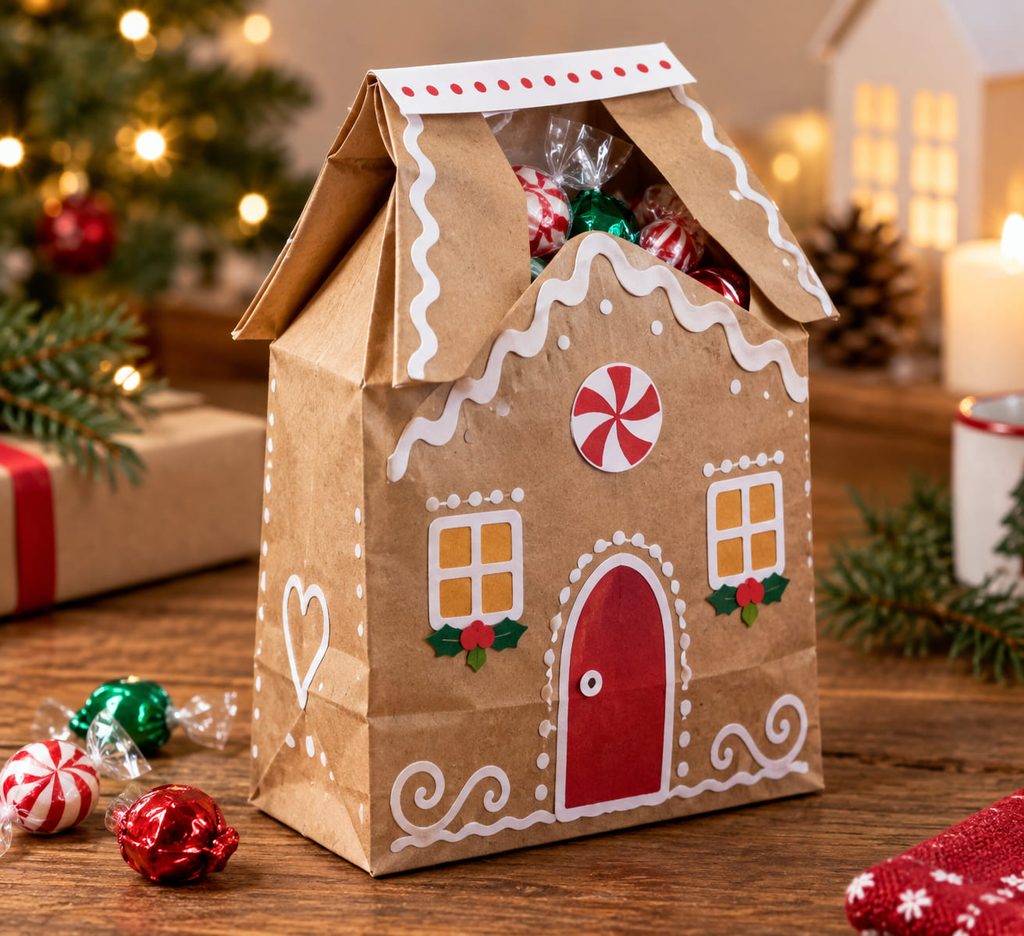
Start by using the bag exactly where it is strongest: as a small container. Open the flat bottom fully, fill the bag with wrapped candy or another lightweight favor, then pinch the upper side gussets inward. Fold the front and back top edges toward each other so they meet as two roof slopes; a narrow strip of cardstock can bridge the ridge and act as a removable closure.
Keep thick “icing” and candy layers below that fold line. If raised decorations cross the creases, the roof will fight the bag every time it is opened. The finished piece still works like a normal favor bag, but the closure reads as a gingerbread roof rather than a crumpled top.

2. Vellum-Window Paper Bag Gingerbread Luminary
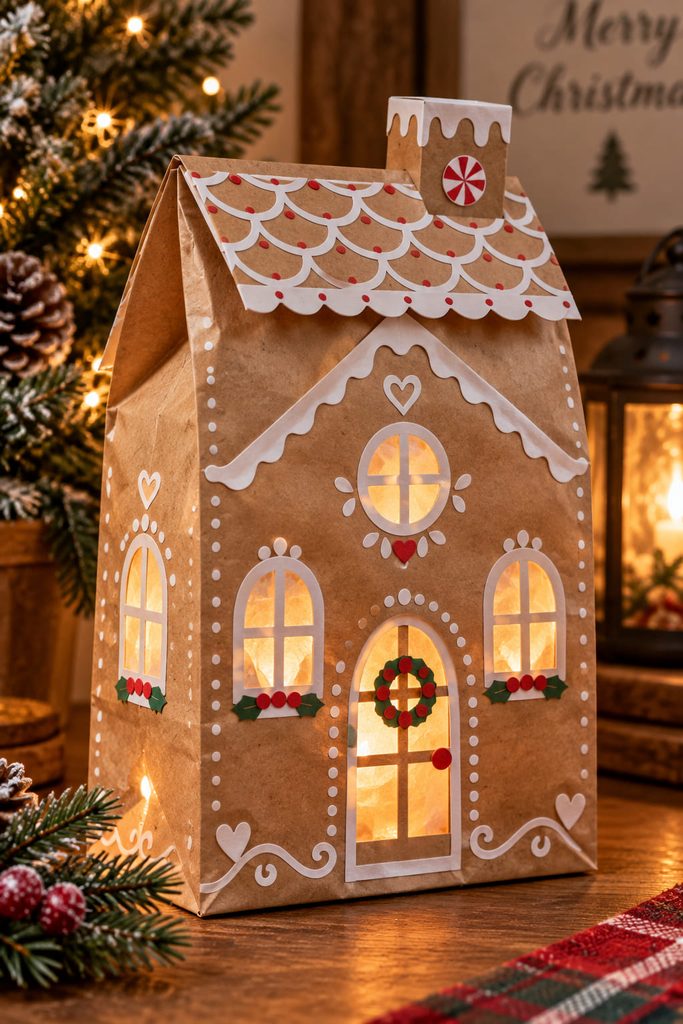
A kraft lunch bag already gives a luminary a stable footprint, but cutting windows removes strength from the very walls that keep it upright. Open the bag first, mark the window positions while the side gussets are expanded, and keep a generous border around every opening. Back the cutouts with vellum from the inside so the light is diffused without covering the folds that let the bag collapse.
Use a small battery LED rather than any open flame. The light needs a clear path to the vellum, and the LED needs an access route that does not require crushing the roof. One practical arrangement is to leave the top loosely folded instead of glued shut, then hide that access seam under a separate paper roof cap.
Light-Path Check: Switch on the LED before adding exterior candy pieces. If one window stays noticeably darker, look for an interior glue tab, overlapping vellum edge, or roof flap blocking it. Move the obstruction before the final roof layer goes on.
3. Hanging Advent Village House Pockets
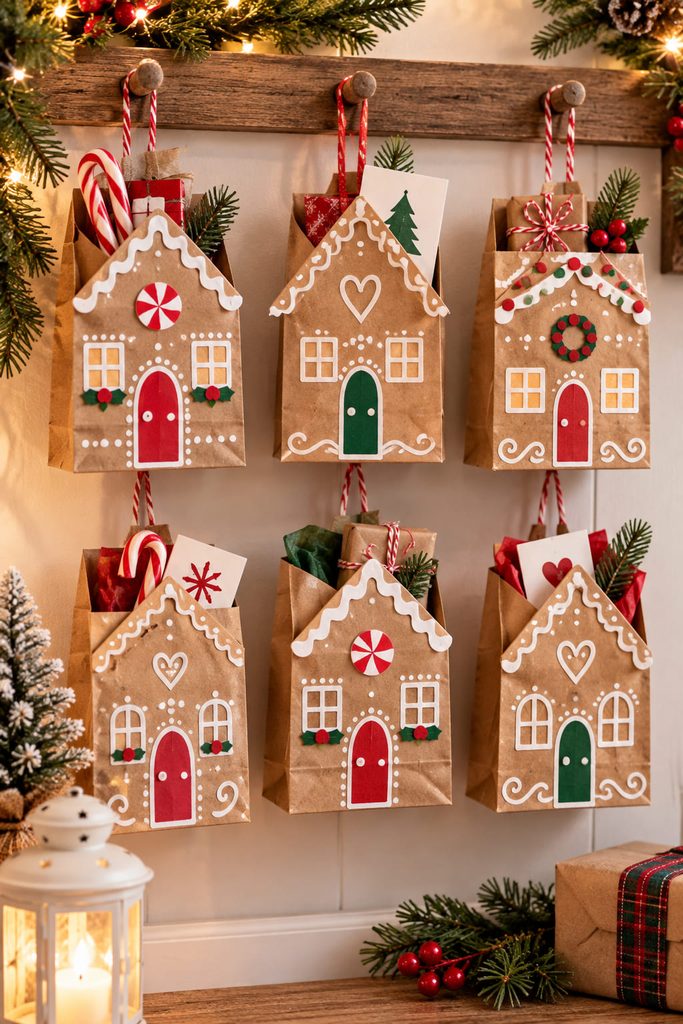
For an advent display, the useful part of the bag is its open mouth, not its ability to imitate a closed cottage. Make a set of small house pockets, each holding a note or lightweight wrapped treat, then hang them from a rail, branch, or sturdy cord with the openings still reachable.

- Trim the bags to varied heights before decorating so the rooflines do not form one flat row.
- Fold only the front panel into a shallow gable while leaving the back panel taller as a hanging tab.
- Reinforce that back tab with a second piece of kraft paper before punching or clipping it.
- Load the pockets after hanging so you can see which positions sag and move heavier contents closer to the supports.
The result behaves like a wall organizer disguised as a gingerbread village, which makes refilling easier than untying twenty-four sealed paper packages.
4. Peekaboo Gingerbread House Bag Puppet
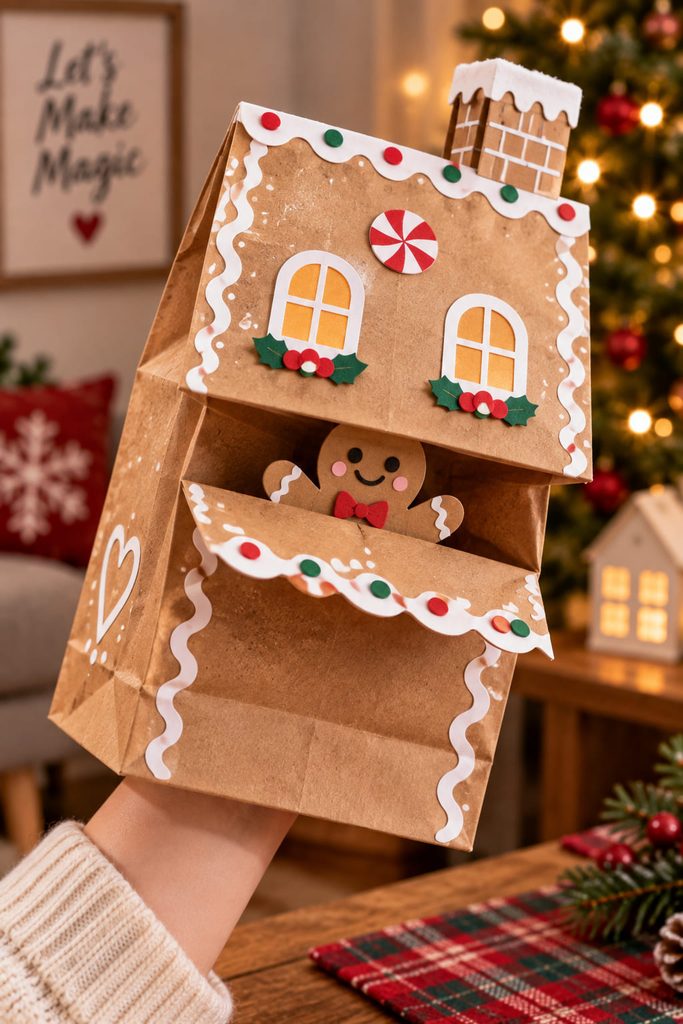
Turn the bag upside down and the rectangular bottom flap becomes a ready-made moving panel. Decorate the main body as a gingerbread-house facade, then use the flap as a hinged awning, attic window, or roof section. A hand inside the bag can lift it to reveal a tiny paper gingerbread character or “bakery” scene. Keep that reveal lightweight and flat; thick pom-poms or heavy layered candy shapes can make the hinge droop, while thin cardstock preserves the bag’s natural flex. Choose this version when the house needs movement for a classroom story or puppet show rather than shelf display.

5. Gingerbread House Place-Setting Marker
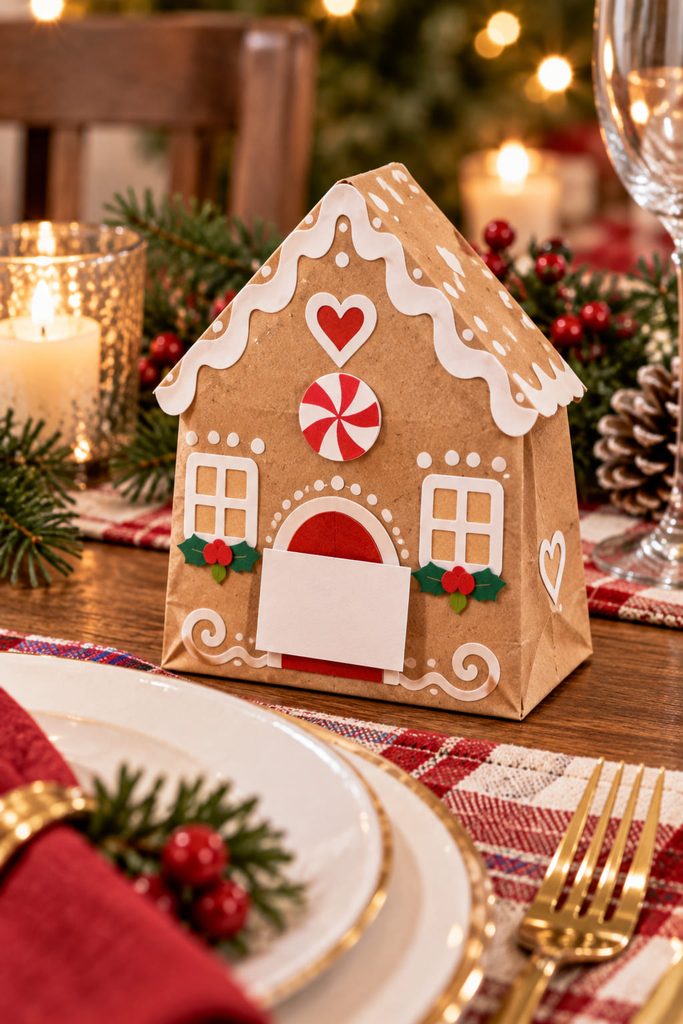
At a holiday place setting, a shortened kraft bag can stand as a small house marker without becoming a bulky centerpiece. Open the bottom fully, use the side gussets as the feet, and place a name card where the “door” would be. Keep the roof as a decorative silhouette rather than a sealed closure.
| Check | Pass Condition |
|---|---|
| Base | The bottom rectangle sits flat. |
| Name area | The card stays visible below the roof. |
| Raised details | Candy pieces do not touch the table. |
| Optional favor | The bag stays upright after it is loaded. |
Here the bag earns its place through stability and readability, not capacity.
6. Folded Kraft Gingerbread House Garland
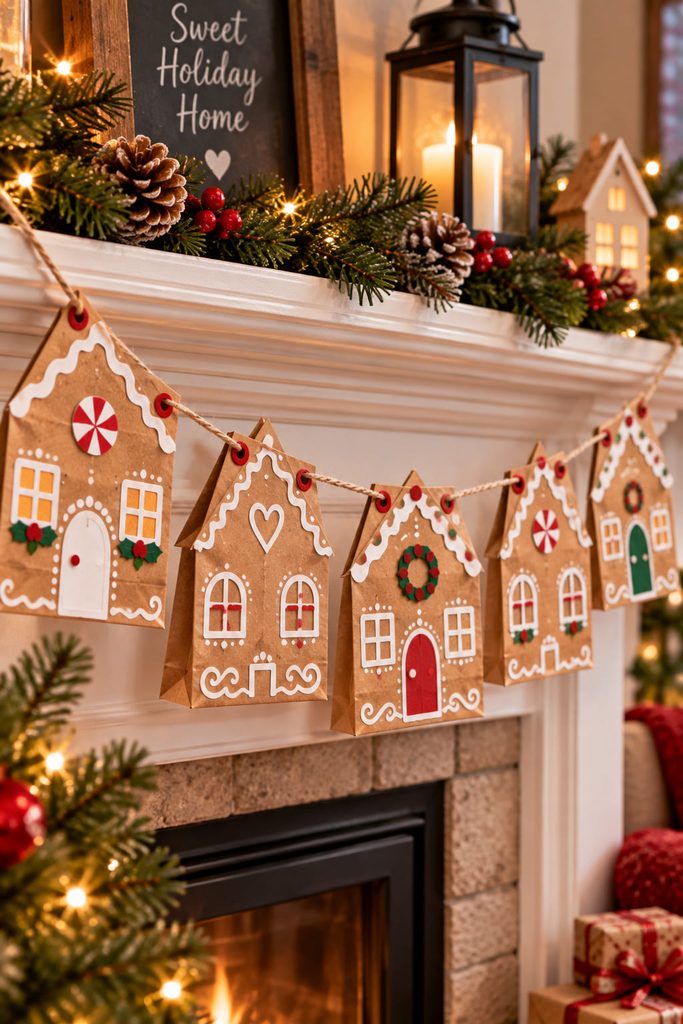
Flattening the bags turns them into wide sheets of kraft paper while preserving fold lines that can add shadow to a garland. Cut a simple gable across the top of each flattened bag, keep one or two original vertical creases, and string the houses from reinforced holes near the roof corners. The slight ridges left by the bag folds keep the facades from looking as flat as ordinary cut-paper pennants.

Space the houses far enough apart that roof peaks do not overlap when the garland curves. This format is especially useful for using bags that are wrinkled at the bottom but still clean through the large front panels: the damaged base can be cut away while the strongest paper becomes the visible decoration.
7. Paper Bag Gingerbread House Mini Album
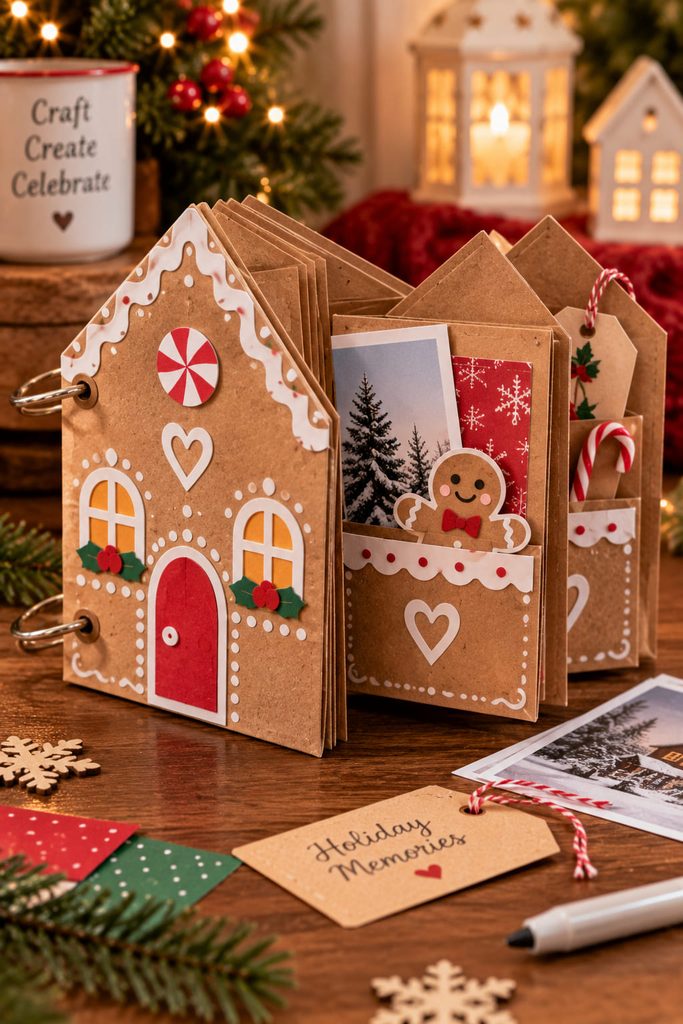
Stack several kraft bags with alternating openings and the bags become pages with built-in pockets. For a gingerbread-house mini album, bind the closed ends along one side with binder rings or a stitched paper hinge, then trim the exposed outer edge of the stack into a shared gable silhouette. Each bag opening can hold a photo mat, recipe card, gift list, or handwritten holiday note.
The order of assembly matters because roof trimming after the bags are bound helps the whole stack read as one house, while decorating every page first can make the edges too thick to cut cleanly. Keep bulky layers away from the spine and from the pocket mouths.
| Album Part | Best Use |
|---|---|
| Front cover | Strong house silhouette with minimal depth |
| Inner bag pages | Flat photos, labels, or recipe cards |
| Removable inserts | Cardstock tags slightly narrower than each opening |
| Back page | Heavier kraft or chipboard reinforcement if the album will stand |
Pocket Access Test: Pull every insert out once before adding the final roof trim. If two layers catch at the opening, reduce the insert width or remove decoration from that pocket edge rather than forcing it.
8. Flat Gingerbread House Gift Card Pocket
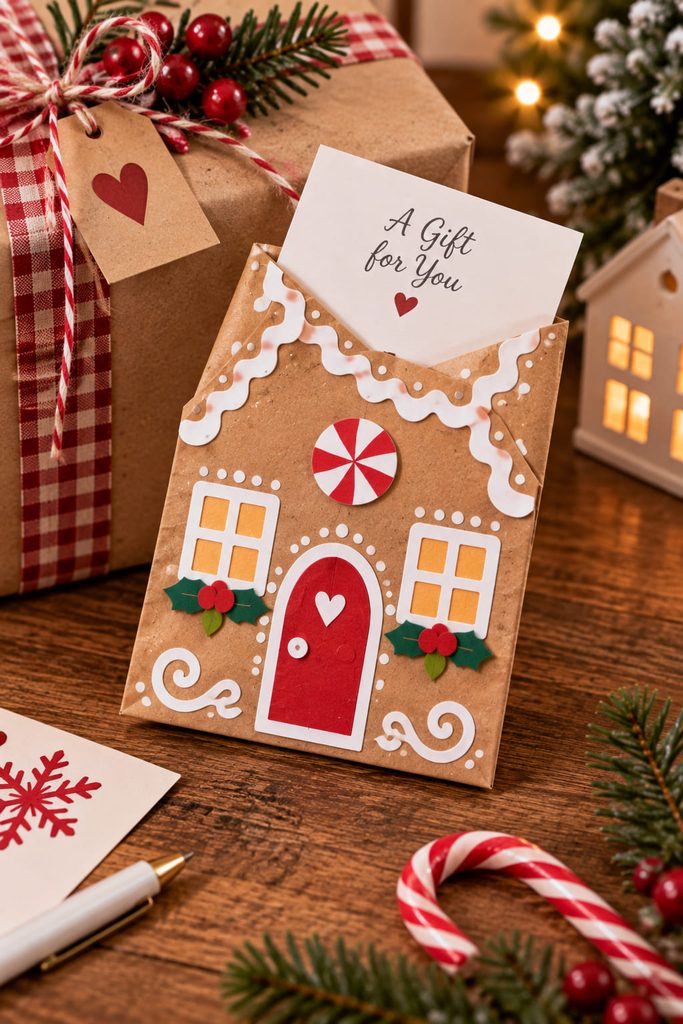
When the finished gift is only a card, the full depth of a lunch bag is unnecessary. Flatten one bag, cut away the bulky base and side-gusset sections, and keep a clean front-and-back pair of kraft panels. Glue three edges to make a slim pocket, then trim the open top so the front reads as a simple house while the back stays slightly taller for support.
Keep icing, windows, and the door around the card path rather than over it. The flat holder can slip into a greeting card or hang from a wrapped gift, giving the kraft bag a useful second life without turning it into another dimensional container.
9. Stuffed Paper Bag Gingerbread House Ornament
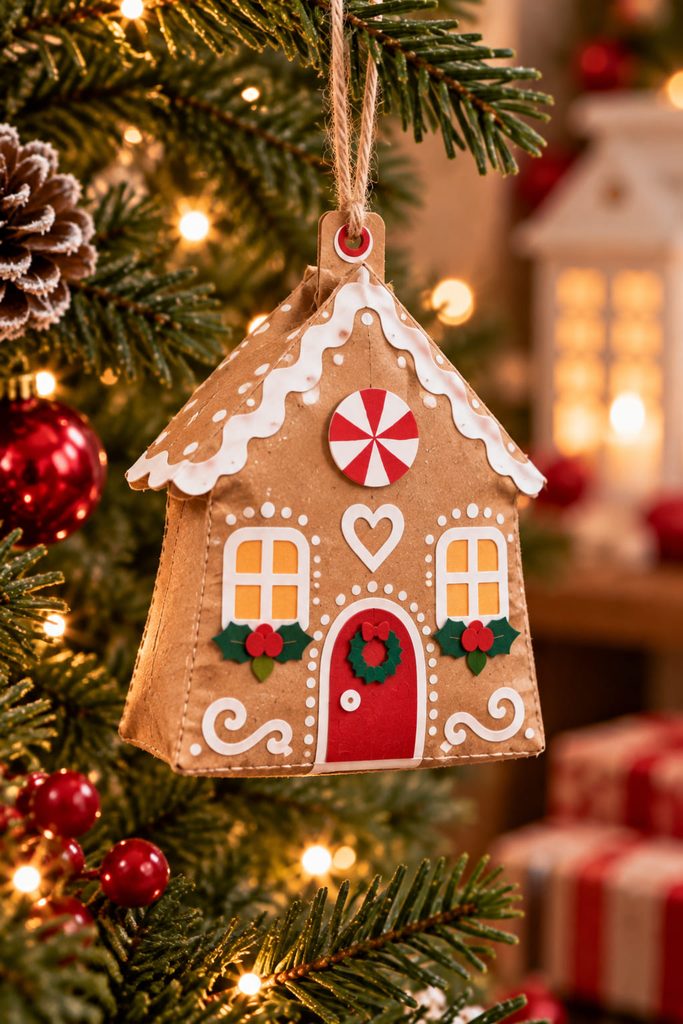
For a tree ornament, a paper bag can supply two matching house faces at once. Flatten the bag, cut a house silhouette through the front and back layers, then separate or trim away the side gussets. Add a small amount of crumpled tissue between the two faces and seal the perimeter with glue, leaving the roof peak reinforced with an extra kraft patch for the hanging loop.
| Symptom | Likely Fix |
|---|---|
| Ornament twists | Remove a heavy front detail or balance the back. |
| Roof bends | Move the loop through a doubled kraft patch. |
| Bottom looks swollen | Use less tissue near the base. |
A little stuffing gives the ornament a soft dimensional profile, but the outside shape should stay crisp enough to read as a house among tree branches.
10. Large Gingerbread House Holiday Card Pocket
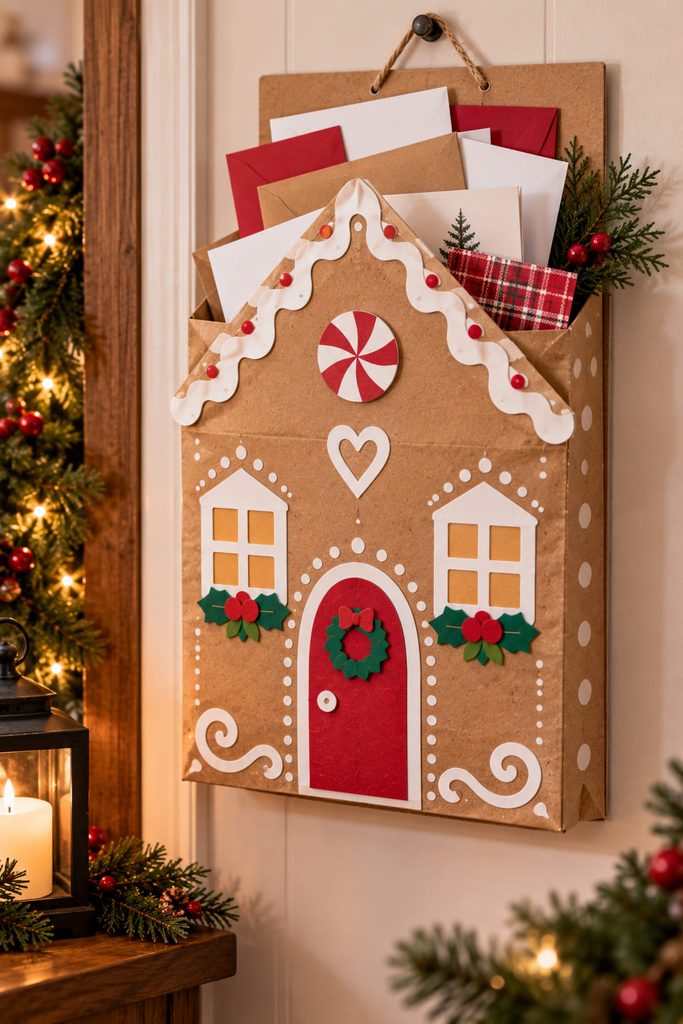
Because the mouth of a larger kraft grocery bag stays open naturally, it can become a holiday-card pocket once the bag is flattened against a rigid backing strip. Decorate the front as a tall gingerbread house, leave the top open behind the roofline, and attach the bag only where glue will not block the pocket. The backing carries the hanging load; the bag simply stores cards, notes, or lightweight paper keepsakes.
| Load Check | What to Verify |
|---|---|
| Suspension | The hanger is fixed to the backing, not a thin bag handle. |
| Access | The roof stays clear of the pocket opening. |
| Lower edge | Cards sit above the weakest bottom crease. |
| Wall fit | The loaded facade does not bow far from the wall. |
This is a better use for a large shopping bag than forcing it into a tiny tabletop cottage.
11. Bag-Bottom Gingerbread House Diorama
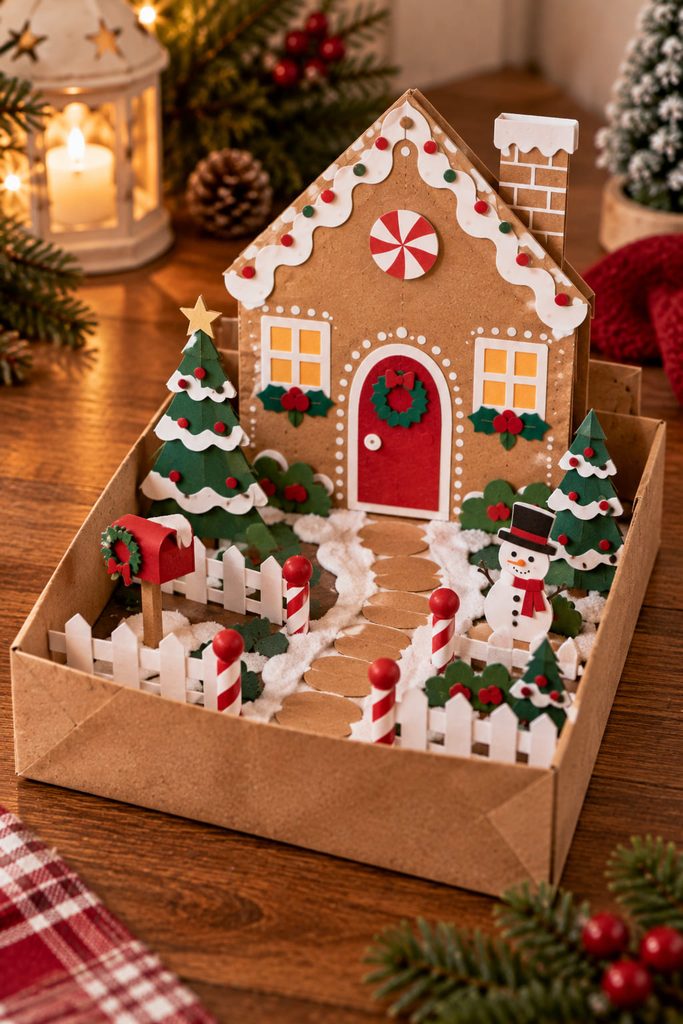
By cutting the bag down to a low tray, you can use its bottom panel as the ready-made floor of a shallow diorama instead of treating the whole bag as the finished house. Leave the rectangular bottom and a short band of side wall intact. Add a freestanding gingerbread-house facade at the back edge, then layer a pathway, trees, fence, or candy-cane posts toward the front.
| Step | Build Order |
|---|---|
| 1 | Square the bag-bottom tray and reinforce any soft corner with an inside kraft patch. |
| 2 | Fit the rear facade and check that it stands without leaning over the tray. |
| 3 | Add middle-ground pieces while their glue tabs are still easy to reach. |
| 4 | Finish with the lowest foreground layer to hide the tray edge and anchor the scene. |
The bag is doing structural work here as a shallow stage rather than pretending to be a boxy house, which gives the project real depth without needing a separate shadow-box frame.
12. Fold-Flat Paper Bag Gingerbread Village
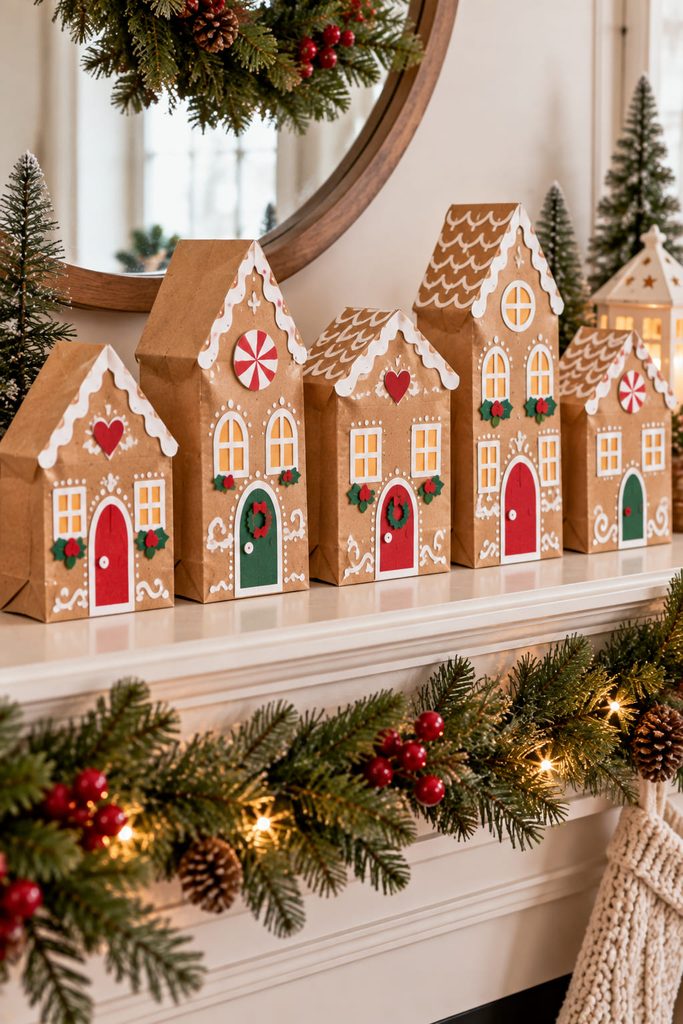
Once several lunch bags are opened side by side, they can form a tabletop gingerbread village that collapses almost flat after the holidays. Trim each bag to a different roofline, open the flat bottoms, and let the side gussets remain visible as part of the architecture. The houses need no separate wall tabs because the original bag construction already lets them stand.
Keep the heaviest layered details low on each facade and vary height through the roof cuts instead of stacking bulky decoration near the top. If one house leans, fully square its bottom rectangle before adding weight or permanently gluing it to a base; a fold-flat village works best when every bag can stand on its own.
For storage, remove loose props, unfold any roof caps, press the gussets inward, and stack the houses flat. That seasonal reset is the main advantage over a permanently glued 3D village.
13. Gingerbread House Vase Sleeve From a Kraft Bag
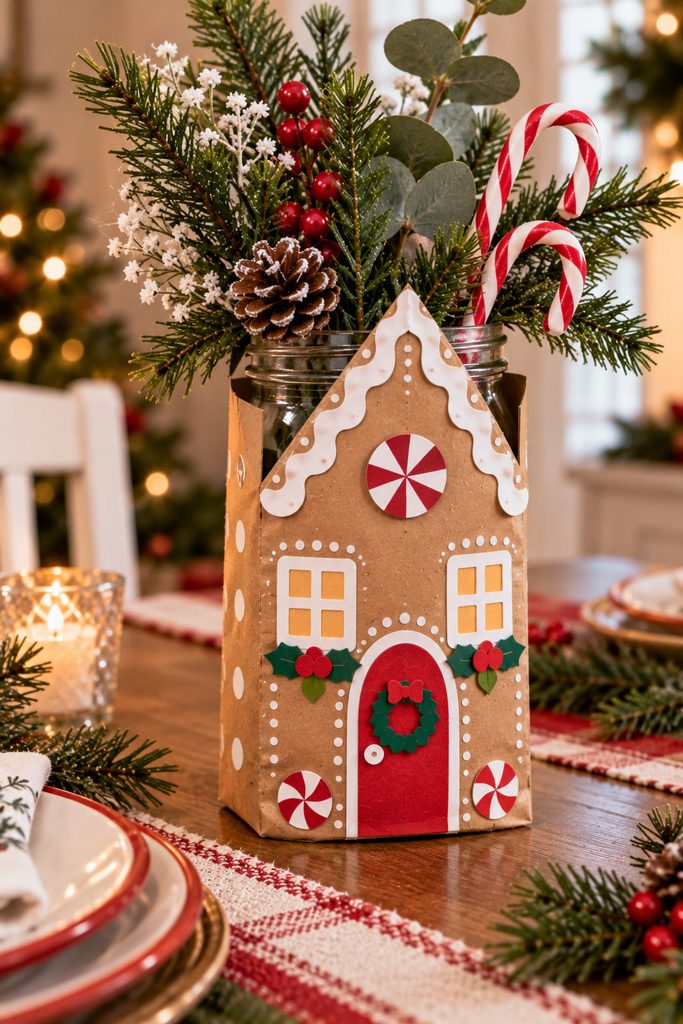
Paper and water are a bad pairing, so a kraft-bag gingerbread “vase” should be a sleeve around a real jar rather than a container for water. Cut away the bag bottom, trim the sleeve to the jar’s height, and fit it loosely around the outside. A separate gable-shaped front panel can extend above the rim so the glass disappears behind a gingerbread-house facade while greenery, candy canes, or paper stems rise from the center.
| Fit Check | Pass Condition |
|---|---|
| Jar access | The jar lifts out without scraping raised icing. |
| Moisture gap | Kraft paper stops below the jar opening. |
| Load path | The jar base, not the bag, carries the weight. |
| Grip | The facade stays clear of the area used to lift the jar. |
This keeps the kraft-paper look in the centerpiece while giving the load and moisture to a container designed to handle both.
Let the Bag Choose the Construction
A kraft bag is most useful when you let one of its existing features do the hard work. The flat bottom is already a stand, the gussets already fold, the open mouth already creates storage, and the bottom flap already behaves like a hinge. Start with the feature that matches the finished use, then add rooflines, white icing borders, windows, candy shapes, and snowy details after the mechanism works.
Among these paper bag gingerbread house ideas, the treat bag and garland are the fastest places to begin. The luminary, mini album, and bag-bottom diorama are better choices when you want more structure or interaction. If you want to move beyond ready-made bags and build the house geometry itself from cardstock, continue with 14 Paper Gingerbread House Ideas Straight from a Storybook.