

This post contains affiliate links. As an Amazon Associate I earn from qualifying purchases, at no extra cost to you. Thank you for supporting Diynify!
When floor space is tight, paper Christmas tree wall ideas can give you the outline, color, and handmade texture of a holiday tree without asking for a stand, a wide base, or a permanent corner of the room. The best versions are not simply flat tree cutouts. They use folds, overlap, suspension, shallow relief, pockets, negative space, or light so the wall itself becomes part of the design.
Most of these projects use cardstock, decorative paper, scissors or a craft knife, a ruler, a scoring tool, and paper-safe adhesive. Depending on the idea, you may also need a lightweight backing board, removable wall-safe mounting products, thread or cord, a narrow dowel or paperboard header, vellum, foam spacers, or a cool battery-powered LED. Choose first by the wall you actually have: a door needs a very shallow design, a narrow column rewards a vertical silhouette, and a blank wall above a desk can handle more depth.

1. Overlap Chevron Strips for a Slim Wall Tree
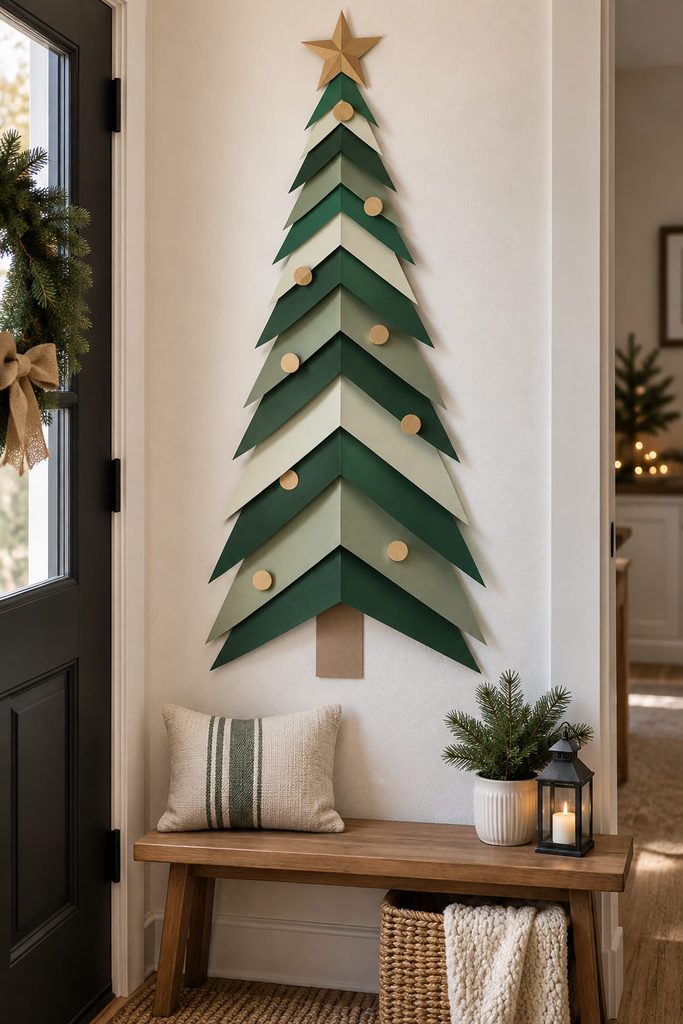
A narrow wall does not need a miniature version of a full tree. It needs a silhouette that reads clearly from a few feet away while staying almost flush to the surface. Cut long cardstock strips in several decreasing widths, score each strip at the center, and fold it into a shallow chevron. Mount the widest strip low and stack the shorter ones upward with small overlaps, keeping the center creases on one vertical axis. The repeated V-shapes create branch rhythm without any protruding framework.
For a renter-friendly version, assemble the whole tree on a thin sheet of poster board or lightweight paperboard rather than attaching every strip directly to the wall. Trim the backing just inside the outer tree silhouette so it disappears from normal viewing distance, then hang the finished panel with a removable method appropriate for the wall surface. This also makes the tree easier to lift down in one piece after the holidays.
2. Build a Folded Diamond Branch Relief

Instead of drawing branches, let each branch be a small folded module. Cut elongated diamond shapes from medium-weight cardstock, score them lengthwise, and raise the center crease so each piece becomes a shallow ridge. Arranged in staggered rows, the modules catch side light and make a low-profile tree that feels dimensional even when every piece is only slightly lifted from the wall.
A reliable build order keeps the geometry crisp:
- Mark a light centerline on a removable backing panel.
- Place the lowest diamonds first, with their widest points extending beyond the row above.
- Shorten each new row as you move upward, but keep the center creases aligned.
- Glue only the outer tips or small flat tabs so the ridge remains raised.
- Add a simple trunk or star only after the full silhouette reads correctly from across the room.
Fold Line Check: If the relief looks uneven, inspect the creases before moving the pieces. A diamond folded off center throws its highlight to one side and can make an otherwise symmetrical row appear crooked.
3. Cut a Soft Fringe Tree for a Door or Hallway

Fringe works well where deeper paper sculpture would catch on sleeves, bags, or a swinging door. Start with a flat triangular cardstock backing, then cut broad paper strips with fringe along one edge, leaving an uncut band at the top for adhesive. Layer the strips from the bottom upward so each uncut band is hidden by the fringe above it. Tissue paper gives a softer, more feathery surface; light cardstock produces cleaner, graphic cuts and is less likely to sag. Keep the fringe fairly short on a door so the tips move without becoming easy to snag. Because the backing carries the shape, you can leave small gaps between rows and still preserve a strong tree outline.
4. Curl Paper Ribbons Into Shadow-Casting Branches

The point of a curled-strip tree is the shadow between the paper and the wall, not a dense pile of curls. Cut narrow strips in graduated lengths, draw each strip around a round tool to give it a controlled arc, and attach only one or both ends to a backing panel. The middle of the strip should lift away naturally, creating a row of loop-like branches without closing into chain links.
If the result misbehaves, the symptom usually tells you what to change:

- Curls collapse flat: the paper is too light for the span, or the strip is too long; shorten the branch or use slightly firmer stock.
- Branches spring away from the backing: the curl is too tight; relax it before gluing rather than forcing the ends down.
- The tree looks bulky instead of airy: increase the vertical spacing and let wall color show through.
- One side feels heavier: compare branch projection, not just branch length; a deeper curl can carry more visual weight than a wider but flatter one.
This design is especially useful beside a console or desk where a few centimeters of projection are acceptable but floor space is not.
5. Turn Pleated Rosettes Into a Corner Tree

Pleated rosettes can solve an awkward corner because the tree does not need to be one continuous object. Make several flat paper rosettes in mixed diameters and arrange them in a loose triangular cluster that narrows toward the top. The circular forms break the strict geometry of the tree while still reading as one holiday shape from a normal viewing distance.
There are two good ways to handle the cluster. A tight arrangement lets rosettes overlap slightly and gives the tree a fuller, almost wreath-like surface; it suits a blank wall where the decoration can be the main focal point. An open arrangement leaves visible wall between rosettes, uses fewer pieces, and feels lighter in a small room. Whichever route you choose, mount the largest rosettes lower and closer to the centerline, then let smaller ones define the outer taper. If every rosette is the same diameter, the tree tends to read as a dot pattern instead of a deliberate silhouette.

6. Make an Advent Pocket Tree That Uses the Wall
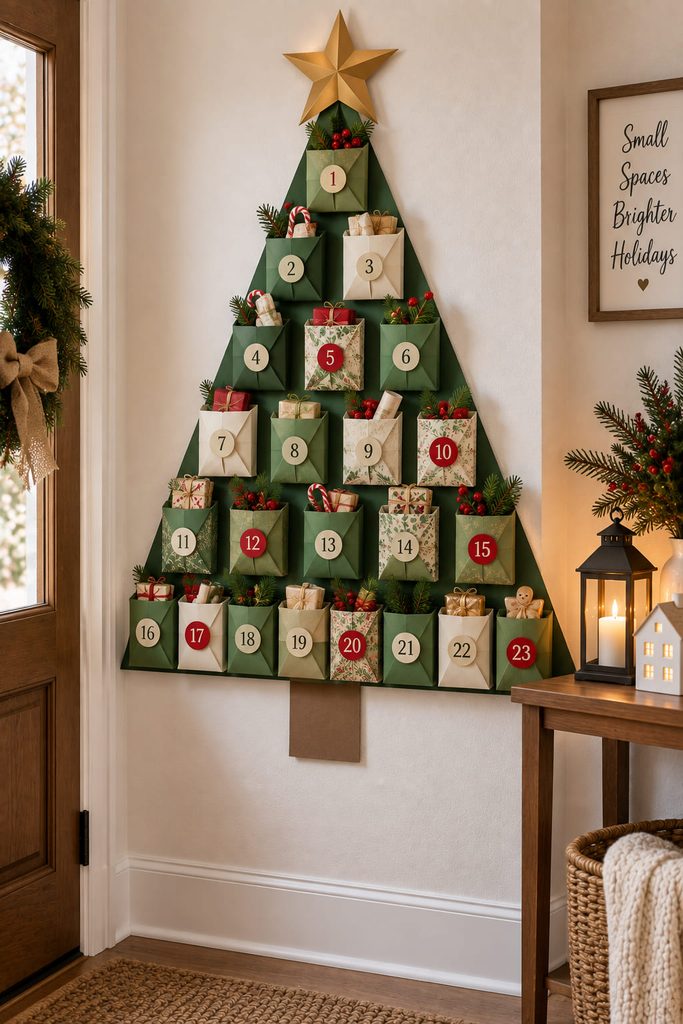
A wall tree can earn its space by storing something. For an advent version, arrange small folded paper pockets in a triangular field, with the widest row at the bottom and progressively fewer pockets above it. Each pocket needs a closed bottom and sides, an open top, and enough depth for the item it is meant to hold. A flat envelope shape works for notes; a gusseted pocket is better for a small lightweight treat because the contents do not force the front panel outward as sharply.
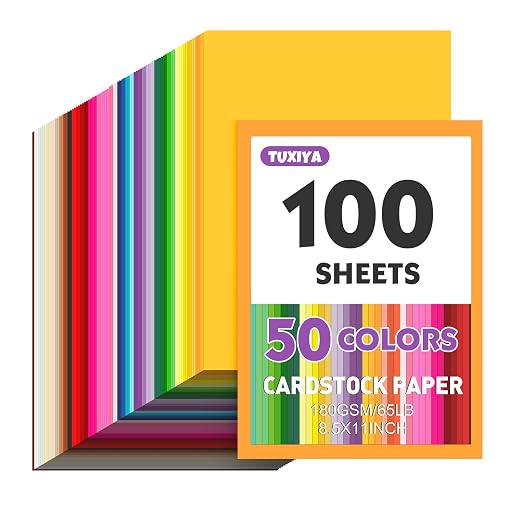
Useful supplies include:
- medium-weight cardstock for the pockets;
- a rigid but lightweight paperboard backing;
- scoring tool and strong paper-safe adhesive;
- optional paper numbers or flat decorative shapes;
- a wall-safe mounting method rated for the finished panel and surface.
Build one sample pocket before cutting the full set. Load it with the heaviest type of item you plan to use, then turn the backing upright. If the front bows open or the bottom seam spreads, increase the side overlap or reduce the contents rather than relying on more decoration to hide the strain.
Pocket Load Check: Mounting strength must account for the backing, all pockets, and their contents together. Keep the project for lightweight notes, paper activities, or small treats unless the support system is designed for more.
7. Hang a Fold-Flat Paper Ladder Tree
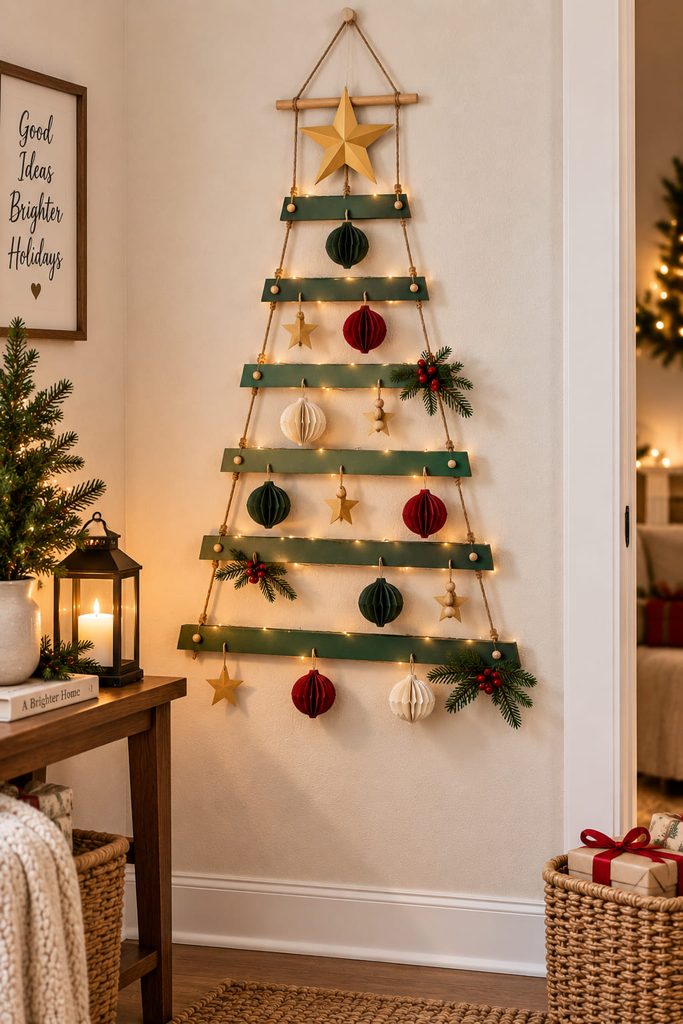
For a tree that can store nearly flat, use graduated cardstock bars instead of a solid backing. Cut horizontal strips from long to short, reinforce each end with a small folded tab, then run two lengths of thread or thin cord through matching holes near the ends. Spaced correctly, the bars hang like a tapering ladder and form a tree silhouette while gravity keeps the rows horizontal.
Before mounting, check:

- the top support carries both cords rather than one paper bar;
- matching holes sit the same distance from each strip end;
- heavier decorative pieces stay close to the center;
- the lowest bar clears furniture and door movement;
- the two cords are equally tensioned so the tree does not twist.
A narrow dowel can be used as the top support, but a folded paperboard header also works when the tree is very light. To store it, lift the bottom bar upward and stack the strips together instead of crushing the assembly into a box.
8. Layer Cutout Trees for a Shallow Shadow Panel
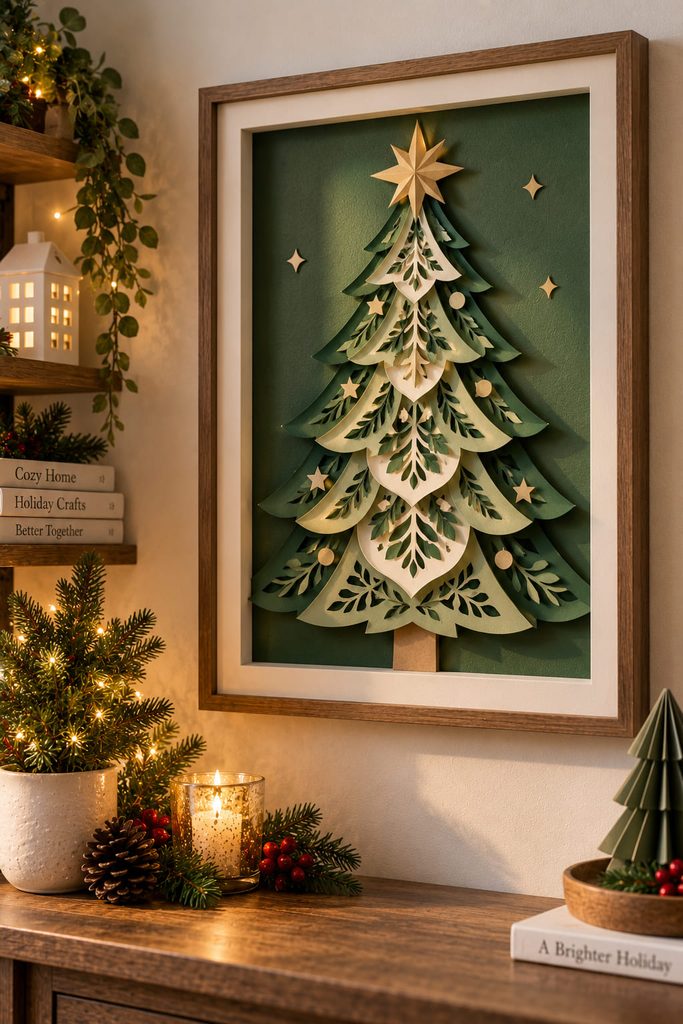
Negative space can make a wall tree feel deeper without giving it much physical depth. Cut the same simplified tree silhouette into several cardstock sheets, changing the size or internal openings slightly from layer to layer. Mount the sheets over a contrasting backing with slim foam or folded-paper spacers. Seen head-on, the aligned openings create a nested tree; from the side, the small gaps cast shadows that separate the layers.
Plan the cutouts from front to back before gluing. The front layer should have the strongest, cleanest outer shape because it controls the first read. Rear layers can carry wider openings or secondary branch shapes, but every cut needs enough surrounding paper to stay connected to the frame. If a narrow bridge bends while you handle the sheet, enlarge the opening or simplify that detail before assembly.
More spacing is not always better. Deep gaps make stronger shadows but also expose side edges and can make the panel bulky on a tight wall. For a hallway or bedside area, shallow spacing usually gives enough relief while keeping the piece easy to frame or mount.
9. Arrange Folded Stars Into a Tree Silhouette

A star cluster is a useful option when you want a tree that can expand around outlets, switches, shelves, or an existing picture frame. Fold simple paper stars in two or three sizes, then place them loosely inside an imaginary triangle rather than filling every inch. Concentrate the larger stars near the lower center and taper toward smaller pieces at the top. The tree appears through grouping and empty space rather than through a drawn outline, so the wall can stay visible and the arrangement feels lighter than a solid panel. Test the composition on the floor first; once the outer triangle reads clearly from several feet away, transfer the positions to the wall or to a removable backing sheet.
10. Slot-Fit Paper Branches Into a Wall-Mounted Spine
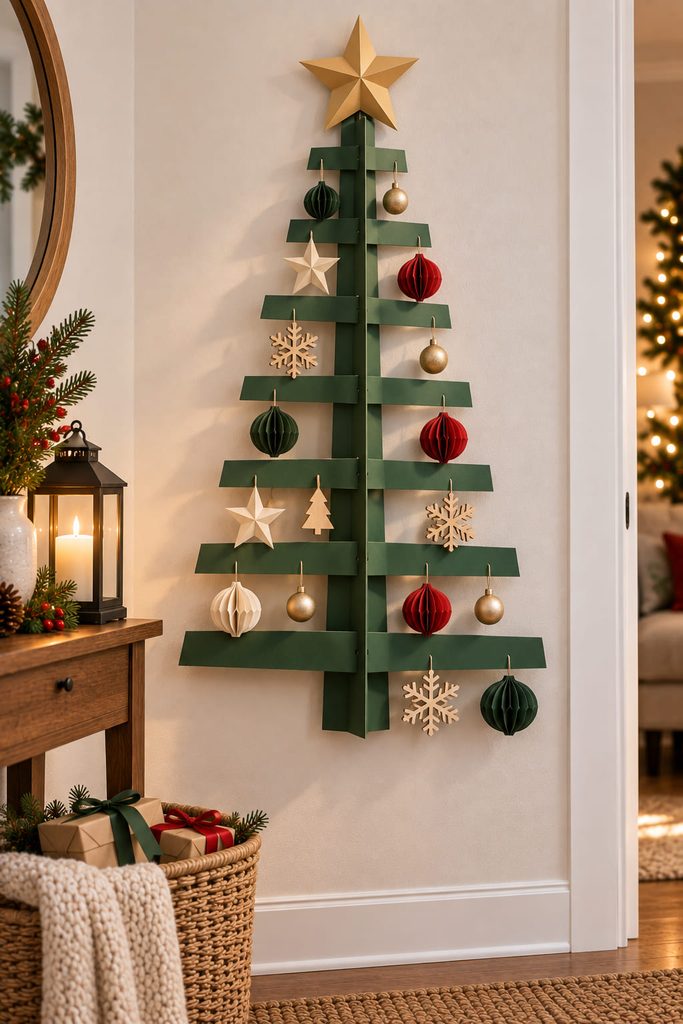
Use one vertical paperboard spine and a set of horizontal branch strips when you want a rigid, graphic wall tree. Fold the spine lengthwise into a shallow channel so it resists bending, then cut paired slots at measured intervals. Each branch strip gets a narrow centered tab with small fold-back shoulders. Pass the tab through a matching slot, then open the shoulders behind the spine so the branch cannot simply slide forward again. The joint, rather than surface glue along the whole branch, determines whether the rows stay level.
Use a narrow branch-to-slot fit if you want a crisp architectural tree, but leave enough clearance that the paper does not buckle during insertion. For a temporary display, assemble the slotted tree on the table, lift it by the reinforced spine, and mount only that central support to a wall-safe backing or hanger. This keeps the outer branches free of individual wall attachments and makes the piece easier to remove intact.
11. Build a Christmas Card Display Tree With Paper Rails
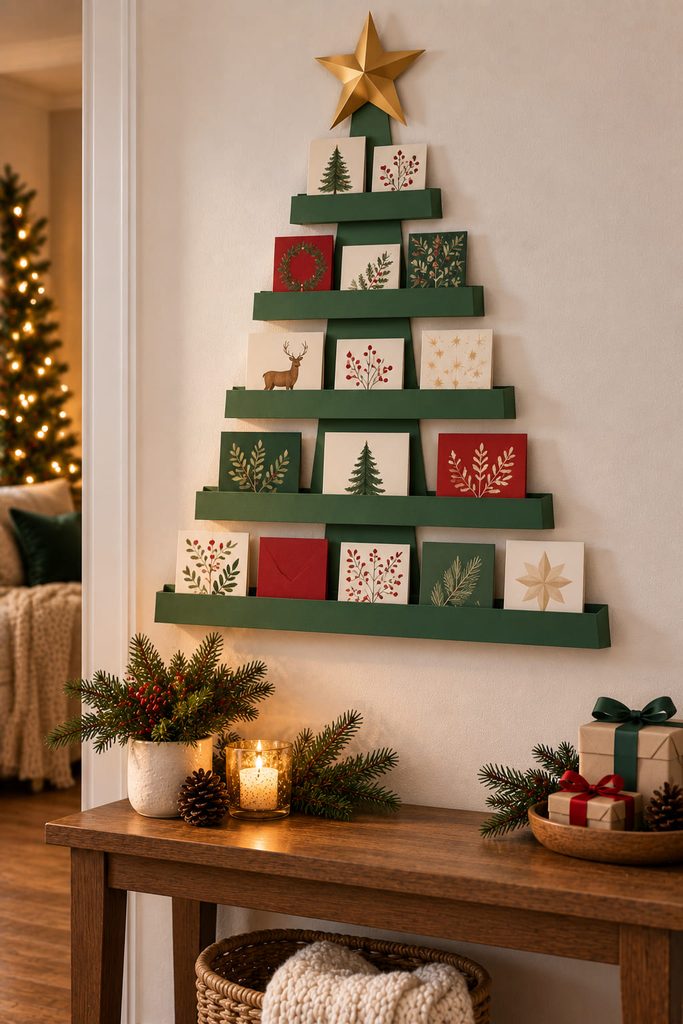
Holiday cards can become the ornaments if the wall tree is designed to hold them. Fold several long cardstock strips into shallow rails with a front lip, a bottom crease, and a rear attachment flange. Mount the rails on rigid paperboard in decreasing lengths. A card slides behind the front lip and rests on the bottom fold, so the paper rail supports it instead of relying on friction alone.
Assemble the display in this order:
- Mark the lowest rail first and confirm that the backing can accommodate your largest cards.
- Attach the rails from bottom to top, shortening each one to create the tree taper.
- Slide sample cards into every rail before decorating the backing.
- Increase the gap above any rail where a tall card collides with the row above.
- Mount the finished panel only after it has been tested upright with several cards loaded.
The front lip should retain the cards without covering too much of their artwork. If a card bows or is hard to remove, reduce the insertion depth or open the lip slightly rather than forcing it into place.
12. Mount Half-Cones as a Sculptural Tree Relief

Half-cones add projection without taking the floor space of a freestanding tree. Roll cardstock sectors into cones, trim each lengthwise to create a flat rear edge, and mount the shells in staggered rows on a strong backing. Use larger forms near the base and smaller ones toward the top so the repeated curves still resolve into a tree.
Choose wide, shallow cones for a narrow passage and narrow, deeper cones when stronger shadows are worth the extra clearance. In either route, let the backing carry the project; the cut rear rim of each cone is an attachment edge, not a wall support by itself.
13. Backlight a Vellum Tree Panel With a Cool LED
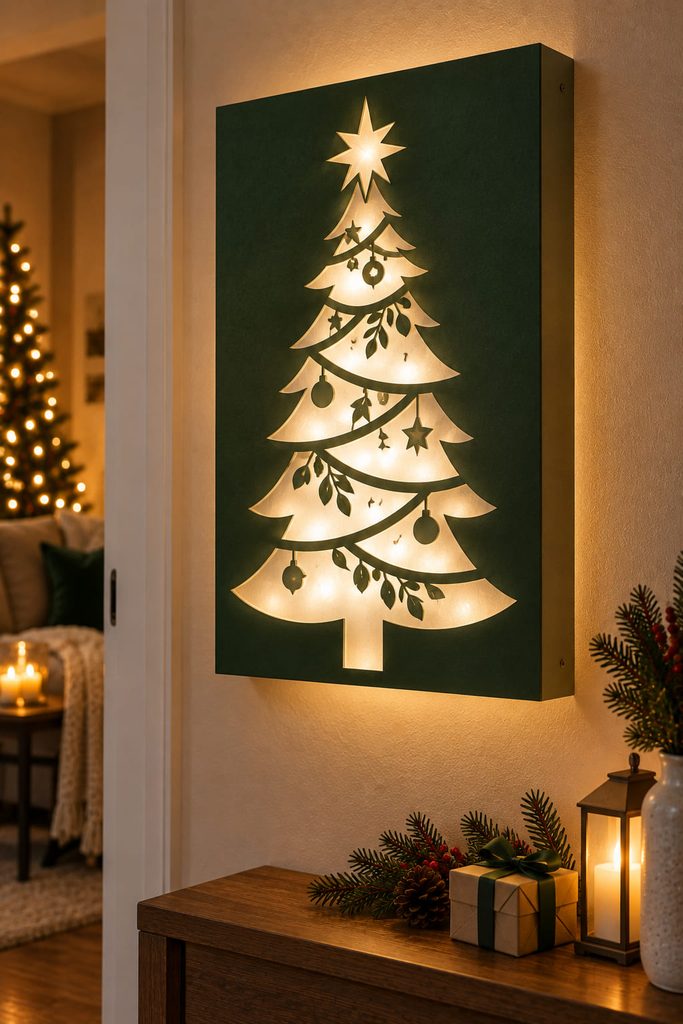
Design the light path before treating a paper silhouette as a glowing wall tree. Start with a shallow rigid frame or paperboard box panel, cut a large tree-shaped opening or a pattern of branch openings into the front cardstock, and cover those openings from behind with vellum. A second inner layer can create smaller cutouts or a few opaque branch bands, but it must not block the areas meant to glow.
Keep the light source behind the diffusing layer and use only a cool battery-powered LED intended for this kind of decorative use. The panel needs enough internal clearance that the LED does not press against paper, plus an access flap or removable back so the light can be switched, repositioned, or removed without tearing the artwork. Route the battery pack where it can be supported rather than hanging from thin vellum or a delicate cut edge.
Keep the Light Path Open: Before closing the back, dim the room and check the front. Dark patches usually mean a tab, battery pack, or inner layer is blocking the opening. Reposition the obstruction instead of moving the LED directly against the paper. The finished panel should hang level with the light source fully supported inside the frame.
How to Choose Among Paper Christmas Tree Wall Ideas for a Small Space
Start with clearance. A door, narrow hallway, or wall beside a bed favors chevron strips, fringe, layered cutouts, or a star cluster because those designs stay shallow. A blank wall above a console can handle curled strips, rosettes, half-cones, or a lighted panel with more visible relief. If the wall also needs to work harder, choose the advent pockets or Christmas card rails so the tree becomes storage or display rather than decoration alone.
Then match the construction to how you want to store it. The ladder tree collapses nearly flat, a backed panel can be lifted down as one piece, and modular stars or rosettes can be packed separately. A deep half-cone relief or lighted panel needs a box that protects its projection.
Make the Wall Do the Work
The strongest small-space tree is the one that uses the wall as part of its structure instead of treating limited floor area as a compromise. For the quickest start, choose a shallow silhouette such as chevrons, fringe, or stars. If you want a project with more function, move to pockets or card rails; if light and shadow are the goal, try the layered panel, curled strips, half-cones, or vellum design.
For a broader mix of tabletop, hanging, wall, and gift projects, continue with 18 Festive Paper Christmas Tree Ideas for Holiday Decor.








