
This post contains affiliate links. As an Amazon Associate I earn from qualifying purchases, at no extra cost to you. Thank you for supporting Diynify!
Paper stars are one of the easiest ways to make holiday decorating feel handmade without filling every surface with bulky craft projects. The same basic motif can become folded wall relief, window decor, a tree topper, table accents, a wreath, a glowing luminary, or a balanced mobile, depending on how the paper is cut, folded, layered, woven, or supported.
Most of these ideas use cardstock or lightweight decorative paper, scissors, a ruler, a scoring tool, and paper-safe adhesive. A few need tissue paper, vellum, quilling strips, thread, a lightweight hoop or dowel, a shallow frame, a chipboard ring, or a cool battery-powered LED. Start with the wall cluster, slot star, or napkin rings for a quick project; choose the shadow frame, luminary, topper, or mobile when you want the structure itself to become part of the display.

1. Score-and-Fold Cardstock Stars for a Wall Cluster
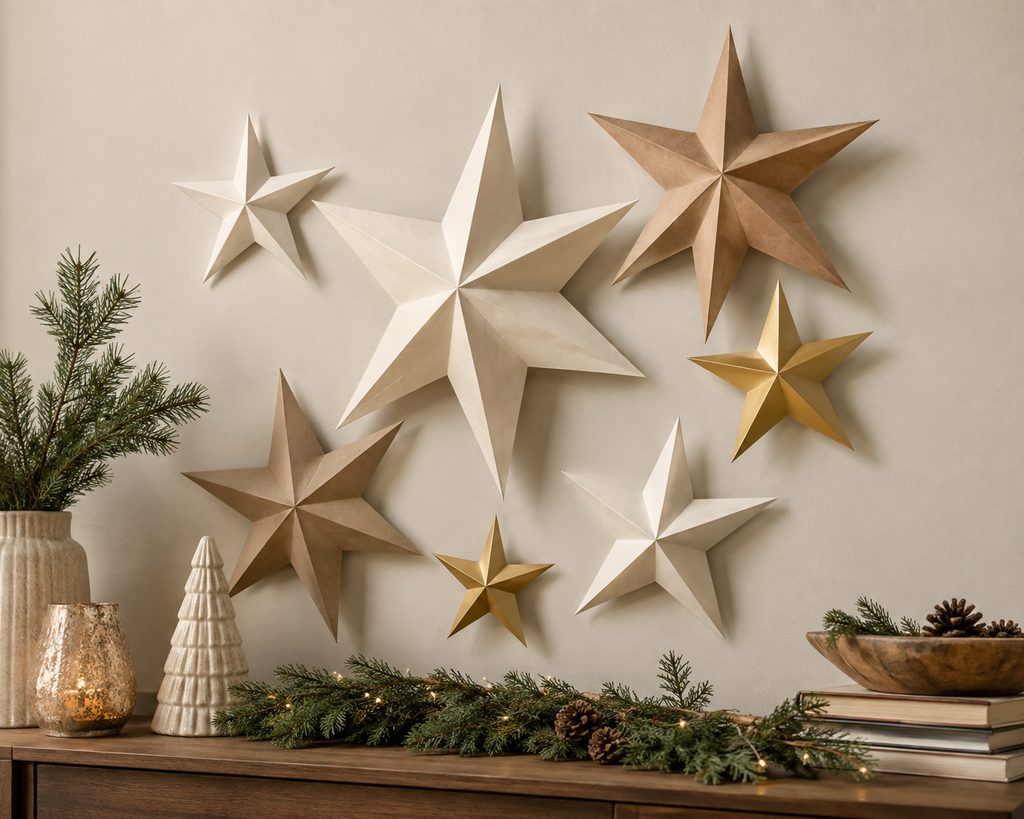
Start with one clean five-point star template, then let the folds create the decoration. Cut the shape from cardstock, score a line from each point toward the center, and gently alternate the creases so the surface rises into shallow facets instead of staying flat. Because the depth comes from scoring rather than extra layers, these stars stay light enough for removable wall-mounting tabs or small loops of low-tack tape on a suitable surface. Make a few sizes and cluster them with uneven gaps; the wall reads more like one installation when the largest star sets the focal point and the smaller ones trail away from it.

2. Accordion-Fold Window Starbursts
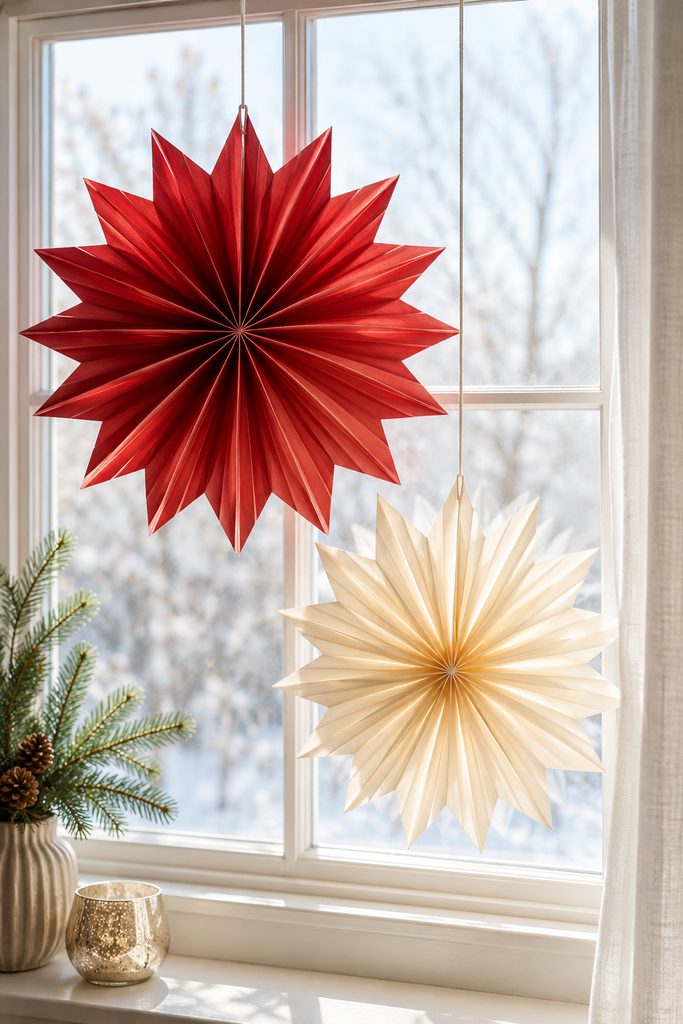
Daylight does most of the visual work for this version. Thin decorative paper or lightweight colored paper forms crisp pleats without making the finished starburst bulky, so the ridges catch light while the open outer silhouette stays easy to read against glass. Fold two matching strips into accordions, pinch each strip at the center, and open the ends into fan-shaped halves.
Join the two halves at their straight edges, then secure the center so the pleats cannot relax. If the points look uneven, the cause is usually mismatched pleat width rather than the final join; refold the shorter section before adding more adhesive. Hang one large starburst or stagger several smaller ones near the upper half of a window, where daylight can outline the folds without blocking the whole view.
3. Interlocking Slot Stars for a Fold-Flat Mantel Display
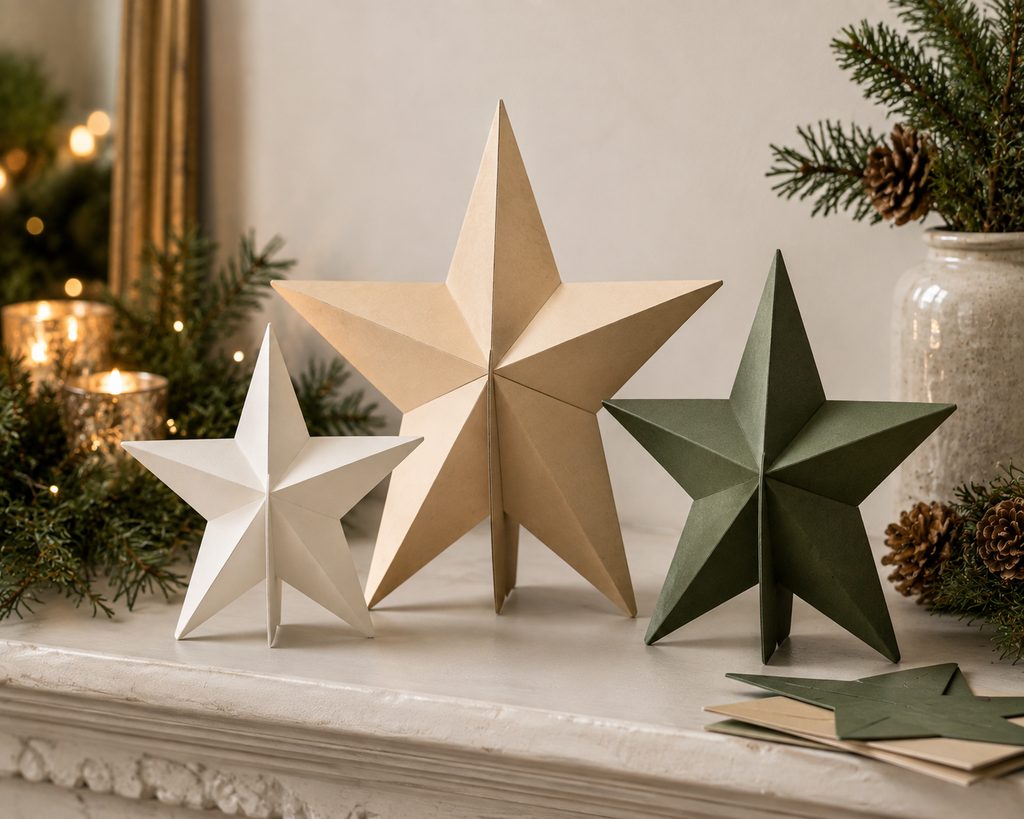
When seasonal storage is tight, a star that comes apart flat is more useful than a permanently glued sculpture. Cut two identical cardstock stars, then add a narrow slot from the top of one toward its center and from the bottom of the other toward its center. Slide the pieces together at right angles so the crossed planes create a freestanding shape with four supporting edges touching the shelf or mantel.

Before you finish the surface:
- The slot width should match the actual paper thickness closely enough to grip without crushing the edges.
- Both cuts need to stop at the same central point or the star will lean.
- Test the two pieces dry before decorating them; trimming a slot is easier before the surface is finished.
- If the base rocks, square the slot first rather than adding a hidden blob of glue.
After the holidays, pull the two planes apart and store them flat between larger sheets of paper.
4. Woven Nordic-Style Star Ornaments
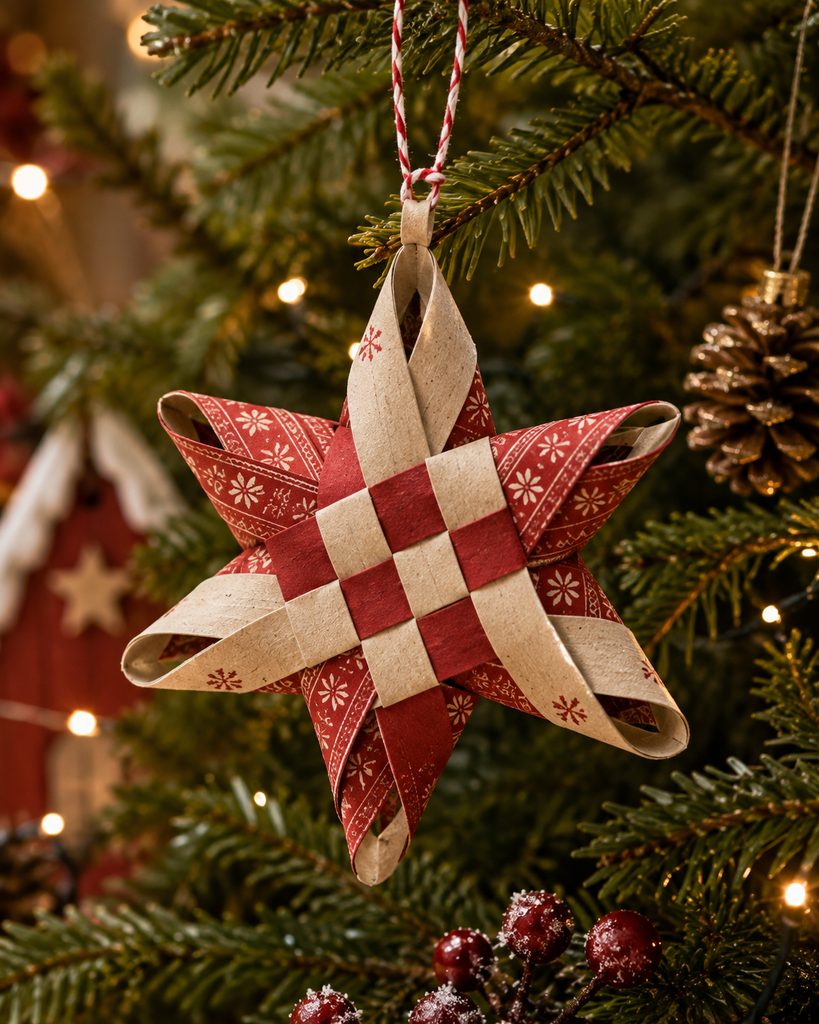
The woven center is what separates this ornament from a star made from stacked cutouts. Narrow paper strips cross in a true over-under pattern, creating a small square grid that can support folded or looped points around the perimeter. Use firm paper that bends cleanly without cracking, and keep the strip widths consistent so the center stays square.
- Weave the first strips over and under each other to form a compact central lattice, then secure only the intersections that need to stay fixed.
- Pair the free ends at each corner and fold or curve them into points, keeping the same direction around the star.
- Add a lightweight hanging loop through a reinforced center intersection or a small glued paper tab, not through a fragile point.
Weave Check: If the center twists into a diamond, loosen the outer points and square the over-under lattice before the adhesive fully sets.
5. Layered Star Shadow Frames with Real Depth
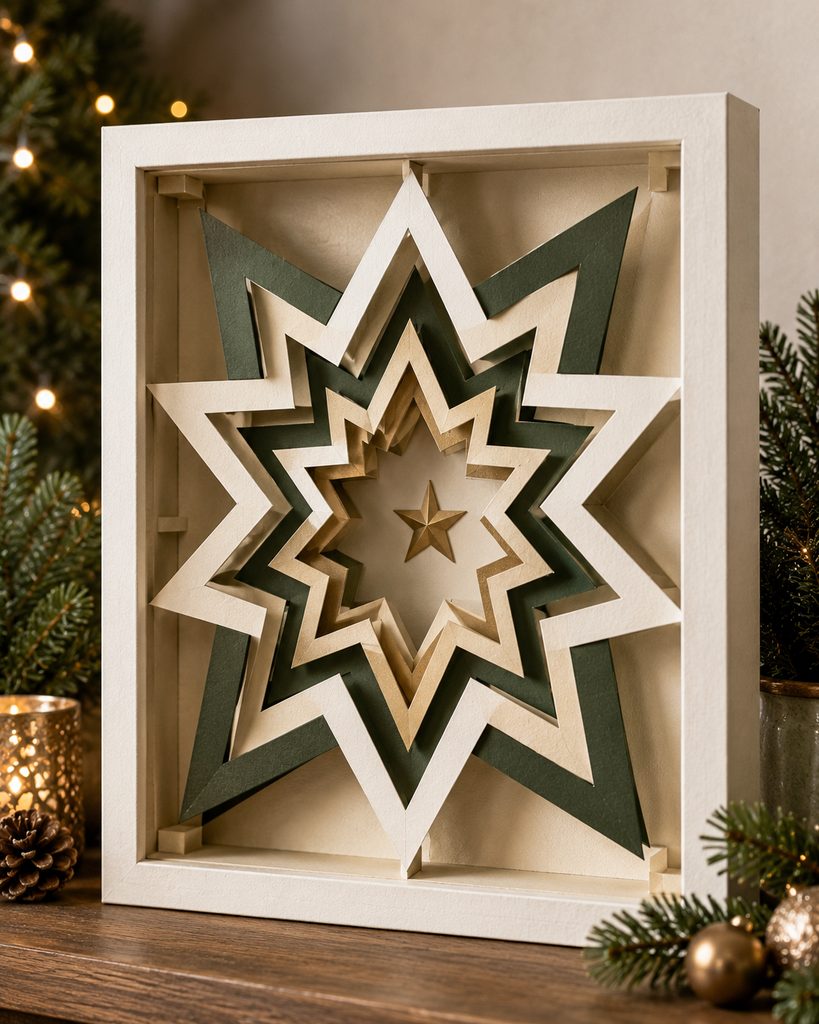
There are two useful ways to build a framed paper star, and the better choice depends on how much shadow you want. A shallow relief uses two or three star layers with minimal spacing and stays visually quiet; a deeper shadow frame uses repeated star-shaped openings separated by paper spacers, so the eye looks through a small tunnel of edges toward the back layer. The second route needs more careful alignment, but the depth comes from the air gaps rather than from extra decoration.

For a deep version, cut the largest front opening first and work inward with smaller or differently rotated star apertures. Dry-stack the pieces inside the frame before gluing, using narrow cardstock strips or dimensional paper spacers around the perimeter rather than random glue dots near the opening. Stand the frame upright and look from several feet away: you should still see a clear center, distinct edge planes, and at least one uninterrupted background area.
Choose the route by the result:
- Shallow relief: easier to assemble and better when you want a flatter graphic star.
- Spaced shadow frame: stronger cast shadows and more depth, but every layer needs enough open area to keep the center readable.
Keep the Negative Space Open: If the center turns into a dark knot, remove or widen one competing aperture instead of adding another layer.
6. Folded Star Luminaries with Vellum Windows
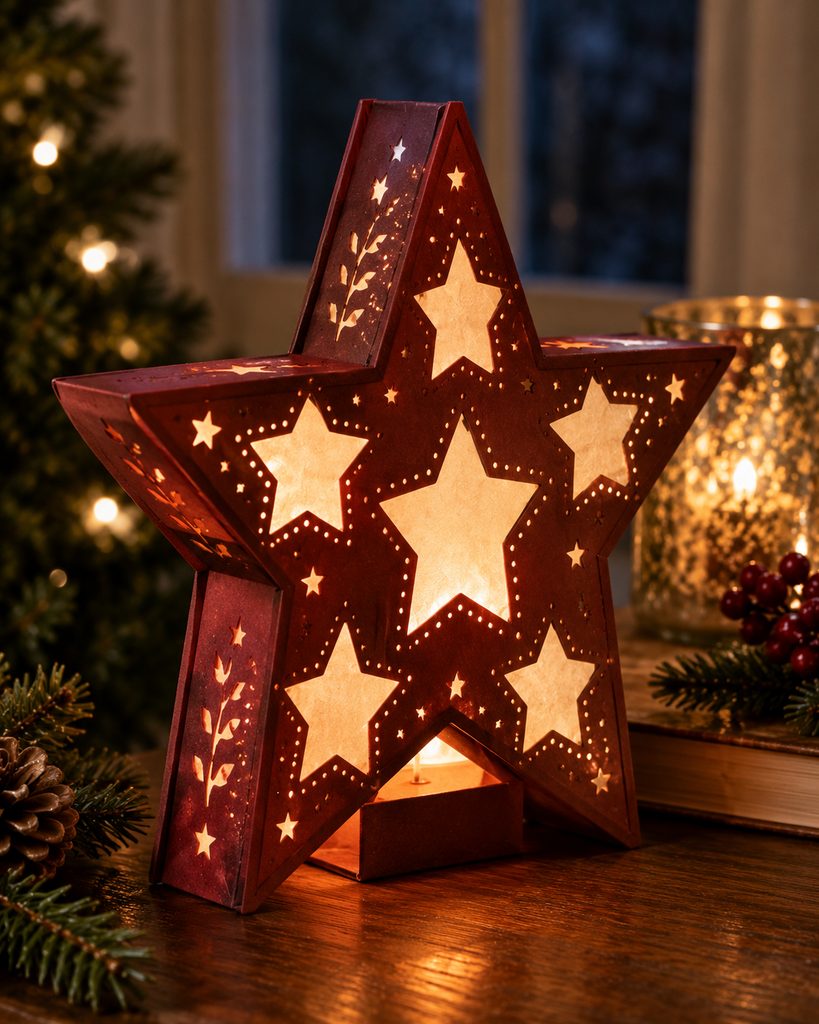
A paper star can glow safely only when the light path and access are designed before the decorative cuts. Build this as a shallow freestanding luminary rather than as a sealed paper ornament: use two matching star frames for the front and back, connect their edges with folded cardstock side strips, and line selected openings with vellum so the light is diffused instead of exposed directly. The bottom edge needs a broad, level section or a small folded base so the piece stands without tipping.

Before closing the final side seam, check the functional parts in order:
- Place a cool, battery-powered LED inside and confirm that it can be inserted and removed without bending the star.
- Make sure vellum or decorative backing does not block every opening; the glow needs a continuous path to the front and side windows.
- Keep the battery switch reachable from the open base or a deliberate access flap.
- Press the empty luminary lightly on its base. If it rocks, correct the side-strip folds before the light goes inside.
Light-Path Check: A dim patch usually means a seam, opaque backing strip, or overly dense embellishment is covering the opening. Adjust the obstruction rather than moving the LED against the paper.
7. Honeycomb Tissue-Paper Stars for Hanging Decor
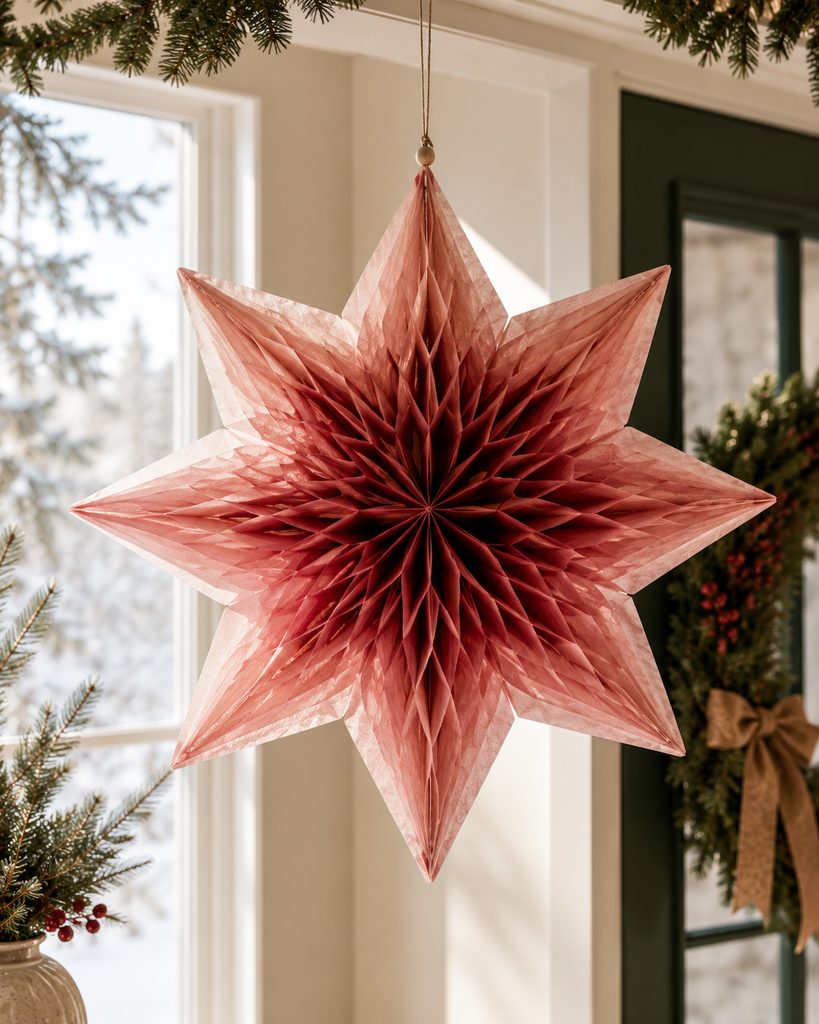
A flat stack of tissue-paper half-stars becomes a full hanging form when the glue lines alternate from layer to layer. Fold or stack identical half-star pieces along a central spine, apply narrow adhesive zones in one pattern on the first layer and a shifted pattern on the next, then repeat until the stack is thick enough to open into cells. Fan the piece around, join the first and last faces, and add the thread at the reinforced spine rather than at an outer point. The result is light enough for a window, doorway, or ceiling hook, and it can often be reopened carefully if one missed glue line makes the cells expand unevenly.
8. Quilled Star Place Cards for the Holiday Table
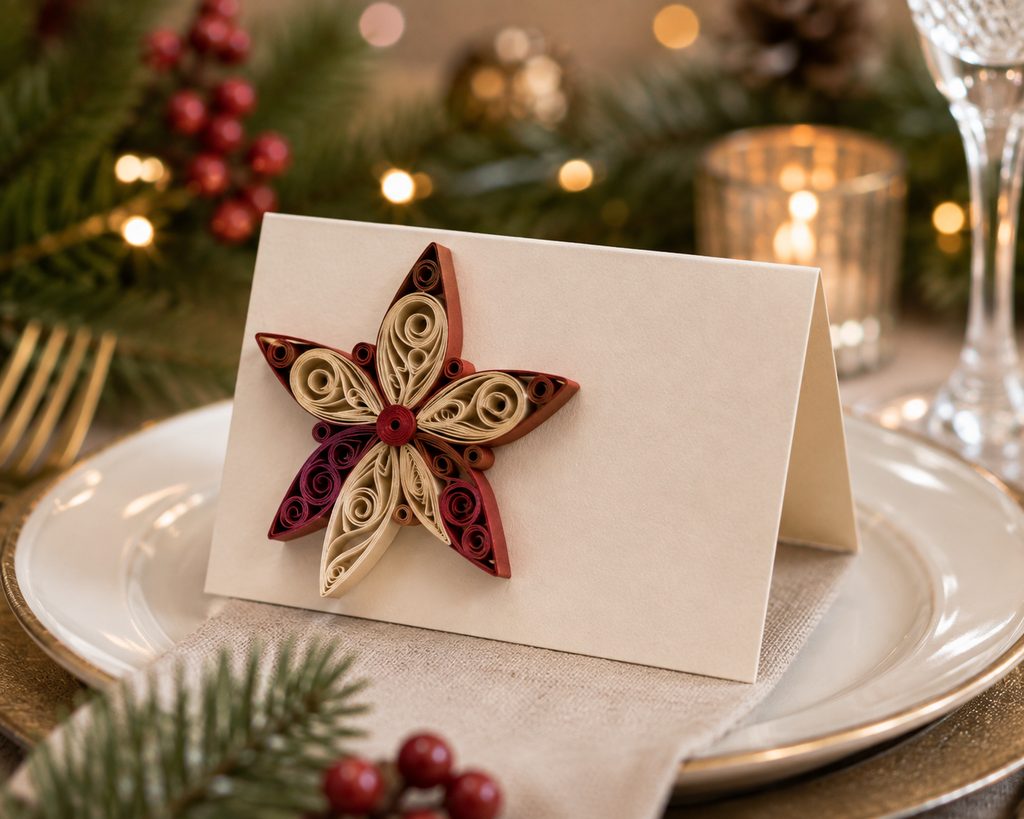
At a place setting, the star has to do more than look decorative: it needs to stay upright and leave the name readable. Build a small star from quilled paper strips using tight coils, teardrops, or marquise shapes, then attach the finished motif to the front of a folded cardstock tent. Keeping the quilled shape slightly smaller than the card prevents the paper coils from becoming the support structure.

For a full table, make the quilled stars as a batch before folding the cards. Roll matching components first, sort them by size, and assemble the motifs on a flat surface so their points stay aligned. Only then glue each star to its tent card and add the guest name to the plain cardstock area. This separates the slow decorative work from the easy repeated folds and makes crooked table tents easier to replace without rebuilding the quilling.
9. Tiny Origami Lucky Stars as Bowl Filler

Small folded stars are useful when you want color and texture on a table without building one large centerpiece. Lucky stars begin as narrow paper strips, so scraps of wrapping paper or lightweight decorative paper work well as long as the strip can crease tightly without splitting.
- Tie the strip into the compact pentagonal starting knot and flatten it neatly.
- Wrap the long tail around the pentagon, following its existing edges so the packet stays even.
- Tuck the end into a paper pocket, then press the five sides inward to puff the points.
Fill a clear bowl only partway so the individual shapes remain visible instead of compressing into a solid mass. A mix of two or three related paper patterns reads more deliberately than a bowl filled with every leftover scrap.

10. Layered Paper Star Wreaths for Doors or Walls
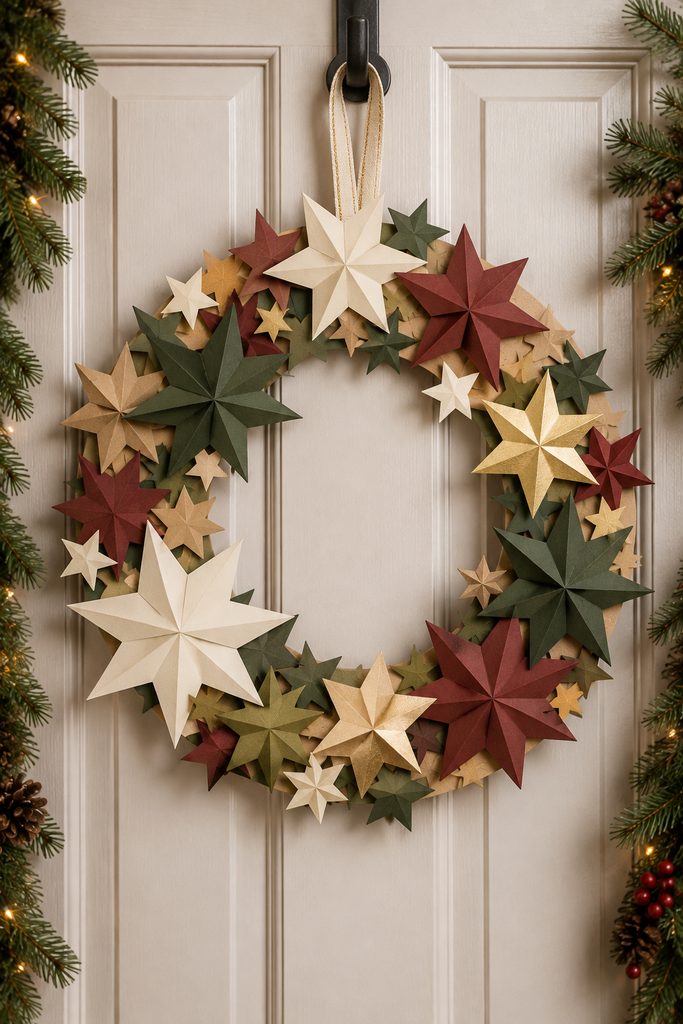
A star wreath works best when the eye sees one circular rhythm, not a pile of identical motifs. Start with a lightweight cardstock or chipboard ring and place the largest stars at a few uneven intervals. Fill the gaps with smaller stars that overlap the ring rather than covering every inch of it; leaving some base visible helps the circle remain readable.
Score selected stars lightly from point to center so a few lift away from the backing while others stay flat. That alternating depth creates shadow without making the wreath too bulky for a door or wall. Before fixing the final pieces, add a reinforced paper loop to the back of the ring or leave a clear section for the wall or door hook, then hold the wreath at display distance. If the star outlines merge into a jagged mass, remove one layer or widen the gaps instead of adding more color. The outer circle and at least several complete star silhouettes should still be recognizable from across the room.
11. Paper Star Tree Toppers with a Hidden Cone Sleeve
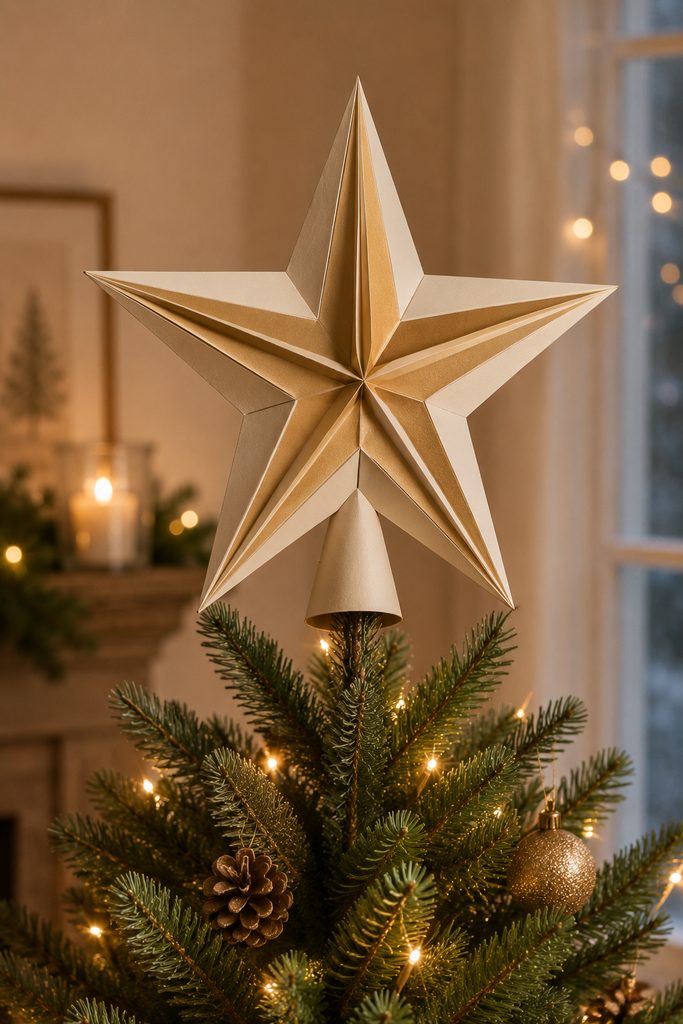
A tree topper that looks straight on the worktable can tilt as soon as it goes onto the tree because the visible star and the mounting sleeve solve different problems. Build the front as a lightweight layered or scored cardstock star, then attach a tapered paper cone to the back. The cone should be open at the bottom so it can slide over the tree’s upper leader, while its top remains narrow enough to keep the star centered above the attachment point. Reinforce the connection between cone and star with a second backing patch rather than hanging the full load from one glue line.
Use the symptom to find the fix:
- The star leans forward: the cone is attached too low or the front layers are too heavy; raise the rear attachment or reduce unnecessary front weight.
- The topper spins: the cone opening is too loose; add a removable inner paper shim rather than squeezing the outer star.
- The point crushes the tree tip: the cone is too narrow too early; widen the lower section so the load rests farther down.
- The star itself twists: check that the cone centerline aligns with the star’s vertical center before adding stronger adhesive.
Do the fit test before metallic paper, glitter accents, or other surface details are added. Mounting geometry is much easier to correct while the back remains accessible.
12. Balanced Paper Star Mobiles for an Entry or Window
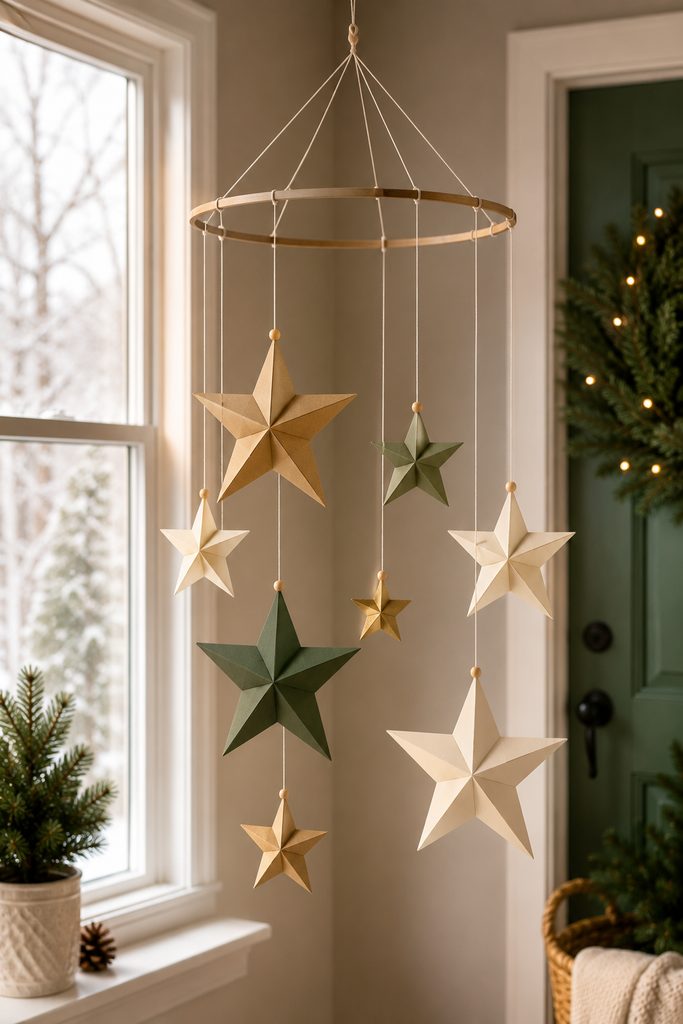
Balance starts at the support, not at the stars. Use a lightweight hoop or dowel that can hang level on its own, then suspend paper stars from separate threads at different heights. Each star can be a simple folded or layered shape, because the real construction challenge is distributing weight so one side does not drag the whole mobile down.
Build the hanging layout in stages:
- Attach the largest or heaviest star first and let the support settle.
- Add the next star on the opposite side, moving its thread inward or outward until the support returns close to level.
- Continue with lighter pieces, checking the balance after every addition instead of finishing one side at a time.
- Leave enough horizontal and vertical space for the stars to turn without striking each other, the wall, or the window.
If the finished mobile tilts, shorten thread only when you want to change height; to correct balance, move the attachment point along the support or reduce weight on the heavy side. A gentle draft should make the stars move independently rather than collide as one cluster.
Clearance Matters: Test the mobile in its actual location before trimming thread ends. Window frames, curtains, doors, and nearby walls can all reduce the space that looked generous on the worktable.
13. Star-Topped Paper Napkin Rings
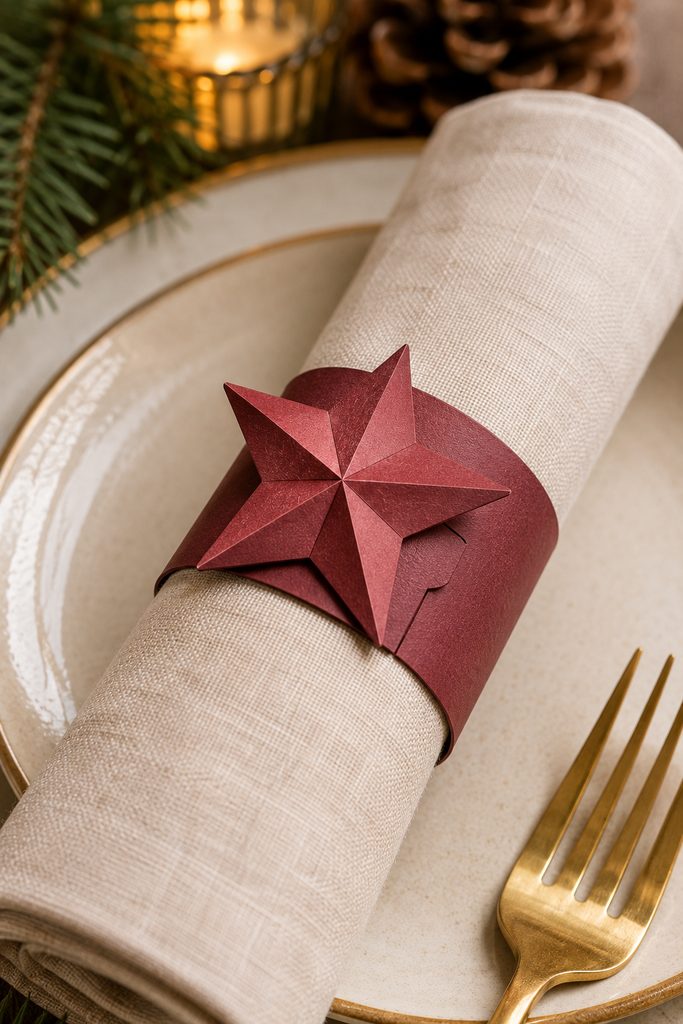
For a small table detail, wrap a narrow cardstock band around a rolled napkin and mark the overlap before gluing or slot-locking the ring; sizing the band around the actual napkin matters more than choosing the star first. Add one flat or lightly scored paper star over the seam so the decoration hides the join without making the ring top-heavy. Keep the star clear of the inner opening, where a point could catch the fabric when the napkin is removed. If you want to reuse the rings, choose a tab-and-slot closure instead of permanent adhesive, then store the opened bands flat with the stars facing upward.
Choosing Paper Stars by Where They Will Hang or Stand
The easiest way to choose among paper stars is to start with the finished location. Wall and door pieces can carry a little more depth because they stay supported; window and hanging stars need low weight and a strong attachment point; tabletop pieces need a base or band that prevents tipping or snagging.
For bright windows, use lighter paper, open silhouettes, or vellum so daylight stays part of the design. For a mantel, shelf, or table, firmer cardstock gives scored folds and slot joints enough stiffness to keep their shape. Hanging ornaments and mobiles should stay light, with thread attached through reinforced centers, spines, or tabs rather than fragile points. If you plan to store the decor for another season, favor slot-fit, fold-flat, or detachable constructions before adding permanent adhesive.
Start With the Space, Then Pick the Star
For the fastest result, choose one place that needs a clear holiday accent and match the star to that job. A wall cluster gives you scale with very little material, a woven ornament adds detail at tree level, and a fold-flat slot star works well when storage matters. If you want a more involved centerpiece, the luminary, tree topper, or mobile lets the construction do more of the visual work.
If dimensional paper is the direction you want to keep exploring after these holiday projects, continue with 20 Stunning 3D Paper Art Ideas for Handmade Decor for folded reliefs, honeycomb forms, mobiles, and other structure-driven paper decor.








