
This post contains affiliate links. As an Amazon Associate I earn from qualifying purchases, at no extra cost to you. Thank you for supporting Diynify!
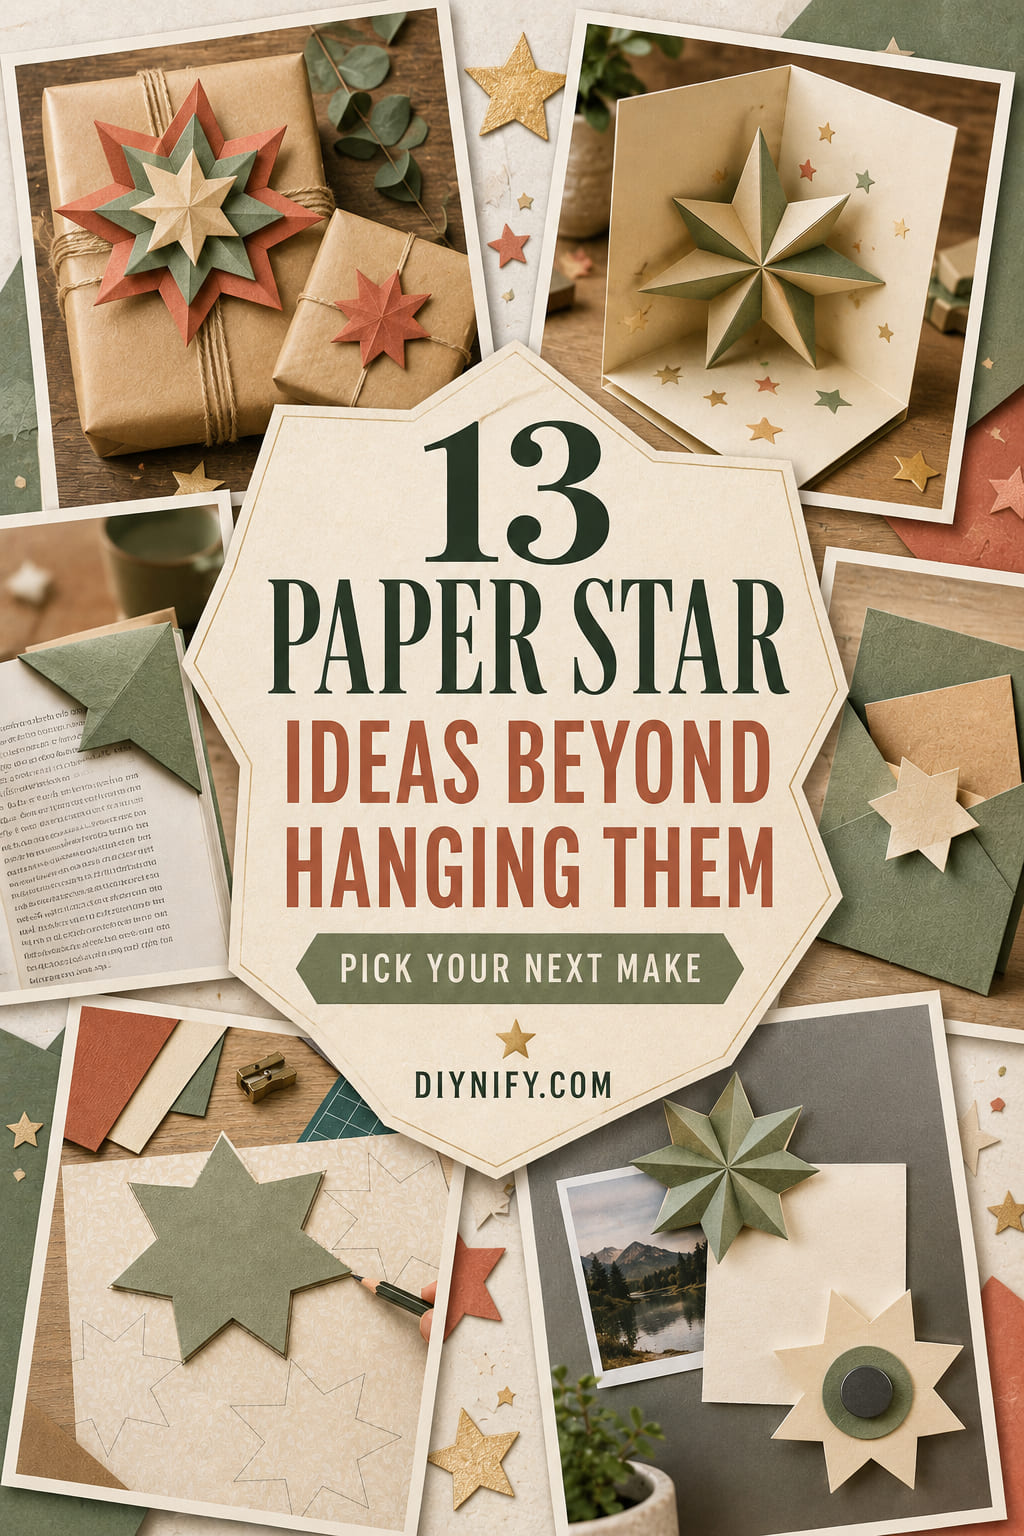
Paper stars do not have to end up on a string, branch, or window hook. Some of the most useful paper star ideas treat the star as a working part of another object: a gift topper that hides a ribbon join, a bookmark that grips a page corner, a closure for a paper sleeve, or a small marker that helps guests tell drinks apart.
Most of these projects use finished flat, folded, or dimensional stars plus cardstock, scissors or a craft knife, a ruler, a scoring tool, and paper-safe adhesive. A few need paper clips, drinking straws, food-safe party picks, a gift card, acetate and foam tape, a brooch pin back, or a small craft magnet. Choose by use first: thin stars suit stationery, firmer cardstock handles clips and closures, and dimensional stars work best where they will not be crushed.

1. Layer Finished Stars Into Gift Toppers
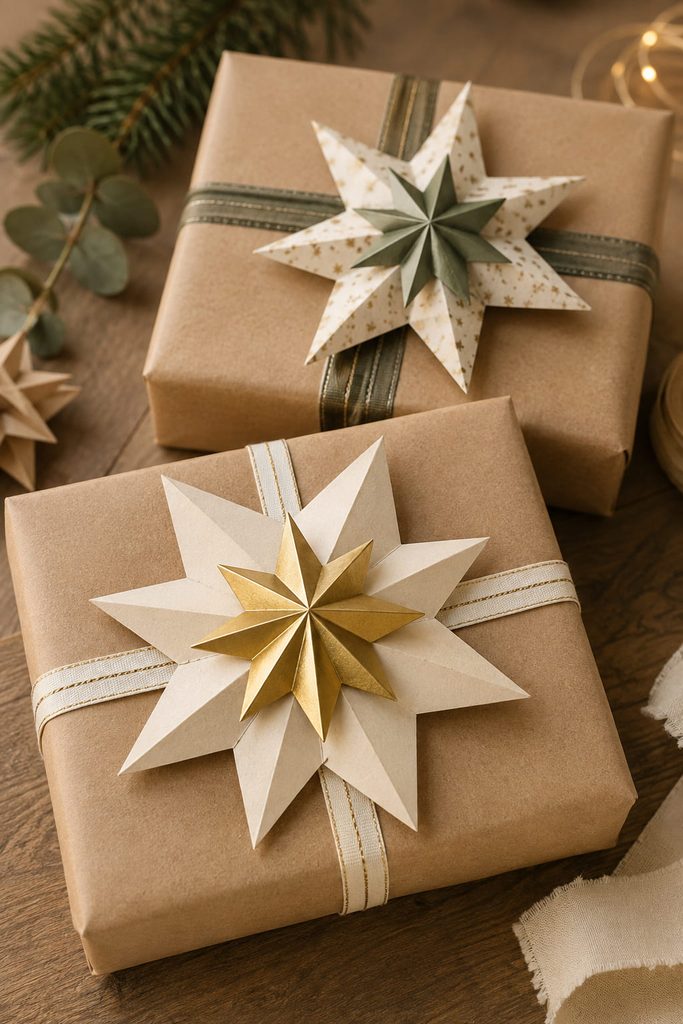
Instead of tying another bow over a wrapped box, stack two or three finished paper stars directly over the ribbon crossing. A broad flat star can cover the knot or tape joint, while a smaller scored star on top adds shadow without adding much bulk. Fix the bottom star at its center only, then let the outer points stay free so the paper still looks dimensional. This works especially well when the wrapping itself is simple, because the star becomes the focal point rather than another small decoration competing with a busy print. For a topper that needs to survive handling, use cardstock for the lower layer and lighter paper above it; if the package will be opened carefully, attach the star stack to the ribbon instead of the wrapping paper so the whole topper can be lifted off and reused.

2. Turn a Star Into a Corner Bookmark
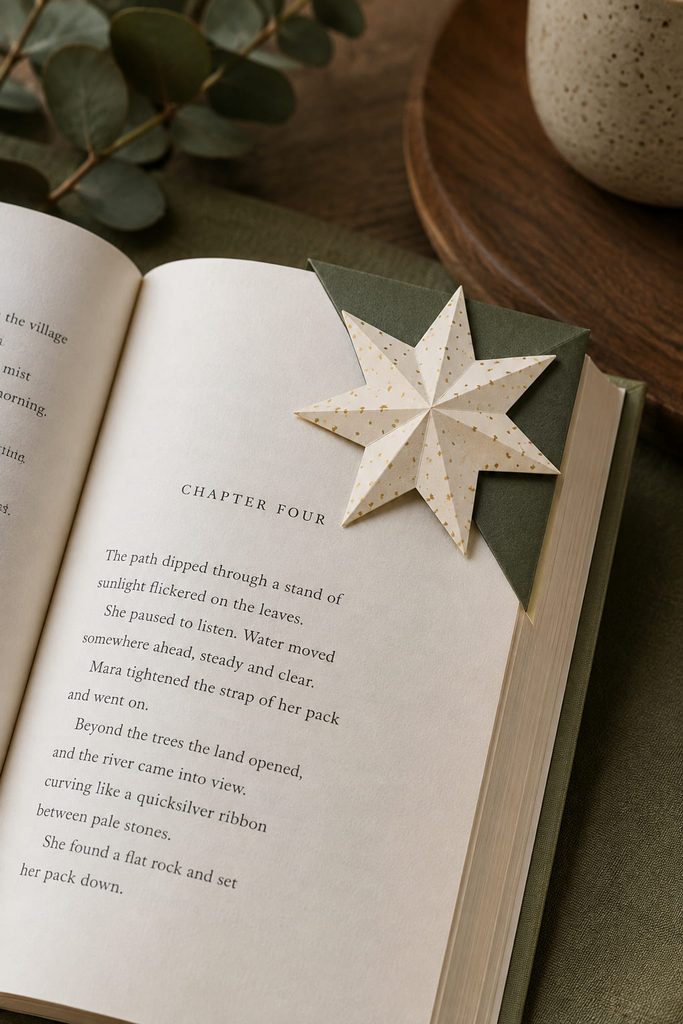
A finished star can mark a page without covering the text if the gripping part sits behind it. Cut a small right-angle pocket from thin cardstock, glue only the two outer edges, and attach the pocket behind the lower half of a flat star. The open corner slides over the page while most of the star remains visible above the sheet. The pocket should do the holding; the star should not. If the star itself is folded tightly around the page, thick points can dent paper and the bookmark becomes awkward to move.

Corner Fit Check
- If it falls off, deepen the pocket before adding more glue.
- If it wrinkles the page, trim the pocket smaller or switch to lighter cardstock.
- If the star flops backward, add a second thin backing star rather than making the pocket thicker.
3. Use Flat Stars as Envelope Seals
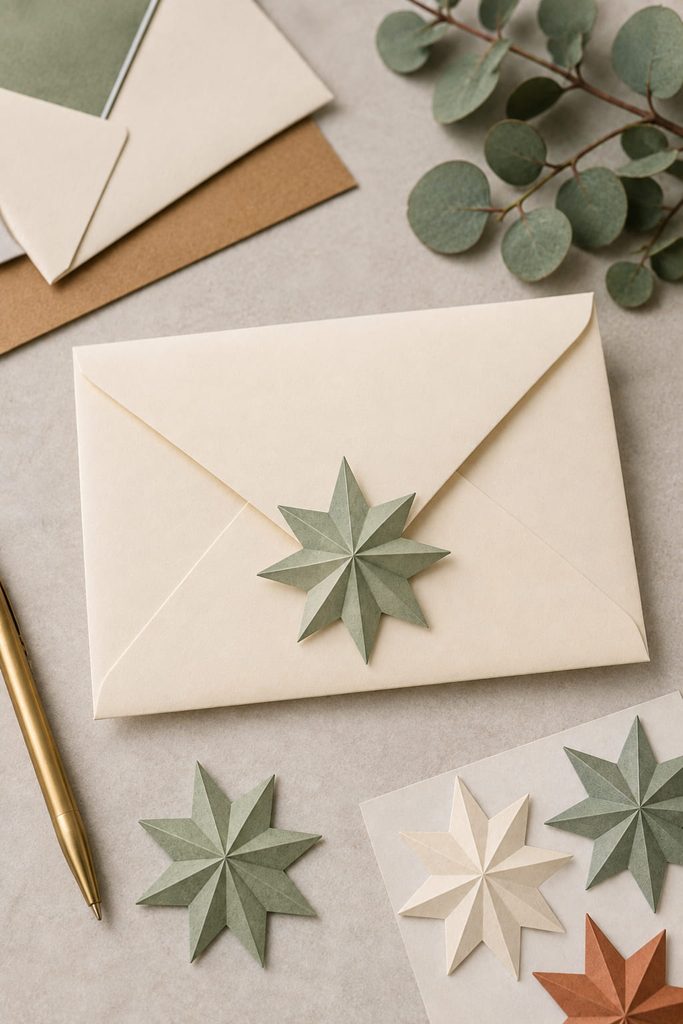
Flat paper stars can replace a plain sticker on hand-delivered notes, party invitations, or gift envelopes. Place the star so its center bridges the flap edge, then glue only the portion that crosses the flap rather than coating every point. The unglued tips keep the shape readable and make the seal easier to lift without tearing a large patch from the envelope.
This is better for decorative closure than for secure mailing. If the envelope needs to travel through postal equipment, keep the outside surface flat and follow the mailing requirements that apply where you are sending it; raised points and bulky layers can catch during handling.
4. Make a Pop-Up Star Greeting Card
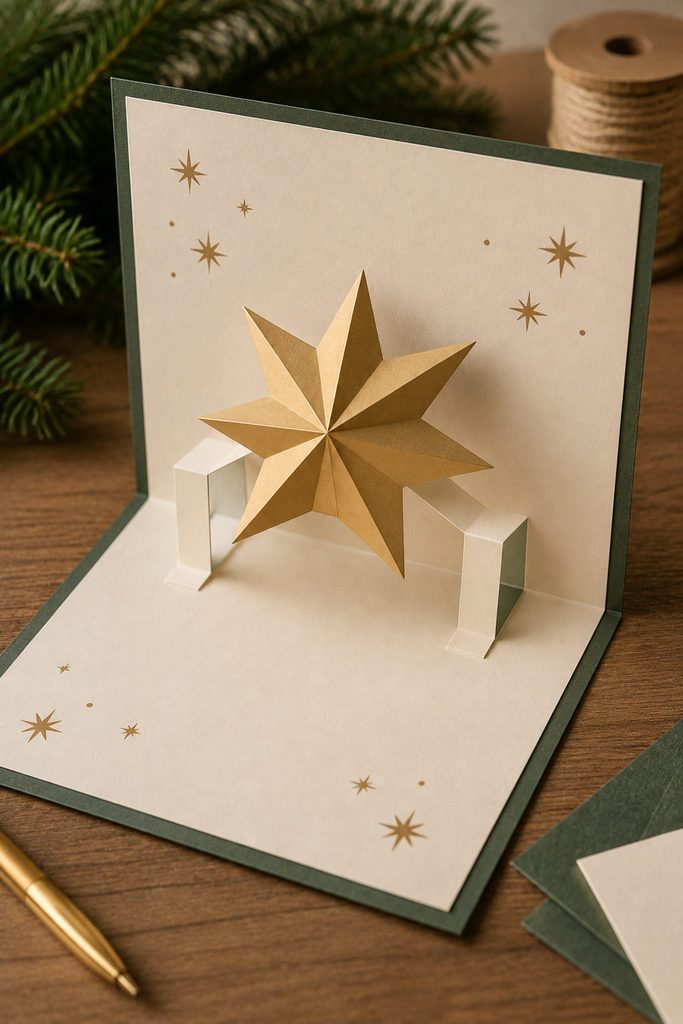
A star can rise from the center of a card without becoming a complicated paper sculpture. The mechanism is a pair of folded paper hinges that push the star upward when the card opens and collapse inward when it closes. Use a lightweight flat or shallow-scored star so the hinge does not have to lift unnecessary weight.

- Fold the card base and mark the centerline before attaching anything.
- Cut two narrow cardstock tabs, score each into a small Z-shaped hinge, and glue one end of each hinge to the back of the star.
- With the card opened to about a right angle, position the free hinge ends on opposite sides of the center fold so the star sits above the crease instead of directly inside it.
- Close the card slowly before the adhesive fully sets. The hinges should fold inward without the star points striking the card edges.
- Reopen the card and adjust the hinge spacing if the star twists, sinks into the fold, or leans to one side.
Closed-State Check: The card should lie nearly as flat as it did before the mechanism was added. If one point is trapped at the fold, move the hinge attachment outward rather than trimming the star first.
5. Add a Star Closure to a Gift Card Sleeve
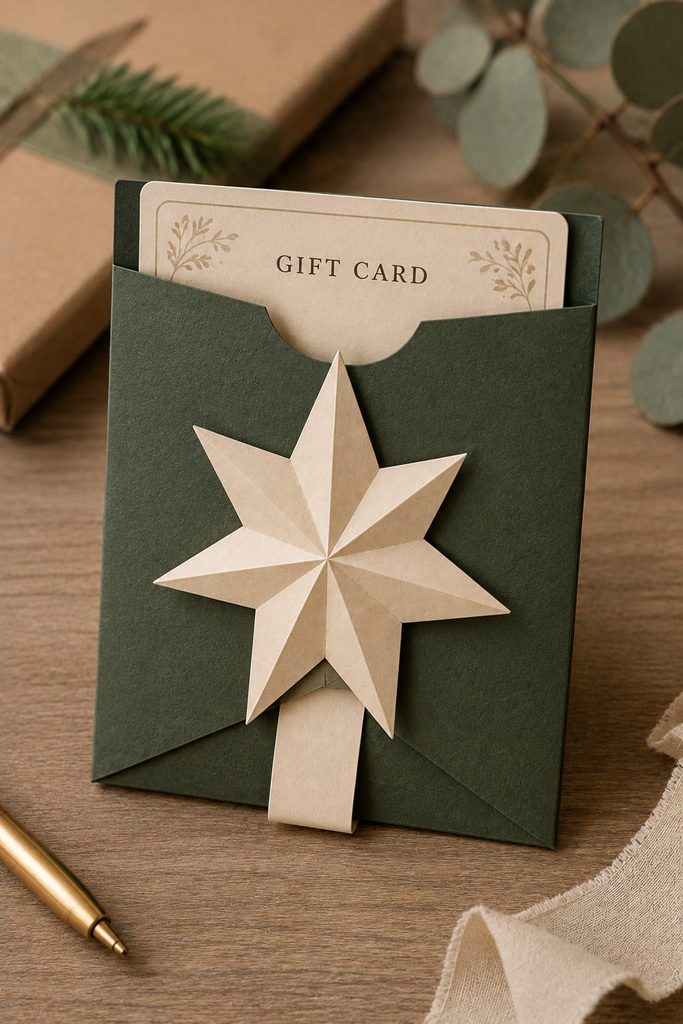
For a paper gift-card holder, the star can become the actual tuck point instead of a glued-on decoration. Build a simple sleeve slightly wider than the card, leaving one short end open for loading. On the front, attach a sturdy flat star only through its center and upper half. The lower point stays free, creating a small space where a narrow flap from the back of the sleeve can slide underneath.
The useful part is the clearance between star and sleeve. Too much adhesive removes the tuck space; too little support lets the star tear away after a few openings. A second small backing patch inside the sleeve spreads the load without showing from the front.
Before finishing the surface, check the fit:
- The gift card slides in and out without scraping the side seams.
- The closing flap reaches under the free star point without forcing it upward.
- The star remains attached when the flap is pulled out.
- The closed sleeve stays flat enough to place inside an envelope or another gift.
- If the flap slips free, lengthen it slightly or deepen the overlap; tightening the glue under the star only steals space from the tuck.
6. Build Star-Topped Paper Clips for Page Markers
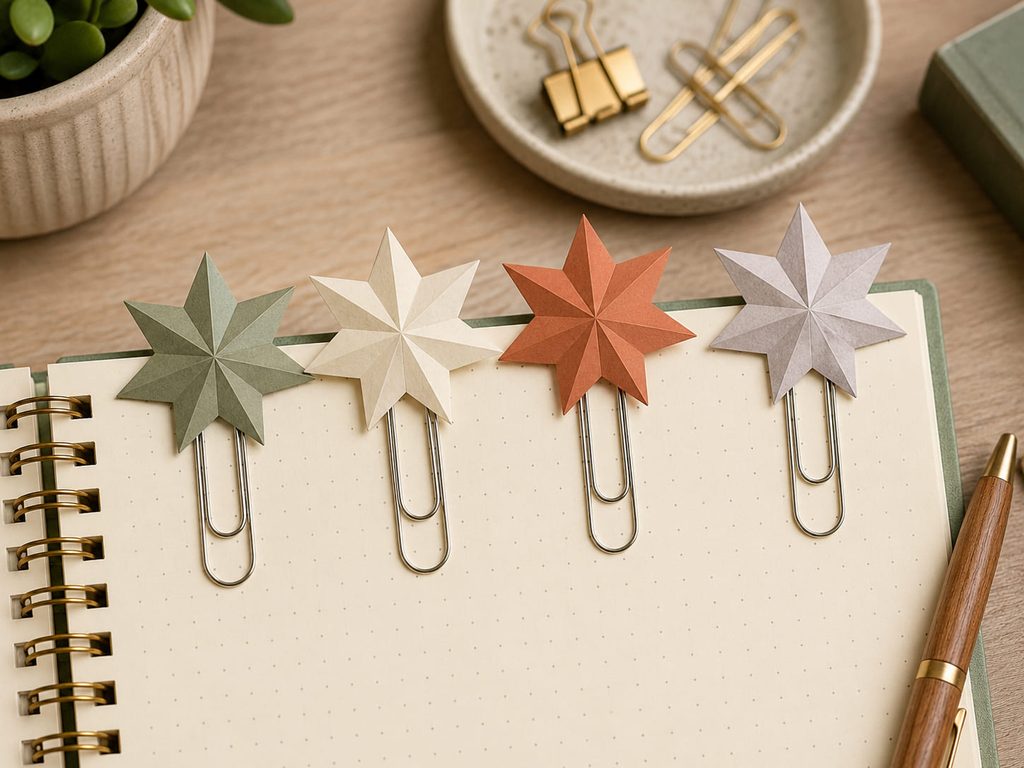
A paper clip becomes easier to spot in a notebook when a small star sits above the top edge. Sandwich the closed end of a standard paper clip between two matching cardstock stars, gluing the paper faces to each other around the metal rather than relying on one small glue dot. Keep adhesive out of the lower wire loops so the clip can still slide onto a page. The star should be small and firm enough to act as a tab, not a counterweight: oversized folded stars tend to twist the clip and can catch when the notebook closes, while a flat or lightly scored shape stays more practical for everyday page marking.
7. Wrap Slit Stars Around Drink Straws as Markers

When several cups look the same, a small paper star can act as a quick drink marker without dangling from the glass. Keep the marker above the drink line and away from moisture; lightweight cardstock holds its shape better than thin copy paper once condensation appears nearby. Choose the attachment by whether speed or reuse matters more.

| Attachment | How It Works | Trade-Off |
|---|---|---|
| Single radial slit | Cut from one valley toward the center and flex the star around the straw. | Fast and low-profile, but repeated removal can widen the slit. |
| Paper loop on the back | Glue a narrow paper band behind the star and slide the straw through it. | One extra piece, but the front star stays uncut and can be reused. |
8. Sandwich Paper Stars Around Cupcake Picks
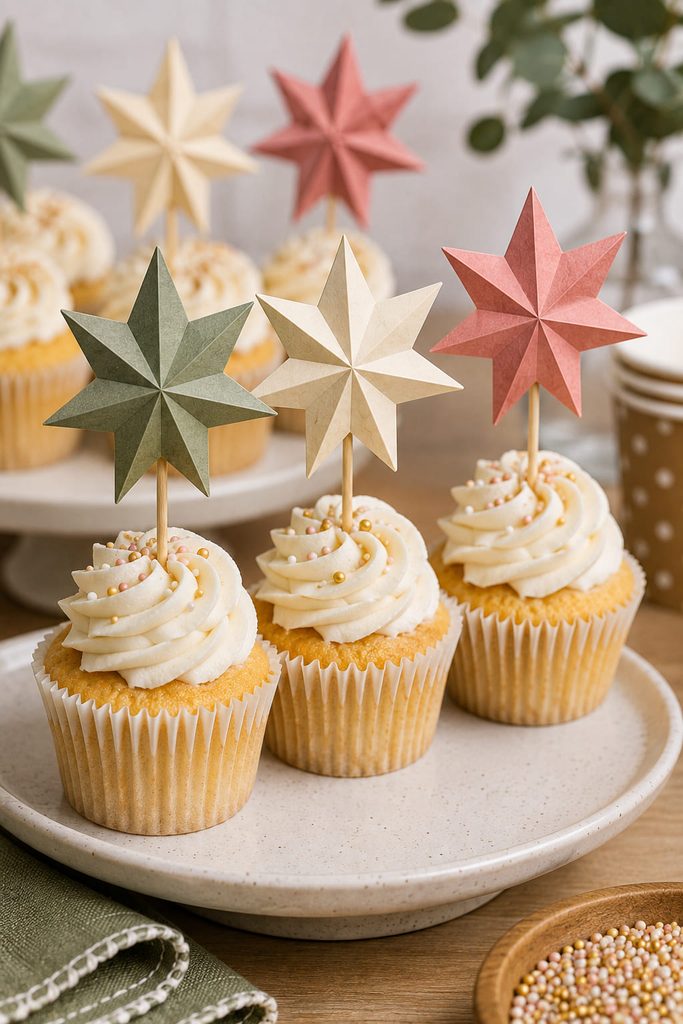
For cupcake toppers, the attachment needs to be balanced so one paper face does not peel away from the pick. Use two matching flat stars and glue them back-to-back with the top of the pick captured between their centers. That hides the stick, gives the topper a finished front and back, and keeps the star from rotating as easily as a single shape glued to one side.
Keep paper and adhesive above the food rather than pressing the decorated section into frosting. The pick is the part that enters the cupcake; the paper star remains a visual topper. For a batch, cut all stars first, align one sample around a pick, then use that sample as the height reference for the rest.
9. Fit a Folded Star Over a Pencil Top
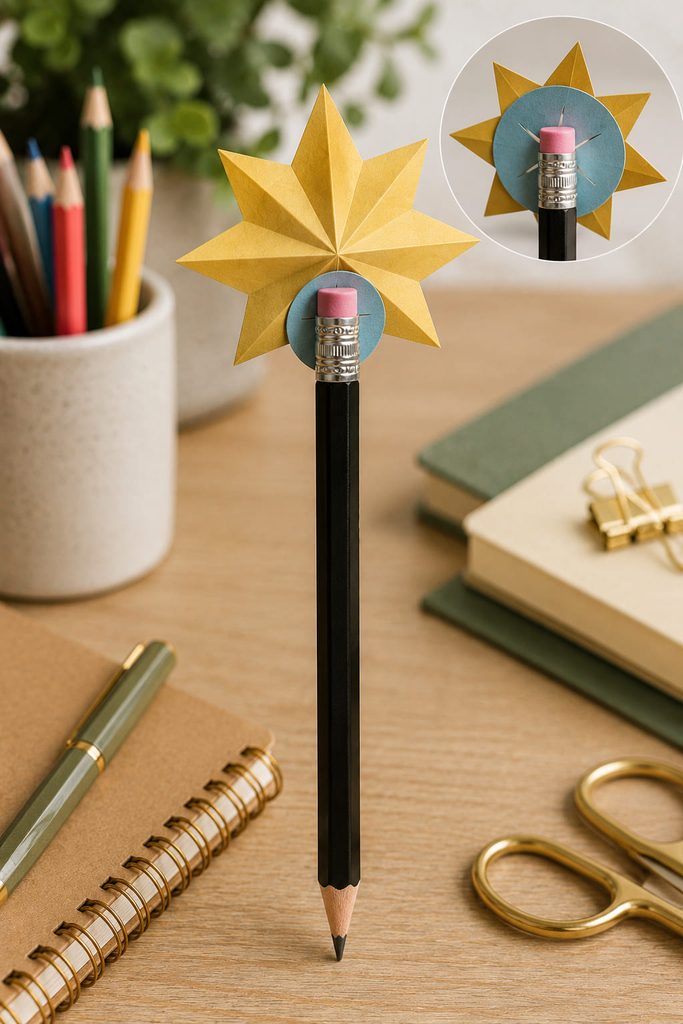
Grip is the main constraint in a removable pencil topper: the hold should come from a reinforced center rather than permanent adhesive on the barrel. Reinforce the back of the star with a small cardstock disk, cut a short cross-shaped slit in the disk, and push the pencil end through gradually so the slit opens around the barrel and holds by friction. The decorative star should ride on that reinforced disk instead of taking the stress itself.
Fit Diagnosis
- If the topper slides down, the slit is too long or the backing paper is too soft.
- If the disk tears immediately, the opening is too small for the barrel.
- If the star creases around the center, enlarge or replace the backing disk rather than gluing the star to the pencil.
- A good fit pulls off cleanly without crushing the pencil or stretching the star.
10. Use a Sturdy Star as a Reusable Tracing Template
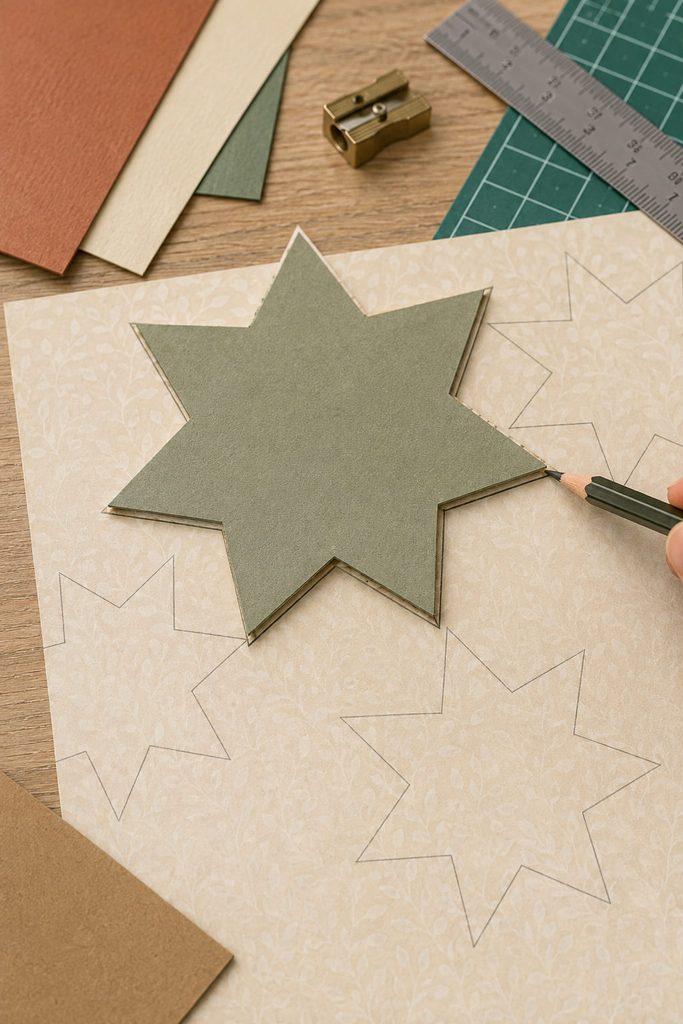
When you need the same star outline more than once, one clean cardstock star can become the master instead of another finished decoration. Choose a flat shape with crisp valleys and points, then laminate it with a second cardstock layer or glue it to thin chipboard if repeated tracing starts to soften the edges.
Place the master on the back of decorative paper and trace with a sharp pencil held close to vertical. Keeping the pencil upright matters because a steep angle can push the line outward around the points and make every copy slightly larger than the original.
Store the template flat and unscored. If one point begins to curl, reinforce or replace the master before tracing a whole batch; a bent edge is repeated in every copy, while a clean template makes stars for cards, labels, packaging, or other projects consistent without requiring a cutting file.
11. Make a Paper Star Brooch With a Reinforced Back
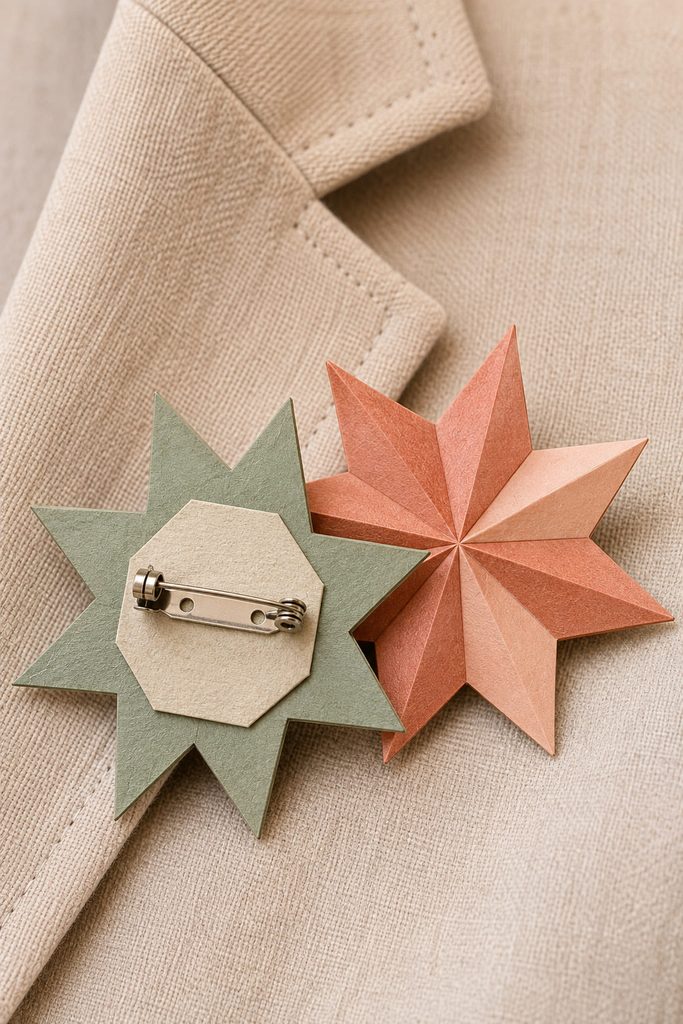
Wearable paper needs a different build from tabletop paper. Start with a firm but lightweight star, then glue a smaller cardstock patch across the center of the back before attaching a brooch pin. The patch spreads the pull from the hardware across a wider area, so opening and closing the pin does not repeatedly flex one crease or one thin paper layer.
Use the finished piece where it can stay reasonably dry and avoid very long, sharp paper points that can bend against clothing.
Back-and-Fit Checklist
- The pin back sits entirely on the reinforced patch.
- Adhesive does not block the pin hinge or clasp.
- The star remains clear of the fastening point so fingers can operate the clasp.
- The paper does not sag when the brooch is held by the pin alone.
A flat layered star usually wears more cleanly than a deep puffed form because it stays closer to the fabric and is less likely to be crushed by a coat or bag strap.
12. Use Mini Stars as Shaker-Card Fillers
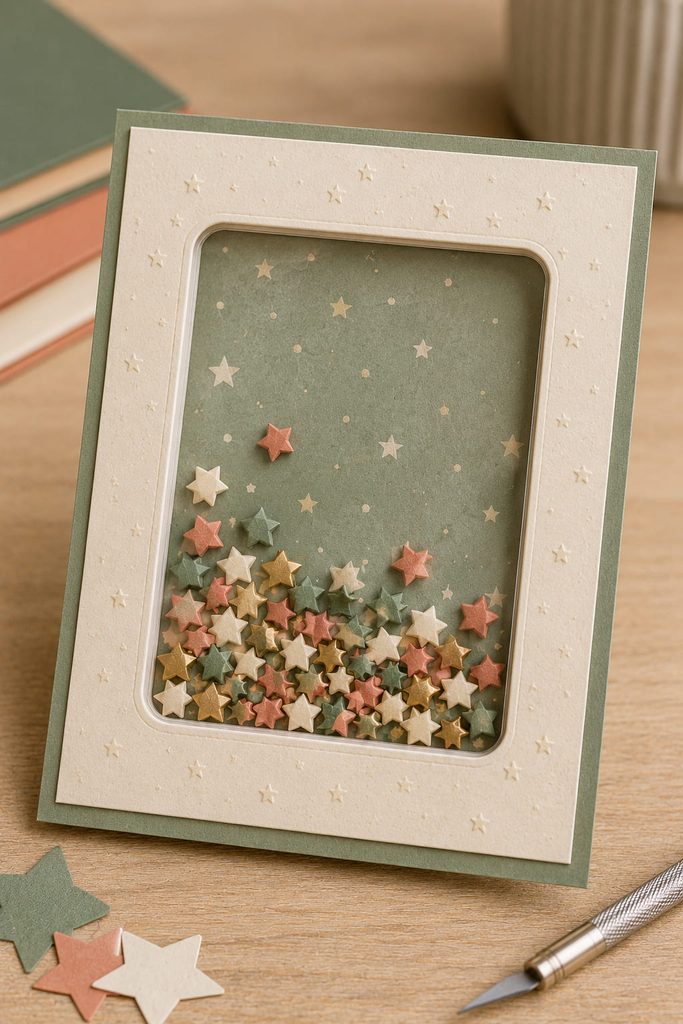
Inside a shaker card, loose mini stars supply the moving layer instead of being glued to the front. Build the shaker cavity first: a cardstock frame surrounds a clear acetate window, while foam tape or paper spacers create enough depth for the stars to move. The filler pieces need to be smaller than the open window and shallower than the cavity.
Before sealing the final edge, add only enough stars to leave visible empty space. If the cavity is packed, the pieces cannot slide and the shaker effect disappears. Tilt the unfinished card in several directions; the stars should travel across the window rather than wedging in the corners.
A useful correction is usually about clearance, not more decoration. Stars that stick may be too thick, the spacer walls may lean inward, or adhesive may be exposed along an edge. Fix the obstruction before closing the card permanently.
13. Back a Paper Star With a Small Magnet for Notes
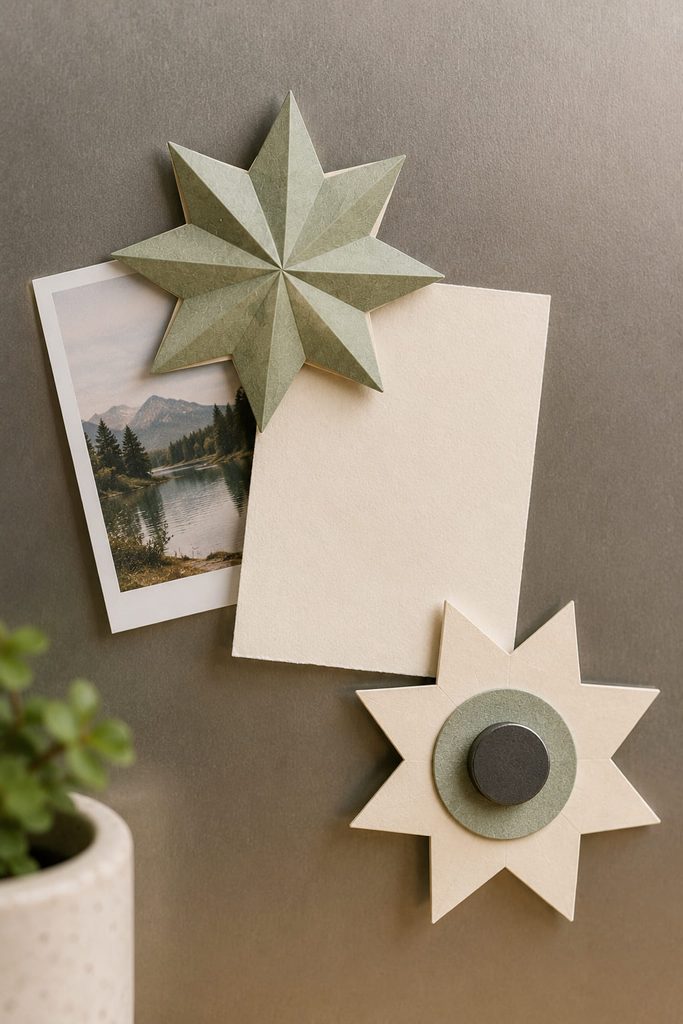
Memo magnets put concentrated pull on the center of a paper star, so the hardware needs more support than one thin layer can provide. Add a cardstock backing disk behind the center of the star, attach a small craft magnet to that reinforced area, and keep bulky folded points away from the surface that needs to sit against a refrigerator, locker, or magnetic board. A flatter center gives the magnet better contact. Keep the finished piece for lightweight notes, photos, or small paper reminders; for heavier objects, use hardware meant for that load rather than asking extra paper layers to do structural work.
Choose Paper Star Ideas by How They Will Be Used
The easiest way to choose among these projects is to match the star construction to the kind of handling it will receive.
| Finished Use | Better Star Build | What Matters Most |
|---|---|---|
| Gift wrapping and envelopes | Flat or lightly scored | Low bulk and controlled glue placement |
| Bookmarks and page markers | Thin, reinforced cardstock | Smooth edges and easy removal |
| Interactive cards and sleeves | Lightweight with clear hinge or tuck zones | Movement and closed-state clearance |
| Party markers and picks | Small, simple silhouettes | Repeatable sizing and secure attachment |
| Wearable or magnetic pieces | Firm layered center | Reinforcement around added hardware |
| Templates and shaker fillers | Flat master or miniature pieces | Clean edges, clearance, and repeatability |
A star that only needs to sit on a package can stay delicate. A star that will be pulled, clipped, worn, or opened repeatedly needs reinforcement where the force actually enters the paper. That distinction is more useful than choosing paper by color alone.
Give the Star a Job Before You Make Another One
If you already have a pile of folded or cut stars, start with the least destructive use: gift toppers, page markers, magnets, tracing templates, and shaker fillers can often use finished shapes with only a backing piece or attachment added. Save pop-up mechanisms and tuck closures for the next batch, because those uses work best when the function is planned before the final assembly is locked in.
For more construction-focused star projects—including freestanding, woven, glowing, framed, and tabletop versions—continue with 13 Paper Stars DIY Ideas for Easy Holiday Decorating.








