This post contains affiliate links. As an Amazon Associate I earn from qualifying purchases, at no extra cost to you. Thank you for supporting Diynify!
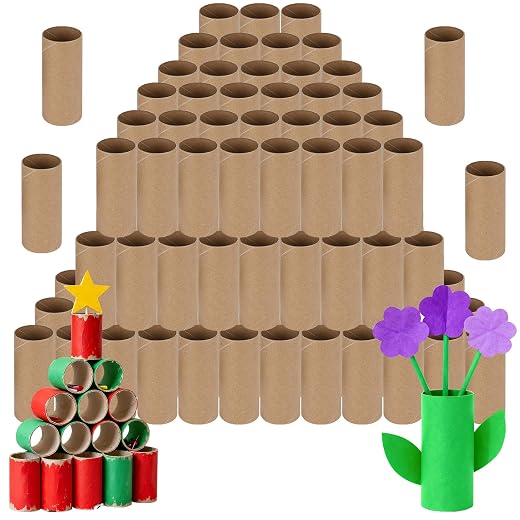
Toilet paper roll wall art becomes much more interesting when the cardboard tube is treated as a structural material rather than just something to paint. A tube can be flattened into pointed rings, opened into curling strips, folded into faceted cells, pulped into textured tiles, or kept cylindrical for lightweight sculptural decor.
Most of these projects use clean, completely dry cardboard tubes, scissors or a craft knife, a ruler, tacky craft glue or PVA, and clips for holding joints while they set. A few ideas also need a rigid backing board, a shallow frame, a small mirror, vellum, a cool battery-powered LED, thread or a dowel, or acrylic paint. Choose by the effect you want: openwork pieces emphasize the wall behind them, deep reliefs depend on side shadows, and hanging designs add texture through gravity and movement.
1. Pinched-Ring Botanical Branch Relief
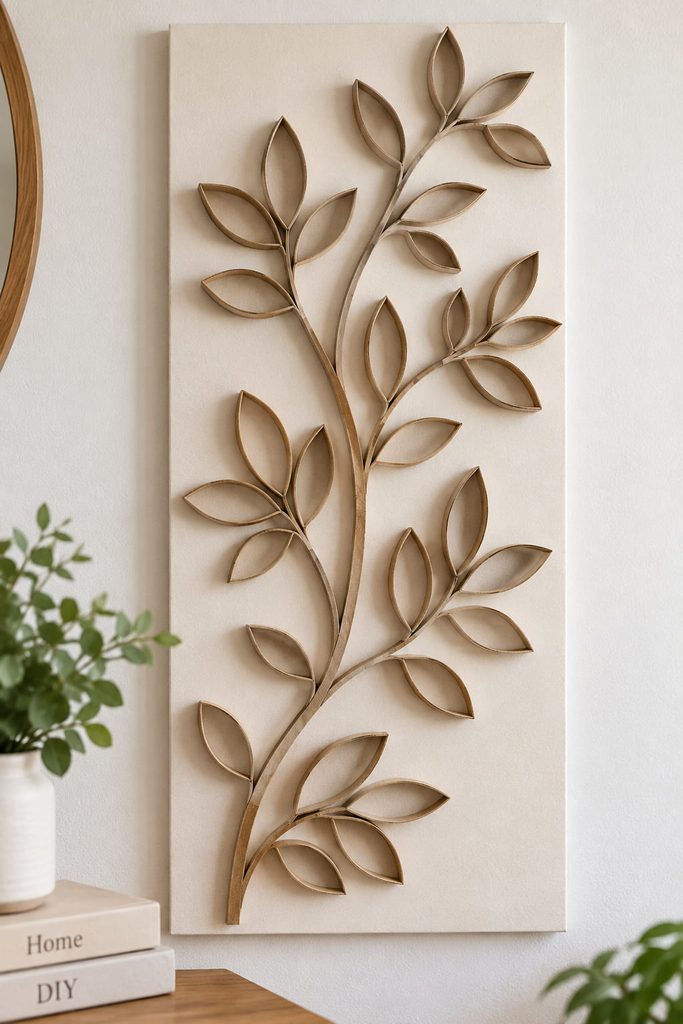
Flattening a tube gives every crosswise slice two natural points, which makes the material unusually good at suggesting leaves without cutting each leaf from flat card. Use those pointed rings as the repeating unit, but avoid turning them into identical flowers. A stronger botanical composition starts with one curved cardstock stem on a slim backing panel, then sends pairs of tube-ring leaves outward at changing angles. Keep a few gaps large enough for the background to show through; the negative space helps the branch read from across the room.
Build from the stem outward so each new leaf has a clear attachment point. Near the base, slightly wider rings can carry more visual weight, while narrower rings toward the tip keep the branch from looking top-heavy. Mount the finished relief on a painted panel or directly on a lightweight mat board, then hang the backing rather than trusting one small cardboard loop to carry the whole piece.
2. Tube-End Stamp Abstract Print
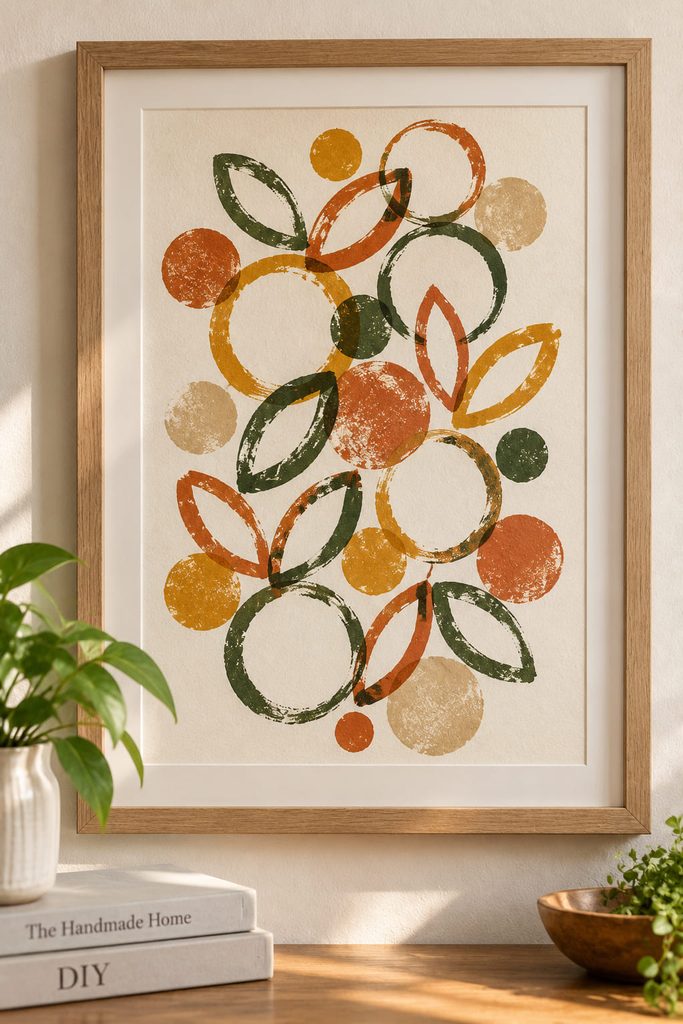
For a flatter project, use the toilet paper roll as the tool rather than leaving it in the finished artwork. A round tube end prints circles; a gentle pinch turns the same end into a leaf, eye, or pointed oval. Dip only the rim into a shallow layer of acrylic paint, test the pressure on scrap paper, then build a framed composition from overlapping impressions.
- Establish one large cluster or sweeping path before adding isolated marks.
- Rotate the pinched stamp between impressions so repeated shapes do not all lean the same way.
- Let one paint layer dry before overlapping a second color if you want crisp intersections.
- Stop while some background remains visible; the untouched paper is what separates the printed shapes.
This idea works especially well when you want recycled-material craft without a visibly recycled-cardboard finish. The tube creates the pattern, while the final wall art can stay light enough for an ordinary picture frame.

3. Curved Half-Tube Arch Sculpture
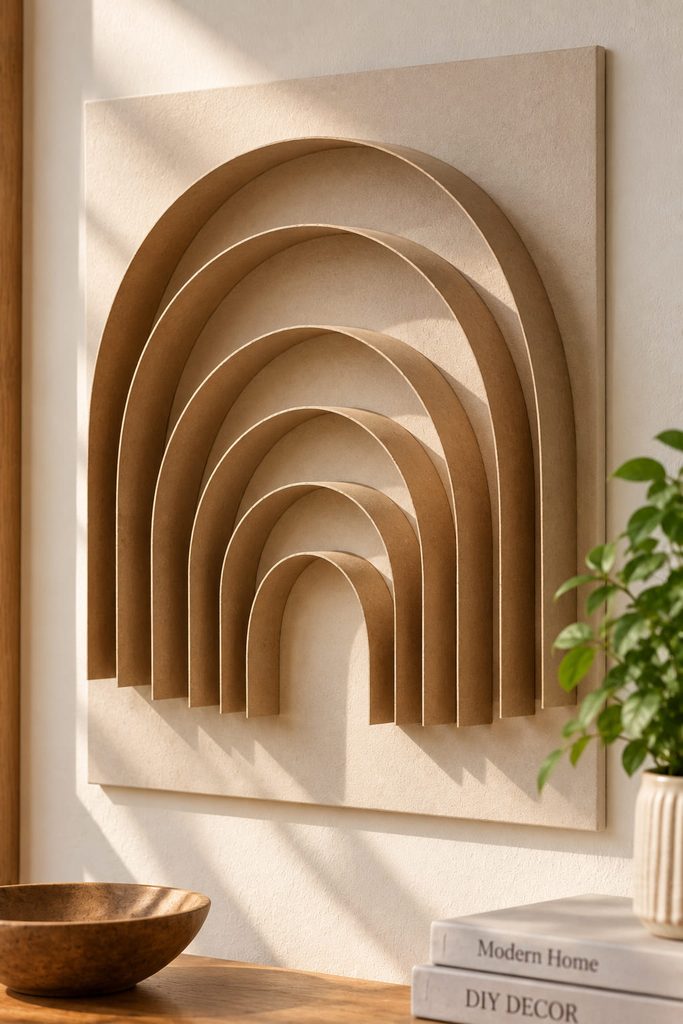
Do you want depth without building dozens of tiny rings? Split several tubes lengthwise and open them into curved half-cylinders. Mounted on their long edges, those curved pieces act like shallow ribs and throw broader shadows than narrow tube slices.
| Route | Best Effect | What Changes |
|---|---|---|
| Nested arches | Calm, centered composition | Trim each rib shorter so the curves step inward toward one focal point. |
| Offset wave | More movement across a wide wall | Shift each rib sideways and vary the spacing instead of keeping one shared centerline. |
Use a rigid board behind either version, because the half-tubes need a stable surface to keep their curves aligned. A single paint color makes the shadow pattern do most of the visual work; leaving the cut edges natural can add a thin kraft outline around each rib.

4. Faux Wrought-Iron Scroll Panel
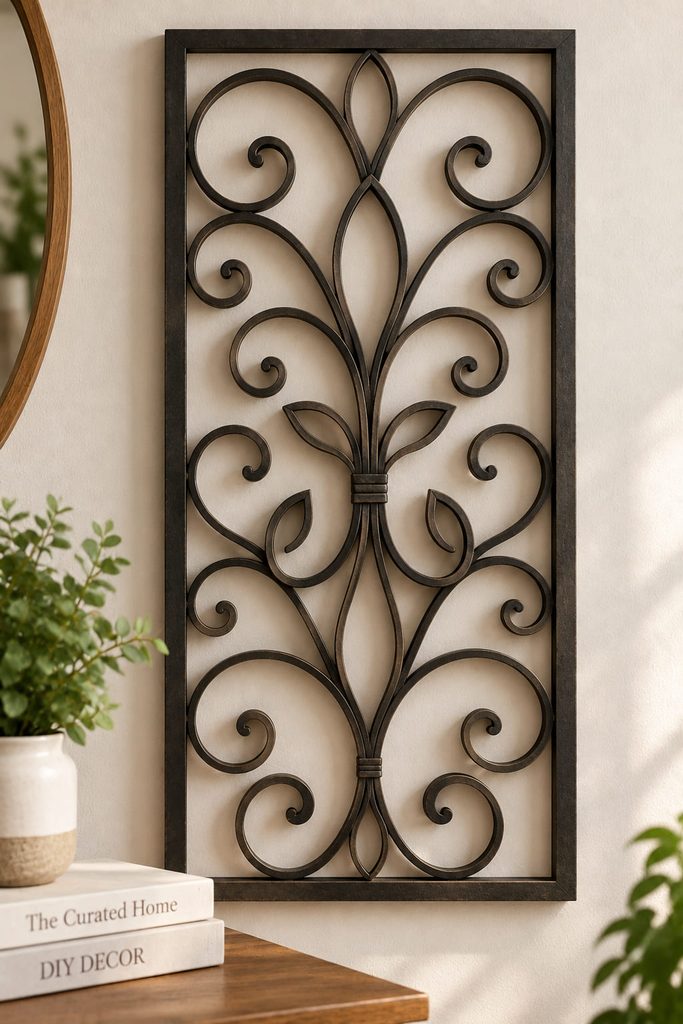
Open each tube with one lengthwise cut, press it flat, and trim the cardboard into narrow strips. Instead of arranging the strips as a flat pattern, pre-curve them around a dowel or marker and join them into mirrored C- and S-shaped scrolls inside a lightweight rectangular frame. The surrounding frame is structural: it gives the outer curls two reliable attachment zones and prevents a large scrollwork composition from depending on fragile tip-to-tip joints.
Work from the perimeter inward. Fix the largest scrolls to the frame first, then bridge them with smaller curls only where another connection improves stiffness or completes the rhythm. Keep deliberate openings between neighboring lines; faux wrought-iron styling reads through silhouette and negative space, not through filling every gap.
Scroll Joint Check: lift the empty frame vertically before painting. If a curl peels away or twists out of plane, add a second contact point where it naturally meets another strip rather than burying the joint under extra glue.
A dark matte finish can make the cardboard silhouette resemble metal from a distance, while natural kraft keeps the recycled material obvious. Either finish works better when the panel has one clear visual center and a few larger openings instead of dozens of equally tight curls.
5. Scored Hexagonal Tube Tile Relief
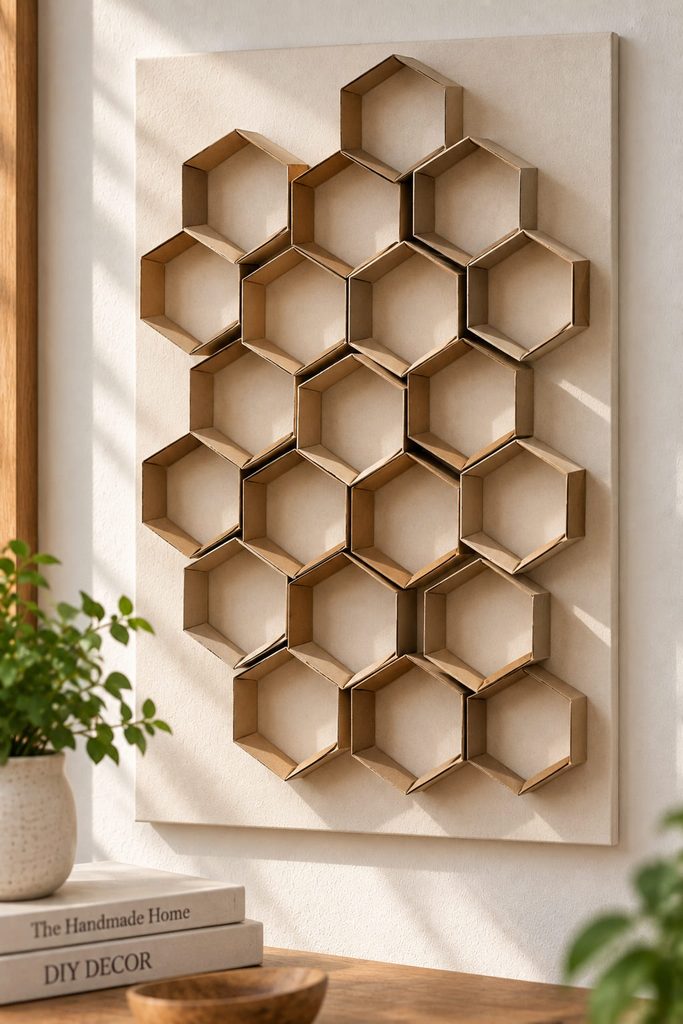
The strongest visual shift can come from changing the tube’s cross-section before you cut it. Mark six evenly spaced vertical lines around a tube, score them lightly, and fold the cylinder into a rough hexagonal prism. Crosswise slices from that prism become faceted open tiles rather than round or leaf-shaped rings.
If the tiles do not sit cleanly, diagnose the fold before assembling the panel:

- One side looks wider: the vertical score lines are not evenly spaced; remake that prism instead of forcing the slice.
- Corners spring open: deepen the score slightly and press the fold flat before cutting more tiles.
- The relief looks too busy: use one tile orientation for most of the field and rotate only a few focal units.
- Rows drift out of alignment: draw a light centerline or modular grid on the backing before gluing.
Mount the hex tiles with their open faces forward so the folded walls create small directional shadows. Because the geometry is already assertive, a restrained palette usually lets the shape do more work than added embellishment.
6. Vertical Reed Gradient Panel
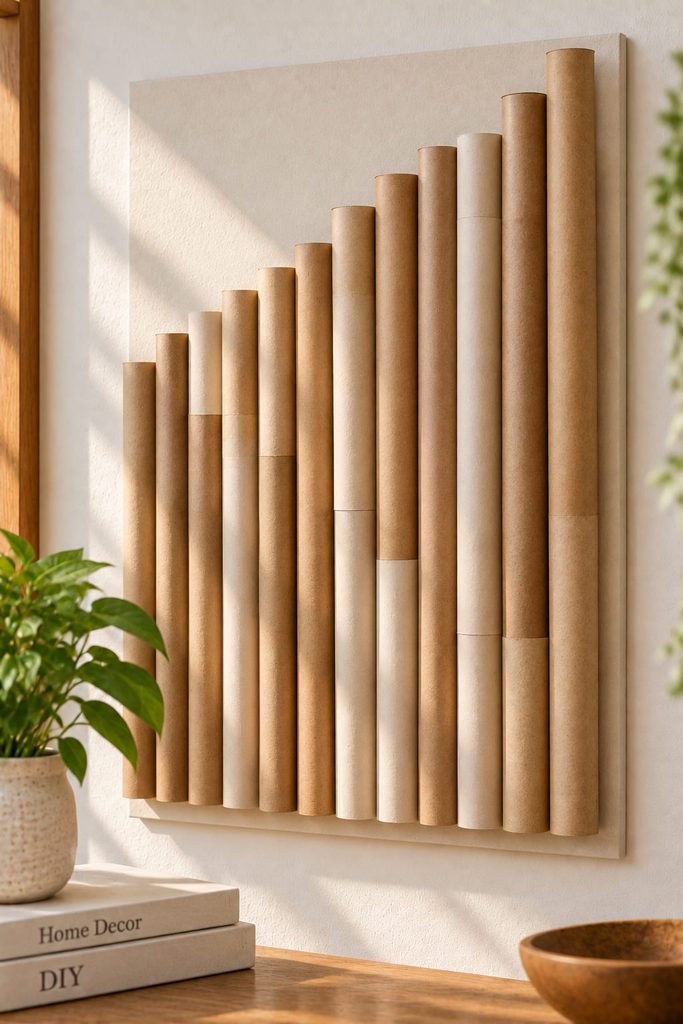
A whole tube can function like a hollow reed when it is used lengthwise instead of sliced into rings. Cut clean tubes to a planned set of heights, flatten the back of each one only enough to create a stable glue zone, and mount them side by side on a rigid panel. The front halves stay rounded, so the row catches light as a sequence of soft vertical ridges.
Shape the top edge as a gradient, stepped skyline, or one broad wave rather than trimming every tube to a different random length. The repeated cylindrical faces are already visually active, so even spacing at the base keeps the piece controlled. A side-lit wall is especially useful for this design because the shallow curved fronts produce a readable light-dark rhythm without requiring multiple paint colors.
7. Backlit Openwork Wall Art
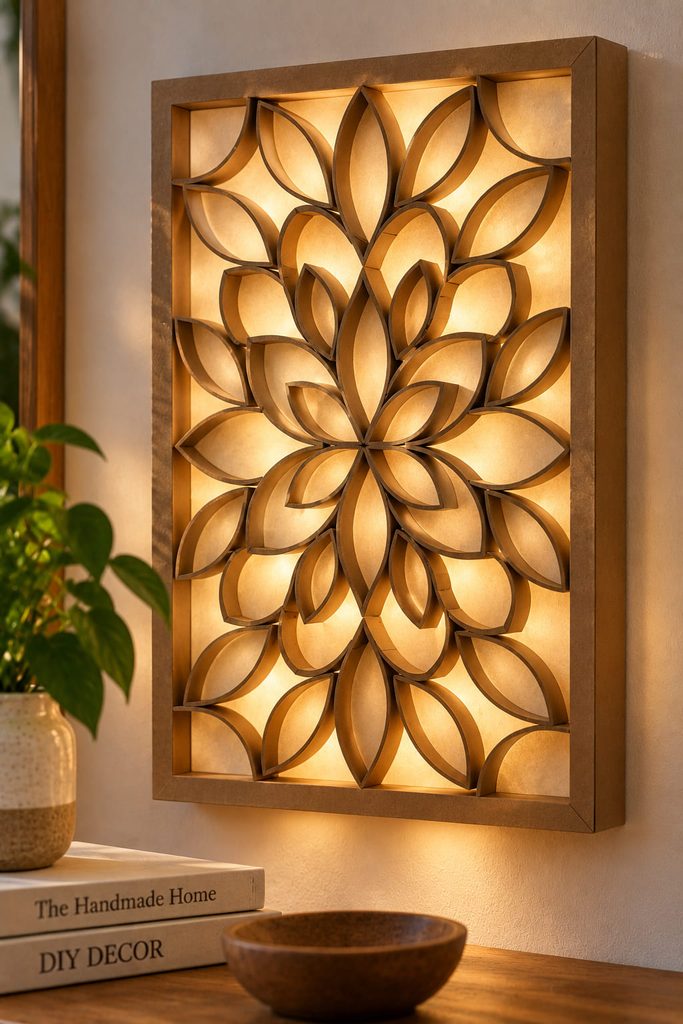
Backlighting changes the construction logic of ordinary tube decor. The cardboard should shape and screen the light, not trap a hot source. Build an open pattern from cut tube windows or spaced curved sections on a shallow spacer frame, place translucent vellum behind the pattern, and use only a cool battery-powered LED source with enough rear space for insertion, removal, and airflow.
The useful sequence is to prove the light path before you decorate:
- Build the outer spacer frame and confirm it sits flat against the wall.
- Add the tube pattern while preserving open areas between the cardboard elements.
- Fit the vellum behind the pattern without blocking access to the LED compartment.
- Position the LED so it washes the vellum rather than touching the cardboard.
- Test the piece upright; look for dark blocked zones, visible hardware, and any area where the source cannot be removed without damaging the art.
Keep the Light Path Open: if the center becomes much darker than the edges, the cardboard pattern is probably too dense or the light is sitting too close to one section. Remove a few inner elements or increase the spacing before adding more decoration.
A backing lip or side rail should carry the wall-mounting hardware. Do not hang the piece from a decorative opening in the face, because that part is designed to shape light, not take the mounting load.
8. Pulp-Pressed Organic Wall Tiles
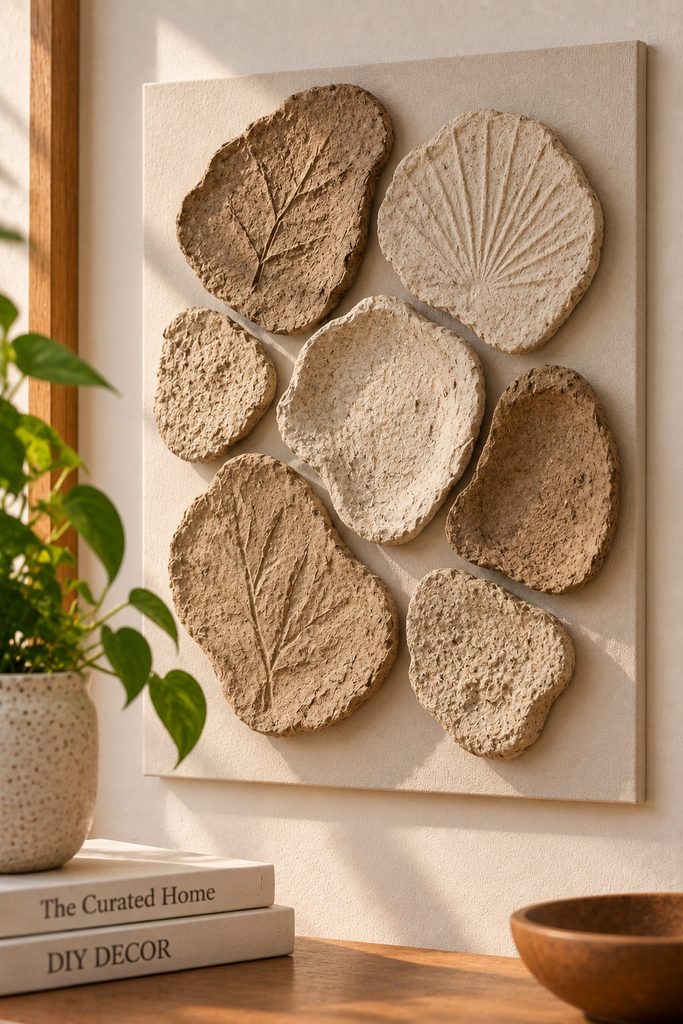
Instead of preserving the tube shape, tear clean cardboard rolls into small pieces, soak them until the fibers soften, and mash the material into a coarse paper pulp. Press that pulp into shallow hand-shaped tiles on a nonstick surface, squeezing out excess water and keeping the backs as flat as possible. Once the pieces are completely dry, their irregular edges and fiber texture can become the point: arrange a small group as pebble-like forms, raised contour shapes, or quiet monochrome tiles on a rigid panel. This route takes longer to dry than cut-and-glue projects, but it produces a surface that no longer looks like a row of recycled tubes.
9. Fringed Feather Wall Hanging
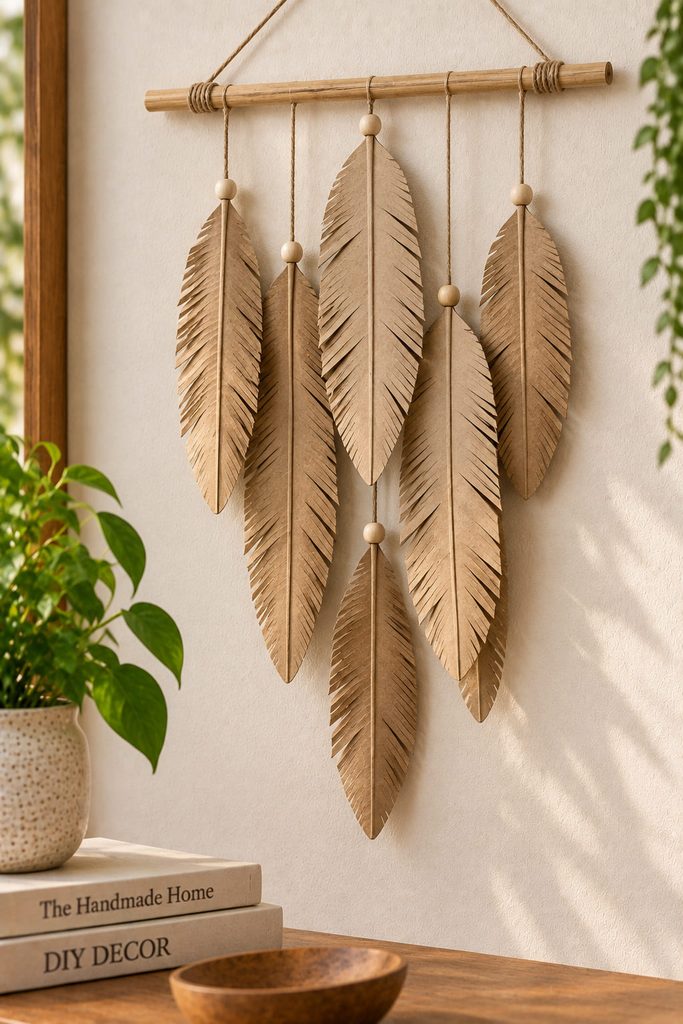
A long vertical hanging works well when the tube material is turned into repeated feather-like units instead of a rigid panel. Flatten each tube, cut it lengthwise, round or taper one end, and snip fine fringe along both sides while leaving an uncut spine down the middle. The remaining center strip keeps each piece from falling apart when the fringe opens.
Before threading the units onto a dowel or cord, check the features that control the finished silhouette:
- the spine stays wide enough to support the fringed edges;
- the top attachment hole is above the deepest fringe cuts;
- neighboring feathers vary in length rather than ending on one straight line;
- heavier or wider pieces hang near the center of the composition;
- the wall hanging has enough clearance to move slightly without snagging on nearby frames or shelves.
Natural kraft can make the cut texture especially visible, while a limited painted palette keeps a large hanging from becoming visually noisy.
10. Sunburst Mirror Frame
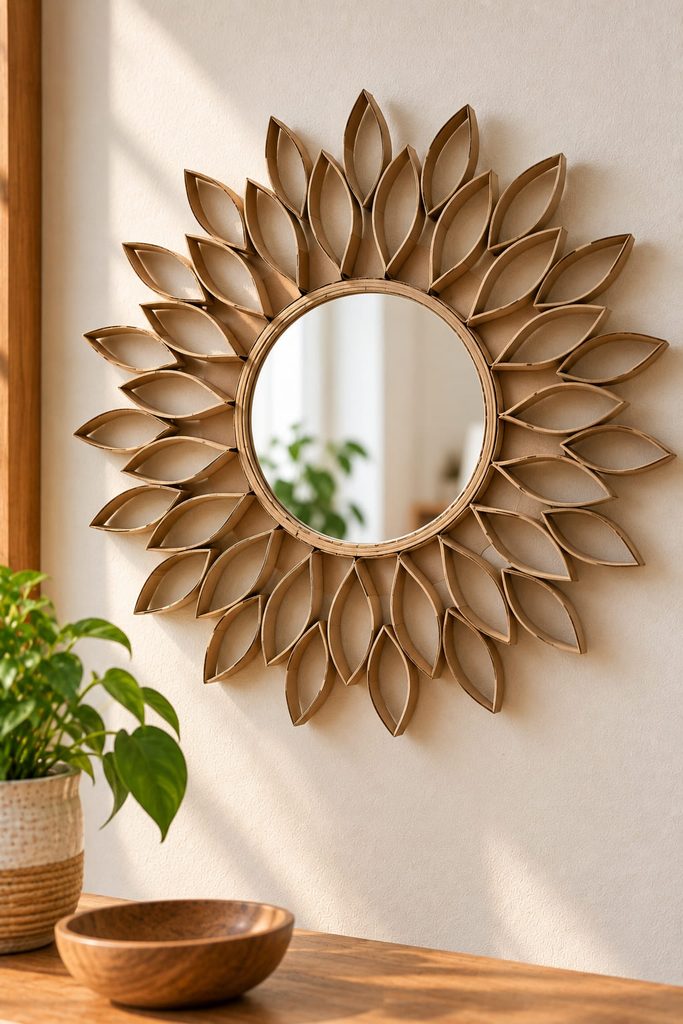
If you want the recycled cardboard to serve a real object, a small round craft mirror gives a radial tube design a clear center and a reason for every ray to point inward. Flattened tube slices can become narrow pointed loops, while split tubes can create broader curved rays. Both routes work, but they produce different edges.
With pinched rings, the frame looks airy and lace-like; glue the inner tips to a rigid backing ring that sits behind the mirror. With curved half-tubes, the rays read more sculpturally and need fewer pieces, but each ray requires a wider glue footprint. Whichever route you choose, dry-fit the full circle before attaching the mirror so the outer diameter stays even.
Keep the cardboard off the mirror face itself. The mirror should be supported by its own backing and mounting method, with the tube work acting as a decorative surround rather than as the part that carries the mirror. That separation makes the frame easier to align and safer to move.
11. Nested Tunnel Shadowbox
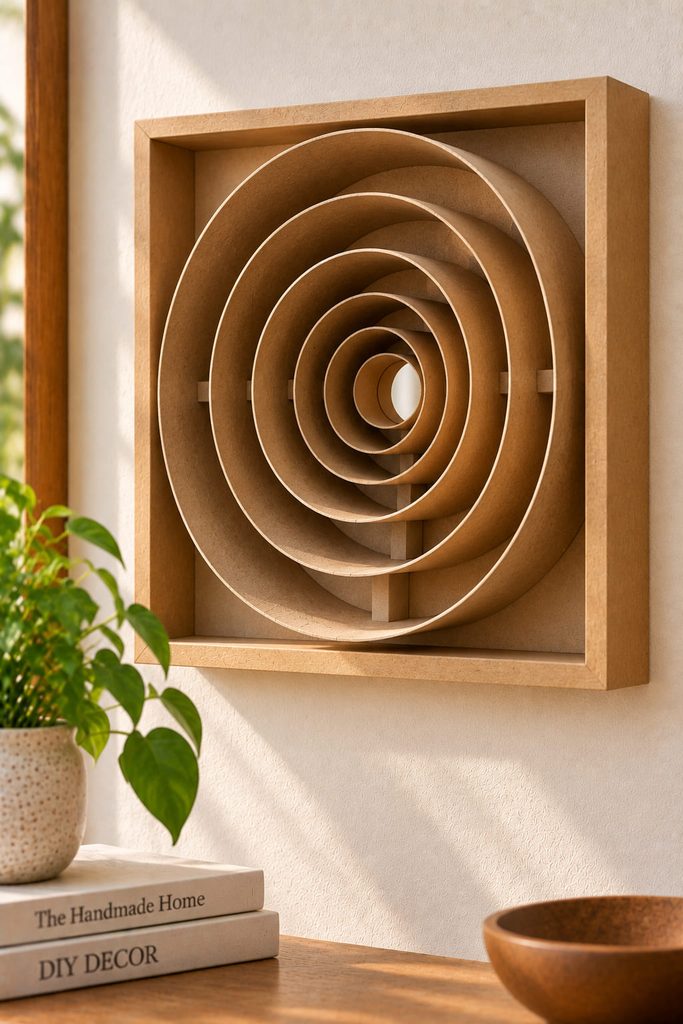
To create a tunnel effect, control the diameter changes instead of stacking unrelated shapes. Slit several tubes lengthwise, overlap each slit by a different amount, and reglue the cardboard into smaller cylinders. When the resized tubes are nested concentrically with visible gaps between them, the viewer sees a sequence of receding openings instead of one flat ring.
Build the largest cylinder first and attach it to a rigid shadowbox backing. Center the next cylinder inside it with small hidden cardstock spacers, then continue inward. Keep the spacers consistent around each level; if one side is thicker, the tunnel will drift off-center even when every cylinder is individually round.
The frame depth sets a hard limit. None of the cylinders should touch the glazing, and the deepest inner tube still needs enough visible opening to avoid becoming a dark plug. Side lighting exaggerates the concentric shadows, so a simple monochrome finish is often enough.
Before closing the frame, view the piece straight on and from both side angles. If the rings seem to lean, correct the spacers or the overlap seam rather than trimming the front edges. A clean tunnel works because its centers align, not because every rim is perfectly identical.
12. Linked Ring Chain Wall Hanging
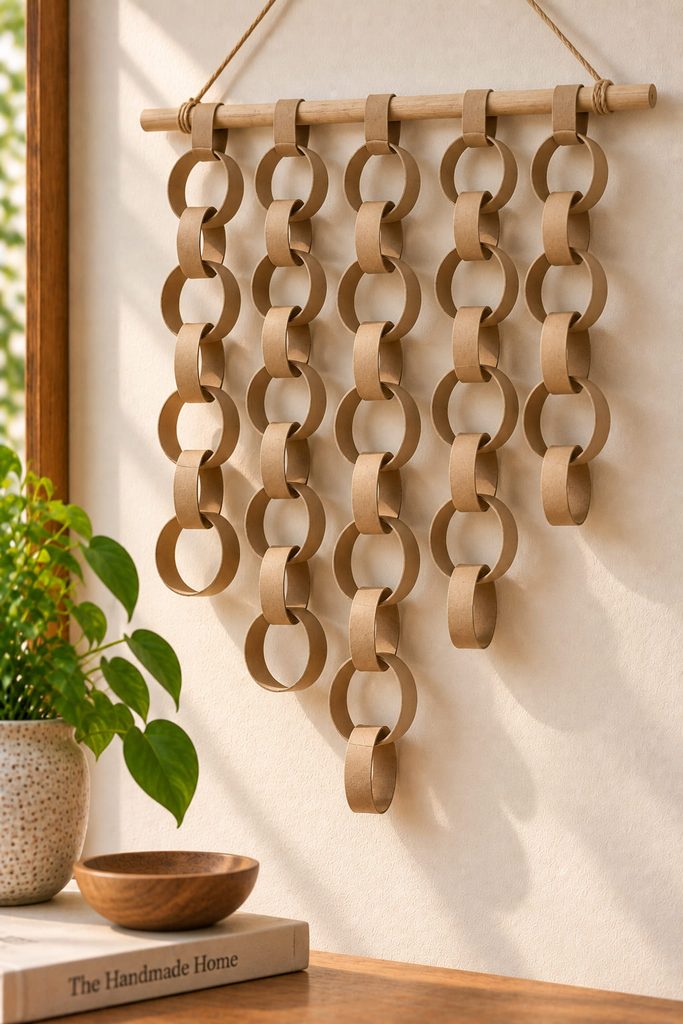
Turn crosswise tube slices into something flexible by cutting one side of selected rings, threading them through closed rings, and reglueing the cuts. The result is a lightweight chain that uses actual linkage instead of merely drawing a chain pattern on a backing. Several chains can hang from a painted dowel as a soft geometric wall piece.
- Make a short test chain and pull it gently to confirm every reopened ring is fully closed.
- Build several strands to different lengths, keeping the longest ones near the visual center or deliberately offset as one focal cascade.
- Attach each strand around the dowel or through a reinforced top ring instead of gluing only the rim of one cardboard slice.
- Hang the dowel from two level points and make sure the chains clear furniture, vents, and frequently handled surfaces.
The open links cast changing shadows but stay visually lighter than a solid panel. For a calmer result, keep the ring width consistent even when the strand lengths vary.
13. Rolled-Bead Cardboard Tapestry
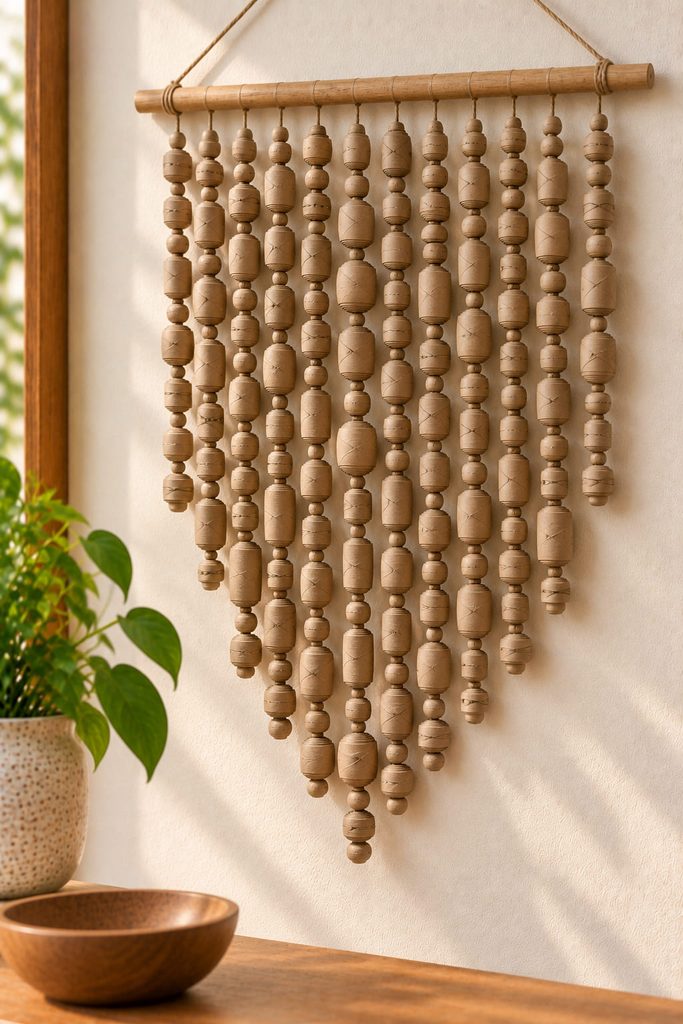
Give the tube walls a smaller scale by opening them flat, cutting tapered strips, and rolling those strips tightly around a thin skewer or similar mandrel. Each strip becomes a hollow cardboard bead with visible layered edges. Stringing many of those beads creates a wall tapestry that feels closer to fiber art than to ordinary tube-ring decor.
A useful batch setup keeps the dimensions under control:
- wide tapered strips make chunkier beads with more visible cardboard edge;
- narrow strips make lighter beads and reduce the pull on the hanging cord;
- a tiny glue area at the strip tip is enough to lock the roll;
- holes must stay open so the bead can slide onto thread without being crushed.
Build several vertical strands and test their weight before committing to the top rail. If one strand pulls much harder than the others, shorten it or use smaller beads rather than relying on a soft cardboard rail to resist the imbalance.
A rigid dowel, slim wood strip, or reinforced cardstock bar should carry the strands. Space them far enough apart that the beads can hang freely instead of wedging against one another. The final pattern can come from bead size, spacing, and strand length, so color does not have to carry the whole design.
How to Prepare Tubes for Toilet Paper Roll Wall Art
Start with clean, completely dry tubes. Peel away loose paper, flatten only the pieces that need crisp creases, and mark repeated cut widths with a ruler before making a batch. For ring-based projects, cut one test slice first: the depth of that slice changes both the shadow and the amount of glue surface available at each joint.
Paint can go on before or after assembly, but the choice affects the finish. Prepainting reaches the inner walls of rings and cells more easily; painting after assembly can visually unify many joints. If moisture from paint or glue softens the cardboard, let the pieces dry flat before continuing so matching modules do not spring into different shapes.
For large wall pieces, build small modules and dry-fit the complete layout on the floor or a table before mounting. The finished art may be lightweight, but its hanging method still needs to suit the size, backing, wall surface, and any added components such as mirrors or lights.
Choose the Technique That Fits the Wall
The easiest starting point is a project where the tube’s existing shape already does useful work: pinched rings for the botanical relief, curved halves for the arch sculpture, or whole tubes for the reed panel. If you want more process and texture, move to the pulp-pressed tiles, nested tunnel, rolled-bead tapestry, or the backlit openwork piece.
For more projects that use cardboard as the visible structure rather than hiding it, continue with 17 Cardboard Wall Decor Ideas for Creative DIY Interiors.