
This post contains affiliate links. As an Amazon Associate I earn from qualifying purchases, at no extra cost to you. Thank you for supporting Diynify!
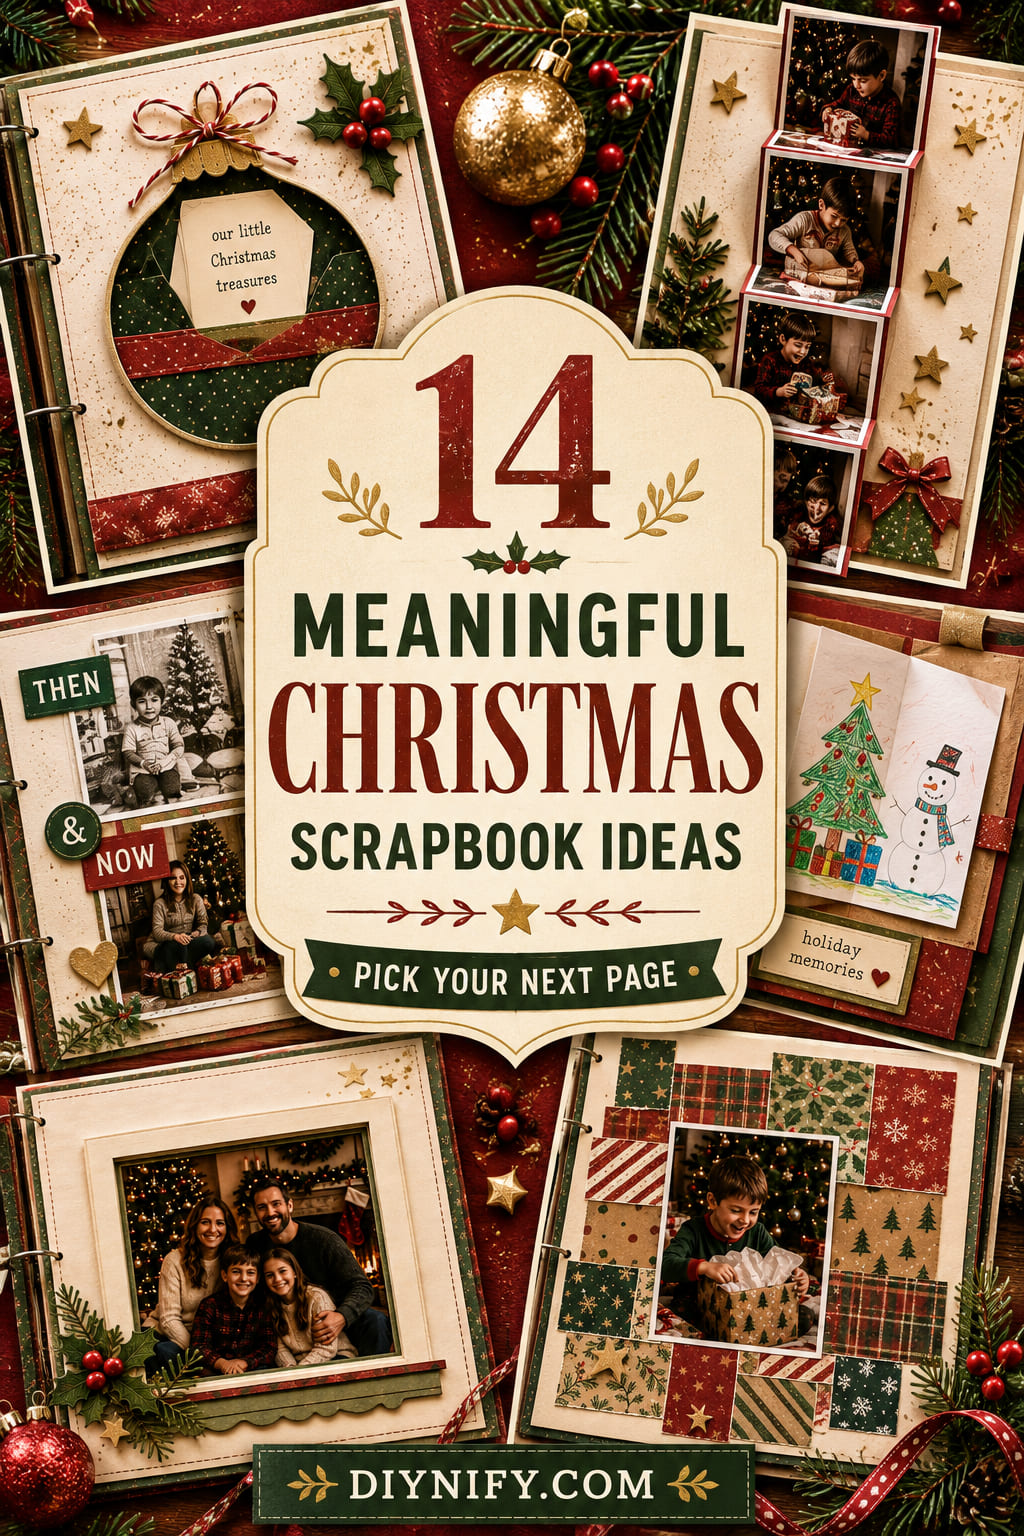
Christmas scrapbook ideas work best when they preserve something more specific than a generic red-and-green page. A photo sequence, a handwritten recipe, a child’s drawing, a gift tag, or a folded note can carry the detail that makes one holiday different from every other December.
Most of these layouts use scrapbook paper or cardstock, a paper trimmer or scissors, adhesive, a ruler, and a journaling pen. A few also need vellum, embroidery floss, photo corners, foam tape, a small envelope, or extra backing paper. Choose the structure around the memory first: flat layouts suit everyday photos, while pockets, foldouts, and hinged elements make sense when the original keepsake needs to remain readable or removable.
1. Tree-Shaped Family Photo Collage
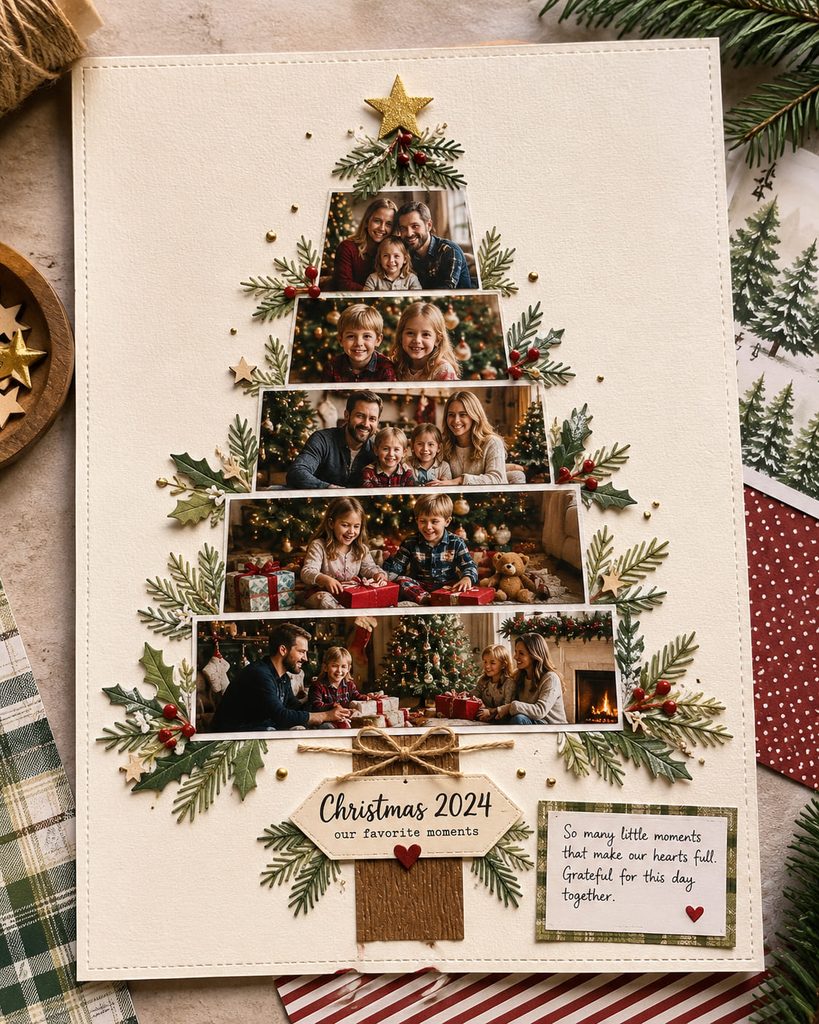
When one Christmas portrait deserves to lead the page, build the layout around a tall tree silhouette instead of filling every corner with embellishments. Trim three to five photos into progressively narrower rectangles and stack them from wide to narrow, leaving small gaps so the layers read as branches. A single star, date, or short title can finish the peak without competing with faces.

The tree shape gives unrelated snapshots one visual structure, which is useful when the photos share a day but not a matching background. Keep the strongest image near the lower-middle area, where the “tree” has enough width to show detail, and move tiny supporting photos upward. A narrow journaling strip along the trunk area can hold the place, year, or one sentence you want remembered.
2. Ornament Pocket for Tiny Keepsakes
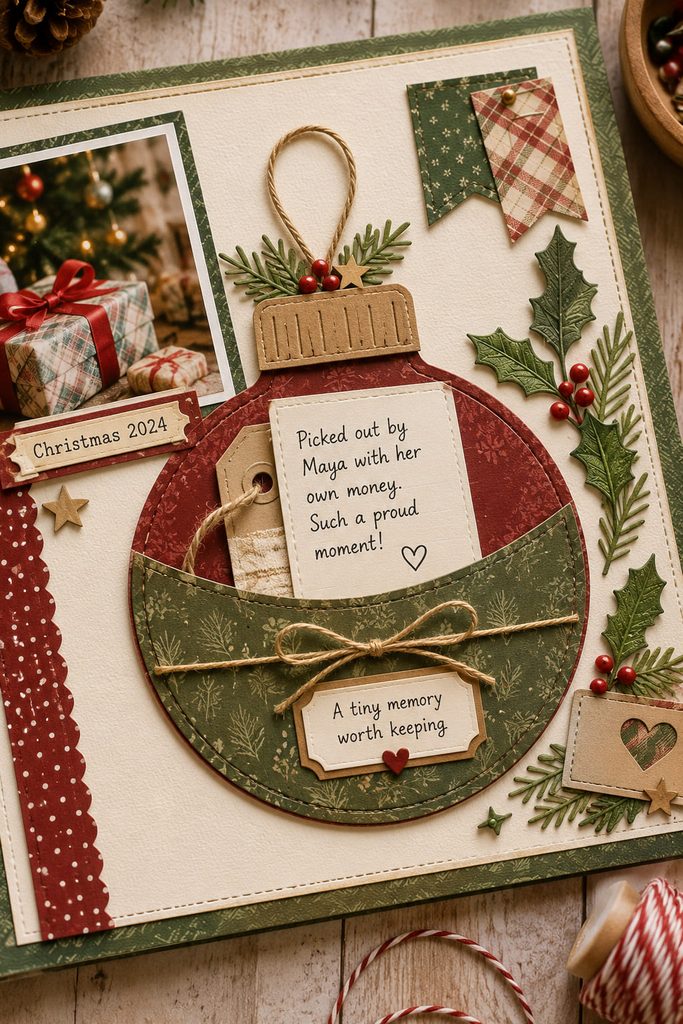
Turn a paper ornament into a working pocket rather than a flat decoration. Cut a sturdy ornament base, add a slightly smaller front layer, and adhere only the lower curve and side edges so the top remains open. Slip in a tiny note, a gift receipt with sentimental value, a short wish list, or a tag from a meaningful present. A contrasting insert edge helps the hidden piece look intentional instead of accidentally tucked behind the ornament.
- Dry-fit the insert before sealing the pocket edges.
- Leave a thumb-width opening at the top so the keepsake can be removed without bending it.
- Add a reinforced paper cap or narrow strip above the opening if the ornament needs a stronger visual “hanger.”
Pocket Capacity Check: if the page bows when the album closes, reduce the contents or switch from stacked memorabilia to one thin insert. The pocket should preserve the object without turning the whole spread into a bulky storage envelope.

3. Saved Gift Tag Journaling Cluster
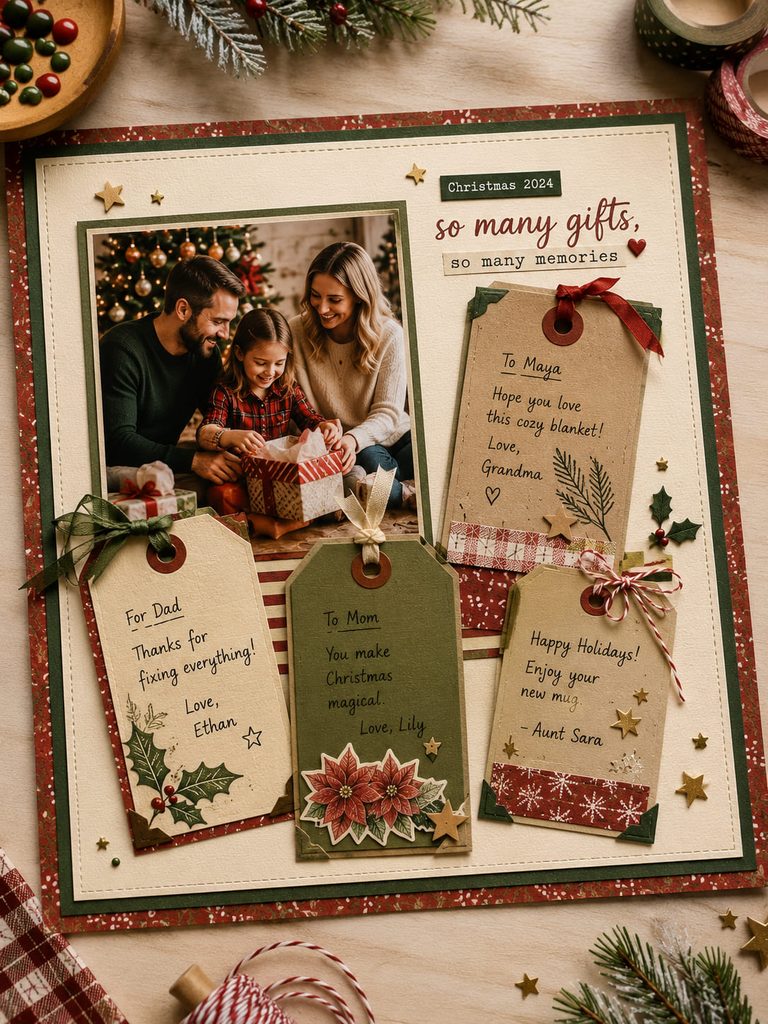
Instead of replacing saved gift tags with new labels, use the originals as the journaling layer. Handwriting, nicknames, ribbon marks, and slight wear can identify the actual celebration more specifically than a fresh decorative tag. Mount two or three originals as a loose cluster beside a gift-opening photo, using photo corners or small hinge strips if you want the backs to remain readable. Let the irregular tag shapes create the composition; a quiet cardstock mat behind them is usually enough to separate busy wrapping-paper patterns from the page background.
4. Accordion Christmas Morning Photo Strip
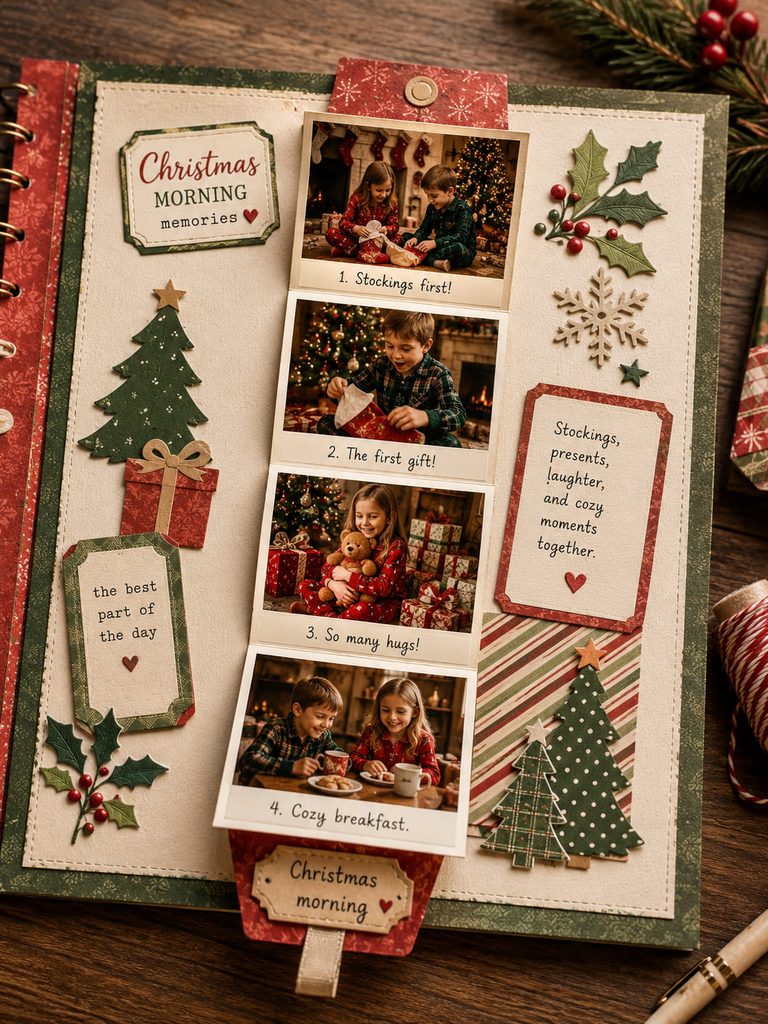
To make a burst of Christmas-morning photos read as a sequence, let the pictures physically unfold in order. Make a narrow accordion strip from lightweight cardstock, score equal panels, and attach only the final panel to the scrapbook page. Each fold can carry one small photo: stockings first, then gifts, breakfast, a walk, or the sleepy aftermath.
Build the insert in this order:
- Score and fold the empty strip before adding any photos.
- Check that the folded stack fits inside the page margins.
- Add photos from first moment to last, keeping faces away from the fold lines.
- Close the strip and mark where a paper tab, belly band, or small flap needs to hold it flat.
Closed-Page Test: shut the album before adding dimensional decoration around the insert. If the accordion pushes against the facing page, remove raised embellishments rather than tightening the folds; compressed folds are more likely to spring open or crease the photos.
5. Vellum Snowfall Reveal Page
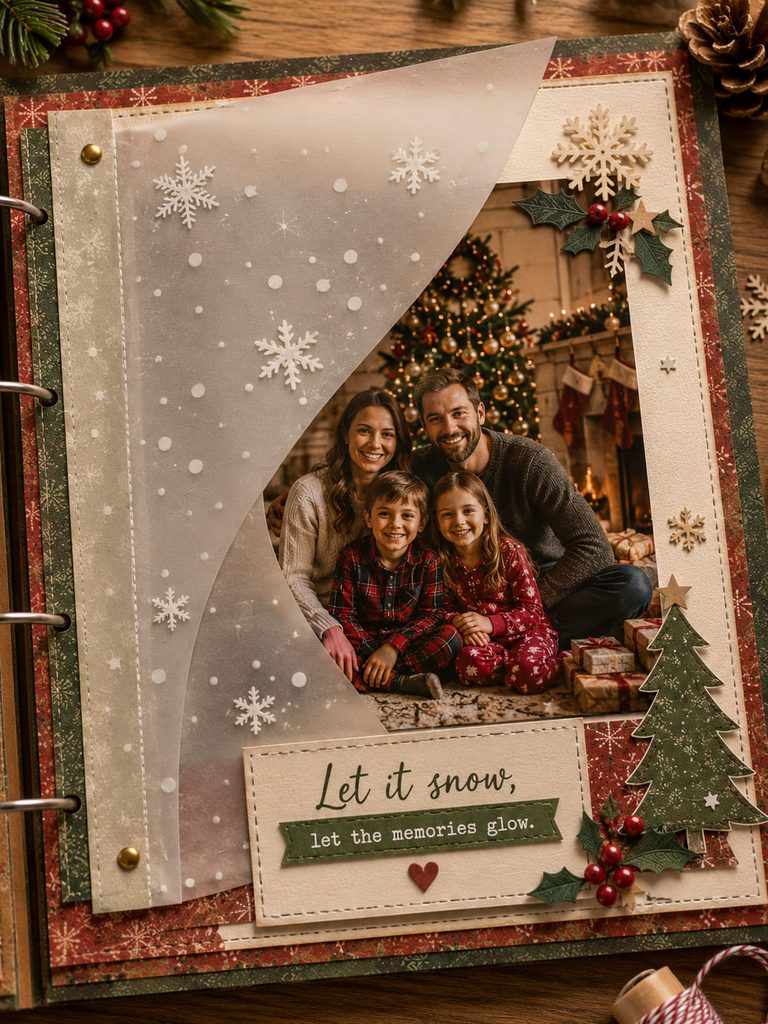
Because vellum softens contrast without completely hiding what is underneath, it works well as a snowfall reveal. Hinge a sheet along one edge, then add sparse white punched dots, tiny stars, or hand-drawn flakes so the overlay creates atmosphere when closed and reveals the sharper image when lifted. The effect is strongest when the underlying photo has a clear focal area rather than a crowded group of equal details.
Adhesive is the main visual limitation. Hide it under a cardstock hinge, a title strip, or a few opaque snow shapes instead of dotting glue across transparent areas. If the page already includes patterned paper, keep the vellum decoration lighter; the overlay should soften the scene, not turn the photograph into background texture.

6. Family Recipe Card Pocket
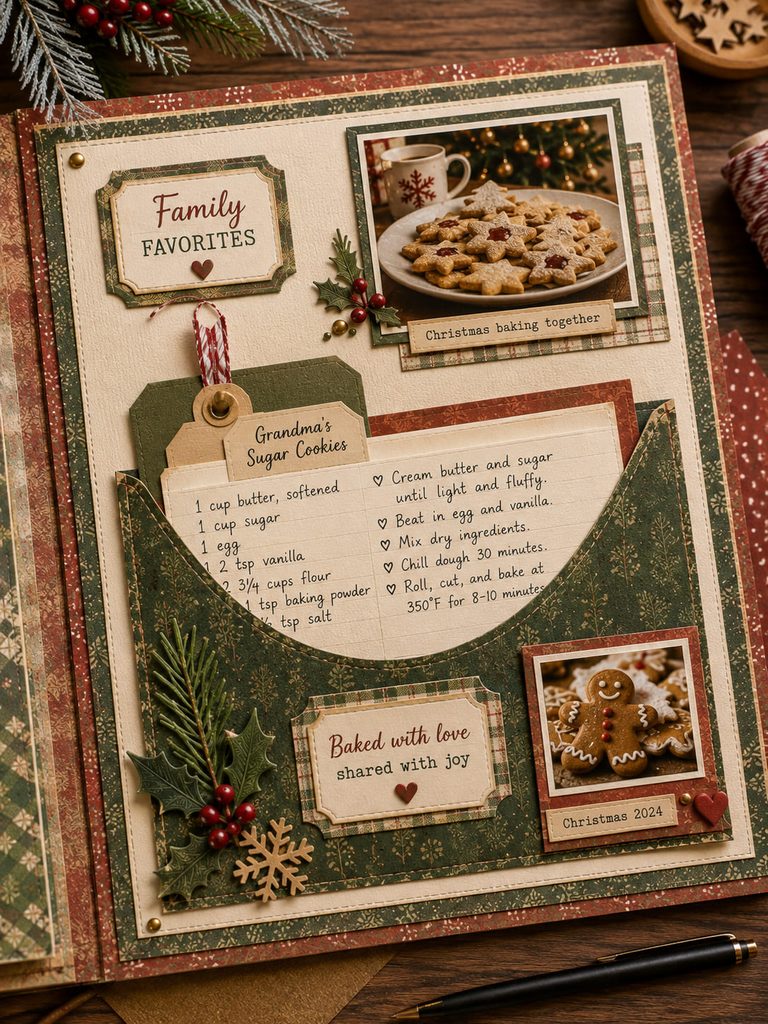
If a family recipe is part of the holiday memory, give it a removable place instead of retyping it into a decorative block. A side-opening cardstock pocket can hold a copied handwritten recipe while one small food or kitchen photo anchors it to a specific Christmas.

Useful extras:
- medium-weight cardstock for the pocket;
- a copied handwritten recipe card;
- a small pull tab;
- one flat photo or dish label.
Size the pocket around the card before gluing and leave enough side clearance for easy removal. The page works because the recipe remains usable at the kitchen counter without removing the whole scrapbook.
7. December Calendar Memory Grid
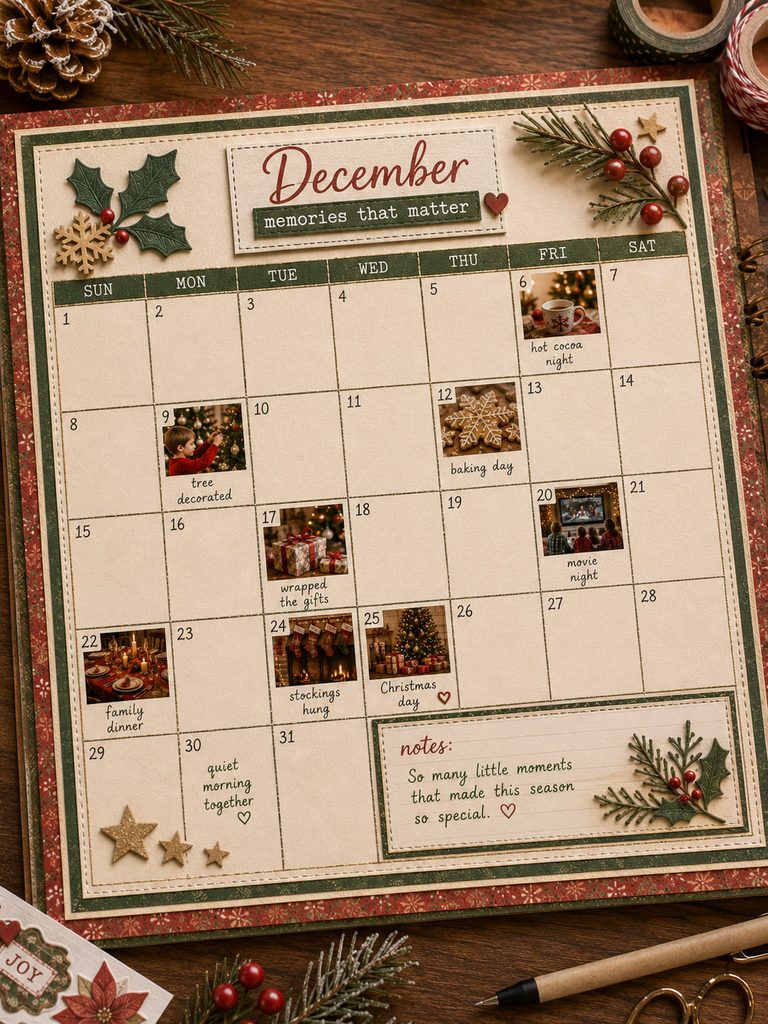
Want the whole month to feel visible rather than reducing Christmas to one day? Draw or cut a simple December calendar grid and add tiny photos or short phrases only on dates that actually matter.
Use a quick selection check:
- Does this square mark a different event or tradition?
- Can the image still read at thumbnail size?
- Would one handwritten phrase preserve the memory better?
- Is enough blank space left for the calendar to stay recognizable?
The empty dates are useful. They keep meaningful days from disappearing inside a wall of miniatures.
8. Then-and-Now Christmas Comparison Spread
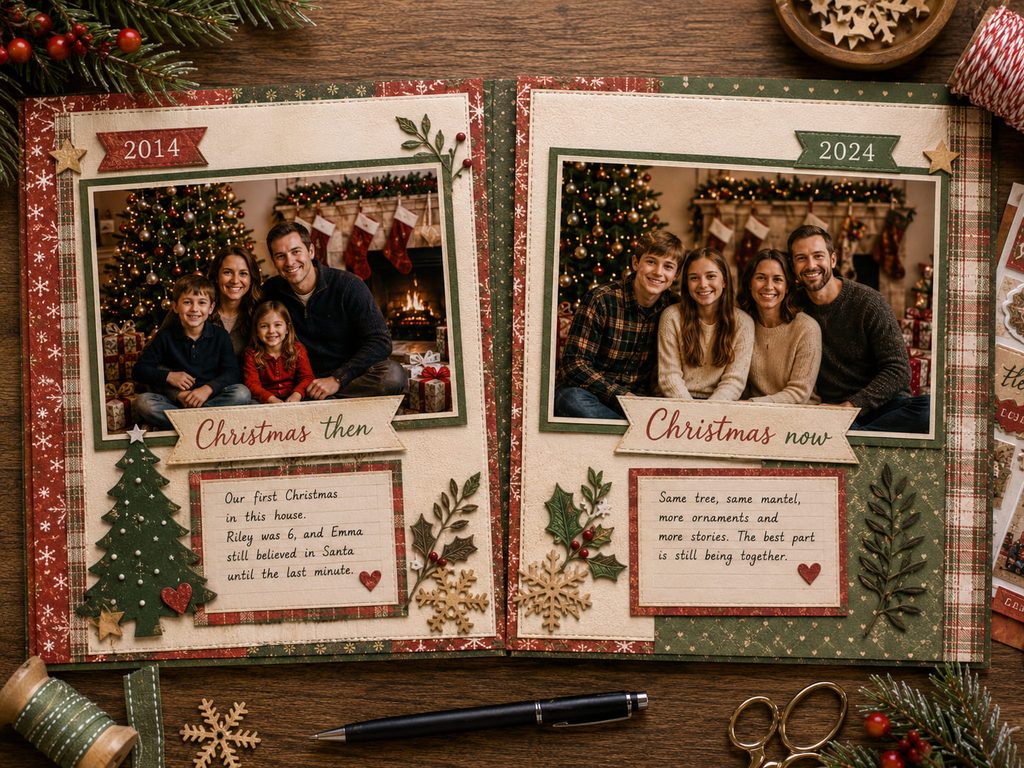
Place this year’s photo beside an older image of the same tradition when the real story is change over time. Match the two pictures by subject—same doorway, same ornament, same baking ritual, same group pose—then align them on a shared horizontal line so the eye compares them before reading any journaling.

There are two useful ways to build the spread. A mirrored layout gives each year equal visual weight and works well for family portraits or repeated locations. An asymmetrical layout makes one year dominant and treats the older photo as evidence, which is better when the current image has stronger detail. Whichever route you choose, write about the difference that matters: who joined, what disappeared, what stayed exactly the same, or why the tradition changed. The comparison is the content; matching red-and-green decorations are optional.
9. Holiday Travel Route Map Layout
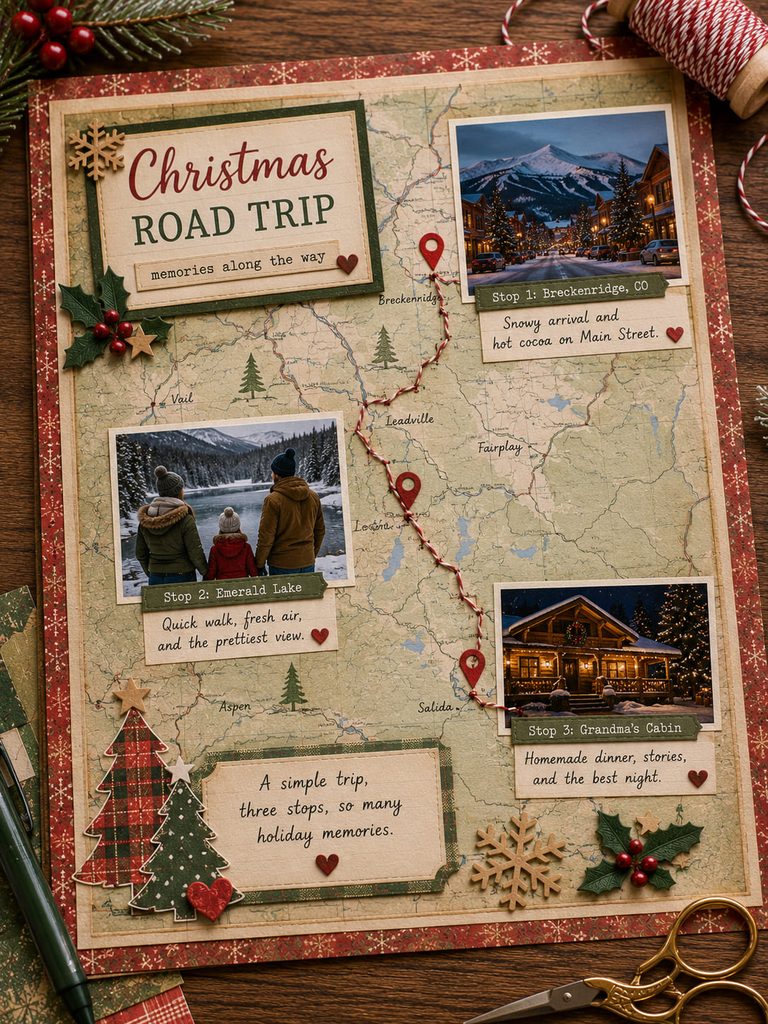
For a Christmas spent away from home, location can organize the memory better than ornaments or snowflakes. Use a simplified paper map as the background layer, mark the route with pen or stitched thread, and anchor two or three photos at the places where something actually happened. A route is especially useful when the day involved several stops that would otherwise look like unrelated snapshots.
- Reduce the map to only the roads, cities, or landmarks needed to understand the trip.
- Place photos before drawing the route so the line does not disappear beneath them.
- Add one short note at each stop: a meal, weather moment, visit, delay, or unexpected detour.
- Keep the final route visible as one continuous path.
A route page works best when geography explains the order of events. If the trip stayed in one place, a neighborhood sketch or single-location photo spread will usually tell the story more clearly than forcing in a travel line.

10. Kids’ Artwork Foldout Page
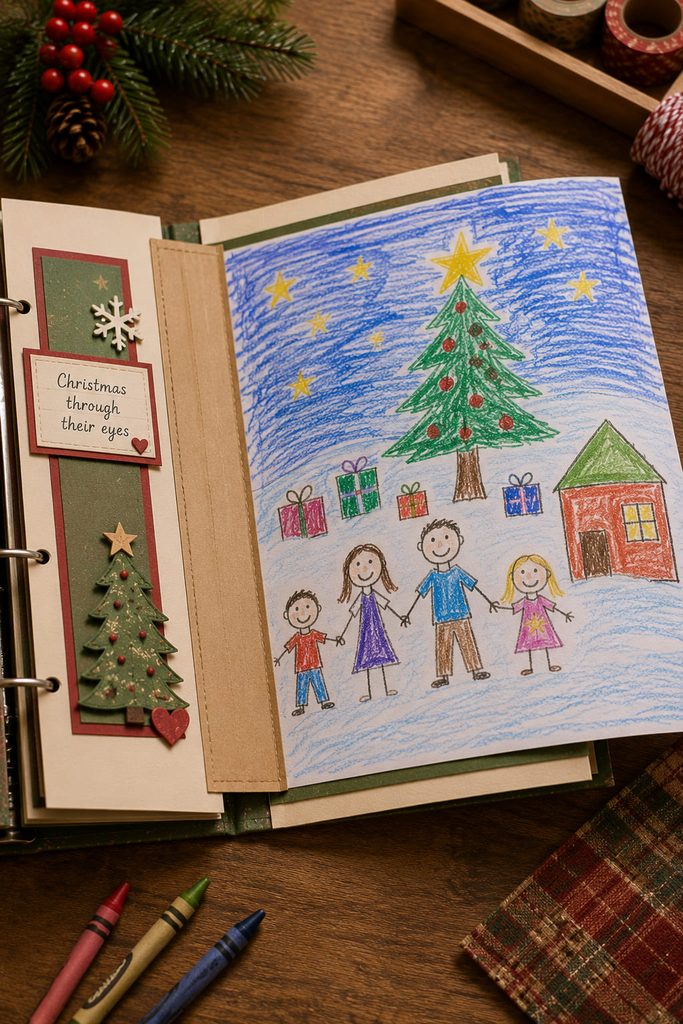
Rather than trim an oversized child’s drawing to fit a scrapbook, turn the artwork into a controlled foldout. Mount the original piece to a thin backing sheet, score a hinge outside the drawing area, and fold the extra width inward so the art opens beyond the normal page edge only when someone wants to see it.
The hinge needs to carry the paper without pulling against the album binding. Keep the fold parallel to the page edge, leave clearance from the spine, and use a second narrow hinge strip if the artwork is heavier than the surrounding scrapbook paper. If the piece is tall as well as wide, use a gatefold with two inward flaps rather than stacking several folds on one side.
Foldout Clearance Check: close the album, then open the foldout while the page is still in the binding. If it catches on rings, posts, or the facing page, shorten the backing or move the hinge outward before decorating. The success condition is simple: the artwork should open fully without needing to flex around the binding.
11. Stitched Garland Photo Timeline
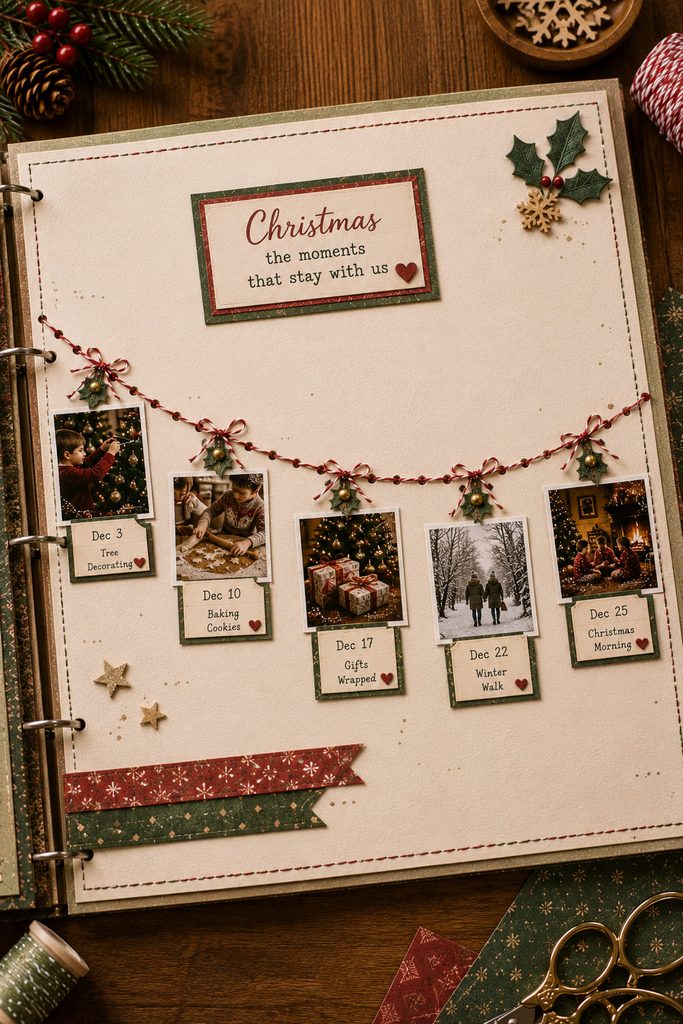
Stitch a loose garland curve across the page when you have several small photos that belong to a timeline but do not need equal-sized frames. Pierce holes along a shallow arc, sew the line with embroidery floss, and attach mini photos or date tags at intervals as if they were hanging from the garland. The thread gives the eye a clear reading direction while leaving more open background than a rigid row of boxes.
Thread Tension: keep the floss snug enough to lie flat but not so tight that the cardstock cups. If the page begins to bow, loosen the final stitch before securing the thread on the back.
12. Layered Window-Frame Portrait Page
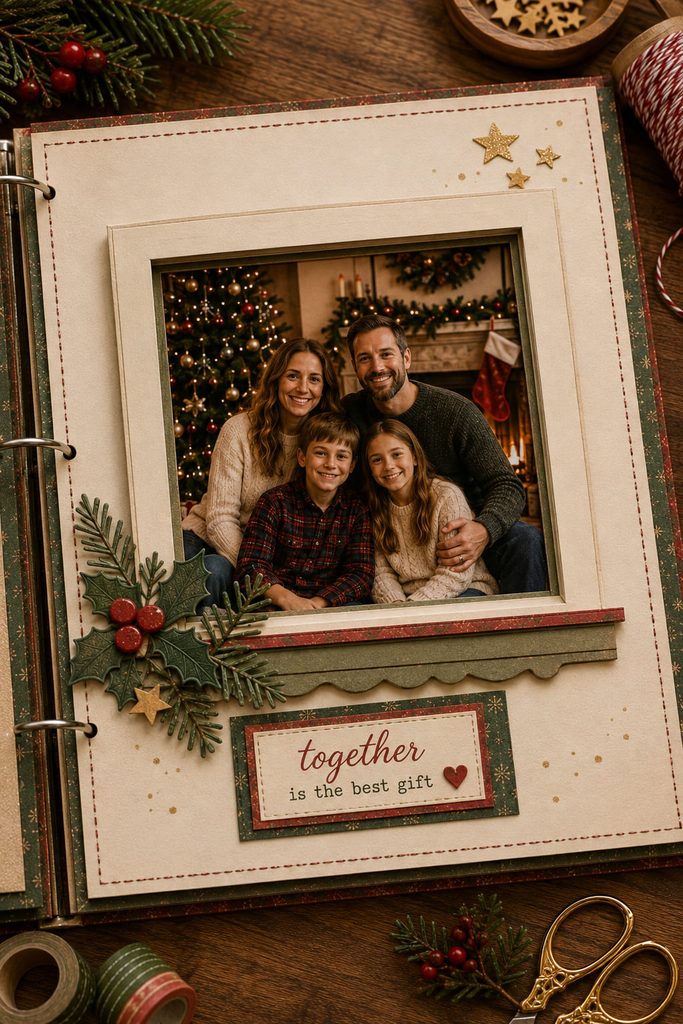
Behind a cut-out paper window, a family photo becomes the deepest visual plane instead of another rectangle on the surface. Cut the opening in a sturdy top sheet and raise it slightly over a second layer. A sill, curtain edge, or paper greenery can overlap the aperture, but it should not cover the faces or the detail that makes the scene worth framing.
Depth has a trade-off in an album. Thin foam tape can make the aperture cast a useful shadow; thick stacked spacers can make facing pages rub and distort. Test the page at normal viewing distance before adding more layers. If the window reads clearly without extra depth, keep it shallow. This idea earns its space when the frame directs attention to one scene—someone at the tree, a snowy porch, a child looking outside—not when it becomes another generic layered border.
13. Envelope Page for Santa Letters and Notes
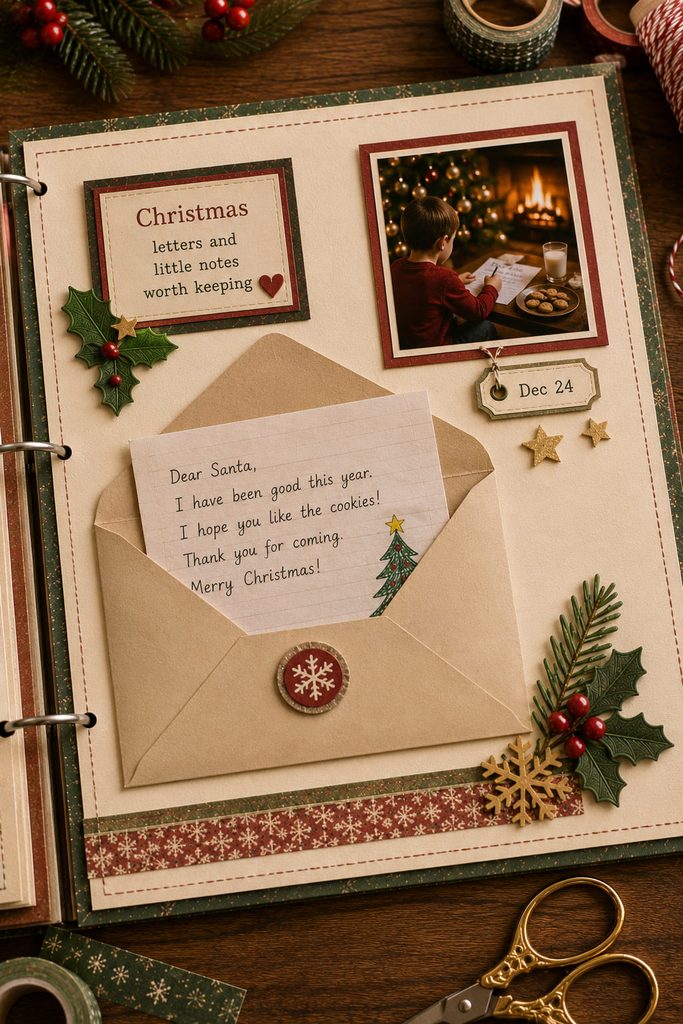
Letters to Santa, notes left with cookies, and short messages exchanged during the holiday often need storage more than decoration. Add a flat envelope with a real closing flap and enough clearance for one or two folded notes, then place a small photo or date beside it so the contents have context even before the envelope is opened. Aim for reversible access: the memory should be readable again without tearing the page or the paper inside.
If the envelope misbehaves:
- Flap will not stay closed: move the crease slightly outward instead of forcing a thick stack underneath it.
- Envelope bulges: remove duplicate paper or scan a fragile original and store the copy in the album.
- Note catches at the opening: widen the envelope by a few millimeters rather than trimming the keepsake.
14. Saved Wrapping Paper Memory Mosaic
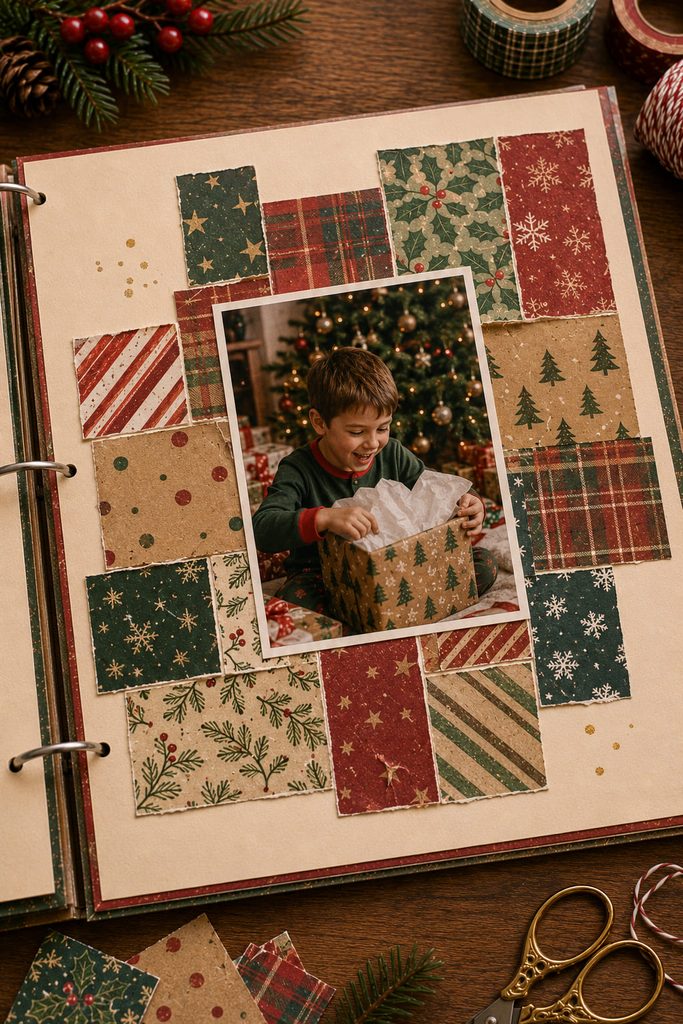
Saved wrapping paper does more than add a Christmas pattern; it records the actual materials that were on the table that year. Cut a few recognizable scraps into uneven rectangles and build a restrained mosaic around one gift-opening photo, leaving enough solid background to keep the face or hands readable. Choose pieces from different presents only when their scale and pattern contrast are clear. A few authentic scraps can carry more specific memory than a full sheet of newly purchased holiday paper.
Choosing Christmas Scrapbook Ideas by the Memory You Want to Keep
The easiest way to choose a layout is to identify what would be lost if you reduced the memory to one photo. A sequence needs order, a physical keepsake needs access, a comparison needs matched reference points, and an oversized item needs room to unfold.
| Memory to Preserve | Layout Structure That Helps |
|---|---|
| One standout portrait | Tree-shaped collage or window-frame page |
| A sequence of moments | Accordion strip, calendar grid, or stitched timeline |
| A removable paper keepsake | Ornament pocket, recipe pocket, or envelope |
| Change across years | Then-and-now comparison spread |
| A large original item | Foldout page |
| A trip with several stops | Route map layout |
| Wrapping or tags from the day | Flat artifact-based collage |
That distinction also keeps the album from feeling mechanically themed. Repeated Christmas colors can unify several pages, but the construction should change when the kind of memory changes.
Build the Page Around the Memory, Not the Motif
Start with the memory that is hardest to replace. If it is handwriting, build for access; if it is a sequence, build for order; if it is one strong photograph, give it visual space instead of surrounding it with equal-weight decoration. The most meaningful scrapbook pages usually become clearer when the Christmas motif supports the evidence rather than replacing it.
For another holiday paper format that can preserve personality in a smaller, giftable form, see 14 DIY Handmade Christmas Cards with Real Personality.








