This post contains affiliate links. As an Amazon Associate I earn from qualifying purchases, at no extra cost to you. Thank you for supporting Diynify!
Paper gift boxes can turn even a very small holiday present into something that feels intentional before it is opened. The useful difference is not just whether the paper has stars, snowflakes, or festive colors; it is how the package closes, supports the gift, and lets the recipient reach what is inside.
Most of these ideas use medium cardstock, a ruler, a scoring tool, scissors or a craft knife, and paper glue or double-sided tape. A few need lightweight decorative paper, vellum, ribbon or paper cord, and a hole punch. Choose the box by the shape of the present first—flat, tall, delicate, carried, displayed, or meant for a dramatic reveal—then add the holiday details.
1. Pillow Box With a Paper Belly Band
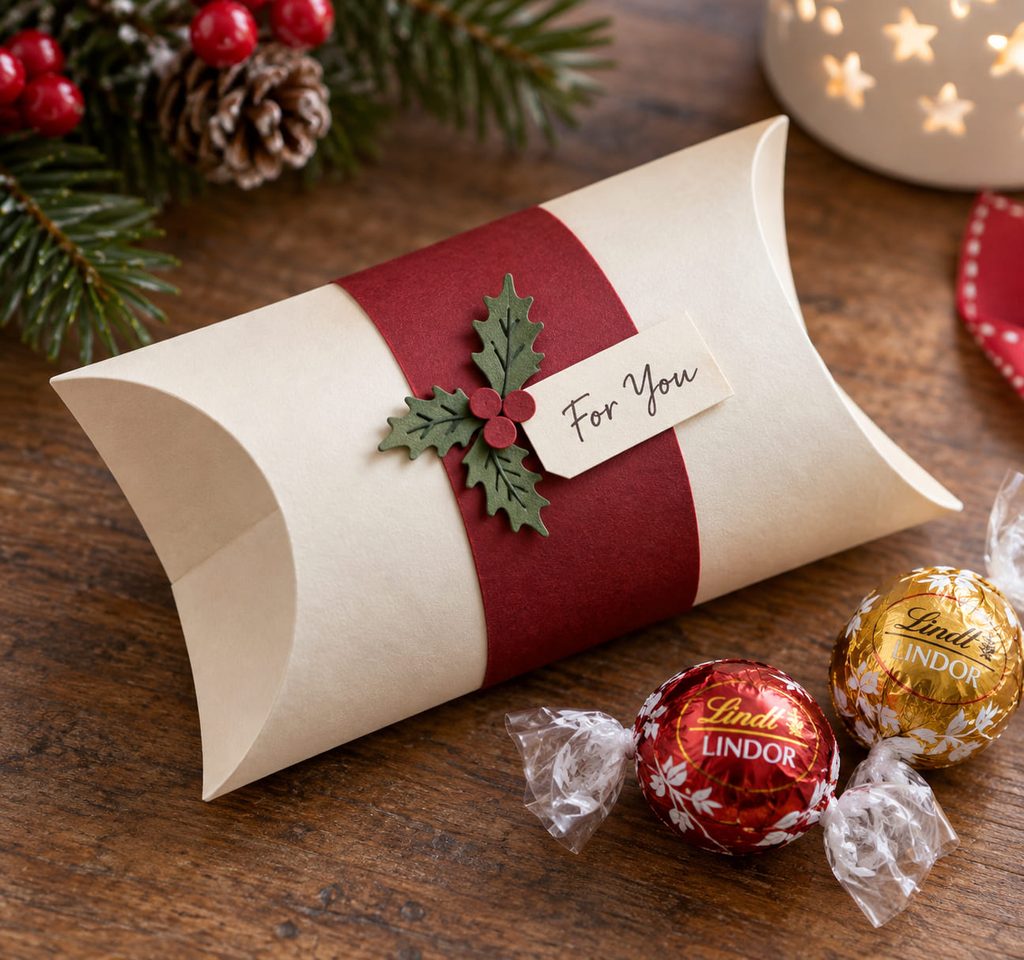
For earrings, a folded note, or two wrapped chocolates, a pillow box keeps the package small without looking like a plain envelope. The body is one curved rectangle with a glued side seam; matching scored arcs at both ends push inward and lock against one another. That curve is what creates the box’s depth, so crisp scoring matters more than extra decoration.

Use medium cardstock that can bend along the curved end lines without cracking. A narrow paper belly band can carry the holiday color or name tag while leaving both ends accessible. Keep the gift lighter and flatter than the widest point of the box: a bulky object presses the arcs outward and weakens the closure.
2. Matchbox-Style Sliding Drawer Box
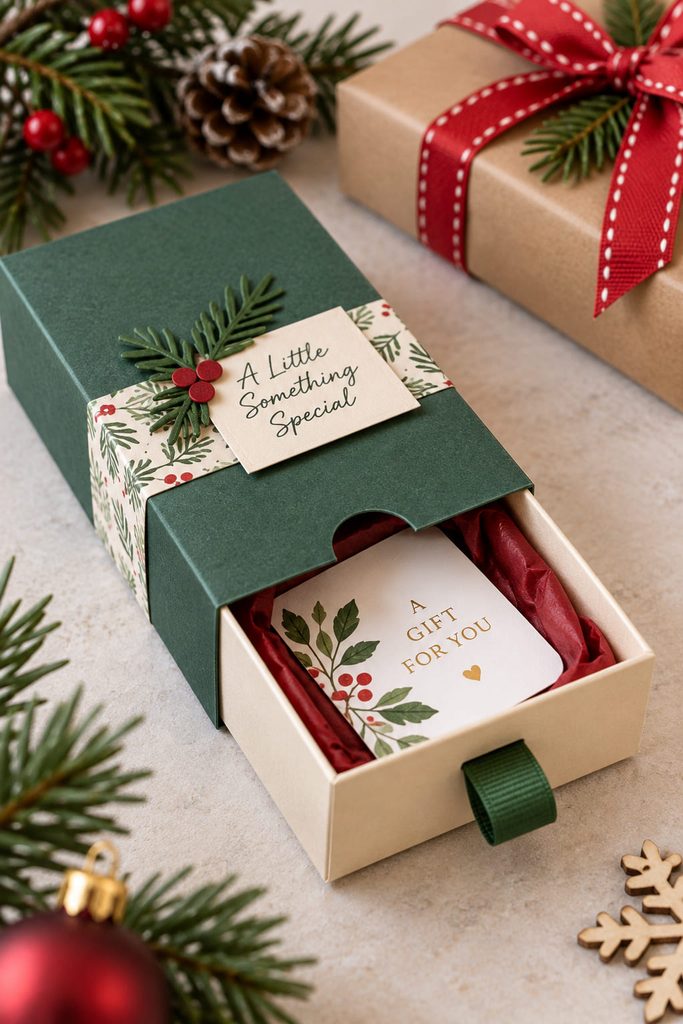
A sliding drawer gives a tiny present a deliberate reveal instead of making the recipient unfold the whole package. Build a shallow tray first, with four walls folded up around a flat base, then wrap a separate sleeve around the finished tray. The sleeve should be long enough to overlap and glue on one face, but loose enough that the drawer can move without bowing.
The easiest way to get the fit right is to size the sleeve around the assembled tray rather than around your original paper measurements. Add a small semicircle thumb notch to one end of the sleeve, or glue a folded paper pull to the tray front if you want a more gift-like opening.

Drawer Clearance Check: Slide the empty tray in and out before adding the present. If it drags, do not force it; open the sleeve seam and reglue it with a fraction more room. If it rattles loosely, a thin paper liner inside the sleeve can remove some play without rebuilding the tray.
This format suits gift cards, small stationery, wrapped jewelry, or other flat presents because the sleeve protects the drawer edges while keeping the gift easy to reach.
3. Ribbon-Tied Pyramid Gift Box
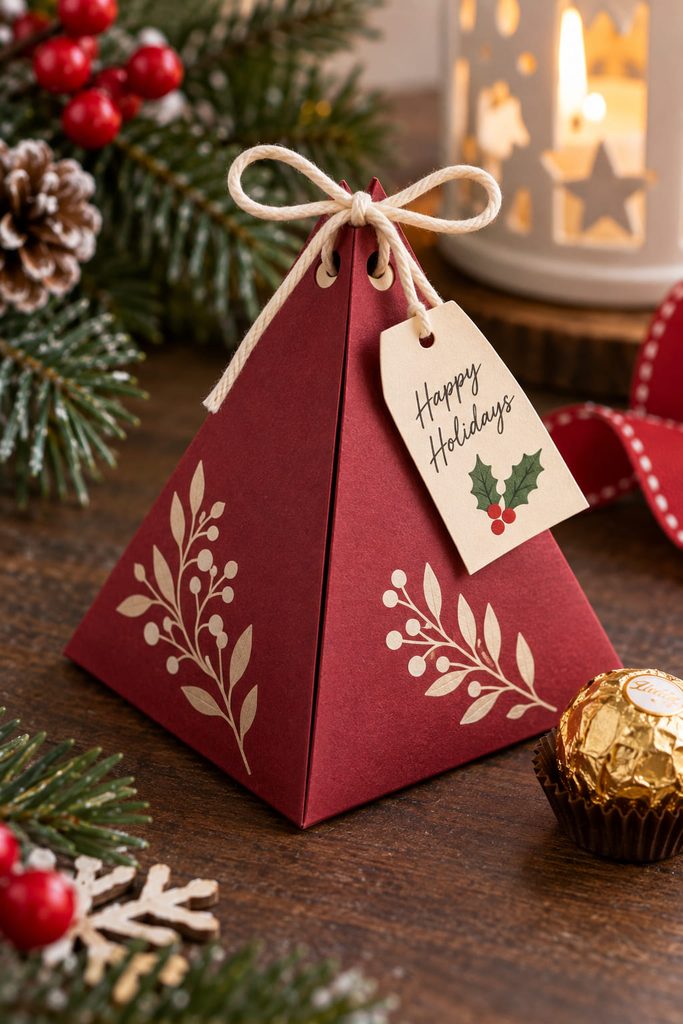
Need packaging that already looks festive before you add an ornament? A four-sided pyramid does most of the work through its silhouette. The present sits on a square base while four triangular walls rise to a point, making the package feel more like a small table favor than a standard carton.

- Score the square base and all four wall folds before cutting any decorative openings.
- Glue the side tab so the pyramid body closes cleanly around the gift.
- Punch matching holes near the upper corners only after the form is aligned.
- Thread narrow ribbon or paper cord through the holes and tie it above the apex.
This works best for one compact item such as a wrapped truffle, tiny ornament, or rolled note. Keep the gift centered on the base; a heavier item leaning against one triangular wall can distort the point and make the ribbon closure sit off-center.
4. Mini Milk-Carton Box for Tall Gifts
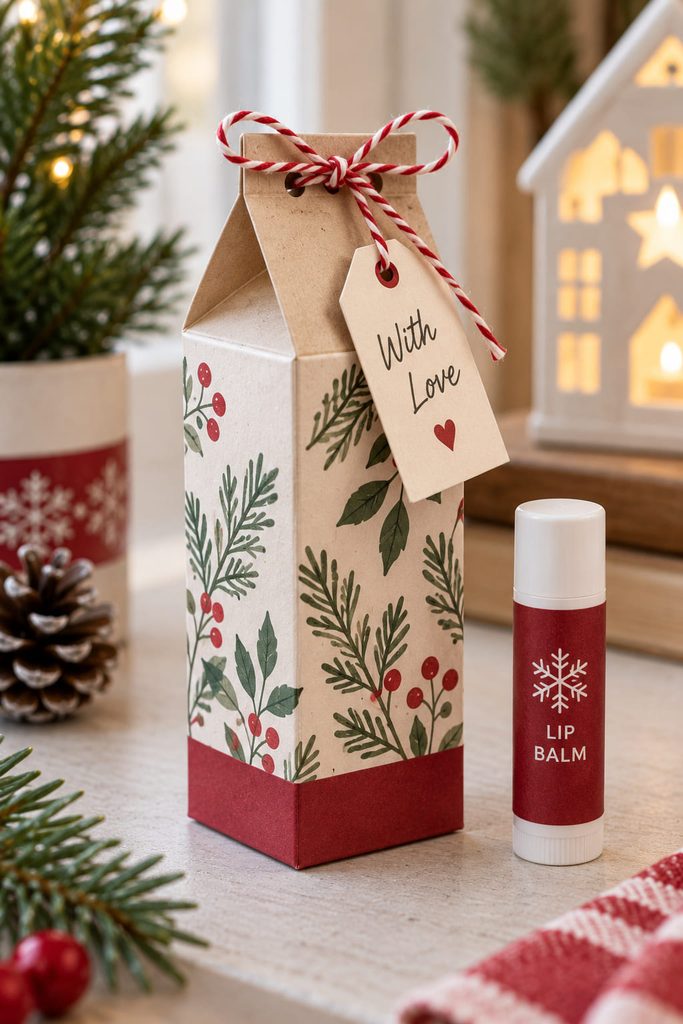
Tall but narrow gifts can disappear inside a cube, while a miniature milk-carton box uses vertical space more efficiently. Start with a rectangular base and four straight walls, then score the upper section so two opposite panels pinch inward and the other two meet as a short gable. The carton shape gives you a real interior cavity without requiring a separate lid.
The top can close with a small clip, a tied cord through paired holes, or a paper tab that folds over the gable. Choose the closure before decorating the top because thick layered embellishments can block the pinch folds. This is a useful shape for a lip balm, narrow ornament, small bottle-shaped item, or stack of wrapped candies—anything that benefits from height more than width.

5. Hexagonal Ornament Gift Box
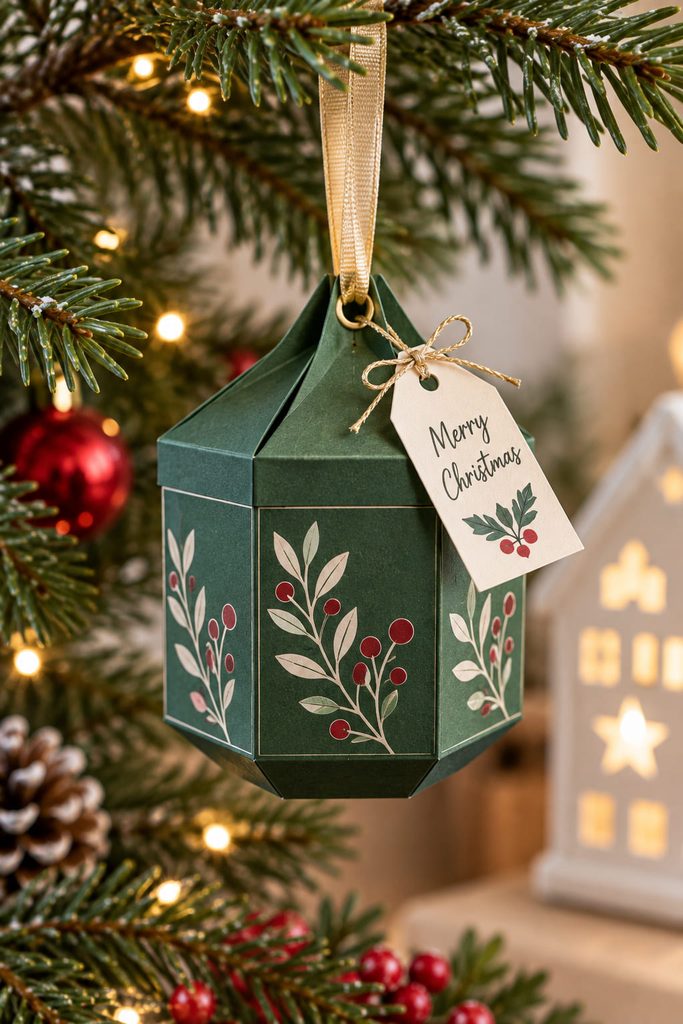
If you want the wrapping to become part of the tree display, turn the box into a faceted ornament. A six-sided body gives the package enough flat surfaces to stand securely while still reading as an ornament once a hanging loop is added. Use a hexagonal base with six wall panels, then close the top with a matching cap or folded flaps.

Before hanging it, check three things:
- The gift cannot shift hard enough to pull the top open.
- The ribbon loop passes through a reinforced top layer rather than one thin flap.
- The box hangs clear of branches so its weight is supported by the loop instead of a side panel.
For a very small, lightweight present, the box can go on the tree and be discovered there. For anything denser, keep the ornament look but place the box on a table or under the tree instead of asking paper and ribbon to carry unnecessary load.
6. Star-Shaped Box With a Fitted Lid
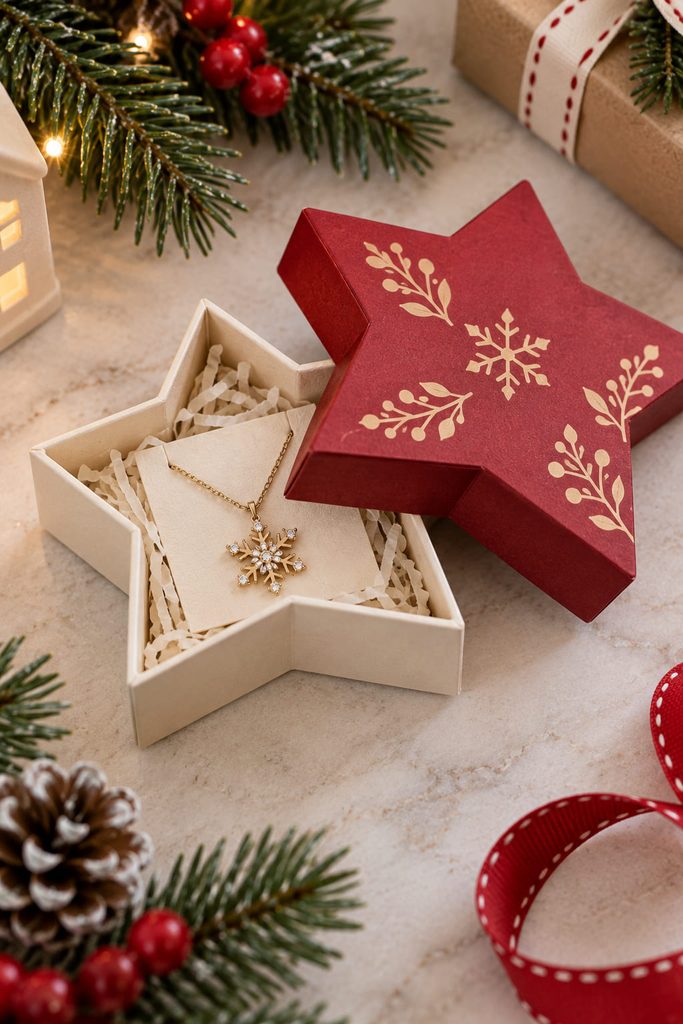
A star-shaped box looks decorative even in solid-color cardstock, but the real challenge is the lid. You can build it two ways: as a low star tray with a separate telescoping lid, or as a deeper base with a shallow cap that covers only the upper edge. The first looks more polished from the side; the second is easier to fit because there is less overlapping wall area.

Whichever route you choose, cut the lid from the same star outline with a small, even allowance added around every point. The points exaggerate fit errors: too little clearance makes the tips jam, while too much makes the lid rotate and expose the base rim.
Lid Fit Test: Assemble the empty base completely, then dry-fit the lid before gluing its final seam. It should lift off with two fingers without squeezing the star. If one point catches, trim or reopen that local seam rather than enlarging every edge.
The broad, low interior works well for a pendant, small ornament, folded cash, or several flat wrapped treats.
7. Diamond-Fold Bonbon Box
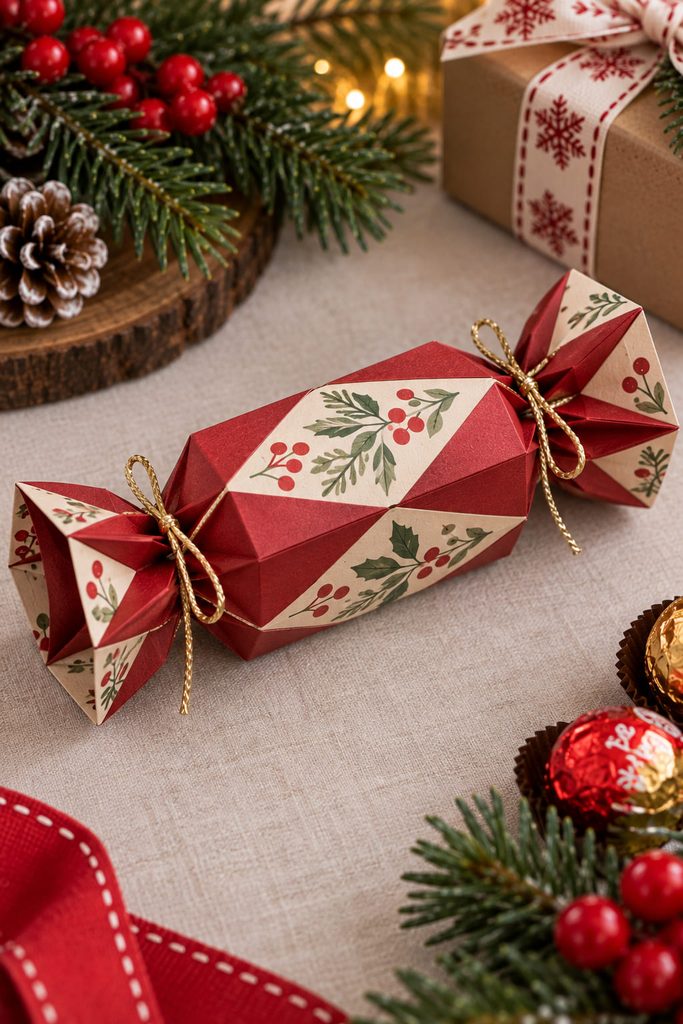
Score the center tube before you form the ends on a diamond-fold bonbon box. This construction starts as a long rectangular strip, but diagonal score lines near both ends collapse into a repeating faceted pattern when the paper is pushed inward. The result resembles a wrapped candy without needing actual twisted paper.

Use this order because the geometry depends on the creases meeting cleanly:
- Mark the straight wall panels that create the central compartment.
- Add the diagonal diamond scores at both ends, keeping the pattern mirrored.
- Pre-fold every diagonal in the intended direction before gluing the long side seam.
- Form the tube, load the wrapped gift, then compress the scored ends toward the center.
- Tie each narrowed end with ribbon or paper cord if the folds do not lock firmly on their own.
Why the order matters: Trying to create the diamond folds after the tube is glued leaves little support behind the paper and makes the diagonals harder to control. Pre-creasing gives each facet a path to follow.
This is best for a light, narrow present such as a few candies, a rolled message, or a tiny craft supply set. Avoid forcing a wide object through the faceted end; size the central chamber for the gift before committing to the diagonal pattern.
8. Gable Gift Box With a Built-In Handle
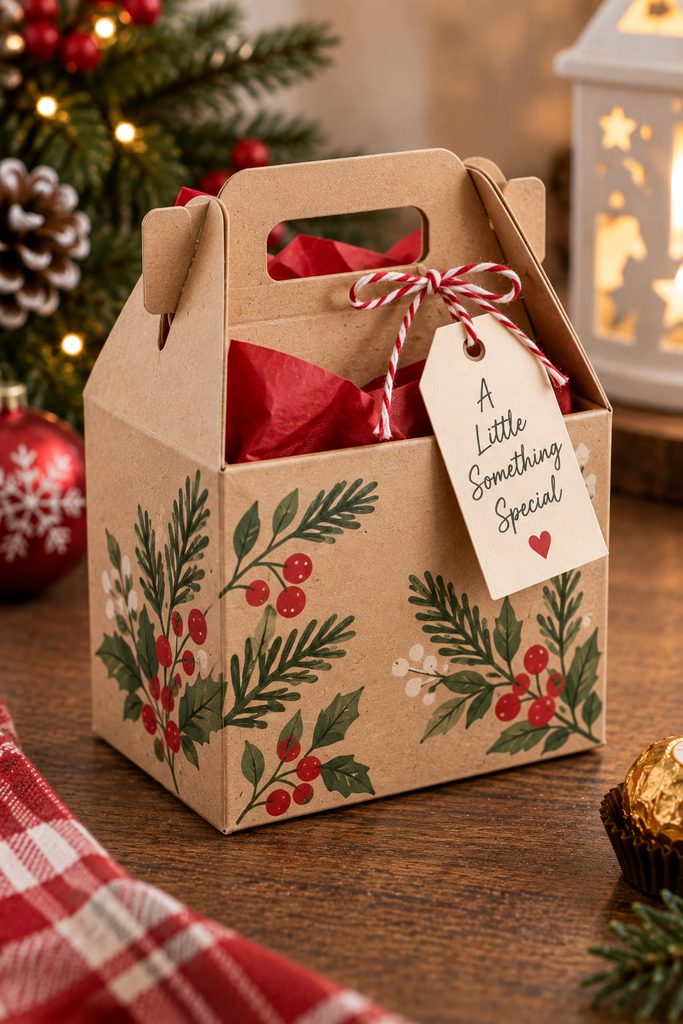
When the present has a little height and you want a handle, a gable box is more practical than a decorative top that must be untied. Build a rectangular base with four walls, then extend two opposite walls upward into handle panels. The remaining two sides fold inward under them and help close the top.
The handle needs to carry the box through the wall panels, not through a thin glued decoration. Cut matching handle openings in both tall panels and let those panels overlap across a broad area. A tuck tab or small locking slot can keep them aligned.
Handle Load Path: Put the wrapped gift inside and lift the box a few inches over a table before adding embellishments. If the top panels bow apart, widen the overlap or reduce the gift weight. This shape is especially useful for a small candle tin, compact toy, or several individually wrapped treats because the straight walls provide more usable space than a pointed closure.
9. Book-Style Hinged Gift Box
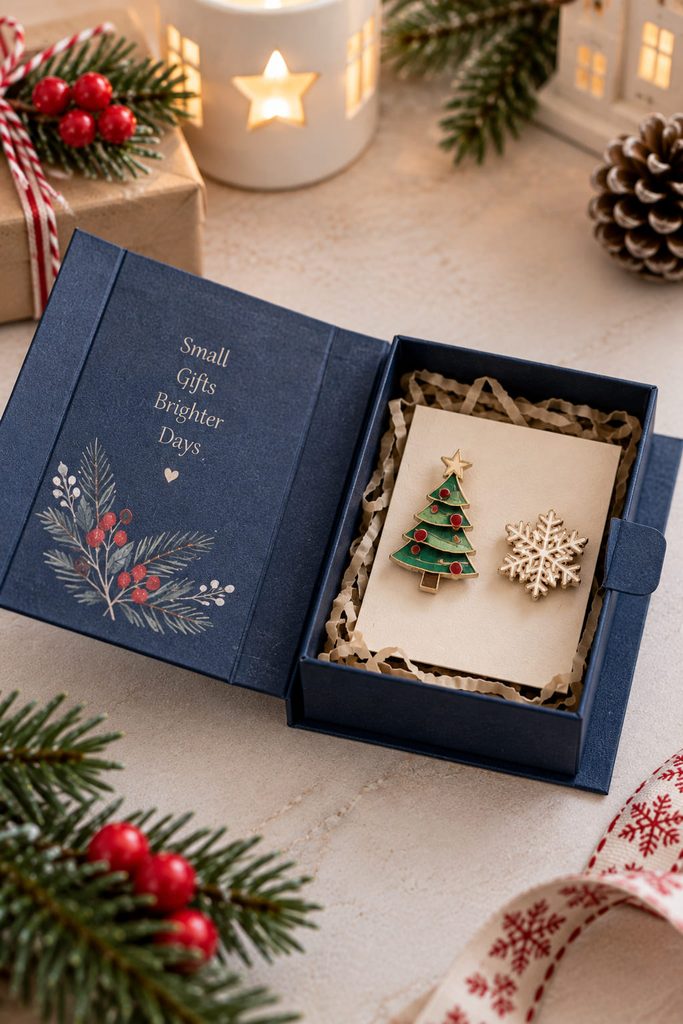
Opened flat, a book-style gift box turns the act of unwrapping into a small reveal. Make a shallow four-wall tray for the present, then attach one long cover panel along a single tray edge so it works as a paper hinge. A second scored line lets the cover wrap over the tray top, and a tuck flap on the far edge keeps it closed.
Assemble the parts in this order:
- Build and square the inner tray.
- Score the cover to the tray’s finished thickness, not just its flat paper dimensions.
- Glue only the hinge section to one tray wall.
- Fold the cover over and mark the tuck position while the tray is closed.
That last fitting step prevents the cover from pulling the tray out of square. A paper band can replace the tuck flap when you want a smoother outside surface. The format is a good match for a gift card, small photo, handmade pins, or a tiny flat keepsake.
10. No-Glue Origami Masu Box
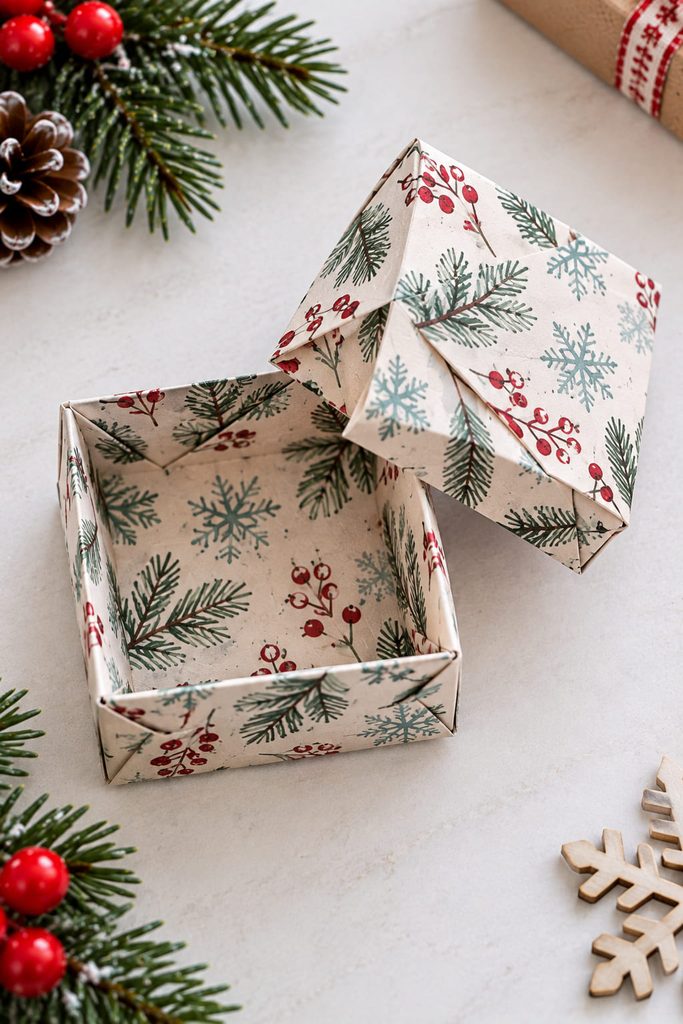
Two folded squares can become a complete gift box without glue. An origami masu base is formed by bringing the paper edges and corners inward through a sequence of symmetrical folds, then raising the walls from the creased grid. Fold a second square the same way for the lid, using paper that is just slightly larger so it can slip over the base.
The appeal is less about decoration than reversibility: the box can be unfolded later and the paper reused or stored flat. Crisp, relatively thin paper works better than very heavy cardstock because several layers stack at the corners. Use it for lightweight items that will not push hard against those layered folds.
11. Vellum-Window Tuck-Top Box
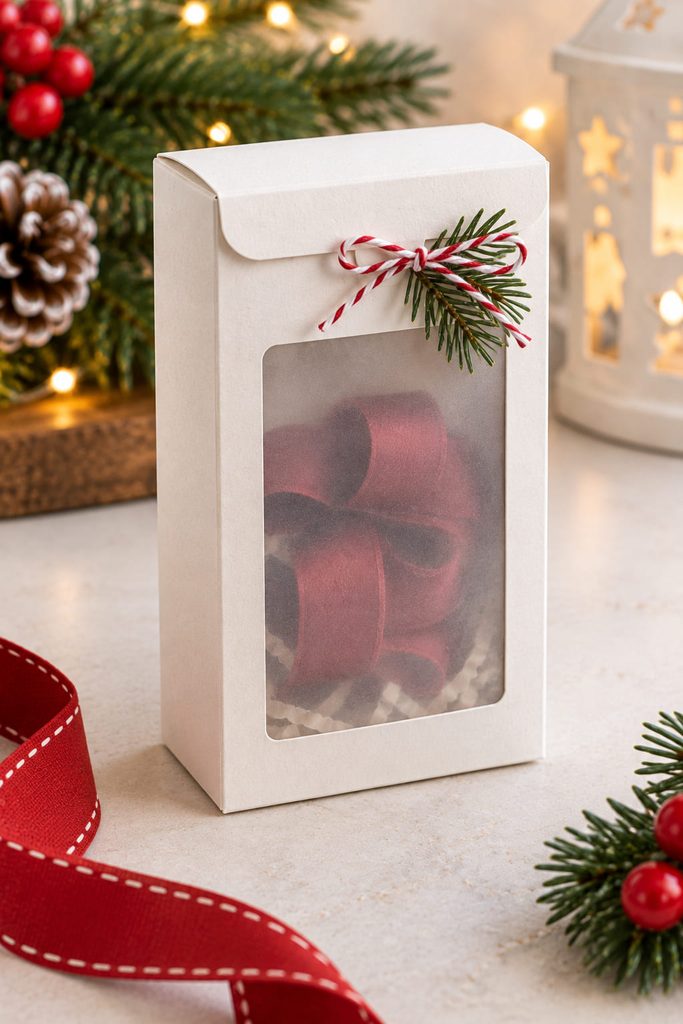
Vellum softens the view of a gift without hiding it completely, which makes a window box useful when the present itself has color or texture worth showing. Build a standard rectangular tuck-top box, but cut one opening from the front panel before assembly. Glue a vellum patch to the back of that opening while every wall is still flat; once the box is formed, the glue area becomes much harder to reach.
A compact material set is enough:
- Medium cardstock for the box body.
- Lightweight vellum for the window.
- Paper-safe adhesive placed outside the visible opening.
- Optional thin paper trim to cover the vellum edges inside.
Keep the window away from score lines and corner tabs. A large opening removes stiffness from the front wall, so leave a solid paper border on all sides. This design suits a wrapped soap, ornament, ribbon bundle, or other small gift that can sit behind the translucent panel without needing direct contact with the vellum.
12. Petal-Lock Holiday Favor Box
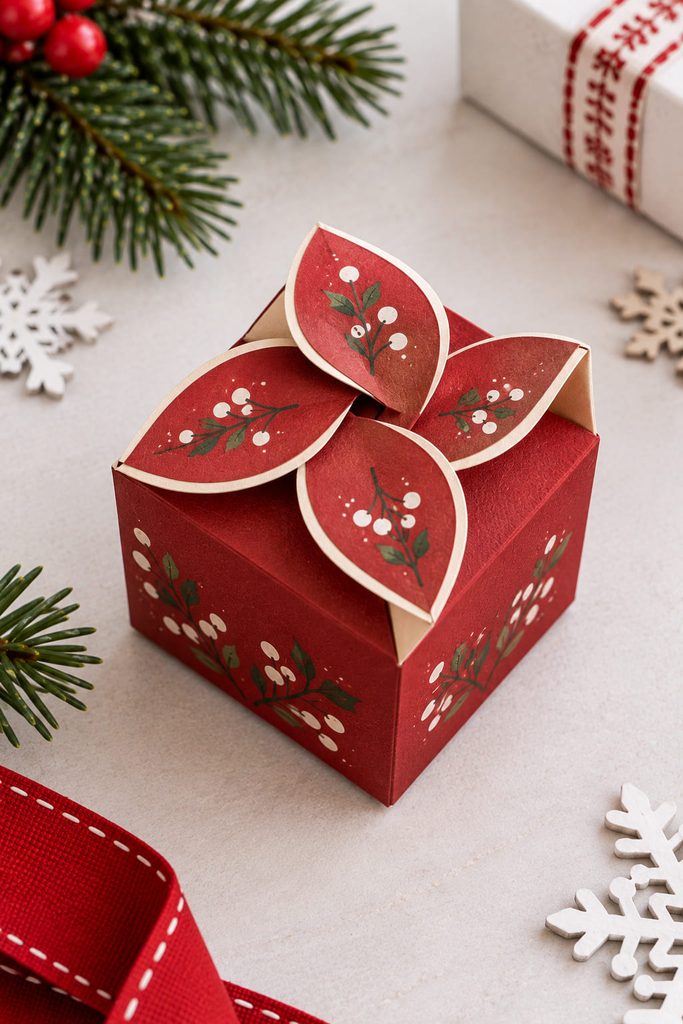
Skip the separate lid by making the top panels close into one another. A petal-lock box uses four rounded or pointed flaps that overlap in sequence; the final flap slides beneath the first, creating a flower-like closure above a small base.
The flaps need similar lengths, and the box cannot be filled to the top. Leave enough headroom for each petal to bend inward without pressing on the present. For repeated favors, make one sample and mark the maximum fill height inside it. This no-ribbon closure works well for wrapped candy, folded wishes, or tiny handmade ornaments, and a small paper snowflake can hide the central overlap without blocking access.
13. Gusseted Paper Purse Box
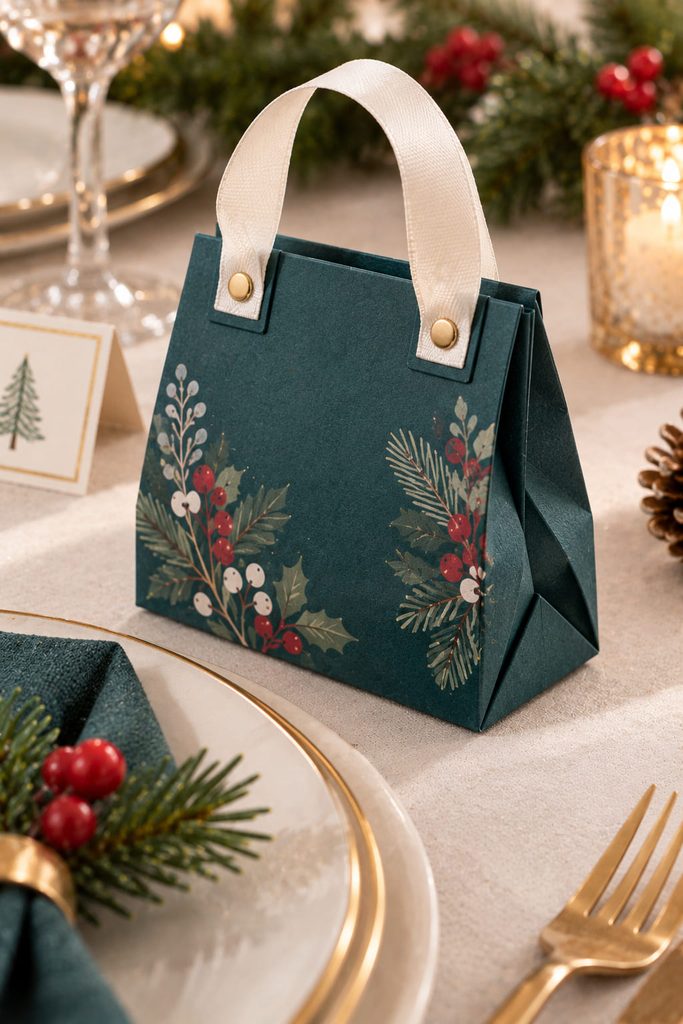
Pinched side gussets are what make a paper purse box feel like a bag rather than a decorated rectangle. The front and back stay mostly flat, while the scored side panels fold inward as the top edges come together. Add a narrow paper handle or short ribbon loop only after the body has been test-folded, so the handle holes land on reinforced areas rather than on moving gussets.
If the purse refuses to close, look at the symptom before trimming anything:
- Sides bulge outward: the gift is too thick for the gusset depth; enlarge the base or choose a slimmer item.
- Top edges miss each other: one side gusset is folding in the wrong direction or the score lines are not mirrored.
- Handle area tears: add a second cardstock patch behind each attachment point and keep the handle away from the fold.
This shape is well suited to jewelry, a keychain, miniature beauty items, or a small note-and-treat combination, especially when you want the package to be carried to a place setting or tucked into a stocking.
14. Surprise Cube Box That Falls Open
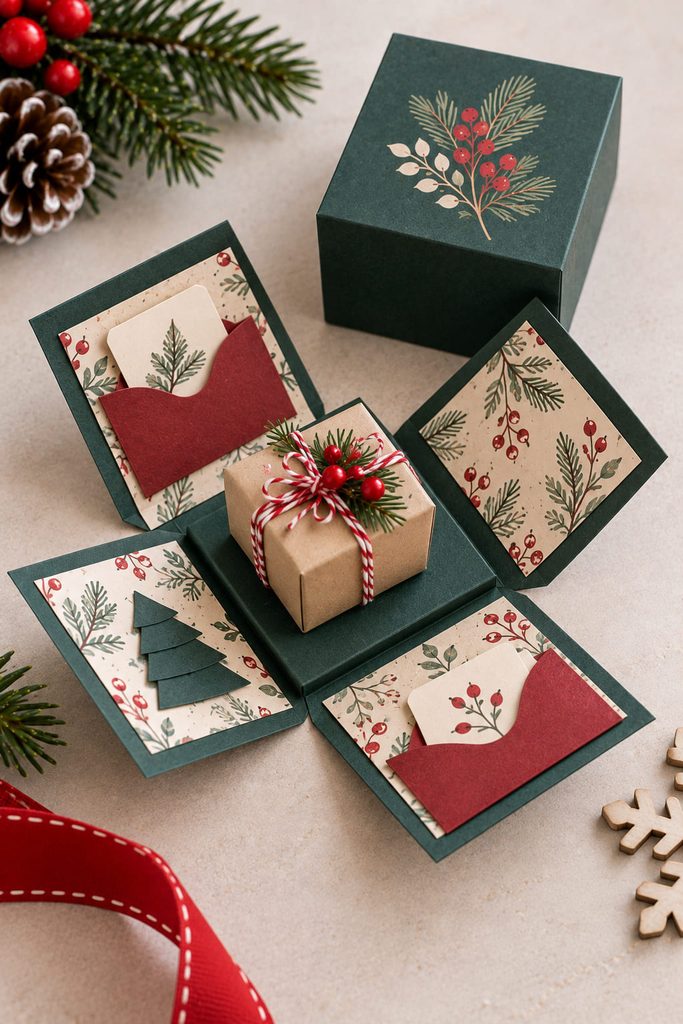
Lift the lid and let the box open around the gift. A surprise cube uses four side panels attached to a square base, but unlike a normal carton, the side seams are left unglued. A snug lid holds the walls upright; once the lid comes off, the panels fall outward and reveal the center platform.
Plan the build from the closed state backward. The base must be large enough for the present, each wall must be no taller than the lid can capture, and the lid needs enough depth to keep the four loose panels aligned. If you add inner pockets, photos, or paper messages, keep their thickness balanced so one wall does not push outward more than the others.
A simple assembly check catches most problems:
- Put the empty lid on and lift the closed cube while supporting the base rather than pulling from the lid.
- Set it down and remove the lid straight upward.
- Confirm that all four walls open without snagging on the gift platform or one another.
- If a panel sticks, reduce bulky decoration near the bottom hinge crease before changing the lid fit.
This is one of the more involved constructions in the set, but the extra work makes sense when the reveal is part of the gift. A tiny keepsake, small piece of jewelry, handwritten message bundle, or centerpiece present can all sit at the center while the paper panels become part of the moment.
Choosing Paper for DIY Paper Gift Boxes
Match the paper to the movement of the box rather than automatically choosing the thickest cardstock available. Pillow boxes and diamond-fold bonbon boxes need paper that can take curved or repeated creases without fighting them. Origami boxes benefit from thinner paper because multiple layers collect in the corners. Drawer trays, gable boxes, star bases, and hinged trays need more stiffness because their walls have to stay square while the gift is handled.
Before decorating a new design, make one plain-paper or scrap-cardstock prototype and test the closure with an object that is approximately the same size as the real present. That quick fitting stage tells you whether the problem is the box dimensions, the paper thickness, or the closure itself before decorative layers make those variables harder to change.
Pick the Box Around the Gift
Start with the simplest mechanism that solves the job. A pillow box or origami masu box is enough for a light, uncomplicated present; a drawer or book-style box makes more sense when the reveal matters; a star lid, faceted bonbon, or surprise cube earns its extra construction when the packaging is meant to feel like part of the gift.
For more holiday projects beyond boxes, the related Diynify collection 17 Simple Paper Christmas Crafts That Feel Festive, Not Fussy explores paper projects built around different finished functions.