
This post contains affiliate links. As an Amazon Associate I earn from qualifying purchases, at no extra cost to you. Thank you for supporting Diynify!
Christmas quilling ideas are a good fit for holiday crafting when you want small paper details to do more than simply fill a shape. Tight coils can add weight and punctuation, loose coils create lace-like openings, and pinched forms such as teardrops and marquises can build recognizable silhouettes without covering the background completely.
Most of these projects use quilling strips, a slotted tool or needle tool, tweezers, cardstock, and paper-safe glue. A few need extra materials such as ribbon or thread, vellum, a battery-powered LED tea light, acetate, foam tape, a narrow dowel or skewer, or a sturdy backing board. Choose by finished function first: some ideas are meant to hang, some need to fold or hold something, and others are built to stay protected in a frame.

1. Quilled Snowflake Ornament With a Reinforced Hanging Loop
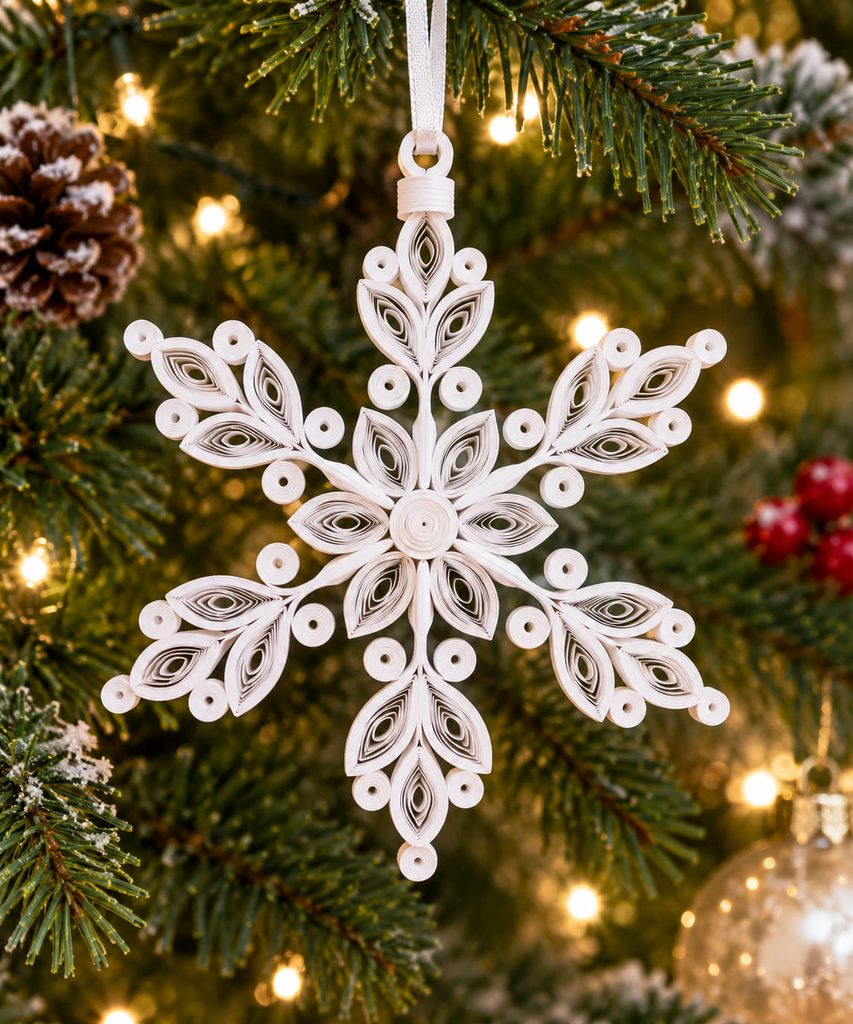
Start at the center rather than at the tips. A snowflake stays visually balanced when each arm grows from the same small core and the repeated units are matched before they are glued into place. Loose coils, marquises, and teardrops are especially useful because they leave open space between the paper edges, which keeps the ornament light enough to hang without looking flat.
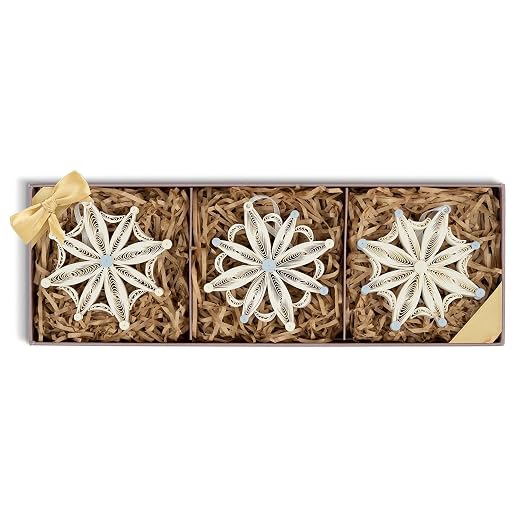
Build the snowflake in a sequence that protects that symmetry:
- Make one compact center coil and arrange the first ring of identical shaped coils around it.
- Build each arm from the center outward, checking opposite arms as pairs instead of finishing one side at a time.
- Add a doubled closed coil or a small hidden cardstock loop at the top so the thread pulls on a stronger connection than a delicate open curl.
- Let every joint dry flat before lifting the piece, then tie on a hanger long enough for the snowflake to clear nearby branch tips.
Symmetry Check: Place the dry snowflake over a simple cross or six-spoke guide. If one arm reaches farther, correct the paper unit before adding the hanger; extra ribbon will not fix an off-center balance.
2. Quilled Christmas Tree Greeting Card With Open Branch Layers
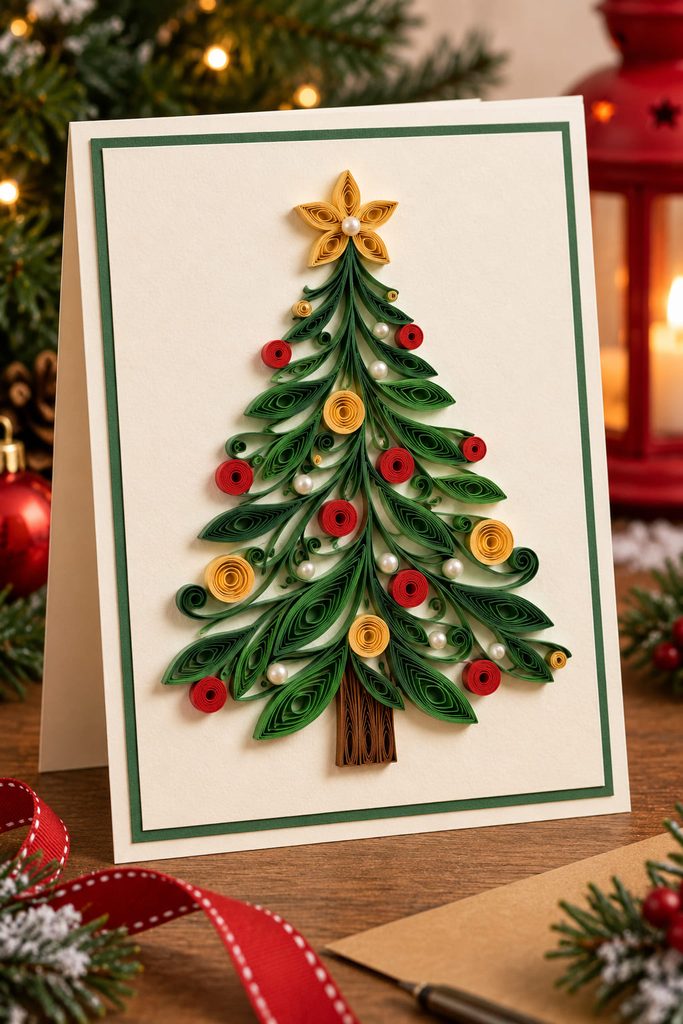
Instead of filling a triangular tree with dozens of identical coils, let a few branch directions define the silhouette. Long green teardrops can point outward like boughs, while small tight coils work as ornaments and a narrow strip on edge can establish the trunk. Keeping white or colored card visible between the shapes gives the design more contrast and also reduces bulk for an envelope.

Mailability sets the limit. Use lower-profile coils near the outer edges of the card and reserve the deepest shapes for the center, where they are less likely to catch on an envelope. A second piece of cardstock cut slightly larger than the quilled panel can act as a clean mat and keep glue marks away from the fold.
3. Poinsettia Quilling Gift Topper on a Removable Paper Disc

Pinched marquise shapes naturally create the pointed petals of a poinsettia, so this topper can look full without needing a large amount of paper. Build two uneven petal rings on a small cardstock disc, offsetting the upper ring so the backing disappears while the flower keeps a clear center; a cluster of tiny tight coils gives the middle enough visual weight to stop the petals from reading like a starburst. Attach the finished disc to ribbon, a paper belly band, or a low-tack removable adhesive point rather than gluing the quilling directly to wrapping paper. That separation lets the gift open without crushing the flower and makes the topper reusable on a tag, place setting, or small ornament later.

4. Domed Quilled Snowman for a Small Tabletop Display
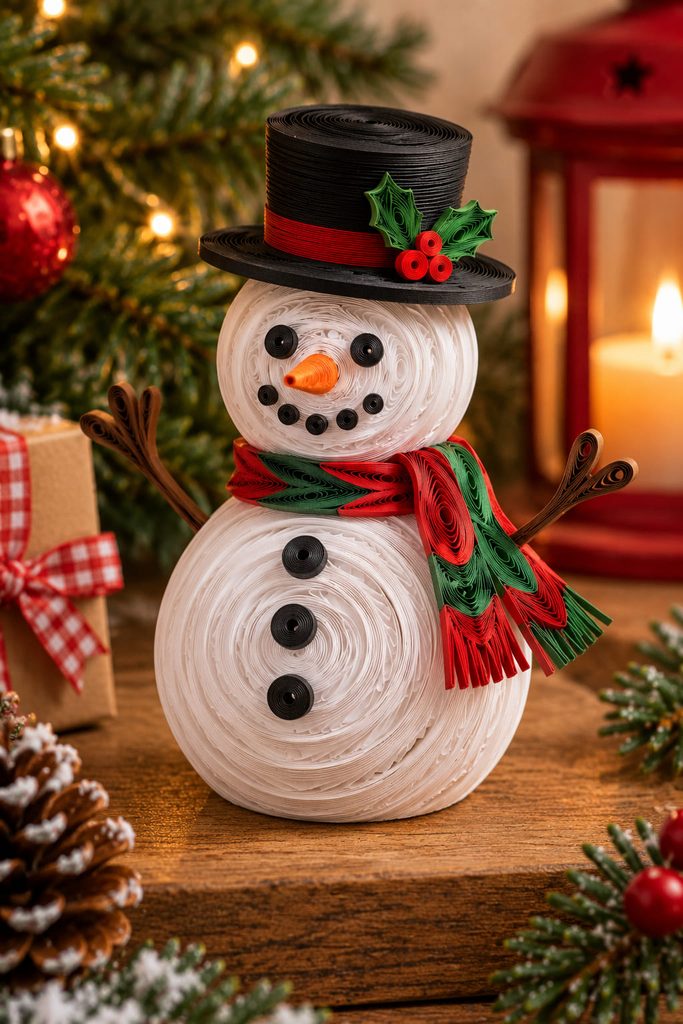
A three-dimensional snowman depends on dense coils behaving like shallow paper shells, not on loose decorative curls. Roll two wide, tight coils for the body sections, then gently push the centers outward from the back to form matching domes. Coat the inside surfaces with a thin layer of paper-safe glue and let them dry before joining the front and back halves; the dried interior skin helps the domed shape resist flattening.
The lower body needs a broader contact area than the head. If both sections are made the same diameter, the figure becomes top-heavy and the join between them takes more stress. A slightly flattened base coil or a small hidden cardstock oval under the lower sphere gives the snowman a dependable footprint without changing the rounded silhouette.

Small details can be lighter: a rolled cone for the nose, narrow strips for scarf ends, and tiny coils for buttons. Keep them close to the body rather than extending several inches away, because long paper projections act like levers and are easier to snag.
For assembly, dry-fit the two body sections first. If the snowman rocks, correct the base before adding the head; if the domes soften when handled, let the interior glue cure longer rather than compensating with more surface glue at the seams.
5. Quilled Wreath Place Card With a Clear Name Window
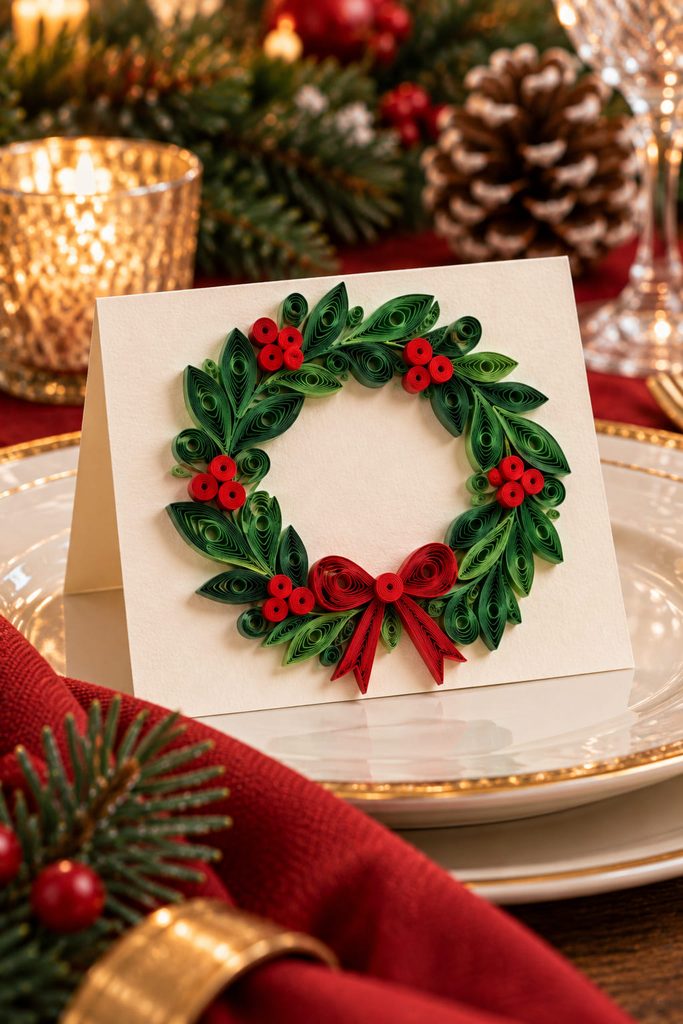
The useful part of this miniature wreath is the empty center. Arrange green leaf-shaped coils around a cardstock ring, then stop before the foliage closes over the opening. The name should remain readable from across a place setting, so the quilling works as a frame rather than as the main field for lettering.
Before gluing, check three things:

- the wreath does not extend below the bottom edge of the folded place card;
- the center opening is wide enough for the guest name;
- heavier berry coils are distributed across both sides instead of clustering on one corner.
If the card tips forward, move the wreath slightly higher or reduce the frontmost coils. The fold underneath is the real stand, so the decoration should not pull the weight beyond that footprint.
6. Quilled Angel Tree Topper Built Around a Paper Cone
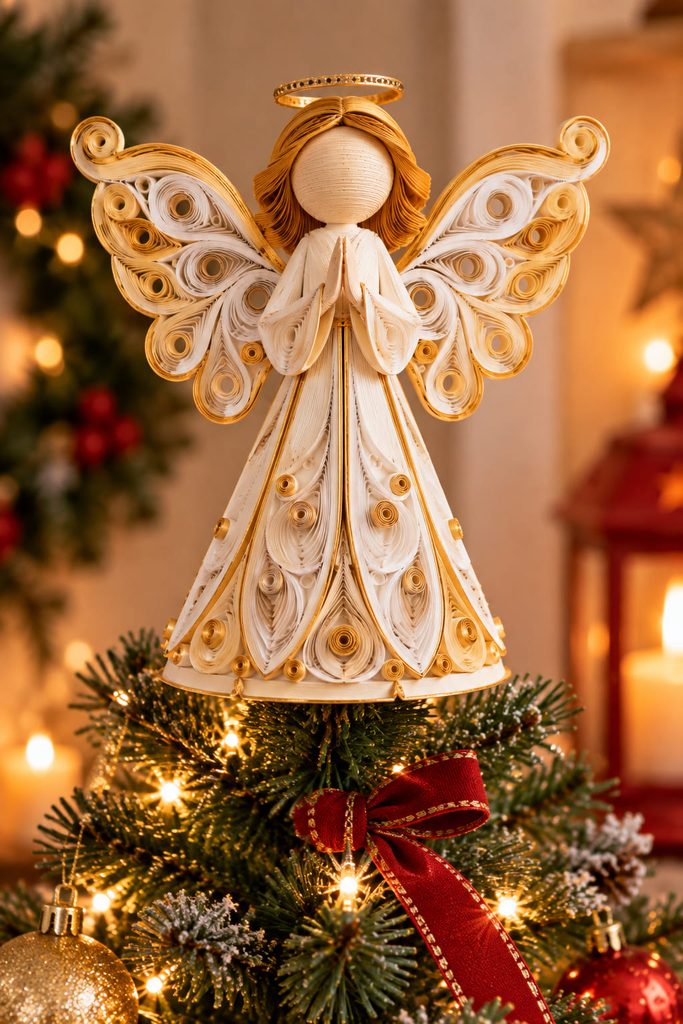
A tree topper has to solve a fit problem before it solves a decorating problem. Form a light cardstock cone with an open base sized to slip over the top branch, then use quilling as the visible angel layer: broad scrolls can define wings, a tight coil can form the head, and long teardrops can create the suggestion of a robe without making the whole topper solid.
If the topper leans, diagnose the cause before adding glue. A cone that is too wide will wobble around the branch; a cone that is too narrow will perch high and expose most of its weight above the support point. If the cone fits but the angel still turns sideways, the wings are probably carrying unequal paper mass. Shorten or simplify the heavier side rather than thickening the cone.
Cone Fit Test: Test the plain cone on the tree before attaching any quilled parts. It should slide on easily, stop without being forced, and remain upright when the tree is gently touched.
Keep the angel light. Deep stacked coils look dramatic on a framed piece, but on a topper they move the center of mass away from the branch and make the support problem harder.
7. Holly Quilling Napkin Ring With a Protected Paper Band
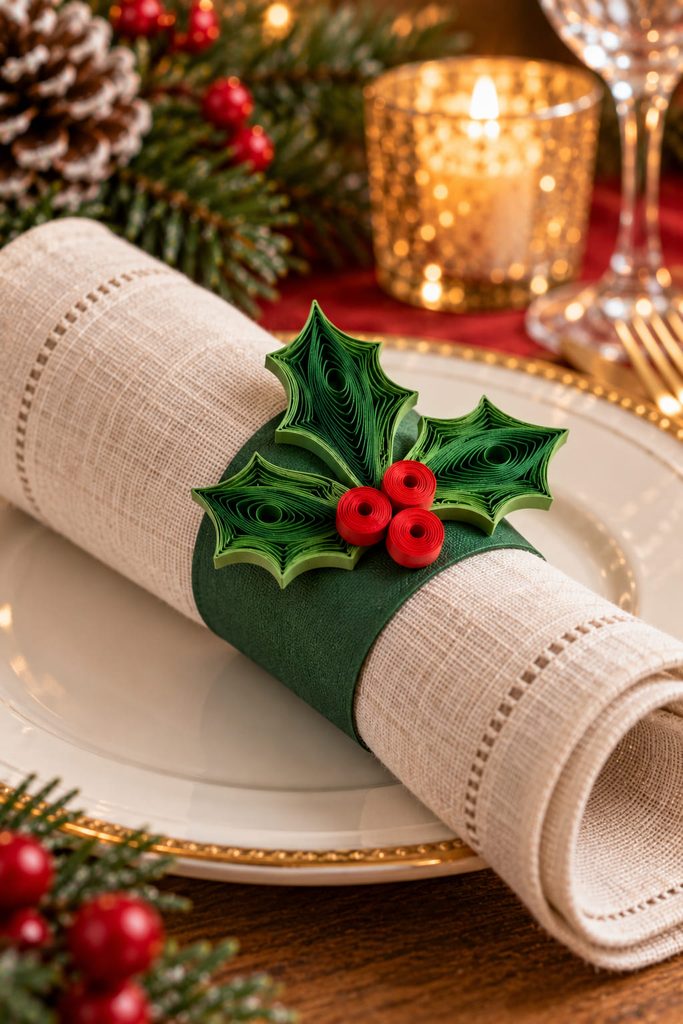
Because napkin rings get handled, the holly should sit on a stronger carrier rather than forming the ring by itself. Make a cardstock band wide enough to wrap around a rolled napkin with a small overlap, then attach two or three marquise leaves and a cluster of tight berry coils only to the front section. Position the leaves so their pointed ends stay within the width of the band; that keeps delicate tips from catching on fabric when the napkin slides in or out. A glued tab or a narrow slot-and-tab closure at the back keeps the ring functional while the quilling remains decorative instead of load-bearing.

8. Quilled Christmas Village Luminary Sleeve With Vellum Windows
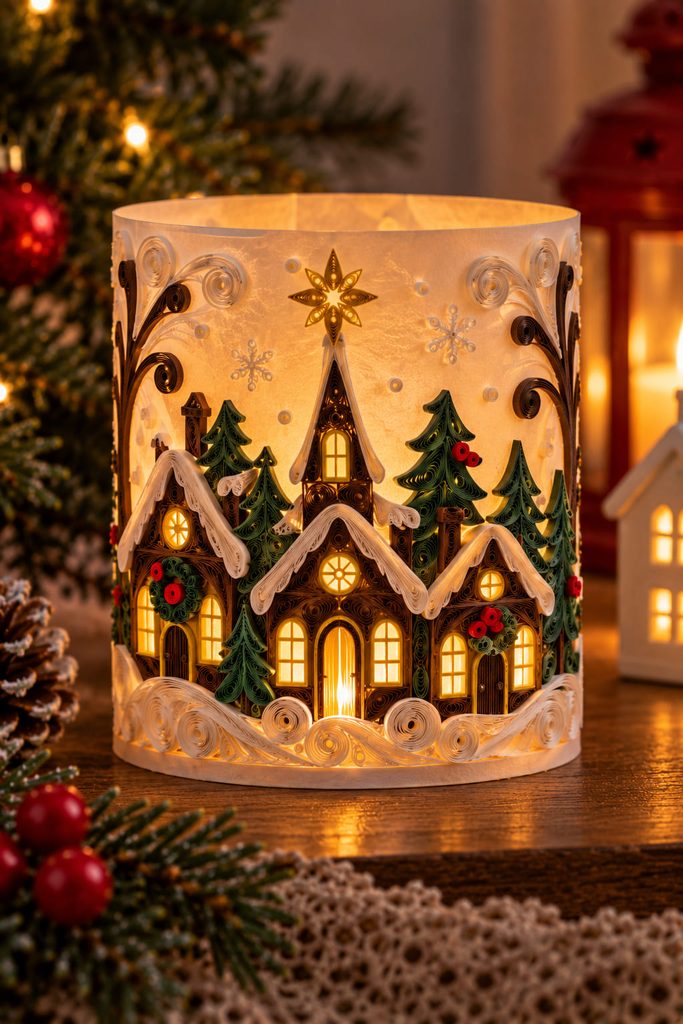
Here the quilling is most effective as an open architectural layer in front of a translucent wall. Build a short vellum cylinder or four-sided vellum sleeve, then add dark quilled rooflines, door frames, trees, and scrollwork so the pale window areas remain uncovered. The light needs a continuous path through the vellum; dense coils over every opening will turn the project into a dark silhouette.
A stable build order matters:
- Finish and test the vellum sleeve before adding quilling, including the overlap or corner tabs that hold its shape and a flat lower edge that sits steadily on the table.
- Lay out the village on the flat sleeve so rooflines and windows stay level across the closure.
- Glue quilled pieces only where they have reliable contact with the vellum or a narrow cardstock frame.
- Re-form the sleeve, then place it around a cool battery-powered LED tea light with enough room to insert and remove the light without scraping the paper details.
Keep the Light Path Open: View the unlit sleeve against a window before final assembly. If the window areas already look blocked, the effect will be even weaker once the room is dark.
Never use an open flame inside a paper-and-vellum luminary.
9. Quilled Stocking Gift Card Pocket With an Open Top Edge
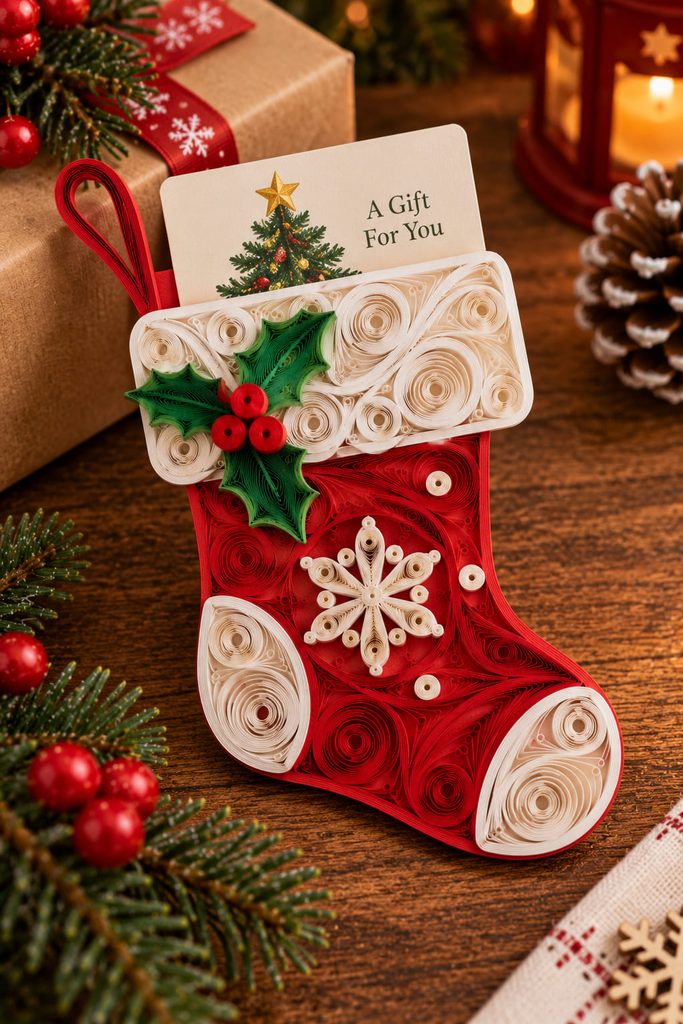
Treat the stocking as a real pocket first and a quilled decoration second. Cut a front and back stocking shape from cardstock, glue only the side and lower edges, and leave the top fully open so a gift card can slide in without touching the quilling. A narrow folded gusset is optional if you want more depth, but a flat two-layer pocket is enough for one card.
Place quilled cuffs, holly, or small scrolls on the front after the pocket is assembled. Keeping the deepest coils below the opening prevents fingers from crushing them during loading. Before decorating, insert the actual card and confirm that at least a small portion remains easy to grasp; a beautiful pocket that hides the card too deeply is awkward to use.
10. Quilled Star Garland With Repeated Lightweight Units
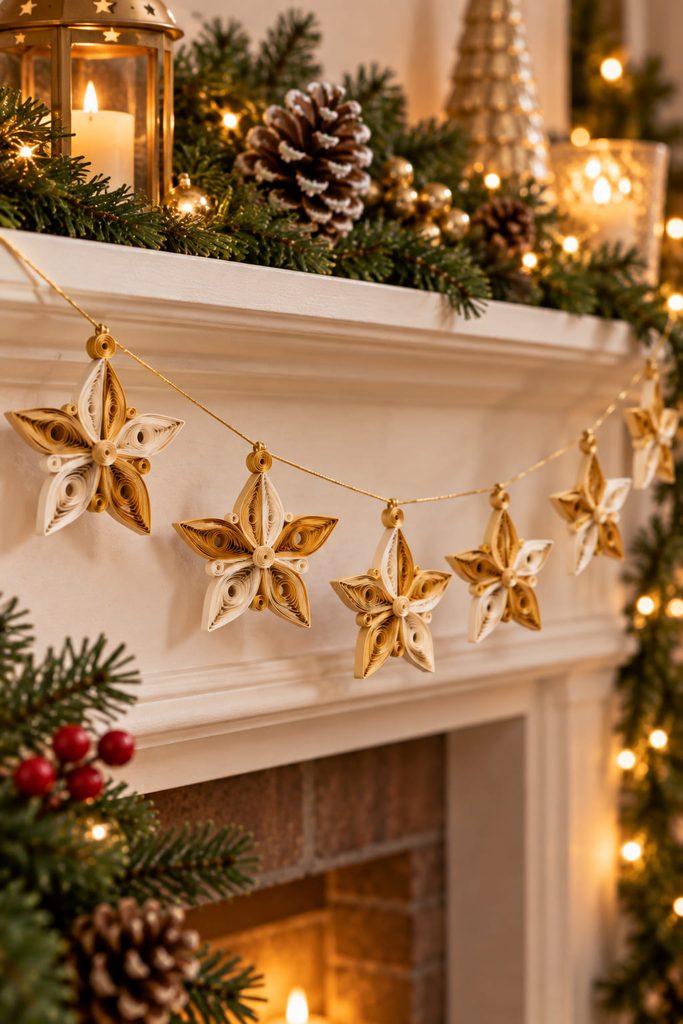
For a garland, repetition matters more than complexity. Small five-point stars made from matched marquises or V-scrolls can repeat along thread without creating one heavy section that pulls the whole strand into a curve. Make a sample star first, decide on the finished width, and use that as the size reference for the rest.
A practical micro-kit keeps batch work consistent:
- quilling strips cut to one repeated length for the main star points;
- a circle template or marked work board for matching coil size;
- waxed paper or a nonstick work surface;
- lightweight thread or narrow cord;
- tiny cardstock tabs or closed coils for the hanging connection.
Join the thread at reinforced points rather than piercing open curls. Leave enough space between stars for each one to hang freely; if neighboring units touch, the coils can lock together and twist the strand.
11. Quilled Nativity Silhouette in a Deep Frame
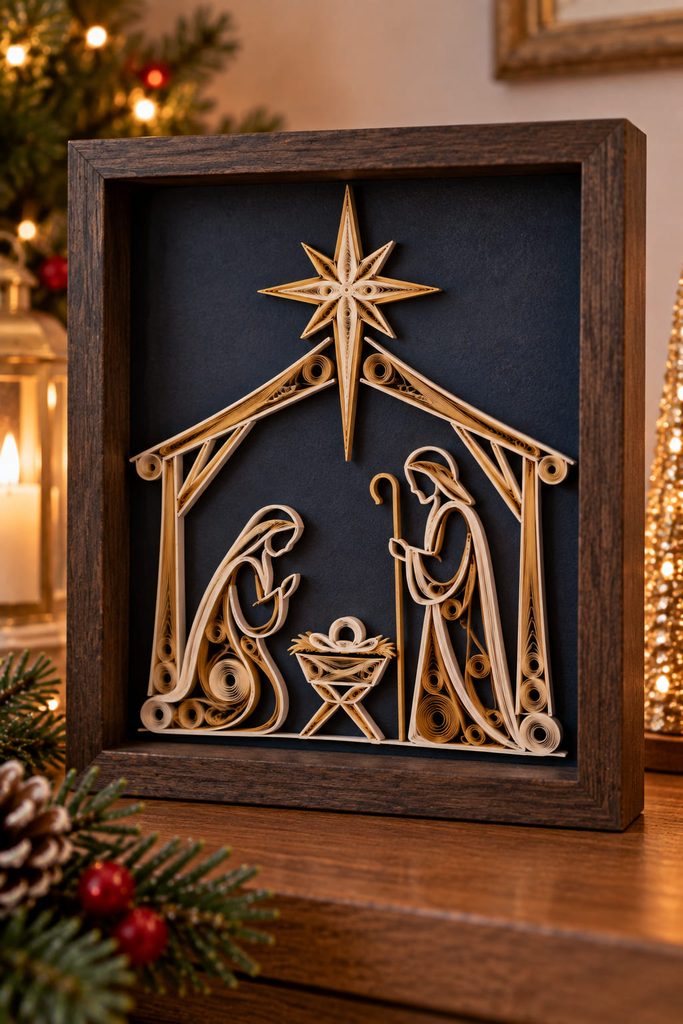
Negative space carries much of the meaning in a nativity silhouette, so resist filling every area with coils. Start with a simple arrangement of the stable, figures, and star on a contrasting backing, then use on-edge paper strips to outline major contours. Small coils can support key intersections or add restrained texture, but the empty spaces between figures help the scene remain readable at normal viewing distance.
Depth can come from selective layering rather than from piling coils everywhere. Raise the star or the stable roof slightly with a second cardstock layer, while keeping the central figures closer to the backing. That hierarchy gives the eye one or two clear focal planes instead of a uniformly busy surface.
A deep frame protects the exposed paper edges from dust and accidental contact. Before closing the frame, stand the artwork upright and look at it from several feet away. If the figures collapse into one dark mass, remove interior detail or widen the gaps; more quilling will not improve a silhouette that has lost its open shapes.
12. Quilled Advent Countdown Board With Removable Mini Motifs
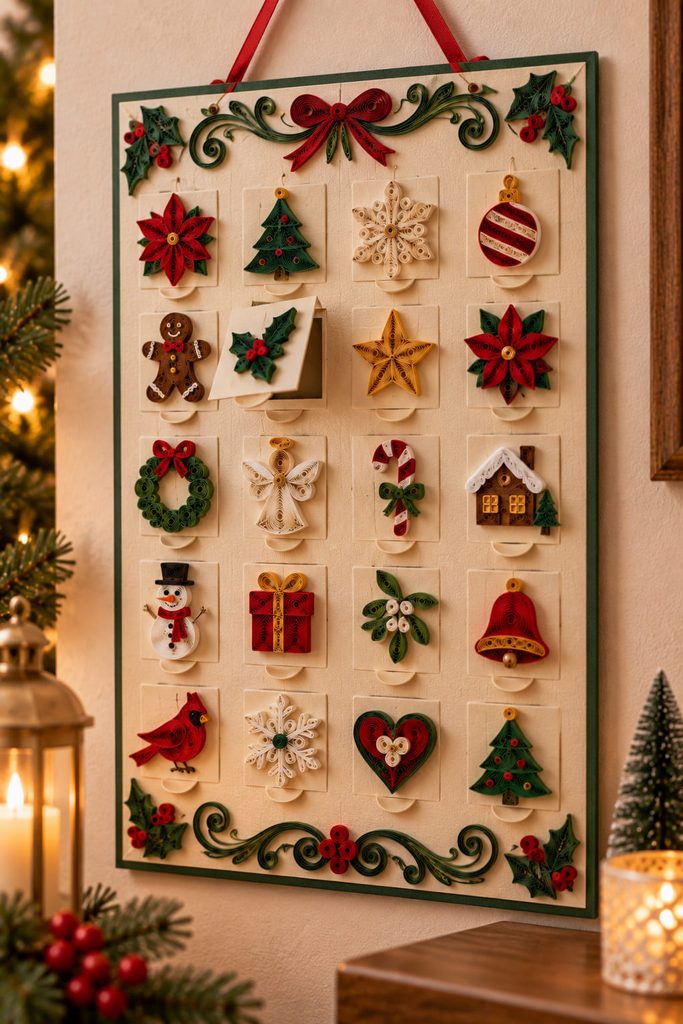
The key decision is whether the daily pieces will move or the marker will move. One route is to make small quilled motifs on sturdy paper tabs and hang or tuck one onto the board each day. The other is to keep all motifs fixed and use a lightweight pointer, ring, or clip to mark the current position. The first route feels more interactive, but every removable piece needs its own durable attachment point; the second protects the quilling because the paper art is never handled.
Whichever route you choose, build the board grid or hanging points before making the decorative units. That lets you set a maximum motif size and prevents crowded coils from interfering with neighboring positions. If children will handle the countdown, keep the quilled elements behind a clear pocket or use the movable-marker route so the delicate paper is not the part being pulled each day.
13. Quilled Snow Globe Shaker Card With a Clear Sealed Window
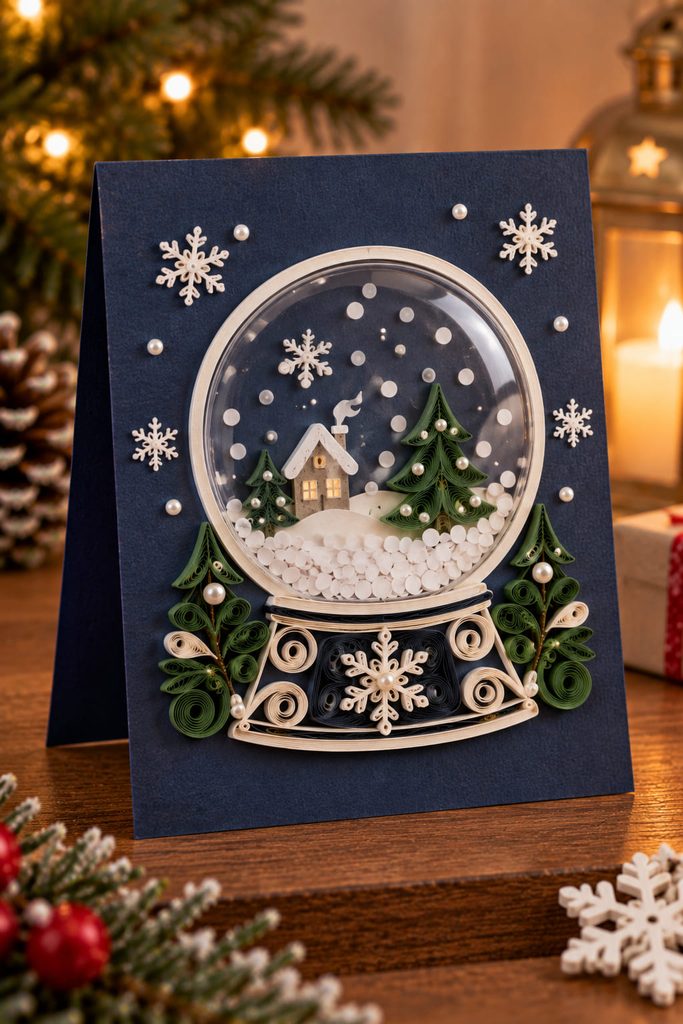
Shaker cards fail when the moving filler catches on dimensional decoration. Keep the quilled snowman, tree, or tiny house outside the shaker cavity or mount only very low-profile quilling behind the acetate. The moving pieces need a smooth perimeter and enough internal depth to slide when the card is tilted.
Use the symptom to find the fix:
- filler stuck in one corner: level the foam-tape wall or increase cavity depth;
- sequins escaping: close the perimeter before adding coils that could hide a gap;
- acetate bowing inward: reduce the filler or switch to a firmer clear sheet.
The quilling should finish the scene, not become part of the moving mechanism.
14. Candy Cane Quilled Bookmark on a Slim Cardstock Spine
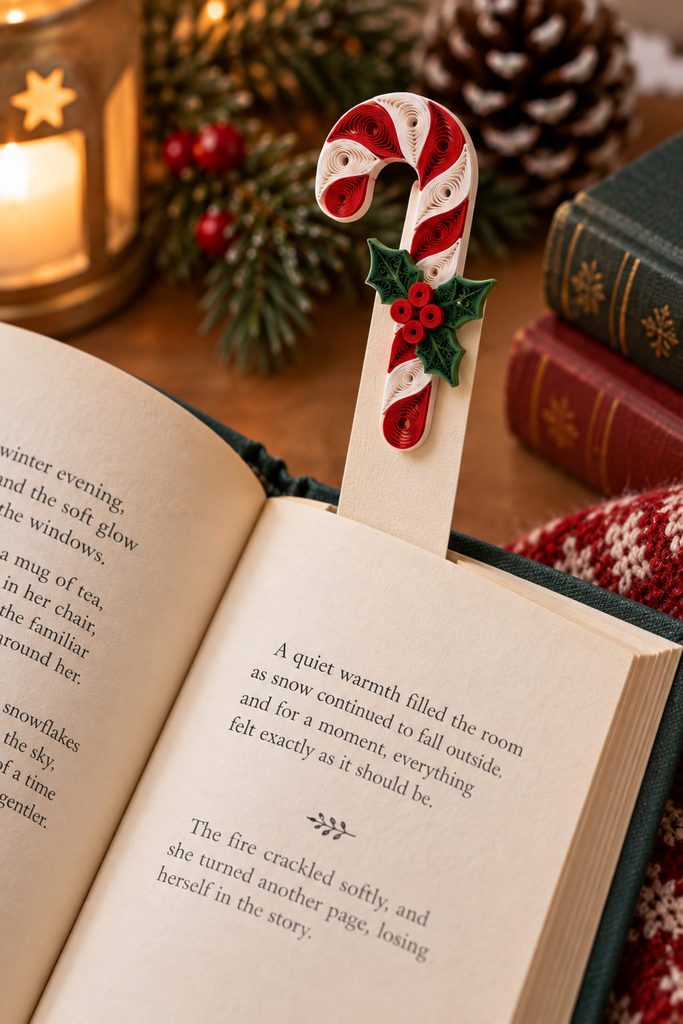
A bookmark works best when the quilling stays narrow and low. Use a sturdy cardstock strip as the spine, then build the candy-cane motif from alternating red and white curved strips or small coils along only the upper section. That keeps most of the bookmark flat between the pages while the decorative top remains visible above the book. Avoid large loose coils along the lower half because they can catch on paper and leave a thicker pressure point inside a closed book; for extra detail, add tiny holly leaves near the exposed top edge rather than extending the quilling farther down the spine.
15. Quilled Bell Mobile With a Balanced Crossbar
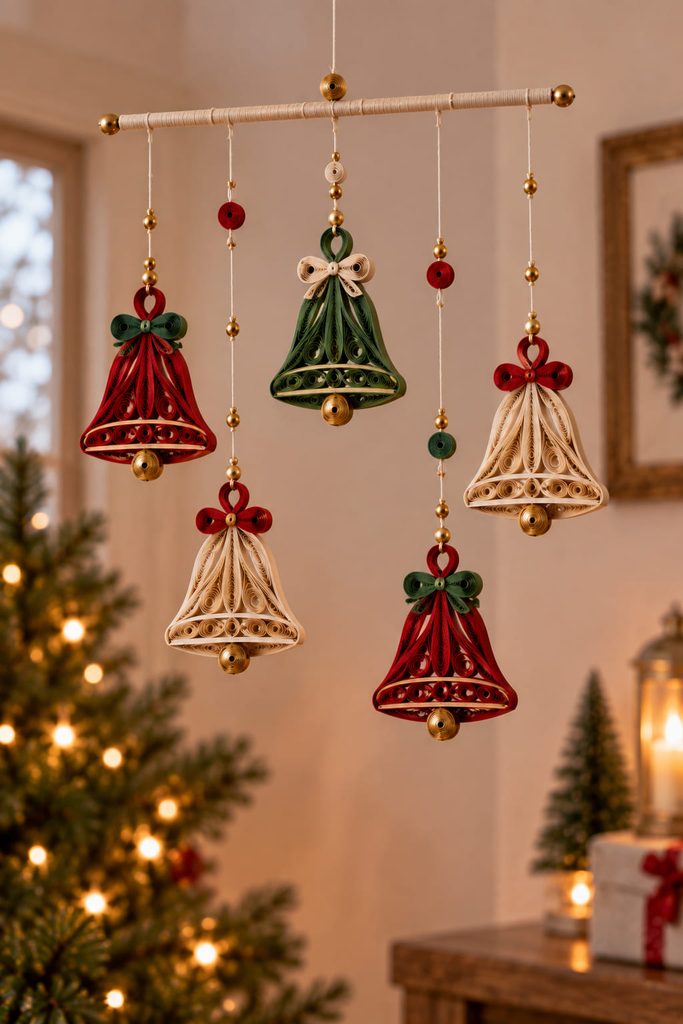
Suspending several quilled bells from one bar turns decoration into a balance problem. Make the bells as lightweight flat forms—curved scrolls for the bell outline, a tight coil for each clapper, and a reinforced closed coil at the top for suspension. The hanging loop should be structurally separate from the most delicate decorative curl so the thread pulls through a compact connection.
Build the suspension system before deciding the final positions. A narrow dowel, paper-wrapped skewer, or stiff cardstock crossbar can carry two or more bell strings, but each side must balance around the central hanging point. Slide the thread positions along the bar until it hangs level, then secure them only after the balance is correct.
Clearance matters as much as weight. Stagger the bell lengths so the paper forms can turn without colliding, and hang the mobile far enough from a wall that the bells can move slightly without brushing the surface.
Balance Before Glue: Test the complete mobile with temporary knots. If one side drops, move its thread closer to the center or reduce weight on that side; adding decoration to the lighter side is usually a less predictable fix.
How to Choose Christmas Quilling Ideas by Function
Start with the amount of handling the finished project will receive. Framed nativity art and the village luminary protect delicate coils from fingers, while a napkin ring, bookmark, gift card pocket, or countdown board needs a sturdier carrier because the quilling shares space with a practical object. Hanging pieces introduce a different question: reinforce the exact point where thread or ribbon pulls on the paper.
Technique can narrow the choice further. Loose coils and marquises suit open snowflakes, stars, wreaths, and wings; tight coils are more useful when you need compact berries, centers, clappers, or the dense shells of a domed figure. If you are new to quilling, a flat card or gift topper lets you practice consistent coil size before moving into balance, three-dimensional doming, or lighted structures.
Pick One Detail to Master First
The best starting point is the project that teaches one useful control skill. Choose the snowflake if you want to practice symmetry, the poinsettia if shaped coils are your focus, or the greeting card if you want a forgiving flat composition. Once coil size and glue placement feel consistent, the snowman, luminary, tree topper, and mobile add more demanding questions of support, depth, fit, or balance.
For another ornament-focused route through holiday paper techniques, see 16 Paper Christmas Ornaments for a Truly Handmade Tree.








