This post contains affiliate links. As an Amazon Associate I earn from qualifying purchases, at no extra cost to you. Thank you for supporting Diynify!
Christmas paper crafts for kids are much more appealing when the making itself has a payoff. Tearing paper can become snowy texture, a chain can turn into a countdown, a puppet can talk, and a folded spinner can become a tiny game instead of another decoration that is finished the moment the glue dries.
Most of these projects use construction paper or cardstock, printer paper, scissors, a ruler, crayons or markers, and a glue stick. A few need tissue paper, paper bags, string, a hole punch, or a sheet of vellum or tracing paper. Choose by the action the maker enjoys most—tearing, folding, weaving, decorating, building, or playing—and help with any cutting or punching that is beyond their current skill level.
1. Torn-Paper Christmas Tree Collage
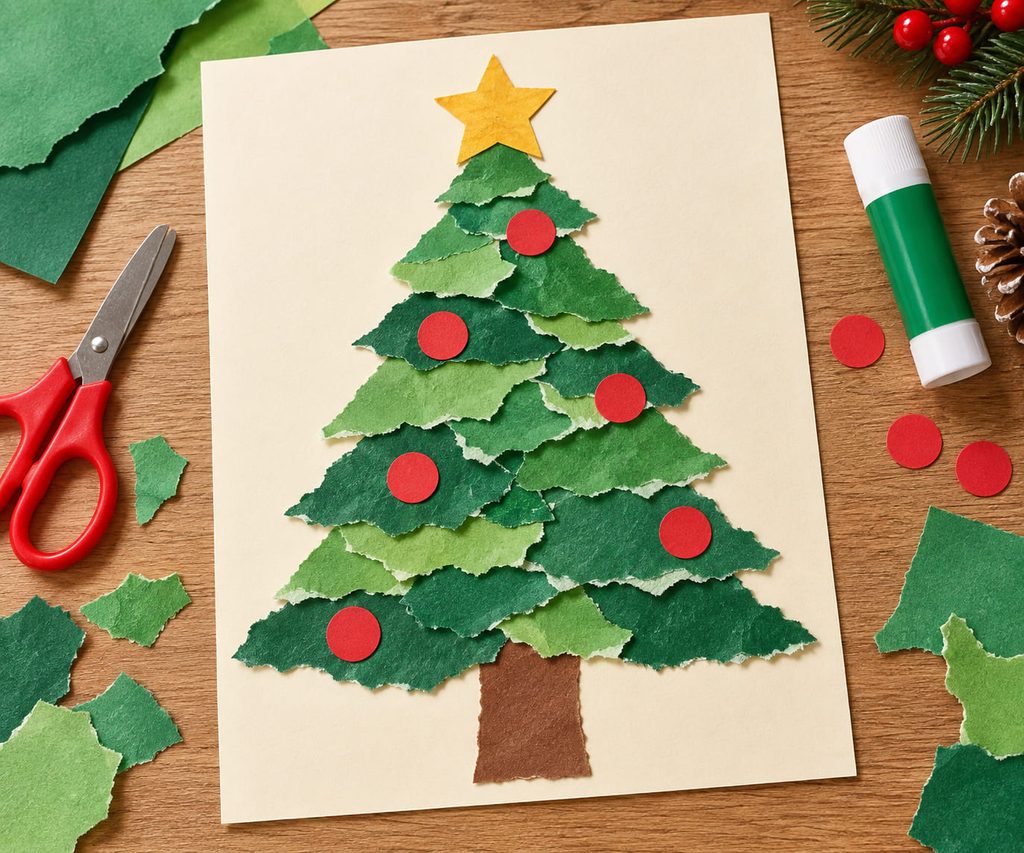
Skip the precise cutting and let torn edges do the visual work. Tear green paper into strips and chunky triangles, then overlap them from a wide bottom row toward a narrow top so the rough edges read like layers of branches. A brown trunk and a few larger paper circles or stars are enough to make the tree recognizable; packing every gap with tiny decorations usually hides the texture that makes this version satisfying. Use sturdy cardstock underneath so the collage stays flat as glue is added.
2. Accordion-Fold Trees That Stand Up
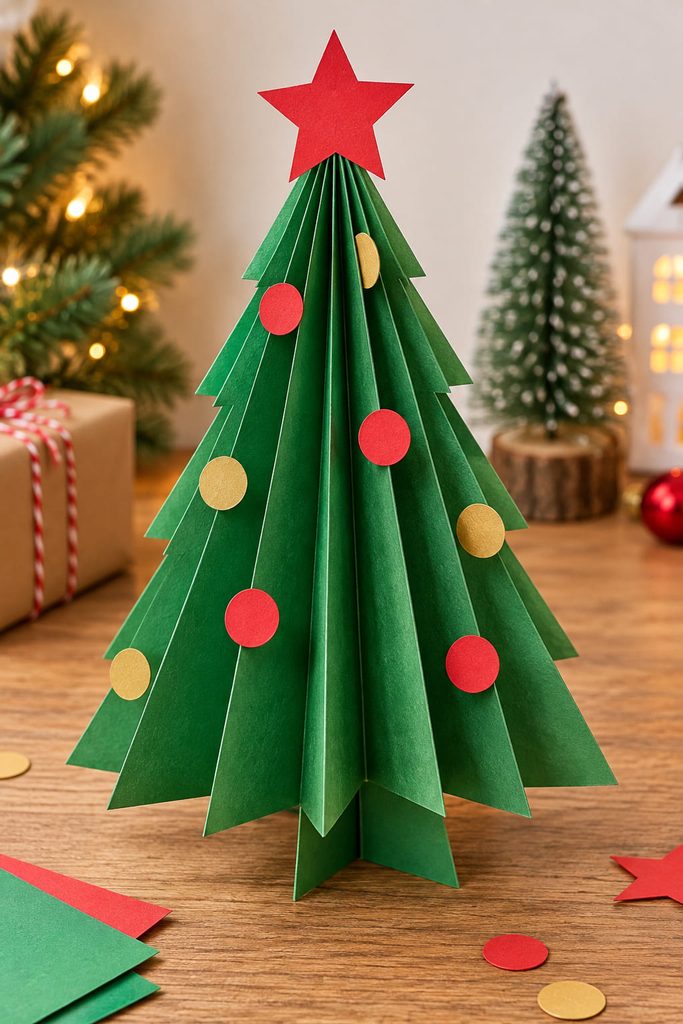
Even pleats do most of the structural work here. Fold a rectangle back and forth like a fan, trim the top to a point, and open the lower folds until the tree has enough width to feel three-dimensional. Lightweight paper makes crisp pleats, while slightly firmer construction paper holds its shape better once the tree is standing.
The part that matters is the base, not the star on top. Add a small folded cardstock kickstand behind the center crease, then set the tree on the table before decorating it. If it leans, widen the kickstand or flatten the lowest pleats rather than trying to hide the tilt with extra paper pieces.
Standing Tree Check: The undecorated tree should stay upright after a light tap to the tabletop. Fix the base first; decoration adds weight but not stability.
3. Countdown Paper Chain With Tear-Off Links
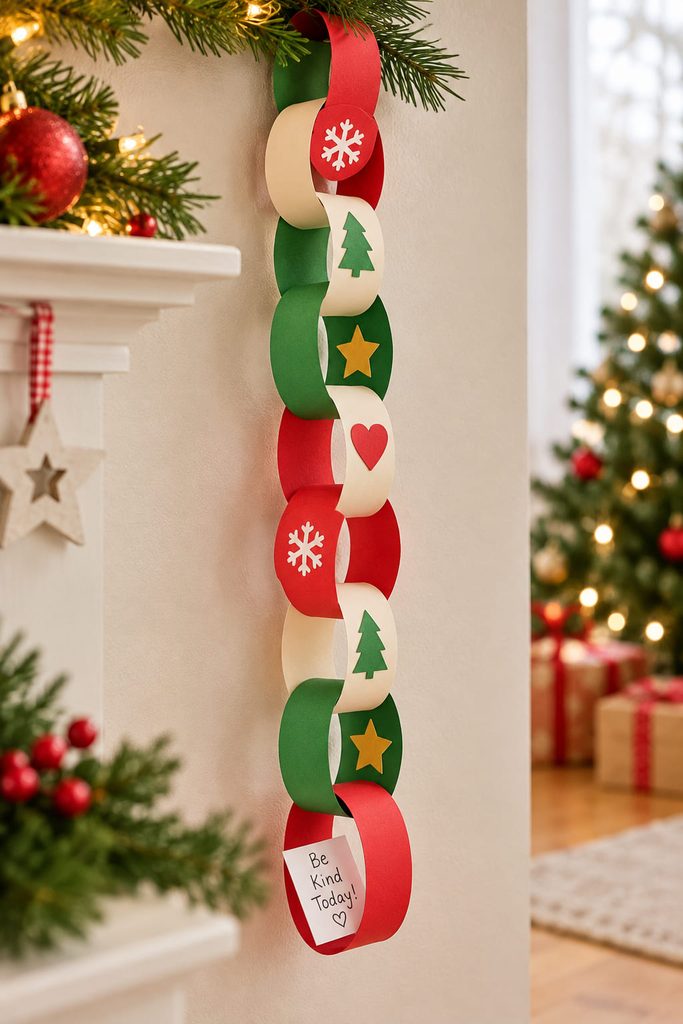
If the fun needs to last beyond craft time, turn the classic paper chain into a Christmas countdown. Each loop becomes something the child can remove, read, or act on later, so the repetitive assembly has a clear purpose.
- Cut equal paper strips and decide how many countdown links you need.
- Write a tiny prompt, joke, drawing, or holiday activity on the inside of selected strips before forming the loops.
- Close the first loop with glue or tape, then thread each new strip through the previous loop before fastening it.
- Hang the chain where the lowest link can be reached without pulling on the whole garland.
For batch-making, stack a few sheets and mark strip widths with a ruler before cutting. Consistent width matters more than perfectly matching colors because it keeps the loops moving and hanging the same way.
4. Woven Paper Stocking Pocket for a Secret Note
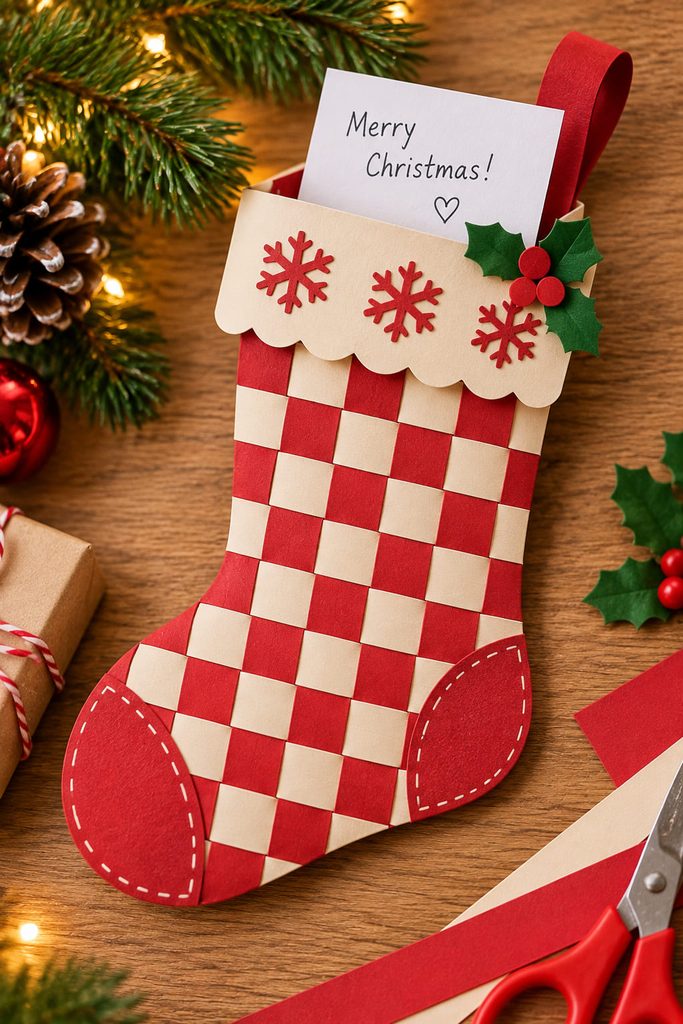
The weave is both the decoration and the challenge in this stocking. Cut paper strips of equal width, lay half vertically, then weave the remaining strips over and under to make a small rectangular panel. Alternate the starting direction on every row; if two neighboring rows follow the same over-under pattern, the surface will look stacked rather than truly woven. A dab of glue at the outer intersections keeps the panel from shifting while you trim it.
Use the woven panel only for the front. Trace a stocking shape onto sturdy cardstock for the back, trim the woven piece to match, and glue around the sides and toe while leaving the top edge completely open. That backing gives the loose weave enough support to act as a pocket instead of a floppy mat.
Slip in a folded note, paper coupon, or other lightweight flat surprise. Before adding trim around the cuff, slide two fingers into the opening; if the top has narrowed, peel back or re-trim the edge before the glue fully sets.
Pocket Opening Check: Glue belongs around the perimeter, not across the top. The finished stocking should hold a flat note while still letting it slide back out easily.
5. Paper Bag Reindeer Puppet With a Moving Mouth
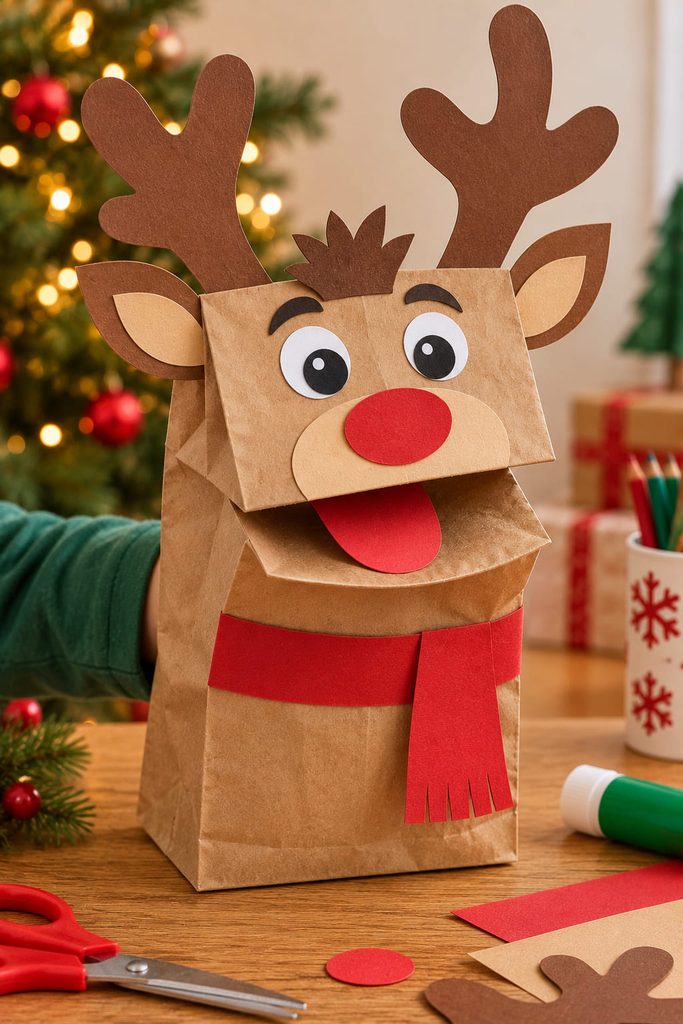
A paper lunch bag already has the hinge this project needs: the folded bottom flap becomes the reindeer’s upper face while the larger bag section becomes the lower mouth and body. Decorate the flap with eyes and a paper muzzle, then attach broad antlers high enough that they do not interfere with the fold. When a hand goes inside the bag, lifting the flap makes the reindeer “talk” without adding brads, sticks, or a separate mechanism.
Keep the features large and flexible near the mouth fold. Thick layered pieces placed directly across the hinge can stop the flap from opening freely, so save heavier cardstock for the antlers and use lighter paper around the moving section. Once it moves easily, the puppet can lead a Christmas story, tell jokes, or become a character in a homemade holiday show.
6. Spiral-Cut Christmas Tree Twirler
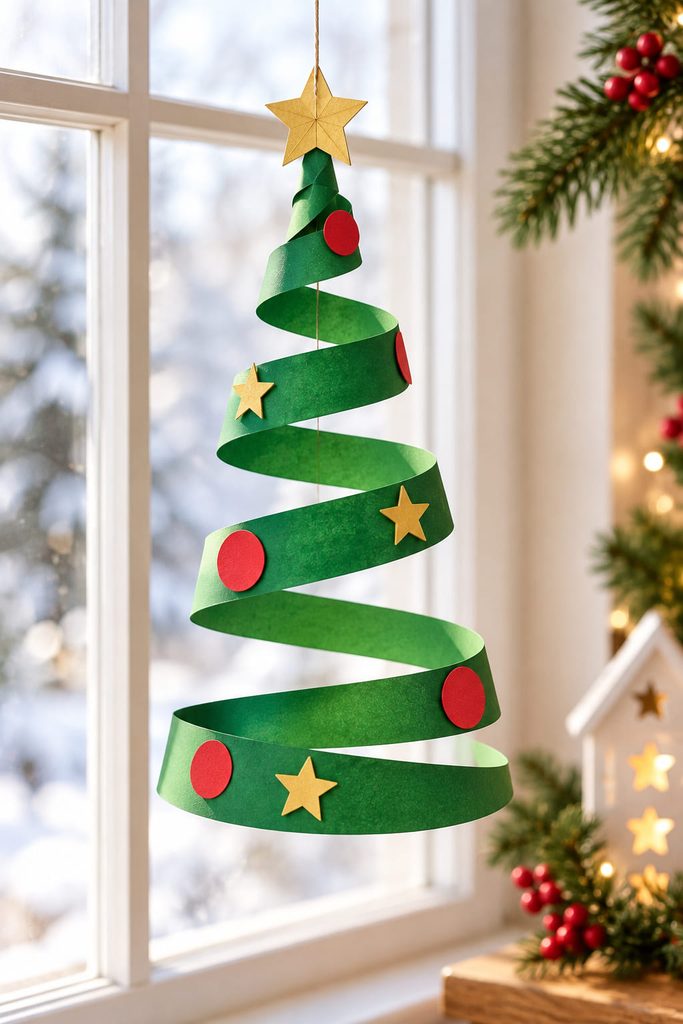
Cut a broad spiral into a green paper circle, lift the center, and gravity turns the flat shape into a hanging tree. The outside edge becomes the widest “branch,” while the spiral narrows toward the top, so a simple cut creates both the silhouette and the movement. Punch or pierce a small hanging point near the center, add thread, and keep paper decorations light enough that the spiral can still uncurl.
If the twirler does not behave the way you expected:
- It barely opens: the paper may be too stiff or the spiral bands too wide.
- It droops unevenly: heavy decorations are probably concentrated on one side.
- It hangs like a flat disk: gently separate the cut bands and give the center enough vertical lift.
- It tangles against the wall: shorten the spiral or hang it where it has more clearance.
7. Fold-and-Snip Snowflakes With a Big Reveal
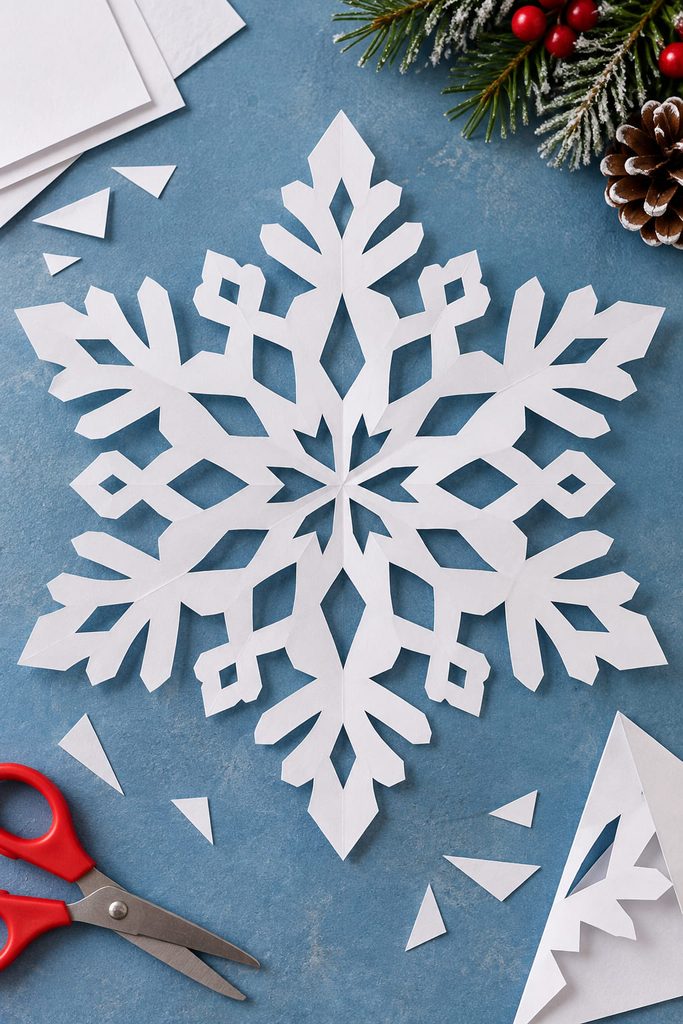
The reveal is the best part of a paper snowflake, so keep the cutting bold enough that the final shape can actually be opened without tearing. Fold thin paper into a compact wedge, snip triangles and curves from the folded edges, then unfold one layer at a time. Leaving solid bridges between cuts keeps the snowflake connected, while larger openings make the pattern easier to see from across the room. Press the finished piece under a book or between clean sheets of paper if the folds are too raised for a window or wall display.
8. Pop-Up Present Card That Still Closes Flat
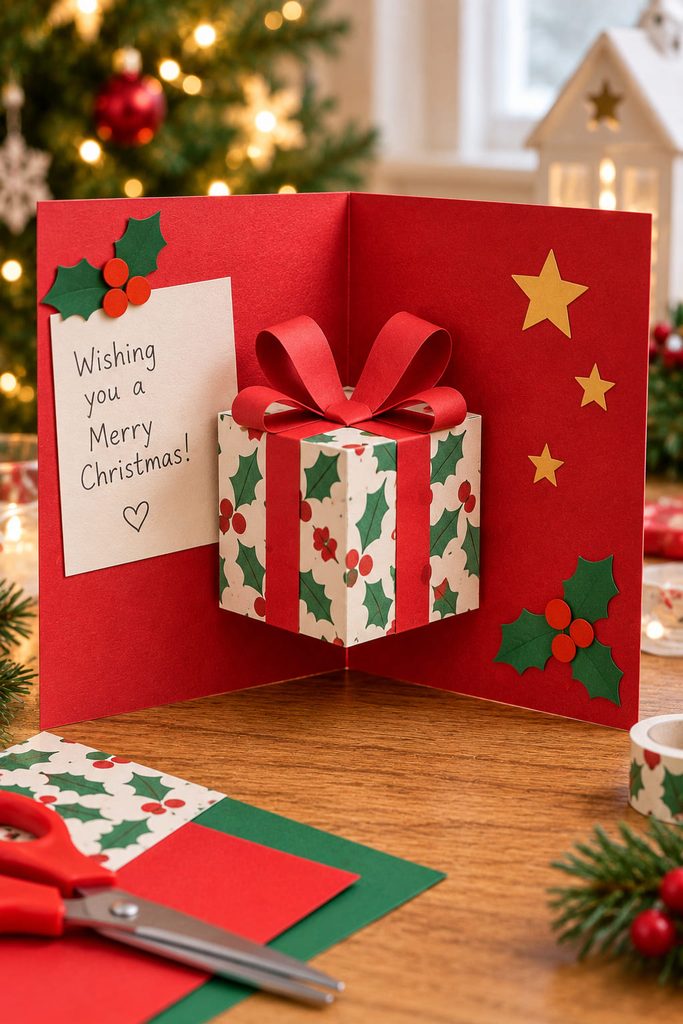
A pop-up gets frustrating when the inside piece looks great open but buckles the card shut. The simplest fix is to make the moving support first and decorate it second. Fold a cardstock card in half, then use two short parallel cuts across the folded edge to create a rectangular tab that can be pushed inward.
- Open the card and reverse the crease on the cut tab so it projects toward the reader.
- Close and reopen the card once to make sure the tab collapses cleanly inside.
- Glue a lightweight paper present shape to the front face of the tab, keeping it clear of the card’s outer edges.
- Add bows, patterned-paper strips, or a message only after the mechanism has passed the closing test.
A taller present creates more drama, but it also needs more empty space inside the card. If the gift catches on the top or bottom edge, shorten the decoration rather than cutting a deeper tab; an oversized mechanism can weaken the folded spine.
Closed-Card Check: Close the card without forcing it. No paper should protrude, wrinkle sharply, or collide with the opposite side.
9. Christmas Cootie Catcher With Two Ways to Play
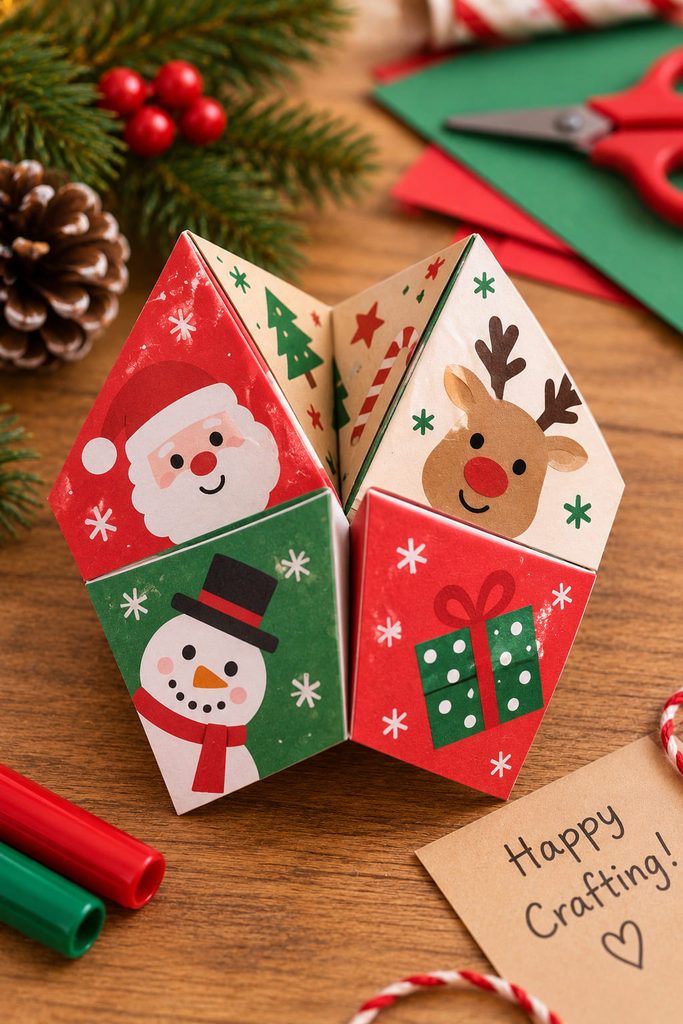
Decide what happens when the flaps open before decorating the outside. Start with a square sheet, build the familiar folded fortune-teller form, and use the inner triangles for short prompts rather than long sentences. The mechanism is more fun when every reveal asks the player to do something.
| Play Route | What Goes Inside |
|---|---|
| Silly Christmas Moves | “Waddle like a penguin,” “ring invisible bells,” “freeze like a snowman,” or another quick action. |
| Tiny Holiday Missions | “Make a paper star,” “draw a gift tag,” “give someone a compliment,” or another small task. |
Keep the writing near the center of each flap so fingers do not cover it. If the folded pockets feel too stiff to move, switch from cardstock to ordinary printer paper; the game depends on flexible creases more than durability.
10. Paper Cone Snowman Bowling
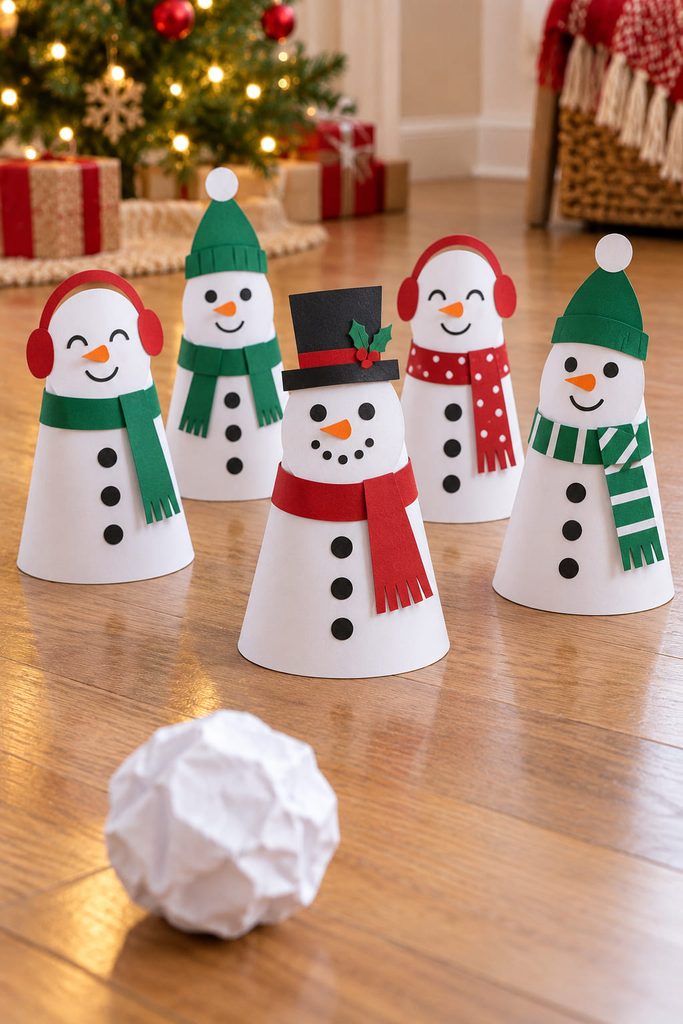
For a craft that earns a second life as a game, roll white cardstock into several low cones and turn each one into a snowman pin. Trim every cone so the open base sits flat, then add broad paper faces, scarves, or buttons without covering the bottom edge. The pins are supposed to topple, so they do not need heavy reinforcement.
Make the game work:
- Keep the snowmen close to the same height so one is not much harder to knock over.
- Use a loosely crumpled paper “snowball” rather than a hard object.
- Space the pins on a clear patch of floor, away from fragile decorations.
- Flatten any base that rocks before the first round.
The decorating and the play are equally important here: each snowman can look different, but matching cone size keeps the game from feeling random.
11. Tissue-Paper Stained-Glass Ornament Panel
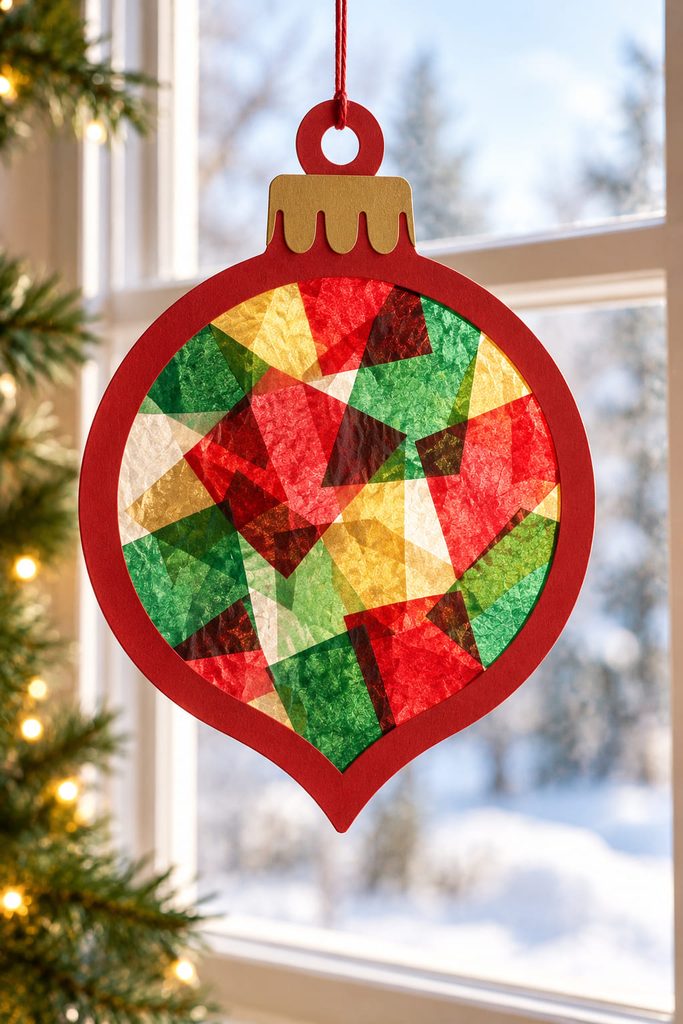
Tissue paper gets more interesting when light passes through it. Overlap small translucent pieces on vellum or tracing paper, leaving some areas pale and some richly layered, then sandwich the finished center inside a simple cardstock ornament-shaped frame. The frame gives the fragile tissue surface enough support to hang in a window without turning the whole project into a thick collage.
A small material set keeps this one manageable:
- tissue paper in two or three colors;
- vellum or tracing paper for the translucent base;
- cardstock for the outer frame;
- glue stick or small amounts of paper-safe adhesive;
- thread or narrow ribbon for hanging.
Hold the panel up to a window before adding more pieces. If every area has several tissue layers, the light effect disappears; a few almost-clear spaces make the brighter overlaps look stronger.
12. Slot-Together Name Trees for the Christmas Table
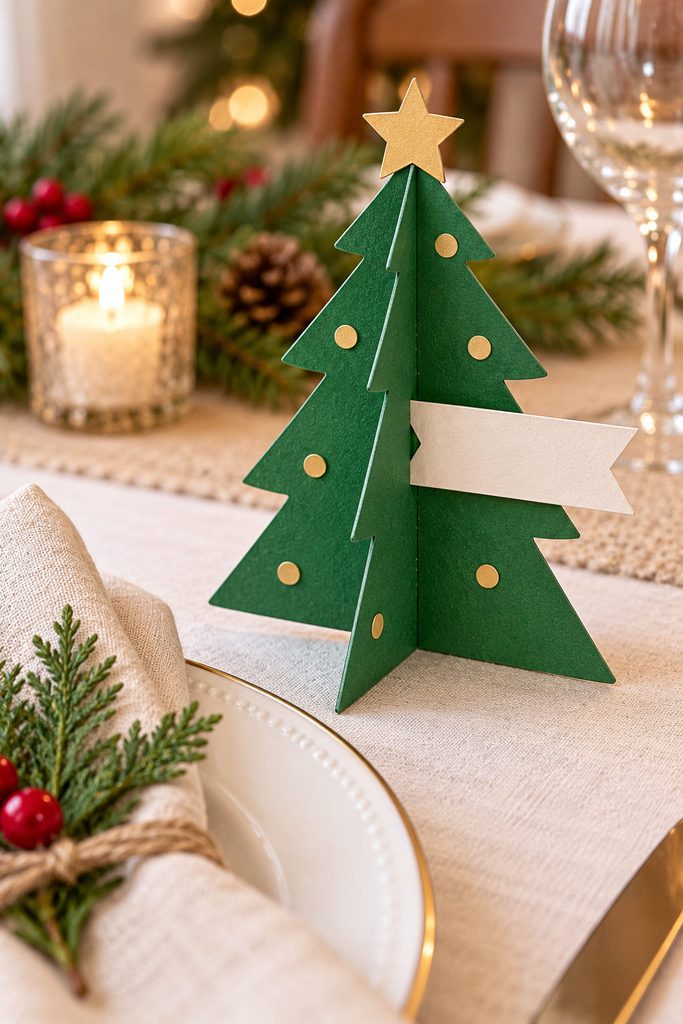
Two flat tree silhouettes can become one freestanding place marker with a pair of matching slots. Cut one tree from the top down to the midpoint and the second from the bottom up to the midpoint, then slide them together at right angles. The crossed profiles create four directions of support without glue along the center seam. Write a guest’s name on one visible side or tuck a tiny paper name flag into a branch slit. If the tree twists instead of standing square, widen the slots slightly rather than forcing thick cardstock through a cut that is too narrow.
13. Reindeer Antler Paper Headband
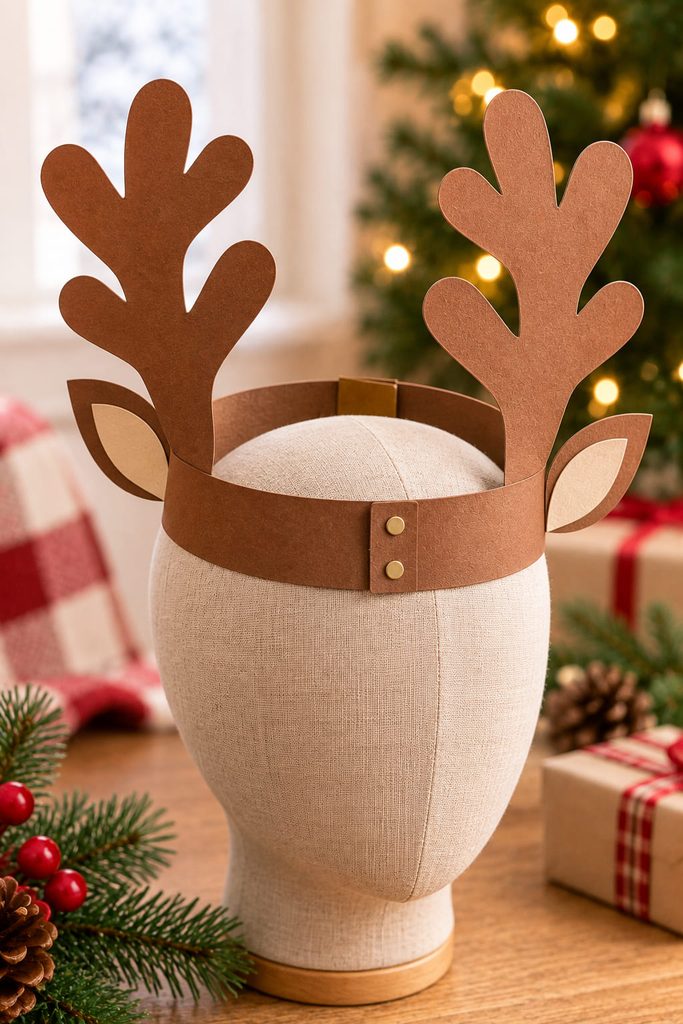
Measure the band around the wearer before the antlers go on. A long strip of cardstock should overlap comfortably and sit above the eyebrows without sliding over the eyes; tape or glue the overlap only after the fit is right. Cut broad, rounded antlers from a second sheet and attach them near the sides of the head rather than directly at the front, where they can block the wearer’s view. If the antlers flop, add a short reinforcing strip behind the base instead of making the entire headband thicker.
Fit Check: The band should stay in place without being tight, and all decoration should remain outside the wearer’s line of sight.
14. Santa-and-Chimney Paper Thaumatrope Spinner
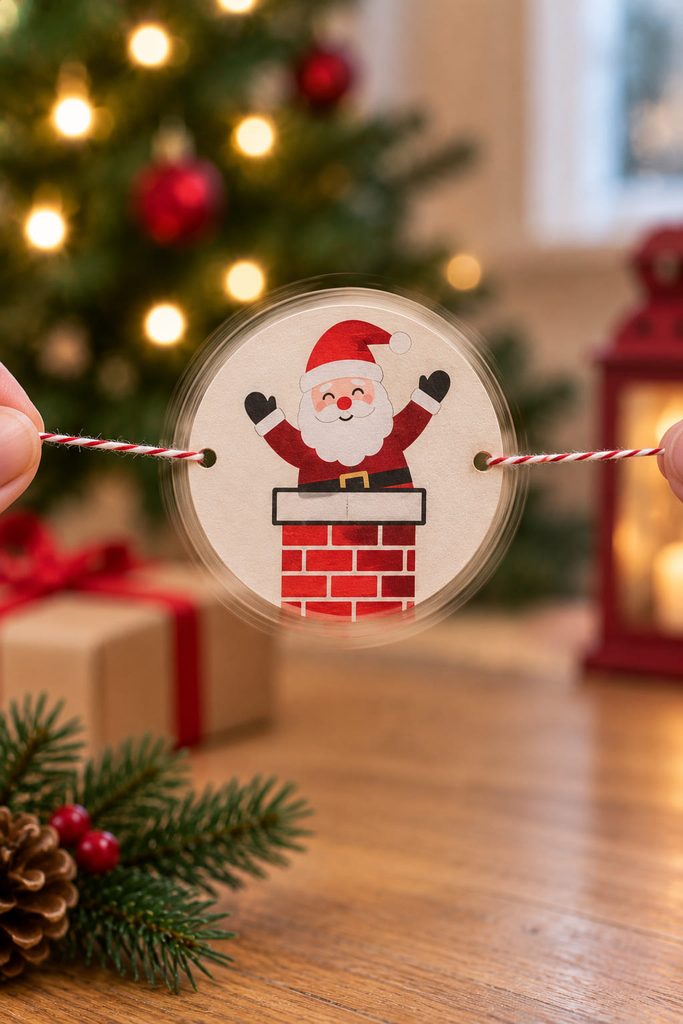
A thaumatrope turns two separate drawings into one fast-moving visual trick. Make two matching cardstock circles: put a simple Santa on one and a chimney on the other. Glue the circles back-to-back, but rotate the back image so it will appear upright when the disk flips around its horizontal axis. Punch one hole at the left edge and one at the right edge, then tie equal lengths of string through both holes.
- Hold one string in each hand and twist the disk several times.
- Pull gently outward so the disk spins back and forth.
- Watch whether Santa appears to sit in or over the chimney as the two sides alternate.
- If the images look upside down or far apart, separate the layers and correct their orientation before re-gluing.
Simple silhouettes work better than tiny details because the disk is moving too quickly for small features to read clearly. Keep both strings clear of nearby objects so the spinner has room to rotate.
Image Alignment Check: Before punching holes, flip the loose circles around the same left-to-right axis the finished toy will use. The two drawings should occupy matching positions.
15. Open-Back Paper Christmas Village for Pretend Play
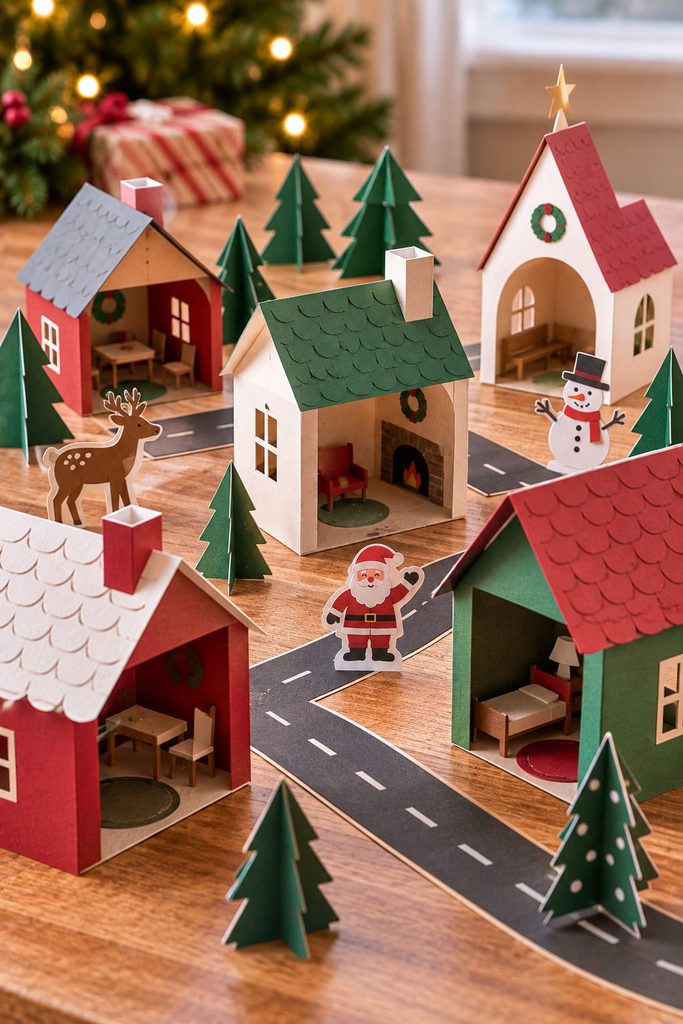
A small paper village becomes much more playable when the houses are built as sturdy shells instead of sealed decorative boxes. Score cardstock for a front wall, two side walls, and glue tabs, then add a pitched roof that bridges the side walls while leaving the back open. The open side lets small paper characters move in and out, makes the inside easy to decorate, and avoids trapping loose pieces inside a closed house.
Build one house first and use it as the scale reference for the rest. Wide wall tabs and straight bottom edges matter more than tiny window details because they determine whether the houses stay square on the table. If a roof pushes the walls outward, shorten its span slightly or re-crease the roof fold before adding more glue. Children who enjoy the decorating more than the measuring can work from pre-cut wall pieces and spend their time on doors, signs, paper wreaths, trees, and characters.
Once the houses stand reliably, arrange them as a story setting rather than a fixed display. A road made from paper strips, removable trees, and loose character pieces turn the village into something that can be rebuilt each time it comes out.
How to Choose Christmas Paper Crafts for Kids by the Kind of Fun
The easiest way to pick a project is to start with the action rather than the finished picture. Choose the torn tree or tissue-paper panel for a child who likes arranging color and texture; the snowflake, accordion tree, or slot-together tree for someone who likes folds and shape changes; the woven stocking and pop-up card for a maker who enjoys a construction challenge; and the puppet, bowling set, cootie catcher, spinner, or village when the finished craft needs to keep doing something after the glue is dry.
If several children are crafting together, pick projects that can be divided naturally. One person can tear or sort paper while another glues; paper-chain strips can be prepared in a batch; village walls can be decorated before assembly. That makes shared craft time easier without turning every project into the same group activity.
Pick the Project by What Happens Next
For the quickest start, choose a craft with an immediate reveal: the torn-paper tree, snowflake, spiral twirler, or tissue-paper window panel. For a longer build, the woven pocket, pop-up card, thaumatrope, and paper village give the construction itself more of the fun.
The best next project is the one that still has a job after it is finished—counting down, moving, standing, holding a note, becoming a game, or starting a story. For a broader mix of holiday projects that is not specifically kid-focused, continue with 17 Paper Christmas Crafts That Feel Festive, Not Fussy.