
This post contains affiliate links. As an Amazon Associate I earn from qualifying purchases, at no extra cost to you. Thank you for supporting Diynify!
Pop up Christmas cards feel extra special because the greeting changes as the recipient opens it. A flat sheet can become a tree, fireplace, snowy village, flower, tunnel scene, or tiny gift presentation simply through folds, hinges, tabs, and carefully planned clearance. The best ideas are not just dimensional; the movement itself supports the Christmas scene.
Most of these projects use folded cardstock, decorative paper, scissors or a craft knife, a ruler, a scoring tool, and paper glue. A few work better with lighter paper for honeycomb or spiral elements, and the gift-card design needs a gift card for fit testing. If you are new to pop-ups, start with a V-fold, accordion, or simple step. Save tunnels, box cards, and multi-part mechanisms for when you are comfortable testing the closed state before final glue.

1. V-Fold Christmas Tree Forest Card
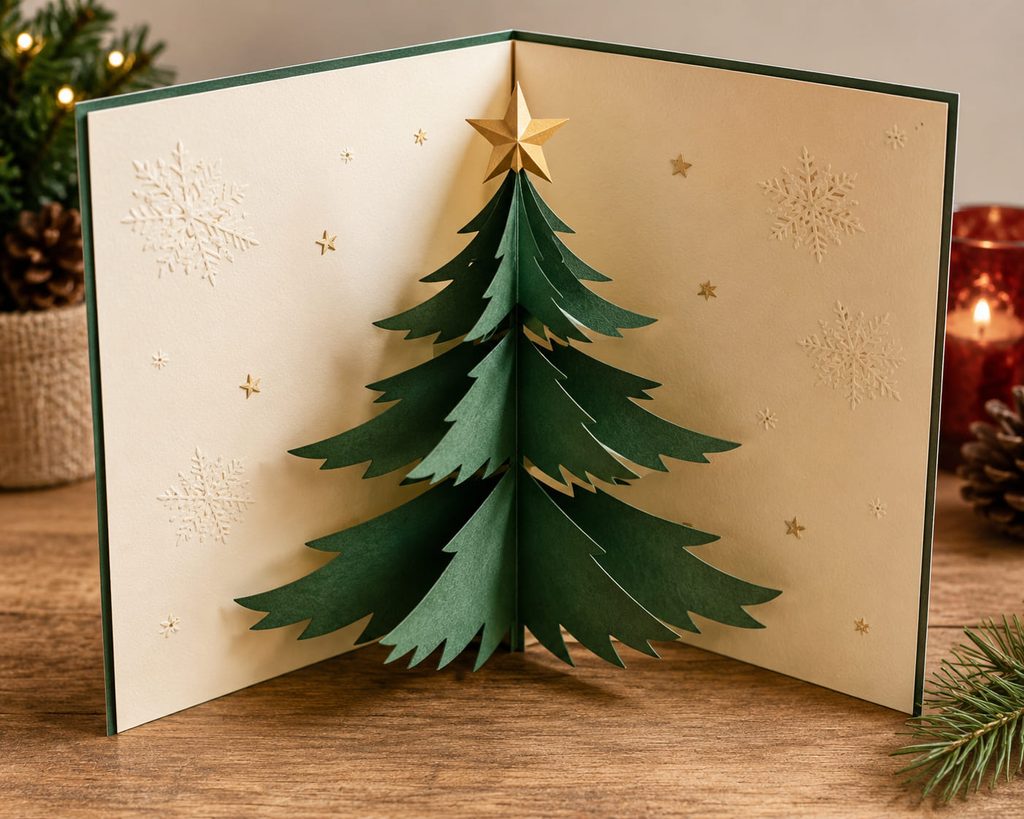
Open the card and the tree should rise because the branches are attached across the center crease, not simply layered on top of it. Cut three or four green branch tiers, fold each into a shallow V, and glue the tabs so every point aims into the card fold. When the covers spread, the angles open and push the tiers forward.
Keep the lowest tier widest and leave vertical space between branches. That gap lets each layer collapse without catching the one below it. Keep the top star small so the whole silhouette can fold completely inside the closed card.
2. Pop-Up Fireplace Mantel Card
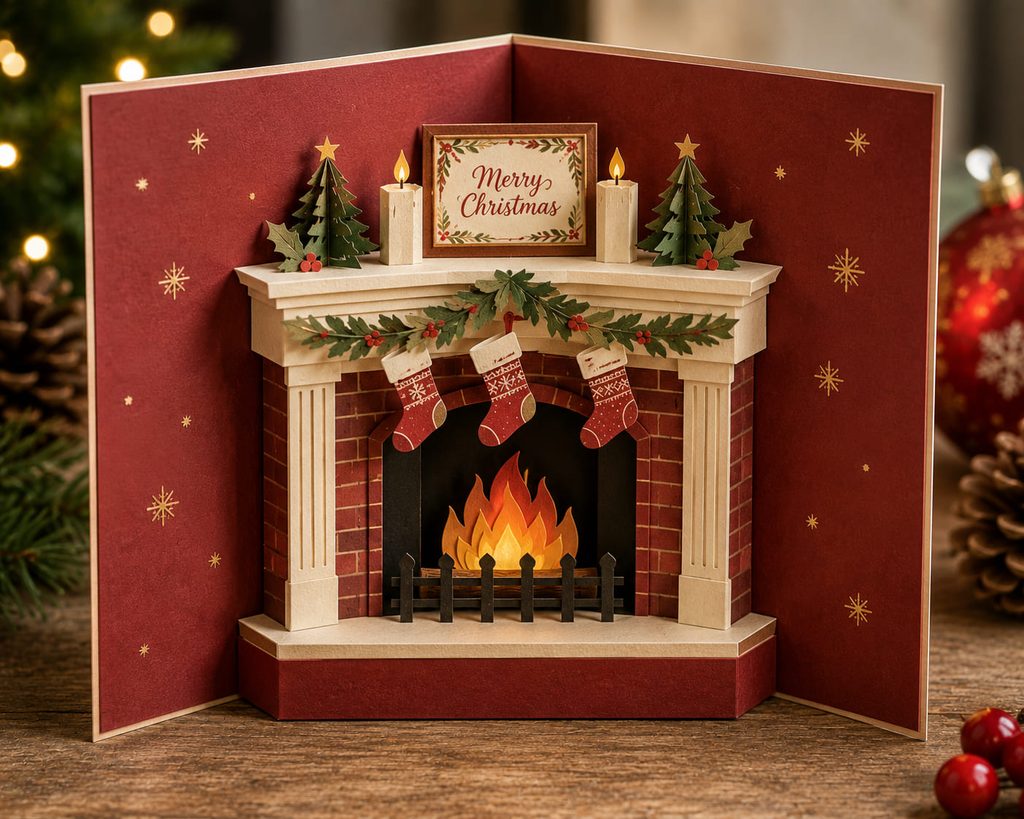
A fireplace scene only feels convincing if the mantel has real depth. Build the firebox from a rectangular step fold cut into a separate insert, then mount that insert across the inside center of the card. The step projects forward when the card opens, creating a ledge for a paper mantel while the back wall stays flat enough for stockings, greenery, or a small framed greeting.
The important measurement is not the height of the fireplace; it is the distance the step projects from the fold. Too deep, and the front edge can collide with the opposite card panel when you close it. Too shallow, and the mantel reads like a flat strip. Dry-fold the insert before adding decoration, then trim the projection if the covers resist closing.
Mantel Clearance Check: Close the undecorated card slowly while watching the outer edge of the step. It should disappear between the covers without buckling, scraping, or forcing the spine open.
3. Accordion Snowy Village Card
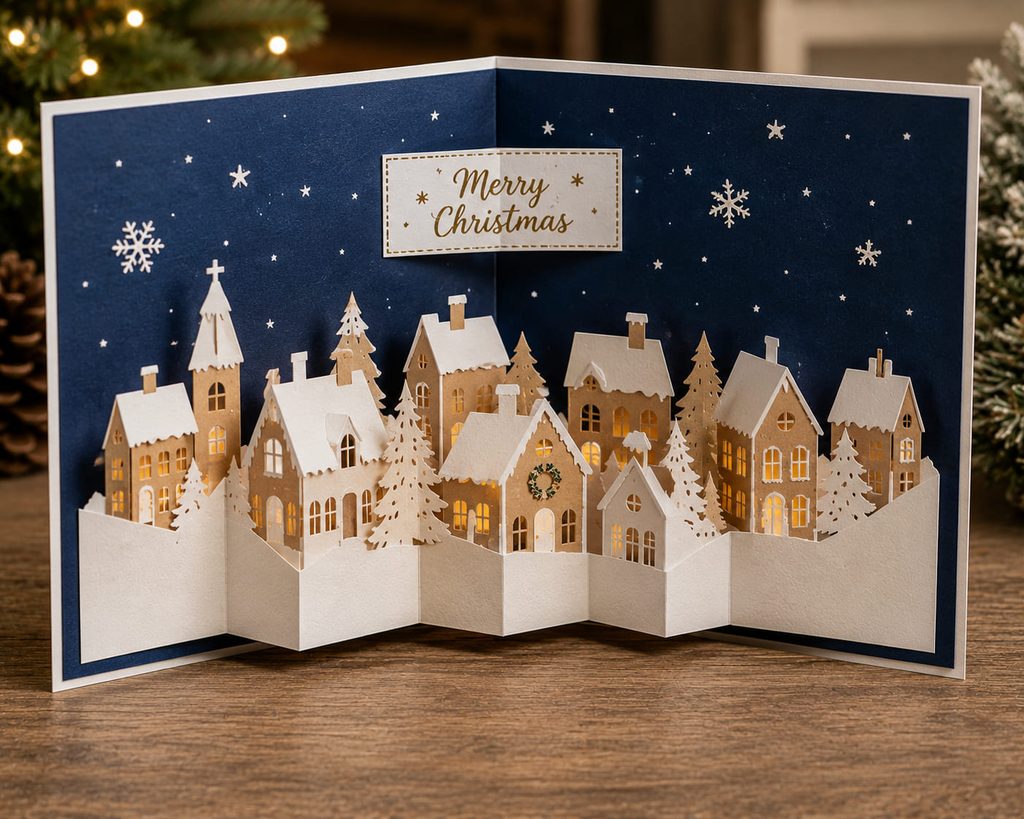
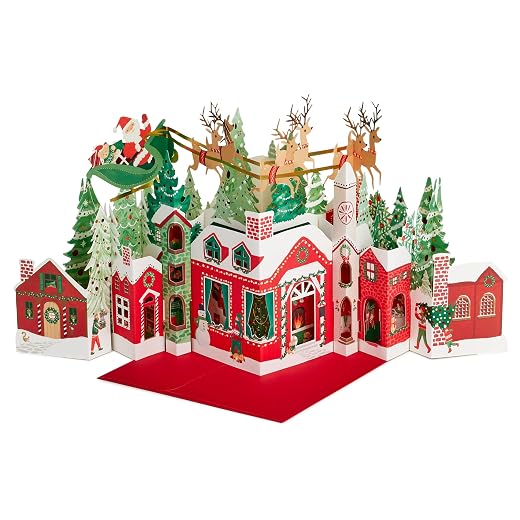
For a card that reads like a whole snowy street, use one accordion strip instead of building separate pop-up houses. The back-and-forth folds create their own depth, while a few rooflines and windows keep the silhouette readable.
- Score a long strip into equal panels and fold it into a concertina.
- Trim the upper edge into a simple sequence of roofs and chimneys while the strip is opened flat.
- Glue only the first and last panels to opposite sides of the card interior, keeping the center crease clear.
- Close the card once before adding tiny trees or snowbanks, because decorations that cross a fold can stop the accordion from compressing.
This structure is useful when you want several buildings to appear at once without stacking multiple independent mechanisms. The village expands sideways as the card opens, so it feels panoramic rather than tall.

4. Stair-Step Christmas Present Card
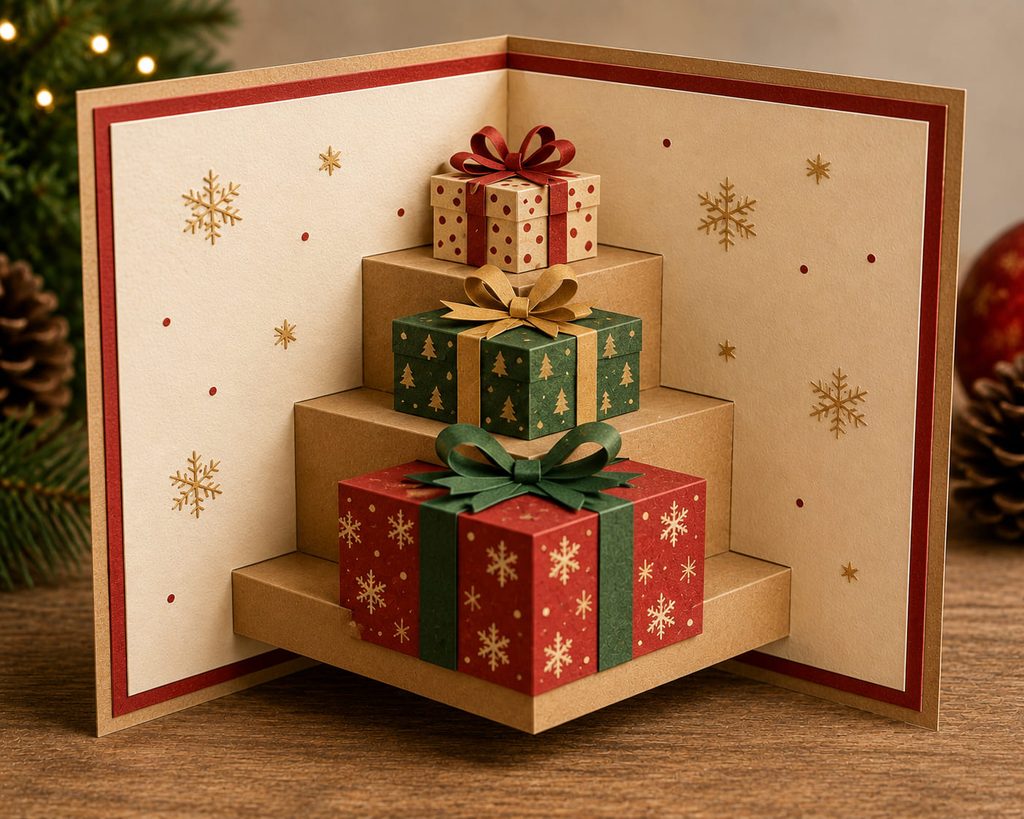
To make stacked presents read as separate boxes, give them different levels instead of one thick cluster. Cut two or three parallel step folds into an inner card panel, with the lowest step projecting farthest. Glue a paper gift box to the face of each platform and keep bows thin enough that the next step can pass over them during closing.

Use the steps to control hierarchy: a wide box on the bottom, a medium box above it, and one small package near the top gives the eye a clear climb. The card does not need many patterns. A few contrasting papers plus narrow ribbon strips let the changing platform depth do most of the visual work.
5. Spiral Snowflake Pop-Up Card
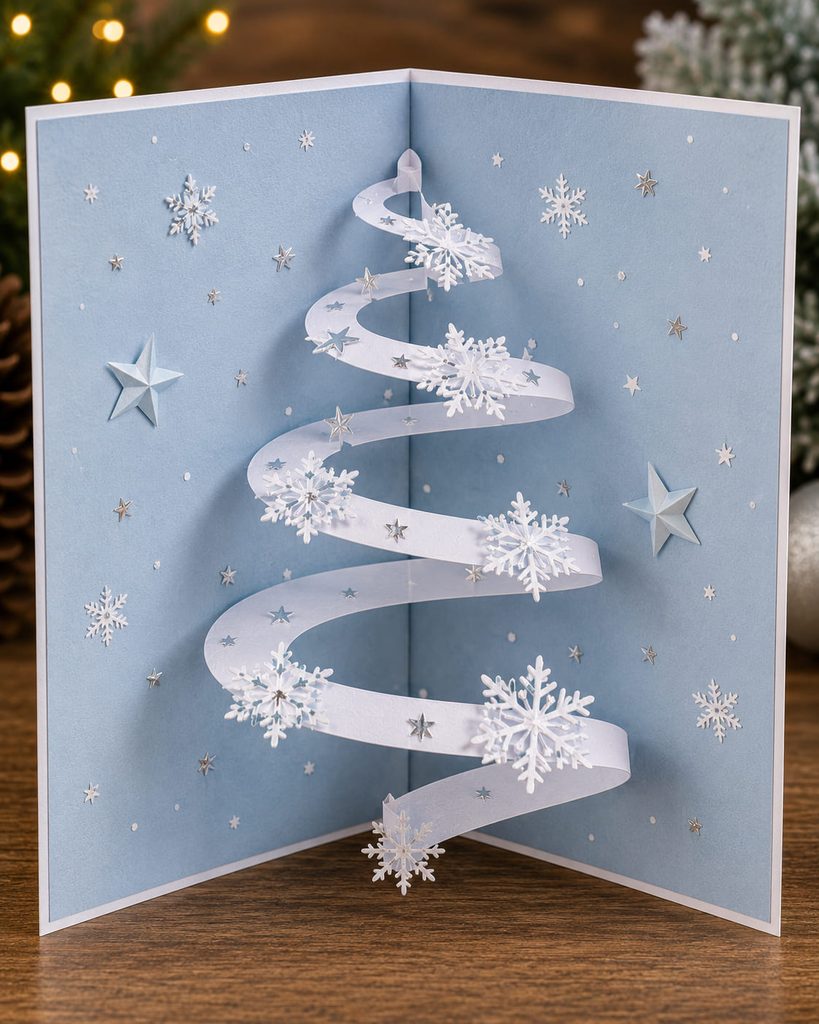
The surprise here comes from a single spiral cut. Start with a paper circle, cut inward in a continuous coil, and attach the outer end to one inside panel and the center end to the opposite panel. As the card opens, the spiral stretches into the space between the covers; when it closes, the coil settles back into a flat circle. Snowflake tips or tiny punched stars can decorate the spiral, but keep them light so they do not drag the coil sideways.
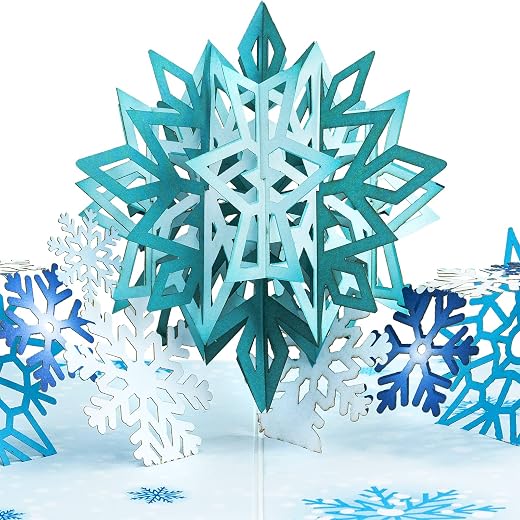
If the spiral twists instead of opening cleanly:
- If the center flips over, the inner attachment point is too far off the card’s centerline.
- If the coil sags, shorten the spiral or use slightly firmer paper.
- If the layers snag, reduce bulky decorations near the narrow inner turns.
The motion is the feature, so a quiet background works better than a heavily layered scene.
6. Honeycomb Ornament Pop-Up Card
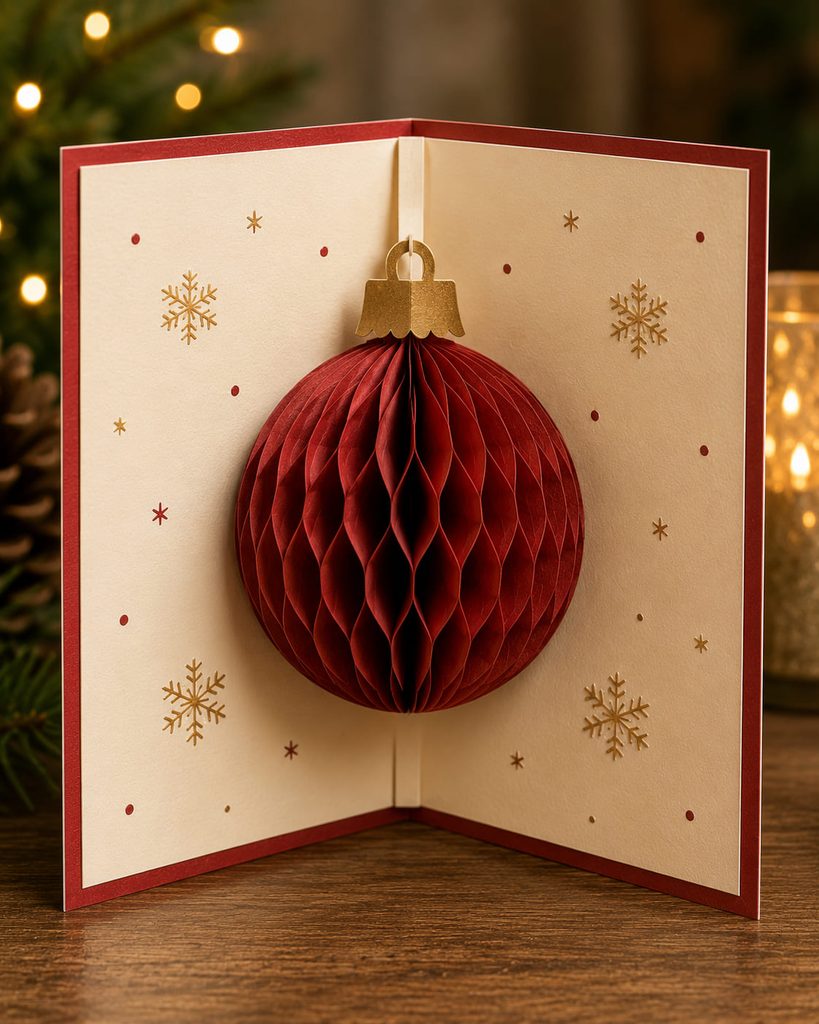
Use honeycomb paper when you want a rounded ornament that still compresses almost flat. Cut a symmetrical ornament silhouette from a small stack of lightweight paper shapes, glue them in alternating narrow bands so adjacent sheets join at different points, then open the stack into a half-honeycomb form and attach its two flat outer faces inside the card. The cells expand when the card opens and close back together when the covers meet. Keep the ornament centered near the fold and avoid a heavy cap or dangling embellishment; the repeating paper cells already create enough texture and volume.
7. Box-Fold Reindeer Face Card
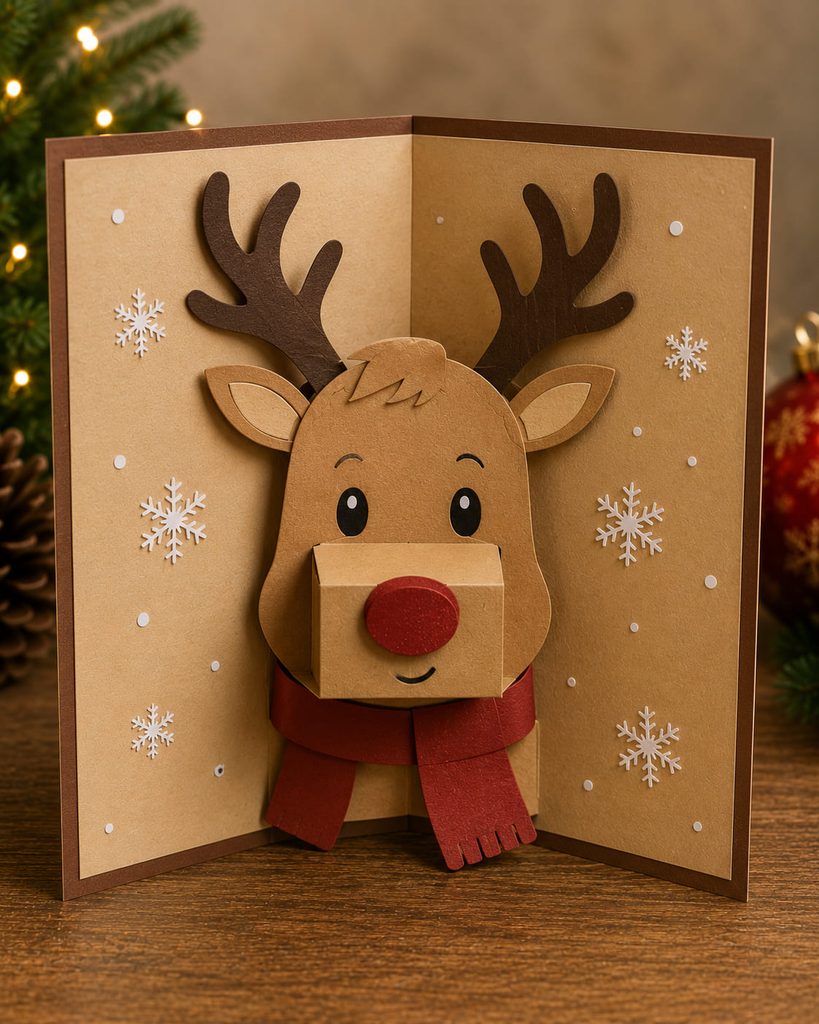
If the reindeer muzzle looks pasted on, the card loses the little sculptural moment that makes the face fun. A shallow box fold can push the nose forward while the head and antlers remain on the back panel.

Choose the muzzle by the finish you want:
- Soft and rounded: use a wide, low rectangular box with a curved muzzle shape attached to its face. This leaves more room for cheeks and nostrils.
- Clean and graphic: make the box narrower and let a dark paper nose cover most of the front plane. This route closes flatter and keeps the silhouette simpler.
Whichever route you choose, test the antlers separately. They should sit outside the path of the projecting muzzle when the card closes, because a beautiful antler shape is not useful if it catches the box edge every time the recipient folds the card.
8. Layered Tunnel Nativity Card
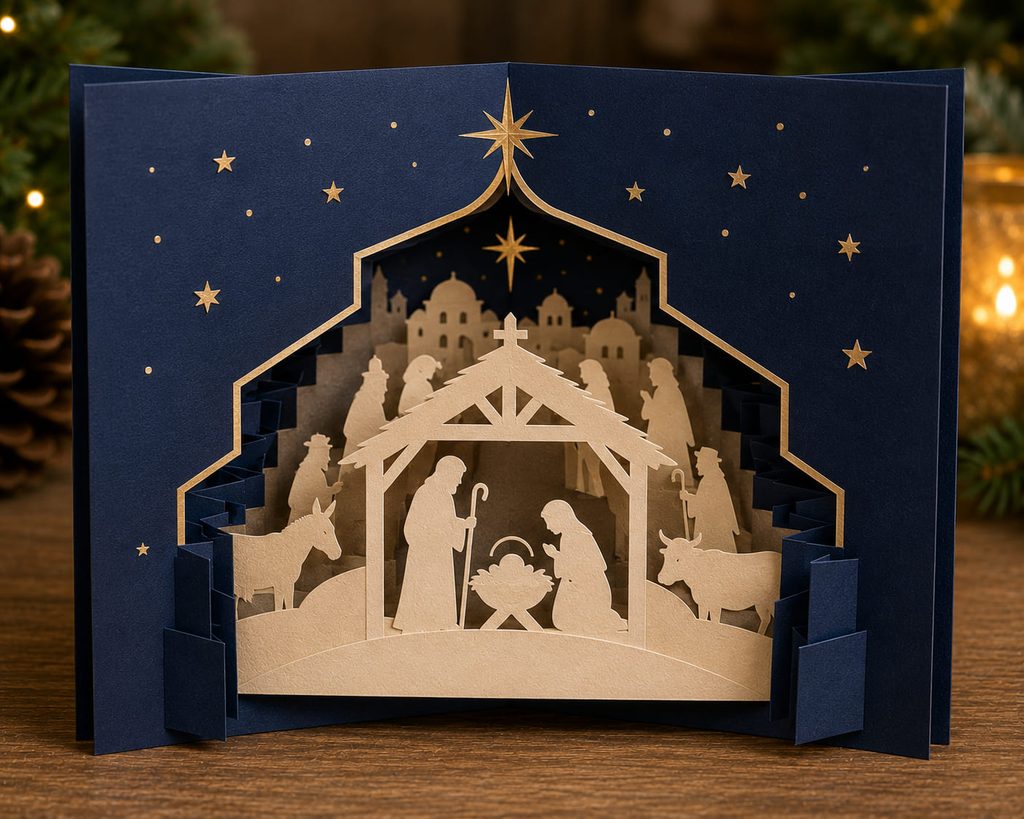
Because the figures need to stay readable, a nativity scene benefits from controlled depth rather than overlapping silhouettes. A tunnel construction solves that by spacing several cut panels apart with folded side accordions. The front opening can frame a star or stable arch, the middle layer can carry the main figures, and the back layer can hold a quiet night-sky shape.
Build the side spacers first. Two matching accordion strips should have the same fold count and fold depth; glue each scene panel into corresponding valleys so the layers stay parallel. Keep the lowest edges aligned, then compress the tunnel gently before attaching the assembly inside the card. Uneven side spacing is the usual reason a tunnel twists.
Layer-Spacing Test
- Open the card to the display angle and check that no figure disappears behind the front aperture.
- Close it and confirm every panel nests between the covers without bowing.
- If one side closes first, detach that side before the glue fully sets and realign the accordion valleys.
This is a good project for crisp cardstock and patient scoring. The reward is controlled depth: each layer has a job, and the negative space between them remains visible.
9. Open-Center Pop-Up Wreath Card
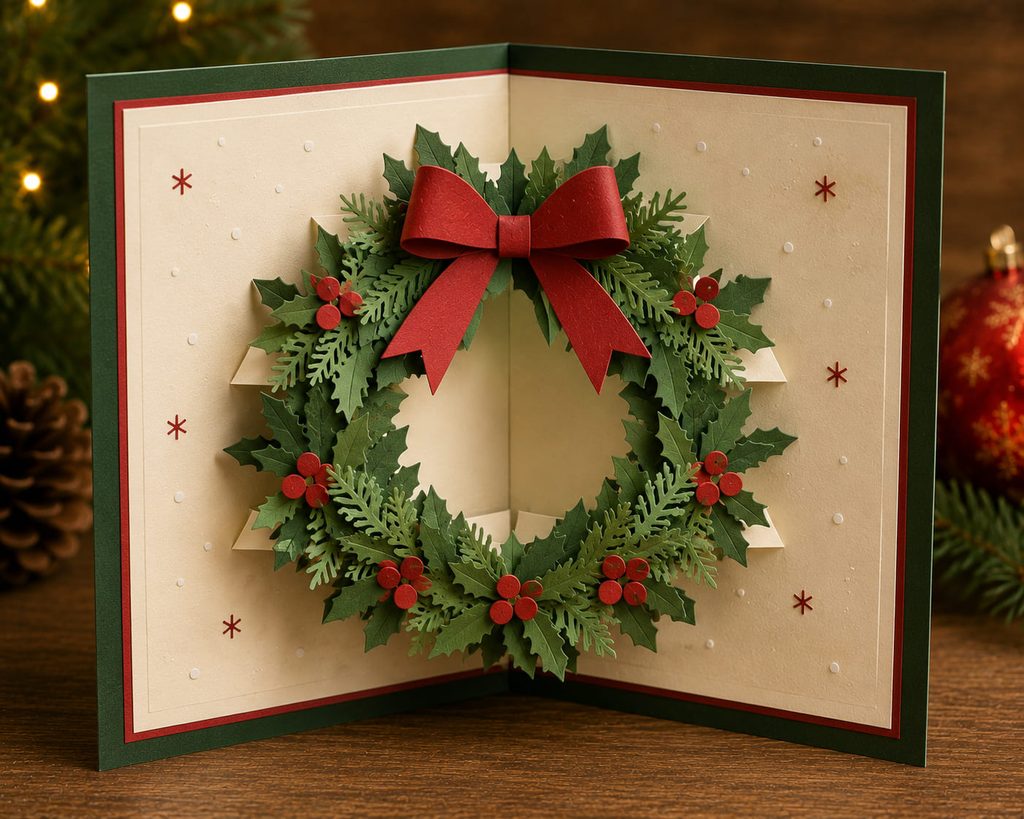
A wreath needs an open center to read clearly, so the pop-up structure should protect that negative space instead of filling it with tabs. Build the ring from two or three curved paper segments mounted on small V-fold hinges around the inside center crease. Each segment lifts slightly forward as the card opens.
Before gluing greenery details, check:
- the center hole stays visibly open at the normal viewing angle;
- hinge tabs hide behind the ring;
- neighboring segments do not lock together;
- the wreath stays inside the card edges when closed.
Use berries or a bow sparingly. The circular opening is what makes the mechanism legible.
10. Curved Snow Globe Pop-Up Card
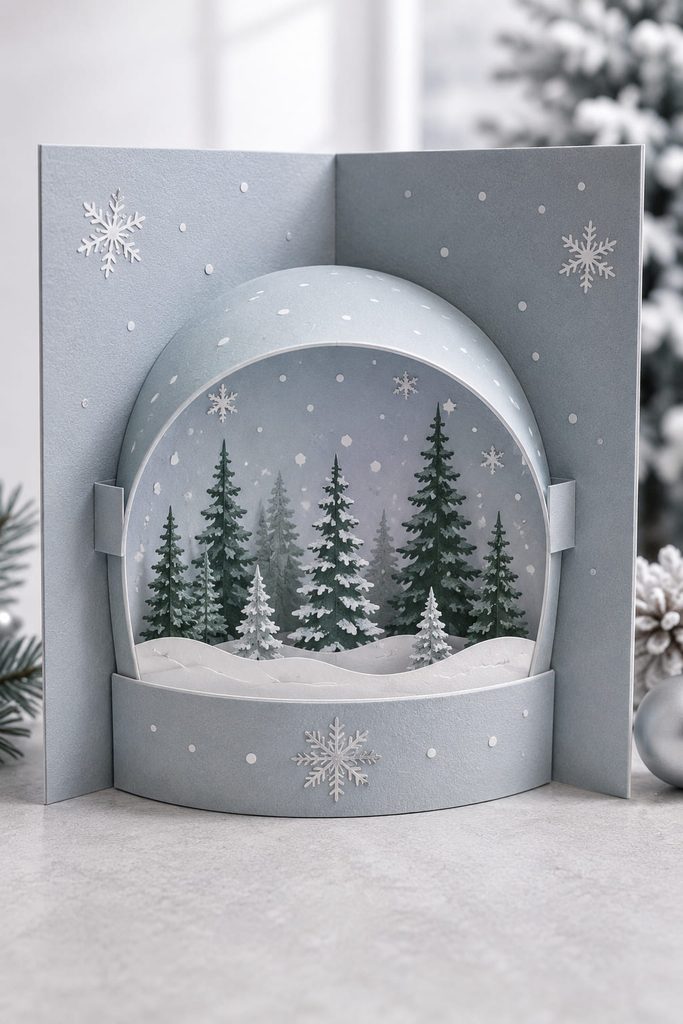
For a snow globe card, let the paper curve create the illusion of glass. Cut a wide dome shape from medium-weight cardstock, score narrow tabs along the two side edges, and attach those tabs so the dome bows forward from the back panel. A flat snowy scene can sit behind it, while a narrow base strip covers the lower attachment area.
Do not force a sharp crease across the dome itself; that would turn the globe into a faceted box. Let the curve form through the side-tab spacing instead. If the dome pushes too far forward, shorten the distance between its attachment tabs rather than trimming the top silhouette.
Keep the Curve, Not the Bulk: Close the card before adding snowflakes or sequins. Anything thicker than the dome’s natural compressed profile can create a hard bump that prevents the covers from meeting evenly.
11. Blooming Poinsettia Pop-Up Card
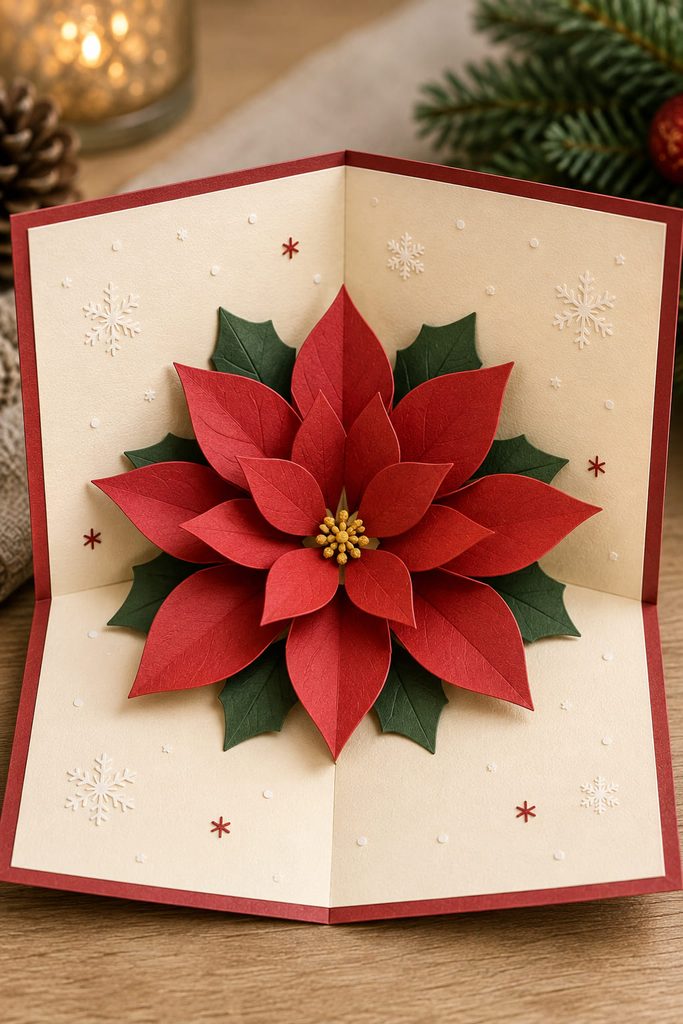
Instead of building a tall tree, let the card opening itself make the poinsettia bloom. Arrange folded petal pairs around a small center point, with each pair attached on a shallow angle fold. As the covers open, the angles spread and lift the petals into a loose radial flower; closing the card draws them back toward the center.
Petal order matters more than petal count. Place the broad outer petals first, add a smaller inner ring, and keep the central cluster low so it does not act like a spacer between the card halves. A cream or deep green interior gives the red paper enough contrast, while a few narrow leaf shapes can stay flat behind the flower. The result is more botanical than architectural, which makes it a strong choice when you want the pop-up to feel soft rather than engineered.
12. Cross-Slice Christmas Star Card
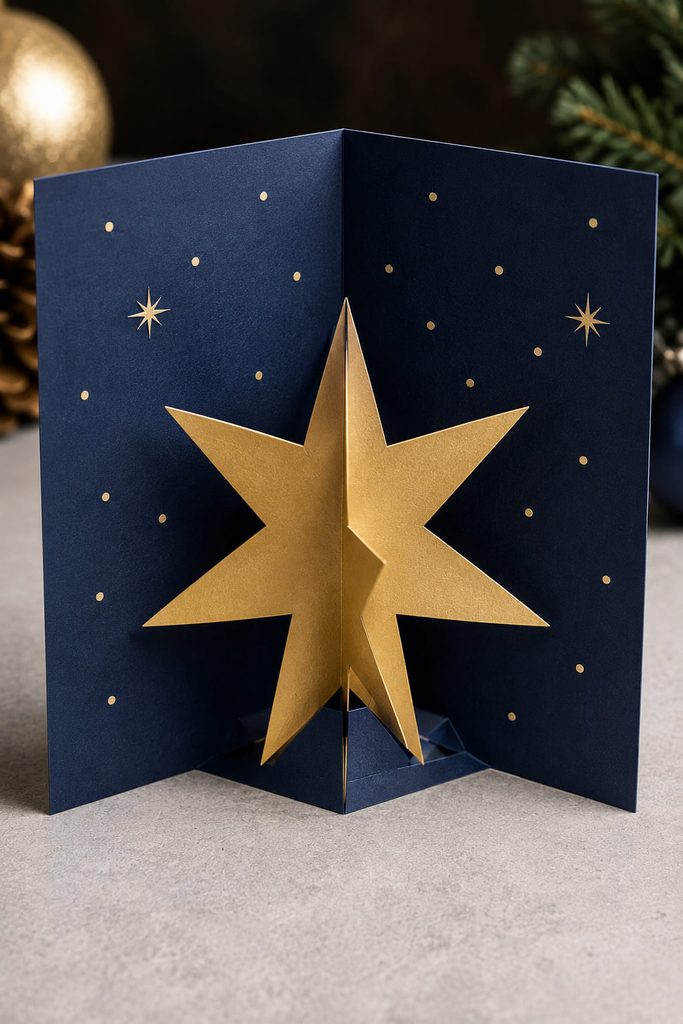
A Christmas star can rise from a compact cross-slice structure made from two slotted pieces. Cut matching star profiles, slit one halfway down from the top and the other halfway up from the bottom, then slide them together so they intersect at right angles.
- Assemble the star before attaching it to the card and make sure the two pieces sit square.
- Add small foldable tabs to opposite points or to a narrow base strip beneath the star.
- Position the tabs across the card center so the star can rotate slightly as the covers close.
- Test the closed state before adding any outer rays; long points may need trimming to stay inside the card edges.
This works best with a bold, simple star outline. Fine cutwork weakens the narrow areas around the slot, while a clean silhouette lets the crossed planes create the dimensional effect.
13. Freestanding Gingerbread Box Card
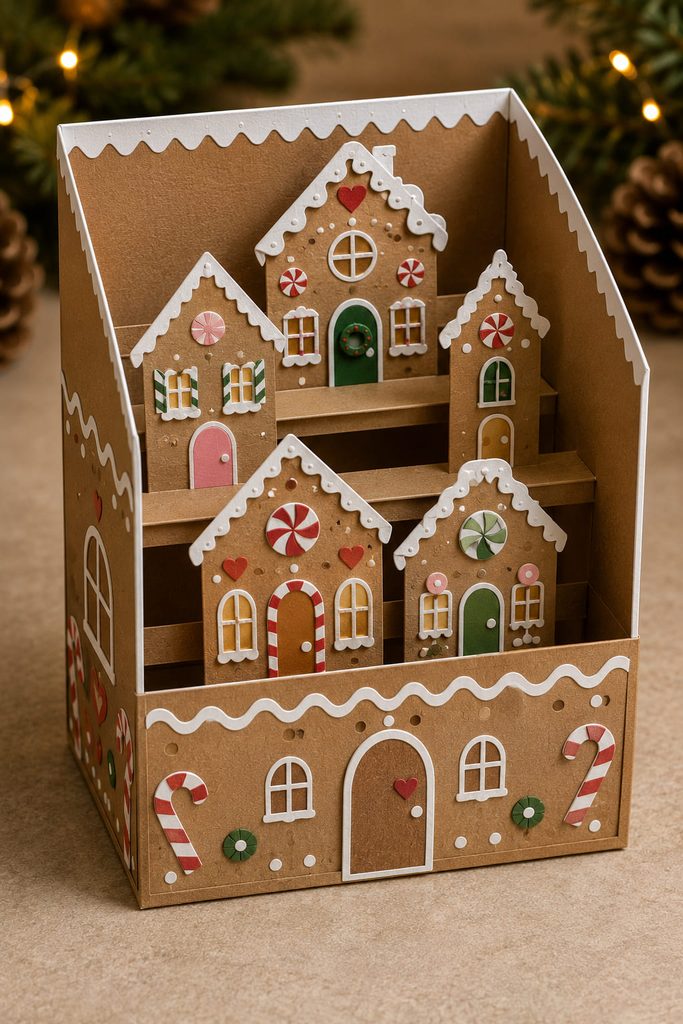
Once opened, the box-card format becomes a tiny gingerbread display that can stand on a shelf. Build a rectangular open-top sleeve with scored corners and a glued side tab, then add narrow interior bridge strips from front to back. Gingerbread-house façades, candy shapes, and snowy roof pieces attach to those bridges at different depths, while the box itself provides the footprint that keeps the scene upright.
The critical feature is fold direction. The box must collapse sideways, and every bridge needs to fold in the same direction without crossing another layer’s path. Dry-assemble the walls and bridges, flatten the structure both ways, and choose the smoother collapse direction before committing to glue. Decorations should stay within the flattened outline so they do not protrude beyond the envelope area.
A box card is different from a center-fold insert because it becomes a freestanding object after opening. That makes it worth the extra setup for a recipient who may keep the card on a mantel, desk, or holiday shelf.
14. Lifted Angel Wings Pop-Up Card
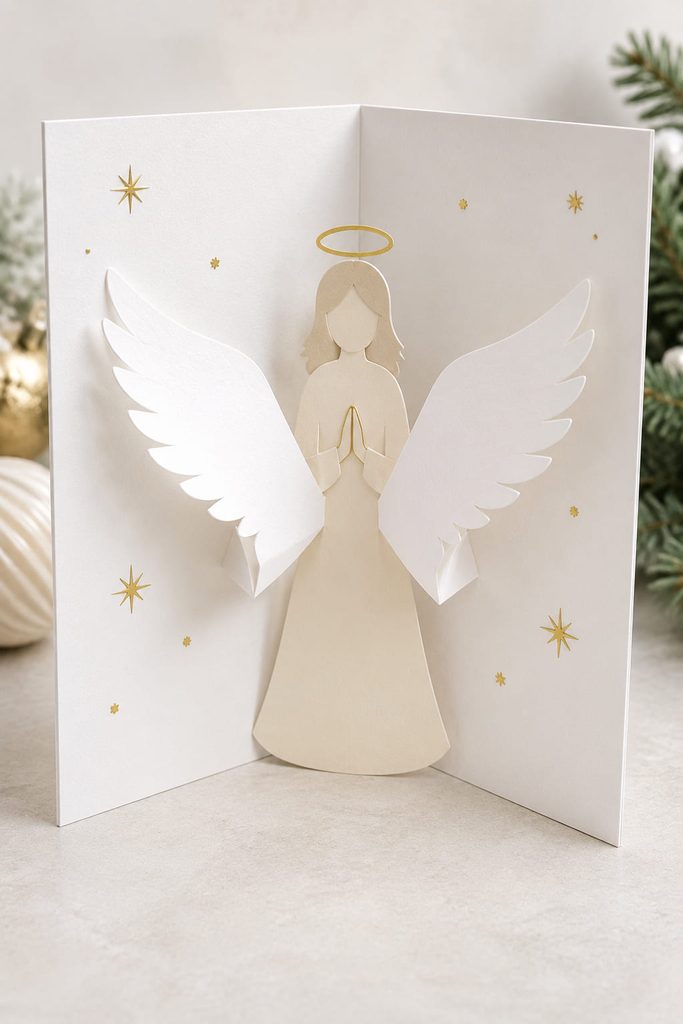
Keep the angel body quiet and let the wings perform the movement. Mount two broad wing shapes on mirrored angle folds so their inner edges sit near the card spine while their outer edges sweep forward as the card opens. A narrow body silhouette can remain flat on the back panel.
If one wing opens higher, compare the angle and position of the two hinges before recutting the wings. If both tips buckle, they probably extend beyond the closing path; shorten the outer feathers or move the hinges inward. Symmetry comes from matching the hinges, not from forcing the paper after assembly.
15. Pop-Up Gift Card Pocket
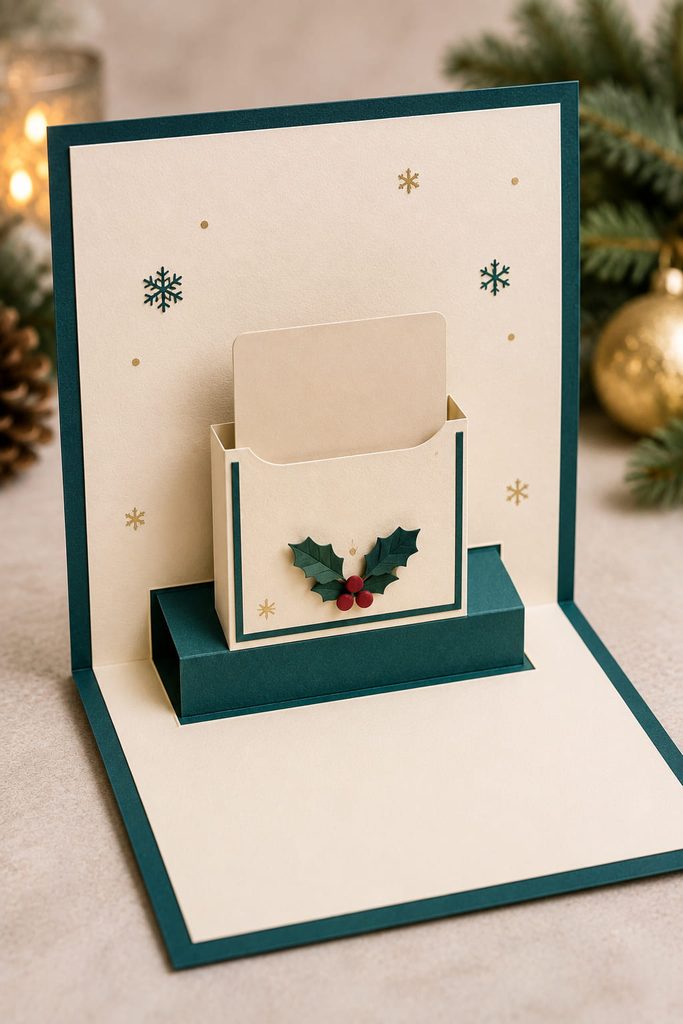
When the recipient opens the card, a small gift-card pocket can rise on a parallel-fold platform instead of sitting flat against the inside cover. Build the platform from a rectangular strip with two matching fold lines, glue one flange to the card base, and attach the pocket to the front face. The second flange connects to the opposite side so opening the card pulls the platform upright.
The pocket still needs normal holder logic: side and bottom edges must retain the gift card, the top must stay open for loading, and there must be enough clearance to remove the card without tearing the pop-up. Keep decorations below the pocket opening so they do not catch the corners.
Pocket + Pop-Up Check
- Insert the gift card before final gluing.
- Open and close the greeting with the pocket loaded.
- Remove the gift card while the card is open.
- If the platform leans or the pocket pinches, widen the pocket slightly before changing the platform folds.
This idea feels especially purposeful because the surprise is not only visual—the pop-up presents the small gift as part of the greeting.
How to Keep Pop Up Christmas Cards Closing Flat
Dimensional cards fail most often when the open view is designed first and the closed state is treated as an afterthought. Before decoration, close every mechanism slowly and watch where paper edges travel. Tabs should fold without crossing each other, projecting platforms should disappear between the covers, and thick embellishments should stay away from compression points.
Cardstock choice also changes the behavior. A firm card base gives the mechanism a stable spine, while smaller moving parts often fold more cleanly when they are not excessively thick. Score folds before forcing them, keep glue out of moving joints, and test-fit layered pieces dry whenever one part needs to pass another.
For mailing, judge the finished card by thickness as well as width and height. If a design only closes when you press it hard, simplify the inner decoration or reduce projection depth rather than relying on the envelope to flatten the mechanism.
Choose the Surprise You Want to Reveal
Choose the first project by the kind of reveal you want. V-fold trees, accordion villages, and step-fold gifts make the mechanism easy to see and understand; flowers, spirals, and angel wings put more emphasis on motion; tunnels and box cards reward extra scoring with deeper scenes. For a practical surprise, the pop-up gift-card pocket gives the movement a second job.
If you want Christmas greetings with personality but less pop-up engineering, the related Diynify collection 14 DIY Handmade Christmas Cards with Real Personality moves into stitching, weaving, pockets, windows, and other interactive details.








