

This post contains affiliate links. As an Amazon Associate I earn from qualifying purchases, at no extra cost to you. Thank you for supporting Diynify!
Origami Christmas tree ideas can range from one quiet square of paper folded into a flat fir to modular structures that hold their shape from every angle. The useful difference is not color or decoration but what the folds actually do: some create a crisp silhouette for a card or gift, some open into a stable tabletop base, and others use repeated modules, pleats, pockets, or suspension points to make the tree functional.
Most projects work with origami paper, lightweight decorative paper, or thin double-sided paper and a firm surface for creasing. Modular trees need several sheets; the card and pocket ideas benefit from paper that shows clean reverse-side color; hanging pieces need thread, and the place-card version needs a small cardstock name strip. Start with a flat or standing model if you are new to folding, then move toward modular, tessellated, or moving designs when alignment matters as much as the individual crease.
1. Flat Kite-Fold Tree Gift Topper

For a gift topper, a flat tree is more useful than a delicate three-dimensional model. Start from a square and let a centered kite-like fold establish the trunk-to-branch axis, then use layered triangular flaps to suggest the fir silhouette without adding separate paper pieces. The important choice is paper contrast: a double-sided sheet can reveal a narrow reverse-color edge at selected folds, while a single-color sheet keeps the geometry quieter. Keep the finished tree low-profile and place it near a ribbon crossing or tag so stacked presents do not crush projecting points.

2. Squash-Fold Standing Tree
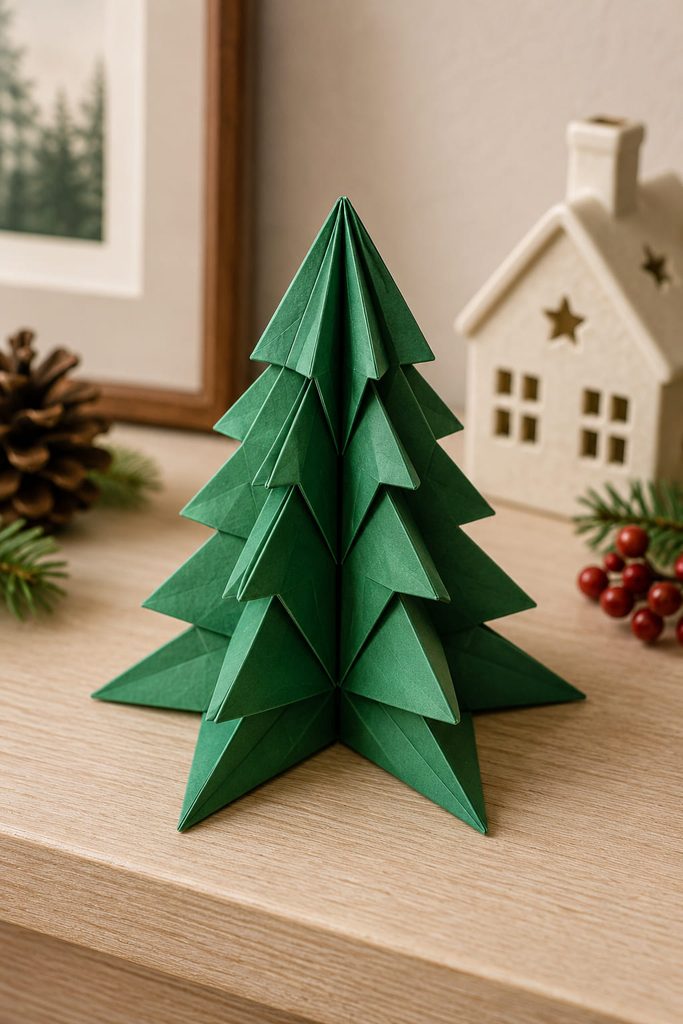
What makes a squash-fold tree stand is the way several layers redistribute around a centerline, allowing a flat base to open into a small footprint. Crease symmetry matters because one shallow squash fold can pull the branch layers off center even when the outer silhouette still looks acceptable from the front.
Once the model is open, judge the footprint before adding a star or other top detail. The lower contact points should sit at the same height, and the base should open far enough that the tree does not balance on one narrow ridge. If it leans, correct the lower folds first instead of weighting one side with decoration.
3. Four-Sided Faceted Tree
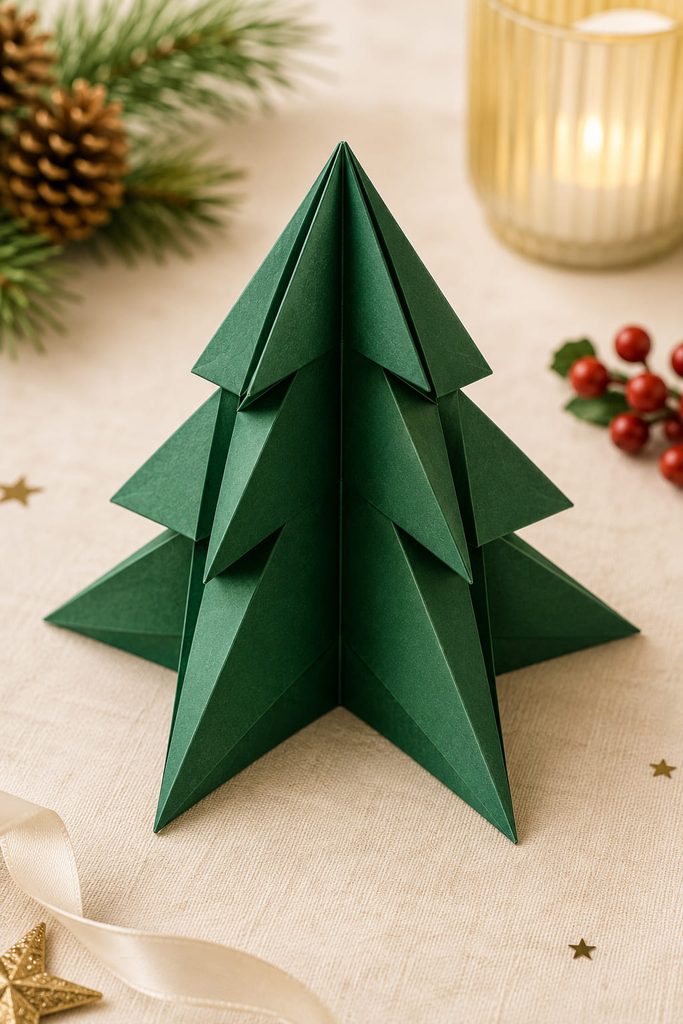
Viewed from above, a four-sided tree should read as a balanced cross of folded faces rather than a flat model forced open. A preliminary or waterbomb-style collapse can provide the central geometry, after which matched folds on each face taper the form toward the top. This approach suits a small shelf or place-setting tree because every side carries the same visual weight.
Facet Alignment Check

- The center axis should stay vertical when the model is set down.
- Opposite faces should open to similar angles.
- Bottom points should contact the surface evenly.
- A top fold that twists usually signals unequal creases lower in the model, not a problem at the tip.
4. Pleated Fan Origami Tree
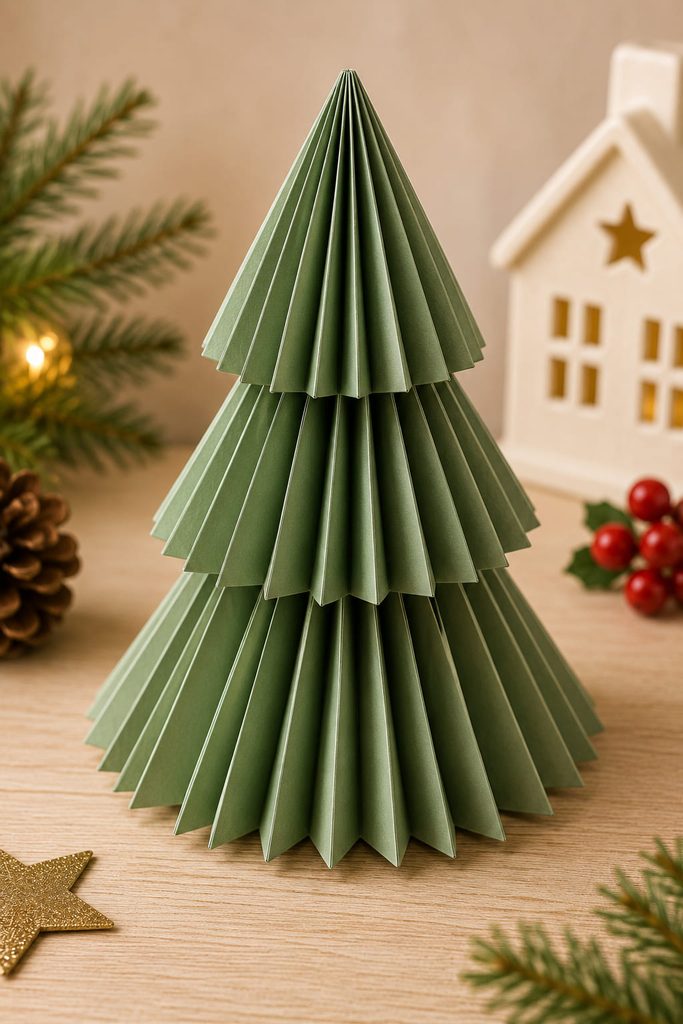
Fold the branch rhythm before worrying about the outline. Repeated accordion pleats create alternating ridges and valleys that can spread into a fan-shaped tree, so the paper itself supplies texture instead of drawn ornaments.
- Establish the full set of parallel pleats while the sheet is still easy to handle.
- Compress the pleats and define the tree’s taper through folded-in edges rather than trimming the paper.
- Open the lower pleats wider than the upper ones so the silhouette grows toward the base.
- Set the model down and adjust only the outer folds until both sides carry similar visual weight.
A softer paper gives deeper movement but less self-support; crisp origami paper keeps narrow pleats cleaner at small scale.
5. Color-Reversal Snow-Capped Tree
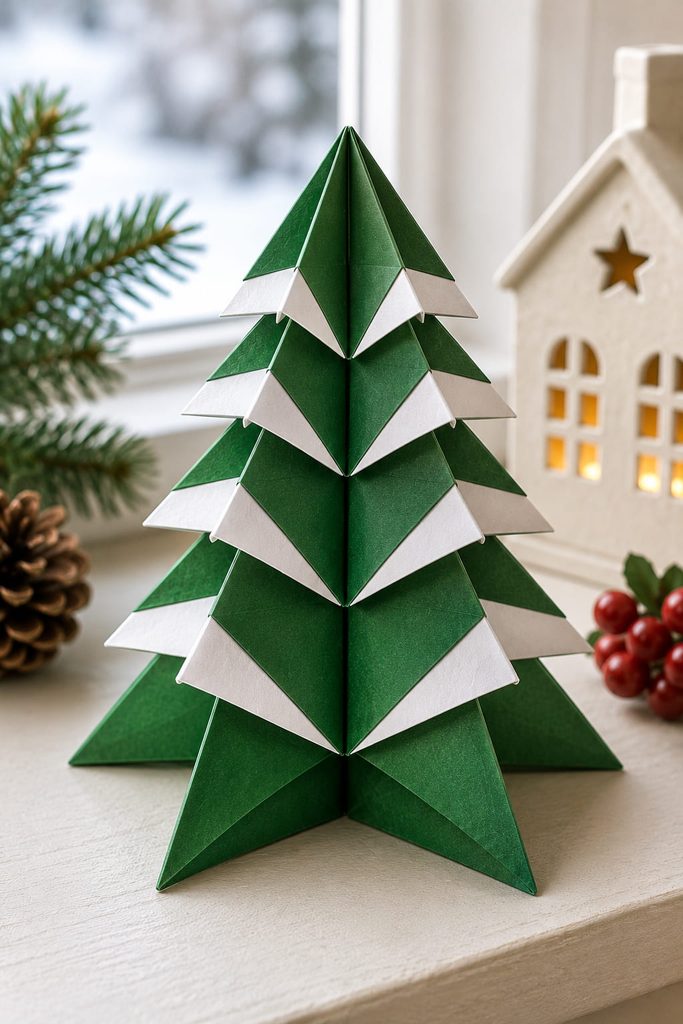
Use the reverse side of double-sided paper as part of the structure instead of treating it as an added decoration. On a color-reversal tree, selected branch folds expose the lighter back of the sheet as snow-like bands while the main faces stay green, blue, kraft, or another darker tone. The effect is strongest when those reversals repeat with restraint rather than appearing on every edge.

Thin paper helps because stacked reversals can become bulky near the center. If the white or metallic reverse starts widening unpredictably from one tier to the next, the issue is usually inconsistent fold depth. Match the depth first; the repeated contrast will then look intentional without needing extra embellishment.
6. Nested Modular Tier Tree
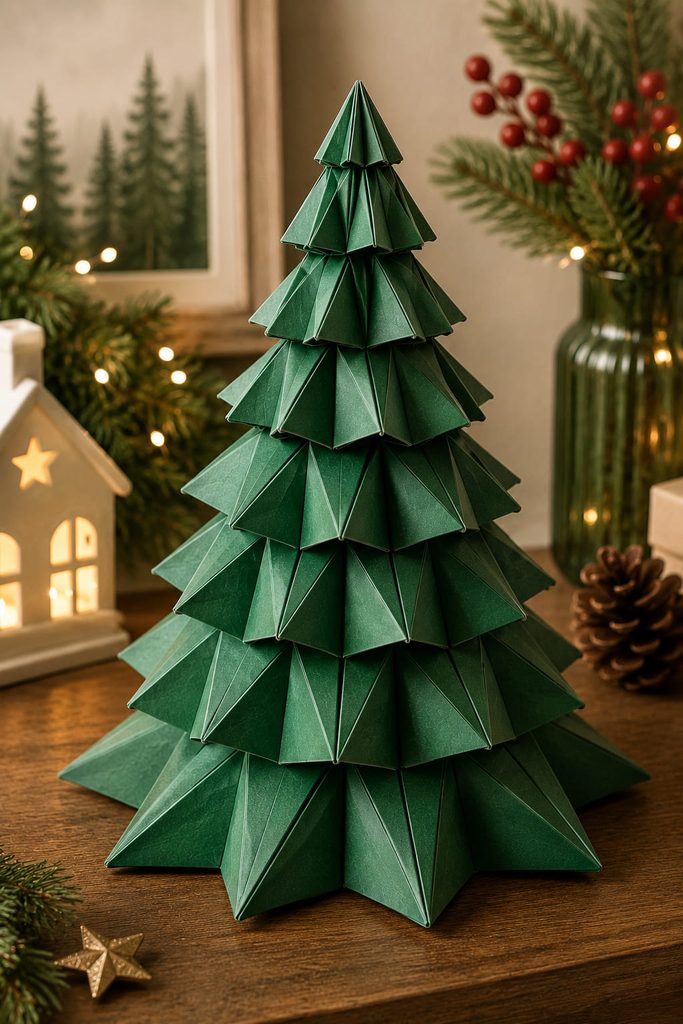
Once a tree is built from separate tiers, scale becomes a construction system rather than a styling choice. Fold several self-contained branch modules in graduated sizes, keeping the same crease logic in each one, then nest or stack them so every lower tier projects beyond the tier above. The finished shape gains depth from real overlapping folded planes, not from cutting branch fringes.
A reliable build order is to complete all modules before assembly, sort them by finished width, and test the stack dry. The centerlines should remain aligned as the tiers descend. If one module has a noticeably different opening angle, refold or replace it before locking the tree together; forcing an irregular tier into the stack usually creates a corkscrew lean higher up.
Tier Stability Test: Set the assembled tree on a flat surface and rotate it a quarter turn at a time. The silhouette should stay centered from every side, and the lowest tier should provide the broadest footprint. If the top drifts off axis, separate the tiers and check their centers before changing the base.
This is a good intermediate project because repetition lowers the difficulty of each individual unit while making consistency much more important.
7. Ring-Module 360-Degree Tree
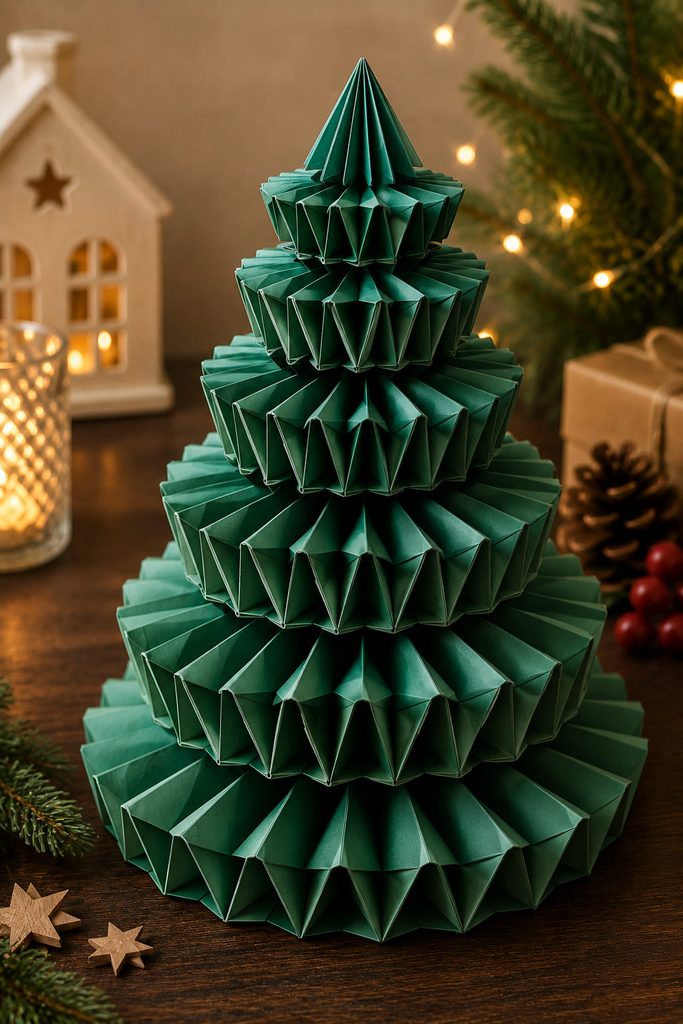
A ring of identical modules exposes alignment errors quickly: each unit has to tuck into the next at nearly the same depth or the circle will close with a gap, buckle, or spiral. Build one circular crown at a time, then stack smaller crowns above larger ones to create a tree that reads from every direction. Unlike a nested single-module tree, this construction depends on the circumference of each ring as well as the size of its parts.
If the structure misbehaves, the symptom points to the likely cause:
- The ring will not close: several joins are too shallow, or the module count does not match the intended circumference.
- The crown twists upward: insertion depth is changing as you move around the ring.
- One side collapses inward: a module has softened or opened at a load-bearing pocket.
- The stacked tree leans: the ring centers are not directly above one another.
Correct the faulty ring before adding the next tier. A taller stack magnifies a small circular error instead of hiding it.
8. No-Cut Hanging Tree Ornament

Suspended from a branch, the model needs to load a strong folded area rather than whichever point happens to look highest. Choose a one-sheet tree whose upper layers meet in a reinforced crease or pocket, then place the thread through or around that structural area rather than piercing a thin tip. The tree should hang with its centerline close to vertical and with enough clearance that lower branches do not rub against the evergreen behind it. Lightweight paper is usually an advantage here: the fold needs to hold its shape, but the ornament does not need the stiffness required for a tall tabletop model.
9. Repeated-Unit Origami Tree Garland

Decide first whether the garland should read as a row of flat silhouettes or as small three-dimensional trees. Flat folded units sit close to a mantel, wall, or gift-wrap edge and are easier to space evenly. Open standing-style units cast stronger shadows, but they need more distance from the backing and can rotate around the cord.
For a flat garland, thread or clip each tree at the same reinforced fold and keep the intervals consistent. For a dimensional garland, test one unit on the actual cord before batch-folding the rest; a model that stands beautifully on a table may twist sideways when suspended. The right route depends on viewing angle, not on which version looks more elaborate in the hand.
10. Origami Tree Gift Pocket

How much the pocket can hold matters more than a perfect tree silhouette once the fold has to carry something. Build the project around a genuine pocket opening, then use the upper folds to create a triangular evergreen profile without sealing the access point. A small note, flat chocolate, or gift card is a more realistic load than a bulky bundle because paper pockets lose their shape when the contents push hard against the side folds.
Pocket Function Check

- The item slides in without forcing the opening.
- Its top edge stays below the pocket rim.
- The lower point remains closed enough to retain the contents.
- The front still reads as a tree after loading.
- The recipient can remove the item without unfolding the whole structure.
If the pocket bows outward, reduce the load or choose a roomier folded envelope rather than adding adhesive to every edge.
11. Waterbomb-Base Tree Greeting Card
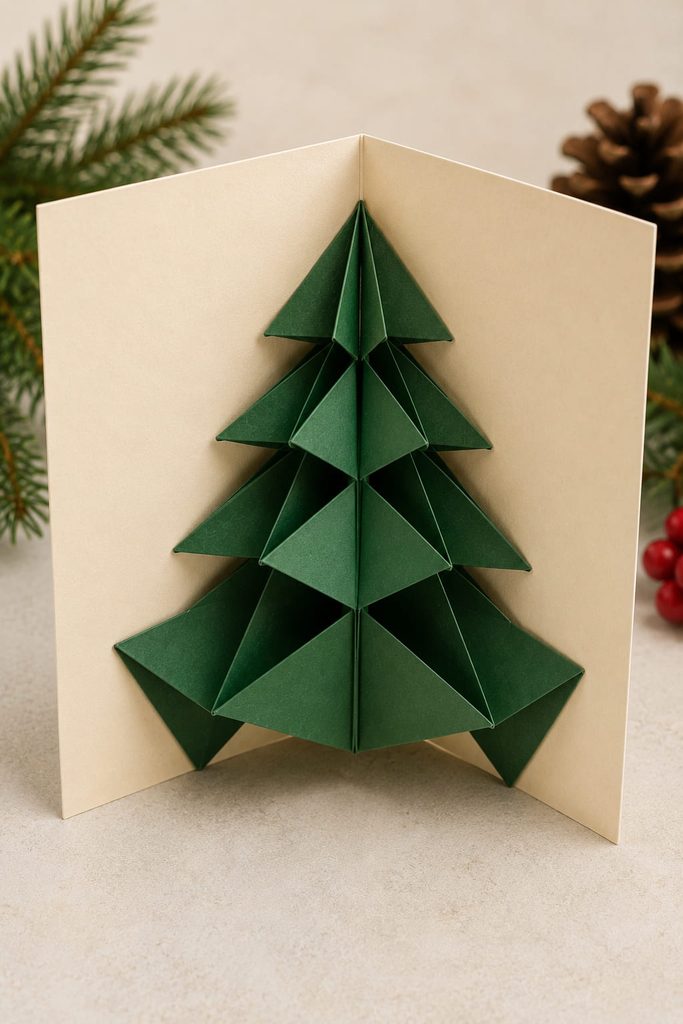
To work as a greeting card, the tree has to solve two states at once: a readable Christmas tree when open and a clean, low-bulk shape when closed. A waterbomb-style triangular base can create a tree section that expands away from the card face, while the same creases allow it to collapse back toward the fold. That movement is what makes the design more than a flat tree glued onto cardstock.
Build the mechanism before decorating the card:

- Establish the card’s main fold and the tree’s collapse direction.
- Fold the tree unit and identify which creases must open toward the viewer.
- Position it so the expanding layers stay inside the card edges.
- Close the card slowly and watch for a point that catches, reverses, or buckles.
- Adjust the attachment position or fold angle before adding a star, sentiment panel, or other layers.
Closed-State Check: the card should shut without a hard lump or forced bend. If one branch pushes outward, do not simply trim it away; first check whether the base is sitting too close to the center fold or whether a crease is trying to collapse in the wrong direction.
This is one of the stronger intermediate choices because successful folding is proven by motion, not just by the open appearance.
12. Origami Tree Place Card With a Folded Base
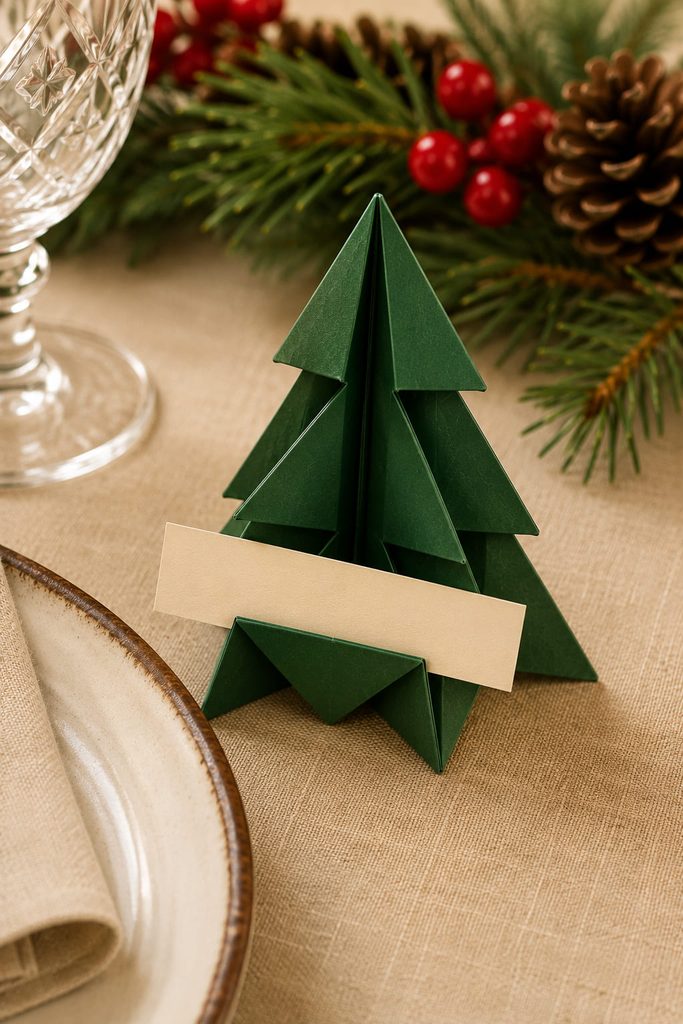
At a holiday table, the tree needs a real footprint and a readable name position. Use a compact standing model with a broad lower fold, then slide a narrow cardstock name strip into a shallow front pocket or supported fold instead of balancing the strip against the tree.
- Fold one complete sample before preparing the rest.
- Open the base until it stands without the name strip.
- Insert the strip and make sure its weight does not pull the tree forward.
- View it from seated eye level and adjust the strip height.
- Batch-fold the remaining trees only after the first one works.
The folded model should remain the support; the name card should never become a hidden prop holding it upright.
13. Tea-Bag Fold Layered Tree Card Front

With a tea-bag fold approach, several small squares collapse into shallow triangular units that can be nested from largest to smallest. The units create stepped branches without asking one thick sheet to carry every crease, which makes the finished tree well suited to a card front, scrapbook page, or flat gift panel.
The key difference from the waterbomb-base card is movement: this tree is a layered surface element, not a mechanism that has to open and close with the card. Keep every unit’s centerline aligned and overlap each tier by a similar amount. If patterned paper is busy, let the folded edges supply the decoration and leave more open cardstock around the tree so the stacked geometry remains readable.
14. Tessellated Christmas Tree Relief
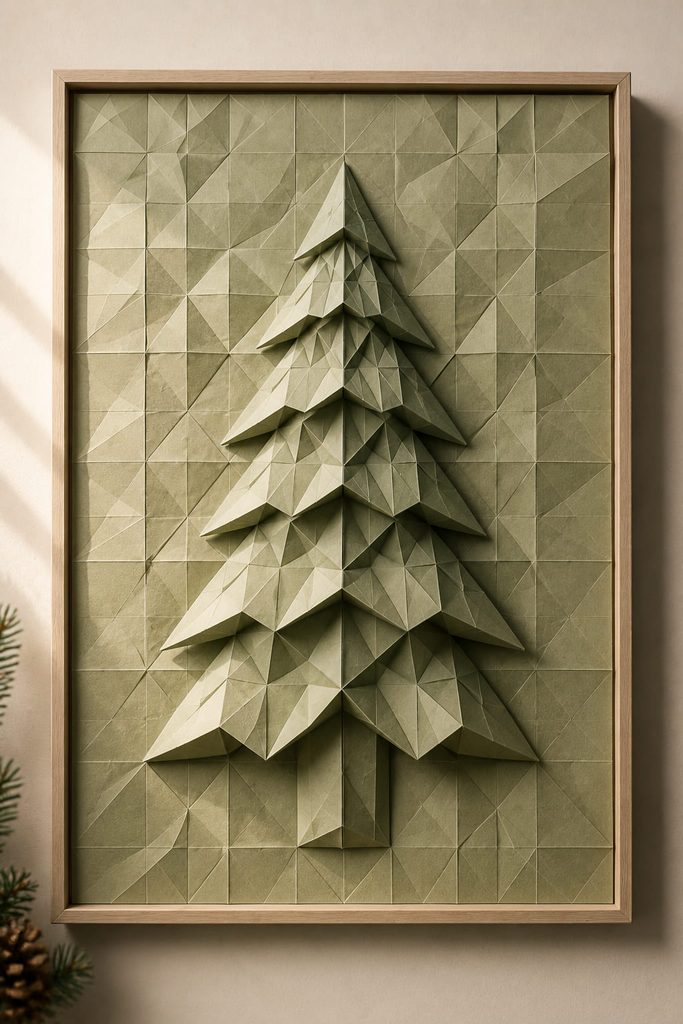
Instead of drawing the tree as an outline, tessellation can raise it from a planned crease field of repeated cells. Start with an accurate grid, then use repeated local collapses to raise selected triangular or diamond areas while leaving surrounding cells flatter. The finished tree can remain part of a single sheet, which makes it especially effective as framed wall art where side lighting reveals the relief.
The grid is unforgiving. Pre-crease the full pattern before trying to push any one section into depth, and work outward from a stable reference area rather than collapsing random cells. If a ridge refuses to sit flat, check whether one neighboring mountain fold has been reversed; pressing harder usually makes the distortion worse.
Light-and-Relief Check: stand the sheet upright and move a lamp to one side. The tree should read through alternating highlight and shadow without needing a printed outline. If the silhouette disappears, deepen only the folds that define the main mass instead of increasing every cell equally.
A tessellated panel is best treated as a deliberate display piece, not a quick ornament. The reward is a tree whose surface changes as the viewing angle changes.
15. Balanced Origami Tree Mobile
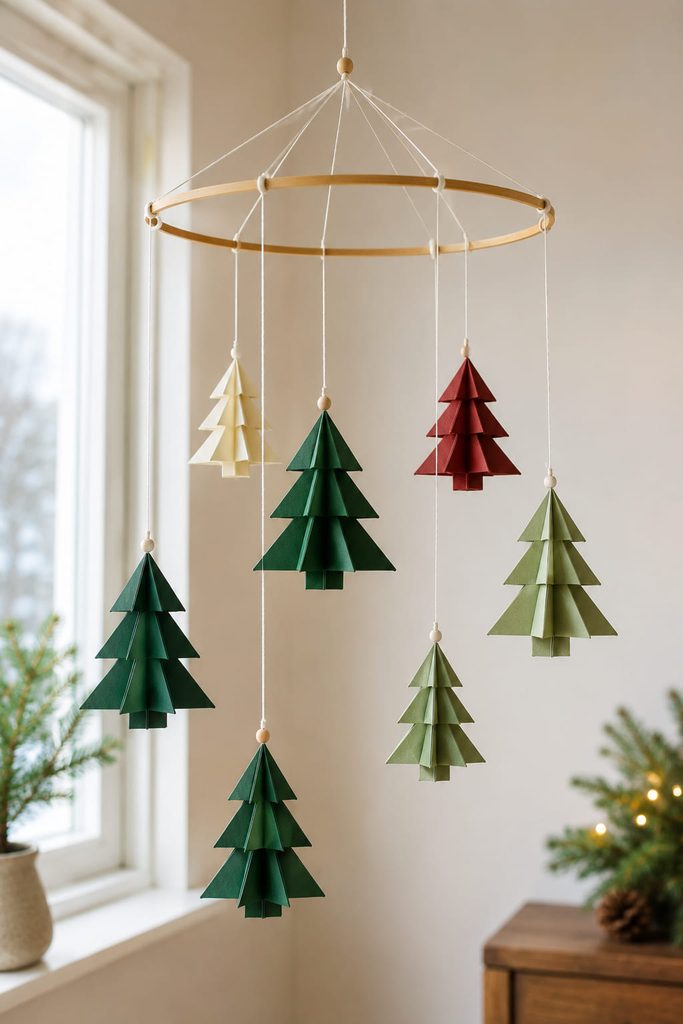
Before you add thread, decide how the folded trees should occupy space. A mobile works when several lightweight models hang at different heights without pulling the support ring or dowel permanently to one side. Fold the trees consistently, but vary their size only after you understand how that changes weight and visual balance.
If the mobile tilts, diagnose it before adding more pieces:
- One side drops: shorten that arm, move its suspension point inward, or shift a lighter tree to the opposite side.
- A tree spins into its neighbor: increase vertical or horizontal clearance.
- A model hangs nose-down: move the thread toward its actual balance point rather than its geometric center.
- The support twists: the upper hanging loop is off center or the loads are not distributed around it.
Hang the finished mobile where air movement is gentle and where the lowest tree cannot catch on curtains, garland, or a wall. Movement should reveal the folded silhouettes, not turn them into a tangle.
How to Choose Among These Origami Christmas Tree Ideas
Choose by finished use first. Flat kite-fold and color-reversal trees suit cards, tags, and wrapped gifts because they stay low-profile. Squash-fold, faceted, pleated, and nested modular models make more sense when the tree must stand on a shelf or table. Pocket and place-card versions need enough usable space in their folds to perform the job they promise, while ornaments, garlands, and mobiles need reinforced suspension points and clearance.
Paper weight should follow the same logic. Thin origami paper is easiest for dense reversals, tessellations, and small modules. Slightly firmer paper helps standing trees keep a clean footprint, but very heavy stock can fight squash folds and tight pleats. For modular work, consistency between sheets matters more than choosing the thickest paper available.
Pick the Fold That Matches the Display
A first tree does not need to be the most dramatic one. Fold a flat kite-based model to learn clean centerlines, move to a standing squash-fold tree when you want to understand footprint and symmetry, then try modular or tessellated construction when repeated accuracy becomes part of the design.
If you want to branch out beyond trees, Diynify’s 20 Christmas Origami Ideas to Fold This Holiday Season continues with ornaments, boxes, figures, table details, and other folded holiday projects.








